When I first started to dabble in photography, I knew very little about post-processing. I used Picasa to edit my photos. It’s free and easy to use. I experimented with the different settings and created some pretty interesting images (they weren’t very good). Needless to say, I had no idea what I was doing.
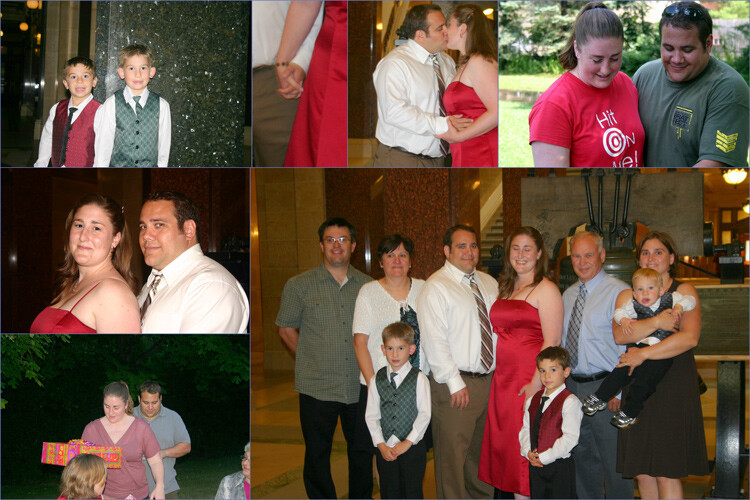
This was the extent of my early post-processing attempts. I created collages in Picasa.
Self-learning methods and benefits
Like many of you, I am a self-taught photographer. My degree is in English Literature, and photography was something I dabbled in as a hobby. I learned photography by reading books, participating in online forums and through trial and error. It’s been a long hard road but it’s been well worthwhile.
I learned most of my post-processing by watching YouTube videos. It has become one of my favorite ways to learn. There’s some inspirational stuff available that you can use to teach yourself all kinds of different skills. It’s a lot of fun, and the benefit of learning in this way is that you can go at your pace.
This type of learning is perfect for my lifestyle, and I’m sure for many of you the same factors apply. It always amazes me what we can teach ourselves when we put our minds to it. Check out this video. Sean Tucker experiments with landscape photography and discusses how important it is to continue to learn and push ourselves.
Three Lightroom Features Discovered by Accident
Now that we are on the path to self-directed learning I would like to share with you three Lightroom shortcuts, hacks, tricks, or whatever you want to call them, that I learned completely by accident. I just pushed buttons to see what would happen. By just experimenting, the results paid off. I learned some very efficient ways to manage my post-processing workflow, and I want to share them with you.
Accidental Discovery #1 – the Alt key
By simply pushing buttons I discovered some pretty cool functions. If you hold down the Alt key while in the Library module, little numbers appear by each keyword. You can then simply hit the number, and the module will tag your images with that keyword. Brilliant!!!
If you create a set keywords, this little trick becomes even more useful. The keyword set is then added to your images by simply typing in the correct number.
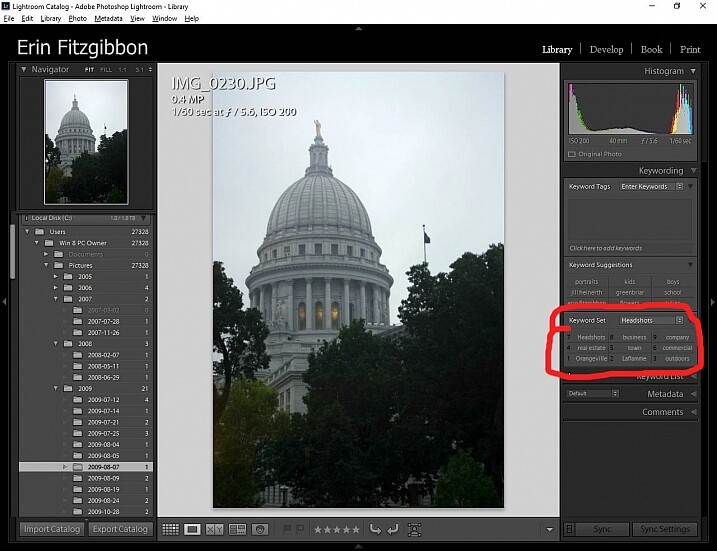
This little discovery saves me loads of time.
In the Develop module, the Alt key is very useful when setting black and white points in your images. Hold down the Alt key while hovering your cursor over the Blacks slider. The image will go completely white and as you move the slider from side to side (move it left to darken or add black) you will be able to see when the blacks begin to clip in your image.
This is a great way to adjust your image and super easy to see (and adjust) how much contrast range it will have. You can use the same principle to adjust the white points in your image. Give it a try. It’s one of the first steps I take when editing my work.
Note: It’s okay and even desired to have some blacks clipping in your image, but ideally you want to keep any whites from doing so. Clipping means areas with no detail in that tonal range.
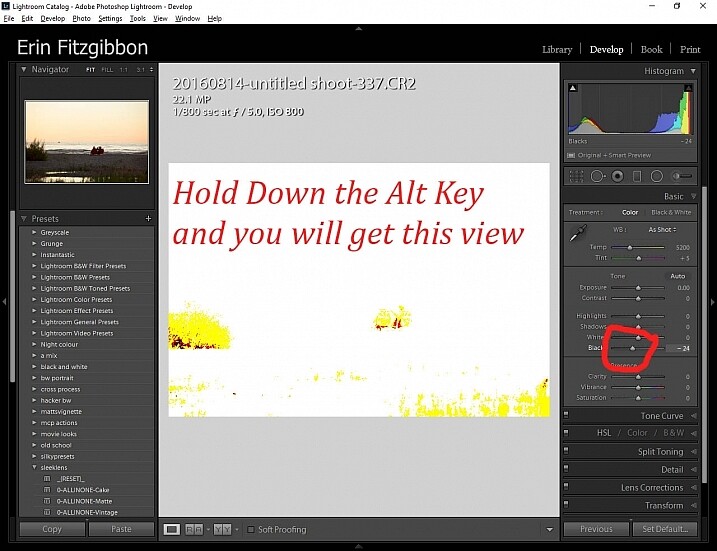
Here’s a screen shot of the black point slider.
Accidental Discovery #2 – Navigator Window
The Navigator window is very useful when you need to zoom in. This is probably really obvious and silly to those who have formal Lightroom training. Before discovering this little trick, I would zoom in and out applying the adjustment brush to small sections of the image. It was very tedious.
Then one day I discovered that if I click the 1:1 button on the Navigator (preview) window and then slide the square around on the screen, I could apply the adjustment brush without the tedium of closing the adjustment brush and moving out to the full-screen view.
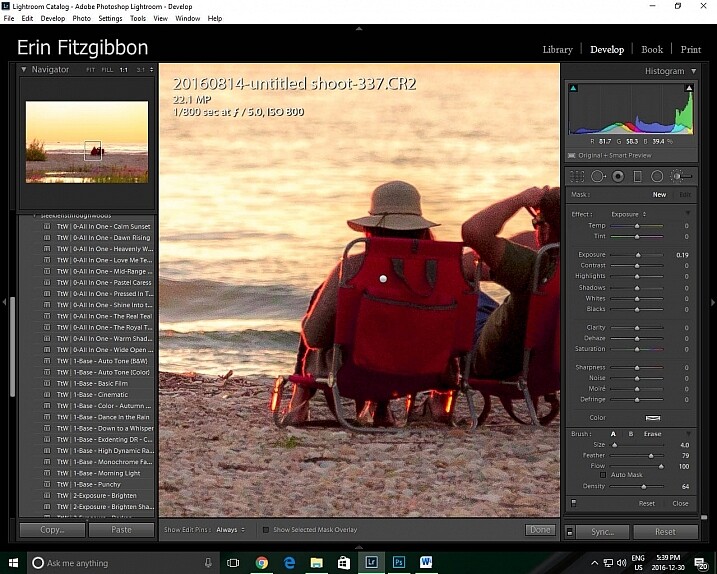
When I need to apply the same brush to several different areas of an image I click on the 1:1 feature and slide around the image making adjustments.
Accidental Discovery #3 – Lights Out in the Library
It took me a little while to figure out this trick. Again, I was just experimenting and pushing buttons. I had learned to use the Lights Out feature in the develop module. When you press the letter L on your keyboard, it dims the surrounding panels so that you can focus more on the image at hand (press L again for total black around your image, and once more to return to normal). This same tool works well in the library module. I now use the “Lights Out” feature to isolate specific images. Simply select the images you wish highlight then hit the “L” button. It’s a neat little trick.
This same tool works well in the library module. I now use the Lights Out feature to isolate specific images. Simply select the images you wish highlight then hit the “L” button. It’s a neat little trick.
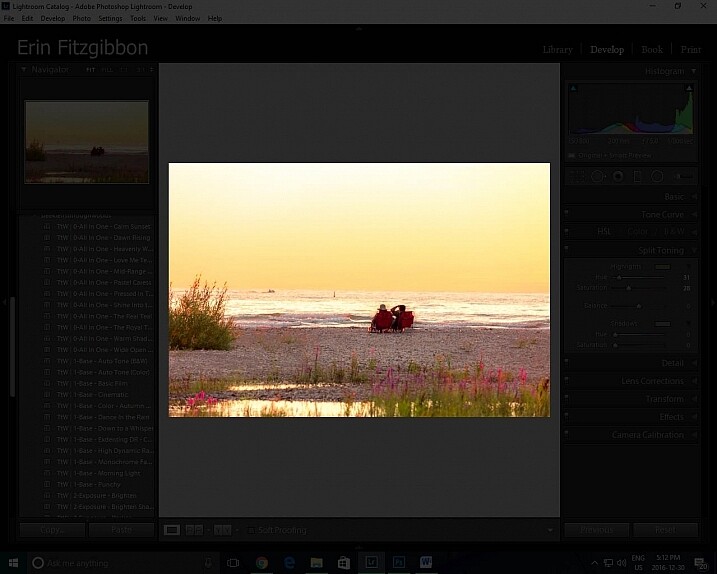
I use this feature to help me analyze an image before I decide it’s finished.
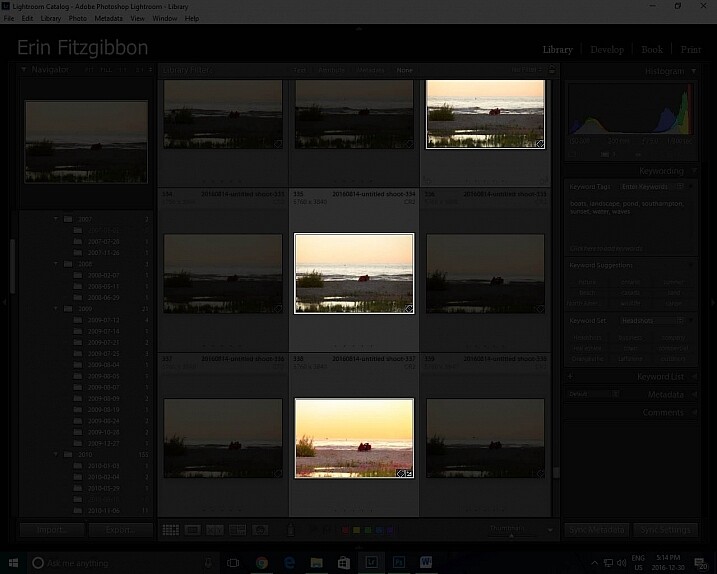
Look how easy it is to isolate specific images in the library module.
Conclusion
Experimentation is never a bad thing. We live in an age when we are lucky to have so many resources available to us. The internet is a true cornucopia of opportunity. Don’t be afraid to try different things. You really can’t break the program.
Sure there have been times when I have had to call Adobe and ask for assistance because I’ve pushed some button and haven’t been able to reset the program, but those times have been very few and far between.
Let me know about some of the tricks you use when post-processing. I’m sure there’s so much out there I still need to learn and I’m hoping you can add to my list of discoveries. What have you taught yourself about post-processing or using Lightroom in general? Please share in the comments below.
googletag.cmd.push(function() {
tablet_slots.push( googletag.defineSlot( “/1005424/_dPSv4_tab-all-article-bottom_(300×250)”, [300, 250], “pb-ad-78623” ).addService( googletag.pubads() ) ); } );
googletag.cmd.push(function() {
mobile_slots.push( googletag.defineSlot( “/1005424/_dPSv4_mob-all-article-bottom_(300×250)”, [300, 250], “pb-ad-78158” ).addService( googletag.pubads() ) ); } );
The post 3 Handy Lightroom Features I Discovered by Accident by Erin Fitzgibbon appeared first on Digital Photography School.
You must be logged in to post a comment.