RSS
 

Archive for July, 2015

Paint the Town: Massive Mural Transforms Mexican Neighborhood

31 Jul

[ By Steph in Art & Street Art & Graffiti. ]

rainbow mural 4

Waves of rainbow color cascade down a hillside neighborhood in Mexico’s drug capital as a street art collective paints over 200 houses. ‘German Crew’ enlisted the help of youth living in Las Palmitas to transform the town, brightening the facades of almost every single building in continuous swoops of fuchsia, orange, yellow, green and blue.

mural before

rainbow mural 1

The muralists covered 20,000 square meters (225,280 square feet) with powerful pops of color. Commissioned by the Las Palmitas municipality, the project is five months in the making, and these photos only show completion of the first stage. The aim is to revitalize the town, which is located in the state of Sinaloa, where most of the country’s drug cartels are based.

rainbow mural 2

rainbow mural 3

rainbow mura 5

According to the German Crew Nuevo Muralismos of Mexico, the project involved the participation of 452 families, or 1,808 people living in the neighborhood. Keeping kids and teenagers busy painting all of those houses nearly eradicated violence among youths while it was in progress. Lots more photos can be found on the crew’s Facebook page and Instagram.

favelas

favelas painted

Previously, street art duo Haas & Hahn transformed 34 buildings in a Rio de Janeiro favela (above), with the similar effect of creating jobs, bringing the community together and making a place that’s often feared by outsiders feel more welcoming. These large-scale mural projects can bring attention to under-served neighborhoods and help boost residents’ sense of pride.

Share on Facebook


[ By Steph in Art & Street Art & Graffiti. ]

[ WebUrbanist | Archives | Galleries | Privacy | TOS ]


WebUrbanist

 
Comments Off on Paint the Town: Massive Mural Transforms Mexican Neighborhood

Posted in Creativity


Quick Review: PhotoKeeper

31 Jul

PhotoKeeper aims to provide photographers with safe cloud storage and easy access to their images from anywhere. While there’s no shortage of websites providing free storage for photos, PhotoKeeper goes beyond the standard offerings and tailors its product to photographers. Are its features worth the price? Read review

Articles: Digital Photography Review (dpreview.com)

 
Comments Off on Quick Review: PhotoKeeper

Posted in Uncategorized


Olympus Tough TG-4 studio and real-world samples posted

31 Jul

Olympus’ TG-series Tough cameras have been a popular choice among enthusiasts looking for a rugged compact. The TG-4 is waterproof to 15m/50ft, as well as shockproof and crushproof, and includes Raw support. See how it performs out and about and in our studio compared to other rugged compacts. Read more

Articles: Digital Photography Review (dpreview.com)

 
Comments Off on Olympus Tough TG-4 studio and real-world samples posted

Posted in Uncategorized


Aktion: Raus aus dem Kreatief! Teil 1

31 Jul

Abstrakte Landschaft aus Gelb und Violett.

Das kennst Du sicher: Du fühlst Dich kreativ blockiert, möchtest eigentlich ein tolles neues Projekt machen, aber die Idee oder Motivation fehlt. Vielleicht fühlst Du Dich auch in den von Dir selbst aufgestellten Regeln Deines Stils gefangen. Oder hast die Ahnung einer großartigen neuen Idee in Dir, sie will aber nicht so recht Form annehmen.
kwerfeldein – Fotografie Magazin | Fotocommunity

 
Comments Off on Aktion: Raus aus dem Kreatief! Teil 1

Posted in Equipment


Rainbow Rail: 5,000 Neon Lights to Line Underside of Chicago “L”

31 Jul

[ By WebUrbanist in Art & Installation & Sound. ]

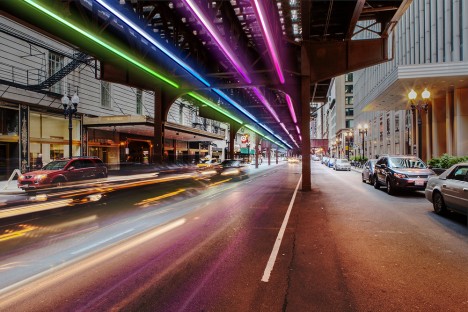
wabash lights large

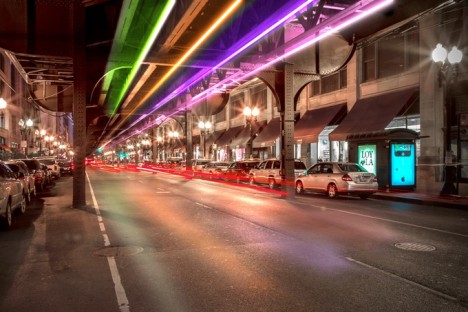
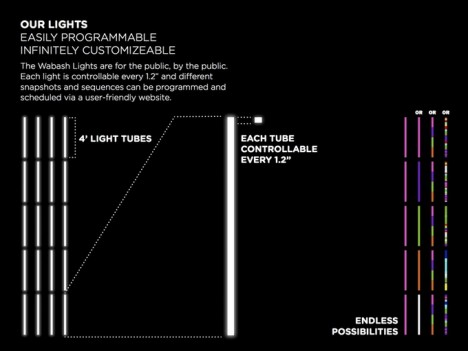
Designed to be suspended below Chicago’s elevated rail system, hovering above cars and pedestrians, this 5,000-tube neon lighting installation aims to bring bright colors to drab railway tracks, using illumination to bridge the dark gap formed by overhead infrastructure.

wabash lights rendering

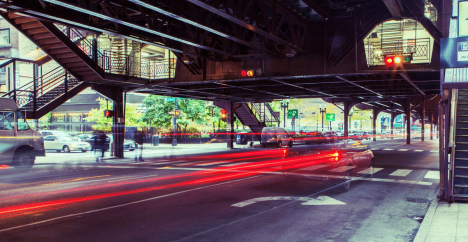
A set of elevated rails forming a rounded rectangle in the heart of the city, the Chicago Loop defines the downtown experience. Physically, visually and audibly, this nexus of sometimes-subway lines creates a circuit of transit over and under which vast numbers of people travel each and every day. Despite its centrality and functionality, the Loop has little presence in terms of the city’s public image, at least it until The Wabash Lights came along.

wabash lights neon art

The main aim is to activate this shady pseudo-circular zone, turning it from an ignored void into a enjoyed space. The first phase of the project has already been successfully funded on Kickstarter and the next step will be a limited-scale test implementation of the technology. The lights are highly programmable and infinitely customizable, able to cycle through sets of colors and form complex patterns.

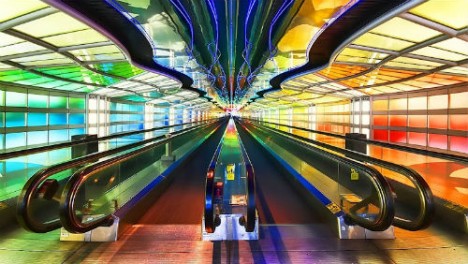
skys the limit art

It is hard to avoid drawing a comparison with another highly-visible and quite popular neon project in Chicago, namely: the neon light tunnel (Sky’s the Limit by Michael Hayden) connecting Concourses B and C at Terminal 1 in the O’Hare International Aiport, “a mile-long kinetic light sculpture composed of 466 neon tubes [reflected from above by] 23,600 square feet of mirror.”

wabash street

The duo behind the idea, Seth Unger and Jack C. Newell, are well-suited to the endeavor, with backgrounds in design, branding and creative strategy on the one hand, filmmaking and public art on the other. Together, they are looking to involve citizens from start to finish, looking to them for feedback as well as funding.

wabash lights technology

More on the project from its creators, using “LED light tubes to transform an iconic piece of Chicago infrastructure into a canvas for a dynamic, interactive experience, serving as a catalyst for a re-energized Wabash Avenue. Working with the Chicago Transit Authority, Chicago Department of Transportation, and City Government, we have received approval to install a small section of lights on the Wabash Ave tracks to troubleshoot design, interactivity, and test how vibration from the “L”, temperature changes, and the wear and tear of the city affect our hardware.” (Hat tip to Chris B and James B).

Share on Facebook


[ By WebUrbanist in Art & Installation & Sound. ]

[ WebUrbanist | Archives | Galleries | Privacy | TOS ]


WebUrbanist

 
Comments Off on Rainbow Rail: 5,000 Neon Lights to Line Underside of Chicago “L”

Posted in Creativity


Cable TV is So Broken, Can Apple and Google Save Us All?

31 Jul

Comcast CEO Brian Roberts, Allen & Company, 2015
Billionaire Comcast CEO Brian Roberts

Last night I spent a frustrating hour trying to cancel Showtime with Comcast, my current cable TV provider. I could not find (nor is there) any way to cancel any Comcast service online and their customer service department was closed.

Finally I was able to get chatty with one of those chatbots online who confirmed to me that there is simply no way to cancel Showtime on Comcast without speaking with a human representative. Even though the chatbot convinced me they were a human, they were not allowed to cancel it for me and I would need to try again tomorrow on the phone only. Interestingly enough I had no problem signing up for Showtime online originally, it’s just when you want to cancel that Comcast gives you such a hard time.

This morning after navigating the Comcast phone voice response menu I was finally able to talk to a human being, who tried to talk me out of cancelling my Showtime. I was committed though and I did finally get it cancelled.

I actually love Showtime and don’t mind paying for it. Masters of Sex and Ray Donovan are two of my favorite shows on right now. I also like the series Homeland. I had several reasons for cancelling it with *Comcast* though.

1. Why am I paying Comcast $ 19.99/month for Showtime when I can just buy it direct from Showtime on my AppleTV for a free 30 day trial and then $ 10.99/month after that?

2. Watching Showtime using the AppleTV app through Comcast is a royal pain in the ass. I’ve had to re-authenticate and prove I’m a paying cable customer at least 20 times with the app.

I go to watch one of my shows and am interrupted with a message and code on the AppleTV telling me that I have to go to Showtime online on my phone or computer and authenticate. Next I have to log into my Comcast account enter in the code from my television set and then after that I finally get my access.

I wouldn’t mind it if I did this one time, the first time I signed up for the app, but having to re-authenticate over and over and over again, especially late at night when I’m in bed and just want to watch my favorite show is a drag.

3. Last night I wanted to watch episode 2 of the current season of Master’s of Sex on the app but it wasn’t available. I could only watch episode 3. I have no idea why Comcast customers were not allowed to watch episode 1 or 2, but I didn’t want to watch episode 3, before episode 2, so I just gave up and didn’t get to watch a show that I’m paying $ 20/month for. No wonder so many people just say screw it and go to bitTorrent.

4. I hate the way Comcast abuses the AppleTV ecosystem. If I pay for CNN with Comcast, why do they not allow me to watch it on my AppleTV. Comcast’s decisions here feel entirely arbitrary. They will let me watch CNBC if I subscribe, but not CNN. I can watch HBO (although I have the same re-authentication problem there over and over again) but when my wife wants to watch Lifetime she has to figure out some weird hack to try to authenticate the app through some hard to find link in a forum on the internet.

It is clear to me that Comcast is purposely trying to make your AppleTV experience an ugly and difficult one and so any chance I can get to bypass Comcast and purchase premium content elsewhere, I’d rather do that — by contrast Netflix has always been an absolute breeze to use with my AppleTV.

According to Buzzfeed today, Apple is rolling out a new version of AppleTV in September which will be setting AppleTV up to offer their own subscription service in 2016. This is such welcome news. I love my AppleTVs and if I could get my content directly through Apple I’d love to cancel my Comcast cable TV subscription entirely.

I’m much more optimistic about an AppleTV service working on my AppleTV than Comcast’s current service. Also with AppleTV I can just buy a device one time and don’t need to have a cable box for every single TV in my house at a price of $ 10/month each. Will Apple finally be the one that saves us from Comcast?

My other beef with Comcast is their highspeed internet service. At present I’m paying for the maximum speeds I’m allowed which give me 120MBps down and 10MBps up. Frankly, in today’s world these just feel too slow to me — especially the 10MBps upload speeds. I use the internet a lot for uploading high res photos and I wish I could get faster upload speeds.

I was excited about Comcast’s new residential gigabit service announcement the other day until I saw the pricing for it: $ 1,000 to set it up and $ 320/month with a two year commitment. PC World lists the service at $ 300/month, but when I called to ask about it they told me that there would also be a $ 20/month equipment rental fee on top of that fee. That’s just too expensive for high speed internet.

By contrast Google sells their gigabit internet service for $ 70/month with no installation fee — which is even less than I’m paying Comcast today for my crappy 10MB/second upload speeds — for less money Google Fiber users can upload 100x faster than I can.

I was reluctantly willing to pay Comcast’s highway robbery fees for gigabit internet and was hopeful when a Comcast rep told me I could get it. They told me though that they would need to do a survey of my house in person to confirm and would call me for an appointment. I never heard back from them on this appointment so after a week I called them back only to be told that they did in fact do the survey and that I did not qualify at present.

Unfortunately AppleTV’s subscription television is not here…. yet. Unfortunately Google Fiber is not here… yet. Hopefully both of these services will eventually get to my neighborhood though. It would be so nice to just be able to cut Comcast out of my life entirely.

While I realize I could just go ahead and cut the cord right now, with a family of six, the rest of my household is just not ready to cut the cord yet and I’d have a mutiny on my hands if I cancelled our Comcast — so for now I continue to pay my $ 233/month. However, I’m looking optimistically towards the future, to a day when Apple and Google will let me cut Comcast out of my life for good.


Thomas Hawk Digital Connection

 
Comments Off on Cable TV is So Broken, Can Apple and Google Save Us All?

Posted in Photography


Samsung starts mass-production of thinner 16MP sensor with 1.0?m Pixels

31 Jul

Samsung has announced the start of mass-production of its S5K3P3 image sensor for mobile devices. The new chip is 20 percent thinner than previous generations. At under 5mm thickness, the new sensor can be used in ultra-thin smartphones without creating the protruding camera modules we’ve seen on some of the latest Samsung Galaxy models. Read more

Articles: Digital Photography Review (dpreview.com)

 
Comments Off on Samsung starts mass-production of thinner 16MP sensor with 1.0?m Pixels

Posted in Uncategorized


Top 10 Features to Bring Your Seascape Photos to Life

31 Jul

Seascapes are awesome opportunities for photography. In fact, it will probably be your first impulse upon seeing the ocean to pull out your camera (or wish you had it with you). It takes some skill, however, to turn a beautiful coastal scene into something more than a snapshot. If you are not careful, your coastal photo can be a boring picture of sand and water.

One of the keys to success for coastal photography is finding something interesting along the coastline to put in your picture. It would be great if there was an abandoned boat every 100 meters, but there isn’t. And we don’t all live near Big Sur or the Cliffs of Moher. Therefore, you often have to hunt for features to make your seascapes come alive. When you find such a feature, look at it from different angles, often with your camera to your face (you’ll be surprised at how different things sometimes look through the viewfinder or through the LCD). 

To get you started, here are some suggestions of coastal features to look for:

1. Old piers and docks

Abandoned piers and docks solve a huge problem with most coastal photography in that they add a center of interest to your photos. Many times you have a beautiful background created by the coastal scenery, but nothing else. You want an actual subject for your photo, the pier gives you that.

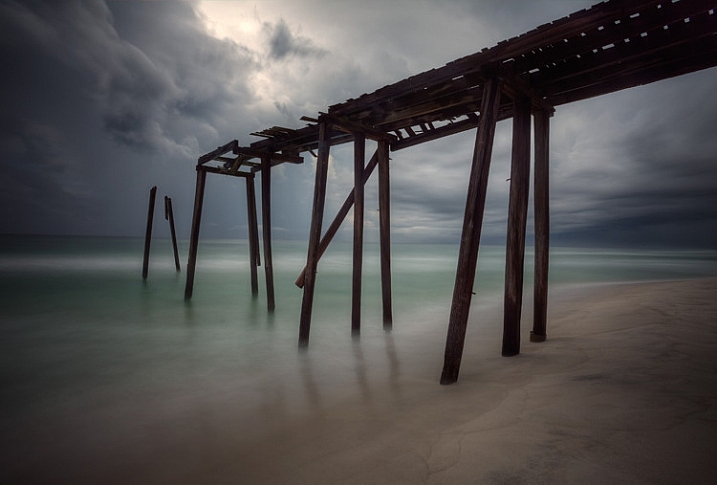
Top Coastal Formations - Pier

Abandoned piers and docks also provide a great opportunity for you to blur out the water, which creates a strong contrast between the blurred water and the sharp pier. To do this, make sure you have a 10-stop neutral density filter. Using this filter will reduce the amount of light allowed into your camera, and cause the camera to use a much longer shutter speed than it would otherwise. That long shutter speed blurs (or smooths) the water.

2. Lighthouses

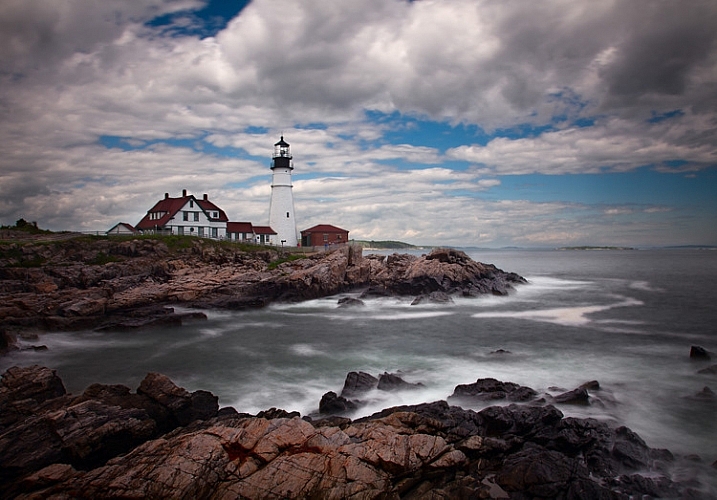
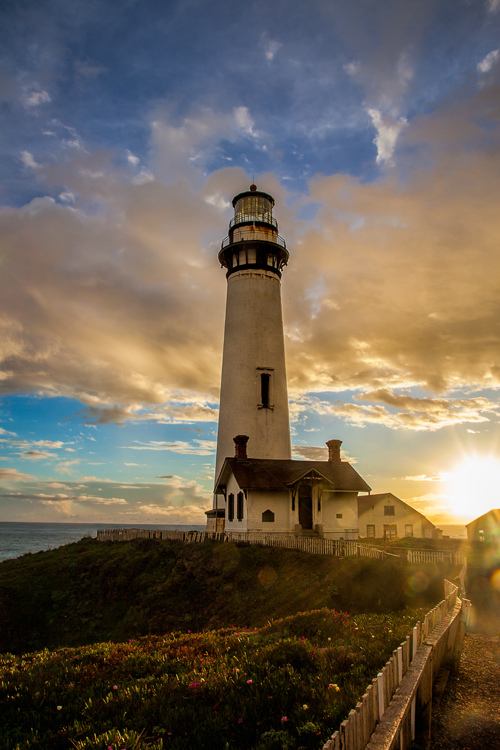
A less common feature, but one that you should always look for, is a lighthouse. These add a great subject to an otherwise uninteresting scene.

Obviously, you won’t find lighthouses everywhere, but you’d be surprised how many there are if you look for them. In the U.S., the state of Maine alone has over 60 lighthouses, California has about 30. You can check to see if there is a lighthouse near your destination by using the map created by the Lighthouse Friends.

Seascape features example -  Portland Head Light

Oftentimes access to lighthouses is restricted to certain hours because they are on public property. This can be an issue if you want to shoot before sunrise or after sunset, as most of us do. Be sure to check the access and/or opening times.

3. Sunrise and sunset

Whereas your location may not have something like an abandoned pier or a lighthouse, no matter where you are there will always be a sunrise and sunset. You may not get the most dramatic of sunrises or sunsets on the day you are out shooting, but you will always have one. If you are not doing this already, it is the number one improvement you can make to your photographs, and it costs nothing.

If you don’t ordinarily shoot into the sun, do so on occasion to add drama and interest. You can also use the sun as a center of interest.

Top Coastal Formations - Sunset at Pigeon Point

Be sure to arrive well before sunrise or hang around after sunset. The skies are often more dramatic during these times than during the actual sunrise or sunset itself.

4. Interesting rock formations

Remember that in coastal photography, the top half of your picture is often a given; it will be the water and sky. In those cases, the only variable is the foreground. Therefore, you should spend a lot of time looking down to get the best foreground possible.

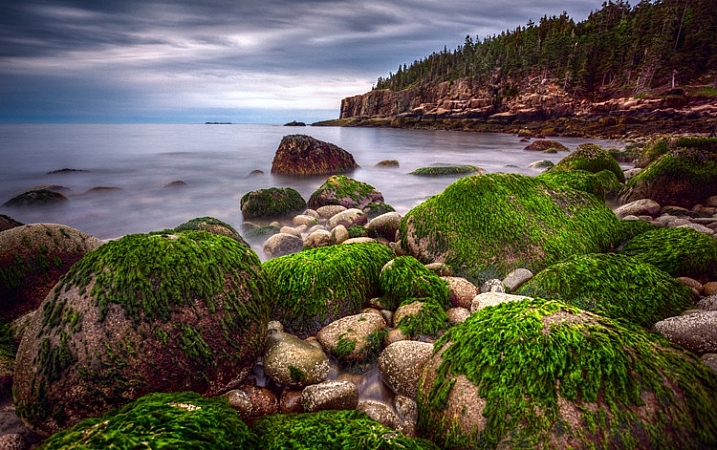
When you do that, one thing to look for – which is available no matter your location – is interesting rocks, or rock formations. Spend a lot of time looking for them, and as you do so, look through your camera frequently. The camera sees things differently than you.

Seascape features example -  Green rocks at Acadia

To make the rocks stand out, get let low to the ground and get right behind them. This is sometimes inconvenient or uncomfortable, but it is worth it. Be sure to use a wide angle lens to capture the whole scene.

5. Patterns in the water

Sometimes the water itself is enough to create an interesting photo. For this to be the case, you will need to capture the pattern of the waves or the currents in the water.

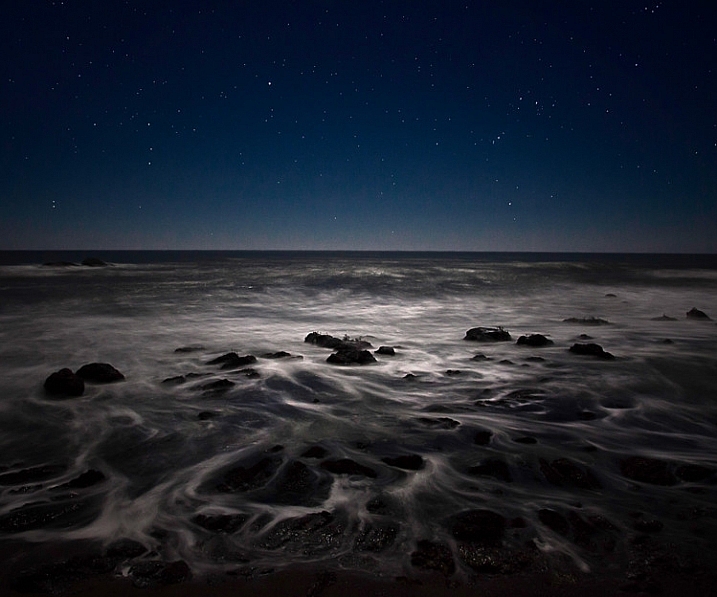
top Coastal Formations - Ocean at Night

Use a slow shutter speed to capture the patterns of the waves and currents. At night, your shutter speed might naturally be slow enough to do this because of the low-light environment. During the day, however, you will need a 10-stop neutral density filter to use a slow enough shutter speed.

6. Animals

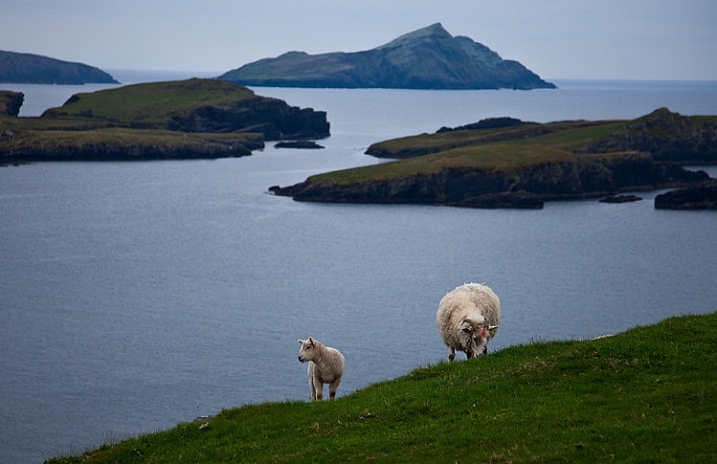
Seacoasts are home to a vast array of wildlife. In some places, livestock are allowed to roam freely along coastal regions. If nothing else, you can count on birds being present at the coast. Use one of these animals as a center of interest for your photo when you capture the scene.

Seascape example - Valencia Island with Sheep

You will need to use a reasonably fast shutter speed to capture the animal and make it sharp. If you like to shoot from a tripod and use a neutral density filter when capturing coastlines, you will have to change things up. Creating a blur to the water will also blur the animal, which will ruin the shot.

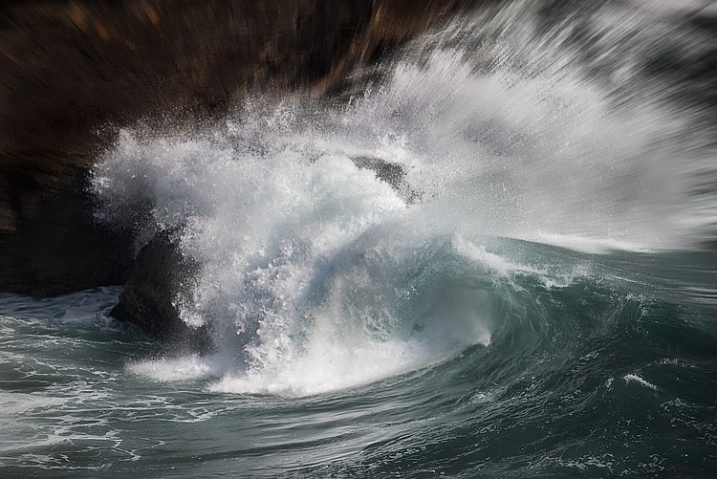
7. Powerful waves

On some days, the waves are enough to create a nice photo. In particular, after a storm or high winds, the waves may come crashing in and give you something interesting to work with.

Top Coastal Formations - Crashing Waves

Use a fast shutter speed (at least 1/250th) to capture the power of the waves. If you use a slower shutter speed it will blur the wave, which will create a sense of movement, but not show the power of the wave. This will probably not be a problem most days, but if you are working in low light you will need to increase your ISO, or open up your aperture a bit to get the shutter speed fast enough.

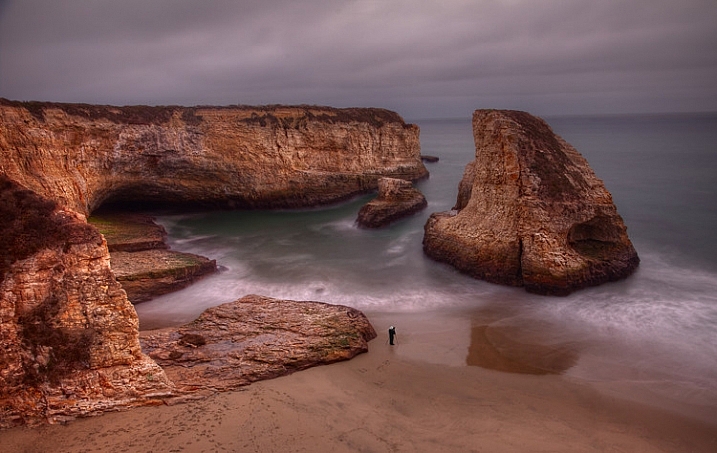
8. People (for a sense of scale)

You can have the most dramatic scenery in the world in your picture, but if your viewer cannot instantly determine the scale of the scene, it might be lost. Nothing solves this problem more than having a person in your picture. We all know how big people are, and seeing a person in the picture instantly helps put the size and scale of the scenery in perspective.

Seascape features example -  Photographer at Davenport cliffs

Next time, rather than cloning out that person who wandered into your picture, leave them in. Better yet, look for opportunities to include a person in your scene to add a sense of scale.

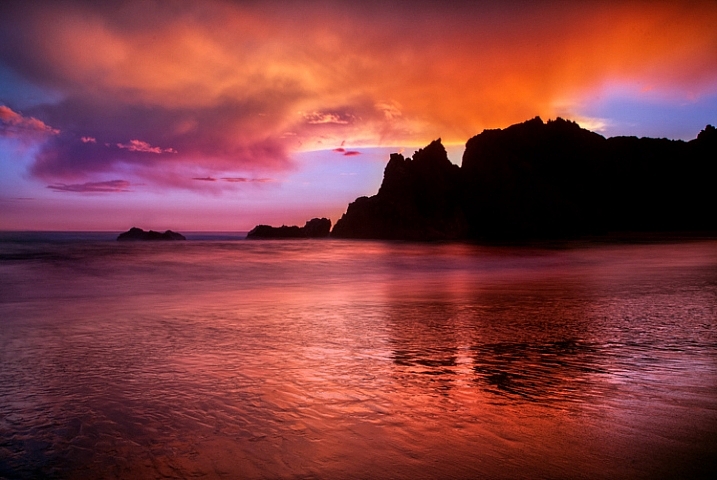
9. Reflective water

If you are shooting up or down the coastline (i.e. perpendicular to it), land features will sometimes reflect on the water or wet sand. These reflections can make a nice foreground for your picture. Capturing reflections usually requires that:

  1. You are photographing just before sunrise or after sunset
  2. You use a long exposure, which will blur the water and make the reflection show up

Seascape features example -  Reflections at Pfeiffer beach

It need not be a perfect reflection (it rarely will be, since the water is moving so much), but just something that captures the colors and tones in general. You will use these to create a foreground that is more interesting than just a bunch of sand. Slow down your shutter speed and see what develops.

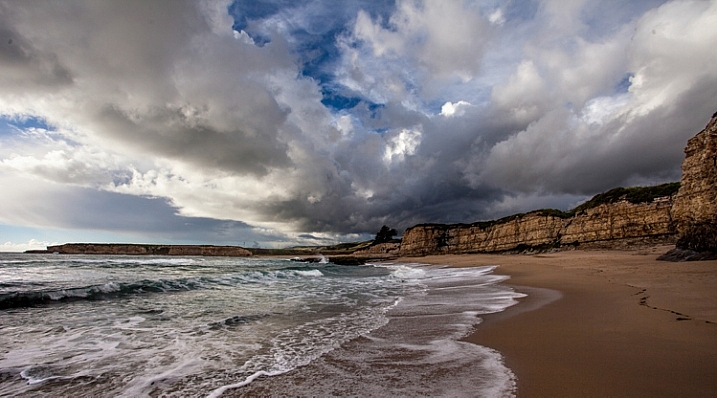
10. Clouds

Another item found along the coast that does not depend on your location or geography is clouds. More often than not, the clouds will give you something to work with. Coastal regions – being a transition between land and sea – often develop the most interesting clouds anywhere, and conditions can change rapidly.

Seascape features example -  Davenport clouds

If you are focusing on the clouds as the subject of your picture, make sure that the top two-thirds (2/3) of your picture (at least) is above the horizon line. Be sure to use your polarizing filter if you are shooting near midday.

Next steps

There is nothing to do now but get out there and photograph the coast. Start with the features in this article, then go find your own. There is no end to the interesting things you can find along the coast. If you have a favorite that I didn’t list, be sure to leave it in the comments below.

googletag.cmd.push(function() {
tablet_slots.push( googletag.defineSlot( “/1005424/_dPSv4_tab-all-article-bottom_(300×250)”, [300, 250], “pb-ad-78623” ).addService( googletag.pubads() ) ); } );

googletag.cmd.push(function() {
mobile_slots.push( googletag.defineSlot( “/1005424/_dPSv4_mob-all-article-bottom_(300×250)”, [300, 250], “pb-ad-78158” ).addService( googletag.pubads() ) ); } );

The post Top 10 Features to Bring Your Seascape Photos to Life by Jim Hamel appeared first on Digital Photography School.


Digital Photography School

 
Comments Off on Top 10 Features to Bring Your Seascape Photos to Life

Posted in Photography


30. Juli 2015

31 Jul

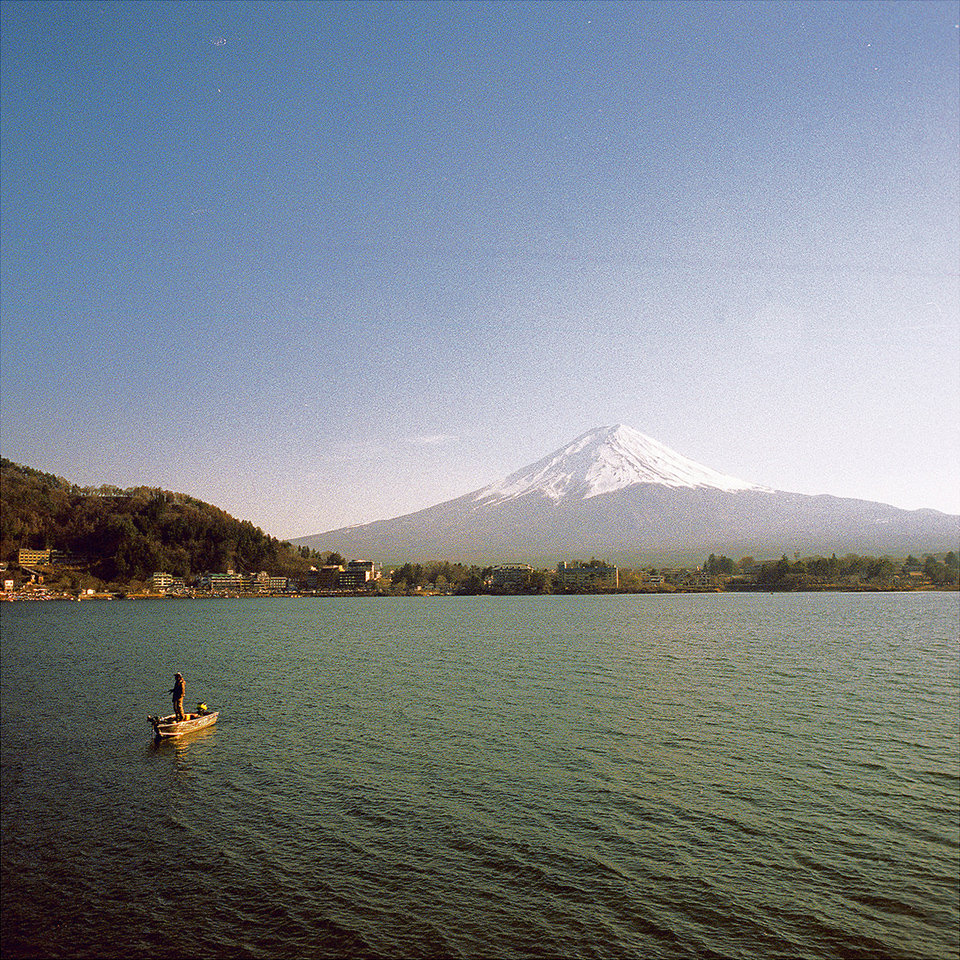
Das Bild des Tages von: Thomas W.

lake-kawaguchi-©-Thomas-W-19240527224

Im Ausblick: Ein Hund und ein Baby, Instagram und Manipulation im Fotojournalismus.
kwerfeldein – Fotografie Magazin | Fotocommunity

 
Comments Off on 30. Juli 2015

Posted in Equipment


How to do Milky Way Photography – A Comprehensive Tutorial

31 Jul

How to Photograph the Milky Way

You’re spinning through our solar system on a gorgeous blue marble which offers jaw dropping views of an astronomical phenomenon we call The Milky Way. Wait for our marble to line up just right, and you’ll have a perfect opportunity to create awe inspiring images that harness that galactic chandelier hovering over your head.

My students are often delighted to learn that capturing spectacular images of The Milky Way is easy, once you know a few essential tips. Planning when and where to do Milky Way photography is just as important as the techniques and equipment you’ll be using.

If you want to get truly majestic shots of The Milky Way you’ve really got to consider your location and timing. I’ll tackle that first, before we move on to the shooting technique.

1 – Where and when to see the galactic core
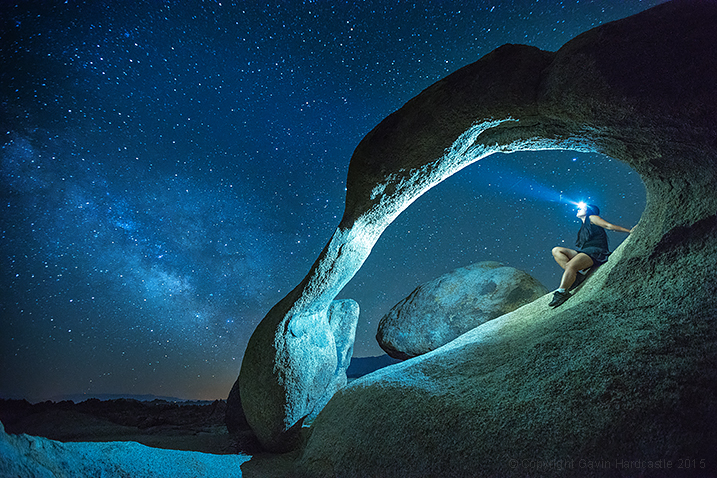
How to Shoot the Milky Way

The full galactic core is only visible during certain months, at certain locations. You can see the rest of The Milky Way throughout the year, but for truly eye-popping results it’s the galactic core that you’ll be hunting for, so let’s discuss the best times of year to see it in all its glory.

Northern Hemisphere
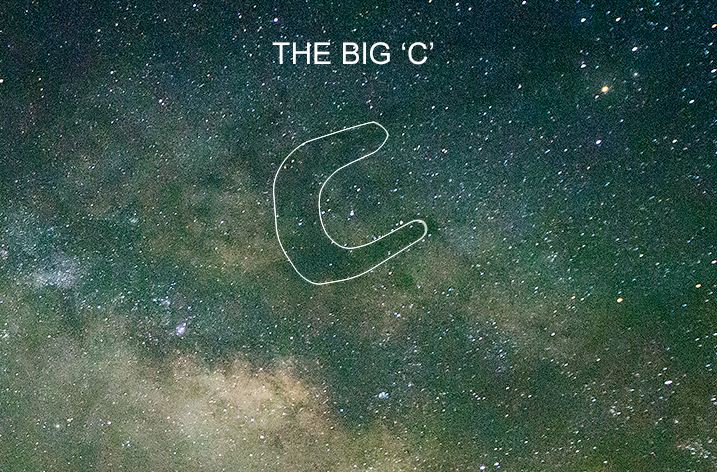
The Big 'C' of the Galactic Core

Parts of The Milky Way are visible all year round but the galactic core is present only from late April to late July and can be seen in the southeastern to southwestern sky. That’s when you’ll get to see what I call The BIG C. As the summer progresses, you’ll see the core move west so that by the end of summer it appears to rise in the southwestern sky.

You have no chance of seeing the galactic core in winter.

Southern Hemisphere

Photographers who live in the southern hemisphere are lucky because they get to see the core from February right through to October, with peak visibility being in June and July. I’m rather jealous.

Don’t forget lunar phase

For super clear Milky Way photography you’ll need minimal light pollution, which means you’ll want to avoid a bright moon. However, I’ve actually captured good shots of The Milky Way even with a first quarter moon in the sky (so don’t feel like it’s not worth shooting when the moon is present) but obviously a full moon is to be avoided.
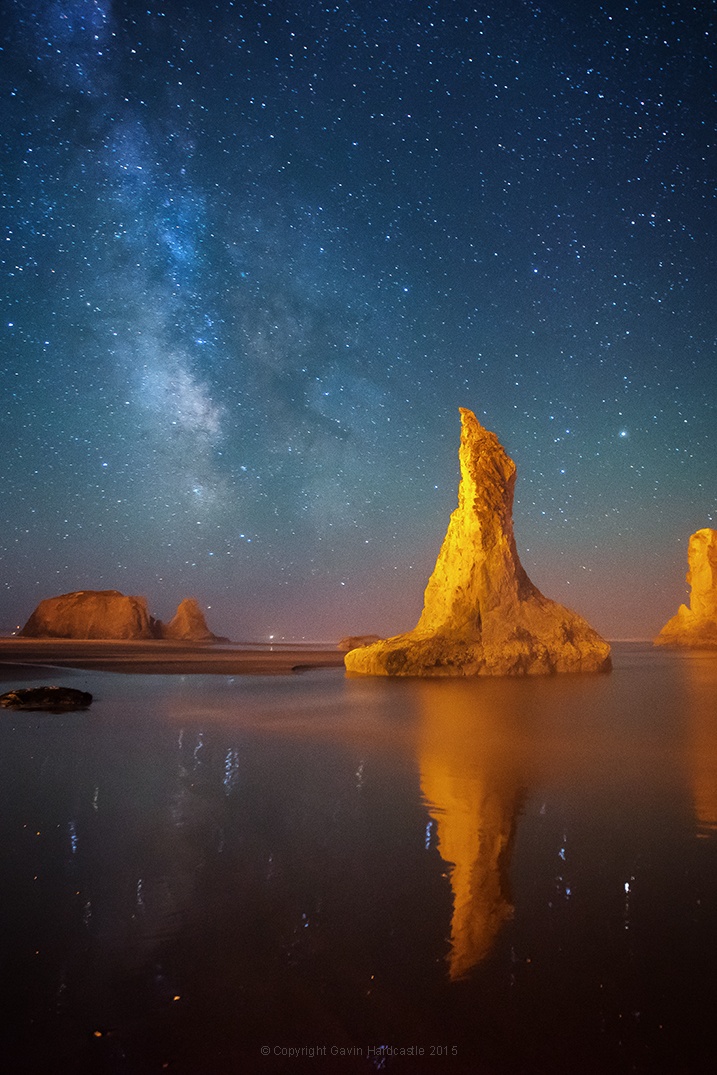
Milky Way Photography Tutorial

The other thing to consider is the position of the moon in relation to The Milky Way. For example , a first quarter moon isn’t such a problem if it’s way off in the west while your Milky Way appears in the southeast. But, if the moon lines up dead centre in the Milky Way, it could be too bright, right where you don’t want it.

How do you know where The Milky Way is going to be?

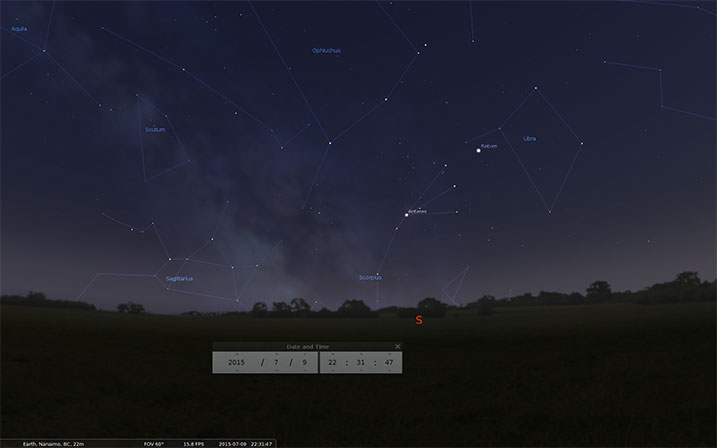
There are a multitude of phone and desktop apps that can help you to plan your Milky Way shoot but my favourite is the free app called Stellarium. There’s a phone and desktop version, I prefer the latter to plan my shoots.
Milky Way Photography Tutorial - Stellarium

You can enter a location and time to see when and where things are going to line up. You’re mainly looking to see where the galactic core is present during a darker lunar phase. Stellarium will show you a picture of The Milky Way, and its position, at the times you specify. You can also see where and how bright the moon will be.

Check out some of the other popular apps like; The Photographers Ephemeris and Starwalk.

2 – Find a dark location

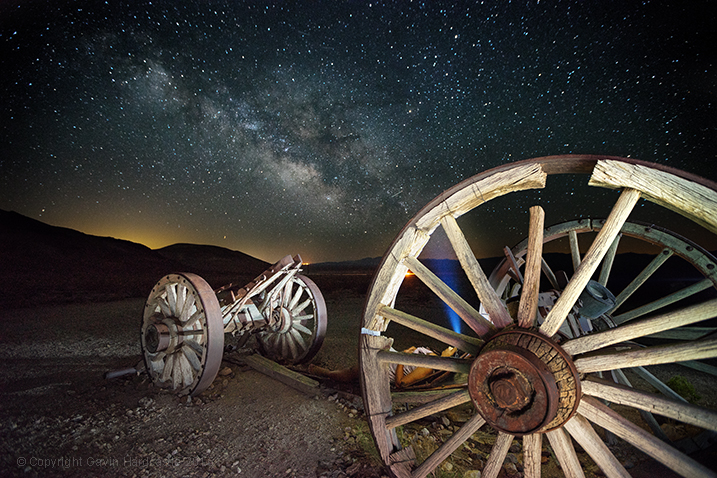
Purists will say that you MUST be in a dark sky area and of course that will give you a much clearer shot, but don’t let a little bit of distant light pollution stop you from shooting The Milky Way. If you can see it, you can shoot it. The image I shot below in Death Valley shows light pollution from two large cities and I honestly think it adds to the contrast in the image. That glow on the horizon adds a great separation of earth and sky.
Milky Way Photography Tutorial - Death Valley

If you want to discover the best dark sky locations, the International Dark Sky Places site is a great resource.

3 – Wait for clear weather

Most landscape shooters love clouds and hate blue skies. Once you get into shooting nightscapes, you’ll quickly reverse that thinking.
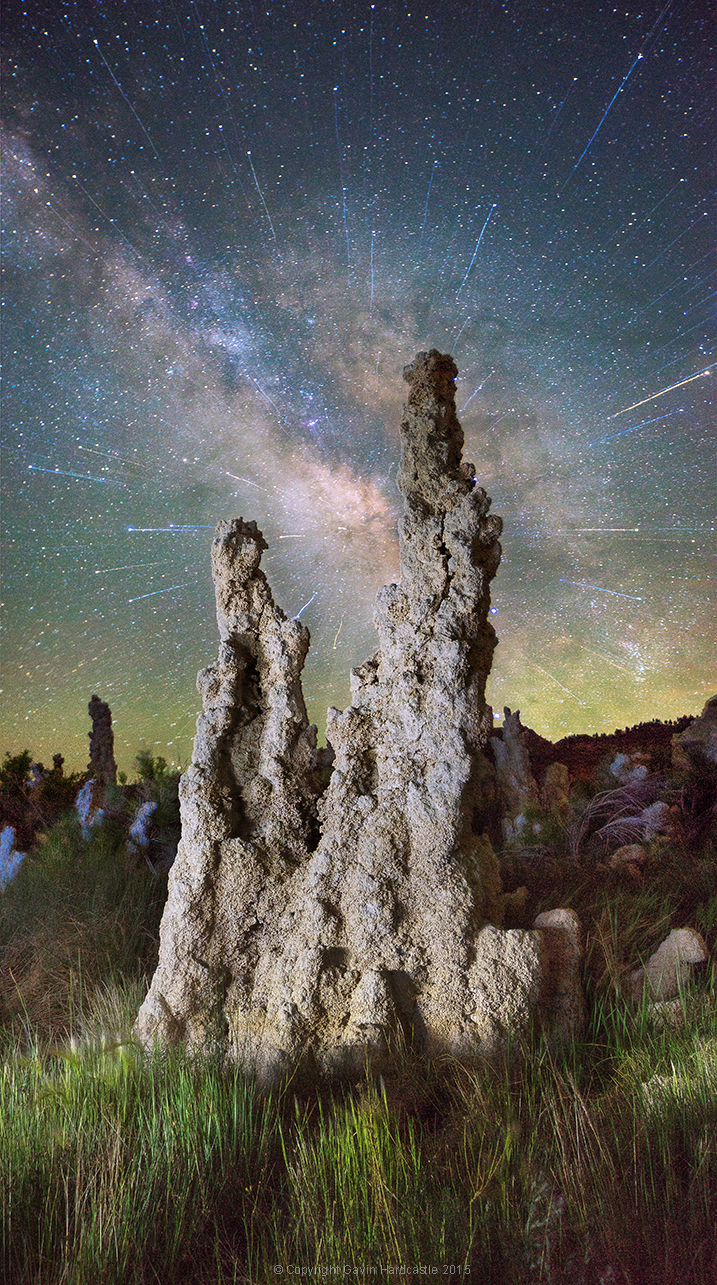
Astrophotography Tutorial - Gavin Hardcastle

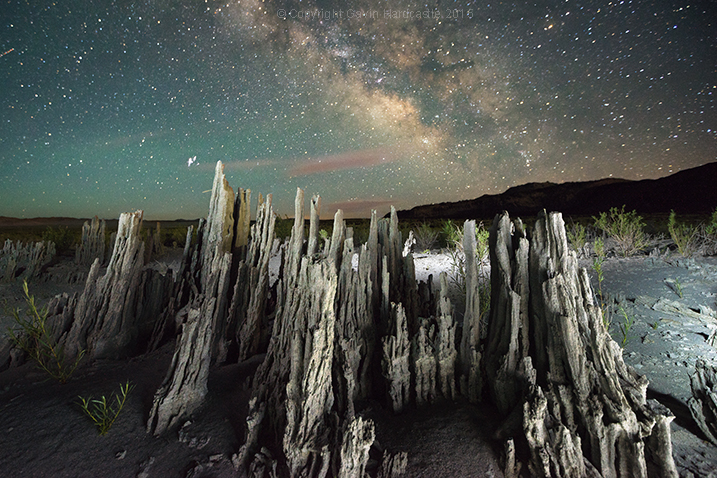
In this shot of Mono Lake the small clouds actually added a little interest to the shot, without obscuring too much of the galactic core.

A blanket of cloud is bad news if you want to get clear shots of The Milky Way, but don’t be put off by the presence of light cloud cover. Sometimes a few clouds can add drama and framing to a Milky Way shot so it’s still worth shooting if the clouds aren’t completely blanketing the entire sky.

4 – The Milky Way is only half the shot

For me, the most awe inspiring Milky Way images are those that show the galactic core in relation to earthly locations and objects. Something as mundane as a person on a camp chair can look really dramatic when framed by the phenomenon of The Milky Way.
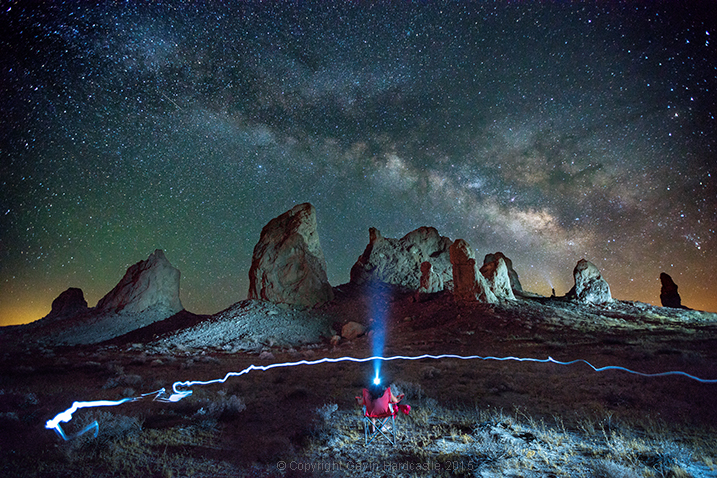
Photographing the Milky Way - Tutorial with Gavin Hardcastle

Think hard about what you’d like to put in the foreground of your Milky Way shot. If you get perfect conditions and execute perfect technique you’ll still get a boring shot if you don’t put something else in your frame to ground the viewer. Pick an interesting foreground feature and maybe try a little light painting to make your Milky Way shots truly awesome.

That could be anything from an interesting rock formation like a sea stack or arch, right through to a derelict shed, or an interesting tree. Think about locations that feature a point of interest and then consider how that place lines up with The Milky Way.

5 – Using the right gear

Lens choice

While there’s something to be said for using the gear you’ve already got, night photography is something of a challenge because of the absence of light. You’ll need a fast lens that ideally has a maximum aperture of f/2.8, or even brighter like an f/1.4.

Super wide angle lenses are ideal for shooting nightscapes because they don’t usually produce much bokeh. By that, I mean that even when set to maximum apertures of f/1.4 you’ll still be able to get a great deal of your image in focus – if you focus correctly. The last thing you want is a sharply focused Milky Way with a foreground that is completely blurred in soft, creamy bokeh, so leave the lovely Sigma 85mm f/1.4 at home.

The other great thing about super wide lenses is that you can fit a lot of The Milky Way into your frame, and there’s less magnification which allows for longer shutter speeds before the stars in your shot begin to trail.

It’s not the end of the world if you’ve got a standard, all-purpose, kit lens that isn’t very fast. You’ll still get some decent Milky Way shots because you’ll be using long exposures and high ISO settings to maximize your camera’s sensitivity to light.

Astrophotography Lens Choices

On the left we have the Rokinon/Samyang 24mm f/1.4 ($ 549) which costs a third of the price of the Canon 24 mm f/1.4 ($ 1549).

If you really get into shooting nightscapes you’ll be glad to learn that some of the most popular wide angle lenses for nigh photography are actually quite affordable.

Rokinon (AKA Samyang/Bower) offer two lenses that have something of a cult following among night shooters with their 14mm f/2.8 and their 24mm f/1.4 lenses. The build quality is atrocious but as long as you treat them with kid gloves (carefully), they usually perform well.

These are popular because they offer sharpness, speed, a wide field of view, and much less coma than other more costly lenses. Coma is the amount of elliptical aberration around stars in the corners of the frame. Some more expensive lenses, like the Canon 16-35mm f/2.8, have really bad coma on stars in the corner of the frame, which isn’t the end of the world, but it’s not ideal.

6 – Camera choice

With night photography you’ll be forced to use high ISO settings during your long exposures so it’s vital to have a camera that can operate at ISO 3200 and above, but more importantly still produce good image quality. No matter what camera you use, the image quality will take a major hit when you start to crank up the ISO numbers, that’s unavoidable.

Camera sensors have come a long way in the last couple of years so even if your camera isn’t top of the range you might be pleasantly surprised at the image quality of your high ISO images.
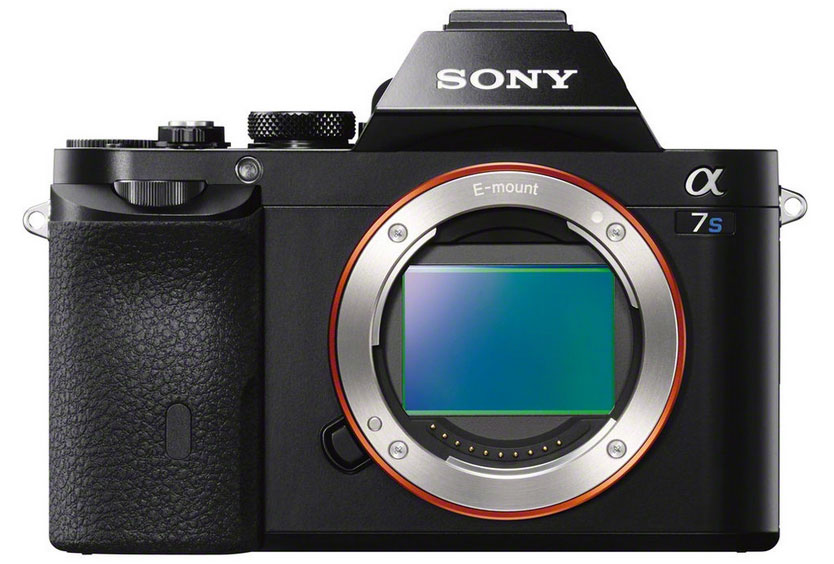
The Sony A7S for Astrophotography

The Sony A7S has become something of a legend among astrophotographers but it isn’t cheap.

Some of the best performers of the last couple of years have been the Sony A7R, Nikon D810 and the absolutely brilliant Sony A7S, which is known for its amazing low light capability. These are all full frame cameras, and will deliver the best image quality as they typically offer better noise performance. But if you’re rocking a MFT (mirrorless four thirds) or APS-C sensor, don’t let that stop you from going out and getting some Milky Way action.

Don’t feel that you absolutely MUST have the most expensive gear. Work with what you’ve got, then upgrade when you become addicted, and can’t resist the temptation to splurge.

The one thing you’re going to really need your camera to have is a good Live View screen or an EVF (electronic viewfinder). You will use this to focus and compose your shots.

7 – You need a tripod

It’s dark, you’re going to be doing long exposures, and that means you have to use a tripod. Read my article on the reasons why a good tripod is essential for any kind of outdoor photography. For night photography a tripod is obligatory.

Shooting technique

Ok, you’ve planned everything right, The Milky Way is looming large above you, and you’ve framed up a lovely composition of it with some fascinating foreground object. It’s time to set up your camera for Milky Way shooting. Here’s where I start:

NOTE: For now you’ll want to turn off your in-camera noise reduction, as this will just slow down your test shots.
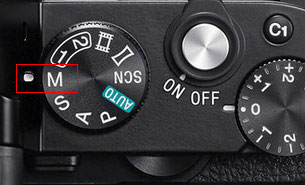
Shooting in Manual Mode8 – Shoot in M (Milky Way Mode) and Shoot RAW

You want full control over every aspect of your shot so set your camera to Manual mode. This allows you to control the ISO, the shutter speed, the aperture and white balance. Always shoot in RAW.

9 – Use Live View or the EVF (if you have one)

This is where we’ll set our focus. Make sure you switch auto-focus OFF as we’ll be focusing manually. Before we do this you need to crank your ISO up to something like 5000 to make your sensor really sensitive to light.

10 – Set your focus on a star

Set your aperture to the widest, fastest setting it can achieve (smallest number such as f/2.8). This wide aperture will expose your sensor to the maximum amount of light.

Using your camera’s Live View or EVF, point it at the brightest star you can see until a small dot of light appears in the centre of your view. Zoom in (magnify the view NOT zoom the lens) so that you see that tiny little dot as large as possible. Now turn the focus wheel on your lens until the star becomes a sharp, tiny pin-point of light. Try turning the focus wheel passed that point until the star blurs again and you’ll have gone too far, so just back it up until you’re able to get the star as sharp and small as possible. Don’t rush this, take your time and get it right.

If your camera has a feature called Focus Peaking or Focus Assist, that can sometimes help you to determine perfect focus on a star. If you’re into calculating hyperfocal distance, you could do that too, but I prefer this method.

Whatever you do, don’t blindly set your focus to infinity by cranking your focus wheel until it reads Infinity (?), you’ll just end up with blurred images.

11 – Compose your shot

Now that you’ve focused your lens on the brightest star, it’s time to compose your shot. Use your headlamp to illuminate the scene so that you can see what you’re looking at in your Live View. If your camera has a digital level for perfect horizon lines use that – if not, you might want to invest in a bubble level for your hot shoe attachment.

Set your shutter speed to about 10 seconds (at ISO 5000 if you have it), and take a test shot. At this point all you’re doing are some rough test shots to get your composition sorted, so there’s no point in shooting a full 30 second exposure and waiting around while you take a whole bunch of test shots.

Once you’ve finished taking test shots and made your final tripod adjustments for the perfect composition, it’s time to dial in your camera settings.

13 – White Balance

When shooting The Milky Way I prefer to shoot with my White Balance set to Incandescent (aka Tungsten) which I believe is Sony’s version of Tungsten. I like the blue hue and it also displays a lot of contrast in my camera’s EVF so that I can clearly see The Milky Way. When I process my images later I often reset the White Balance back to Auto (AWB) mode for a more realistic neutral color temperature.

White Balance Settings for Milky Way Photography

This RAW file was shot with Incandescent White Balance. You can see how it looks in Adobe Camera RAW when set to Auto.

I advise you to experiment with different WB settings to get the colour temperature you like best. Shooting with the Incandescent/Tungsten prest will almost always produce good, neutral results, which you can change later in Lightroom or Adobe Camera RAW.

14 – Set your ISO

You used ISO 5000 for the test shots so that you could compose your shot quickly. But, for your actual Milky Way shot you want to use the lowest ISO setting you can get away with so dial it down to ISO 2000 and see if that gives you good results. You can always increase it to ISO 3200 after a few more test shots. I personally rarely go above ISO 3200 as my RAW files tend to degrade significantly at that point.

15 – Shutter speed versus ISO

From this point on you’re going to be juggling your shutter speed and ISO setting to get the most light sensitivity, while still having a shutter speed fast enough to avoid getting star trails. Star trails are great if you’re going for the that effect (read my star trails photography tutorial here) but even a very small star trail just results in a Milky Way shot that lacks clarity. That may just be okay for web images, but for prints you’ll want more sharpness.

Try to limit your shutter speed to a maximum of 15 seconds so that you can keep the stars in your image sharp and trail free.
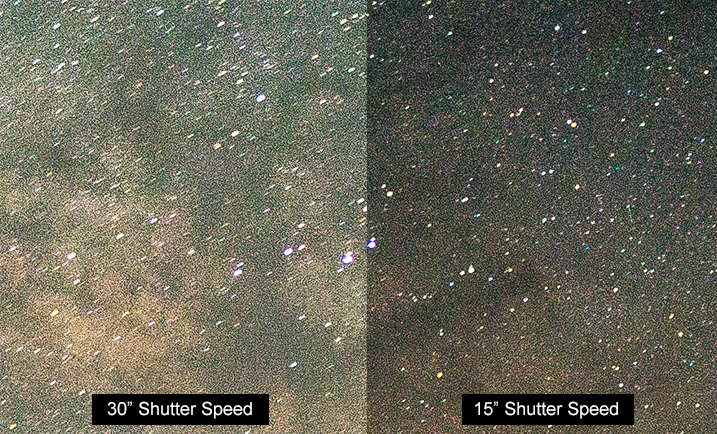
Shutter Speeds for Milky Way Photography

As you can see, the 30 second exposure on the left has a motion trail on each star. The 15 second exposure on the right has sharper stars, although it is darker.

With a shutter speed of 15 seconds, take a look at your camera’s light meter reading. If it’s telling you that the image is overexposed you might be able to dial your ISO number down a bit, or shorten your shutter speed to 10 seconds.

Sometimes I like to overexpose the image and ignore my light meter reading entirely. When shooting the Milky Way I’m guided more by what I see in my test shots than what my light meter is telling me to do. With my Sony cameras I use Multi metering mode, for what it’s worth.

After your shot is complete and you’re reviewing it, be sure to zoom in and check the details.

16 – Try a 30 second exposure
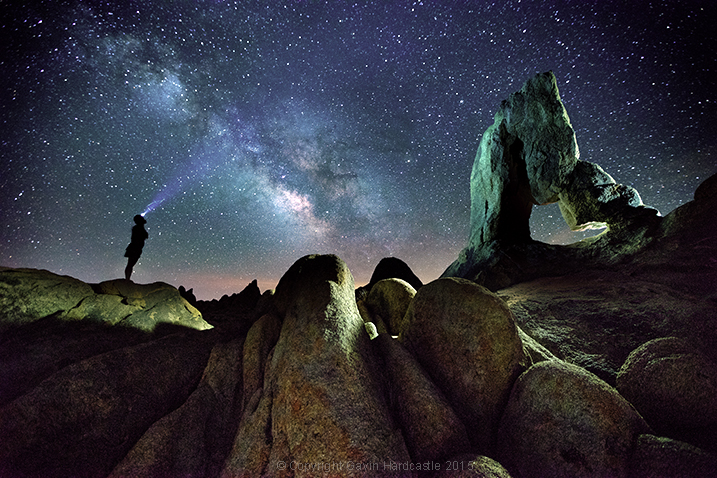
Milky Way Photography Tutorial - Alabama Hills, Gavin Hardcastle

I know I just said to keep your shutter speed to a maximum of 15 seonds but I always like to take an additional shot with a 30 second exposure to capture a much brighter Milky Way. I do this if I’m planning on publishing a web-only (low resolution) image because the slight star trail caused by the longer exposure won’t be very evident in a low-res web image. The stars will still look sharp enough but will have a much brighter appearance than a 15 second exposure. For prints, I’ll almost always use the 15 second exposure version for the extra sharpness.

In-camera Noise Reduction

Some cameras do a great job of processing and reducing noise reduction. But, this will double the amount of time it takes to complete your shot, so it’s always a good idea to switch this function off, at least temporarily. If you like the results of your in-camera noise reduction you can always switch this function back on once you’ve finished all of your test shots.

I personally prefer to do my own noise reduction in Adobe Camera Raw and Photoshop which gives me more control and allows me to shoot faster while on location.

Now it’s your turn

Okay, so now you know how to get gorgeous clear photos of The Milky Way. I hope you get some great results and have as much fun as I do when shooting this awe inspiring sight. If you’d like to learn how I process my Milky Way shots please post a request in the comments and if there’s enough interest I’d be delighted to share my techniques.

googletag.cmd.push(function() {
tablet_slots.push( googletag.defineSlot( “/1005424/_dPSv4_tab-all-article-bottom_(300×250)”, [300, 250], “pb-ad-78623” ).addService( googletag.pubads() ) ); } );

googletag.cmd.push(function() {
mobile_slots.push( googletag.defineSlot( “/1005424/_dPSv4_mob-all-article-bottom_(300×250)”, [300, 250], “pb-ad-78158” ).addService( googletag.pubads() ) ); } );

The post How to do Milky Way Photography – A Comprehensive Tutorial by Gavin Hardcastle appeared first on Digital Photography School.


Digital Photography School

 
Comments Off on How to do Milky Way Photography – A Comprehensive Tutorial

Posted in Photography