It’s not always easy to be a photographer, seeing all of the great photo opportunities around us, and wanting to capture them all. Recently, I was working with a student of mine, and she wanted to know how to handle changing settings quickly from one situation to another. Her example was trying to go from photographing landscapes, to trying to focus on a bird or other wildlife that may quickly enter the scene. While some seasoned photographers may be ready for a situation such as this, it’s certainly not easy, and for someone just learning, I would argue that it shouldn’t be attempted at all.
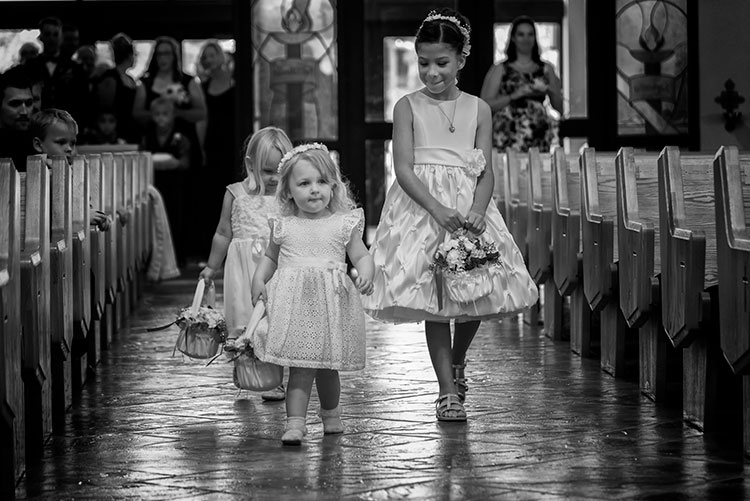
24-120mm, shot at 120mm, 1/160, f/4, ISO 1400. Knowing how the lens behaves at both ends of the zoom, I knew I could use this lens for wide angle shots in close, but zoom in as the flower girl was coming down the aisle and still get an interesting shot.
While many of the camera manufacturers want to make photography sound easy (anyone remember “So advanced, it’s simple”?), the fact is, photography is a craft, that despite the advances in technology, takes some time to master. Different photographic situations call for different settings, different lenses, or even a completely different approach to the subject matter. If you’re a hobbyist with only one camera, it can be impossible to be ready for all of the possibilities as they happen.
So here are three ways to keep it simple while you’re learning photography, and stop the overwhelm.
#1 – Focus on one subject at a time
I’m a strong advocate for keeping things simple. First off, if you’re planning to photograph landscapes, wildlife, or portraits, stick with that one goal. It is easy to get distracted by other subjects that come along. Those opportunities can seem like gold when they pop up, and they can be, but if you’re already set up to shoot a landscape photo at ISO 100, f/16 aperture, and 1/20th shutter speed, quickly switching to settings suitable for capturing a bird in flight is not an easy process. It will likely end in you being frustrated, capturing photos that don’t quite meet your expectations, or worse, don’t come out at all.
Even now, 20-plus years after beginning my photography career, I try not to do too much at once with a camera. I focus on what my goal was when I first decided to pick up the camera and head out. If I’m planning on photographing a landscape at sunset, that’s what I do. The only time I will try to be ready for two separate subjects, is when I have two cameras. For instance, if I’m photographing a landscape, but there are waterfowl nearby and I want to be ready for that, I have a second camera set up with a telephoto lens, so I can grab it and try and get the shot. Even this requires me to at least temporarily put my initial subject, the landscape, aside for a bit.
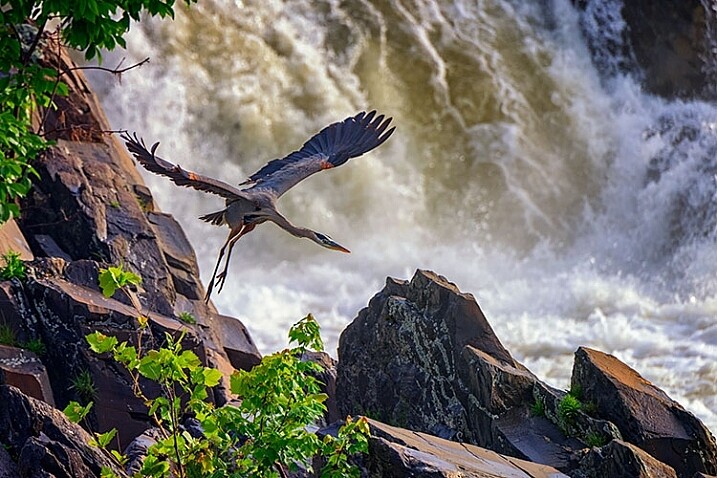
This shot of the blue heron was taken with a 400mm lens, using continuous AF, and 1/1250 shutter speed.
The image of the waterfall (below), and the image of the great blue heron (above), were both taken at the same location. However, for the shot of the waterfall, I needed to use a neutral density filter to slow down the exposure. There is no way I’d have been able to remove the filter, and be ready to photograph the heron, even if both shots could have been captured with the same lens. Not only would my shutter speed have needed to be drastically faster to stop the flight of the heron, I would also have needed to use continuous AF to capture its flight sharply, while I always use one-shot AF when photographing landscapes.
Knowing there may be wildlife nearby, I mounted a Nikon 80-400mm lens on one camera (on a strap on my shoulder), while I had a second camera with a shorter lens, set up on a tripod to capture the waterfalls. If I only had one camera, I would have needed to choose between one subject or the other, and then move on. Rare is the occasion when you can jump so quickly from one subject to a completely different one using only one camera.
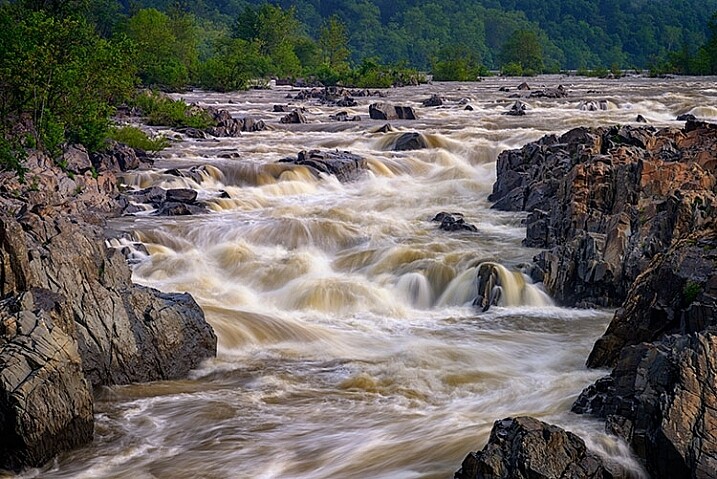
This shot was taken with a 16mm lens, using one-shot AF, and a 0.6 second shutter speed.
If you’re working with only one camera, don’t try to do too much. Pick one subject and work that until you feel you’ve accomplished what you wanted, then move on to another subject. Yes, it’s difficult to be set up to catch a sunset and watch a beautiful snowy egret land nearby and start fishing, leaving you itching to try and catch it, but chances are it will fly away again while you’re still fiddling with your settings. Meanwhile, the sun is still setting, the color is fading, and you’ve likely missed a shot or two there as well.
#2 – Use only one lens
Back when I took my first photo course in college, my professor was adamant that each student use only a 50mm lens. I didn’t understand why at the time, but I do now. It’s important to understand how your lenses behave, so you’ll know which one is right for the job. As photographers, many of us become gear collectors, always wanting another lens, to allow us to photograph the way we saw another photographer do it. But before you start collecting lenses, it’s important to recognize what each lens can do for you, and to truly understand that, you’ve got to use each lens extensively.

Using a wide angle lens, I was able to emphasize the ice in the foreground, while pushing the bridge to the background at the top center of the frame.
I currently have seven camera lenses in my kit right now. At any given time, there may be four or five in my camera bag when I’m out photographing, depending on what my planned subject is, or what contingencies I want to be ready for. But, as usually happens, it’s rare that most of those lenses will see the outside of my bag once I get where I’m going. While each situation is different, I often find that one lens will usually handle what I want to do when I get to a location. So unless it’s one of those rare times when a situation calls for both a telephoto and a wide angle look, usually only one of those lenses gets mounted on the camera. While in the above example I broke this rule and used two cameras with two different lenses, that is not usually the norm for me.
When you pull your camera out of the bag next time and select lens to use, stick with that one lens. Really get to know it. If it’s a zoom, shoot at only one end of it. The next time you use it, use the other end. Learn how to make that lens really sing. Find out what it’s really good for, and what it’s not good at. Do this with every lens you own, if you own more than one. When it comes time to purchase new glass, you’ll have a much better understanding of where your kit comes up short, and what you need to buy. In addition, you’ll also be building on my first point, focusing on one subject. Too often, new photographers miss opportunities because they are busy changing lenses because they think they need one over another. If changing lenses is not an option, you won’t waste time with it, and can focus on making great photos with whichever lens you find on your camera.

Telephoto lenses compress perspective. Want to make the sun or moon look really big in relation to a building or structure? Back away from your subject a bit and use a telephoto lens to compress the perspective and distort the size relationship.
In the two images shown above, the same bridge can be found in both, and both shots were taken from roughly the same spot. One was taken with a 16mm lens, and the other, with a telephoto lens at 290mm. Wide angle lenses expand perspective, emphasizing the foreground and pushing background objects back, while telephoto lenses minimize foreground and tend to flatten perspective. Using only one focal length will also help you to compose more effective images. Zooms can at times make you lazy. Zooming from a wide angle to a telephoto lens changes the image profoundly, and it’s important to understand what effect that can have on your image.
Telephoto lenses compress perspective, while wide angle lenses enhance it, and each perspective communicates something different to the viewer. There are reasons to use both wide and telephoto lenses, but only working with them extensively will help you recognize the situations where each is most effective.
#3 – Don’t accessorize
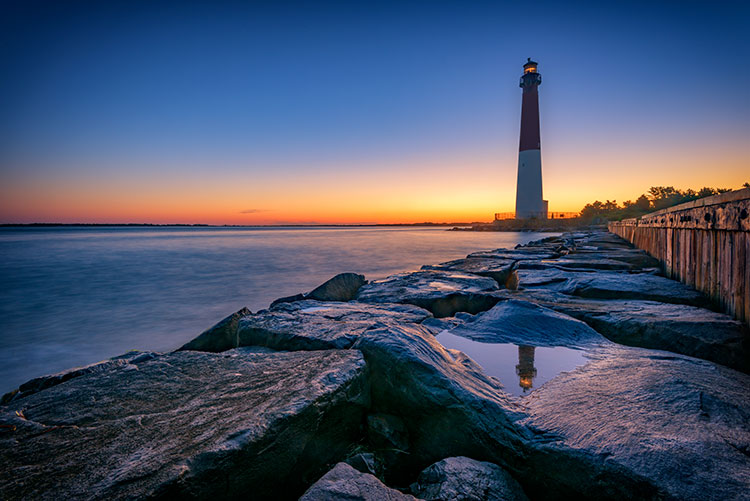
Shot at 16mm, f/16, 15 seconds, ISO 64. I simplified my composition down to two elements, the reflection in the foreground, and the lighthouse in the background. Knowing the lighthouse would be there regardless of where I stood or how I zoomed, I focused on getting the reflection right, and letting the rest of the composition fall into place.
One of the great things about digital photography, and today’s technology, is the many cool new tools available to help with your picture-taking endeavors. It’s great to be able to connect to a camera from your smartphone, and do things such as time lapse or long exposures, but often times, these accessories are one more thing that can go wrong, or distract you from actually taking photos.
There are only three accessories that I use regularly. One is a time controller that plugs into my camera directly, second is a tripod, and finally, a set of neutral density and graduated neutral density filters, used to help control exposure. I didn’t even begin using the filters until a few years ago, more than 15 years into my photography career. Both images below used nothing more than a remote shutter release. In the case of the Milky Way image, on the right, I set my camera to manual for a 15 second exposure and used the remote release as I would the shutter button, simply to avoid touching the camera. For the image on the left of the star trails, while that becomes a bit more complicated in processing, in reality, it’s just a lot of 30-second exposures. I simply set my camera to continuous drive, and locked the shutter button on the remote down. Simple.
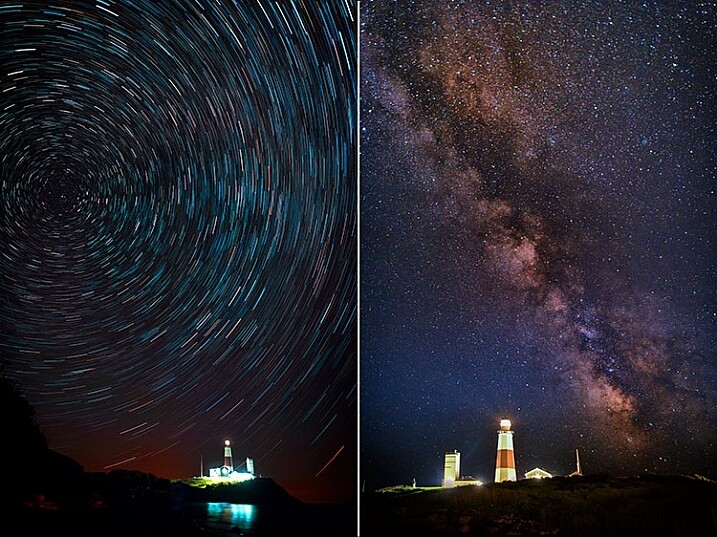
Even for images such as these, the only accessory I used was a time controller, with only the shutter button locked down.
It’s important, when learning photography, to focus on the basics – aperture, shutter speed, and ISO, and understand how they affect your images. It’s too easy to get caught up in all the bells and whistles and how cool they are, and forget that the end result is what matters. In my mind, if the accessory isn’t contributing in a way that affects the final image, then I don’t need to use it. I’m not saying that accessories are bad, or even unnecessary, but if you aren’t sure how to achieve a proper exposure yet, put off purchasing that shiny new toy, and really learn your camera.
I would even advise you to stay away from the special modes on your camera, such as HDR, or star trails mode (I do that manually in post-production), or multiple exposure mode. Yes, they can look cool, and do great things, but again, understanding the basics of exposure is paramount. If you don’t understand basic exposure, using the bells and whistles won’t help you make music.
I find that simplifying the process as much as possible helps me come away with the best images possible. What do you do to help simplify your photographic process?
googletag.cmd.push(function() {
tablet_slots.push( googletag.defineSlot( “/1005424/_dPSv4_tab-all-article-bottom_(300×250)”, [300, 250], “pb-ad-78623” ).addService( googletag.pubads() ) ); } );
googletag.cmd.push(function() {
mobile_slots.push( googletag.defineSlot( “/1005424/_dPSv4_mob-all-article-bottom_(300×250)”, [300, 250], “pb-ad-78158” ).addService( googletag.pubads() ) ); } );
The post 3 Ways to Simplify and Learn Photography Faster by Rick Berk appeared first on Digital Photography School.


You must be logged in to post a comment.