
Tamron SP 150-600mm f/5-6.3 Di VC USD was tested in April 2014. The version of the lens tested is for the Canon DSLR mounts and it is compatible with both crop and full frame sensor bodies. The lens is also compatible with Nikon and Sony bodies.
On a Canon crop factor camera body the lens provides a field of view equivalence of 240-960mm. The lens has fast, silent focusing, Vibration Compensation and eBAND (Extended Bandwidth and Angular-Dependency) lens coating in addition to the conventional BBAR (Broad-Band Anti-Reflection) coating. These coatings are designed to reduce flare and ghosting, and to increase contrast. The lens has a moisture-sealed construction, and has 20 lens elements in 13 groups including three low dispersion (LD) elements and an iris diaphragm with nine rounded aperture blades.
What is in the box
The lens, a large lens hood, a removable tripod mount collar and a large fold out guide or manual.
Specifications of the lens tested
- Focal Length (full frame): 150-600mm
- Aperture Maximum: f/5.0-6.3 Minimum: f/32.0-40.0
- Camera Mount Type: Canon EF Format
- Compatibility: 35mm Film / Full-Frame Digital Sensor, Canon (APS-C), Canon (APS-H)
- Angle of view: 16° 25′ – 4° 8′
- Minimum focus distance 8.86 ft (2.7 m)
- Maximum reproduction ratio: 1:5
- Lens elements/groups 20/13
- Diaphragm blades: 9
- Filter thread front: 95 mm
- Dimensions (DxL): 4.16 x 10.15 in (105.6 x 257.8 mm)
- Weight: 4.30 lb. (1.95 kg)
Handling and Features
This is a fairly large lens compared to the Canon 100-400 f/4-5.6 push-pull L series lens, and weighs 4.3 pounds as compared to the Canon 100-400 at 3.2 pounds. Tamron have used high quality plastics for the lens barrel in order to keep the weight down. Had this lens been made as an all metal construction, it would be much heavier and would not be as well balanced.

The lens extend to 600 mm
The lens was tested using a Canon 5D Mk III and a Canon 7D. I found the lens reasonably well balanced while hand holding. It does get to be a bit of a strain during extended shooting so a tripod with a smaller gimbal style tripod head is advisable.
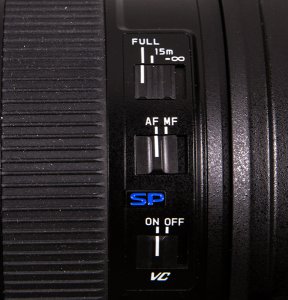
Switches on the Lens Barrel
The lens is equipped with tripod mount, footed lens collar. An Arca Swiss style long lens plate was mounted for all tripod based testing.
The lens has three switches; each is a two position switch which is flush mounted on the lens barrel. The switches have a positive click and an audible feedback when operated. The switches are for: Autofocus/Manual focus, Vibration Compensation on or off, and focus limit. A lens lock at 150mm is also provided.
Lens Zoom Creep
The lens barrel tends to zoom creep over an extended period of time when positioned at an acute angle downward . There is also some zoom creep when pointed directly upward. The greater the angle the greater the creep. Extending an index finger to grip the lens barrel just beyond the zoom ring prevents any creep when the lens is handheld. Tamron has provided a lens barrel lock that will keep the lens locked in the 150 mm focal length position. This is good during transport but Tamron should have considered making the lens lockable at all the major focal length positions.
Focusing
The autofocus is fast and fairly accurate. The lens uses a USD (Ultrasonic Silent Drive) focusing motor. The lens barrel has a two-stage focus limiter switch with a full and a 15 meter (49.2 feet) to infinity limited range. This is a very nice feature that prevents the lens from hunting through the whole focus range particularly when the subject is beyond 15 meters.
Manual focusing is reasonable as the focus ring is damped and very smooth. The position of the manual focusing ring could be improved as the lens collar comes in the way. For hand held operation it is preferable to rotate the collar 180 degrees or remove it entirely. Manual focus adjustments can be made in Auto or Manual focus modes as Full Time Manual is fully supported. The minimum focus distance is 8.9 feet/2.7 meters provides a magnification of 1:5. A focus window provides distances in meters and feet from the minimum focusing distance to infinity.
The front filter tread is 95mm and the front element does not rotate while focusing. This is a welcome feature, particularly for polarizing and split/graduated ND filter use.
TESTS
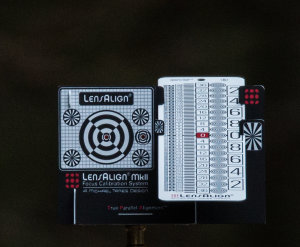
Micro Focus Calibration Tool
I set up the lens to test auto focus accuracy. Using a LensAlign Mk II micro focus adjustments were made at 150mm and 600mm. At 150mm no adjustment was needed while at 600mm a -5 was needed to correct for some back focusing.
The Ultrasonic Silent Drive (USM) motor in the lens is very quiet when focusing and the speed is comparable to the Canon 100-400mm f/4.05.6 IS L lens. At 600mm the lens first retracts to the closest focus distance before extending to the focus on the distant subject. Overall it does not affect the focus speed, as this phenomenon is controlled by the camera body. This issue was prevalent using both camera bodies.
Manual Focus
As mentioned earlier the manual focus ring is in an awkward position for my liking. The total rotation is 120 degrees and very manageable at shorter focal lengths but is not as well tuned at focal lengths greater than 450mm, and focus appears to have a slight lateral shift.
Once focus is established on a subject, varying the focal length does not maintain focus. Refocusing is required for any change in focal length.
Autofocus
The lens was tested using the most accurate center focus point on the Canon 5D MarkIII as well as the focus assist group.
With both bodies the “One Shot” (AF-S on Nikon) and “AI Servo” (AF-A on Nikon) focus methods performed well from focal lengths of 150mm to 400mm. At 500mm through 600mm the lens did not track well in AI Servo mode due to the high magnification, but was fine in One Shot (AF-S) mode. The lens was erratic, and if it dropped focus lock on the subject it rarely recovered to lock on again. Re-focusing was the only way to track a moving subject again. The loss of tracking is more apparent for subjects that are approaching the lens and less problematic for subjects moving left to right, or vice versa.
Vibration Compensation
Overall performance of image stabilization was very good. At focal lengths of 150 through 500 the lens maintains stability 2 to 3 stops below the hand held shutter speed guideline of 1/focal length as the minimum shutter speed. Hand holding at ISO 200 while looking through the viewfinder, one notices an image shift when the VC (IS) motors kick in.
Here are some images of the full moon (cropped and sized to the same frame size) Settings used were: ISO 250, f/6.3, at 1/400th of a second, at focal lengths of 600mm, 500mm, 400mm and 300mm. The VC (IS) functions very well and is a pleasure to use.

Focal length 300mm

Focal length 400mm

Focal length 500mm – some chromatic aberration is visible

Focal length 600mm – some chromatic aberration is visible and there is a slight drop in sharpness
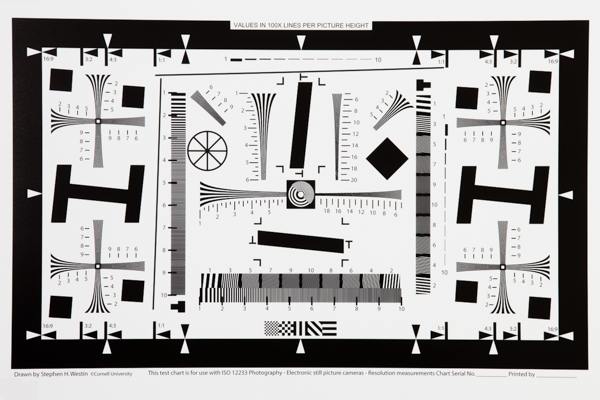
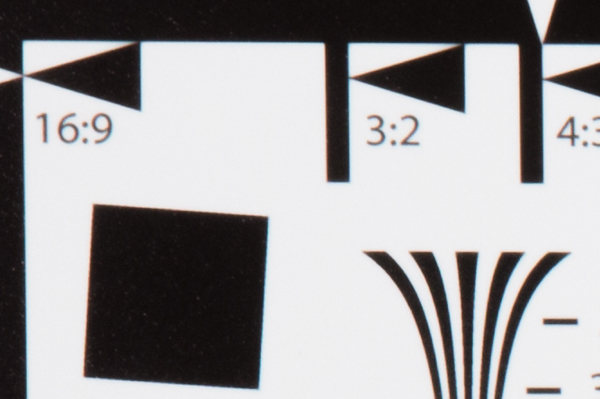
Test Results
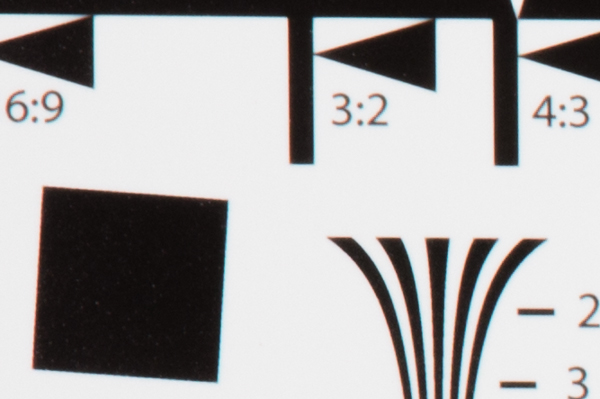
All controlled environment testing was done in the studio with constant lights and and a test chart as shown below.
The Sweet Spots
f/8.0 from 150-250mm: at 300mm there is a loss of sharpness both in the center, as well as on the edges. At 400-600mm the center is sharp with some fall off toward the edges.
During tests, f/11 was found as a good aperture from 300-600mm. At 600 mm the edge fall off is pronounced, but that is also a factor of chromatic aberration. At the widest aperture in the 150-300mm range the lens has better overall sharpness from 200-300mm than at 150-200mm.
Aperture settings of f/8 through f/11 provide the best performance across the frame on a full frame sensor. f/5.6 through f/6.3 are good in the center. On a crop factor camera like the 7D the edge sharpness is acceptable in the f/6.3 to f/8.0 range at focal lengths of 300mm and higher while f/5.6 to f/6.3 is acceptable at focal lengths 300mm and below.
Pincushion Distortion
There is a slight amount of pincushion distortion through the entire focal length range of this lens. This distortion however, is minimal and very easily corrected using lens correction in Adobe Camera Raw or in Lightroom.
Edge Exposure Fall Off
Only visual testing was conducted for this test. The lens handles light fall off very well. It is most noticeable at f/22 but does not pose a problem at f/20. On the 7D body the frames captured at f/22 were acceptable with no cropping applied. f/20 is a very safe aperture for maximum “Depth of Field” and minimum edge fall off.
Chromatic Aberration
There is fringing at apertures of f/16 through f/22 at focal lengths of 400-600mm. Progressively getting pronounced as the focal length increases, it should be noted that though there is chromatic aberration it is not bad compared to other lenses in this class and could be considered low.

Chromatic aberration at 300mm
Chromatic aberration at 400mm
Chromatic aberration at 500mm
Chromatic aberration at 600mm
Pros and Cons
Pros
- Great value for the price point
- Very good build quality
- Well damped focusing
- Center sharpness throughout the range
- Very quiet operation
- Very good Vibration Compensation (Image Stabilization)
- Low distortion and chromatic aberration
Cons
- Position and rotational direction of focusing ring
- Image shifting when VC (IS) engages
- Edge sharpness fall-off at 600mm on a full frame body
- Focus speed decreased at longer focal lengths
Conclusion
You might conclude from this list of cons, and some of the criticism, that the Tamron 150-600mm is not exceptional, but that would be very wrong. There are very few perfect lenses and the issues should be taken under consideration based on their significance for type of photographer who will use this lens, and the type of photography they do with it. This lens is a great performer, and the price point just can’t be beat. Used properly, and keeping its small limitations in mind, this lens will deliver excellent images and is a highly recommendable lens. It is an ideal hand holdable lens for nature and sports photographers.
Sample Images

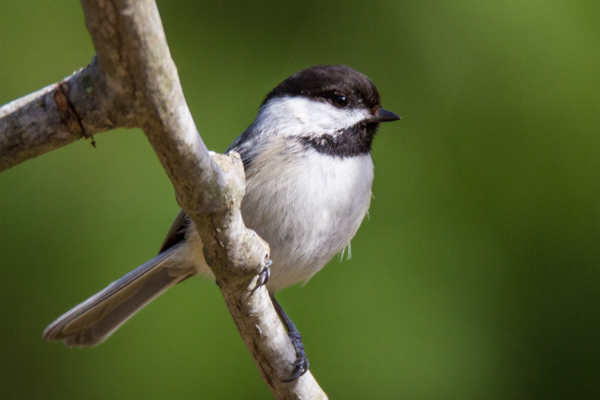
Canon 7D on tripod, at 600mm, ISO 250, f/9, 1/640th. As shot.
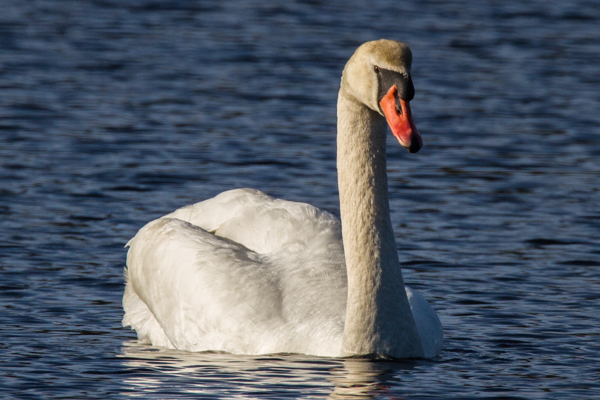
Image above, cropped to fill the frame.

Same image cropped to show head detail – crop size 280 x 187 pixels then zoomed to 600 pixels (Greater than 200% magnification)

Canon 7D, at 500mm, hand held, ISO 2000, f/6.3, 1/125th
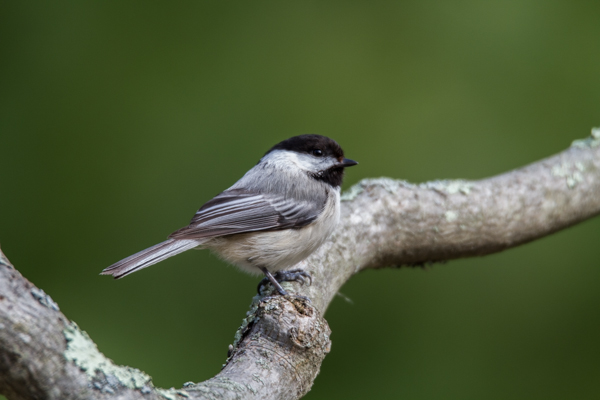
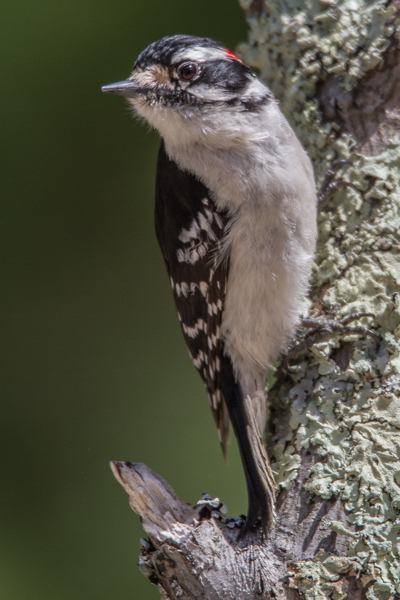
Canon 7D, at 450mm, hand held, ISO 250, f/6.3, 1/1000th
Canon 7D, at 600mm, on tripod, ISO 250, f/6.3, 1/200th
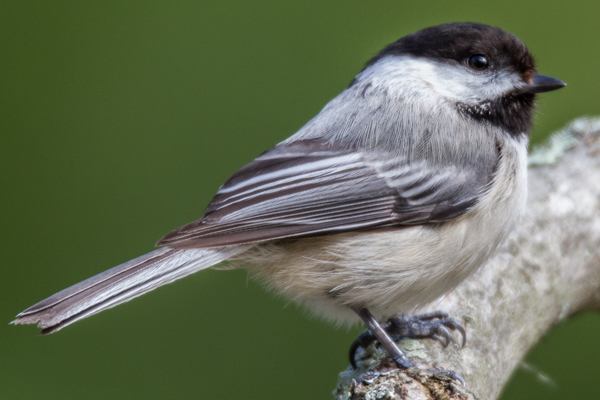
Image above, cropped to fill the frame.
Canon 7D, at 600mm, hand held, ISO 250, f/6.3, 1/800th
A recent press release from Tamron announced – TAMRON WINS TIPA AWARD 2014 FOR SP 150-600MM F/5-6.3 DI VC USD (MODEL A011) “BEST EXPERT DSLR LENS” These awards are presented each year by the Technical Image Press Association (TIPA) to top photo and imaging products.
The post Lens Review Tamron SP 150-600mm f/5-6.3 Di VC USD by Shiv Verma appeared first on Digital Photography School.


You must be logged in to post a comment.