RSS
 

Archive for March, 2015

Ready, steady: Sony Alpha 7 II Review

31 Mar

The Sony Alpha 7 II provides a number of features and ergonomic enhancements over its predecessor, but its standout feature is the 5-axis image stabilization system surrounding its 24.3MP full-frame CMOS sensor. Sony also claims improvements to the camera’s hybrid AF system, and it also sports a redesigned grip. Find out all about the a7 II’s added features and see what difference they make. Read review

Articles: Digital Photography Review (dpreview.com)

 
Comments Off on Ready, steady: Sony Alpha 7 II Review

Posted in Uncategorized


DIY Light Modifier You Can Do With Savage Translum Material

31 Mar

Translum Blue 600

The thing studio product photographers hate the most is when undesirable reflections show up in their images. There are many ways to control these and I’ve got one that you can easily build at home. It’s a DIY project using the Savage Translum material.

What you’ll be creating is a rollable sheet of Translum with a hole in the middle for your camera lens. That will enable you to set it between the object you’re photographing and the camera which will eliminate the big direct reflections you get by using a softbox pointed straight on the subject.
Compare 600

What is Savage Translum material?

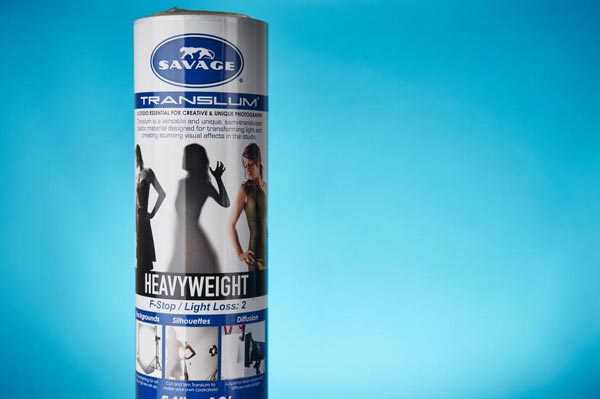
Savage is known for their paper backgrounds. They have a ton of them and are pretty much the industry standard as far as that goes. However, they do make other studio product such as the Translum material. It is a roll of thick white translucent styrene plastic, 54” wide (or 60”, depending on the model you get) by 18 foot long. When you put a light behind it, it gets highly diffused and loses two stops of light (that is, with the heavyweight version).

There are many uses for it such as; creating a pure white background and making DIY light diffusers and reflectors. Currently, there are three options (lightweight, medium and heavyweight). The difference is the quantity of light you lose and, thus, the amount of diffusion. You lose two stops with the heavyweight (it’s the original Translum), 1.5 stops with the medium weight and ¾ of a stop using the lightweight one. I think of the heavyweight for use with flash whereas the lightweight Translum would be to diffuse window light, for example. One thing that makes that material so useful is that is very cuttable and encourages improvisation in the studio, leading to more creative light setups. You can pick some up at all the big camera stores (B&H, Adorama, Amazon).

Build it!

Before you can start building, you’ll need to gather the items you’ll need in the project. They are:

  • A roll of Savage Translum
  • A measuring tape
  • A pencil
  • A pair of scissors
  • A compass (to trace the circle)
  • A X-acto (utility) knife
  • A central vacuum system with 2” PVC pipe the width of your roll (54” or 60”)
  • A handsaw (to cut the PVC)
  • A roll of Tuck Tape
  • A roll of painter’s tape

The very first thing you’ll need to do is determine the length of the sheet of Translum you’ll want. Mine measures 54” wide (the size of the roll) by 50” long. You can have it as long as you want, but I suggest not going less than 50” and also not too long because you may want to use the remaining Translum later and it would be a waste (to the floor is usually sufficient).

Once that’s done, simply measure the desired length and cut it. A pair of regular kitchen scissors works wonder to do so.

Next, decide where to place the hole for the lens to fit through. I would suggest putting it 6-12″ lower than the exact center, because you need a lot less material under your camera than you do up top. Once that’s done, mark that point and grab a compass (if you don’t have one, any round object that’s large enough will work just as well). To select the size of the hole, you want it to be as small as possible but still big enough so that the front of your lens can pass through.

Take the diameter of your lens and add an inch just so you have some play. Then, make the appropriate circle with the compass and grab an X-acto knife and a cutting board. Again, it is surprisingly easy to work with Translum and cutting the circle should be a breeze. The easiest way to do so it is by placing it on the floor (put the cutting board underneath the Translum to protect your floor). Since the plastic is really sturdy and resistant, it’s no problem if you step on it. Try to cut the circle so that you end up with a it in one piece as it will be useful in the future.

Next cut the central vacuum system PVC pipe. These are good because they are light, inexpensive, and available at your local hardware store. I strongly suggest that you take a 2” diameter one. Since they are sold 10 feet long, you’ll need to cut it to the right size for your Translum. A regular handsaw does the job.
TuckTape 600

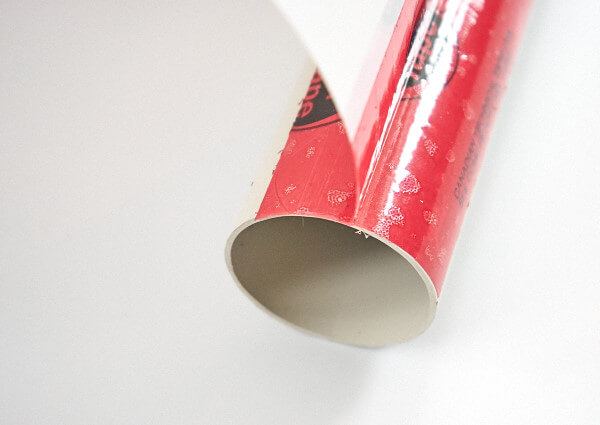
Once that’s done, you can start assembling everything (see photo above). The best tape to stick the sheet to the PVC is a roll of Tuck Tape. Duct tape is not strong enough and gaffer’s tape is thick and expensive. The PVC will be at the top of the sheet so make sure it is on the end that is the farthest from the hole that’s near the middle. You want to put down a piece about two feet on the Translum. Half of the width of the tape should be on the PVC and the other on the sheet of diffusion. After, just finish taping that side down, flip everything 180° and apply pressure on the sheet of Translum so that the tape you just put on is folded nicely. Finally, you want to to place another row of Tuck Tape on the opposite side of the Translum, so that the construction is rock solid.

The last step is to tape a piece of wood at the bottom in order to add rigidity, and to limit the tendency of the material to curl up. While any diameter will work, I recommend you that you use 5/8 of an inch. The best way to add the wood is to put tape running the full width of the roll with the sticky side facing up (again, half the tape should be on the plastic). Then, just put the wood at the end of the tape and slowly roll up toward the Translum. That way, most of the wrinkles will be eliminated.
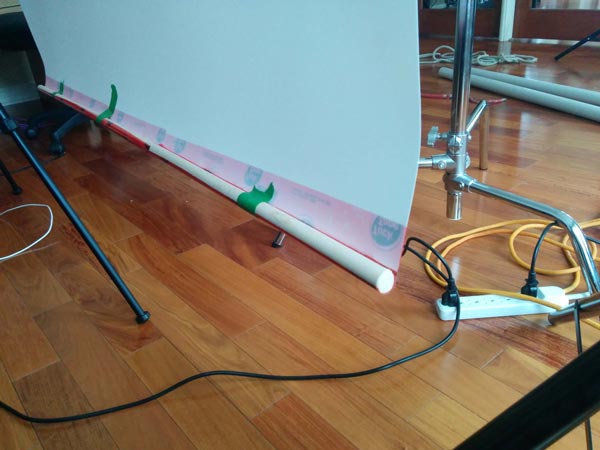
Wood 600

To store the sheet when you’re done using it, just roll it around the PVC pipe and use a few pieces of painter’s tape to hold it in place.

Results and other setups

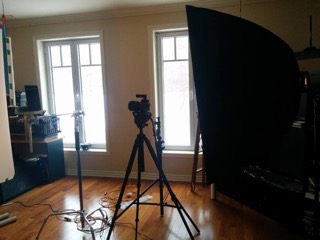
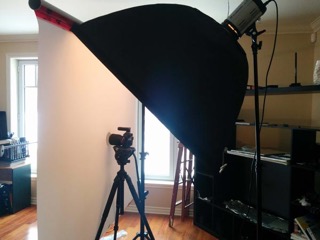
The most basic, and effective, setup to use the DIY sheet of Savage Translum for catalog product shots on a white background is as follows: place a softbox (or stripbox) at about a 45° angle where the top almost touches the upper edge of the Translum sheet. The horizontal center of the softbox should align with the camera. You can place the Savage roll between the object and the camera lens with the lens through it very slightly. This will create very soft lighting without any big and ugly direct reflections.

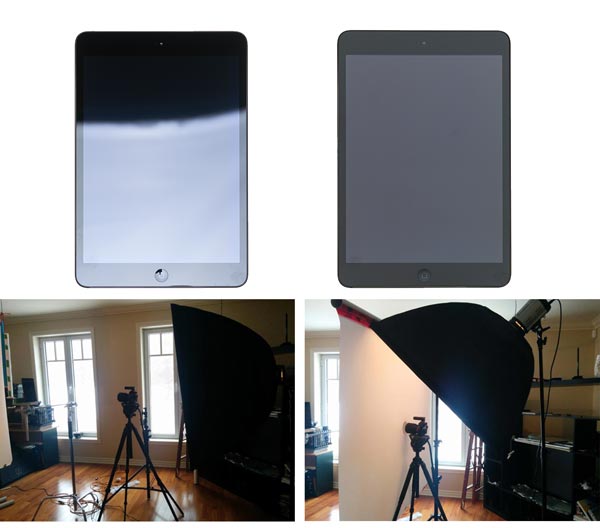
To compare, I shot an iPad (for its shininess) in two ways: one setup without the Translum sheet and one with. The light was moved down in the first image so there is a part with a reflection and one without. In the image just under, you can see the tremendous differences between the two. All of the settings were identical.

No Translum 600 IPad Reflection 600
Translum 600 IPad 600

As much as I like Savage Translum, it is not perfect and will never give you a final image right out of the camera (nothing will). The shot above still need quite a bit a retouching to be complete.

Remember I recommended keeping the hole for the lens away from the middle? Well, for another setup, you can put the lens back into the sheet, hold it in place with a little piece of scotch tape and move the whole Translum sheet to any other position other than in front of the camera. That allows a huge amount of different setups to be created. Experiment with different light modifiers for your flash or even none at all. Try moving the material everywhere and see what it does to the shot. That’s where the fun is!

This is just one of the many uses of the wonderful Savage Translum! What’s nice is that, when you’re ready for another DIY project, you’ll still have more than 13 feet of the stuff left.

Have you used the Translum diffusion sheet before? Did you come up with another DIY light modifier? Tell us below, we all love the share our ideas.

Read more about light modifiers here in this Beginner’s Guide to Light Modifiers

googletag.cmd.push(function() {
tablet_slots.push( googletag.defineSlot( “/1005424/_dPSv4_tab-all-article-bottom_(300×250)”, [300, 250], “pb-ad-78623” ).addService( googletag.pubads() ) ); } );

googletag.cmd.push(function() {
mobile_slots.push( googletag.defineSlot( “/1005424/_dPSv4_mob-all-article-bottom_(300×250)”, [300, 250], “pb-ad-78158” ).addService( googletag.pubads() ) ); } );

The post DIY Light Modifier You Can Do With Savage Translum Material by Tristan Robitaille appeared first on Digital Photography School.


Digital Photography School

 
Comments Off on DIY Light Modifier You Can Do With Savage Translum Material

Posted in Photography


Wildnis

31 Mar

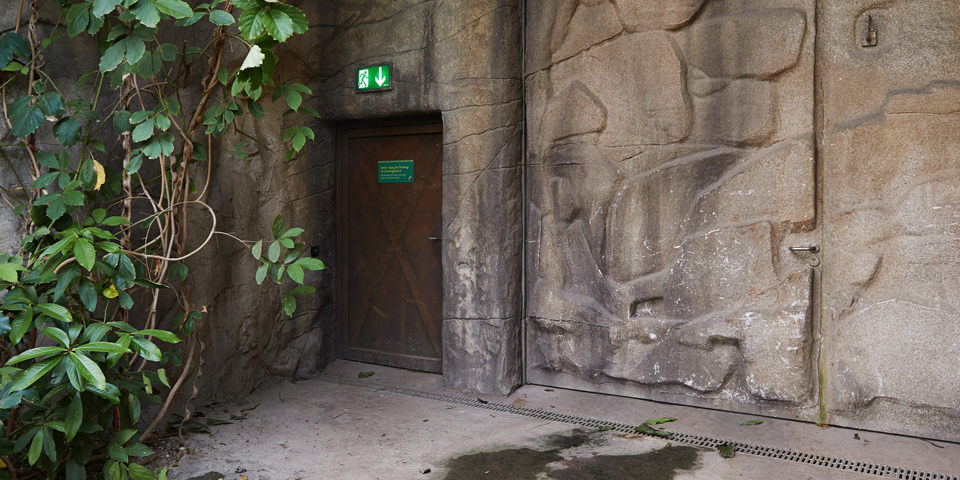
Notausgang in einem Zoo

Ein Beitrag von: Michael Gessner

In einer Zeit, in der der Mensch sein Umfeld so stark verändert wie noch nie zuvor in der Geschichte der Erde, fällt es schwer, einen gemeinsamen Nenner zu finden, wenn es um die Definition der Begriffe „Natur“ und „Wildnis“ geht. Es ist lediglich eine Richtung, in die sich die Definition bewegt, festzustellen. Eine klare, einheitliche Definition des Begriffs „Natur“ ist aber nicht zu finden.
kwerfeldein – Fotografie Magazin | Fotocommunity

 
Comments Off on Wildnis

Posted in Equipment


Yale acquires Meserve-Kunhardt Collection with iconic Abraham Lincoln portraits

31 Mar

Yale has announced the acquisition of the Meserve-Kunhardt Collection, which is comprised of more than 73,000 items including portraits of Abraham Lincoln. The collection was assembled by Frederick Hill Meserve and his daughter Dorothy Meserve, and serves to document American history spanning from the Civil War up to the 19th century. Read more

Articles: Digital Photography Review (dpreview.com)

 
Comments Off on Yale acquires Meserve-Kunhardt Collection with iconic Abraham Lincoln portraits

Posted in Uncategorized


Before the Tempest, Yosemite

31 Mar
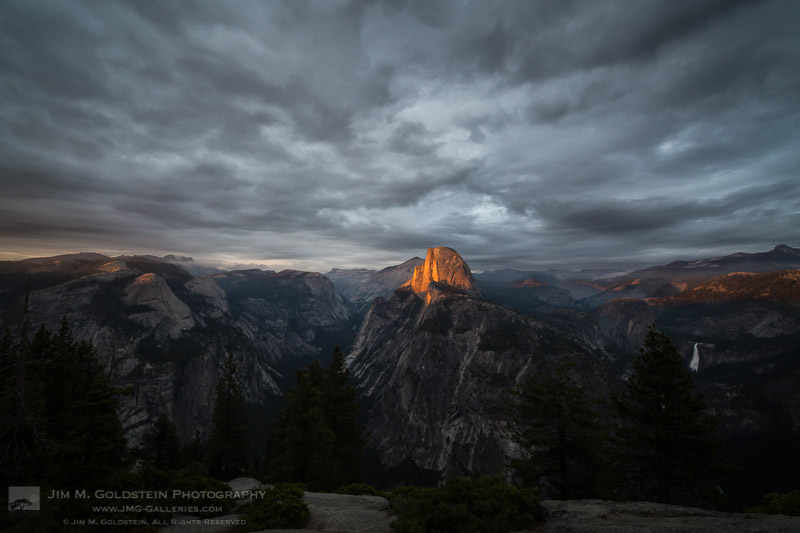
Before the Tempest, Yosemite National Park

A final pipe of light hits Half Dome before the clouds burst into rain.

Sometimes a short break in the clouds is all you need…

along with a lot of patience, a nap in your car, and a notion something might develop out of nothing. All that being said the Sun and the clouds do the hard part in these situations.  While waiting for conditions to unfold the hardest part is fighting the nagging doubt that you made the wrong call on where to shoot.  This self-doubt is particularly potent when you have limited travel time, but at the same time it is what keeps you on your toes as a photographer to not miss that fleeting moment when everything lines up. If you’re particularly fortunate then maybe that moment you thought was the special moment isn’t the most special moment of the evening.

Copyright Jim M. Goldstein, All Rights Reserved

Before the Tempest, Yosemite

The post Before the Tempest, Yosemite appeared first on JMG-Galleries – Landscape, Nature & Travel Photography.


Related Stories

  • Before the Tempest, Yosemite – Enclosure
  • Best Photos of 2014 by Jim M. Goldstein
  • Best Photos of 2014 by Jim M. Goldstein – Enclosure
Feed Ads by FeedBlitz
powered by ad choices


JMG-Galleries

 
Comments Off on Before the Tempest, Yosemite

Posted in Equipment


Sound & Fury: Motorcycle & Instrument Designers Switch Roles

31 Mar

[ By Steph in Technology & Vehicles & Mods. ]

yamaha switch roles 1

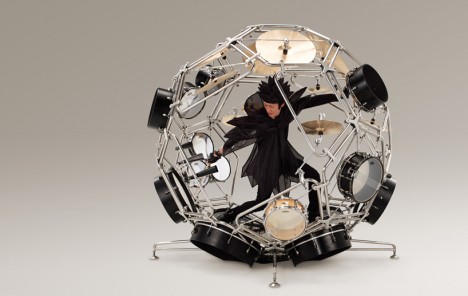
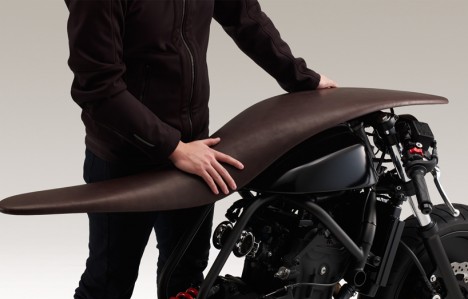
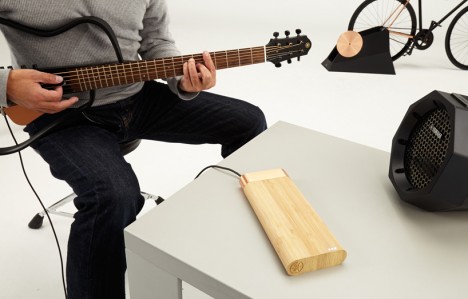
How would someone who designs motorcycles for a living approach creating a kit of drums, and vice versa? Yamaha’s Project AH A MAY explores that question, swapping the roles of designers in very different fields to produce the kinds of creative epiphanies that can only occur when taking a truly fresh look at a subject.

yamaha switch roles 2

yamaha switch roles 7

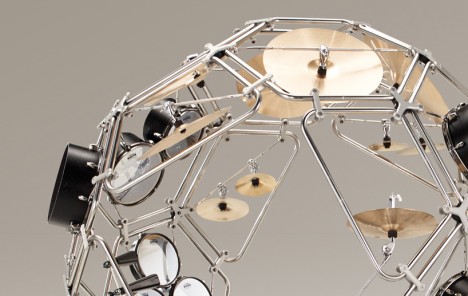
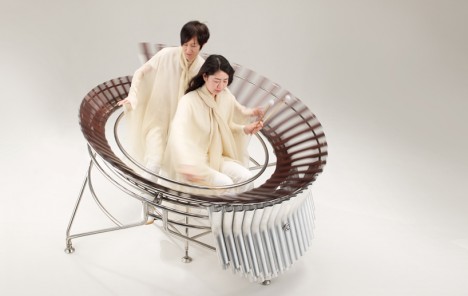
The RAIJIN God of the Thunder Drums, for example, seat the performer inside a cage, surrounding them with drum surfaces in a nearly-full sphere. This puts the musician in the driver’s seat metaphorically, and encourages them to have an even more physical interaction with their instrument. The same goes for FUJIN God of the Wind, a marimba that has two people playing at once as if they’re sitting on a two-seater motorcycle.

yamaha switch roles 3

yamaha switch roles 4

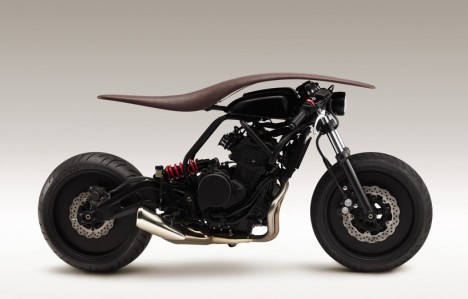
Meanwhile, the ROOT motorcycle design is incredibly sleek, with brass parts contrasting against a whole lot of matte black. The flowing seat form runs from the front all the way to the fuel tank, with instrument panels and meters hidden underneath so the driver is fully focused on the experience of riding and watching the scenery.

yamaha switch roles 5

yamaha switch roles 6

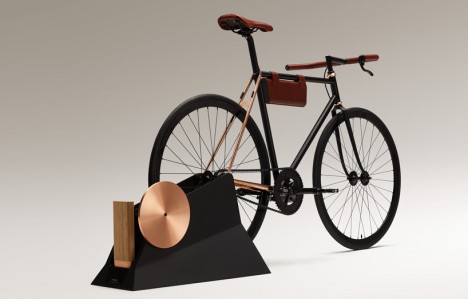
The Zero Plus/Minus Zero electric bicycle fits into a very musical-looking charging stand; to juice it up, you simply pedal. The energized battery can then be used to power all sorts of electronic gadgets around the house – including musical instruments.

Share on Facebook


[ By Steph in Technology & Vehicles & Mods. ]

[ WebUrbanist | Archives | Galleries | Privacy | TOS ]


WebUrbanist

 
Comments Off on Sound & Fury: Motorcycle & Instrument Designers Switch Roles

Posted in Creativity


For the Record: 13 Modern & Conceptual Turntable Designs

31 Mar

[ By Steph in Technology & Vintage & Retro. ]

turntable flynote 2

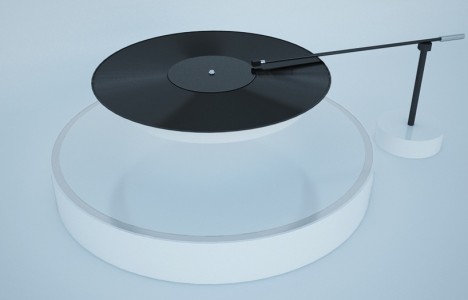
As record players enjoy a resurgence in popularity, their designs get sleeker and more modern, incorporating 3D printing, lasers, magnets that levitate the disc so it plays while in mid-air and other high-tech features.

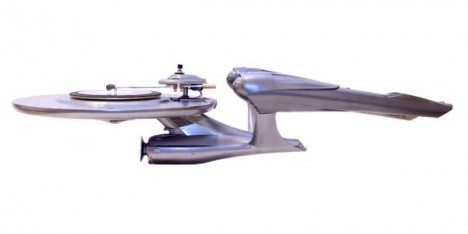
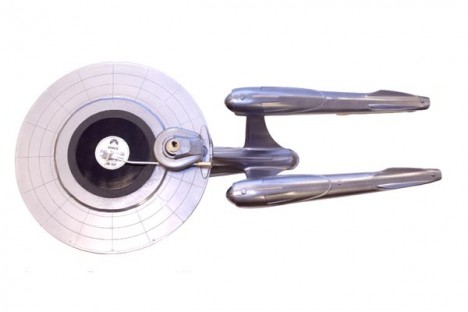
Star Trek Enterprise Record Player

turntables star trek 2

turntables star trek 1

It’s truly a shame that this Star Trek Enterprise-shaped record player is just a model and doesn’t actually work, but the level lot detail is impressive and it would be cool to see someone take the idea further.

DaVinci Audio Labs Luxury Turntable

turtnable davinci 1
da vinci audio labs gmbh swiss

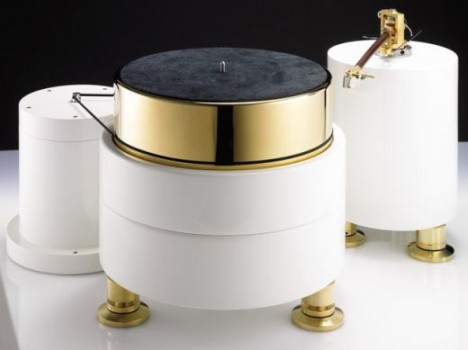
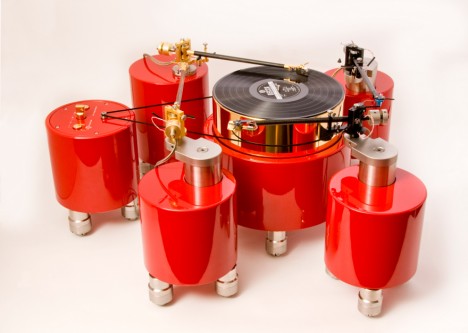
A luxury turntable for people who can afford to drop a ton of money on the highest end of the spectrum, the AAS Gabriel by DaVinci Audio Labs is designed with thick bases based on the same process that’s used to cut grooves into masters, eliminating noise and vibration.

Void Record Player

turntable void 2

turntable void 1

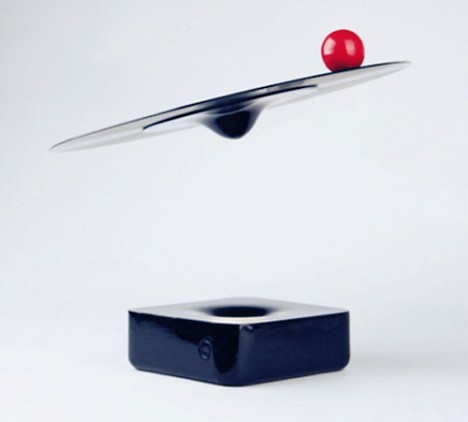
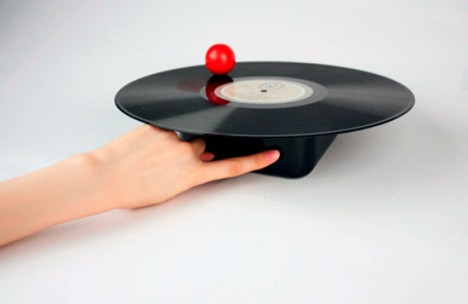
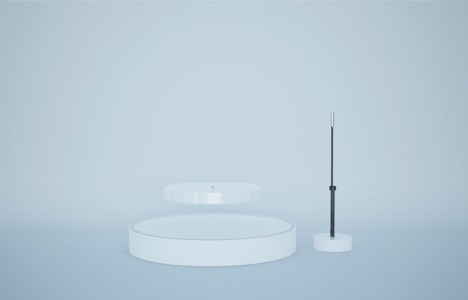
‘Void’ by designer Rhea Jeong literally levitates a record in the air using a magnetic control system. A free-spinning red sphere contains the needle, amplifier and speaker. When you turn the record player on, you can control the levitation using touch sensors on the front of the base.

3D Printed Hand-Crank Record Player

turntable 3D printed 1

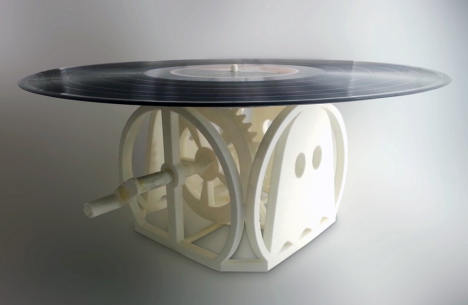
Another design bringing together technologies from very different eras is this 3D-printed creation by Oana Croitoru. Made on a MakerBot Replicator 2 for the Ghostly Vinyl Design Challenge, the design is operated via hand-crank.

Flynote

turntable flynote 2

turntable flynote 1

The Flynote also uses an electromagnetic field to suspend the disc above the base of the player. Say the designers, “The levitation technology uses repelling magnets combined with sophisticated electrons to keep floating objects in position. The plastic skin with the electromagnetic motor are provided with an LED crown to light the turntable and the disc while the product is on. Furthermore, those LED have a switch and an independent electric connection to switch them on at any tie and without interfering with the electromagnetic motor.”

Next Page – Click Below to Read More:
For The Record 13 Modern Conceptual Turntable Designs

Share on Facebook


[ By Steph in Technology & Vintage & Retro. ]

[ WebUrbanist | Archives | Galleries | Privacy | TOS ]


WebUrbanist

 
Comments Off on For the Record: 13 Modern & Conceptual Turntable Designs

Posted in Creativity


How to Mix Ambient Light and Fill-Flash for Outdoor Portraits

31 Mar

If you have ever wondered how to improve your outdoor portraits. Turn off your Smartphone, shuffle your schedule, and make sure you read every single word on this page. Because outdoor portrait lighting secrets will finally be revealed.

Below is an example of one of my typical on-location lighting setups. It consists of a studio strobe with a battery pack and a Westcott 35″ Deep Parabolic Zeppelin modifier.

Mod1

I am guessing you have most likely stumbled upon this article because you are searching for a way to improve your outdoor portraits. If you would like to capture perfectly exposed images in ambient light, the real secret is to use fill-flash and a light modifier. Sure, if you have a reflector and an assistant you may be able to achieve similar results using only natural light. But in this article, I am going to assume you shoot outdoor portraits by yourself and you are looking for the easiest way to control, and modify the light in your images.

Below is an example of an image taken with the above lighting set up, where I lowered the background exposure with a three stop neutral density filter.

Lia1

Before we go any further, I just want to caution you, you may find some aspects of this article confusing the first time you read them. So I have included a video tutorial for you to further illustrate the lighting concepts discussed here.

Let’s break it down step by step:

Step #1 – meter the background

Step one is to meter the background area behind your subject, using either a light meter or your in-camera meter. For example, let’s say you metered the background at f/5.6 and you took a test exposure with your camera.

Step #2 – check highlights on the test shot

The second step is to examine your test shot and to make sure there are no blown out highlights in the brightest part of your image. Some DSLR models have a highlight warning indicator that you can enable and you can also view the Histogram to help you decide if your exposure falls within an acceptable range. The reason you are checking for blown out areas, is that once you loose detail in the highlights, the information from that part of the image is lost forever. So adjust your exposure if necessary to ensure you have an accurately exposed image with highlight detail intact.

Malia1

Step #3 – check highlights on the test shot

Once you are pleased with the background exposure you may find that your subject appears too dark in relation to the background. Your next step is to match the foreground exposure with fill-flash. To do that, you can use either a speedlight or a studio strobe with the light modifier of your choice.

Let’s go into a little more detail. For example, if your background is exposed at f/5.6 then you have to match the same exposure on your subject’s face. Sounds simple right? Here is where you can run into some problems. If you meter the background at f/16 on a sunny day, but the speedlight you are using only meters f/11 at full power – then what do you do? Your subject will appear darker than the background. What are your choices?

In most cases your first impulse would be to raise the shutter speed, but when you’re using strobe lights you are capped at a shutter speed between 1/160 and 1/200th of a second. In some cases you may be able to use high-speed sync, but for the purpose of this article let’s say your maximum shutter speed is 1/200 (your camera’s native flash sync speed). If that is the case, you will have to use a two or three stop neutral density filter to lower the background exposure, so you can match the foreground exposure to the background.

Have I lost you yet? In case you find this concept difficult to grasp, I have included another video tutorial below on outdoor portraits using fill-flash, where I use a three stop neutral density filter to bring down the ambient exposure. In this example that allows me to use a wide open aperture, in combination with fill-flash to create a blurry background effect.

If you are like most people, it will probably take you a little practice until you feel comfortable balancing ambient light and fill-flash. Take your time and have fun with it. Read the article a few times and watch the video tutorials again. Once you have a pretty good grasp of the concepts discussed, head out and practice balancing your exposure. Some people prefer a background exposure that is one to two stops darker than their subject. Experiment with different ratios until you find a look that suits your style.

Sheena1

Please post any questions you have in the comments below.

googletag.cmd.push(function() {
tablet_slots.push( googletag.defineSlot( “/1005424/_dPSv4_tab-all-article-bottom_(300×250)”, [300, 250], “pb-ad-78623” ).addService( googletag.pubads() ) ); } );

googletag.cmd.push(function() {
mobile_slots.push( googletag.defineSlot( “/1005424/_dPSv4_mob-all-article-bottom_(300×250)”, [300, 250], “pb-ad-78158” ).addService( googletag.pubads() ) ); } );

The post How to Mix Ambient Light and Fill-Flash for Outdoor Portraits by Craig Beckta appeared first on Digital Photography School.


Digital Photography School

 
Comments Off on How to Mix Ambient Light and Fill-Flash for Outdoor Portraits

Posted in Photography


Photo History and How to Repeat It

31 Mar

Know your history, or you’re doomed to repeat it?

Nah, we’ve learned our photo history and we’re happy to repeat it.

Check out our timeline of photo trends, pick up some tips on how to recreate historic looks on your phone. Try your hand at 1930s colorization or go back to that 70s film grainy goodness.

Learn your history, and repeat away!

Learn From the Last 100 Years of Photography
(…)
Read the rest of Photo History and How to Repeat It (1,172 words)


© laurel for Photojojo, 2015. |
Permalink |
No comment |
Add to
del.icio.us

Post tags:


Photojojo

 
Comments Off on Photo History and How to Repeat It

Posted in Equipment


Mint introduces Instantflex TL70 instant film TLR camera

31 Mar

Polaroid camera repair and maintenance company Mint has introduced its own instant camera called the Mint Instantflex TL70. Fitted with a 65.4mm lens the camera offers aperture settings of f/5.6, f/8, f/16 and f/32 with an additional setting called f/bokeh – which creates a 5-pointed star shaped aperture. The Instantflex also features a flip-up flash unit housed above the viewing lens. Read more

Articles: Digital Photography Review (dpreview.com)

 
Comments Off on Mint introduces Instantflex TL70 instant film TLR camera

Posted in Uncategorized