RSS
 

Archive for May, 2013

UK’s Focus on Imaging photo trade show to close

31 May

focus-on-imaging-crop.jpg

The organisers of Europe’s largest photographic trade show, Focus on Imaging, have declared that this year’s show was the last. Mary Walker Exhibitions had organised the show, held in March at the National Exhibition Centre in Birmingham UK, for the past 24 years. In a statement Mary Walker announced that the rights to the show would not be sold on, but instead it is simply being brought to an end.

News: Digital Photography Review (dpreview.com)

 
Comments Off on UK’s Focus on Imaging photo trade show to close

Posted in Uncategorized


Thinker Thing: 3D-Printed Object Made Using Brain Waves

31 May

[ By Steph in Gadgets & Geekery & Technology. ]

3D Printed with the Brain 1

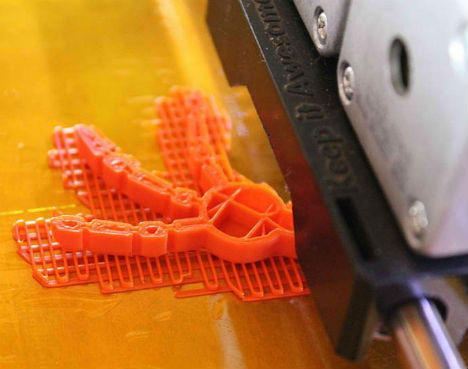
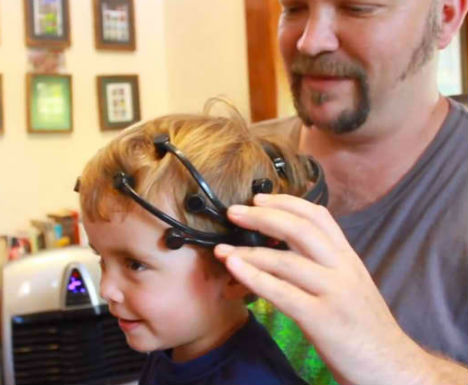
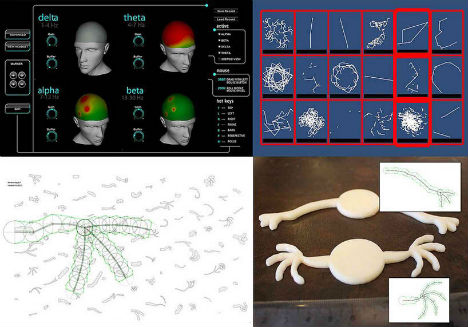
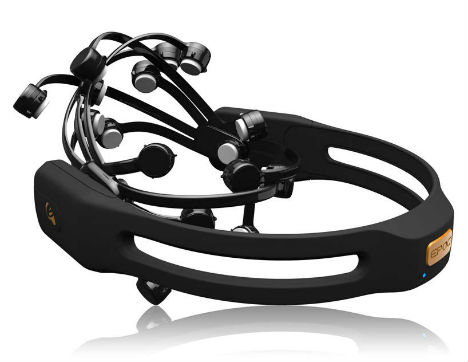
Small electrical impulses detected by a brain-computer headset produce strange and amazing 3D printed objects in a new project by George Laskowsky of Thinker Thing.  The Emotiv EPOC headset analyzes brain patterns and uses it to understand the wearer’s emotional response to certain features in visual stimuli; in this way, the wearer is able to ‘grow’ a three-dimensional model with their mind.

Laskowsky successfully created the first real physical object made with brain patterns in May, and set out to fund the project on IndieGoGo. Thinker Thing will take the invention to Chile, where children will use the technology to create fantastical creatures, which will be exhibited in a gallery.

3D Printed with the Brain 2

How is it possible to create an object with the mind? “We use your brain patterns to evolve a 3D model from a genetic seed, which can then be made real with a standard 3D printer. The DNA seed defines the start point of an evolutionary chain for the object. Dinosaurs are very diverse, for example, but they can be traced back to a single common dna ancestor. We create this first DNA definition as the first building block from which all future objects evolve.The DNA of the object is then mutated over each generation, and how well that new mutations does, whether it lives or dies, is determined by the mind.”

3D Printed with the Brain 4

“We are all born creative, our brain begins like an open field and can make connections in many directions, it is only later we become stuck in the ruts and troughs of the paths that our mind constantly treads, paths so deep we are sometimes unable to see that there is still an open field around us. Mistaking skill (a learned ability) with creative imagination is like believing walking in a deeper rut gives you greater freedom of movement across the field.”

3D Printed with the Brain 3

Learn more at IndieGoGo.

Share on Facebook


[ By Steph in Gadgets & Geekery & Technology. ]

[ WebUrbanist | Archives | Galleries | Privacy | TOS ]


WebUrbanist

 
Comments Off on Thinker Thing: 3D-Printed Object Made Using Brain Waves

Posted in Creativity


Selbstportraits scharfstellen

31 May

Jeder, der sich schon einmal an Selbstportraits versucht hat, ist hierbei sicher über dieses Problem gestolpert: Wie stelle ich scharf? Ich möchte Euch dazu einige Varianten vorstellen, die Ihr gern in den Kommentaren vervollständigen könnt.

Was für Selbstportraits unverzichtbar ist, ist ein Stativ. Zudem braucht Ihr einen Selbstauslöser oder die Möglichkeit, eine Auslöseverzögerung von mindestens 10 Sekunden an der Kamera einzustellen.

Um so weiter die Blende geschlossen ist, um so größer ist der Schärfebereich und um so leichter ist es natürlich auch, Euch selbst in diesen Schärfebereich zu stellen. Bei Blende 1.4 oder 1.8 ist es nahezu unmöglich, auf die eigenen Augen scharfzustellen. Ich selbst nutze immer mindestens 2.8 oder mehr, je nachdem, wie viel Licht zur Verfügung steht. Denn mit höherer Blendenzahl fällt natürlich auch weniger Licht in die Kamera und die Bilder werden dunkler.

Steht die Kamera nun zum Beispiel mit Blende 4.5 auf dem Stativ, kann es auch schon losgehen.


Variante 1

Ihr markiert Euch den Bereich, auf dem Ihr stehen wollt mit einem Kreidestrich oder einem Stöckchen auf dem Boden und stellt genau an diese Stelle eine Leiter oder ein weiteres Stativ. Am besten auf jeden Fall etwas, das Eurer Größe nahe kommt.

Nun fokussiert Ihr auf dieses Platzhalter-Objekt und stellt Euer Objektiv auf manuellen Fokus. Das ist wichtig, da sich sonst Eure Kamera einen neuen Schärfepunkt sucht, wenn Ihr die Leiter wieder aus dem Bild gestellt und Euch an ihrer Stelle positioniert habt. Ja, an diesem Punkt freut man sich über den Kreidestrich, den ich leider immer noch hin und wieder vergesse …

Nun steht Ihr also mit Selbstauslöser auf dem Strich und könnt auslösen. Im Optimalfall ist das Bild direkt scharf, was jedoch nicht der Regel entspricht. Etwas Geduld gehört auch dazu. Am besten macht Ihr direkt auf dem Strich stehend mehrere Bilder und bewegt Euch dabei ein paar Millimeter vor und zurück.


Variante 2

Meine Kamera hat ein schwenkbares Display und einen Liveview-Modus. Beim Kauf war mir das relativ egal, aber mittlerweile möchte ich beides für meine Selbstportraits nicht mehr missen. Denn steht meine Kamera auf dem Stativ, kann ich das Display so zu mir drehen, dass ich mich bei der Aufnahme selbst sehen kann.

So kann ich mich oder meine Augen genau positionieren, sehe den Bildausschnitt, ob ich mir gerade den Kopf wegschneide oder ob eine Haarsträhne nicht richtig sitzt. Das Objektiv ist bei dieser Variante auf Autofokus eingestellt.

Diese Variante mag ich sehr bei nahen Portraits. Bei weiter entfernten Ganzkörperaufnahmen hat meine Kamera im Liveview-Modus leider hin und wieder Probleme, überhaupt einen Schärfepunkt zu finden.


Variante 3

Diese Möglichkeit fand ich hier. Ich konnte sie aufgrund eines fehlenden Studios nicht testen, aber sie klingt plausibel und die vielen postiven Kommentare geben dem Autor recht.

Das Objektiv ist dabei wieder auf Autofokus gestellt. Man selbst positioniert sich im Dunkeln vor der Kamera. Die Kamera benötigt zum Scharfstellen Licht, das man ihr mit Hilfe einer kleinen Taschenlampe gibt, die man genau auf Höhe der eigenen Augen hält. Hat die Kamera den Fokuspunkt gefunden, nimmt man die Taschenlampe aus dem Bild und löst aus. Die gleichzeitig auslösenden Blitze erhellen das Bild und man bekommt ein Foto, das den Schärfepunkt genau auf den Augen hat.


Probiert es am besten selbst aus, berichtet von Euren Tests und verlinkt auch Euer eines oder anderes Ergebnis. Und wenn noch Fragen sind, fragt.


kwerfeldein – Fotografie Magazin

 
Comments Off on Selbstportraits scharfstellen

Posted in Equipment


Augenschmaus: Kirsch-Haselnuss-Muffins

31 May

Ein Beitrag von: Mihl

Diese Muffins sind schnell zubereitet und gelingen immer. Durch die Zugabe von Polenta werden sie außen knusprig und innen saftig. Sie sind nicht zu süß und eignen sich deshalb nicht nur als Nachtisch, sondern man kann sie auch als Snack oder zum Frühstück essen.

Portion: 12 Muffins
Zeit: 5-10 Minuten + Backzeit

Zutaten

210 ml Sojamilch
1 EL Apfelessig
80 ml Raps- oder Sonnenblumenöl
150 g Zucker
210 g Vollkornmehl
60 g Polenta
1 EL Backpulver
1 Prise Salz
70 g Haselnüsse
100 g Sauerkirschen aus dem Glas (entsteint und abgetropft)

© Mihl

Zubereitung

Den Ofen auf 200°C vorheizen. Eine Muffinform mit 12 Vertiefungen einfetten oder mit Papierförmchen auslegen.

Sojamilch und Essig in eine Schüssel geben, Öl und Zucker dazugeben und alles mit einem Schneebesen verschlagen. Mehl, Polenta, Backpulver und Salz dazugeben und alles zusammen gut verrühren. Dann die Nüsse und Kirschen unterheben. Den Teig in die Form geben und ca. 16 – 18 Minuten backen.

Fotorezept

Gemacht wurde das Foto bei Tageslicht mit meiner alten, von meinem Vater geerbten Konika Minolta Dynax 5D und einem 100mm Makroobjektiv. ISO 100, Brennweite f/2.8, 1/125 Sekunde Belichtungszeit.

~

Du hast auch ein leckeres Rezept und die passenden Food-Fotos dazu, die einem das Wasser im Munde zusammenlaufen lassen? Dann werde einfach selbst Teil von „Augenschmaus“!


kwerfeldein – Fotografie Magazin

 
Comments Off on Augenschmaus: Kirsch-Haselnuss-Muffins

Posted in Equipment


The Kick: Control LightingWirelessly w/ your Phone!

31 May

Extra photos for bloggers: 1, 2, 3

The right light can go a long way. A wirelessly controlled, fully customizable light will take you even farther!

Meet The Kick: it’s like a full blown lighting studio, but tiny enough to tote anywhere.

The Kick is an LED light panel that you control through an app on your phone. Change the color, shade and brightness with just a few taps. It can even mimic the light from any photo or video already on your camera roll.

You can use it off camera or slide it onto the back of your phone. It has a tripod mount for hands-free lighting.

The precise controls let you use it as a subtle fill light, a white balancing light, or start a disco tech in your living room. This little guy does it all!

See Examples of The Kick at Work
$ 179 at the Photojojo Store

 Tweet it!      Share

Related posts:

  1. The Phlash: Camera Phone Super Flash Every photographer knows that the key to the art is…
  2. Attachable Lenses for Your Camera-Phone, Fisheye & Macro/Wide Angle Phone Lenses Extra photos for bloggers: 1, 2, 3 Camera-phones. They’re a…
  3. Phoneography Guide: How to Shoot a Wedding on Your Phone! Extra photos for bloggers: 1, 2, 3 The Big Day….


Photojojo

 
Comments Off on The Kick: Control LightingWirelessly w/ your Phone!

Posted in Equipment


On Bathroom Detail All Week

31 May

We're remodeling two bathrooms, and as part of a barter deal with the contractor I am doing a series of before and after photos. I'll post more about that later, but I just wanted to drop something in quickly about the lighting on the detail shots I was doing today.

It's a quick-and-dirty, two-light setup and the effect is almost like a charcoal drawing—sort of 2-D and 3-D at the same time. And try as I might, it's pretty hard to mess this up.

Read more »
Strobist

 
Comments Off on On Bathroom Detail All Week

Posted in Photography


Binder Clip Handbag: Office Product-Inspired Tote Purse

31 May

[ By WebUrbanist in Design & Products & Packaging. ]

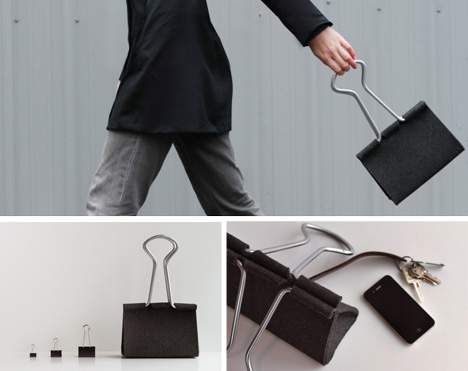
binder clip hand bag

It is a familiar trope these days, but fun nonetheless: take a common object, tweak the scale and transform the materials, and you get a new item that has a recognizable shape but a distinct new function.

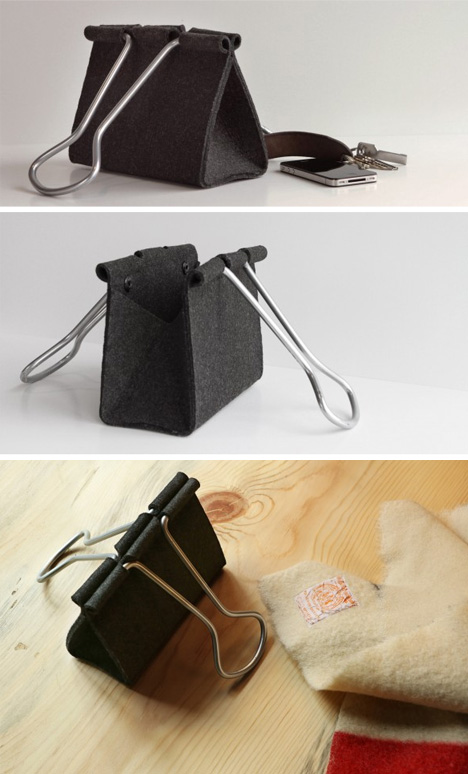
binder handbag giant sized

In this case, the Clip Bag by Peter Bristol manages to look both fresh and fashionable – the light (hollow aluminum) metal grip widens to fit the hand, and the felted bag manages to look a lot classier and more comfortable to carry than its plastic inspiration.

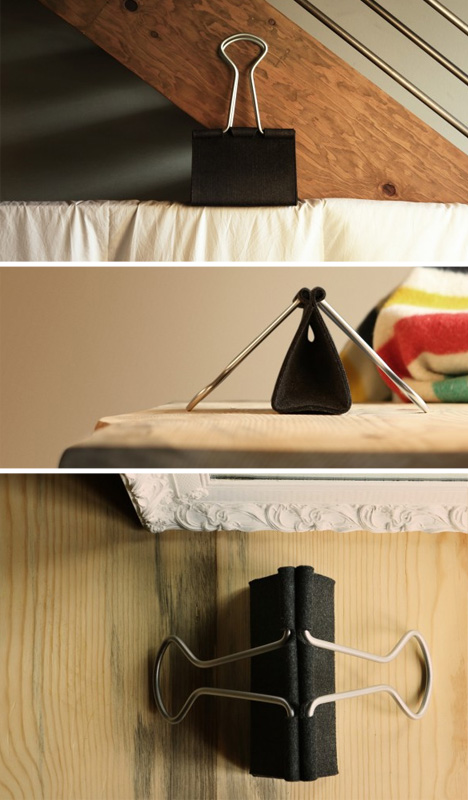
binder bag wood background

There is a curious psychological side-effect in play as well: suddenly, we are forced to rely a lot more on context to determine the size of the bag – it makes its tiny cousins look extra-small, and wood grain seem huge by comparison.

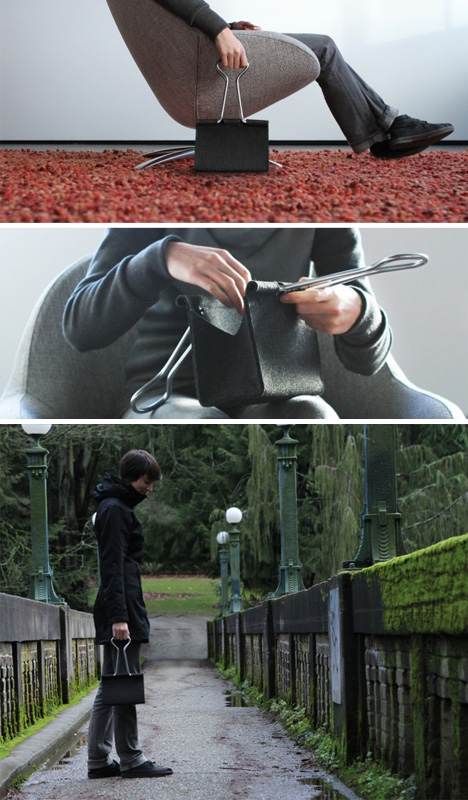
binder purse human hands

A play on memory and novelty, its scale becomes most obvious, in the end, when put to its intended use and held in human hands.

Share on Facebook


[ By WebUrbanist in Design & Products & Packaging. ]

[ WebUrbanist | Archives | Galleries | Privacy | TOS ]


WebUrbanist

 
Comments Off on Binder Clip Handbag: Office Product-Inspired Tote Purse

Posted in Creativity


ACD Systems launches ACDSee 16 with more tools and introductory price

31 May

ACDSee16.png

ACD Systems has announced the latest version of its ACDSee photo management and editing software for Windows. ACDSee16 gains a range of editing and organizational tools, including features that simulate out-of-focus regions and tilt-shift lens effects. The latest version is available at a reduced price ($ 50), for a limited time, with existing users being about to upgrade for $ 30. A 15-day free trial is available from the company’s website.

News: Digital Photography Review (dpreview.com)

 
Comments Off on ACD Systems launches ACDSee 16 with more tools and introductory price

Posted in Uncategorized


30. Mai 2013

30 May

Ein Beitrag von: Charlotte Grimm

Crimson © Charlotte Grimm


kwerfeldein – Fotografie Magazin

 
Comments Off on 30. Mai 2013

Posted in Equipment


Chicago Sun-Times lays off entire photo staff: switches to freelancers

30 May

chi-sun-times-job-cuts-001.jpeg

According to a report in the Chicago Tribune, the Chicago Sun-Times has laid off its entire photography staff, and plans to use freelance reporters and photographers in the future to save costs. The layoffs, which are believed to take effect immediately, were announced to the 28-strong photo staff on Thursday morning. In a statement issued by the paper, it suggested that the move was in response to a demand for ‘more video content’ from its audience. Click through for more details. 

News: Digital Photography Review (dpreview.com)

 
Comments Off on Chicago Sun-Times lays off entire photo staff: switches to freelancers

Posted in Uncategorized