RSS
 

Posts Tagged ‘Features’

DaVinci Resolve 17 announced, includes over 300 new features and improvements

10 Nov

Blackmagic Design has announced DaVinci Resolve 17, the latest major release of its flagship video and audio editing software. DaVinci Resolve is ‘the world’s only solution that combines editing, color correction, visual effects, motion graphics and audio post-production all in one software tool.’

DaVinci Resolve 17’s primary new features include HDR grading tools, redesigned primary color controls, an AI-based magic mask, a next-generation Fairlight audio engine and much more. Blackmagic states that in total there are over 100 new features and 200 improvements to existing features.

The new HDR grading feature is accessible within the software’s color page. Users can create new color wheels with ‘custom roll-off for specific tonal ranges,’ resulting in additional creative control when making fine adjustments. The new wheels include control over exposure and saturation within each zone and are color space aware, allowing for uniform results.

Additional improvements to colorwork include mesh-based warping tools. You can adjust hue and saturation or chroma and luma. Adjustments are performed by dragging control points and Blackmagic Design promises ‘clean, natural-looking adjustments.’ Primary color controls have also been redesigned in the software. With respect to color space, DaVinci wide gamut and DaVinci intermediate are new timeline color space and gamma settings which deliver a universal working color space. Blackmagic states that ‘it’s larger than what cameras can capture’ and that ‘customers will never lose image data, no matter where it comes from.’

DaVinci Resolve 17 includes numerous improvements to color work, such as HDR Color Wheels, Custom Curves and more. Image credit: Blackmagic Design. Click to enlarge.

The Fairlight Audio Core in DaVinci Resolve 17 has undergone major changes. Blackmagic says it is ‘the world’s fastest and highest quality solution for audio post-production.’ Fairlight Audio Core is a low latency, next-gen audio engine that intelligently manages CPU cores and threads in your computer. With the new Fairlight Audio Core, you can work with up to 2,000 tracks at a time with fully supported real-time effects, EQ and dynamics processing. DaVinci Resolve 17 promises ‘sample-accurate editing tools’, ADR, Foley and Fairlight FX (like reverb, de-esser, hum remover and more). You can mix and master stereo audio, 5.1, 7.1 and 3D audio formats. For improved performance, you can also utilize an optional Fairlight Audio Accelerator Card. Further, with the software’s multiple user collaboration feature, multiple sound editors can work on the entire project at the same time.

A new transient analysis tool has been added. This tool automatically detects individual words, beats or sound effects. Transient markers are displayed in the waveform as vertical lines and can be navigated by users via the arrow keys. Blackmagic states that these markers make it easier to identify specific parts of a sound when editing audio. You can also now see larger audio waveforms while trimming.

Image credit: Blackmagic Design. Click to enlarge.

The DaVinci Neural Engine allows for automatic mask creation for an entire person or for specific features such as a face or arms. Further, ‘customers get matte finesse tools, the ability to add and remove strokes and automatic tracking.’ When editing in 16:9 HD or Ultra HD, you can now quickly create square or vertical versions for publishing to platforms such as Instagram. The Neural Engine helps here as well by automatically identifying faces and repositioning them inside the new frame, thus saving time.

Additional time-saving features include the new multi-column view for viewing effects, transitions and titles. The new workspace includes description icons, plus you can cover the cursor over an item to see a live preview in the viewer. The edit page includes ‘dozens’ of time-saving new features as well. These include the ability to manage independent proxy media, more easily synchronize multicam clips, create a sync map, generate render files for any portion of the timeline, make source side adjustments and much more.

Doubling back to multi-user collaboration, this feature is now included in the free version of DaVinci Resolve 17. This means that multiple free users can collaborate on the same project, across multiple devices, simultaneously. Of course, the free version doesn’t include all new features, but it includes a lot. A quick note that it appears that a much-requested feature, ProRes RAW support, doesn’t appear to be coming in DaVinci Resolve 17.

Image credit: Blackmagic Design. Click to enlarge.

Of DaVinci Resolve 17, Blackmagic Design CEO, Grant Petty, said, ‘This is a massive update and it has amazing new technology and features for colorists, audio engineers, editors and visual effects artists. While the new color science, HDR grading and improvements and Fairlight usability are the most noticeable features, what I am most proud of are the thousands of small improvements that customers will notice every day!’

There are many features and improvements in DaVinci Resolve 17 that are beyond the scope of this article, so let’s quickly summarize the primary features of DaVinci Resolve 17:

  • Next generation HDR color correction with customizable wheels and tonal zones.
  • Mesh and grid based color warper delivers an entirely new way to transform color.
  • Magic mask automatic object isolation powered by the DaVinci Neural Engine.
  • Improved color management with tone mapping and color space aware tools.
  • Massive DaVinci wide gamut color space for higher quality image processing.
  • High speed audio editing with new keyboard and mouse context-sensitive tools.
  • Fairlight Audio Core engine with auto load balancing and support for 2,000 tracks.
  • Revolutionary FlexBus architecture for audio routing without limitations.
  • Automatic transient detection for beats, words, and sound effects.
  • Support for massive audio projects with thousands of tracks on a single system.
  • Metadata based card view in media pool on cut page.
  • Precision audio trimming on the cut page timeline and graphical trimmer.
  • Smart reframe powered by the DaVinci Neural Engine on cut and edit pages.
  • Live effect, title, and transition previews on cut and edit pages.
  • Import and edit projects from ATEM Mini Pro ISO.
  • Proxy media workflows up to 1/16th resolution in H.264, H.265, ProRes or DNxHR.
  • Timeline based clip syncing to create multicam and compound clips.
  • Alpha support for keying and compositing on cut and edit pages.
  • Render in place command for effects heavy clips on cut and edit timelines.
  • Make source side adjustments before editing clips into the timeline.
  • Portable timeline and bin files for easy sharing.
  • Native interlace processing and realtime 3:2 pulldown removal.
  • Node tree bookmarks, customizable Fusion toolbar, and vertical node layouts.
  • Support for growing files in media pool.
  • Support for frame based metadata for BRAW, ARRI, RED, Sony and EXR.
  • Workflow integration API and third party encoder API.
Image credit: Blackmagic Design

DaVinci Resolve 17 is available now as a public beta. You can download the software by clicking here. DaVinci Resolve is available as a free download. For all the new features, including the DaVinci Neural Engine, stereoscopic 3D tools, additional Resove FX filters, Fairlight FX audio plugins, HDR grading and more, you must purchase DaVinci Resolve Studio. When the public release of DaVinci Resolve 17 Studio is available, it will cost $ 299 USD.

In addition to DaVinci Resolve 17, Blackmagic Design has also announced additional products. The DaVinci Resolve Speed Editor, $ 295 USD, is a new keyboard for DaVinci Resolve’s cut page and ‘allows a new and dramatically faster editing solution that’s a combination of integrated hardware and software.’ For a limited time, every customer who purchases DaVinci Resolve Studio from a Blackmagic Design reseller will get the Speed Editor free of charge.

DaVinci Resolve Speed Editor. Image credit: Blackmagic Design.

On the Fairlight side of things, a new Fairlight Desktop Console will be available this December for $ 3,495. This is a complete audio mixing control surface for mixing multiple tracks at once, automating various parameters and plug-in settings and more. Blackmagic has also announced the Fairlight HDMI Monitor Interface. This allows customers to use any HDMI or SDI television or monitor with large Fairlight Studio Consoles. This product will cost $ 259 and you can learn more about it here.

Articles: Digital Photography Review (dpreview.com)

 
Comments Off on DaVinci Resolve 17 announced, includes over 300 new features and improvements

Posted in Uncategorized


Panasonic firmware shares more features across S1, S1R, S1H and S5

04 Nov

Panasonic has announced an extensive series of feature-enhancing firmware updates for its S1, S1R, S1H and S5 full-frame mirrorless cameras, along with the G100 Micro Four Thirds model. All five updates will become available on November 24, 2020.

The updates vary between models, often adding features and improvements from the other cameras. For example, the boost in AF performance for the S1H, S1R and S1 brings them inline with the performance of the S5. Meanwhile, the S1R, S1 and S5 gain the ability to specify shutter speed and gain (rather than shutter speed and ISO), an option originally reserved for the S1H.

Notable improvements include the S1R gaining 10-bit HLG capture and 4:2:2 10-bit output of 50p and 60p 4K footage over HDMI.

The S5 gains a series of DCI ‘cinema 4K’ (4096 x 2160) shooting modes. The S5 also gains the ability to stream Raw footage, which can be encoded as ProRes RAW using an Atomos external recorder. The S5 also gets Master Pedestal (black level) control and a Vector Scope display mode.

S1 users, in addition to the promise of firmware v1.6 in November, will gain a series of 12-bit Raw video output options, in a v2.0 update promised for 2021. This will also add the ability to explicitly control the Dual ISO behavior, along with a host of 10-bit internal capture modes which were previously only available on the S1H. This will include V-Log options for users who have bought the SFU2 Log upgrade.

Panasonic Announces Firmware Update Programs for the LUMIX S1H, S1R, S1, S5 and LUMIX G100 and Further Upgrades for the LUMIX S1 with a Future Firmware Update

Newark, NJ (November 4, 2020) – Panasonic is proud to announce the release of
firmware update programs for DC-S1H (Ver.2.2), S1R (Ver.1.6), S1 (Ver.1.6) and S5
(Ver.2.0) for the LUMIX S Series full-frame mirrorless cameras and for DC-G100 (Ver.1.1)
LUMIX G Series MFT(Micro Four Thirds) mirrorless camera on November 24, 2020.
Panasonic is also pleased to announce the future firmware update exclusively for
S1(Ver.2.0) to further enhance the functions and performance in the first half of 2021.

  1. Firmware Update Programs to be released on 24 November 2020
    DC-S1H Firmware Version 2.2 DC-S1R Firmware Version 1.6
    DC-S1 Firmware Version 1.6 DC-S5 Firmware Version 2.0

    • Improved AF performance S1H S1R S1
      LUMIX’s state-of-the-art AF technology and performance of the new LUMIX S5 will also be available on the S1R, S1H and S1. The upgraded AF notably excels in detection of human and its movement. In addition to the eye, face, body the head is also separately recognized by real-time detection technology to provide even more precise focusing. The camera keeps tracking the subject person even if he/she moves quickly, turns his/her back to the camera, tilts his/her head or moves far away from the camera. In addition, improvements to the DFD technology has enhanced AFC, which also enables users to keep tracking small or fast-moving subjects to capture them in crisp focus. Users can take these advantages in both still and video recording.
    • Human/Animal recognition can be set ON or OFF when the AF mode is set to [1-Area] or [1-Area+]. S1H S1R S1 S5
    • [AF+MF] can be used during video recording S1H S1R S1 S5
    • Recognition performance during video recording in V-Log has been improved. S1H S1 S5
    • [SS/Gain Operation] function has been added. S1R S1 S5
    • [Red REC Frame Indicator] is available. S1R S1
    • It is possible to play back vertical videos vertically. S1H S1R S1
    • 4K video files can be transferred to a smartphone via Wi-Fi. S1H S1R S1
    • [Horizontal Image Flip(Monitor)] / [Vertical Image Flip(Monitor)] enables to reverse or not to reverse the monitor image when the free-angle monitor is rotated. S1H S5
    • 5K (4992×3744) video recording in MOV is available. S1R
    • C4K (4096×2160) MOV can be recorded. S5

      5K 30p/25p/24p 4:2:0 10-bit LongGOP 200Mbps LPCM
    • [Like 2100(HLG)] has been added in [Photo Style] to support 10-bit HDR video recording. S1R
    • High-Resolution audio recording using an XLR Microphone Adaptor DMW-XLR1 is available and it can be controlled with [XLR Mic Adaptor Setting] menu. *MOV only S1R
    • [Luminance Level] function supports the 10-bit mode. S1R
    • 4K 60P/50P 4:2:2 10-bit video output over HDMI has been supported. S1R

      C4K 60p/50p 4:2:0 8-bit LongGOP 150Mbps LPCM
      C4K 30p/25p/24p 4:2:2 10-bit LongGOP 150Mbps LPCM
      C4K 30p/25p/24p 4:2:0 8-bit LongGOP 100Mbps LPCM
    • RAW Video Data output over HDMI has been supported. S5
      [5.9K] / [4K] / [Anamorphic (4:3) 3.5K] 12-bit RAW Video Data can be output over HDMI.
      The Apple ProRes RAW can be recorded on Atomos NINJA V.
      *All functions may not be available depending on the situation.
      *Software that supports Apple ProRes RAW is required to edit RAW video recorded with NINJA V.
      *Apply the LUT(Look up table) available on the following customer supports site to make the same color grading as V-Log/V-Gamut. ???
    • It is possible to display a Vector Scope. S5
    • [Master Pedestal Level] function has been added. S5
    • [L.ClassicNeo] and [L.Monochrome S] have been added to Photo Style. S5

    DC-G100 Firmware Version 1.1

    • The camera will be compatible with LUMIX Webcam Software (Beta).
    • [Horizontal Image Flip(Monitor)] / [Vertical Image Flip(Monitor)] enables to reverse or not to reverse the monitor image when the free-angle monitor is rotated.

  2. Firmware Update Program to be released in the first half of 2021 DC-S1 Firmware Version 2.0
    To meet the demands of users, the LUMIX S1 will continue to evolve. [5.9K] / [4K] /
    [Anamorphic (4:3) 3.5K] 12-bit RAW video data can be output over HDMI, thus, the RAW video data can be recorded on Atomos Ninja V*1 *2 . Also, 5.9K/C4K internal video recording, 4K60p/50p 4:2:0 10bit recording as well as Anamorphic mode and Timecode will also be available*2 . The firmware itself enables manual setting of Dual Native ISO.

*1 5.9K (5888×3312) 29.97p/25p, 4K (4128×2176) 59.94p/50p, Anamorphic 3.5K (3536×2656) /50p.
*2 To activate functions related to MOV and V-Log video recording, a Software Upgrade Key DMW-SFU2 (sold separately) is required. Users who already have DMW-SFU2 do not need to purchase extra DMW-SFU2.

Panasonic further addresses technology development and its achievement shall be applied not only to the new products but also to those already released via firmware update.

Articles: Digital Photography Review (dpreview.com)

 
Comments Off on Panasonic firmware shares more features across S1, S1R, S1H and S5

Posted in Uncategorized


Hasselblad firmware update adds Distance Meter, improved Interval Timer features to its X1D II 50C, 907X 50C cameras

30 Oct

Hasselblad has released a pair of firmware updates for its X1D II 50C and 907X 50C medium format cameras that adds, amongst other improvements, an on-screen distance scale for measuring focus and improved intervalometer features.

Firmware version 1.4.0 for both the X1D II 50C and 907X 50C adds a new Distance Scale feature that effectively recreates the distance scale that’s traditionally on the lens and overlays it on the liveview display. It can be set to metric or imperial units and will work with any XCD lens updated to the latest firmware.

Hasselblad has also improved the Interval Timer feature, adding the option to capture up to 1,000 frames (previously, the limit was 99 frames or ‘No Limit.’ When shooting between 2 and 25 frames you can select any number; from 25–100 you can select intervals of five; and from 100–1,000 you can select intervals of 50. The ‘No Limit’ option also remains.

Hasselblad has also added the ability to meter the exposure for every shot. Previously, the first image captured served as the baseline by which all subsequent images’ exposure settings were shot at. Now, the cameras will be able to meter for each individual frame, which should help when capturing timelapses in varying lighting conditions.

The firmware updated also improves compataibility with Hasselblad’s Phocus Mobile 2 app, improving live view quality and addressing a bug that prevented the camera from changing its white balance settings when changed inside the app. Other changes include an array of unspecified bug fixes.

You can download firmware version 1.4.0 for the X1D II 50C and 907X 50C on Hasselblad’s website (at the bottom of the page — note you will need to be logged into your Hasselblad account).

Articles: Digital Photography Review (dpreview.com)

 
Comments Off on Hasselblad firmware update adds Distance Meter, improved Interval Timer features to its X1D II 50C, 907X 50C cameras

Posted in Uncategorized


Halide Mark II is a redesigned Raw camera app for iPhones with over 40 new and improved features

22 Oct

Lux Optics, the company behind the popular iOS camera app Halide, has announced the release of Halide Mark II, a second-generation camera app for iOS that’s the culmination of more than 18 months of work.

Halide Mark II is an entirely new app with a revamped interface designed from the ground up to make a more a user experience that is simple to use, but rich in professional-level features for those who want to get the most out of their iPhone photography.

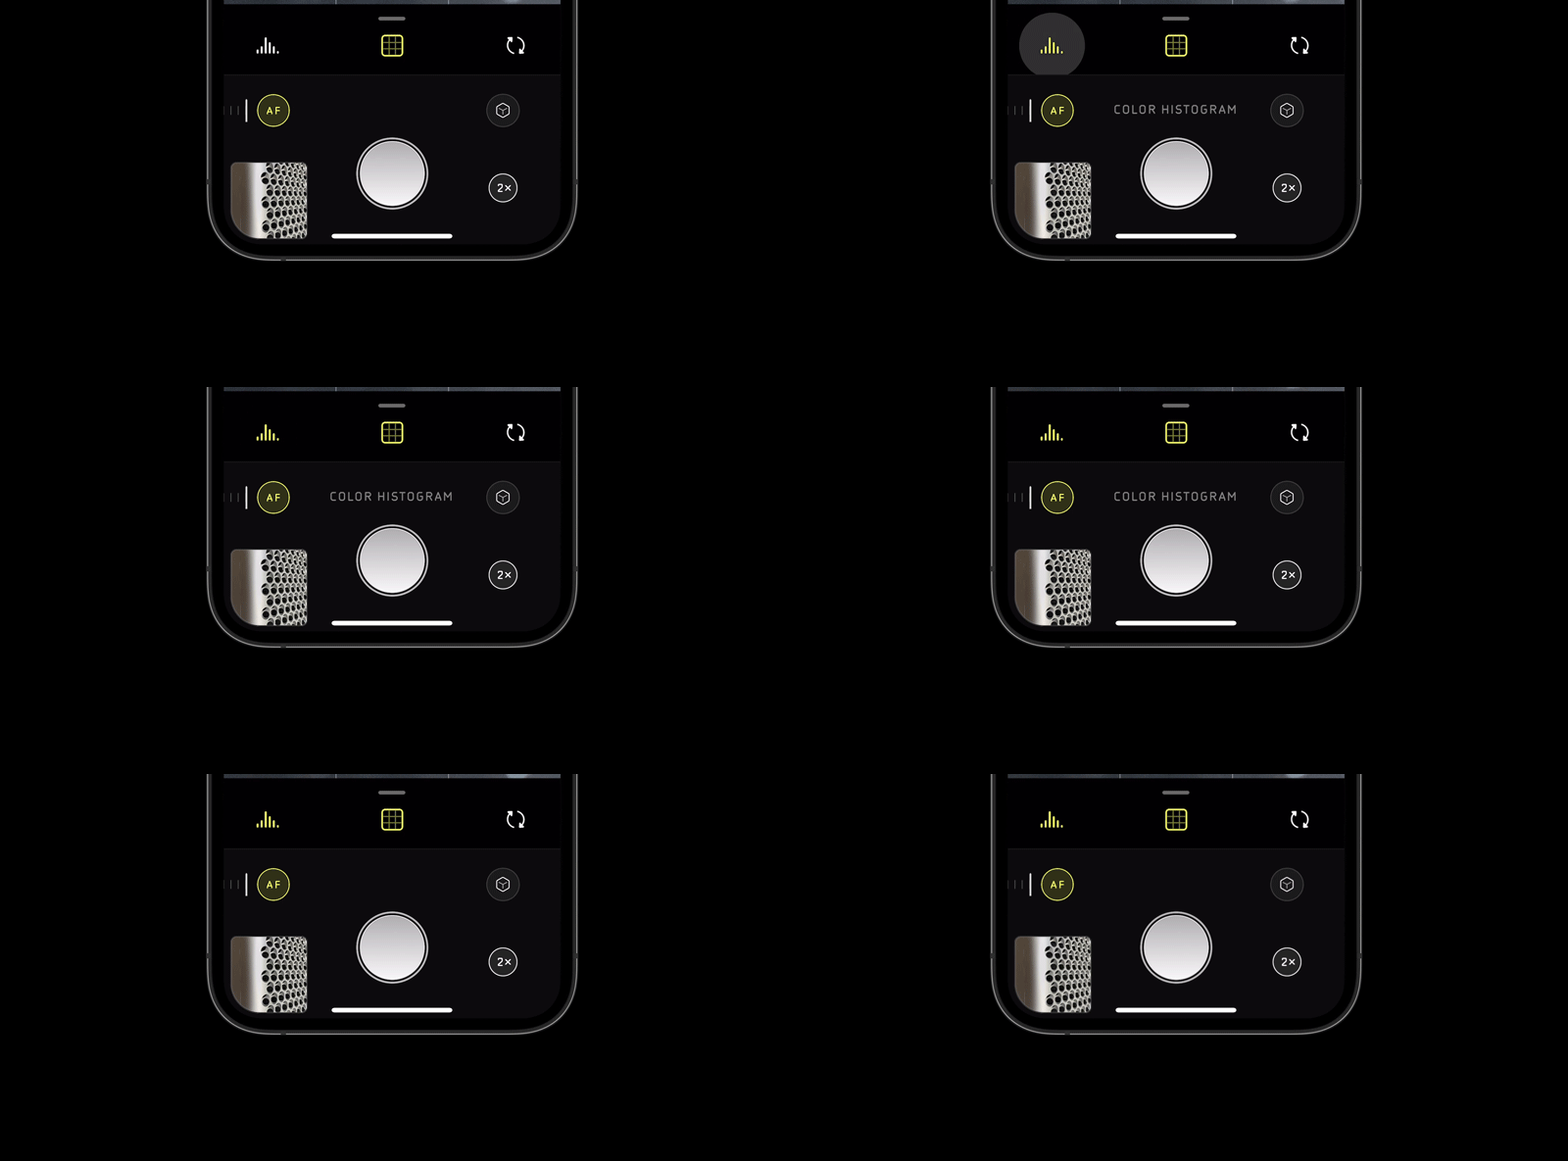
Halide Mark II has the same exposure control and focus gestures as before, but has further refined the experience with additional interface elements. Now, when manually adjusting focus, a new Focus Loupe will appear in the center of the screen that zooms in to help ensure you get focus just where you want it. When you let go, the Focus Loupe will disappear and show the usual overlay so you can compose your shot.

The manual exposure controls, including ISO and shutter speed, have also been moved and are now accessible with a quick swipe from the right-hand side of the screen. The app keeps its interface minimal, but when tapping on an icon, a text description of the tool or setting you’re adjusting, as you can see in the below GIF:

With Halide 1.0, you were given the option to see both Color and Luminance histograms to ensure you achieved just the right exposure. Well, as with most things in Halide Mark II, both of these have been updated with option to make the overlays smaller on the screen. Also new is the ‘Color Zebras’ feature, which breaks down three separate color channels — red, blue and green — into individual waveforms with zebra stripes that will appear if certain colors are clipped in either the highlights or the shadows. This ensures that no matter what color the scene you’re composing is, you can ensure you’re not clipping the highlights or shadows for any three of these channels.

If you’re using the histogram, waveform or zebra tools while in fully-manual mode, where you adjust the ISO and shutter speed, things get even more powerful thanks to a new feature Lux Optics calls XDR Analysis. Rather than using the post-processed 8-bit data other camera apps do to display the waveform and histogram data, Halide Mark II uses the full 14-bit Raw data, in real time, to calculate the exposure. Although Lux Optics says it has a more in-depth post in the works on the technology behind XDR Analysis, it sums it up like this in its blog post:

’Consider that video of the Golden Gate Bridge from earlier. Your histogram, analyzing 8-bit data, might think the sky is clipped. If you saw that in your zebra stripes, you’d say, “It’s over exposed, I should go down turn things down a bit.” In fact, the cloud are not over exposed in the RAW, and there’s no need to turn down your exposure. By under exposing, you’re now going to lose details in the shadows!’

The redesigned image reviewer now shows more accurate metadata information and allows you to view both the Raw and JPEG/HEIC image with a toggle between the two buttons.

Halide Mark II also features ‘Coverage,’ a new capture mode that takes two photos — one with Smart HDR 2/3 and Deep Fusion, and one in RAW. This gives you the benefit of having a more robust Raw file to work with in an editor as well as an instantly sharable JPEG or HEIC file to share with family and friends. Also new is ‘Instant Raw,’ a feature within Halide Mark II’s image reviewer that uses a 17-step process powered by onboard machine learning to instantly create a sharable image from an iPhone Raw file.

If all of these new features, settings and modes seem confusing, don’t worry. To complement the new app is a built-in 10-day course that will not only show off the features of Halide Mark II, but also teach a number of photography concepts along the way through examples.

As Lux Optics explains at the conclusion of its introduction blog post, it’s decided to make Halide Mark II an entirely separate app from Halide 1.0; one that’s free-to-download with a one-week trial and two options for continuing to use the app after the one-week trial is up.

After spending time talking with current users of Halide, as well as beta testers of Halide Mark II, the Lux Optics team decided to offer both a one-time purchase option in addition to an annual subscription option, both prices of which were based on the suggestions of users. A one-time purchase, which will include all future updates and features, costs $ 30 at launch and will go up to $ 36 after the introductory offer. Subscriptions will start at $ 12/month with a limited $ 10/month introductory offer that will lock you in at $ 10 for the life of the app.

Users who have already purchased Halide 1.0 will get Halide Mark II for free and have a year’s membership comped to their account.

You can download Halide Mark II in the iOS App Store and find out more information on the Halide website. For a full run-down of all the new features and updates, check out Lux Optics’ thorough introduction blog post.

Articles: Digital Photography Review (dpreview.com)

 
Comments Off on Halide Mark II is a redesigned Raw camera app for iPhones with over 40 new and improved features

Posted in Uncategorized


ACDSee Photo Studio Ultimate 2021 announced, promising faster performance and new features

23 Sep

ACD Systems International has launched ACDSee Photo Studio Ultimate 2021. This is the newest version of the company’s flagship photo editing software. The new version is focused on providing improved performance. ACD Systems International states that Photo Studio Ultimate 2021’s performance enhancements are up to 100 percent faster and RAW decoding is up to 20 percent faster.

Frank Lin, CTO & COO of ACD Systems International, says, ‘This product is everything you need to optimize your digital asset management, your photography workflow, your editing process and your work as a photographer. We’re pleased to have focused on responding to customer feedback to make this the best product for today’s photographers.’

New features in ACDSee Photo Studio Ultimate 2021 include:

  • New Color Wheels and Tone Wheels – These wheels allow users to more precisely adjust colors, highlights, midtones and shadows.
  • Text on paths and text in a frame – You can now customize your text, including its path.
  • Refine Selection – In the new version, you can shift or soften edges, allowing for better use of included tools such as Smart Erase.
  • New and improved batch rename and resize functionality – You can now create your own templates and presets to speed up batch processes.
  • New optimized user interface and panes – New UI and panes are designed to streamline the editing process, allow the user to capture snapshots and view a full edit history for a file.
  • Improved Quick Search – Finding images in large databases is much faster.
  • Improved crop and watermarking – You can crop multiple images to custom sizes and add watermarks using anchor points.
  • Easier migration from Lightroom and Picasa – You can import face data in three clicks.
This screenshot shows the new Color Wheel in ACDSee Photo Studio Ultimate 2021. Image credit: ACDSee

ACDSee Photo Studio Ultimate 2021 is available now. You can purchase a perpetual license for $ 149.99 or purchase the software via subscription for $ 69 per year. You can learn more about ACDSee Photo Studio Ultimate 2021 and evaluate your purchasing options by clicking here. Photo Studio is also available in Professional and Home versions as well for $ 100 and $ 60 respectively. These versions have fewer features than Ultimate in exchange for a lower price.

Articles: Digital Photography Review (dpreview.com)

 
Comments Off on ACDSee Photo Studio Ultimate 2021 announced, promising faster performance and new features

Posted in Uncategorized


ON1 unveils ON1 Portrait AI, new ON1 Photo Mobile features and ON1 Photo RAW 2021

23 Sep

ON1 has unveiled new updates for its suite of software, including major upgrades to ON1 Photo RAW and new features in ON1 Photo Mobile. ON1 has also announced the all-new ON1 Portrait AI, which is available as a standalone application and as a plug-in for Adobe Lightroom and Photoshop, Affinity Photo, Corel Paintshop Pro, Apple Photos and Capture One (at a later date).

ON1 Portrait AI uses machine learning to locate and evaluate each face in portrait photos to retouch and process them without the need for manual adjustments. Dan Harlacher, VP of Product for ON1, describes ON1 Portrait AI as follows, ‘This product was created to solve the main problem portrait photographers face, spending way too much time editing individual portraits or entire shoots.’ Harlacher continues, ‘…ON1 Portrait AI is incredibly fast at getting through an entire shoot…’

The new software classifies individual faces in the frame, adds ‘realistic retouching’ to the skin, eyes and mouth without the use of global retouching. The software also includes other tools for manual skin retouching. Tools include frequency separation, skin shine reduction, blemish removal, face shape sculpting, eye and teeth whitening and more.

ON1 Photo RAW Mobile for iOS, iPadOS and Android devices includes new masking features, allowing users to make specific localized adjustments and effects. As part of the new masking functionality, ON1 Photo RAW Mobile includes ON1’s Perfect Brush. The brush includes edge detection features and allows the user to create a precise mask with just their finger. The new masking tools also support the Apple Pencil and Android Stylus. Further, local adjustments in ON1 Photo RAW Mobile utilize ON1’s proprietary raw processing engine.

The mobile version of ON1 Photo RAW includes new effects and filters, such as the Dynamic Contrast filter, which ON1 states is the ‘gold standard for amazing clarity and detail.’ Additional new filters include Curves, Glow and HDR Look. Organization and workflow are improved with the new update as well thanks to new built-in ways to search and sort photos within the app.

ON1 Photo RAW for mobile is available on the App Store and Google Play. Image credit: ON1

ON1’s president, Craig Keudell, says, ‘ON1 Photo RAW Mobile has been significantly enhanced in a short amount of time and there is more on the way. The addition of creative masking tools and filters helps make it a photography tool everyone will want to use.’

ON1’s autumn lineup is rounded out by ON1 Photo RAW 2021, ON1’s flagship raw photo editor. ON1 Photo RAW 2021 is available for macOS and Windows and includes pro-grade photo organization, raw processing, nondestructive editing, a layers-based workflow and more.

A key new feature in ON1 Photo RAW 2021 is the integration of ON1 Portrait AI. In addition to the new portrait retouching functionality, ON1 Photo RAW 2021 makes it easier for users to organize their images with a new Smart Organize mode. This feature makes it easier than ever before to identify image duplicates, locate groups of photos from the same day or location and the mode can even identify similar images. ON1 states that it is the ‘perfect solution for those who want to speed up their culling, improve organization, or even save on storage space.’

In terms of performing localized editing, ON1 Photo RAW Mobile is not the only new ON1 software with new features. ON1 Photo RAW 2021 includes a color range selection tool that integrates edge detection from ON1’s Perfect Brush to create flexible gradient masks. You can create color-sensitive gradient masks, which should allow for easier local editing when working with skies behind subjects such as trees and buildings.

Photo RAW 2021 also includes new custom brush shapes. You can select between hard-edge shapes, making it simpler to paint straight edges or opt for more organic brush shapes and textures, which will allow you to paint on something like snow or grass. Further, a new non-destructive healing brush has been added to help remove distracting elements from your images such as dust spots, cables and people from the scene. The new healing brush includes a content-aware mode and a clone stamp mode.

A new full-screen preview mode has been added to the software, allowing the user to view an image without any distracting user interface elements on the screen. When in the full-screen mode, you can still utilize some tools, such as brush tools. There is also a new Quick Slideshow mode so you can show off your images in a full-screen display.

When ingesting images, ON1 Photo RAW 2021 includes new camera-based presets. This means you can set specific editing presets for individual camera models and even individual serial numbers. ON1 says this feature is helpful for users with custom camera profiles or with cameras that have been converted to infrared.

ON1 Photo RAW 2021 includes new local and global adjustment features. Image credit: ON1

In terms of global photo editing tools, ON1 Photo RAW 2021 includes a new Color Replacement filter. It is precisely what it sounds like, meaning that you can select a color in your image and adjust it. For example, you can select the color of a subject’s eyes to change them, change the color of flowers in a scene and much more.

When it launches this October, ON1 Photo RAW 2021 will also add a new method to batch process HDR and panoramic photos, introduce color fill layers, present a refined user interface and add new camera and lens support.

ON1 Portrait AI is available now at a special introductory price of $ 59.99 (regularly $ 79.99). A free trial download of Portrait AI is available. When ON1 Photo RAW 2021 launches in October, ON1 Portrait AI will be integrated into the new software. For existing ON1 Photo RAW owners, you can preorder ON1 Photo RAW 2021 for $ 79.99. When you preorder, you will also receive the standalone and plug-in versions of ON1 Portrait AI. New users must pay $ 129.99 for ON1 Photo RAW 2021. Earlier this year, ON1 introduced a subscription service as well, ON1 Photo RAW 360, which includes all the new products mentioned in this article and is available as low as $ 7.99 per month. For more information, head to ON1’s website.

Articles: Digital Photography Review (dpreview.com)

 
Comments Off on ON1 unveils ON1 Portrait AI, new ON1 Photo Mobile features and ON1 Photo RAW 2021

Posted in Uncategorized


digiKam 7.1.0 ‘maintenance’ bug fix update arrives with a few new features

10 Sep

Open-source photo management app digiKam is back with another update a little more than a month after launching its big version 7.0.0 release. This latest update largely revolves around ‘maintenance,’ but it does include a few relatively minor new features amid the numerous bug fixes.

With digiKam version 7.1.0, the team has expanded upon its basic Canon CR3 RAW metadata support, enabling the software to read a greater amount of Exif tags, including color profile and GPS data. The team explains that dealing with camera RAW files is a ‘big challenge’ due to, among other things, the lack of standardization.

DigiKam 7.1.0 features a metadata interface that was written based on the libraw library, expanding the CR3 read support. However, the app doesn’t feature write support for this particular RAW format. The full list of cameras support for libraw can be found on its website here.

The expanded CR3 support aside, digiKam 7.1.0 brings a new Batch Queue Manager plugin offering an automatic fix for Hot Pixels. This feature isn’t new; rather, the update improves it and enables the tool to ‘manage a collection of black frames from different camera models,’ according to the team.

The Batch Queue Manager has also received another new plugin, this one for applying textures to images. As with the Hot Pixels fix, this tool has already been available in the Image Editor, but adding it to the Batch Queue Manager makes it possible to automatically process target images.

Finally, the new digiKam update also brings expanded IPTC compatibility with UTF-8 characters encoding, according to the team, enabling users to use ‘extended characters set everywhere in legacy IPTC text containers.’

These tweaks and new features come alongside a slew of bug fixes, with the team saying they managed to close out more than 300 Bugzilla entries in the past couple of months. The full list of these bug fixes can be found here.

Work on digiKam 7.2.0 is already underway with a few features planned, including improved support for face management. The team says there are some beta releases coming up that will test new planned features. As always, digiKam is available to download for free.

Articles: Digital Photography Review (dpreview.com)

 
Comments Off on digiKam 7.1.0 ‘maintenance’ bug fix update arrives with a few new features

Posted in Uncategorized


The Five Key Features on any Street Photography Camera

06 Jul

The post The Five Key Features on any Street Photography Camera appeared first on Digital Photography School. It was authored by Jaymes Dempsey.

dps-key-features-street-photography-camera

Are you struggling to choose the perfect street photography camera?

You’ve come to the right place.

Because while picking the perfect camera for street photography can be tough, it doesn’t have to be.

In fact, there are five basic features you’re going to want with any street photography body. While finding them all in a single camera can be tough, depending on your current lens lineup and preferred system, I’d recommend getting a camera that offers as many as possible.

And if you can find a camera that includes all of these features, you know it’s going to be a great street shooting option.

Let’s dive right in:

street photography camera
50mm | f/1.8 | 1/320s | ISO 200

1. A compact body

When you look for a street photography camera, the very first aspect you’ll want to consider is size.

Because here’s the thing about street photography:

The less that people notice your camera, the better.

expressions captured by a street photography camera
50mm | f/2.8 | 1/320s | ISO 200

As soon as people start to see your camera, they get nervous, you get nervous, and photography becomes uncomfortable.

And while it’s inevitable that your camera will be seen, the smaller it is, the less this will happen.

That’s why I recommend you get the most compact camera you can find. Or, at least, a camera that offers a small form factor.

One option is a higher-end point-and-shoot camera, such as the Fujifilm X100V. That camera is tiny but still manages to offer excellent image quality.

But if you’re a fan of interchangeable lens cameras, you have other options. Some APS-C mirrorless cameras are designed to be near pocket-sized, including models such as Sony’s a6000 series, or the Fujifilm X-T200. Same with quite a few Micro-Four-Thirds cameras, such as the Olympus OM-D E-M10 Mark III.

These bodies are light, they’re compact, and they’re some of the most inconspicuous cameras I’ve ever come across.

(Another advantage of a compact body is that they’re easy to carry around. You can take a Fujifilm X-T100 with you wherever you go, so that you never miss a shot!)

So start your search by looking for a small body, and only then should you consider the rest of the features on this list.

store model street photography camera
If you want to capture close-up candid shots of people, I recommend a compact street photography camera.
50mm | f/3.5 | 1/200s | ISO 200

By the way:

It’s not just the camera that should be small; you’ll want small lenses, as well. One of the best ways to ensure you have plenty of small lenses to choose from is by working with a Micro-Four-Thirds camera (offered by both Panasonic and Olympus).

These systems have unusually compact lenses, thanks to their smaller sensor size.

2. A high continuous shooting speed

If you’re planning on doing lots of street photography, then you’re going to need a camera that shoots fast.

Why?

Because the best street photos tend to involve a convergence of elements. Three people are perfectly aligned with a building, a person makes a sudden strange expression, or a biker passes in front of an interesting facade.

street photography camera continuous shooting
The ability to shoot frame after frame is key when shooting images like this.
50mm | f/2.8 | 1/200s | ISO 250

And you’re going to miss out on these moments…

…unless your camera can fire off a burst of shots in quick succession.

I’d recommend a continuous shooting speed of at least five frames per second, and more is better. For me, the 8-10 range is ideal, which you can find on quite a few cameras these days.

And honestly, anything more than 10 fps is overkill for most street photography purposes. You’ll run through your memory cards ridiculously fast, and end up with a huge amount of unnecessary shots.

You’ll also want to get a camera with a decent buffer. There’s no use in being able to shoot at 10 fps if you can only capture 15 frames. So I recommend you look for a camera with a buffer of at least 25 RAW files (and more is better!).

man hidden by umbrella
50mm | f/3.5 | 1/160s | ISO 320

3. Excellent autofocus with strong eye detection

As I said above, street photography happens fast.

And you’re often reacting to moments that come and go instantly.

man walking through door street photography camera
24mm | f/8 | 1/200s | ISO 320

That’s why the best street photography cameras have lightning-fast autofocus and, ideally, face/eye detection.

I’m talking about systems that can nail focus instantly, as well as track a subject through a complex array of objects without losing focus.

For this latter requirement, a great option is any of the more recent Sony a6000 models (including the a6100, the a6400, and the a6600). These cameras offer fantastic tracking, great AF speeds, and amazing Eye AF.

street photography camera
A camera with fast autofocus will allow you to seize the moment and grab shots like this!
f/3.5 | 1/640s| ISO 320

Now, it is possible to do street photography with a less AF-adept camera. But you’ll frequently struggle, especially when trying to lock focus for spur-of-the-moment shots.

You’ll also want good AF for situations when you’re shooting from your LCD or from the hip. If your camera can grab focus with ease, you’ll end up with quite a few keepers, even if you’re firing the shutter without looking!

4. A silent shooting mode

Getting a camera that can shoot in silence was a real game-changer for my street photography.

Finally, I could shoot without people realizing, and it made me feel so much less anxious.

silent shooting street photography camera
f/2.8 | 1/640s | ISO 200

And the truth is that most street photographers feel anxious at one time or another, and a loud shutter sound just made that anxiety worse.

(If you’re a street photographer that never feels uncomfortable, please share your secret in the comments!)

In fact, I almost quit street photography. It was only once I had a camera that could do true silent shooting that I was able to resume and feel better about what I was doing.

That’s why I recommend you get a street photography camera that has some sort of silent shooting mode. Ideally, it has an electronic shutter, one that allows you to shoot in total silence (though any silent shooting mode is better than nothing at all).

You’ll want to be careful, though:

Some cameras can be restricted when using a silent shutter. For instance, my Sony a6300 can only shoot bursts at about 3 frames per second when silent, and this can be extremely frustrating. So, I’d suggest looking for a camera that can maintain both silence and fast continuous shooting speeds.

That way, you can capture bursts of action without dealing with the chatter of a camera shutter!

5. A tilting screen

This feature is a bit more optional, but it’s still useful in quite a few situations.

You see, there will be times when you want to shoot from the hip (i.e., keep your camera held down low and fire off some shots).

low angle street photography
50mm | f/4 | 1/800s | ISO 200

I do this while walking past people on busy streets because I don’t want to bother them with the sight of my camera. And I also like the low-angle look that it creates!

Of course, you can do this blindly, and you’ll end up with some keepers.

But if you have a tilting screen…

…you can look down at the camera while you walk, in order to ensure perfect focus and composition!

Note that you don’t need a fully articulating screen, as you won’t need to shoot from ultra-strange angles. A screen that tilts up 90 degrees will do just fine.

And since we’re talking about screens, I’ll mention that a touchscreen can be pretty useful in these situations, too. If you can tap to set focus, you can quickly choose a subject while looking down at your LCD, then fire off shots as they come closer.

Make sense?

The five key features on any street photography camera: Conclusion

Choosing a camera for street shooting doesn’t have to be hard.

Just make sure it has as many of these characteristics as possible, and you’ll be capturing stunning shots in no time!

That’s the power of a great street photography camera.

street photography camera
50mm | f/2.8 | 1/160s | ISO 400

The post The Five Key Features on any Street Photography Camera appeared first on Digital Photography School. It was authored by Jaymes Dempsey.


Digital Photography School

 
Comments Off on The Five Key Features on any Street Photography Camera

Posted in Photography


WWDC2020 : A round-up of photo features and updates in iOS 14, iPadOS 14 and macOS Big Sur

24 Jun

Apple’s virtual WWDC keynote yesterday was light on photography-related news, but hidden within the iOS 14 and macOS 11.0 (Big Sur) are a few small updates worth noting.

iOS 14

In iOS 14 the launch time of the stock camera app has been improved and time required between shots has been reduced. Specifically, Apple says ‘you can now shoot photos up to 90% faster (compared to iOS 13.5) at up to 4 frames per second’ and start-up time for the camera app has been improved by 25%.

Additionally, Apple has added a new exposure compensation control that lets you lock an exposure value while separately locking focus on another point — something third-party camera apps have offered for years now. Also new is an updated interface when shooting in Night mode on the iPhone 11 and 11 Pro that provides an overlay using gyroscope information to ensure you stay steady throughout the image capture.

A final small update is a new option within the camera settings that lets you mirror photos captured with the front-facing camera.

Also, although it’s not directly related to photography, Apple has added an option within its accessibility settings to run Shortcuts with a double- or triple-tap on the back of the device. This means you could trigger various photo-related Shortcuts with either of these gestures, such as opening up a third-party camera app with a double-tap and opening up the editing app of your choice with a triple-tap.

You can see all of the latest iOS 14 features on Apple’s iOS 14 ‘New Features’ page.

iPadOS

iPadOS doesn’t put as much emphasis on the capturing of photos as iOS, but Apple didn’t leave it hanging either. In camera mode, Apple has added quick toggles to change video resolution and framerate within the camera app and like iOS, there’s now an option to mirror images captured with the front camera.

The Photos app on iPadOS is redesigned using Apple’s new full-height sidebar, making it easier to navigate between albums, search and more. It’s also possible to add captions to images within the Photos app and Apple has also improved the Memories function, which should better select more relevant photos and videos to highlight.

The image picker has also been redesigned, which should make it easier to find and share or upload images within Safari, Messages, Mail and other third-party apps.

You can find a full rundown of all the new iPadOS 14 features on Apple’s website.

macOS 11.0 (Big Sur)

Aside from the overall user interface changes and a few changes to the Photos app, there aren’t many photo-specific changes within macOS Big Sur. At least not for now.

As much as macOS Big Sur changes things up on the visual side of things, it’s also about laying the groundwork for Apple’s forthcoming computers that will use its own ARM-based architecture. This requires a lot of behind-the-scenes work and programming to ensure apps designed for current computers and CPUs will work with the first computers with Apple’s own chipsets, the first of which Apple CEO Tim Cook says will be out by year’s end.

Apple showcased both Adobe Lightroom CC and Photoshop running on one of its ARM-based developer kit computers and specifically said it’s working with Adobe to make sure Creative Cloud apps will work with the new architecture out of the gate, but we’ve heard similar statements before that took a little longer to come to fruition to be expected (i.e. Photoshop for iPad), so you might want to keep your expectations subdued for the time being.

Still, making the jump from Intel chips to its own is no minor feat for processor-intensive applications such as Lightroom and Photoshop, so any collaboration between Apple and Adobe ahead of future hardware releases is a welcomed sight.

As for the Photos app, Apple has added new video editing capabilities such as adjustments, filters and cropping, as well as improved the Retouch tool, which now uses ‘advanced machine learning to remove blemishes, dust specks, and other objects from photos.’

Like the iPadOS update, Photos for macOS adds improved navigation, the ability to add captions to images and the aforementioned improvements to Memories for more relevant collections.

Wrapping up

Overall, the photo-related updates to iOS, iPadOS and macOS are relatively minor based on the hardware currently available. However, it’s usually the hardware that brings major changes and all of these operating system updates, macOS Big Sur in particular, lay the foundations for future hardware. You can watch the complete keynote on Apple’s YouTube Channel.

Articles: Digital Photography Review (dpreview.com)

 
Comments Off on WWDC2020 : A round-up of photo features and updates in iOS 14, iPadOS 14 and macOS Big Sur

Posted in Uncategorized


Tripod Buying Guide – 6 Vital Features to Look For

08 Jun

The post Tripod Buying Guide – 6 Vital Features to Look For appeared first on Digital Photography School. It was authored by Suzi Pratt.

dps-tripod-buying-guide

A tripod is one of the first accessories people like to buy when they get a new camera. But there are hundreds of thousands of tripods out there, all with different features and price points. How do you go about choosing the best tripod for you? This tripod buying guide will highlight 6 features to consider before purchasing a new tripod.

Best tripod for beginners
Canon 5D Mark III with Canon 100mm f/2.8 – 1/160 sec, f/7.1, ISO 400

Why use a tripod?

There are a couple of reasons why you might need a tripod in the first place.

First, you should use a tripod if you plan to shoot slow shutter speeds or high f-stops (apertures). Conditions like this are typically real estate, interior, architectural, and landscape photography, where you need your scene to be as sharp as possible, often in low light conditions.

You should also use a tripod when shooting bracketed photos for compositing or HDR in post-production, or when taking selfies or group photos that you want to be a part of.

There are certainly more reasons to consider using a tripod, but hopefully, these give you good examples to start thinking about.

Waterfall tripod photo
Fujifilm X-T3 with Carl Zeiss Touit 12mm f2.8 WITHOUT Tripod – 1/75 sec, f/2.8, ISO 2500
Waterfall tripod photo
Fujifilm X-T3 with Zeiss 12mm WITH Tripod – 0.8 sec, f/9, ISO 400

1. Payload (or load capacity)

The very first feature to consider when researching tripods is its payload or maximum load capacity. In other words, how much weight is it able to support? The payload is typically found in the product description of each tripod. To come up with this number, consider the heaviest and largest camera setup that you plan to use on the tripod. Camera and lens weights can easily be found via a Google search or examining their respective product descriptions.

For example, my Sony A7rIII camera body alone weighs 23.2 oz (657 grams). My heaviest lens, the Sony 70-200mm f/2.8 weighs 52.16 oz (1480 grams). So together, my heaviest camera setup would be 75.36 ounces (2137 grams). That means I should find a tripod with a payload of at least that amount.

It is also important to look at the payload of the tripod head or the piece that attaches your camera to the tripod legs. Some tripods come with a head included, or you can replace it with a head that you buy separately. Many tripod heads have their own payloads specified, so be sure to consider that number as well.

Best tripod for beginners
MeFoto Roadtrip travel tripod. Canon 5D Mark III with Canon 100mm f/2.8 – 1/160 sec, f/7.1, ISO 400

2. Tripod minimum and maximum height

All tripods have a minimum and maximum height expressed in their product descriptions. Some tripods can get ultra-tall, others can get ultra-low to the ground. Think about what kind of subjects you will be photographing, and the optimal height you would want your tripod to be.

If you are tall or plan to shoot tall subjects, aim to get the tallest tripod you can find. However, if you shoot subjects that are lower to the ground, you may want to consider tripods with a low minimum height. There are even new tripods like the upcoming Peak Design Travel Tripod designed to get extremely low, down to 5.5 inches.

Best tripod for beginners
Manfrotto 055 tripod. Canon 5D Mark III with Canon 100mm f/2.8 – 1/160 sec, f/7.1, ISO 400

3. How stable is the tripod?

The next quality to consider is how stable the tripod is. First, consider the payload or weight capacity mentioned above – this will give you a good idea of whether the tripod can support your camera and lens combination. But there are other features that can enhance tripod stability.

Some tripods come with retractable or removable spikes in the tripod feet. These provide extra stability by sticking into the dirt or soft ground if you happen to be shooting outside.

Tripods can also come with a retractable hook in the center column of the tripod, allowing you to hang weight to stabilize the tripod. Attaching a heavy sandbag to the hook is often the optimal option, but you can also get creative by using other items like a heavy water bottle or even your camera bag.

Best tripod for beginners
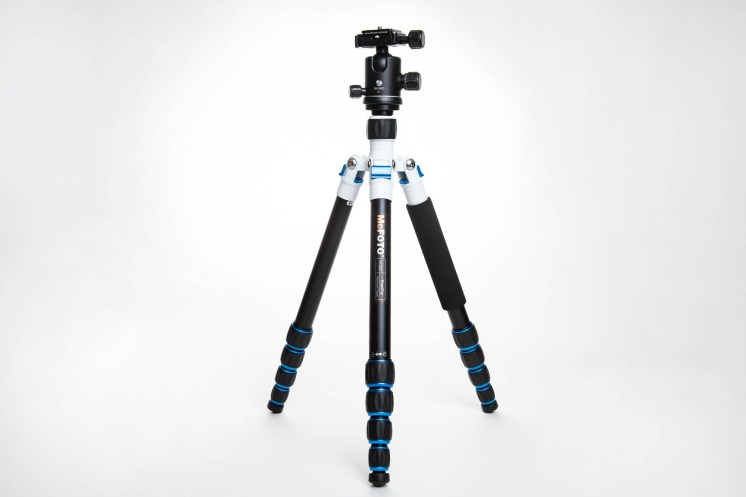
MeFoto Roadtrip Travel Tripod.
Canon 5D Mark III with Canon 100mm f/2.8 – 1/160 sec, f/7.1, ISO 400
Best tripod for beginners
Legs of the Manfrotto 055 tripod.
Canon 5D Mark III with Canon 100mm f/2.8 – 1/160 sec, f/7.1, ISO 400

4. How easy is it to carry the tripod?

If you plan to travel a lot with your tripod, or use it on the go, it’s important to consider the overall weight and folded length of the tripod. If you opt for a heavy, large tripod, you might get optimal stability, but you will likely struggle to carry that tripod around.

Consider the material the tripod is made from. Most tripods are made of aluminum (cheaper, but heavier) or carbon fiber (lightweight, but more expensive). Many tripod models are available in either construction material, so think about your budget and how important the weight saving is to you.

Also, look at the overall ease of folding the tripod up. Most tripod legs are three sections meaning they get taller with each section you open, but some can be two sections or even five sections. The more leg sections you have to deploy equates to a longer time to set up and put away. Along the lines of tripod legs, look at the mechanism they use to deploy. Most tripods use a twist-lock mechanism, which can get confusing about which direction locks or unlocks the legs. Meanwhile, other tripods have a simple clip lock that is much easier to unlock and lock.

5. Tripod head quality?

Some tripods come with a tripod head, and others require that you buy it separately. In some cases, you may even want to buy your own tripod head if you have a preference in the best type to use.

A ball head is the most common type of tripod head, allowing for 360-degree rotation to position the camera where you want it. However, many ball heads, especially cheap or low-quality ones, will slip over time and be less stable. Thus, it may be worth buying a high-end ball head or looking at another type of head to use on your tripod.

Examples include the Manfrotto 3-Way (my favorite), or a pistol grip tripod head. Pretty much every large tripod allows you to replace the tripod head with one of your choosing.

Best tripod for beginners
Standard Arca Swiss type tripod ball head.
Canon 5D Mark III with Canon 100mm f/2.8 – 1/160 sec, f/7.1, ISO 400

The final piece of the tripod head to consider is the tripod plate or the piece that mounts directly to your camera. Arca-Swiss type plates are among the most common and universal, but they often come with the need to use an Allen wrench to tighten the plate to your camera.

On the other hand, there are other tripod plates such as those made by Manfrotto or Joby that includes a twist screw that you can easily secure without the need for an extra tool.

6. Extra features?

The last things to consider are any extra features or bells and whistles that come with the tripod. Here are a few examples to look out for:

Tripod to monopod conversion

Some tripods such as those made by MeFoto, allow you to easily convert the tripod into a monopod by simply removing one leg and attaching it to the center column. This is a handy feature if you anticipate needing a monopod.

Tripods with a column that can be positioned at 90 degrees

If you have the need to shoot with a 90-degree column, look for a tripod that offers this feature. My Manfrotto 055 has this feature and it comes in very handy for product or flat lay photography.

Built-in bubble leveler

While many cameras have a built-in leveler, it always helps to have a physical bubble leveler to make sure your camera is straight. Some tripods have bubble levelers built-into the tripod head or the center column of the tripod.

Carrying case

Some tripods come with a carrying case to aid in transportation, and others require the carrying case to be purchased separately.

Best tripod for beginners
Manfrotto 3-Way tripod head.
Canon 5D Mark III with Canon 100mm f/2.8 – 1/160 sec, f/2.8, ISO 2000

In conclusion

There are a plethora of tripods out there and it is not an easy task to find the right one for you. Ultimately, this tripod buying guide is intended to help you think of all of the situations in which you plan to use a tripod and encourage you to carefully research all six features above. And while there are plenty of cheap tripods out there, consider investing in a high-quality tripod to begin with. Your camera equipment is expensive, and you don’t want to risk dropping or damaging it due to placing it on a cheap tripod.

Video

The post Tripod Buying Guide – 6 Vital Features to Look For appeared first on Digital Photography School. It was authored by Suzi Pratt.


Digital Photography School

 
Comments Off on Tripod Buying Guide – 6 Vital Features to Look For

Posted in Photography