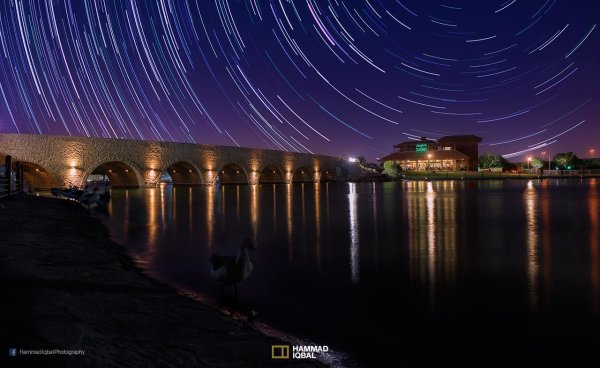
If you are reading this, you must be among those who have a special place in their hearts for stars, galaxies and the wonders of the universe. With recent advancements in camera technology, many photographers have captured the beauty of the night sky in spectacular ways. The truth is that every photographer is fascinated by the glittering stars, and captivating night skies, that have the power to instantly teleport us to a world beyond our wildest imaginations. From a photographic perspective, star trails can add another dimension to an otherwise average shot and that is likely the primary reason for many photographers desire to learn how to capture star trails. If you are struggling to find out and learn about this rewarding effect, get your camera and computer ready. But before that, let me introduce you to star trails.
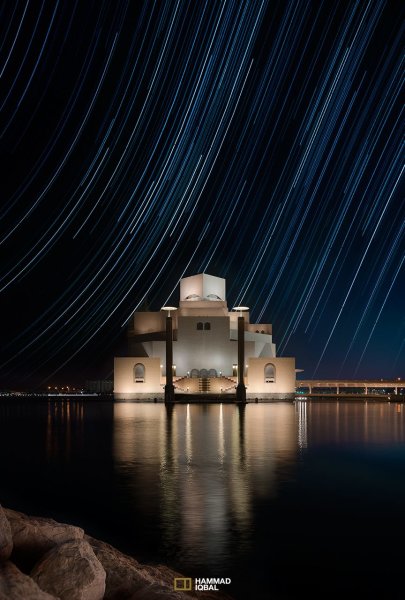 What are Star Trails?
Star trails is a photographic effect that gives an illusion of motion to the stars along a circular or an elliptical path. Technically, stars do not move when we observe them. They are quite stationary very much like our Sun. In reality, the circular motion of the stars we see in star trail images is a result of rotation of the Earth along its axis. For better understanding, please refer to the ‘equatorial grid’ figure under “Understanding Star Trails” section below.
How are Star Trails captured?
Traditionally, star trails are captured by taking multiple shots of the sky in succession over a period of many hours. Modern DSLR cameras also allow you to take a single exposure of an extended length of 30 minutes or more but many photographers prefer to take multiple shots at 30 seconds each and stack them together. Doing it this way eliminates any chances of shaky exposures that can occur due to wind or bumping into the setup while the shutter is open. If you are attempting to make almost a full circle star trails, then the number of shots required to create it can go in hundreds. Later, all those shots are stacked together in Photoshop or a free software such as StarStax to create a single image that shows the circular paths of the stars.
Photographers have been using this method for years with great results. But if you do not have the option to return to the same location again, then the conventional method would feel limited, as it requires you to stay in one spot for hours, thereby limiting your options to take multiple shots and capture a variety of angles on location in one night.
Understanding Star Trails
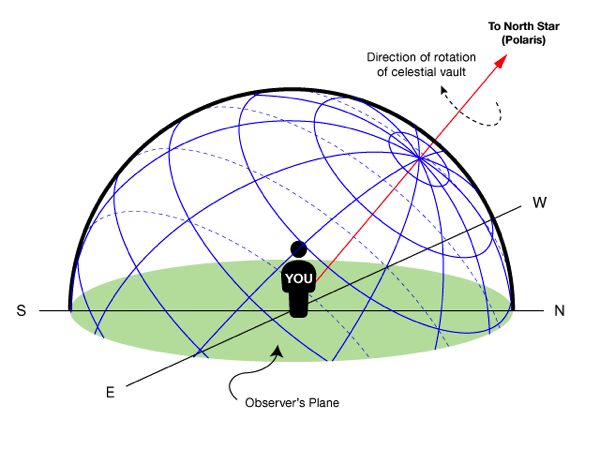
Equatorial grid from observer’s point of view
Imagine that ‘YOU’ are inside a giant sphere (see above diagram). Now, depending on the direction you look at, the effect of the star trails will be as follows:
Facing North: Star trails effect will appear to be circular with some stretching of the circular lines at the far edges of the frame.
Facing East: The trails will appear to be straight in the middle moving diagonally in an upward direction from bottom center to top center. They will also appear to be converging at both top left and bottom right at the far sides of your frame. See image below:
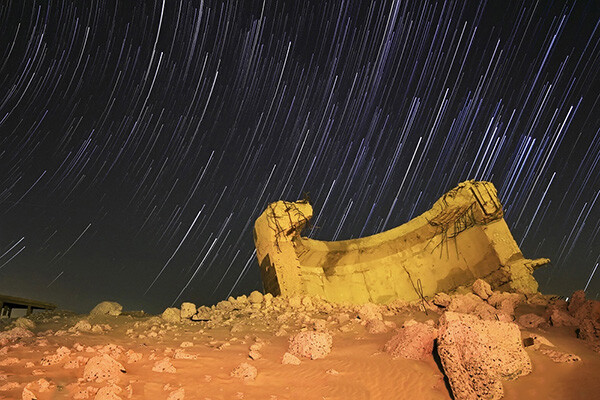
Umm-ul-Aish, Kuwait – image shows the upward motion of East star trails
Facing West: In this direction, the trails will appear to be the exact opposite of what you see when looking towards the South. Moving downwards and to the right from top to bottom in a diagonal line, they will also appear to be converging at both bottom left and top right at the far edges of your frame.
Facing South: If you are facing South head-on, the star trails will appear to be moving from left to right in an upward curve.
One-shot Star Trails – the Technique
I have been developing a new method to create star trails in Photoshop. Unlike the ‘Star Trails’ Photoshop action that you might already be familiar with, this technique is much more than that. It eliminates all limitations associated with the traditional method of capturing star trails. Unlike the conventional method, this technique only requires a single shot, that’s right, only ONE shot of the night sky to create realistic star trails. Since this technique is a result of a joint effort between me and my friend Mobeen Mazhar, who is a great landscape photographer from Pakistan, we have named it the “HM technique” or “HM star trails”.
When implemented correctly, this technique will open endless possibilities for you in your star trail adventures and is sure to spark new hope among photographers for all levels of expertise. Now, let’s take a look at different types of star trails and how you can use this new technique to create them in Photoshop with just one shot.
Creating North Star Trails
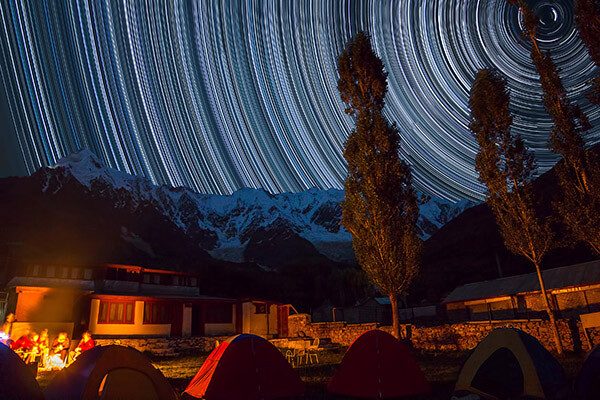
Nanga Parbat-Trashing, Pakistan – North Star trails created with HM technique
This is the most common and simplest type of star trails. Traditionally, it can be achieved by pointing your camera towards North with the focus set to infinity and then taking consecutive long exposure shots (30 seconds) at high ISO settings. Since the North Star remains almost stationary, the final effect is circular with the stars seeming to revolve around a pivot point, which is the North Star. Then at the time of post-processing, all shots are stacked using Photoshop or StarStaX.
The downside to this approach is that it can take as many as 700 shots over a period of five to eight hours to get a full circle trail. Now watch the video below to learn to create North Star trails within minutes using just a single shot of the night sky.
Creating Meteor Shower Trails
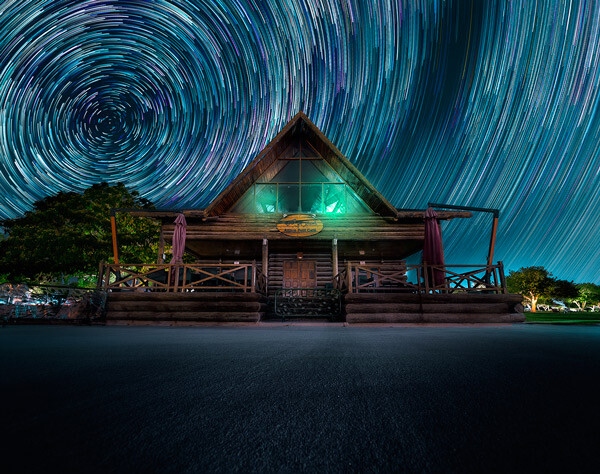
Aspire Park, Doha – meteor shower trails created with HM technique
Meteor shower trails is by no means an official name. This is fundamentally a beautiful variation of the North Star trails. Instead of a long continuous streak of light, the trails seem to disappear at the origin which gives it depth and dimension. There is also another variation of the meteor shower trails in which the tip of the trail is thicker, brighter and looks like a blob or droplet.
The underlying technique of the meteor shower trails is the same as shooting the North Star trails. The only difference is in post-processing. The meteor or comet effect is achieved by using the ‘Comet mode’ in StarStaX as shown below.
‘Comet Mode’ feature in StarStax
But regardless, the traditional method still requires that you spend hours on a single spot to take hundreds of consecutive shots. Now watch the video below to see how you can create amazing meteor shower trails in minutes, and once again, all you need is a single shot of the night sky.
Creating Vortex Star Trails
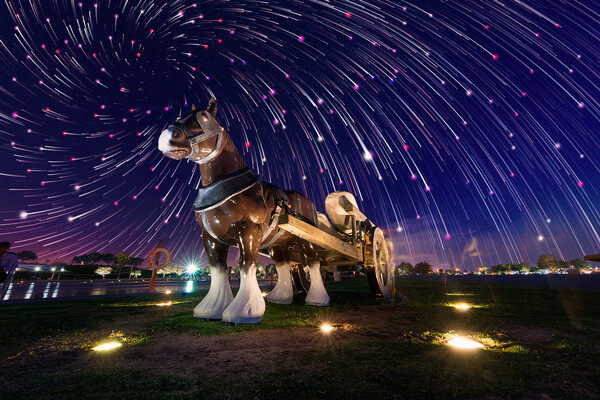
Aspire park, Doha – Vortex star trails created with HM technique
This is by far my favorite kind of star trails and is quite complex to achieve. Unlike the previous two types of trails, vortex star trails require special equipment which can be costly and may prevent most photographers from trying it. The vortex effect is achieved by zooming in or out on the lens during the long exposure. It may sound simple at first but the trick is to avoid vibrations as you zoom during the 30-second long exposure. Hence it makes it extremely difficult, if not impossible, to do it with bare hands without shaking the whole setup.
But if you have plenty of free cash to burn, you can get the tools which would include a geared ring that goes on the zoom ring of your lens, a motor and a wireless remote for controlling the motor. The setup is basically what DSLR filmmakers use for focus racking, that is a motorized follow focus system as shown below. The system is very useful if you shoot professional video with your DSLR but for photographers, the cost might not be justifiable.

Wireless electronic follow focus kit v2 by Jag35
Do not worry because the following video will show you how to create vortex star trails in Photoshop. No cash required.
Conclusion
With the help of this powerful new technique, you will be able to maneuver on location, shift your focus towards making a variety of compositions, save countless hours, battery power and thousands of shutter actuations on your DSLR. Would you have thought that a single shot could give you such incredible flexibility in your star trail photography?
Tip: Just make a note of the direction your camera is facing to help you create star trails in relation to the reference direction.
I am sure that this tutorial will add a new skill to your photography arsenal. If you have any questions, post them in the comments below. Thank you.
Technique developed by Hammad Iqbal and Mobeen Mazhar
Mobeen Mazhar is a passionate traveler and has spent more than a decade exploring Pakistan and its natural beauty. Photography gives him a mode to express his love for nature and a medium to document his travel experiences. He is a landscape specialist, regular travelogue writer and travel expert for Pakistan. You can find his photographic work at Facebook, 500px and Flickr.
The post Single Image Star Trails – a Powerful Technique to Create Star Trails in Minutes Using Phototoshop by Hammad Iqbal appeared first on Digital Photography School.
You must be logged in to post a comment.