If you have ever seen a professional photographer using flashgun on top of their camera, and wondering why the flash is not pointing directly at the subject, that’s because they are bouncing the flash. In this article I will reveal to you the secrets of bounce flash, which I have learned over the years working as a professional wedding photographer. I will unveil my killer techniques that will allow you to bounce your way to better photography.
If you are new to photography you may be apprehensive about using flash. I understand. A lot of it has to do with when you first buy a point-and-shoot camera the flash on it just creates a horrible direct flash look and that is what you associate with flash photography. Once you master the art of bouncing however, I promise you will never look back.
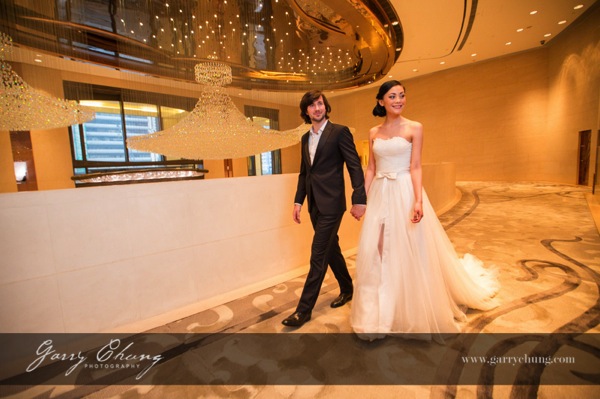
The image above is lit by bouncing flash off the wall on the right side, just out of frame. Notice how it doesn’t look obviously flashed.
What is bounce flash?
Bounce flash is when, rather than firing your flashgun pointing directly at your subject, you point it elsewhere typically up or at an angle, bouncing off a wall or ceiling. The objective is to “bounce” light to soften it before it hits your subject.
Why bounce it and not point directly at my subject?
Because generally speaking direct bare flash, pointing at your subject, is terrible for two reasons:
- The light is “hard” and can cash horrible shadows on your subject. It just generally is not very nice light for portraits. The definition of hard and soft light if you are confused is simply the transition the light makes between shadow and highlights. A gradual transition is called soft light and a sudden transition where you have a strong shadow edge is called hard light. Portrait photographers talk a lot about nice soft quality light and that is why they use light modifiers such as soft boxes and umbrellas.
- Direct flash produces “flat lighting” which gives that deer in the headlights look and also does not give a 3-dimensional quality to the photo
It is probably easier to show you in pictures so here are a few images of my friend Theresa, that I took just to illustrate the point. Just to set the scene, below is the area where I took these photos. This is a shopping center in Hong Kong and I have chosen the area because of the white walls.

This was shot with the flash pointed directly at the subject. Because there were a lot of white walls surrounding Theresa, there was a lot of wrapping light and it didn’t turn out too bad. But, there is a hard shadow in the neck area and the lighting is flat.

Manual Mode, 50mm lens, f/4, 1/80th, ISO 800, flash in ETTL Mode
This was shot with the flash tilted upwards towards ceiling. The light is much softer and you can see that the shadow on her neck is softened. It’s OK but could be better.

Manual Mode, 50mm lens, f/4, 1/80th, ISO 800, flash in ETTL Mode
This is the way I would light this portrait. The flash is tilted, in this case aimed to bounce off the wall to the left, and bounce back. The result is a nice soft light, and also notice the eyes have better catch lights.

Manual Mode, 50mm lens, f/4, 1/80th, ISO 800, flash in ETTL Mode
But wait, I think I can do one better. I want a more dramatic and contrasty image so I cut out the ambient light by setting a faster shutter speed and stopping down to f/8. Still with the flash pointed to the left I now have my nice professional high key headshot, one flash on camera, no light modifier shot in a shopping mall.

Manual Mode, 50mm lens, f/4, 1/200th, ISO 800, flash in ETTL Mode
When do I bounce my flash?
Indoors when there is ceiling or wall, preferably a white wall so there is no colour cast in the light, or outdoors if there is a surface nearby to bounce off. I see so many “professional photographers” have their flash pointing upwards when shooting outdoors when there is nothing to bounce off and I assure that does nothing other than sap power from you flash as it requires more power to light your subject.
How do I bounce my flash?
Firstly you will need a hotshoe flashgun (speedlight) that allows you to both tilt and swivel the head such as a Canon 600EX-RT, Phottix Mitros+ or if you are a Nikon user a SB900. Some flashes allow only tilt such as the Canon 430EX. This is not ideal as I like to bounce the flash in all directions.
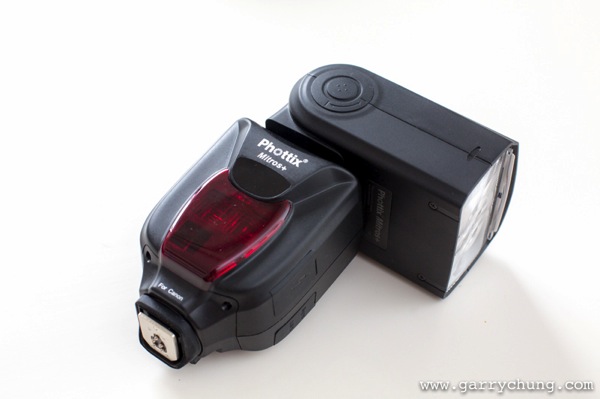
Phottix Mitros+ with swivel head
Which direction to bounce the flash?
Most people just point the flash upwards, which is fine, but I actually seldom do this because I always want to light a portrait using directional light if possible. So most of the time I am pointing the flash to the side, or tilted behind me to one side to give that nice slimming shadow on the face.
There is a simple formula to achieve this look that I learned from Jerry Ghionis – just point your flash head in the same direction as the nose of the subject so you are bouncing. So you are normally pointing the flash away from your subject, to one side. This is of course assuming that you have something to bounce off within a reasonable distance. The other way is to think of your walls as the light source itself, position your subject, frame your shot and then adjust your flash to target the walls.
Remember if you ware shooting events and weddings to readjust your flash direction when shooting from portrait to landscape. For me I am always looking at ways to bounce my flash. One final tip is to crop out the wall or ceiling that you are photographing, that way you don’t end up with a distracting bright wall in your photo.
Camera settings
In terms of camera settings I rely heavily on the Auto TTL system which works for me, so all I do is set the camera in manual mode so something like 1/60th of a second, ISO 1000 and let TTL do the rest. If you have a light subject and dark background, you can bring in more ambient light by:
- Increasing ISO
- Have wider aperture, lower F number
- Slowing down the shutter speed
The more ambient light you drag in, the less “obvious” the flash effect. When it is a really dark scene, and most of the light is actually coming from your flash, I will drag the shutter down to 1/20th which sounds crazy because you could never handhold a shot at 1/20th in daylight. But, as you know the flash helps freeze the frame and hence helps get rid of camera shake. You want to be dragging in as much ambient light as possible if you don’t want your subject to be lit and the background very dark.
One method I use to see what Manual settings to dial into camera is to just take a picture with no flash and if it is totally black then I will increase ISO or switch to a faster lens. One I have the camera dialed-in with my Manual settings for the scene, I will use the flash exposure compensation to properly expose my subject.
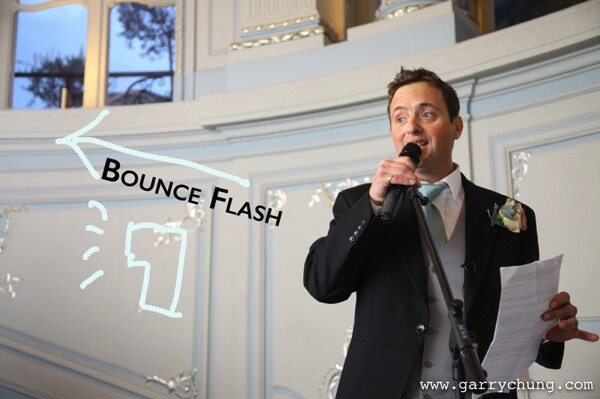
You can see from the below image taken of the best man at a wedding reception, there is no obvious harsh shadow behind him, there is nice light falloff and modelling on his face which adds to 3 dimensional quality of the picture, and the surrounding area is properly exposed. I was kneeling down at the time shooting at 1/30th, 1600 ISO, f/4, 50mm lens with the flash pointed camera left tilted upward behind me about 45 degrees.
Some people put a plastic diffuser on top of their flash what is that for?
I should mention this, many photographers use diffusers on top of their flash to spread the light out in all directions, below are the two most popular products on the market, the Gary Fong Lightsphere and the Stofen Onmi Bounce. There are many more cheaper products, and copies, that essentially do the same thing.
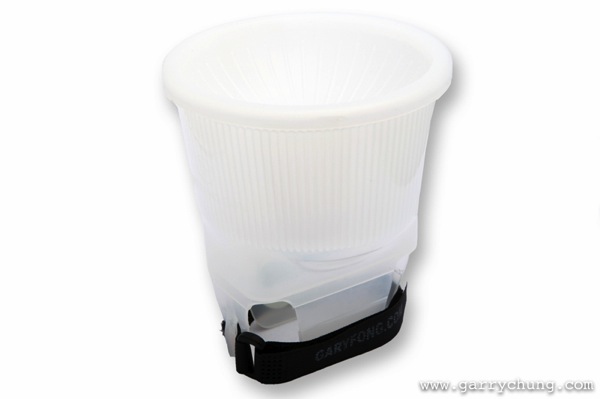
Gary Fong Lightsphere
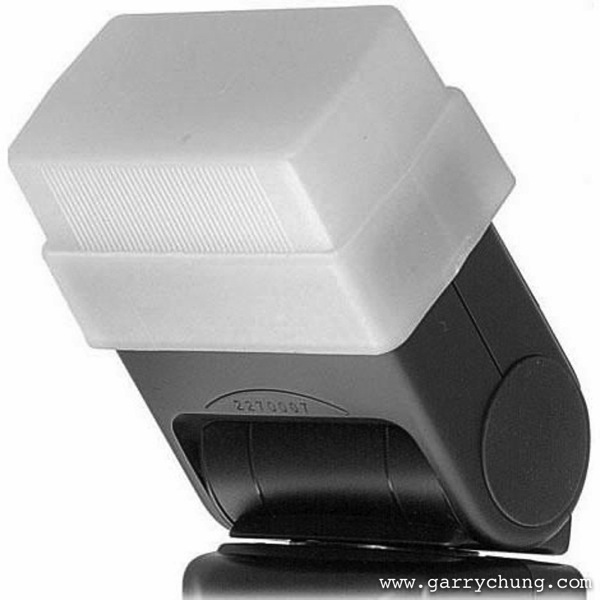
Stofen Onmi Bounce
I have actually owned, and tried, most of the diffuser products and I have nothing against them but I don’t use any of these any more. I prefer more bare bulb bouncing for more directional light and what the diffusers do is the opposite because they spread light in all directions.
Conclusion
Practice makes perfect and I have photographed many wedding receptions in the UK in the winter where it can be pitch black by 5 p.m. Mastering bounce flash technique really improved the quality of my work. Now when I know that there is not enough light and I have to use flash the first thing I do is look for surfaces to bounce off. Remember you have to be adjusting the direction of the bounce dependent on each frame if you are recomposing. So go ahead get a flashgun if you haven’t already and start experimenting with bouncing flash.
The post Bounce Flash Secrets – Bouncing Your Way to Better Photography by Garry Chung appeared first on Digital Photography School.