RSS
 

Posts Tagged ‘Bounce’

Kenko’s new flash automatically moves its own head for optional bounce lighting

25 Sep

Accessories manufacturer Kenko has introduced a flash unit that automatically rotates and tilts its own head to bounce its output from ceilings and walls to provide the ideal soft lighting. The Kenko AB600-R follows the lead of Canon’s Speedlite 470EX-AI by using motors to move its own head into the ideal position to suit the room and the subject, as well as the orientation of the camera.

The new flash unit measures the distance between itself and the subject, as well as between itself and the bounce surface, and automatically calculates the best angle from which to direct its light. The user can also position the head manually and have the flash unit rotate itself when the camera is turned to be used in a different orientation or at an angle.

Where the Kenko flash differs from the Canon model is that it has a guide number of 60m/197ft at ISO 100 (using the 200mm setting) and it offers radio control for wireless operation as well as optical. In wireless mode the unit can act as a master or slave, and can be controlled additionally via the WTR-1 wireless transceiver.

The zoom head can track focal lengths of between 24mm and 200mm, and with the built-in diffuser lowered it will cover the angle of view of an 18mm lens. First and second curtain triggering options can be set, and strobe and high speed sync modes are also available.

The head is powered by 4 AA batteries, but can also be powered by the BP-1 external battery pack and comes with a two-year guarantee. At the moment it comes with i-TTL compatibility for Nikon users (though B&H is advertising a Canon version – but showing the Nikon one), and costs $ 400 / £400. It is expected in stores in November. For more information see the Kenko website.

Manufacturer information

New: AI Flash AB600-R

An electronic flash with Auto Bounce and Angle Lock functions.

The Kenko AB600-R is a high-power, ‘Advanced Intelligence’ flashgun which enables photographers to raise their game to another level, helping them automate the lighting process and get the best results every time.

Amongst its many features, the Kenko AI flash AB600-R incorporates an ‘AI’ Auto-Bounce function that takes care of the most difficult part in the shooting process: Bounce flash. By automatically calculating and moving to the optimum bounce angle, it enables the photographer to concentrate on the artistic part of the process, achieving better results in a more efficient way.

3D Auto Bounce function – The auto-bounce function of the Kenko AI flash AB600-R automatically calculates the most appropriate angle of light-bounce from the wall (left or right side) or from the ceiling. With the help of the auto bounce function, the photographer can accomplish a perfect shot with just a single shutter release; no more wasting time thinking and testing the optimal light path during the photo session. This function is invaluable for wedding photographers or anyone shooting portraits to a tight schedule, when the photographer has no time for failure. Auto Lock function – Allows the photographer to adjust the desired bounce angle, based on the automatically calculated one, in manual mode and lets the system remember this angle when the camera is turned from horizontal to vertical format. This allows the photographer to really focus on the artistic part of the shooting process, like composition and interaction with the model, making the process of getting the ideal shot so much quicker and easier.

Guide number: 60 – With a maximum guide number 60 (ISO 100 at 200mm), the Kenko AI flash AB600-R has all the power it needs to deal with wide range of scenes and situations.

Master to slave flash angle remote control – The built-in radio transmitting and receiving unit allows a master flash to control the bounce angle of the slave flash remotely.

Optical and radio (2.4GHz) wireless control – For off-camera and multiple flash shooting. Sync terminal is also supported.

Auto and manual zoom adjustment – Light coverage angle equal to the 18-200mm range (18mm achieved when used with the wide diffuser panel). External power supply – The optional BP-1 battery pack supports longer shooting sessions and delivers faster recycling times. Firmware updates – The Kenko AI Flash AB600-R firmware can be updated via micro USB port.

  • Zoom Range: 20-200mm (18mm using wide diffuser panel)
  • Flash Modes: i-TTL-BL / i-TTL / Manual / Strobe (1-200Hz), 1st/2nd curtain sync, high-speed sync
  • Power: 4x AA type batteries (alkaline / Nickel Metal Hydride), or external BP-1 battery pack
  • Recycling Time: Approx. 0.1-3.5 sec (using NiMH batteries)
  • AF beam assist: 29 point AF
  • Exposure adjustment: -3.0 to +3.0 stops (TTL mode), Full power to 1/128 power (Manual mode)
  • Wireless Communication Systems: Optical and Radio (2.4GHz)
  • Bounce Mode: AI Auto bounce / Manual bounce (both with angle lock function)
  • External Connections: Micro USB (for firmware updates) / Sync terminal / External power supply
  • Dimensions (HxWxD): 196 x 80 x 62mm

Articles: Digital Photography Review (dpreview.com)

 
Comments Off on Kenko’s new flash automatically moves its own head for optional bounce lighting

Posted in Uncategorized


A Quick Guide to Using Bounce Flash for More Natural-Looking Photos

09 Mar

Creating a portrait using flash is a whole lot more than just pointing your flash at your subject and taking the shot. Learning how to use flash creatively opens up a variety of new lighting options – which you can use to make the picture you envision in your head show up on your camera’s LCD screen. In this article, we’re going to look at using bounce flash.

Bounce flash is a handy trick you can use in a pinch to improve both the quality and amount of light in your finished picture using a flash unit right on top of your camera.

A photo taken using bounce flash to light the subject

The soft lighting for this image was created using a single flash, positioned on the camera and pointed directly up at the ceiling.

What is bounce flash?

Bounce flash is exactly what it sounds like. You aim the flash unit on your camera at a ceiling or nearby wall so that the light reflects off it and then back towards your subject.

This may seem like a really roundabout way of providing illumination, but there are a number of excellent reasons why you would want to bounce your flash, such as:

  • It quickly creates soft light.
  • It can be used to create directional light.
  • Helps you avoid the drawbacks of direct flash.

Let’s go through each of these points in more detail to get a better sense of how to use bounce flash to improve your photography.

Left: On-camera flash rotated to bounce off a wall to the side. Right: Built-in flash that cannot be rotated or bounced.

1. How does bounce flash create soft light?

One of the most important factors in determining how soft the light in your image will be is the apparent size of the light source. Notice I said “apparent size” – not “actual size”.

Your pop-up flash or attached speedlight are small light sources – so if you aim them directly at your subject you get harsh lighting. This is why photographers often use softboxes, umbrellas or other modifiers to create a larger source of light – which makes the light softer.

You can use this same concept to quickly create a larger apparent light source by bouncing your flash off a roof or wall and spreading out the light.

Direct flash is that which is aimed right at the subject.

Direct flash – not flattering to the subject and creates a harsh shadow on the wall behind.

Flash aimed at the ceiling to bounce the light and soften it.

Flash bounced off the ceiling – much more even and softer lighting.

2. How can bounce flash create directional light?

Understanding the direction from which the light is coming – and using that to your advantage – can have a huge impact on the quality of your photos.

Without flash, you’re at the mercy of whatever ambient lighting is available. When you are indoors in a dimly lit room, that ambient light is often rather unpleasant as the light usually comes from the ceiling overhead. This casts deep and dark shadows under people’s eyes – not at all a flattering look for a portrait.

By setting up near a wall, you can bounce your flash off it and effectively create a new light source that sweeps in from the side. Think of it as creating a new window to add more light to the scene. This new light will fill in those ugly shadows for a much more pleasing look.


The result of the flash being bounced off the wall to camera left is more directional light as seen here.

3. How does bounce flash improve on direct flash?

Sometimes a direct flash can significantly improve an image. Sometimes it results in redeye, awkward shadows, and a deer-in-headlights look.

Using bounce flash solves the red-eye problem since that is caused by light reflected directly back at the camera from the back of the eyeball. When your main light is bouncing in from overhead or from the side, you can also say goodbye to large shadows cast by your subject onto the background.

Lastly, direct flash creates boring lighting that flattens facial features and textures. Bounce flash results in more sculpted light that can be used to accentuate features and show depth.

Example of a photo taken using direct flash as the key light

This portrait was taken with direct flash, causing a harsh shadow on the back wall and a bad case of red-eye (Settings: 1/80th, f/3.2, ISO 500)

Example of photo taken without using any flash, high ISO

Without using flash, I had to bump the ISO up to 6400 in order to keep the right exposure. The colors are dull and there is a lot of noise in the shot (Settings: 1/80th, f/3.2, ISO 6400)

Example of a photo taken with bounce flash

With bounce flash, the light on the model is soft and even. There is a glimmer of catch-light in the subject’s eyes and no shadow on the back wall. (Settings: 1/80th, f/3.2, ISO 500)

What do you need to get started with bounce flash?

In order to shoot bounce flash, the bare minimum you will need is an external flash unit with a head that can swivel and tilt.

If you are planning on buying a new flash, make sure to research how it can be maneuvered. Some cheaper models will provide more flash power than your standard in-camera pop-up flash, but if they can’t be adjusted to tilt and swivel then you won’t be able to use them for bounce flash lighting.

Get a flash that can both rotate (swivel) and tilt (up and down) in order to do bounce flash.

Balancing the light

When shooting with flash in a bright room, you need to perform a balancing act in order to keep the light looking natural. This is the case with bounce flash as well.

A flash picture essentially has two exposures:

  1. The ambient, or available light, which is all the light from windows, light bulbs, candles, chandeliers, etc.
  2. The light from your flash.

As the photographer, you need to balance these two exposures to create the image you want. Fortunately, this doesn’t mean that you need to go around flicking light switches until you get the exact amount of brightness needed for each shot – your camera settings can control how much light will be in the final shot.

In this image, the flash is too strong and the exposure is not well-balanced with the ambient light in the room. Exposure here was: 1/125th, f/4, ISO 250, flash was ETTL with +2 Flash Exposure Compensation.

Aperture:

Opening up the aperture will allow more light in, effectively increasing the flash power and also making the camera pick up more of the ambient light

ISO:

Increasing your ISO means the sensor “collects” more light. Again, this effectively increases the power from your flash as well as the influence of the ambient light.

Shutter Speed:

Here’s where a lot of control comes in. As long as you stay within your camera’s maximum sync-speed, your flash will influence the final shot regardless of the shutter speed. On the other hand, a long shutter speed will collect a lot of ambient light, and a short shutter speed will collect less, often drastically affecting the final image.

It may take some time to get used to this balancing act with aperture, ISO, and shutter speed so that your bounce flash shots give you well-lit subjects with natural-looking lighting.

The inside of a car, lit by bounce flash

Firing a flash into the roof of the car creates soft, bounced light that really makes all the surface details shine.

Other details to keep in mind

Flash Power

Since the light from your flash has to travel the extra distance to bounce off a wall or ceiling before reaching the subject, you can’t use your camera’s ETTL metering as is to determine the amount of power needed. Your camera assumes that you are using direct flash, so if you don’t make any adjustments, the flash power will always be a bit too low.

Increase your camera’s flash exposure compensation depending on the distance to the surface you are using to bounce the light. For a typical ceiling in a home, this might be an adjustment of +1/3 or +2/3. If you are photographing in a hall with high ceilings, you may need to boost your flash by +1 or even more.

A young man photographed using bounce flash

A seamless background and soft light from bouncing the flash off a slanted ceiling gives this picture the type of quality you might expect from multiple flashes and a studio setup.

Color

Important question: What color is going to be reflected back at you if you shoot a flash into a pink wall?

Yup, you guessed it – it’s gonna be pink. The light from your flash is going to take on whatever color it bounces off. So unless you’re going for that funky, unnatural pink look, you’ll want to make sure you bounce your flash off neutral-color surfaces like whites, grays or blacks. (Alternatively, you can shoot or convert to black and white.)

Don’t blind people!

As you start to discover how fun it is to swivel your flash around and create dramatic and interesting light, it can be easy to forget where your flash is pointed. If an unfortunate passerby steps between the wall and your flash just as you fire off a shot, they might get an unwelcome blast of light. It’s a good idea to check and make sure the coast is clear before snapping each shot.

Give it a shot!

Bounce flash is a handy trick in your arsenal to help you land that perfect shot when the situation allows for it. So tilt your flash up and give it a try!

The post A Quick Guide to Using Bounce Flash for More Natural-Looking Photos by Frank Myrland appeared first on Digital Photography School.


Digital Photography School

 
Comments Off on A Quick Guide to Using Bounce Flash for More Natural-Looking Photos

Posted in Photography


How to Use Your On-Camera Speedlight to do Bounce Flash Effectively

26 Jul

An on-camera flash (or speedlight) is the tool many photographers own, but few know how to use. Every day I see this amazing piece of equipment go to waste, slamming harsh light into a subject, when it could be caressing it with soft, directional illumination. The flash is a sculptor’s chisel, not a sledgehammer. You just need to know some basic technique.
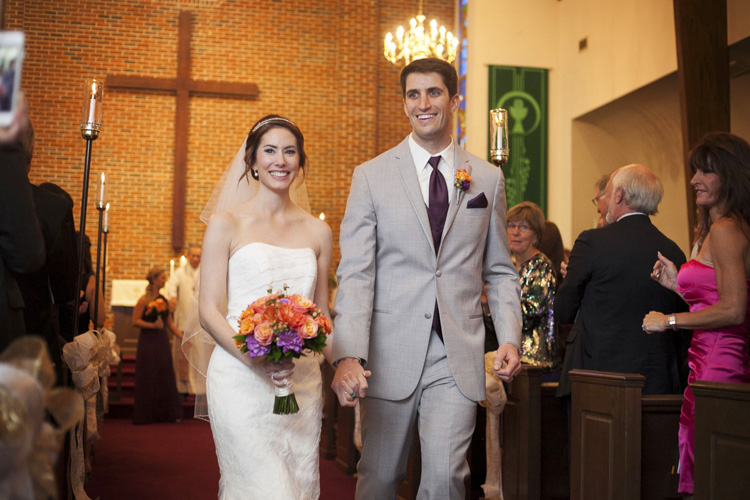
Photo6

In the 400-plus weddings I’ve photographed over the years, much of what I shoot indoors is lit with a speedlight. I have a trunk full of studio lights that I’ll set up and use sometimes at events, but more often than not, I end up preferring the photos from my little on-camera flash (not to be confused with the built-in one). You can create beautiful light bouncing your flash off of walls, ceilings, mirrors, professional wrestlers or herds of sheep.

Let me illustrate with a few examples, using my favorite model, my wife Karen. Every photo below is taken with the same lens (50mm), shutter speed (1/180), and aperture (f/4). We also don’t move at all. We are about 10 feet in front of a gray paper backdrop, white walls to the left and right are about seven feet away. The ceiling is also white. The only thing that changes in these photos is that I am spinning my flash head into different positions.

WHAT NOT TO DO

Photo1

In our first example, I’ve photographed Karen with direct flash. (She is laughing because she thinks I’m incompetent for having my flash in that position).

This is harsh, flat light. There is a nasty shadow on the background. This is the opposite of bounce flash, and typically a last resort flash position. Let’s move on.

A SLIGHT IMPROVEMENT

Photo2

Here I’ve improved things a bit by bouncing my flash off the ceiling. This has softened the light, but it is still coming from overhead, creating unattractive shadows under her eyes, and a lack of catchlights. We can do better!

LOOKING GOOD

Photo3

Here I’ve pointed my flash to the side, so it bounces off the wall to my left, giving me some softness and better directionality and volume of light. I think this is a keeper!

WHAT HAPPENED HERE?

Photo4

Just for fun, I turned my camera upside down here and pointed the flash at the floor, so the light is coming up from below. We call this Franken-light (monster lighting). Not something you are going to do a lot, but if you ever get hired to photograph a vampire, this is a good one to have in your toolkit.

All of these photos illustrate the two main factors I think about when shooting bounce flash: light direction and light quality (softness).

LIGHT DIRECTION

This just refers to the direction the light is coming from, something that is very easy to control with a bounce flash. If you point your flash up at the ceiling, it will hit your subject coming from above. If you bounce your light off a wall to the right, the light will come back from the right, etc.

Photo5

Check out this simple portrait of a wedding guest (above). She was looking to her right in the photo, so I bounced the light off a wall on that side to get some beautiful light into her face. If the next person I want to photograph is facing the other way, all I have to do it spin my flash 180 degrees and bounce it off the opposite wall. This sort of versatility is wonderful when shooting live events.

Photo6

In this photo of a just married couple walking down the aisle, I bounced my flash off a wall to the left again, to get some wonderful light on them. If you look at the people in the background, you can get an idea of the ambient illumination in the room.

The nicest light often comes more from the side than from above. If you fire your flash 90 degrees to your left, the light will come back from the left at 90 degrees. Incidentally, this is a similar angle to the great light you can get at dusk and dawn.

LIGHT QUALITY (SOFTNESS)

The softness of your light is mainly affected by the size of your light source. With bounce flash that is the section of wall or ceiling illuminated by your flash. I think this is the hardest concept for people to get with bounce flash. Just think of your light source as the surface that is illuminated by your flash (rather than the flash itself).

The bigger the light source, the softer the light. In other words, the larger the area you cover with your flash, the softer the light coming back. To cover a larger area with bounce flash, simply move farther from your bounce surface, to allow the light from the flash to spread out more. A lot of flashes also allow you to zoom the flash head in and out, creating a narrower or wider beam (a wider beam allows the flash to spread out faster, and vice versa).
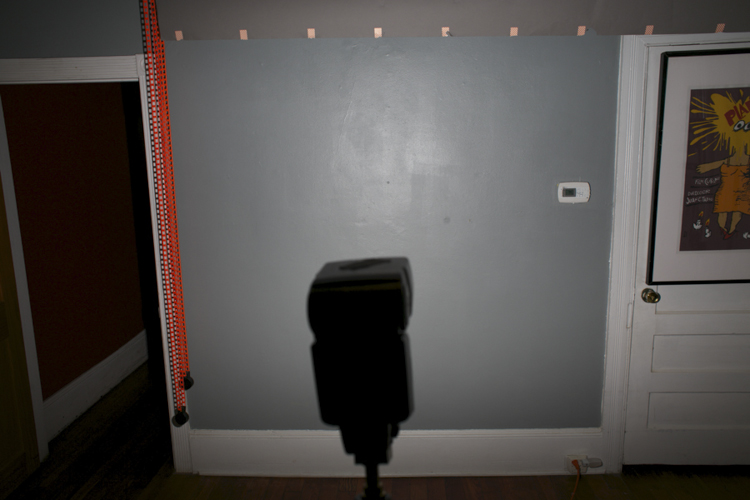
Bounce sample 1

This can be a little hard to visualize, so I’ve taken a couple of photos to help illustrate how it works. In the first photo (above), I have my flash head zoomed all the way out, to create the widest beam possible. I then fired it at a wall in my studio about 10 feet away. As you can see, the flash lights up most of the wall. This would makes for some nice soft light bouncing back towards us.

In the second photo (below), I have moved my flash closer to the wall with the same amount of zoom. As you can see, it is lighting up less wall now, meaning the light source is getting a bit smaller (more harsh/hard – less soft).
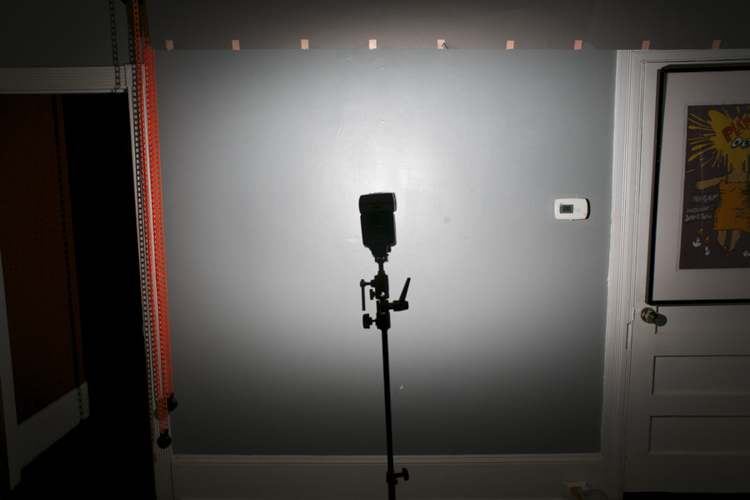
Bounce sample 2

In the third photo, I’ve kept the flash in the same position, but zoomed in the flash head all the way. So the light source is now smaller still (the area on the wall which is reflecting light is the light source).
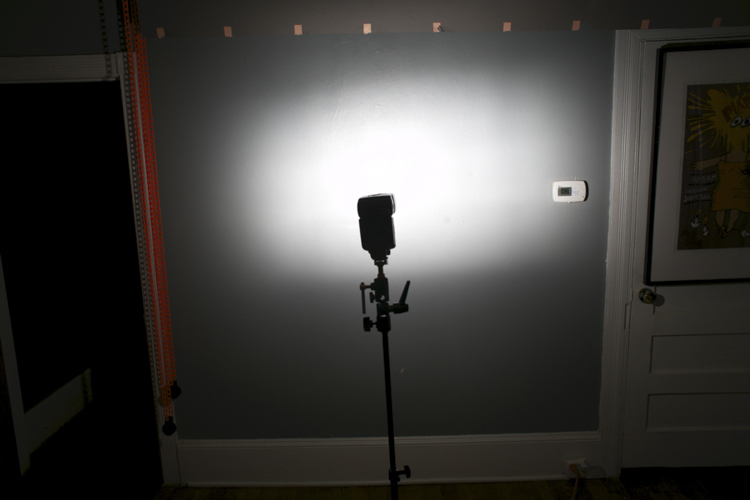
Bounce sample 3

What you may not realize is that you can send your light all the way across a massive hotel ballroom, for example, and have it come back nice and soft. In the photo below of adoring parents listening to a wedding speech, the light from my flash is traveling 20 or 30 feet to the wall and back. The farther it goes, the more it spreads out, and the softer the resulting light. Beautiful!

Photo7

POWER ISSUES AND TRICKY LOCATIONS

Now there is a limit to your flash power, and therefore, to how far away you can be from your bounce surface. Fortunately with digital cameras it’s easy to do some quick tests to see what you can get away with.

For example, let’s say you find yourself in a huge convention space photographing the keynote speaker at the annual prune sellers convention. The lighting in the room is from horrible overhead spotlights, and if you don’t improve upon it you’ll never get another job from this plum client. So you try bouncing your flash off a wall to the speaker’s left, but your flash just isn’t powerful enough. Your image is underexposed and your camera batteries are straining to recharge the flash.

In this situation, you can try a couple of different things to fix your problem:

  1. Ramp up your ISO as high as you can.
  2. Open your aperture up as much as possible.
  3. Zoom your flash head in as far as it will go, to narrow the light beam you are firing at the wall.

If nothing works, you may have to resort to shooting direct flash, but that should be a last resort.

Off course you won’t always be in white-walled rooms, but you can usually find something to bounce off if you look around. White ceilings and dark wood walls? Bounce off that ceiling (but try to point your flash slightly to one side or the other to give some better directionality to your light). You can also bounce off of darker surfaces. If the surface isn’t black, that means it is still reflecting some light and you can bounce a flash off it.

I’ve bounced off of everything from brick to wood paneling, though admittedly these surfaces do suck up a lot of your flash output and drain your batteries faster, so they aren’t ideal (they will also add a color cast to your image).

When I walk into a space where I’m going to use bounce flash, I immediately look around and think about what my bounce surfaces (light sources) could be. I’ll identify the surfaces that look good (generally light colored/reflective things), and position myself so I can use them to my advantage.

Let’s look at some more examples:

Photo8

This wedding couple is having their first dance at the Peabody Library in Baltimore, a very large space that doesn’t even have complete walls to bounce off, just columns, because of the way the library stacks are arranged. But I cranked my ISO up to 4000 and was able to bounce my flash and get some nice light for the photo.

Photo9

I’ve also included a photo above showing the entire space so you can get a better idea what I was dealing with.

Photo11

This sleepy little girl was photographed at a wedding reception at a country club in Virginia. I bounced my flash off a wall about 30 feet to my left, and got a little help from the purple lighting in the background.

Photo12

This wedding portrait was made at night at Camden Yards baseball stadium in Baltimore. This was outside and there was nothing to bounce a flash off, so I had an assistant hold a white reflector behind me to camera left, and I bounced my flash into that.

As I write this article, I’m sitting in a dark restaurant with a black ceiling, dark walls, dark carpet and dark furniture. It’s a real light-sucking pit, but there are a bunch of framed photos on the wall, and also a mirror. I’m pretty sure I could bounce a flash off of those and get some decent light if I needed to.

You can get really good at bounce flash fast. Once you are aware of the possibilities, it’s just a matter of experimenting, and refining your technique. Look around your environment and ask yourself what you can use as a bounce surface. Look at your subject and think, “Where do I want the light to come from?”

Then experiment, point your flash to the right, to the left, behind you. Before you know it, you’ll be a bounce flash master!

Please share your bounce flash tips and images in the comments below.

googletag.cmd.push(function() {
tablet_slots.push( googletag.defineSlot( “/1005424/_dPSv4_tab-all-article-bottom_(300×250)”, [300, 250], “pb-ad-78623” ).addService( googletag.pubads() ) ); } );

googletag.cmd.push(function() {
mobile_slots.push( googletag.defineSlot( “/1005424/_dPSv4_mob-all-article-bottom_(300×250)”, [300, 250], “pb-ad-78158” ).addService( googletag.pubads() ) ); } );

The post How to Use Your On-Camera Speedlight to do Bounce Flash Effectively by Dennis Drenner appeared first on Digital Photography School.


Digital Photography School

 
Comments Off on How to Use Your On-Camera Speedlight to do Bounce Flash Effectively

Posted in Photography


Bounce Below: World’s Largest Underground Cave Trampoline

21 Jun

[ By Steph in Destinations & Sights & Travel. ]

Bounce World Underground Trampoline 1

Deep in a former Welsh slate quarry mining cavern twice the size of St. Paul’s Cathedral, children and adults alike gleefully jump up and down on a system of netting suspended from the walls. Bounce Below, the world’s largest underground trampoline, will open to the public July 3rd in the mining town of Blaenau Ffestiniog.

Bounce World Underground Trampoline 2

Operated by Zip World, the new tourist attraction features three massive trampolines that ascend from twenty feet to 180 feet above the bottom of the cavern, with ten-foot net walls preventing anyone from falling over the edge. Customers get dressed in cotton overalls and put on helmets, then board a train that travels deep into the mountain.

Bounce World Underground Trampoline 4

Bounce World Underground Trampoline 3

They disembark to the sight of the trampolines within the colorfully lit space. Each trampoline is linked by a slide for descending and a net walkway for getting back up. The largest slide is 60 feet long. A spiral staircase leads to the other side of the railway line.

Bounce World Underground Trampoline 5

Workers prepared the space by carrying about 500 tons of rubble out of the cavern, the task illuminated with portable lamps. The mining of slate in Wales dates back to Roman times and the industry peaked in 1898 with 17,000 employees, but by the end of World War II, the introduction of new roofing materials led to many of the mines closing.

Share on Facebook


[ By Steph in Destinations & Sights & Travel. ]

[ WebUrbanist | Archives | Galleries | Privacy | TOS ]


WebUrbanist

 
Comments Off on Bounce Below: World’s Largest Underground Cave Trampoline

Posted in Creativity


Bounce Flash Secrets – Bouncing Your Way to Better Photography

08 May

If you have ever seen a professional photographer using flashgun on top of their camera, and wondering why the flash is not pointing directly at the subject, that’s because they are bouncing the flash. In this article I will reveal to you the secrets of bounce flash, which I have learned over the years working as a professional wedding photographer. I will unveil my killer techniques that will allow you to bounce your way to better photography.

If you are new to photography you may be apprehensive about using flash. I understand. A lot of it has to do with when you first buy a point-and-shoot camera the flash on it just creates a horrible direct flash look and that is what you associate with flash photography. Once you master the art of bouncing however, I promise you will never look back.

Garry Chung Photography 100

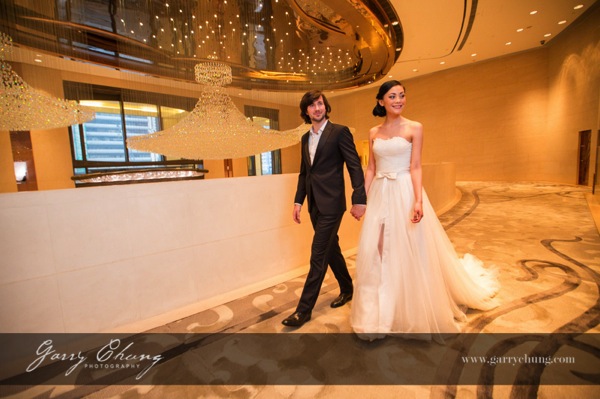
The image above is lit by bouncing flash off the wall on the right side, just out of frame. Notice how it doesn’t look obviously flashed.

What is bounce flash?

Bounce flash is when, rather than firing your flashgun pointing directly at your subject, you point it elsewhere typically up or at an angle, bouncing off a wall or ceiling. The objective is to “bounce” light to soften it before it hits your subject.

Why bounce it and not point directly at my subject?

Because generally speaking direct bare flash, pointing at your subject, is terrible for two reasons:

  1. The light is “hard” and can cash horrible shadows on your subject. It just generally is not very nice light for portraits. The definition of hard and soft light if you are confused is simply the transition the light makes between shadow and highlights. A gradual transition is called soft light and a sudden transition where you have a strong shadow edge is called hard light. Portrait photographers talk a lot about nice soft quality light and that is why they use light modifiers such as soft boxes and umbrellas.
  2. Direct flash produces “flat lighting” which gives that deer in the headlights look and also does not give a 3-dimensional quality to the photo

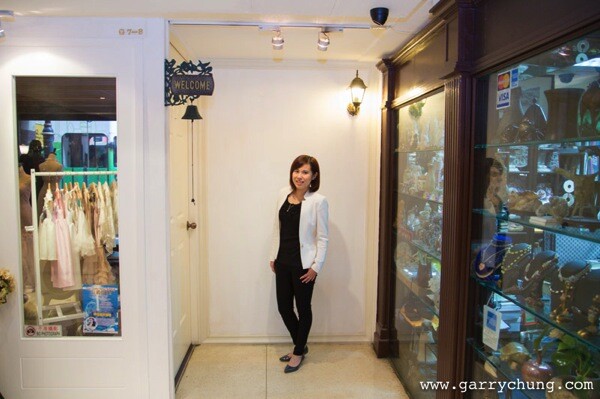
It is probably easier to show you in pictures so here are a few images of my friend Theresa, that I took just to illustrate the point. Just to set the scene, below is the area where I took these photos. This is a shopping center in Hong Kong and I have chosen the area because of the white walls.

Bounce flash 100

This was shot with the flash pointed directly at the subject. Because there were a lot of white walls surrounding Theresa, there was a lot of wrapping light and it didn’t turn out too bad. But, there is a hard shadow in the neck area and the lighting is flat.

Bounce flash 101

Manual Mode, 50mm lens, f/4, 1/80th, ISO 800, flash in ETTL Mode

This was shot with the flash tilted upwards towards ceiling. The light is much softer and you can see that the shadow on her neck is softened. It’s OK but could be better.

Bounce flash 102

Manual Mode, 50mm lens, f/4, 1/80th, ISO 800, flash in ETTL Mode

This is the way I would light this portrait. The flash is tilted, in this case aimed to bounce off the wall to the left, and bounce back. The result is a nice soft light, and also notice the eyes have better catch lights.

Bounce flash 103

Manual Mode, 50mm lens, f/4, 1/80th, ISO 800, flash in ETTL Mode

But wait, I think I can do one better. I want a more dramatic and contrasty image so I cut out the ambient light by setting a faster shutter speed and stopping down to f/8. Still with the flash pointed to the left I now have my nice professional high key headshot, one flash on camera, no light modifier shot in a shopping mall.

Bounce flash 104

Manual Mode, 50mm lens, f/4, 1/200th, ISO 800, flash in ETTL Mode

When do I bounce my flash?

Indoors when there is ceiling or wall, preferably a white wall so there is no colour cast in the light, or outdoors if there is a surface nearby to bounce off. I see so many “professional photographers” have their flash pointing upwards when shooting outdoors when there is nothing to bounce off and I assure that does nothing other than sap power from you flash as it requires more power to light your subject.

How do I bounce my flash?

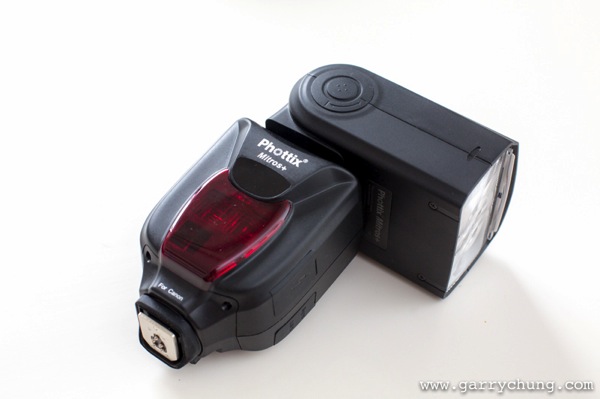
Firstly you will need a hotshoe flashgun (speedlight) that allows you to both tilt and swivel the head such as a Canon 600EX-RT, Phottix Mitros+ or if you are a Nikon user a SB900. Some flashes allow only tilt such as the Canon 430EX. This is not ideal as I like to bounce the flash in all directions.

Bounce flash 105

Phottix Mitros+ with swivel head

Which direction to bounce the flash?

Most people just point the flash upwards, which is fine, but I actually seldom do this because I always want to light a portrait using directional light if possible. So most of the time I am pointing the flash to the side, or tilted behind me to one side to give that nice slimming shadow on the face.

There is a simple formula to achieve this look that I learned from Jerry Ghionis – just point your flash head in the same direction as the nose of the subject so you are bouncing. So you are normally pointing the flash away from your subject, to one side. This is of course assuming that you have something to bounce off within a reasonable distance. The other way is to think of your walls as the light source itself, position your subject, frame your shot and then adjust your flash to target the walls.

Remember if you ware shooting events and weddings to readjust your flash direction when shooting from portrait to landscape. For me I am always looking at ways to bounce my flash. One final tip is to crop out the wall or ceiling that you are photographing, that way you don’t end up with a distracting bright wall in your photo.

Camera settings

In terms of camera settings I rely heavily on the Auto TTL system which works for me, so all I do is set the camera in manual mode so something like 1/60th of a second, ISO 1000 and let TTL do the rest. If you have a light subject and dark background, you can bring in more ambient light by:

  • Increasing ISO
  • Have wider aperture, lower F number
  • Slowing down the shutter speed

The more ambient light you drag in, the less “obvious” the flash effect. When it is a really dark scene, and most of the light is actually coming from your flash, I will drag the shutter down to 1/20th which sounds crazy because you could never handhold a shot at 1/20th in daylight. But, as you know the flash helps freeze the frame and hence helps get rid of camera shake. You want to be dragging in as much ambient light as possible if you don’t want your subject to be lit and the background very dark.

One method I use to see what Manual settings to dial into camera is to just take a picture with no flash and if it is totally black then I will increase ISO or switch to a faster lens. One I have the camera dialed-in with my Manual settings for the scene, I will use the flash exposure compensation to properly expose my subject.

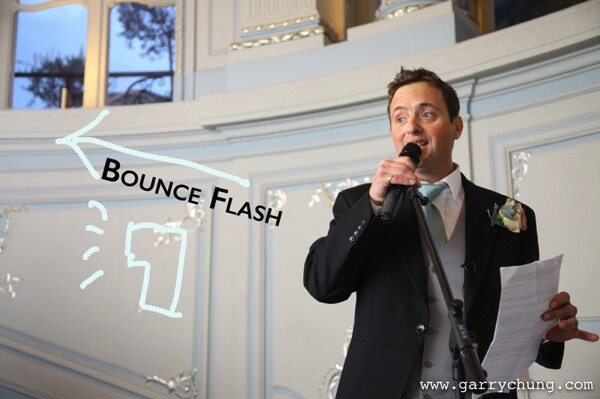
You can see from the below image taken of the best man at a wedding reception, there is no obvious harsh shadow behind him, there is nice light falloff and modelling on his face which adds to 3 dimensional quality of the picture, and the surrounding area is properly exposed. I was kneeling down at the time shooting at 1/30th, 1600 ISO, f/4, 50mm lens with the flash pointed camera left tilted upward behind me about 45 degrees.

Bounce flash 106

Some people put a plastic diffuser on top of their flash what is that for?

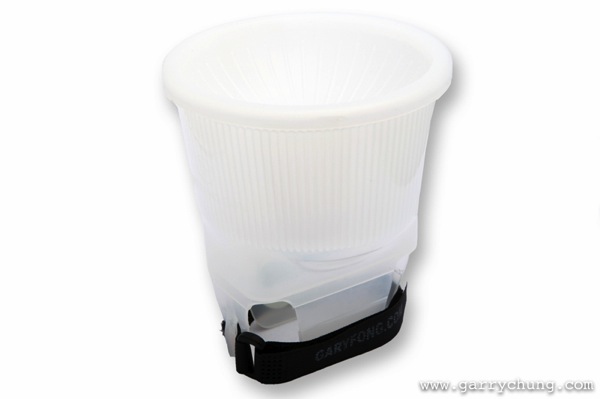
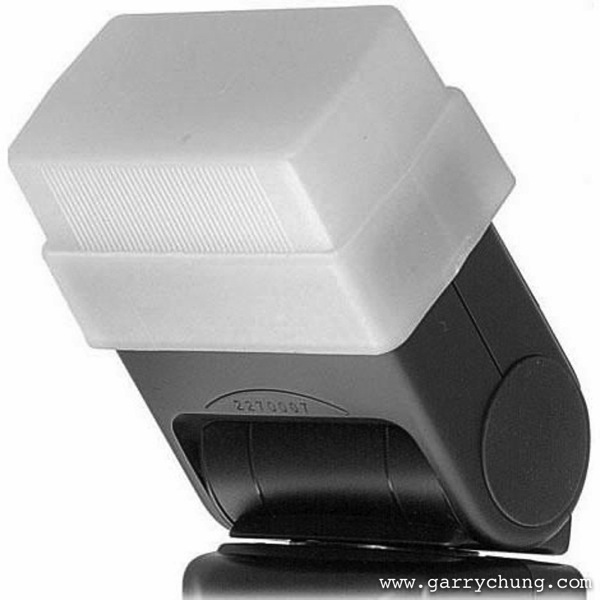
I should mention this, many photographers use diffusers on top of their flash to spread the light out in all directions, below are the two most popular products on the market, the Gary Fong Lightsphere and the Stofen Onmi Bounce. There are many more cheaper products, and copies, that essentially do the same thing.

Bounce flash 2

Gary Fong Lightsphere

Bounce flash 3

Stofen Onmi Bounce

I have actually owned, and tried, most of the diffuser products and I have nothing against them but I don’t use any of these any more. I prefer more bare bulb bouncing for more directional light and what the diffusers do is the opposite because they spread light in all directions.

Conclusion

Practice makes perfect and I have photographed many wedding receptions in the UK in the winter where it can be pitch black by 5 p.m. Mastering bounce flash technique really improved the quality of my work. Now when I know that there is not enough light and I have to use flash the first thing I do is look for surfaces to bounce off. Remember you have to be adjusting the direction of the bounce dependent on each frame if you are recomposing. So go ahead get a flashgun if you haven’t already and start experimenting with bouncing flash.

The post Bounce Flash Secrets – Bouncing Your Way to Better Photography by Garry Chung appeared first on Digital Photography School.


Digital Photography School

 
Comments Off on Bounce Flash Secrets – Bouncing Your Way to Better Photography

Posted in Photography


Bounce House for Adults: Blow-Up Bubble Strung with Nets

21 Nov

[ By Steph in Architecture & Public & Institutional. ]

Inflatable Bounce House for Adults 1

Admit it – you’re jealous of the little kids who get to romp in those inflatable bounce houses. Once we reach a certain age (or weight), we’re just not welcome in those primary-colored playgrounds any longer. But some lucky kids-at-heart got a chance to relive the fun of that experience with ‘Net Blow-Up,’ most recently installed near the waterfront in Yokohama by Croatian-Austrian design collective Numen/For Use.

Inflatable Bounce House for Adults 2

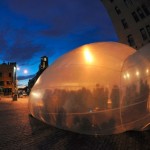
The inflatable play structure looks like a big white bubble in its spot beside the water, glowing like a lantern once the sun goes down. Inside, it’s strung with multiple levels black netting that’s just stretch enough to climb, jump and flip to your heart’s desire.

Inflatable Bounce House for Adults 3

Inflatable Bounce House for Adults 4

Watching it from the outside might be almost as fun as bouncing around within it, as the soft-sided structure deforms and mutates with each movement of those inside. “The outer membrane acts both like a ‘soft box’ diffuser of the outside light, or a projection screen in case of inner illumination of the installation,” say the designers.

Inflatable Bounce House for Adults 5

Inflatable Bounce House for Adults 6

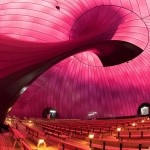
Inflatables are popular as temporary installations, since they’re so easy to install and take down. Plus, they tend to have a lighthearted, comical look. Two recent examples include the Bridge in Paris and the world’s first inflatable concert hall, the Ark Nova.

Share on Facebook


[ By Steph in Architecture & Public & Institutional. ]

[ WebUrbanist | Archives | Galleries | Privacy | TOS ]


WebUrbanist

 
Comments Off on Bounce House for Adults: Blow-Up Bubble Strung with Nets

Posted in Creativity


DSLR Flash Photography Tutorial – Beginner Speedlight / Bounce Flash Tutorial using Nikon SB700

06 Feb

www.facebook.com www.PhotographersOnUTube.com


DSLR Photography Tutorial – Pop Up vs Bounce Flash – Nikon D7000 pop up vs Nikon SB700 speed light

05 Oct

www.facebook.com www.PhotographersOnUTube.com In this video I am comparing Pop Up flash with a Bounce flash or speed light. We’ll look at some sample pictures taken with Nikon SB700 and Nikon SB800 Nikon and Canon flashes can cost a lot of money but you could try third party flashes like Vivitar. As soon as my site is completed I will list inexpensive items for people on tight budget. Sometimes photography on budget can pay off. You just have to do your homework. If these videos are helping you, then please RATE, COMMENT and SUBSCRIBE for future videos. Also, join us on facebook for exclusive behind the scene videos coming soon. http Until next time, you keep clicking 🙂
Video Rating: 4 / 5

froknowsphoto.com I got really amped up about a certain subject and figured it was time for a RANT!!!! I get ranting on a lot of things so best click here to see the full article. froknowsphoto.com


The Bounce Squad 2009

16 Dec

different locations, BELGIUM – Professional photographers Bert Stephani (www.bertstephani.com), Pieter Van Impe (www.fotografie-vanimpe.be), Tom Museeuw (www.fotofolio.be), Ake Van der Velden (www.akevandervelden.be) and Isabel Corthier (www.isabelcorthier.com) set of on a 24 hour mission. In that periode we bounced the light on different locations in Belgium. This video is also the start of the video competition by www.squeezethelime.com (great prices to win for inventive photographers).
Video Rating: 4 / 5


Photography Tutorial 12 ( Bounce and Fill Flash )

18 Oct

A more in depth look at bouncing flash and using fill flash to get more appealing images. This is an abridged version of the Flash chapter from my Mastery of Photography Essentials DVD. Hello all who chose to read this far, can you believe this is the 12th installment already. Thanks for watching all these tips and tricks so far, there is so much more to come. =o) You guys Rule!!! If you wish to buy this series on DVD and help me live happily ever after follow this link www.photomagicsocal.com To where I sell my DVDs. Thanks to all who have purchased and all who are about to. Peace
Video Rating: 4 / 5