RSS
 

Posts Tagged ‘Flash’

How to Create Stunning Wide-Angle Portraits (Using an Off-Camera Flash)

25 Jul

The post How to Create Stunning Wide-Angle Portraits (Using an Off-Camera Flash) appeared first on Digital Photography School. It was authored by Ken Koskela.

how to create stunning wide-angle portraits

Wide-angle portrait photography is unique, it’s fun, and it can make for some outstanding photos. But how can you capture great wide-angle results? What’s the secret to powerful portraits like the one below?

wide-angle portrait of girl in the dirt

In this article, I’ll provide plenty of guidance, taking you through the ins and outs of wide-angle portraiture. By the time you’ve finished, you’ll be able to shoot like a pro.

Also, before starting, I’d like to let you in on a little secret:

Creating photos like these? It’s not actually that difficult. You just have to pay careful attention to your camera settings, your technique, and your lighting.

Let’s dive right in!

portrait of a man smoking a cigarette

1. Use a (relatively) wide-angle lens

Lens choice is critically important in portraiture. Most portrait photographers reach for their 85mm or 105mm lens when heading out because these focal lengths give a nice, realistic look to the subjects.

However, I find myself drawn to portraits that have a surreal look to them and that include extra context to help tell the story. Also, wide-angle lenses require you to shoot close to your subject, which also draws your viewer into the scene.

So the first step is to leave your 85mm or 105mm lens in your camera bag and grab a wide-angle lens instead. Most of the portraits you see here were created at 24mm on a full-frame camera (use a 16mm for the same view if your camera has a cropped sensor). For me, this focal length is the perfect blend of reality and distortion.

In fact, if you go wider than 24mm, elements closer to the lens, such as arms and hands, look big or elongated. Also, wider focal lengths require a much bigger background, which isn’t always desirable or convenient.

man crouching by ships

2. Choose a compelling subject

In wide-angle portrait photography, your subject is paramount. The Indonesian dockworker above was an amazing subject; I spent 20 minutes photographing the guy and had a difficult time choosing the best image.

On the other hand, you could spend all day photographing me on the same dock, in front of the same ships, and have nothing but terrible images at the end of the day.

The point? Make sure your subject is genuinely interesting.

I look for people who have experienced life. The ideal subject has some sort of interesting quality, something that makes them stand out from the rest, though my subjects do have an everyday person quality about them. Finding subjects can be challenging, especially if you live in the suburbs (like I do). I am a travel photographer and usually find my subjects in rural areas overseas, but there are great subjects everywhere – you just need to look!

Clothing is critically important. If your 90-year old rural villager is wearing a hat that says, “I Love New York,” then you will probably want to politely ask them to take it off, or at least turn it around for the picture. Don’t let out-of-context clothing ruin or weaken your shot!
4 Smiley Guy

3. Choose a complementary background

Your image is only as strong as its weakest part – which is often the background. This is because, as photographer Jim Zuckerman puts it, “The world is a compositional mess.” So unless you deliberately choose a beautiful background, you’re going to be stuck with, well, a mess.

There are two important qualities you want to focus on:

First, at the very least, your background must be non-distracting. Before snapping a wide-angle portrait, carefully scan the scene and make sure nothing draws the eye. Beginners, and even intermediate photographers, can overlook obvious distractions in the background, such as trees that look like they are growing out of the subject’s head, patchy spots of bright light, colorful objects, straight lines, and geometric shapes. You don’t want anything that competes with your subject for attention, so make sure to simplify your composition until you get what you’re after.

The background in the image below isn’t at all distracting; the man is standing in front of a shipping container, which won’t win any awards for beauty, but gets the job done. Plus, it’s a good picture because of the strength of the subject.

dockworker smoking wide-angle portrait

Second, whenever possible, include a background that complements your subject by providing context. I’ve shot many images with simple, non-distracting backgrounds. But my favorite pictures include a background that tells a story about the subject.

It’s the reason I love shooting in places like rural China and Indonesia. The countries have many ancient villages that provide opportunities for amazing backgrounds, like the path in the photo below:

cheerful man in a hat

A quick piece of advice: I like to keep all evidence of modernity out of the background. I don’t like plastic stuff in my pictures, and I don’t include modern-looking buildings or cars. Instead, I prefer rural areas with weather-beaten buildings. If you’re like me, and you want to create more rustic, pure wide-angle portraits, then I’d recommend you do the same.

4. Shoot in the right lighting conditions

Great wide-angle portrait photography requires great light.

Try shooting either early or late in the day (when the sun is low in the sky) or in overcast conditions. I actually prefer a soft, overcast day (though I still shoot relatively early or late).

5. Put your subjects at ease

I don’t hire models, so some subjects work well and others less well. What you want to avoid is a picture of your subject standing flat-footed, straight up and down, and holding a fake smile.

For that reason, it’s a good idea to start your session by gaining their interest and confidence. If you have some images you’ve shot and processed, show them to your subject to give them an idea of what you are looking for (and hopefully pique their interest).

Plus, showing past photos will help communicate immediately that you are not looking for your subject to just stand and smile. It should also show that your posing expectations are basic.

woman with a cat posing on a chair

6. Work the scene for the best compositions

Once you’ve found the perfect subject, don’t just take one photo and pack up. Instead, take quite a few (assuming your subject has the patience). And as you take your shots, make sure to work the scene.

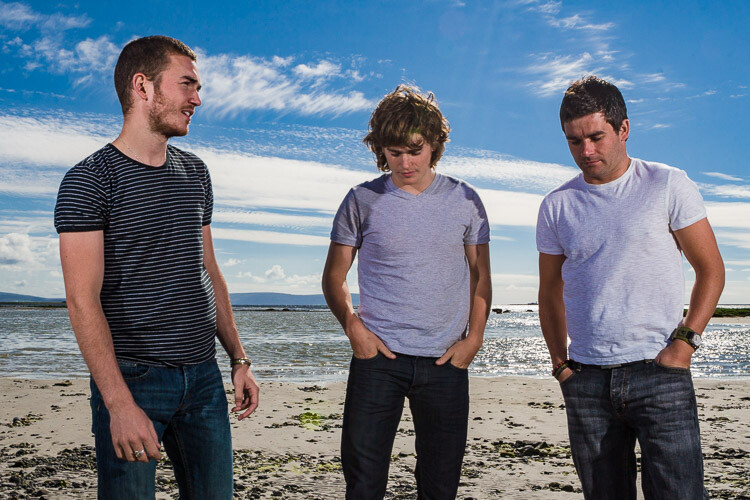
I like to get quite close to my subjects. For me, the eyes are a critically important part of the picture and must be very sharp. I focus on the closest eye, though I re-focus frequently as I move around the subject.

I generally ask the subject to look directly at the camera and not to smile, although not always. I then start moving slightly left or right. I ask them to keep their head still and just follow the camera with their eyes. I usually shoot from slightly below eye level, and I have them stand or sit at an angle to the camera. If the subject is standing, I ask them to put their weight on the back foot.

I like to include the subject’s hands in my compositions. With a wide-angle lens, hands in the foreground will look large, so try to strike a balance (make sure the hands are prominent but not too large). Simply position the hands closer to or farther away from the lens.

girl laughing wide-angle portrait

7. Make sure you have the right equipment and settings

For the best results, you’ll need a camera, a lens, and a single off-camera flash. Your camera should be equipped with an internal or external flash trigger to control your off-camera flash.

Here is how I set things up:

  1. Start by leaving your flash or trigger initially turned off.
  2. Set your camera to Manual mode.
  3. If the session is outdoors, dial in some basic settings – I usually aim for an aperture of f/7.1, a shutter speed of around 1/160s, and an ISO of 100. You can adjust your f-stop and shutter speed, but keep in mind that you cannot shoot faster than your camera’s maximum flash sync speed.
  4. Make the necessary adjustments to slightly underexpose the background by 1/3 to 2/3 stops. I usually start by adjusting shutter speed, but go no slower than 1/60s and no faster than 1/160s. If necessary, adjust the aperture to f/5.6 (at the absolute widest). Then, and only then, should you start bumping up the ISO.
  5. If you are indoors, begin with a higher ISO as a first step, and then make your adjustments to shutter speed and f-stop in the same manner.
woman standing next to building

8. Carefully position your flash for the best results

For 90% of my portraits, I use a single off-camera flash diffused with an umbrella or softbox. I recommend you do the same (while natural light can work, it generally won’t be as sculpted or as dramatic).

The most important rule with flash is “Don’t ruin your shot,” which is usually done by putting too much flash on your subject. Instead, you want to get a decent balance of natural and artificial light, so that the flash is undetectable to the untrained eye but lights your subject brighter than the underexposed background.

Now, turn on your flash and trigger. Here are some starting points:

  • Set your flash to Manual mode.
  • I typically position the flash at a 45-degree angle to the subject, about 2-3 feet (slightly less than a meter) away, higher than their head, angled downward.
  • I usually start with 1/16 flash power when outdoors. Then I adjust from there until the subject stands out from the background but does not look like they’ve been blasted with flash.

Wide-angle portrait photography: conclusion

As you hopefully gathered from this article, capturing wide-angle portraits isn’t hard, and it can look incredible.

So grab your camera, your lens, and your flash, and get out shooting. Remember the tips from this article. And have fun!

Now over to you:

Do you have any tips or tricks for wide-angle portrait photography? What are your favorite lighting setups? Share your thoughts in the comments below!

Table of contents

Portrait Photography

  • GENERAL
    • 15 Common Portrait Mistakes to Avoid
    • 10 Ways to Direct a Portrait Shoot like a Pro
    • How to Photograph People: 7 Tips for Photographers Who Never Photograph People
    • 10 Crucial Things You Need to Think About for Portrait Photography
    • 5 Portrait Photography Rules You Should Probably Ignore
    • Five Budget Portrait Photography Hacks to Save You Money
    • 8 Lessons Learned from My First Attempt at Portrait Photography
    • How Self-Portraiture Makes You a Better Photographer
    • The Photo Critique: Portrait Edition
    • 10 Shots, 10 Portraits, 1 Focal Length: Take this Photography Challenge
    • How I Got The Shot: Portrait Style
  • PREPARATION
    • Tips for Preparing for a Portrait Session
    • 8 Tips to Help Make People Comfortable for Their Portrait Session
    • Clothing for Portraits – How to Tell your Subjects What to Wear
    • How to Plan a Successful Sunset Portrait Session
    • 5 Secrets for Finding Great Indoor Photoshoot Locations
    • 10 Christmas Portrait Locations (with Bonus Lighting and Composition Tips)
    • How to Build a Bench Prop for Great Portrait Photos
    • A Beginners Guide to Taking Portraits of Elderly Clients: Part 1 – Preparation and Rapport
    • How to Scout for Portrait Shooting Locations
    • The Importance of Location for Outdoor Portraits
    • How to Choose Urban Landscapes for Portrait Photography
  • SETTINGS
    • The Best Camera Settings for Portrait Photography
    • How to Achieve Blurred Backgrounds in Portrait Photography
    • How to Bypass the Portrait Mode on Your Digital Camera and Get Great Portraits
    • Understanding the Focus and Recompose Technique
    • Overcoming Depth of Field Problems in Portraits
    • 9 Ways to Ensure You Get Sharp Images When Photographing People
    • Stunning Portraits: Manipulating White Balance
    • Shooting for HDR Portraiture
    • How [Not] to Take a Self Timer Portrait
    • How Focal Length Changes the Shape of the Face in Portraiture
  • LIGHTING
    • 5 Tips How to Set Up a Home Studio for Dramatic Portraits
    • Simple Portrait Setups You Can Create on a Tight Budget
    • How to Eliminate Reflections in Glasses in Portraits
    • Portrait Photography: How to Photograph People in the Harsh Midday Sun
    • 4 Ways to Shoot Portraits in the Middle of the Day
    • 6 Portrait Lighting Patterns Every Photographer Should Know
    • 3 Lighting Setups for Photographing Headshots
    • 6 Ways of Using Reflector to Take Better Portraits
    • How to Create and Shoot Night Portraits
    • How to Make Beautiful Portraits Using Flash and High-Speed Sync
    • How to Make a Low Key Portrait (Step by Step)
    • Fill Flash Photography: How to Get Beautiful Portraits (Even in Bad Light)
    • A Lighting Ratios Guide: How to Make (or Break) Your Portraits
    • How to Mix Ambient Light and Fill-Flash for Outdoor Portraits
    • How to Photograph Fantastic Portraits with One Flash
    • DIY How to Build and Use a Reflector to Take Better Portraits
    • Understanding Light for Better Portrait Photography
    • Tips for Doing Natural Light Headshots and Portraits
    • 3 Reasons to do Headshots with Natural Light
    • A Beginners Guide to Taking Portraits of Elderly Clients: Part 2 – Lighting and Posing
    • How to Create Stunning Wide-Angle Portraits (Using an Off-Camera Flash)

    • Tips for Making the Most of Morning Light for Portraits
    • 5 Ways to Use a Beauty Dish Light for Portraits
    • Beginners Tips for Sunrise Portraits : Part I
    • Getting to Grips with Fill Light in Portrait Photography
    • How to Use Flash for Night Portraits
    • What Size Beauty Dish is Right For Your Portrait Photography?
    • How to Create Catch Lights in Your Natural Light Portraits
    • Tips for Using Golden Hour Light for Portraits
    • Side-by-side comparison between reflectors and diffusers for portraits
    • 6 Tips for Taking Better Natural Light Classic Portraits
    • How to Use a Small Softbox With Your Flash to Transform Your Portraits
    • Simple Tips for Positioning Your Portrait Subject to Leverage Natural Light
    • The Importance of Shadows in Portrait Photography
    • So You Have No Model? Here are Ways to Practice Your Portrait Lighting With Toys
    • How to use Colored Gels to Create Unique and Creative Portraits
    • 3 Steps to Professional Looking Headshots Using One Flash
    • How to Use Two LED Lights to Achieve Moody Portraits
    • Made in the Shade – Why Taking Portraits in the Shade Can be Ideal
    • What Is Good Light? (And How to Use It for Beautiful Portraits)
    • How to do Accent Lighting for Portraits
    • Tips For Great Indoor Portraits Using Natural Light
    • 5 Reasons for Doing Natural Light Portraits
    • Review of the Westcott Eyelighter for Headshots and Portraits
    • How to Use Angle of Light in People Photography for Added Punch
    • High Speed Sync Versus a Neutral Density Filter to Overcome Bright Sunlight in Portraits
    • 5 Creative Portrait Lighting Tricks Using Only Phone Light
    • How to Use Off-camera Flash to Fix Lighting Problems for Outdoor Portraits
    • How to Create Awesome Portrait Lighting with a Paper Bag an Elastic Band and a Chocolate Donut
    • Tips for Using Speedlights to Create the Right Lighting for Outdoor Portraits
    • How to use a Gobo to add Depth to Your Portraits with Subtractive Lighting
    • How to Use Hard Lighting to Create a Dramatic Portrait
    • Portrait Comparison – Flash Versus Natural Light
    • Stealing Light – Using Street Lights for Portraits
    • Five Places for Perfect Natural Portrait Lighting
    • How to See the Light for Portraits: A Quick Tip for Beginners
    • Shooting with Available Light – Lifestyle Portraiture
    • 5 Ways to Light Your Christmas Tree Portraits This Festive Season
    • A Simple Lighting Technique for Couples Portraits
    • Awash In Light: High Key Portraiture
    • A Portrait Lighting Project for a Rainy Day
    • Simple Portrait Lighting Setup: Gorgeous Result
    • How to Achieve Great Portraits with Window Light
    • A Simple Exercise on Working with Natural Light in Portraits
    • Small Flash Portraits on Location with Adorama TV
    • Portraits on an Overcast Day? Use a Reflector
    • Tips for Using Flash for Beach Portraits
    • How to Find and Use Natural Reflectors for Portraits
    • How to Create Dramatic Portraits with Shadow Photography
    • Tips for Portrait Photography in Overcast Weather
    • How to Photograph People Outdoors Without Using a Reflector
    • How To Use an Outdoor Studio for Natural Portraits
  • POSING
    • Female Poses: 21 Posing Ideas to Get You Started Photographing Women
    • Glamour Posing Guide: 21 Sample Poses to Get You Started
    • Posing Guide: 21 Sample Poses to Get You Started with Photographing Men
    • Good Crop Bad Crop – How to Crop Portraits
    • How to Pose and Angle the Body for Better Portraits
    • Posing Guide: 21 Sample Poses to Get You Started with Photographing Groups of People
    • Posing Guide: 21 Sample Poses to Get You Started with Photographing Couples
    • Your Guide to the Best Poses for Engagement Photos
    • How to do Gentle Posing: A Collection of Prompts to Get You Started
    • Tips for Posing Large Families and Groups
    • How to Pose People for Headshots
    • Tips for Posing People in Outdoor Portraits
    • 20 Tips for Getting People to Smile in Photos
    • How to Avoid Fake Smiles in Your People Photography
    • Tips for Posing Muscular Female Body Types
    • Your Posing Guide for Maternity Sessions
    • Handiwork: How to Pose Hands
    • Your Guide to Posing Bands in Photography
    • Posing Tip for Portraits – Which Way Should Your Subject Lean?
    • Posing Tips – Waistlines, Thighs and Bustlines
    • 3 Posing Tips for Young Siblings
    • What Everybody Ought to Know About Posing for Portraits
    • Poser: Achieve Perfect Portrait Expression
    • Capturing Better Portraits Between Poses
    • A Posing Technique from A Girl With a Pearl Earring
    • Tips for Posing Men
  • COMPOSITION
    • 6 Types of Portrait Backgrounds for Creative Images
    • 6 Tips for Perfect Composition in Portrait Photography
    • How to Find Great Backgrounds for Outdoor Portraits
    • How to Make Colors Pop in Your Portraits – Without Using Photoshop
    • How to Use Foreground Framing to Improve Your Portrait Photography
    • How to Use Negative Space in People Photography
    • 3 Simple Ways to Use Framing and Layering in Portraits
    • Is Portrait Formatting always best for Portraits?
    • Portrait Tip: Don't Fill the Frame
    • How to Use Portrait Angles More Creatively: A Visual Guide
    • How to Use Facial View and Camera Angle to take Flattering Portraits
  • GEAR
    • Comparing a 50mm Versus 85mm Lens for Photographing People
    • Comparing a 24mm Versus 50mm Lens for Photographing People
    • 3 Tips for Taking Portraits with a Kit Lens
    • Best Fujifilm X-Series Kit for Urban Portraits
    • 3 Ways to Get Killer Portraits Using a Tripod
    • Photographing Portraits with Classic Lenses (includes Example Images)
    • Portrait Photographers: Do You Really Need a 70-200mm Lens?
    • Essential Portrait Photography Gear You Need When Starting Out
    • Portable Portrait Studio in a Bag: Now You Can Take Portraits While on the Road
    • How to Choose the Perfect Portrait Lens
    • Which 50mm Lens is Best for Portraits?
  • ADVANCED GUIDES
    • 13 Tips for Improving Outdoor Portraits
    • Create Beautiful Indoor Portraits Without Flash (NSFW)
    • 10 Tips for Photographing Great Headshots
    • 3 Simple Ways to Create Stunning Eyes in Your Portrait Photography
    • 11 Tips for Photographing High School Senior Portraits
    • Tips for Doing Fall Portraits
    • 6 Tips for Photographing Large People
    • 7 Tips for Black and White Portrait Photography
    • How to Create Environmental Portraits (Tips and Examples)
    • Capturing Unenthusiastic Teens: Forget the Perfect Pose and Get Photos You Truly Love
    • Tips for Taking the Torture out of Extended Family Portrait Sessions
    • Self Portrait Photography Tips
    • What the Mona Lisa Can Teach You About Taking Great Portraits
    • 5 Tips for Musician Portraits (So You Can Hit All the Right Notes)
    • 5 Tips to Help You Take More Natural Looking Portraits
    • 15 Tips for More Powerful Portraits
    • How to Create Dramatic Portraits in Your Garage
    • 9 Tips that Make Couples Happy During a Portrait Session
    • 5 Tips for Taking Better Portraits in Nature
    • Snow Portrait: Behind the Scenes
    • Tips for Creating Dance Portraits
    • How to Take Better Beach Portraits at Any Time of Day
    • The Introverts Guide to Photographing People
    • 6 Ways to Take a Candid Portrait of Somebody You Know
    • 3 Body Language Hacks to Improve Your Portrait Photography
    • 5 More Tips for Making Better Black and White Portraits
    • Tips for Planning and Capturing a Creative Portrait
    • 5 Tips for Creating Romantic Portraits of Couples
    • 10 Tips to Create Emotive Portraits
    • 7 Tips for Photographing a Bridal Portrait Session
    • 3 Lessons I Learned by Doing a Self-Portrait Project
    • The Ultimate Guide to Photographing People for the Shy Photographer
    • Tips for Getting Yourself to Relax as a Photographer and Have More Successful Portrait Sessions
    • Tips for Taking More Natural Engagement Portraits
    • 6 Tips for Better Portraits on Location
    • 7 Ways to Take Advantage of Autumn in Your Portrait Photography
    • 7 Tips and Etiquette for Taking Portraits in Public
    • How to Make a Unique Portrait in the City at Night
    • 3 Tips for Creating Outstanding Portraits, Inspired by the work of Dutch Artist Van Gogh
    • 5 Keys to Taking Beautiful Maternity Portraits
    • Photographing People: To do Styled Portraits or Not?
    • 7 Steps to Capturing Truth in Your Portraiture
    • Engagement Portrait Shoots: 7 Professional Tips to take your Engagement Shoots to the Next Level
    • Personalities and Portraits – and Getting Them to Mix
    • 3 Reasons to Have Your Own Portrait Taken
    • 5 Tips for Photographing Portfolio-Worthy Costume Portraits
    • 3 Critical People Skills Portrait Photographers Need
    • The Essence of Masculinity – Portraits of Men
    • 5 Corporate-Style Portrait Techniques
    • 5 Tips for Doing Portrait Photography in Busy Locations
    • Tips for Great Beach Sunset Portraits
  • CREATIVE TECHNIQUES
    • How to Create Portraits with a Black Background
    • How Using Props in Portraits Can Make Your Photos More Interesting
    • How to Take Unique Crystal Ball Portraits
    • How to Create a Hollywood Film Noir Portrait
    • How to Create this “Fight Club” Inspired Portrait using One Light
    • Dragging the Shutter for Creative Portraits
    • 5 Secrets for Creating Perfect Silhouette Portrait Photography
    • How to do Tilt-Shift Portraits
    • Copper, Prisms, and Orbs, Oh My! – 3 Creative Techniques for People Photography
    • Portrait Tip: Add Interest and Movement into Your Shots with Wind
    • Glitter Portrait: How I Took It
    • How to Create a Unique Bokeh Portrait for Under $ 10
    • 5 Ways to Use a Piece of Glass for Unique Portraits
    • Room with a View: How to Create this Window with Blinds Portrait Anywhere
    • 7 Steps to Perfect White Portrait Backgrounds in the Studio
    • How to Make Unique Portraits Using Light Painting
  • POST-PROCESSING
    • 11 Steps for Basic Portrait Editing in Lightroom – A Beginner’s Guide
    • Five Common Portrait Retouching Mistakes to Avoid
    • How to Create a Dramatic Cinematic Style Portrait Using Photoshop Color Grading
    • How to Edit Corporate Headshots in Lightroom
    • How to Create a Dark and Moody Rembrandt-Style Portrait In Lightroom
    • How to Retouch a Portrait with the Adjustment Brush in Lightroom
    • Photoshop: Red Eye Fix for Difficult Cases in People and Pets
    • 3 Steps to Photoshop Retouching for Natural Looking Portraits
    • How to do Frequency Separation Portrait Retouching in Photoshop
    • Basic Portrait Post-Processing Workflow Tips to Help You Save Time and Stay Organized
    • How to Add a Grunge Effect to Your Portraits Using Lightroom
    • How to Create Twinkle Lights for Christmas Tree Portraits in Photoshop
    • How to Enhance Portraits Using Gray Layers to Dodge and Burn in Photoshop
    • How to Blur the Background of a Portrait Using the Magnetic Lasso Tool in Photoshop
    • How to Use Photoshop Blending Modes for Fine Art Portraiture
    • Stylized Techniques for Editing Portraits Using Lightroom
    • How to Make a Bubble Portrait using Photoshop CS3
    • Creating a Black and White High Contrast Portrait Edit in Lightroom
    • How to Create a “Soft Portrait” Preset in Lightroom 4
    • Basic Photoshop Tutorial – How to Add Creative Overlays to Your Portraits
    • 3 Essential Photoshop Tools for New Portrait Photographers
    • How to Make Creative Lightroom Develop Presets for Portraits
    • 5 Reasons to Use Lightroom for Portrait Retouching
    • Advanced Portrait Retouch on a Male Subject in Lightroom 4 – Part 1 of 3
    • 3 Ways to Make Selective Color Portraits Using Lightroom and Silver Efex Pro 2
    • Correcting For Under Exposure and Boosting Dynamic Range with an Environmental Portrait in Lightroom 4
    • How to do Portrait Retouching With Luminar
    • Tips for Portrait Processing with ON1 Photo RAW 2018.5
    • 5 Tips to Cut Your Portrait Editing Time in Half
  • BUSINESS
    • Portrait Consultations: Two Questions That Make A Big Difference
    • How to Shoot a Self Portrait to Support your Brand Identity
  • INSPIRATION
    • 5 Examples of Beautiful Simple Portraits
    • DISCUSS: When you Photograph People in Black and White, you Photograph their Souls
    • 21 Inspirational Natural Light Portraits
    • 24 Photos of Perfectly Posed Portraits
    • 19 More Creative Mirror Self Portraits
    • 18 Stunning Self Portraits
    • Interview with Fine Art Portrait Photographer Bill Gekas
    • 11 Influential Portrait Photographers you Need to Know
    • Black and White Portraits a Set of Images to Admire
    • Nadav Kander on Portrait Photography [VIDEO]
    • 21 Spooky Portraits
    • Inspiring Portraits of Women – a Collection of Images
    • 12.5 Years of Daily Self Portraits [VIDEO]
    • Interview with Self Portrait and 365 Photographer – Anna Gay
    • Triptych Portrait Series
    • 8 Striking Portraits from Photograph Einar Erici [Shot in 1930]
    • An Interview With Underwater Portrait Photographer Sacha Blue
    • Masters of Photography – Yousuf Karsh Portrait Photographer
    • 21 Fun Images of People Laughing
  • RESOURCES
    • Portrait Photography: Secrets of Posing & Lighting [Book Review]
    • The Luminous Portrait: Book Review
    • The Portrait Photography Course by Mark Jenkinson – Book Review
    • The Perfect Portrait Guide – How to Photograph People – Book Review
    • Improve Your Portraits with these Courses from Ed Verosky
    • People Photography and Portraits: Best Resources Toolbox

var dpsTopics = {
id: 102682,
titles: [{“id”:”use-a-relatively-wide-angle-lens”,”permalink”:”https:\/\/digital-photography-school.com\/how-to-create-compelling-wide-angle-portraits-using-one-off-camera-flash\/”,”title”:”1. Use a (relatively) wide-angle lens”},{“id”:”choose-a-compelling-subject”,”permalink”:”https:\/\/digital-photography-school.com\/how-to-create-compelling-wide-angle-portraits-using-one-off-camera-flash\/”,”title”:”2. Choose a compelling subject”},{“id”:”choose-a-complementary-background”,”permalink”:”https:\/\/digital-photography-school.com\/how-to-create-compelling-wide-angle-portraits-using-one-off-camera-flash\/”,”title”:”3. Choose a complementary background”},{“id”:”shoot-in-the-right-lighting-conditions”,”permalink”:”https:\/\/digital-photography-school.com\/how-to-create-compelling-wide-angle-portraits-using-one-off-camera-flash\/”,”title”:”4. Shoot in the right lighting conditions”},{“id”:”put-your-subjects-at-ease”,”permalink”:”https:\/\/digital-photography-school.com\/how-to-create-compelling-wide-angle-portraits-using-one-off-camera-flash\/”,”title”:”5. Put your subjects at ease”},{“id”:”work-the-scene-for-the-best-compositions”,”permalink”:”https:\/\/digital-photography-school.com\/how-to-create-compelling-wide-angle-portraits-using-one-off-camera-flash\/”,”title”:”6. Work the scene for the best compositions”},{“id”:”make-sure-you-have-the-right-equipment-and-settings”,”permalink”:”https:\/\/digital-photography-school.com\/how-to-create-compelling-wide-angle-portraits-using-one-off-camera-flash\/”,”title”:”7. Make sure you have the right equipment and settings”},{“id”:”carefully-position-your-flash-for-the-best-results”,”permalink”:”https:\/\/digital-photography-school.com\/how-to-create-compelling-wide-angle-portraits-using-one-off-camera-flash\/”,”title”:”8. Carefully position your flash for the best results”},{“id”:”wide-angle-portrait-photography-conclusion”,”permalink”:”https:\/\/digital-photography-school.com\/how-to-create-compelling-wide-angle-portraits-using-one-off-camera-flash\/”,”title”:”Wide-angle portrait photography: conclusion”},{“id”:”use-a-relatively-wide-angle-lens”,”permalink”:”https:\/\/digital-photography-school.com\/how-to-create-compelling-wide-angle-portraits-using-one-off-camera-flash\/”,”title”:”1. Use a (relatively) wide-angle lens”},{“id”:”choose-a-compelling-subject”,”permalink”:”https:\/\/digital-photography-school.com\/how-to-create-compelling-wide-angle-portraits-using-one-off-camera-flash\/”,”title”:”2. Choose a compelling subject”},{“id”:”choose-a-complementary-background”,”permalink”:”https:\/\/digital-photography-school.com\/how-to-create-compelling-wide-angle-portraits-using-one-off-camera-flash\/”,”title”:”3. Choose a complementary background”},{“id”:”shoot-in-the-right-lighting-conditions”,”permalink”:”https:\/\/digital-photography-school.com\/how-to-create-compelling-wide-angle-portraits-using-one-off-camera-flash\/”,”title”:”4. Shoot in the right lighting conditions”},{“id”:”put-your-subjects-at-ease”,”permalink”:”https:\/\/digital-photography-school.com\/how-to-create-compelling-wide-angle-portraits-using-one-off-camera-flash\/”,”title”:”5. Put your subjects at ease”},{“id”:”work-the-scene-for-the-best-compositions”,”permalink”:”https:\/\/digital-photography-school.com\/how-to-create-compelling-wide-angle-portraits-using-one-off-camera-flash\/”,”title”:”6. Work the scene for the best compositions”},{“id”:”make-sure-you-have-the-right-equipment-and-settings”,”permalink”:”https:\/\/digital-photography-school.com\/how-to-create-compelling-wide-angle-portraits-using-one-off-camera-flash\/”,”title”:”7. Make sure you have the right equipment and settings”},{“id”:”carefully-position-your-flash-for-the-best-results”,”permalink”:”https:\/\/digital-photography-school.com\/how-to-create-compelling-wide-angle-portraits-using-one-off-camera-flash\/”,”title”:”8. Carefully position your flash for the best results”},{“id”:”wide-angle-portrait-photography-conclusion”,”permalink”:”https:\/\/digital-photography-school.com\/how-to-create-compelling-wide-angle-portraits-using-one-off-camera-flash\/”,”title”:”Wide-angle portrait photography: conclusion”}] };

The post How to Create Stunning Wide-Angle Portraits (Using an Off-Camera Flash) appeared first on Digital Photography School. It was authored by Ken Koskela.


Digital Photography School

 
Comments Off on How to Create Stunning Wide-Angle Portraits (Using an Off-Camera Flash)

Posted in Photography


Notes on the Paul Buff Link 800ws Flash

29 May

The Paul C. Buff Link monobloc studio strobe ($ 895.95) delivers 800ws of portable power, and deserves consideration from anyone in the United States who is considering a big gun for use on location.

Please note: This is not a full review.

There have been several thorough examples already published — most notably this one by Mike McGee. There are many others, from the usual suspects, a Google search away.

Rather, this is a quick write-up of some first-hand impressions, thoughts and features I have not seen much mention of elsewhere.
Read more »
Strobist

 
Comments Off on Notes on the Paul Buff Link 800ws Flash

Posted in Photography


How to Make Beautiful Portraits Using Flash and High-Speed Sync

14 Mar

The post How to Make Beautiful Portraits Using Flash and High-Speed Sync appeared first on Digital Photography School. It was authored by Sean McCormack.

how to use flash and high-speed sync for stunning portraits

The scene: Outdoors with full sunlight.

The gear: Your camera, lens, and flash.

The problem: You find that your flash only works at 1/200s or below, so you need to be at f/16 or f/22 to get a well-exposed shot. And at f/16-f/22, everything is in focus, including all the cars and other distractions in the background. (Those dust spots you keep meaning to clean are also perfectly visible.)

Why can’t you shoot with a higher shutter speed so you can have a wider aperture?

Well, it’s all down to the issue of sync speed.

More specifically, it’s about using flash and high-speed sync.

Generally speaking, to overpower the sun and stay below your camera’s sync speed, you’re forced to use a narrow aperture. Here I’m at f/20 just to stop the backlight overpowering the hair and the sky from blowing out:

Woman shot with off-camera flash

The resulting aperture means that everything is pretty much in focus, leaving the background looking cluttered.

(This shot is for example only; you should generally make a point of choosing clutter-free backgrounds.)

What is sync speed?

Sync speed is the fastest shutter speed for which the camera can expose the whole frame at once.

It’s a bit technical, but when you fire any shot below the sync speed, the first shutter curtain opens fully, revealing the entire sensor to light. At the end of the exposure time, the second shutter curtain moves across the frame to finish the capture.

(Generally, the sync speed varies between 1/125s and 1/250s; it depends on your camera.)

When you go above the sync speed, the second curtain starts to move before the first one has completed its journey. As your shutter speed gets shorter and shorter, the gap between the curtains narrows to a tiny slit. Despite this, all parts of the sensor receive light and a full exposure is made. On a bright day with a prime lens, you can easily shoot at 1/8000s at f/1.4 and have a perfect exposure. All parts of the frame still receive light, because ambient (non-flash) lighting is continuous throughout the exposure.

So why does the sync speed actually matter?

The sync speed problem

It’s when you introduce flash that you start to have problems.

You see, when a flash is fired (which usually happens when the first curtain is opened), all the light from it comes out in a very short space of time (in the order of milliseconds).

When you go above the sync speed, the position of the curtains doesn’t reveal the entire frame at the time the flash fires. So the shutter curtain blocks part of the flash and prevents it from reaching the sensor.

Any ambient light will expose normally, but the flash gets hidden in part of the frame. As your shutter speed gets faster and faster, more and more of the flash is blocked until it’s no longer visible in the shot (i.e., your exposure is what you’d get if you never fired the flash at all).

Below is a set of images taken at 1/3-stop increments with a flash. The first photo is at 1/250s, the native sync speed of my Fujifilm X-T2 camera. The other shutter speeds are, in order from left to right (and top to bottom): 1/320s, 1/400s, 1/500s, 1/630s, 1/800s, 1/1000s, and 1/1250s. Note that 1/320s is potentially usable if the subject is away from the edge of the frame.

portraits with flash and no high-speed sync

Everything in focus

Normally, when you use flash outside in daylight, you end up having everything in focus.

Remember the Sunny 16 Rule? If your subject is in direct sunlight during the day, you can set your aperture to f/16 and your shutter speed will be one over your ISO value.

So if your ISO is set to 100, your shutter speed would be 1/100s (at f/16). If your ISO is 200, then the shutter speed would be 1/200s.

Now, to get a darker, richer sky while using flash, you’d really need to be at f/22. Because you can’t get faster than 1/250s (remember, it’s the sync speed!), you have to increase the aperture to expose the shot correctly.

portraits with flash and no high-speed sync
I shot at f/20 and 1/160s to get a richer sky for this band promo shot. It’s quite an old photo, so there were limited options for widening the aperture at the time. Even the hills in the background are in clear focus. The beach isn’t exactly pretty, either.
portraits with flash setup
A behind-the-scenes shot showing my two flashes set to full power.

As you can see from the photos above, this is a huge problem. Shooting at an f/22 aperture just doesn’t give you the creamy bokeh that portrait photographers love, and it can leave you with unpleasant, distracting backgrounds.

So what do you do?

The solution: high-speed sync

There is a solution: high-speed sync, also known as focal-plane sync.

No, it’s not perfect, but it does work. You see, instead of firing the flash at the start of the shot, high-speed sync pulses the flash throughout the whole exposure, trying to simulate the effects of a continuous light.

flash set to high-speed sync
My flash set to high-speed sync. Usually, there’s a single-button hold or a double-button combination to turn HSS on.

It looks good, but it comes at the expense of power and heat, because HSS works the flash really hard. After a few shots, the flash may even shut down for cooling.

Now, for high-speed sync to work, you need the camera to transmit a signal to the flash and for the flash to have high-speed sync built in. Cactus Image makes a trigger called the V6 II, which allows you to use any HSS flash with any camera.

a flash trigger
The Cactus Image V6 II offers power and zoom control over a wide range of speedlights, and it also offers high-speed sync capabilities.

The look of high-speed sync

You can use high-speed sync to go over the sync-speed barrier, so settings like 1/4000s at f/1.4 are achievable with flash. You get complete control over the light, but while using the wide apertures you usually associate with natural-light photographs. Yes, please!

By shooting wide-angle photos with a shallow depth of field, you can even create images that look like stills from a movie.

Settings for high-speed sync

Let’s look at a typical setup and settings for a photo using high-speed sync. This particular shoot was done in the evening when the light was relatively low, but I really wanted a shallow depth of field – and therefore required high-speed sync.

I set my camera to f/1.4 for a super-shallow depth of field. To get the clouds properly exposed, I had to boost the shutter speed to 1/4000s. To get the flash to work, I had to set it to high-speed sync. Using a Cactus V6 II trigger, I could easily get my Fujifilm X-T10 to shoot with high-speed sync.

portraits with flash and high-speed sync
An evening HSS photo shot at 1/4000s, ISO 200, and f/1.4. Notice the shallow depth of field.
portraits with flash and high-speed sync behind the scenes
The behind-the-scenes shot, showing an octabox in front of a model (photo by my assistant, Ola).
close-up portrait
Using high-speed sync, I captured this shot at about 3:00 in the afternoon with the sun high in the sky. I worked with an 85mm lens at 1/2000s, f/2.5, and ISO 100 on a Canon 5D III. The sun acted as a second light in the shot. Again, the background is nicely out of focus.

Another high-speed sync portrait example:

portrait with high-speed sync
An issue with shooting outdoors on overcast days is that your shutter speeds can be low enough to cause camera shake. By bumping up the ISO, you can get a faster shutter speed, keeping you safe from blur. Using high-speed sync then lets the flash do the work. Here, I’ve shot to keep the flash looking as natural as possible.
1/1000s | f/4 | ISO 800

The alternative

Note that high-speed sync isn’t the only way to shoot with a wide aperture and flash.

For one, you can always head out at the beginning or the end of the day when the light is pretty low; then the ambient lighting won’t add much to the shot, and you’ll be able to get a nice exposure at 1/200s. Plus, you can get great sky color and you won’t be fighting against strong sunlight.

portrait with high-speed sync flash
A shot of the band Drown for Thin Air magazine. The evening light made the shot. I needed a higher aperture to get the whole band in focus, so I opted not to use high-speed sync here.

Of course, if you’re doing any photoshoots with clients, you often have to work with the subject’s schedule rather than your own. So you may have to shoot at midday to suit them.

And that leads to the next option.

Using a neutral density filter

If you shoot landscape photography, you will be familiar with neutral density (ND) filters. This filter type allows you to slow the shutter speed down to get nice, silky water.

Neutral means that it adds no color, while density refers to blocking light. You can get ND filters in a range of values from 1 stop to 16 stops.

For portraits, neutral density filters allow you to widen the aperture instead of dropping the shutter speed. So a 4-stop ND filter would take you from f/16 to f/4.

The drawback is that, as you block light, focusing can become harder.

Another potential issue is that not all ND filters are actually neutral. Some tend to have a color cast. (I have a Firecrest 10-stop ND for landscapes, which is neutral, but the older 4-stop filter I own – also from Firecrest – is slightly pink.)

portrait without a neutral density filter
Without the ND filter applied, I was forced to use a narrow aperture; note how the entire scene is in focus.
1/250s | f/16 | ISO 200
portrait with flash and high-speed sync
With the 4-stop ND filter applied, the background can be rendered out of focus. The flash is still at the same power as the unfiltered shot above. The filter does have a color cast, which is hard to remove completely.
1/250s | f/4 | ISO 200

Flash and high-speed sync: conclusion

As you now know, you can make outdoor portraits even when the sun is bright – simply by using flash and high-speed sync.

So make sure you get a flash that has HSS capabilities.

And start practicing!

Now over to you:

Have you ever used high-speed sync? Have you ever struggled to get nice bokeh in bright sunlight? Share your thoughts (and high-speed sync images!) in the comments below.

The post How to Make Beautiful Portraits Using Flash and High-Speed Sync appeared first on Digital Photography School. It was authored by Sean McCormack.


Digital Photography School

 
Comments Off on How to Make Beautiful Portraits Using Flash and High-Speed Sync

Posted in Photography


A Beginner’s Guide to Working With Flash Off-Camera

14 Feb

The post A Beginner’s Guide to Working With Flash Off-Camera appeared first on Digital Photography School. It was authored by Gina Milicia.

a beginner's guide to off-camera flash

I spent the first three years of my photography career avoiding the use of off-camera flash.

Why?

Because I couldn’t wrap my head around the concepts and science behind it.

I tried to cover up my struggles by saying things like “I’m a natural light photographer,” or “I really don’t like the aesthetics of flash photography.”

But I eventually – reluctantly! – invested in a flash for my first Nikon. This was the ’90s, pre-digital, pre-autofocus, and pre-TTL. I had to calculate how much power to use via a chart on top of the flash.

Each photoshoot I went on that required flash was preceded by a sleepless night filled with anxious dreams about turning up to the shoot naked. And the thought of having to use flash also had a mild to moderate laxative effect on me.

Luckily, those days are long gone and shooting flash off-camera has never been easier! In this tutorial, I’ll show you the quick and easy steps I take to shoot portraits using off-camera speedlights.

The gear essentials

If you’re going to use off-camera flash, here’s what you’ll need:

1. Speedlights

I use speedlights most often when I’m traveling and need light, portable flashes, when I’m working on location without access to power, or when I’m working in small, confined locations where studio flashes would be too powerful or cramped.

I work with two Canon speedlights. A great alternative if you are looking to save a few bucks is the Yongnuo YN560 IV. It has a very similar look to Canon speedlights as well as Nikon’s SB speedlight series.

2. Remote triggers

Remote triggers allow you to fire speedlights when they’re not mounted to your camera. As you can imagine, this is essential when using off-camera flash.

The cheapest and most reliable way to fire your speedlights off-camera is by using a sync cord — basically, you connect your speedlight to your camera via a long cable.

The drawbacks of using a cable are that it reduces the distance you can be away from your flash, and it can create a tripping hazard. That said, I still carry a couple of spare sync cables in my kit; remote triggers do fail from time to time, and the sync cords have saved me on a few occasions.

The next option for firing off-camera flashes is cheap infrared triggers. These do the job of setting your flash off remotely, but they’re sensitive to bright sunlight and affected by external factors such as alert lights on emergency vehicles and forklifts, etc., so they can go off without warning. I started out with a $ 30 set of triggers and used them for a couple of years before trading up to PocketWizards, which I’ve been using for the last eight years.

Fill Flash Diagram

3. Light stands

Speedlights don’t float in the air – which means you need something to hold them up!

Now, there are three options when it comes to mounting speedlights off-camera:

  1. First, you can use a light stand. Light stands vary in price from $ 20 to $ 200+ dollars, depending on the make and construction.
  2. Second, you can use a GorillaPod and mount your speedlight to a door or place it on top of something near your model.
  3. Third, you can mount your speedlight to an extension pole (or monopod) and have someone hold the light above your model. I like to do this because it gives me more options when shooting, and it also means there aren’t any light stands that get in the way of my shot.

4. Light shapers

Using a speedlight as a bare light source creates a very hard style of lighting similar to harsh sunlight. This looks great in certain situations, but I prefer to soften and control the light source with a small or medium softbox. This creates a much softer, more flattering, and more realistic-looking light source.

A good softbox to start with is the LumiQuest Mini Softbox. It’ll attach to your speedlight with velcro and can fold flat for easy storage.

5. Camera with a hot shoe

Finally, you will need a camera that works in Manual mode. It must also have a hot shoe.

Note that the “hot shoe” is just a square bit of metal on top of the camera that an external flash or wireless trigger slides into.

Working with off-camera flash

Once I got over my fear of off-camera flash, I started to believe that great portraits needed artificial lighting regardless of the environment. I often added two or three lights to my portrait shoots because I thought that anything less was lazy or unprofessional. I actually felt guilty when I shot with natural light because I thought it was cheating.

Fortunately, I’ve gotten over those thoughts. Here’s what I know now:

Finding great light and being able to use it are learned skills – and so is knowing when to use fill-flash in a portrait.

Nowadays, whenever I set up portrait shoots, I always look for opportunities to use great natural lighting first. It’s the most beautiful and flattering light for portraits, so if it ain’t broke, no need to fix it.

Having said that, there are many times when natural lighting is only just okay or even terrible – and sometimes a portrait needs more mood or drama than the available light can provide.

The following is an example of how I used off-camera flash to light a heavily backlit image. My objective was to create a shot that looked naturally lit. This technique can be used for any portrait that requires off-camera fill flash.

Daylight 001 Daylight 800ISO 001
on-camera flash photo of man on a motorcycle

In the first shot (A), you can see that my model was heavily backlit, which makes a great silhouette but not such a great portrait.

For the second shot (B), I attempted to correct the lighting by increasing my ISO, which overexposed the background and brought more detail to the motorbike, but leaves the model’s skin tones flat, dull, and underexposed. It also added extra noise to the shadows. At this stage, I could have used a reflector to bounce light back onto the model to help create better skin tones.

Finally, for the third shot (C), I used an on-camera flash. As you can see in my example, the Canon speedlight did an okay job of lighting my model, given that I was about five meters (sixteen feet) away using a 200mm lens.

But the thing I don’t like about using flash on-camera for portraits is that it tends to make the subject look unnatural and have a flat appearance. On the other hand, by using a flash off-camera, you can control the direction and amount of light going onto your model to achieve a more natural look.

Which leads me to my off-camera flash setup:

off-camera flash diagram
Here’s a bird’s-eye view of my setup.

My speedlight was positioned approximately one meter (three feet) from the model. I set it at a 45-degree angle because I wanted to make my model look like he was lit from the side.

I was working with a 70-200mm zoom lens set to a focal length of 200mm because I wanted to blur all the details in the background.

My camera was approximately six meters (20 feet) from my model.

My ISO was set at 100, and my aperture was set to f/4. I was working at f/4 rather than wide open at f/2.8 because I find it very difficult to make eyes look sharp at f/2.8 at that distance and in such extreme lighting conditions.

Setting up the gear

off-camera flash setup diagram
Setting up speedlights and radio slaves.

For this motorbike model shoot, I mounted my speedlight to a light stand via an adapter and used a small LumiQuest Softbox to soften and shape my light.

dialing in flash settings
flash remote in action

To manually adjust the flash output of your speedlight, first switch the setting from its default of TTL to M (Manual mode). I recommend you start with the following settings:

  • First, if you’re shooting in full sunlight and you need an aperture of f/16 or higher, use a power setting of 1/1 (full).
  • If you are shooting at f/2.8 or f/4, start at around 1/16-1/32 power.

The diagram above is based on Canon’s 580EX II speedlight. For any other flash, check your manual for instructions on how to increase and decrease power. It should be very similar.

Now take a look at how I set my flash power:

six shots of a man on a motorcycle with increasing flash power
  • Flash set at 1/32 power is underexposed, skin tones look muddy, and there’s no detail in the blacks.
  • Flash set at 1/16 power is starting to look better.
  • Flash set at 1/8 power is looking good, but I prefer slightly brighter skin tones.
  • Flash set at ¼ power is the correct reading for the look I was going for.
  • Flash set at ½ power gives slightly overexposed skin tones, which is perfect for many portraits, as it creates a very flattering light (no model will ever tell you they love seeing all the detail in their pores and skin tones!).
  • Flash set at full power is overexposed; there’s very little detail in the skin tones and the blacks are too light (gray).

A step-by-step guide to how I lit this shot with off-camera flash

Now that you know how to set up your flash and how to determine a good exposure, I’d like to run through my motorcycle photoshoot.

How did I get a nice final result?

Let me take you through the step-by-step process:

man on a motorcycle as a silhouette
My ambient reading was f/4 at 1/125s with ISO 100.
  1. Take an ambient reading to determine the correct exposure for the background (without any flash). In this case, my ambient reading was f/4 at 1/125s and ISO 100. This exposure was set for the entire shoot.
  2. Ask yourself if adding flash will improve or detract from the shot. In this case, the answer is a definite yes – it will improve the shot.
  3. Bring in your flash and set it up as per the diagrams above.
  4. The quickest and easiest way to figure out the best flash power settings is to use a light meter. (If you don’t have a light meter, you can still work with off-camera flash. It will just take a bit longer to work out your exposure.) I believe a light meter is an essential tool in good portrait photography, and I would never leave home without one. When you use a light meter, you know you’ll end up with the most accurate readings and lighting becomes easy. I suggest you set up your lights per the diagram above, start at a power setting of 1/32, and gradually increase your power in small increments (1/32, 1/16, 1/8, 1/4, etc.) until you get your desired result.
  5. Set your light meter to non-sync and press the button on the side of the meter. The non-sync button will flash on and off indicating that it’s ready. If you don’t have an assistant, I suggest taking a radio slave off-camera and using it to test-fire your flash so you can take a reading. Hold the meter in front of your subject’s face and point the sensor dome toward the camera.
  6. Keep increasing or decreasing the amount of light until you have it a half stop to one stop over the ambient setting.
  7. If you want a clean, beauty-style shot with lots of shadow detail, add one stop of fill-flash and shoot at your ambient meter settings.

This is something I strongly urge you to practice with as many patient friends, family members, and pets as possible. That way, you can build up your confidence and really get to know your equipment.

And here’s my final image:

final image of a man on a motorcycle
Glauco Junior Solleri. Vespa courtesy of Glow Studios.

Notice the different background? It’s from a shoot I did in St Mark’s Square, Venice last year. I merged the two images together using Photoshop.

Working with off-camera flash: Conclusion

Now that you’ve finished this article, you should be ready to capture some beautiful shots using off-camera flash!

So make sure you have the right equipment. And make sure you follow my process carefully.

You’ll come away with amazing results.

What are your experiences working with off-camera flash? Have you tried it? Does it intimidate you? Share your thoughts in the comments below!

The post A Beginner’s Guide to Working With Flash Off-Camera appeared first on Digital Photography School. It was authored by Gina Milicia.


Digital Photography School

 
Comments Off on A Beginner’s Guide to Working With Flash Off-Camera

Posted in Photography


Sony’s new HVL-F28RM flash uses camera face detection for better portraits

18 Sep

Sony has just announced the HVL-F28RM flash. It’s designed to be compact and easy to use, but also comes with features that more advanced photographers will appreciate.

When combined with Sony’s a7C, a7S III, a7R IV and a9 II, the F28RM will use face detection information from the camera to better balance its output with the ambient lighting of the scene, as well as adjust white balance for a more natural look.

The flash angle can be adjusted up to 120 degrees and it’s powered by two AA-sized alkaline or NiMH batteries. Other features include radio wireless communication, a stronger metal hot shoe and dust and moisture resistance.

The HVL-F28RM will be available this winter and will retail for $ 249 USD ($ 329 CAD).

Press release:

Sony Electronics Introduces Alpha 7C Camera and Zoom Lens, the World’s Smallest and Lightest[i] Full-frame Camera System

New HVL-F28RM Compact Flash is also Announced

SAN DIEGO, CA – September 14, 2020 – Today, Sony Electronics Inc. announced several additions to an already impressive imaging lineup — the Alpha 7C full-frame camera (model ILCE-7C), the FE 28-60mm F4-5.6 (model SEL2860) zoom lens and HVL-F28RM flash.

The Alpha 7C is the world’s smallest and lightest[ii] full-frame body with uncompromising performance, featuring advanced AF (autofocus), high-resolution 4K video[iii] capabilities and more. When paired with the world’s smallest and lightest[iv] FE 28-60mm F4-5.6 standard zoom lens, this versatile combination delivers an experience unlike any other, maximizing portability and versatility without sacrificing any of the power of full-frame imaging. The HVL-F28RM flash allows users to broaden their photo expressions with outstanding compactness, and an intelligent light intensity control linked to camera face detection[v].

“We are committed to creating the best tools possible, based on the needs of our customers,” said Neal Manowitz, deputy president of Imaging Products and Solutions Americas, Sony Electronics. “The new Alpha 7C camera and FE 28-60mm F4-5.6 zoom lens pack many of our most advanced imaging technologies in a brand new design that is the smallest and lightest full-frame camera and lens system in the world. This opens up a new world of possibilities for creators, giving them the uncompromised power of a full-frame system in the palm of their hand.”

New HVL-F28RM: Compact Flash with Light Intensity Control Linked to Camera Face Detection[v]

The HVL-F28RM is a compact flash designed to match Sony’s mirrorless cameras for a compact, manageable system, and offers the type of reliable, stable performance that only a genuine Sony product can provide. When compared to the HVL-F32M, the HVL-F28RM features a 12 percent reduction in volume and 7 percent reduction in weight. This compact, easy-to-use flash unit delivers the capabilities and dependability to meet the needs of both professional and advanced amateur content creators.

The HVL-F28RM offers consistent GN28[xxv] light output, optimized light distribution and continuous flash performance that won’t interrupt the user’s workflow, as well as stable radio wireless communication and multi flash radio control. The new flash also features Sony’s newly introduced flash control linked to camera face detection[v] advanced technology. When used with a compatible camera, the balance between the light falling on the subject’s face and ambient light is evaluated to automatically adjust accurate white balance so that the subject’s face is rendered with natural, lifelike color. In addition, flash compensation, light ratio, and other detailed flash parameters can be controlled directly from a compatible camera[xxvi]. A camera custom key can be assigned to call up the flash parameter display so that adjustments can be made while looking through the viewfinder and gripping the camera. Flash parameters are shown in the selected camera display language.

A newly developed “Metal Shoe Foot with Rugged Side Frame”[xxvii] that also houses the unit’s electrical contacts offers improved resistance to physical shock and impact from all directions. The Multi Interface foot is fabricated from metal for higher strength. The HVL-F28RM also features a dust and moisture resistant[xxii] design. When the HVL-F28RM is mounted and locked onto the Alpha 7C, Alpha 7S III, Alpha 7R IV and Alpha 9 II, durability to dust and moisture is improved, even when used in challenging outdoor environments.

The HVL-F28RM also features simple, intuitive operation with minimal controls including +/- light level buttons, pairing button, test button and lock lever. Plenty of light is available for bounce applications. The flash angle can also be set as required via 0, 20, 40, 60, 80, and 120 degree click stops for easy positioning. The new flash also features a built-in wireless radio trigger for reliable flash triggering when mounted on a compatible camera[xxvi] and paired with an off-camera unit. When used as a transmitter, the HVL-F28RM can control up to 15 flash and/or receiver units in 5 groups[xxviii] at distances of up to 114 feet (35 meters)[xxix] for extraordinary lighting control and versatility. The HVL-F28RM is powered by two AA (LR6) alkaline or NiMH batteries. A fresh pair of alkaline batteries can provide power for up to 110 continuous flashes (1/1 manual flash with alkaline batteries)[xxix].

Pricing and Availability

The HVL-F28RM flash will be available this winter and will be sold for approximately $ 249.99 USD and $ 329.99 CAD. It will be sold at a variety of Sony’s authorized dealers throughout North America.

Exclusive stories and exciting new content shot with the new camera, lens and Sony’s other imaging products can be found at www.alphauniverse.com, a site created to educate and inspire all fans and customers of Sony ? – Alpha.

[i] An Alpha 7C with an FE 28-60mm F4-5.6 lens mounted. Among full-frame interchangeable-lens digital cameras, in combination with an interchangeable zoom lens. As of Sept. 2020. Sony survey.

[ii] Among full-frame interchangeable-lens digital cameras with optical in-body image stabilization mechanism, as of Sept. 2020. Sony survey.

[iii] A Class 10 or higher SDHC/SDXC card is required for XAVC S format movie recording. UHS speed class 3 or higher is required for 100 Mbps recording.

[iv] Among interchangeable zoom lenses for 35mm full-frame format digital camera bodies, as of Sept. 2020. Sony survey.

[v] This function is only compatible with Alpha 7C as of Sept. 2020

[xxii] Not guaranteed to be 100% dust and water resistant.

[xxv] 50 mm, at ISO 100 in meters

[xxvi] Visit Sony support webpage for functional compatibility information.

[xxvii] Design registration application pending.

[xxviii] In group flash mode. 3 groups (A-C) in TTL or manual flash mode.

[xxix] Sony internal test conditions.

Articles: Digital Photography Review (dpreview.com)

 
Comments Off on Sony’s new HVL-F28RM flash uses camera face detection for better portraits

Posted in Uncategorized


Create Beautiful Indoor Portraits Without Flash (NSFW)

29 Aug

The post Create Beautiful Indoor Portraits Without Flash (NSFW) appeared first on Digital Photography School. It was authored by Ed Verosky.

_dps_ambient-techniques_005.jpg

Ed Verosky is a professional photographer and author based in New York. In this article, Verosky explains how to create portraits using natural and ambient light only. To learn more about achieving great lighting in any situation, check out Verosky’s popular eBook, “100% Reliable Flash Photography.“

Note: This post contains one image with very mild nudity (in fact, so mild you might not even see it).

For me, using flash can be the most efficient way to create a high-quality portrait. There’s nothing like it for an editorial shoot when you need that combination of full lighting control, minimal shooting time, and predictable results. Sure, you have to know what you’re doing to make it come together like that. But that ability comes with knowledge and experience.

Mastering flash means mastering your light in any situation. Sometimes, however, there is beautiful light to be found, just waiting there for you to use it. Natural and constant ambient light can be your best friends if you have a little time and flexibility with the environment and your subject.

Constant light, as opposed to flash/strobe lighting, will allow you to see and adjust its effect on your subject and the environment in real-time. This is a great way to learn about lighting placement and this knowledge and experience will certainly carry over into your flash portraiture. As I like to say, “light is light,” meaning that the principles of lighting a subject and the environment are essentially the same whether the light source is a quick “flash” or a constant illumination.

The main difference is that the flash is capable of producing a more intense light but with too short of a duration for the photographer to see the effects of its position on the subject in real-time. With constant lighting, you can casually move the lights and your subject around and know instantly how the changes will affect the portrait you’re making. With a few test shots to check exposure, you’re good to go.

Lighting setups

Natural light. Window light is just about the most beautiful light you can find when the conditions are right. It can serve as a huge softbox and be manipulated with any combination of window dressings such as blinds and curtains. Simply place your subject nearby the window and let the light create much of the portrait’s drama. I like to position the subject so that there is plenty of shadow to one side, providing many options for classic portraiture looks.

_dps_ambient-techniques_001.jpg

Window light narrowed with curtains. ISO 800, 50mm, f/2.8, 1/80 sec.

Household lights. You can also make great use of simple household lamps. I like to remove the shades off the room lights and utilize them as bare bulb light sources. To start off, just position the main light in front and to one side of your subject, preferably several inches higher than their head. This will give you a classic lighting pattern to work with. A second light may be placed farther back from the subject and serve as a backlight or kicker, which will add dimension.

_dps_ambient-techniques_002.jpg

A setup consisting of two household lamps, minus the lampshades. The kicker is behind Kelly ,and the main lamp is almost directly in front of her, just to camera right. ISO 800, 50mm, f/2.8, 1/60 sec.

Camera settings

My general advice for any indoor shooting is to think “fast and wide.” Your initial camera settings should be a balance of the highest ISO possible that will still provide acceptable noise levels for your purposes, the widest aperture your lens will allow, and the fastest workable shutter speed.

Of course, each of these controls is interrelated and integral to overall exposure, so you’ll have to make some adjustments and concessions for the environment you’re working in, and for the effect you’re trying to achieve in your shots.

Fortunately, most DSLRs are now capable of low noise even when using high ISO speeds, so most room lighting and even low natural light won’t be a problem for you. But even if your camera happens to produce lots of noise at higher ISOs, that isn’t necessarily a big concern. Either leave the noise as is, or bring some of it down in post-processing using your choice of available noise reduction techniques.

Many photographers actually artificially add noise back into their images in order to reproduce the look of film, or otherwise reduce the super-clean, slick, digital look coming out of the camera. Simple advice: Don’t worry about the noise unless it gets in the way of the image you’re trying to create.

Another thing that will really help with achieving beautiful portraits in lower lighting situations is a fast lens. By “fast,” we’re referring to a lens with a wide aperture of at least f/2.8. The wider the aperture, the more light the lens allows to pass through in a given unit of time. This will give you more freedom with your ISO settings (as they won’t have to be so high to compensate for less light coming in through the lens), and faster shutter speeds (as they won’t have to be so low to compensate for less light coming in through the lens). Lenses with wider apertures also have the capability of shallow depth-of-field, which can greatly add to the interest and mystique of your portraiture.

Shutter speed is an important consideration not just because of its effect on overall exposure, but also because of potential blur with lower shutter speeds. As with ISO, however, the effect of supposedly less-than-optimal shutter speeds is what you make it. You might find an occasional blurry image makes a rather artistic statement. Every portrait doesn’t have to be as sharp as a tack.

_dps_ambient-techniques_003.jpg

Another household lightbulb setup, featuring Chris. I used a bare household lightbulb off to camera-left to illuminate her on one side and the background at the same time. The main light is coming in from camera right. ISO 800, 85mm, f/1.8, 1/60 sec.

So, with those factors in mind, you might want to try the following exposure combination as a starting point and adjust according to your needs:

  • Camera Mode: Aperture Priority
  • Aperture: f/2.8 (or the widest possible for your lens)
  • ISO: 800
  • Shutter Speed (target): 1/100 sec. or higher.

In Aperture Priority mode, your camera will automatically set the shutter speed for you while you control everything else. You’ll have to pay attention to your shutter speed to make sure it isn’t falling so low as to create unwanted blurring. Again, these are just starting points. With a stationary pose and a steady hand, I’ve managed handheld shutter speeds as low as 1/15 sec. and produced good results. You might also want to try your camera’s Manual mode to maintain full control of your settings. If your lighting conditions are going to be fairly static, I’d recommend it.

Also, you will most likely benefit from shooting in your camera’s RAW (NEF) format so that critical adjustments, like white balance, exposure, and contrast, can be made easily and with minimal loss of information in post-processing. Although white balance settings aren’t actually imposed on the RAW file, you can set white balance as you wish during shooting in order to get an idea of what the final image might look like. Plus, a chosen WB setting will tell your processing software what color temperature and tint settings to best start off with for each image.

_dps_ambient-techniques_004.jpg

Window light illuminates Satu. ISO 800, 50mm, f/4, 1/200 sec.

Post-Processing

Aside from the creative post-processing possible with your ambient light images, there are some things you might want to address in the initial post-processing effort:

White Balance: Not all light sources produce the same color temperatures. Despite what they look like to our eyes, the camera will record various types of household lighting (fluorescent, tungsten, daylight balanced) and natural light (sunset, cloudy, shade) as producing different color casts.

So if you are shooting a portrait using a bright tungsten light as your subject’s main light, but you have a strong window light coming through in the background, you might have an undesirable color mix to deal with.

Fortunately, you can correct these types of color mismatches in post-processing by making a general white balance setting choice in your software and selectively altering the offending colors in specific parts of the image. If this isn’t something you’d like to worry about, then don’t. The colors might be acceptable just the way they are. If not, you always have artistic color-altering effects and even black and white conversion options. So, it’s all good.

Noise Issues: I personally like a little noise in my images most of the time. But if you had to use very high ISO settings to get your shots, and have the need to bring some of the noise down, there are a number of good built-in, stand-alone, and plug-in software options to handle this. I will occasionally use the noise reduction tools in Lightroom or my Photoshop Noise Ninja plug-in, for example.

Natural and ambient light photography indoors can be a great way to learn the finer points of lighting your portraits. The actual experience for you and your subject is also worlds apart from the strobe and studio effect of working with flash. Unlike outdoor shooting, indoor work without flash can introduce problems having to do with lower lighting situations. Using some of the advice above, you should be able to handle the challenges of low-light portraiture and come away with great-looking images.

If you would like to learn how to get amazing light in any situation, check out Ed Verosky’s eBook, “100% Reliable Flash Photography.” It’s a great resource that has helped thousands of photographers improve their use of flash and ambient light for portraiture.

The post Create Beautiful Indoor Portraits Without Flash (NSFW) appeared first on Digital Photography School. It was authored by Ed Verosky.


Digital Photography School

 
Comments Off on Create Beautiful Indoor Portraits Without Flash (NSFW)

Posted in Photography


Starting with Off-Camera Flash in Photography: Techniques

30 Jun

The post Starting with Off-Camera Flash in Photography: Techniques appeared first on Digital Photography School. It was authored by Carl Spring.

Starting with off-camera flash feature image

In my last post, I showed you what equipment you needed when starting with off-camera flash. This time, I am going to be looking at the technical side and what you actually need to learn in order to take great photos using off-camera flash.

It’s hard

This is the part where you need to really get to grips with how this all works. When starting with off-camera flash, this will be something that frustrates you. I’m not going to lie, it involves hard work and practice to get right.

In order to start, you really should have a good idea of how to shoot in manual mode, or at least a good awareness of aperture, shutter speed and ISO.

For someone new to off-camera flash, the technical aspects are the part that is the most daunting. Not only are you working with the camera in manual mode, but you are also adding things such as flash power and flash-to-subject distance. Then there is a model for an extra layer of pressure. That said, a good model is vital.

Fuji camera close up showing dials and shutter button
It’s time to move to manual mode. It’s not that scary. Promise

Working with a model

Finding people to pose for you while you learn is always hard. For this article, I managed to get an awesome model. She is incredibly patient and did exactly what I asked her to do every time. Here she is:

A mannequin is great when starting in off-camera flash. This image is shot with a soft box against a blue background.
Always hits her mark perfectly and never complains. A great investment.

Honestly, a mannequin head is a great investment when starting with off-camera flash. I only paid £4 for this hairdressers mannequin on an Amazon flash sale. Using a mannequin really allows you to build confidence and test lighting setups without worrying about annoying friends, family or models. 

You can always use other inanimate objects, especially if you are not interested in portraits, but a hairdresser mannequin is one of the best investments you can make to help you master off-camera flash for portraits.

Learn the technical rather than letting the camera do it

With modern cameras, flashes and triggers, you can easily stick with letting the camera do all the hard work. Call me old school, but I think it is hugely important to learn off-camera flash manually. By doing this, it is easier to understand how everything works. It also means you are in total control of what is happening.

Just like learning to photograph in manual mode, using off-camera flash manually allows you to get the exact results you want every time. Even if you then go on to shoot in auto mode, you will have the knowledge to still get the shot when the camera plays up (which they tend to do when you need them to do it least).

As you shoot more, you will become more confident, so I would always suggest using an inanimate object whilst you practice. There is nothing worse for knocking your confidence than having your subject in front of your camera and having a total mental meltdown, because you changed the position of the flash but you can’t remember how to adjust the exposure in your camera to make it look right. 

CANON EOS RP PRESS IMAGE WITH 24-105 LENS
Modern Cameras are incredibly smart. But getting started in off-camera flash requires you to do the hard work.

The five variables

Unlike shooting in ambient light, where you only have three variables that can control the image, shooting flash ramps this up to five.

However, it is simply a case of working through them methodically. With practice, it becomes easier. However, your first few times, it may be trial and error (and possibly frustration). 

The five variables are:

  1. Shutter speed
  2. Aperture
  3. Flash power
  4. ISO
  5. Flash-to-subject distance

Let’s start with the two elements that are present in every photograph: shutter speed and aperture. 

1. Shutter speed

A model bride shot against a dark backdrop in a dimly lit venue.
The ambient light for this shot was awful, so I removed it. I left my shutter at 1/200th and found an aperture to kill the ambient light. I then set the flash power accordingly to create this.

The main use of shutter speed when using off-camera flash is that you can darken or lighten the ambient light. This includes your background and any other light sources, such as room lights and candles, etc. By using your shutter speed, you can alter the amount of ambient light in the shot without altering any other variable. 

The reason for this is that a flash will put out all of its power in the smallest fraction of a second (as quick as to 1/20000th second on some flashes). Your shutter speed will be less than this and, therefore, will not affect the power of the flash itself.

There is also one other thing that affects the use of shutter speed, the flash sync of your camera.

The flash sync is the maximum speed that you can shoot the flash at. This is usually around 1/200th of a second. There is a technical explanation for this and ways to shoot faster, but I won’t get into it within this article as I don’t want to overload you with information. Just remember, you cannot put your shutter speed faster than your flash sync.

Shutter speed in practice

When thinking about using the shutter in off-camera flash photography, the thing you need to decide is how much of the surroundings you want to include. If shooting portraits outdoors against a beautiful sky or backdrop, you may want to balance the exposure with the flash to make the most of the location.

However, if you are doing an indoor shoot with ugly or unflattering lighting, you may want to totally remove all ambient light. Shutter speed is your key to doing this. 

Let’s look at this with a series of images.

In all of the images, the only thing I will alter is the shutter speed. Everything else will remain identical. The Aperture is f/16, ISO 100. My flash power is 1/4.

For the first shot, I set the shutter speed to the maximum sync speed (1/200th). As you can see in this image, the background is underexposed for effect and the model is lit by the flash.

Starting with Off-Camera Flash in Photography: Techniques
The model is lit by flash. Areas where the flash does not hit are much darker (left side of her face)

As I slow the shutter, this time to 1/100th second, you can see the sky is lighter and the darker areas of the model that are not hit by the flash are less harsh. I have allowed one more stop of light into the camera, but only for the ambient exposure due to the speed of the light coming from the flash.

Starting with Off-Camera Flash in Photography: Techniques
See how the sky is brighter and the darker areas are not quite as harsh. This is due to the shutter allowing more natural light into the camera.

Finally, I slowed the shutter down to 1/60th to give the correct ambient exposure for the sky and using the flash as a fill for any shadows on the model.

A photo off a mannequin used to illustrate getting started in off-camera flash. The doll is shot against a cloudy sky.
With a balanced ambient and flash, the flash fills in any shadows on the model’s face.

Notice how the lighting from the flash has not changed. That is because aperture controls flash exposure.

You can also use your aperture or ISO to increase or decrease the natural light coming into the camera, but remember when you alter them, you will also need to alter your flash power too.

2. Aperture

When starting out. The easiest way to think about things is that shutter speed controls the ambient exposure and your aperture controls your flash exposure. I know it is a little more nuanced than that in reality, but when learning, you want things to be as simple as possible.

We know that your shutter speed controls how long your camera shutter is open. Your aperture, however, controls how much light enters your camera, not for how long.

As flash power is too quick to be affected by shutter speed, you control it by changing the aperture. If the image is overexposed, you need to close the aperture down, and if it is too dark, you need to open your aperture up.

Setting aperture in practice

To show this in action, look at the images below. In all images, I will keep the shutter at 1/200th of a second and my ISO at 100.

Firstly, I set the flash at f/4. As you can see, the image is overexposed. This means I need to close the aperture a little. 

A photo of a doll against a blue backdrop. The image is overexposed.
f/4 is overexposed. I need to change the aperture.

Next at f/8, you can see I have closed the aperture down too far. The image is too dark, so I need to open the aperture a little more.

An underexposed image of a dolls head against a blue background.
At f/8, the image is too dark. I need to change the aperture.

Finally, here is the shot at f/5.6. As you can see, this is the correct exposure.

A dolls head against a plain background exposed correctly
Finally, at f/5.6 I have the correct exposure.

As you can see, I have not changed any other exposure variable, just the aperture. Changing the shutter speed would have no impact because the flash discharges its power so quickly. Now I have locked in my exposure, my lighting will be identical every time.

Bonus round

Here is the same image shot with the same aperture and a shutter of 1/100th of a second. A you can see, the change of shutter speed has made no difference to the exposure.

Starting with Off-Camera Flash in Photography: Techniques
Changing the shutter to 1/100th has made no difference to the final exposure.

3. Flash Power

Flash power is simply how much power the flash can put out. This varies from flash to flash.

In terms of getting started, a Speedlite is more than fine. It will mean not shooting in the brightest part of the day (unless you are in shade), but it is super affordable, and the best way to start with off-camera flash.  

As with shooting in manual mode, you want to learn with your flash in Manual mode. This helps with consistency.

If you set your flash to 1/2 power, every single pop of that flash will be half power. This consistency is key to mastering flash. 

In terms of power, you start with full power, which is sometimes also known as 1/1. This is the largest amount of light that your flash can produce. Most modern flashes work in small 1/3 stops, but to simplify things whilst you learn, you really need to concern yourself with the following outputs:

  • 1:1
  • 1/2
  • 1/4
  • 1/8
  • 1/16
  • 1/32
  • 1/64
  • 1/128

Each of these settings equates to 1 full stop of light the flash produces. So changing the flash from full power (1/1) to half power (1/2) reduces the amount of light coming out by one full stop. Changing it from 1/1 to 1/4 reduces it by two full stops, etc. 

Remember, the stops it refers to are your aperture, as this is what controls flash exposure. If you look at the table below it will explain it more clearly.

FLASH POWER 1/1 1/2 1/4 1/8 1/16 1/32 1/64
APERTURE f/16 f/11 f/8 f/5.6 f/4 f/2.8 f/2

As you can see, if the flash at full power gives you a correctly-exposed image at f/16, half power will bring you down to f/11 and so on. This relationship is the key to mastering flash. Half the power = 1 stop of light. 

4. Where does ISO fit into all this?

Shooting a flash at full power is less than ideal. There may be some circumstances where you cannot avoid it, but it will kill your batteries quicker, take longer to recharge between shots, and, in some cases, it may overheat the flash, causing it to not work at all. Ideally, you want to be working at 1/2 power or less.

ISO is where you can make that happen.

By doubling your ISO, you allow one more stop of light into the camera. Therefore, you can reduce the flash power and still get the look you wanted. For example, an image at ISO 100 and a flash power or 1/1 will be the same as an image at ISO 400 and 1/4 flash power.

ISO in practice 

I have decided I want to shoot at f/8 and ISO 100. To do this, the flash has to be at 1/1. To get to 1/4, it means I will lose two stops of flash power.

When starting in off-camera flash, your ISO is something you need to reduce flash power. Here is an example at ISO 100 and flash power or 1/1
Here is the image at ISO100 and flash power 1/1.

To keep the same aperture, I turn my ISO from 100 to 400, therefore, giving me two more stops of light into the camera. The image is virtually identical

Starting with Off-Camera Flash in Photography: Techniques
At ISO 400, the exposure and the flash at 1/4 power, the image is almost identical.

It is all a juggling act, and ISO is there to help you fine-tune. However, upping your ISO comes with more noise. But, most DSLR and mirrorless cameras can easily go up to ISO 800 and still be of great quality.

ISO can also help with getting the correct ambient exposure whilst keeping a required shutter speed – especially as light drops. A simple tip is – if you need to double your ISO to get more ambient light, drop your flash power by one stop to compensate.

5. Flash-to-subject distance

I have saved this for last. This is the most technical when it comes to understanding flash (and involves the laws of physics). 

The distance of your flash to your subject is governed by The Inverse Square Law. This law states:  

The intensity of an effect such as illumination or gravitational force changes in inverse proportion to the square of the distance from the source.

https://www.diyphotography.net/visual-approach-inverse-square-law-affects-photographers/

Now, I am sure you are reading this thinking, what the heck does that mean? Well it means the amount of light is reduced by distance. See the diagram below courtesy of Wikimedia:

Starting with Off-Camera Flash in Photography: Techniques
Every time the distance doubles, the power drops by 3/4.
Image: Borb / CC BY-SA (https://creativecommons.org/licenses/by-sa/3.0)

The easiest way to look at this in a photography sense is every time you double the distance between your light and the subject, the amount of light will be reduced to 1/4 of what it was.

What also happens is that every time you double that distance, you get more space to work in. This is really useful if you are doing a group shot. Again, whilst this is hard to explain with words, look at the diagram below.

A diagram of off-camera flash and how distance is affected by the inverse square law.
If you are doing a group shot, you want to get the flash further away from the subjects to avoid issues with exposure across the image

Flash-to-subject distance in practice

Now we understand the inverse square law, we can use it to our advantage. All of the images will be shot on the same blue background.

For both images, I will set the exposure at 1/200th, f/16 at ISO 100. I will keep the exposure the same by changing the flash power. The model is 1.5m from the background.

I start with the flash close to the subject (30cm). You can see the background is black. This is due to the light being close to the subject. Therefore, the difference in exposure between the subject to the background is huge due to the inverse square law. 

A dummy head showing the inverse square law in action. The head is close to the flash darkening the background
With the flash 30cm away from the model, the background gets virtually no light due to the inverse square law and light fall-off.

Now, as I move the light back, the difference in the power of light between the subject and the background is much less due to the inverse square law.

The distance between the model and the light is now around 2m.

To keep the exposure the same, I have had to increase the power of my flash a whopping 6 stops. In this example, it has gone from 1/128 power to 1/2 power to keep the same exposure. 

As you can see in the image below, the final model and background are both well-exposed due to moving the light further back.

Starting with Off-Camera Flash in Photography: Techniques
With the flash further from the background, the exposure covers the model and the background.

Let’s recap

So hopefully, you now have a good understanding of the basics for getting started with off-camera flash. But let’s recap the basic points to remember:

  • Aperture controls the flash exposure
  • Shutter speed controls the ambient light
  • Doubling or halving the power of your flash moves the power of the flash by one stop of light. 
  • When the flash is close, the light falls off incredibly quickly
  • As you move further away, the fall-off is much slower.
  • Get yourself a model that isn’t human to practice on. Try the model head or bottle of whiskey.
  • Practice, practice, practice. 
  • It isn’t easy to get your head around, but I promise that one day it will just click. The only way for this to happen is if you practice. So, what are you waiting for?

There are more variables you can throw in, such as modifiers, high-speed sync, etc. but right now, that isn’t what you need to learn.

Master these basics and then push things further. The only thing I would suggest to add is an umbrella to diffuse the light and give more flattering results.

Now it’s time to practice

An article about starting with off-camera flash that tells you to shoot fully manual. You might be thinking “I can’t do this.” You can – you just need to practice.

It may sound daunting to some of you, but I promise it is easier than you think. I always compare starting with off-camera flash to learning your time tables. When you are learning them, they feel really difficult. Then it clicks, you suddenly understand it and you wondered why it took so long.

All together class, sing along. Two times two is four…

Do you have any other tips or questions you’d like to share? Please do so in the comments.

The post Starting with Off-Camera Flash in Photography: Techniques appeared first on Digital Photography School. It was authored by Carl Spring.


Digital Photography School

 
Comments Off on Starting with Off-Camera Flash in Photography: Techniques

Posted in Photography


How to Make Exciting Flash Action Photos with Second-Curtain Sync

12 Jun

The post How to Make Exciting Flash Action Photos with Second-Curtain Sync appeared first on Digital Photography School. It was authored by Rick Ohnsman.

dps-flash-action-photos
Blur or Freeze motion?  How about both?!!
In still photography, we can choose to blur or freeze motion. Or… we can do both! Read on to learn how.

All the excitement surrounding the latest cameras seems to center around their video capabilities. Fine, I guess. But, maybe you’re like me, a dedicated still photo shooter with no desire to make videos? I don’t need to make things move in my photos, but I do want to illustrate movement.

My options?

1) Use a long exposure/slow shutter speed causing moving things to blur creating the suggestion of movement, or

How to Make Exciting Flash Action Photos with Second-Curtain Sync
Panning with the subject, and using a slower shutter speed blurs the background, giving a sense of motion. Canon D30 with Tamron 17-50mm f/2.8 lens. 1/60th sec. f/4 ISO 400.

2) Use a short shutter duration to freeze the action, capturing a moment of motion that could not have been seen with the human eye, or

A fast shutter speed will freeze the action.  1/8000 sec.  No flash.
A very short shutter speed will freeze action in many cases. This was lit with bright sunlight only, no flash. Canon 50D with Canon 50mm f/1.8 lens. 1/8000th sec. f/3.5 ISO 400.

3) Use the very short duration of a flash to capture an even thinner slice of time freezing very fast-moving objects.

But have you considered the fourth option? How might you make flash action photos that combine the motion blur of a long shutter speed with the freezing power of flash in the same shot? Let’s explore how that works.

Flash action photos - combining motion blur with frozen action.
Motion blur + Frozen action = Flash action photos. Combining slow shutter speeds with the freezing power of a flash. Canon D30 with Canon 24-105mm f/4 lens. 1/20th sec. f/4 ISO 400. Canon 500EX flash – Second-curtain sync.

An exposure within an exposure

When you make a flash photo, you are really making two exposures in one. Open the shutter and whatever available ambient light is there streams in through the camera iris onto the sensor. How much light is controlled by two things; the size of the aperture (measured using f/stop terminology), and the duration of the exposure (controlled by the shutter speed.)

When we use a flash, the burst of light happens during that same shutter duration. Flash duration is typically much shorter than the total shutter duration and happens “within” the total exposure. Thus, an “exposure within an exposure.”

Flash action photo - an exposure within an exposure.
There are two exposures in one here – The ambient light creates the blur using a longer shutter speed while the flash freezes the action at the end. Canon 50D with Tamron 17-50mm f/2.8 lens. 1-second, f/13 ISO 100. Second curtain sync flash – Canon 500EX.

Open the curtain and let the show begin

Unless you’re using a camera with a leaf shutter (rather rare anymore), your camera probably uses a focal-plane shutter. There are two “curtains” (and that’s what they are called), between the rear of the lens and the sensor.

Watch this slow-motion video of what happens during an exposure.

When the shutter button is pressed: 1) With a DSLR, the mirror swings up out of the way. 2) The first curtain goes down, exposing the sensor to light. 3) The second curtain then comes down, again blocking light from the sensor.

The total exposure duration, the time between the opening of the first curtain and the closing of the second, that is the amount of time the sensor is exposed to light and is what we control with the shutter speed setting.

Back in the outside world

Outside the camera in the real world, life goes on. If the subject or the camera moves during the exposure, the relative distance it moves during the exposure duration will be recorded as a blur.

Subjects that don’t move at all won’t blur even during a long exposure.

Fast-moving objects could move quite a bit and thus blur more unless the shutter speed is fast, the exposure duration short, and the amount of motion imperceptible during that brief period.

Enter the flash

The above describes what happens when a photo is made using only ambient light. It doesn’t matter the light source; it could be the sun, the moon, candlelight, continuous man-made lighting sources like incandescent, fluorescent, LED, flashlights, whatever. For our purposes, ambient light is whatever light exists during the entire duration of the exposure.

The flash, however, will be comparably short and happen within the duration of the exposure. Depending on output power and the type of flash used, flash duration can be very short. Take a look at the chart below illustrating the flash duration of a typical Speedlight (here a Canon 580EX).

Flash power/duration chart for Canon 580EX.
The lower the power, the shorter the flash duration. However, less power also means less working distance.

At a 1/128th power setting, the flash duration can be as short as 1/20,000th of a second! Even fast-moving objects won’t move far during such a thin sliver of time, so they will be frozen by the flash.

Flash did the freezing here - The room was dark, so no ambient light and the shutter speed not that fast – 1/60th sec. f/25 ISO 100 (but the flash at 1/16th power had a duration of just 1/16,000 sec.
Flash did the freezing here – The room was dark, so no ambient light. The shutter speed not that fast – 1/60th sec. f/25 ISO 100 (but the flash at 1/16th power had a duration of just 1/16,000 sec. so everything is totally frozen with no motion blur.

Ambient + Flash = Flash action photos

Since a photo using flash is an exposure-in-an-exposure, what if we harness the power of both ambient light and the flash to use the advantages of each?

What might we get if we used a long exposure to capture the ambient light and thus blur the moving subject and then a burst of flash to freeze it? We could get a photo that combined both motion blur and a frozen subject! We could call that a flash action photo.

Flash action photos - Combine a long shutter speed for the blur with a 2nd curtain sync flash to freeze the action too.
Combine a long shutter speed for the blur with a 2nd-curtain sync flash to freeze the action. Canon 50D with Tamron 17-50 f/2.8 lens. 1 Second, f/5.6, ISO 100

First versus Second-Curtain Sync

The flash will be fired within the total duration of the exposure. If, say, the shutter speed is 1/125th second and the flash duration at 1/64th power is 1/14,000 second, when during that 1/125th second does the flash fire?

The default for most cameras and flashes is to have the flash fire as soon as the first curtain drops to expose the sensor. This is what is termed “first curtain” (aka front curtain) sync.” The timeline below illustrates how that works.

First Curtain Sync Timeline

In a standard flash photo with the flash in ETTL mode, this will be the sequence with the default first-curtain sync:

  • Shutter is pressed.
  • Pre-Flash fires (Omitted if Flash is in Manual Mode).
  • Camera calculates necessary flash output power needed (Only in ETTL Mode).
  • First curtain drops exposing the sensor to ambient light.
  • Flash fires.
  • Ambient light continues for the duration of the exposure.
  • Second (aka “rear”) curtain drops, covering the sensor and the exposure ends.

With most flash photos, especially things like portraits and such, the total exposure will be short enough there won’t be a noticeable difference between the portion of the exposure made with ambient light and that made with the flash. To best capture the moment, having the flash immediately fire is usually a good thing and probably one reason manufacturers make first-curtain sync the default.

So why use second-curtain sync?

We started out talking about photos that combine the blurred motion caused by a slow shutter speed with the freezing power of a flash. The problem with the default first-curtain sync that triggers the flash at the beginning of the exposure is that the frozen portion of the image happens immediately, and the blurred portion made with the remaining ambient light happens after. As the subject moves, the recorded blur will be in front of the frozen portion of the shot.

Flash action photos - Illustrating first and second curtain sync flash.
Assuming we want to make the car look like it’s traveling forward, the top shot done with second-curtain sync flash looks more natural. All settings were the same and the toy car was pushed from right to left in both cases. The top shot is second-curtain sync, the bottom shot the default, first-curtain sync.

But that looks weird

Standard convention is to see the blurred portion of action behind, not in front of the moving object. Illustrators and cartoonists know this and use motion lines (also called “sphericasia”) to help depict motion. (They also use Quimps, Plewds, Grawlixes, and a bunch of other cartoonist marks. Check out this fun read).

How to Make Exciting Flash Action Photos with Second-Curtain Sync

Sometimes as photographers, we will pan with a moving object, use a longer shutter speed, and if we pace our pan correctly, get a photo with a blurred background and the subject relatively frozen. The blur will be behind the subject, and that looks natural. But use a long shutter speed combined with a default first-curtain sync flash and…nope…that just looks weird.

A fast jet can be made to look motionless with a 1/200th second shutter speed.
Though flying at hundreds of miles per hour, this U.S. Air Force Thunderbirds jet can be made to look motionless with a very fast shutter speed. Canon 6D with Canon 400mm f/5.6 lens. 1/2000th sec. f/5.6 ISO 200.
Illustrating movement with motion lines.
This is how an illustrator or cartoonist might depict motion using “sphericasia” or motion lines.

Activate second-curtain sync

So let’s make it look right and create some flash action photos that look correct. You will need to activate second (rear) curtain sync. In some cases, this will be done on your camera. In others, you will do it on your flash. There are too many variables of camera/flash combinations for me to tell you just how to do it with your equipment, so you’ll need to get out your manuals. Look for second (sometimes called rear) curtain sync.

How to Make Exciting Flash Action Photos with Second-Curtain Sync
Left to right – This is the symbol that indicates second-curtain sync on my Canon 550EX flash. Center and right – Setting up second-curtain sync on my Canon 6D camera. Every camera/flash combination will differ, so you may need to consult your manual on how to get into second-curtain sync flash.

This is usually pretty easy. In the combo I used for this article, a Canon 6D camera with a Canon 550EX flash, it was done on the flash. Once set, I was good to go.

Flash action photos - First vs second curtain sync flash.
The same action, swinging the hatchet down into the log. was performed in both photos. All the settings were the same except, the left shot used first-curtain sync flash, while the one on the right used second-curtain sync flash.

Other considerations

You will need to experiment to determine exactly what your settings should be given the variables of amount of ambient light, distance to the subject, speed of the moving subject, and exactly the look you’re going for. There is no precise “recipe” here.

However, here are a few things that may help you get great flash action photos:

  • Going full-manual with both the camera and flash will give you the most control.
  • Going manual with the flash should prevent a pre-flash, which you don’t want.
  • Determine what ISO and aperture you need to expose for the given ambient lighting conditions.
  • Shutter speed will vary depending on the speed of your moving subject, how much blur you want, and whether you’ll be panning with the movement of the subject.
Which is which?  Flash Action photos with first / second flash curtain sync.
Which uses first and which second curtain sync flash? It’s hard to tell with objects like this ball. Here’s a clue – The ball was rolling away from the camera in both shots.
  • You will need sufficient light on your subject to properly expose the ambient portion of the exposure. Take some test shots without the flash to see how things look.
  • You will likely want to manually adjust the flash output power depending on how close you are to the subject and how much “freezing” power you want for that part of the photo. Use the aperture and ISO to control the ambient portion of the image, the shutter speed to control the amount of blur, and the flash power to control the frozen part of the image.
Flash Action Photos - First or second curtain sync?
Another test… In both shots the ball was rolling right to left. So which uses first and which second curtain sync flash?
How to Make Exciting Flash Action Photos with Second-Curtain Sync
If you will be controlling the motion of your subject and also the camera, a remote trigger is handy. Here, I used a Yongnuo RF602 radio trigger.
  • The blurred portion of your moving subject made with the ambient part of the exposure will have a translucent, “see-through” look. You will need some contrast between it and the background to help it show up. Shooting a brighter subject on a darker background helps a lot, especially as you learn the technique.
How to Make Exciting Flash Action Photos with Second-Curtain Sync
Canon 50D with Tamron 17-50mm f/2.8 lens. 1/6th sec. f/ 4.5 ISO 100 w/ second-curtain sync flash.

The key – practice!

As with so much of photography, there is no substitute for practice. Getting your camera/flash into second-curtain sync mode is the easy part.

After that, do some simple experiments such as I show, rolling a bright ball across a dark floor. That should help you grasp the concepts.

You will find that timing can be the tricky part. Know that the flash will fire at the end of the exposure, so experiment to determine where the object will be when that happens as it won’t be when you first click the shutter.

Flash action photos - illustrating he fast and furious of cycle racing with second curtain sync flash.
Illustrate the fast and furious action of cycle racing but still get the expression on the rider’s face with a 1/8th second shutter speed combined with second-curtain sync flash. Canon 6D with Canon 70-200mm f/2.8 lens. 1/8th second, f/8 ISO 800.

Move up to something like the hatchet photos I show here, or maybe someone swinging a golf club or baseball bat. When you have the concepts down, head out to a sporting event or something where there’s some action, to depict like the bicycle races I show or recruit some dancers or other performers.

Blur and frozen action both - Flash action photos with second curtain sync flash.
Canon 50D with Tamron 17-50mm f/2.8 lens. 2 seconds, f/5.6 ISO 100. Second-curtain sync flash with Canon 550EX flash.

Flash action photos that combine blur and a frozen subject all in one shot, will teach you the principals of ambient and flash lighting. Best of all, you can make some really cool and unique images! Gotta scoot now…have fun!

Flash action photo - Scale model of the author's 2003 Ford Sport Trac.  Second curtain sync flash.
Canon 6D with Canon 24-105mm f/4 lens. 1.7 seconds, f/8 ISO 100.

The post How to Make Exciting Flash Action Photos with Second-Curtain Sync appeared first on Digital Photography School. It was authored by Rick Ohnsman.


Digital Photography School

 
Comments Off on How to Make Exciting Flash Action Photos with Second-Curtain Sync

Posted in Photography


Flashpoint announces wireless XPLOR Power 1200 Pro R2 flash, its most powerful flash

11 Jun

Flashpoint has announced a new flagship portable flash, the XPLOR Power 1200 R2. The flash is the newest member of Flashpoint’s R2 series of portable, wireless flashes.

The XPLOR Power 1200 R2 is Flashpoint’s most powerful flash unit and it offers multiple flash modes, including power recycling of less than two seconds and long flash duration for continuous shooting. The XPLOR Power 1200 Pro power pack and flash head combine to weigh just over 17 pounds. Of the wireless flash, Flashpoint Brand Manager, Solomon Leifer, said the following:

The Flashpoint XPLOR Power 1200 Pro is our most robust and powerful wireless flash, while remaining lightweight and portable for location shooting. With 1200W output and an excellent battery-powered system, the XPLOR Power 1200 Pro flash is perfect for ‘big event’ and outdoor photographers.

The Flashpoint XPLOR Power 1200 Pro includes a built-in Flashpoint 2.4 GHz R2 wireless flash system and offers wireless control for Canon, Fujifilm, Nikon, Olympus, Panasonic, Pentax and Sony TTL camera systems. The strobe offers nine steps of output power, ranging from 1/1 to 1/256. The flash includes a high-speed sync (HSS) mode that can work with shutter speeds up to 1/8000s. For stopping action, flash durations range from 1/220 to 1/10,860s.

Photographers need more than speed and power; they also need color stability with their lighting. The flash offers a Stable Color Temperature mode to better control temperature changes. Flashpoint states that this mode keeps temperatures ranges within +/- 75K throughout the entire power range.

Connectivity features include a pair of 3.5mm sync cord plug holes for wired connection, a wireless control port and a USB Type-C port for future firmware upgrades. For connecting light modifiers, the flash head is compatible with Bowens S-Type modifiers, resulting in compatibility with hundreds of light modifiers.

For extended shooting, the large-capacity lithium-ion battery in the power pack delivers 480 full-power flashes and can be fully recharged in two hours. The battery is 36V/5200mAh and it can be swapped out of the power pack in seconds. There is also an optional AC adapter to replace the battery chamber for a direct main connection when shooting indoors or in a studio environment. If photographers want to travel by air, there’s also a 36V/2600mAh rechargeable battery pack option.

Close-up image of the Power Pack.

Additional features include a 40W LED modeling lamp with three selectable modes, fan cooled flash head, three active flash modes (Manual, TTL and Multiflash) and a Stroboscopic Mode capable of delivering 100 continuous flashes at 1/16 power output.

The Flashpoint XPLOR Power 1200 Pro R2 flash comes with the flash head, power pack, reflector, glass lamp cover, lithium-ion battery, battery charger, power cable, carrying case and rolling case.

The Flashpoint XPLOR Power 1200 Pro R2 flash system is available now for $ 1,599 USD from Adorama and comes with a power pack, flash head, reflector, glass lamp cover, lithium-ion battery, battery charger, power cable, carrying case and rolling case.

As Adorama’s house brand in the United States, this flash is sold as a Flashpoint product. However, it can also be purchased as the Godox AD1200 Pro from other retailers and in other markets. As we noted in our coverage of the Flashpoint XPLOR 300 Pro, for customers in the United States, Flashpoint products are covered by a two-year warranty when purchased through Adorama.

Articles: Digital Photography Review (dpreview.com)

 
Comments Off on Flashpoint announces wireless XPLOR Power 1200 Pro R2 flash, its most powerful flash

Posted in Uncategorized


Flash Softbox Diffuser Review

27 Apr

The post Flash Softbox Diffuser Review appeared first on Digital Photography School. It was authored by Jackie Lamas.

flash-softbox-diffuser-review

In this article, we’re reviewing this budget-friendly flash softbox diffuser that fits over your external flash so that you too can have a great tool to add to your camera bag.

Flash Softbox Diffuser Review
The softbox diffuser only works for flashes with a larger head. The smaller Polaroid flash wasn’t compatible.

About the flash softbox diffuser

While the diffuser that comes with most external flashes gets the job done, this attachable softbox will work much better to spread light more evenly and create a softer light source for your portraits or other types of photography.

The softbox has no poles to assemble or extra equipment that might get lost in transport or by using it. It folds out, and you can straighten it into shape by simply using your hands. This is a plus when it comes to setting up and tearing down, which saves you much time and not having to worry about fiddling with assembly parts.

Flash Softbox Diffuser Review
The flash softbox diffuser attaches to your flash and you can use it on a stand or on your camera. 1/80 of a second, f4.5, ISo 400

The flash diffuser softbox comes with a case and holding strap. This allows you to attach it to your bag without any extra attachments or worrying about bending it while using it.

Flash Softbox Diffuser Review
The flash softbox diffuser comes with a handy bag. 1/100 of second, f/4.5, ISO 400

At Although the material the softbox is made out of is a clear indicator that it won’t stand up to longterm wear and tear, the softbox, measuring at 30cm length and 20 cm wide, it does what it’s supposed to diffuse and spread evenly the light of your external flash.

On camera, it adds nothing to the weight of your camera. It stays in place by using an elastic band that wraps around the flash head and is secured by a strip of Velcro.

Flash Softbox Diffuser Review
The flash softbox diffuser has a simple and easy opening for the flash head to place the flash head in. 1/125 of a second, f/4.5, ISO 400

On the inside, the flash diffuser softbox has a silver lining to help bounce light back out. It also has an added diffuser that crosses the front of the flash that is secured by Velcro. This can be useful in situations where you need softer light.

Flash Softbox Diffuser Review
There is an added diffuser inside the softbox too. 1/125 of a second, f/4.5, ISO 400

The universal size makes it perfect for one-light portraits, tabletop and product photography, and using it on or off your camera.

Flash Softbox Diffuser Review
1/160 of a second, f/7.1, ISO 400

Main features

  • The size and weight make it easy to set up and use.
  • No additional hardware or accessories needed with the Velcro closure.
  • It’s universal and fits most models of external flashes.
  • Additional diffuser inside of the softbox.
  • You can use it on-camera or off-camera.
  • Budget-friendly costing no more than US$ 10 dollars.

Ease of use

The soft box is really simple to use. It comes in its own zippered pouch ready to use right away as it easily unfolds. With a little pull, it shapes into the flash softbox diffuser you see in the photos.

Flash Softbox Diffuser Review
1/200 of a second, f/5.6, ISO 100 Flash at 1/8 power.

It has no wires, poles, or additional hardware making it really easy to set up and use on the go, in a studio, or anywhere your flash goes.

Does it really work?

Flash Softbox Diffuser Review
The first image has the flash pointed directly at the subject. The second photo is with the flash softbox diffuser. The third image is with the additional diffuser inside of the softbox. Taken at 1/60 of a second at f/5.6 with an ISO of 400.

Using the flash softbox diffuser for your flash is really easy, given that it simply pops out and attaches quickly.

You can notice how the light gets softer just by adding the softbox to your flash. It goes further in softening the light with the additional white diffuser strip that is inside of the softbox.

Flash Softbox Diffuser Review
In the catchlights, you can see where the softbox is positioned. 1/125 of a second, f/5.6, ISO 125 with flash at 1/8th power angled down at the subject.

In the images above and below, I angled the flash down at my model in a small bathroom. Using the flash softbox diffuser allowed me to be in a small space and use directional light on the subject without it being too harsh or creating undesired shadows.

Flash Softbox Diffuser Review
1/125 of a second, f/5.6, ISO 125 with flash at 1/8th power angled down at the subject.

In the following images, I placed the subject in harsh sunlight to see how the softbox would fill in shadows or otherwise light the subject.

Flash Softbox Diffuser Review
Without the diffuser, with the softbox, with the extra diffuser inside the softbox. 1/100 of a second, f/8.0, ISO 100

For these photos, I directed the flash straight onto the doll without the diffuser. The middle image is with the softbox diffuser on, and the third image is with the softbox diffuser and the added diffuser inside.

Flash Softbox Diffuser Review
1/100 of a second, f/8.0, ISO 100 with flash at 1/8 power with softbox diffuser on flash off-camera.

You can see a big difference in how the light from the flash got softer. These are not retouched and straight out of the camera.

Flash Softbox Diffuser Review
Flash power at 1/16th power with the flash softbox diffuser. 1/200th, f/7.1 ISO 400.

Here I used the flash at 1/16th power to fill in the shadows on the child. I also got really nice catchlights in his eyes that make the portraits pop a little bit more. The flash softens the catchlights making them appear more natural like a big window.

Flash Softbox Diffuser Review

Using the flash in darker lighting situations also proves effective. I photographed the toy in a dark room and used the flash off-camera and on-camera.

Flash Softbox Diffuser Review
1/200 of a second, f/8.0, ISO 160 flash was set to ETTL.

Pros

  • Easy to set up and to use. The softbox works, does its job well, and has an added diffuser inside to help soften the light more if needed.
  • It’s really affordable, lightweight, and convenient to transport and use on-location.
  • It does the job of softening the light. Most of the control is either in the flash or in the camera settings.
  • Fits most flash systems due to the universal build.
  • Folds flat and comes with a pouch.

Cons

  • The material on the outside is a little cheap.
  • The size means it’s not going to give you a large light source so you’ll get some fall off if you’re photographing larger groups.

Who is this flash softbox diffuser for?

This flash softbox diffuser is perfect for someone who is just getting into flash photography and learning about how to control and modify light. It is for someone who perhaps doesn’t have a lot of space to set up a full studio with bigger strobes or flash systems.

Flash Softbox Diffuser Review
1/200 of a second, f/5.6, ISO 100

Being that the diffuser is lightweight and can be taken outdoors, it is also perfect for the photographer who shoots outside a lot. For example, on the beach, macro photography to get close to the subjects, or someone who shoots tabletop and still life.

It’s perfect for the photographer who likes to keep their equipment simple and light when shooting or traveling.

The flash softbox diffuser would also be a perfect addition for a tabletop and product photographer who shoots in small spaces or travels for shoots.

Final verdict

The flash softbox diffuser works as is expected and does soften the harsh light the external flashes sometimes gives.

While the material the flash softbox is made from isn’t too convincing of its longevity, it is a great starter light modifier to help photographers control and soften lights for portraits.

Flash Softbox Diffuser Review

It is rather small in terms of size, which is a good thing and a bad thing. If you’re looking for something lightweight and portable, this is a good buy. However, the size limits the spread of light, then again perhaps with more flashes it could give a better effect.

Flash Softbox Diffuser Review
1/150 of a second at f/2.2, ISO 125, flash output power at 1/16 power.

For the price, at less than $ 10, it is an interesting purchase to play with and experiment without making a major investment.

The softbox diffuser would be more ideal for tabletop and product photography given the size.

Flash Softbox Diffuser Review
1/160 of a second, f/7.1, ISO 400 with flash a 1/16 power.

Either way, it’s a fun accessory to add to your bag in the event you are starting to experiment with flash and light modifiers. And you can’t beat the price!

The post Flash Softbox Diffuser Review appeared first on Digital Photography School. It was authored by Jackie Lamas.


Digital Photography School

 
Comments Off on Flash Softbox Diffuser Review

Posted in Photography