RSS
 

Posts Tagged ‘Successful’

Tips for Getting Yourself to Relax as a Photographer and Have More Successful Portrait Sessions

24 Apr

When I first got started in photography I thought I had things all figured out regarding cameras, lenses, exposure, and even some post-processing. However, the first time I greeted a client on location for an actual photo shoot, I realized just how clueless and ill-prepared I really was, and found myself nervous to the point of almost being nonfunctional. I was so uptight and anxious about the whole photo session, that I’m still not sure how I managed to get any good pictures, but thankfully things have gotten much better in the subsequent years.

Even though I have greatly expanded my knowledge and experience, I still get a little nervous when meeting with clients. I have found several tips that work well to calm the butterflies in my stomach and help make for much more enjoyable and productive portrait sessions, both for me and my clients. I’m going to share them with you.
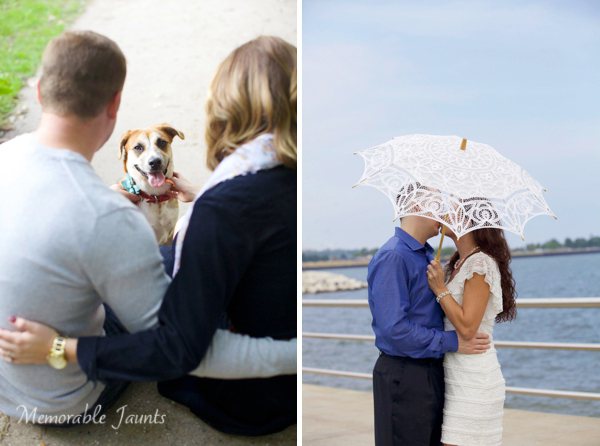
relaxing-for-portrait-session-couple-farm

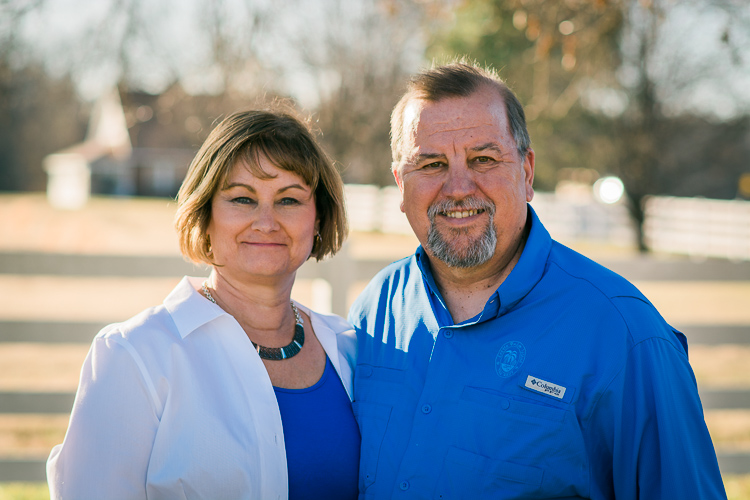
Even after doing this type of work for years, I can still get nervous going into a photo session.

The Three Phases of Portrait Anxiety

While this triad of temporal distinctions is entirely nonscientific in nature, I have found that my stress and anxiety regarding a given portrait session generally can be divided into three discrete phases:

  • Phase 1 – The days or weeks leading up to a photo session. This lasts the longest, but thankfully doesn’t require impromptu decisions and instead gives you time to be thoughtful, analytical, and reflective. The downside is it lasts the longest! This unfortunately means you have way too much time to over-think and over-analyze everything.
  • Phase 2 – The short time before you start the session. This is usually five or ten minutes, interacting with the client at the session but before you start taking pictures. This period is brief but critical, as it can set the tone for the entire photo session and if you’re not properly relaxed things can go downhill quickly.
  • Phase 3 – The photo photo session itself, which usually lasts about an hour, unless you are doing a wedding or other type of protracted engagement. Things can get very tricky here, but if you have taken the time to properly relax during Phases 1 and 2 you will probably find Phase 3 to be smooth sailing.

Here are my tips for helping yourself relax, take things easy, and get mentally prepared for the photo session. While not all of these may apply to you, I do hope they are general enough to be useful to you in similar situations.
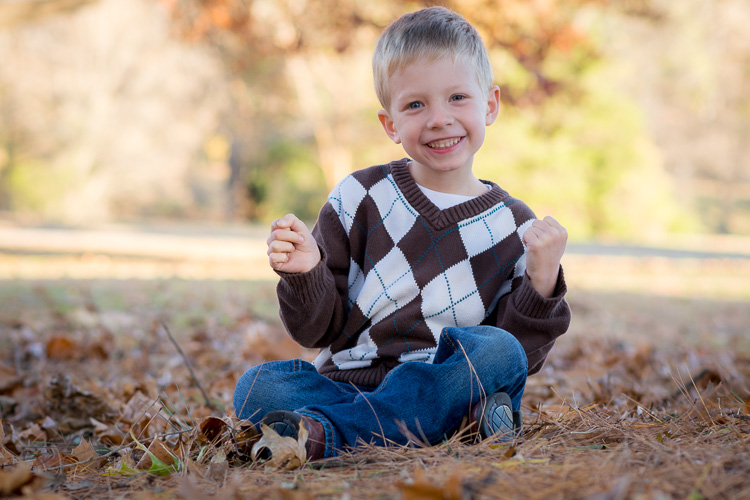
relaxing-for-portrait-session-child-looking-up

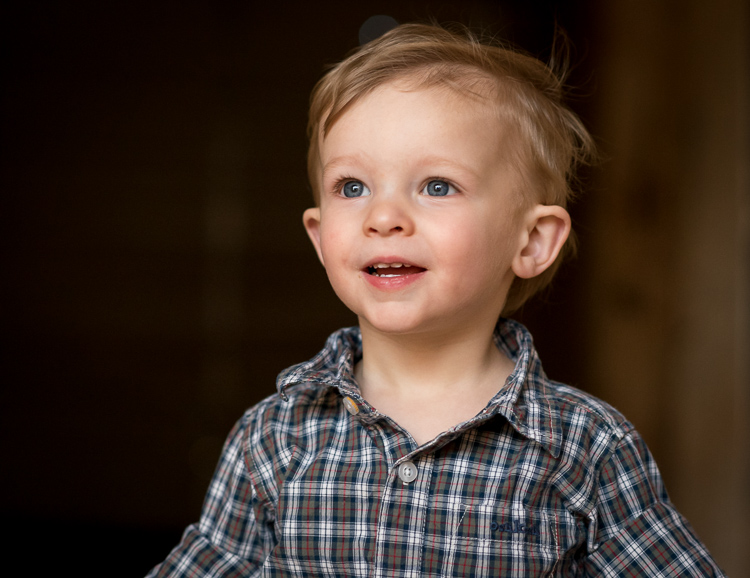
If you aren’t relaxed the kids won’t chill out either, and neither will their parents.

Phase 1: Preparing for the Session

Adele, one of the most popular singers in the world, recently told Rolling Stone that she gets stage fright. “I’m scared of audiences,” she said. “I don’t like touring. I have anxiety attacks a lot.” As a photographer this gives me some degree of comfort knowing that my nervousness leading up to a photo session is not all that different than world-famous singers and actor,s who perform in front of thousands of people every day. Even though I have done many portrait sessions, I still get nervous beforehand, but have found a few tips and tricks to help calm myself down and relax in order to clear my head and do the best job I can.

Talk to someone supportive

Whether it’s a friend, a coworker, a family member, or even a former client, spending time talking about the upcoming session is one of the best ways to clear my head and get some reassurance. For me it’s my wife, who is a solid rock and a constant reminder that I can do the job. She and I discuss my goals for the session, look at examples from other photographers, and talk about what has worked and not worked in past sessions. These conversations always help me calm down, while also giving me a big boost of confidence that goes a long way towards a successful photo session.
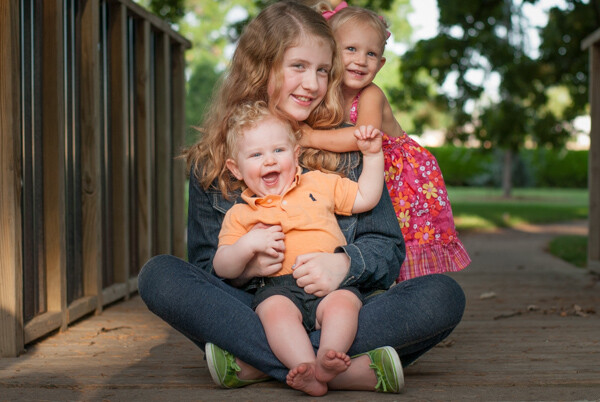
relaxing-for-portrait-session-baby-sister

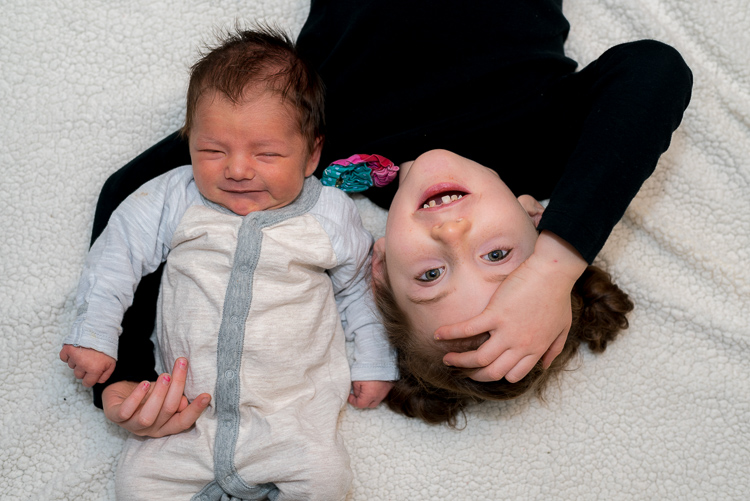
In the days leading up to this session, my wife and I spent a long time discussing the shoot and planning things out. This did wonders to calm my nerves and helped me do a better job at the session.

Look at your own successful images

Look at your own past images as a reminder that you are fully capable of doing the job. Sometimes in the days leading up to a photo session I start to wonder if I really have what it takes to get the shots I want, but looking through my own portfolio always offers enough reassurance to bring me out of that funk and back to reality. Yes, each session has its own unique challenges, but reminding myself of what I have done before, is a great way to relax and prepare for what is about to come.

Have a plan

Have a plan for the session and make a list of poses and shots you want to get. It can be a mental list, but a physical list will help you be sure to get everything you want, and will allow your clients see that you are prepared if you cross items off it during the shoot. One of the last things you want is to get back to your computer and realize you forgot to get a shot of grandma holding her new grandbaby, the happy couple underneath their special tree, or little Timmy in his special new cowboy boots that his mother emailed you about the day before. Making a list will help you avoid this scenario while also helping you to de-stress before the session.
relaxing-for-portrait-session-couple-downtown

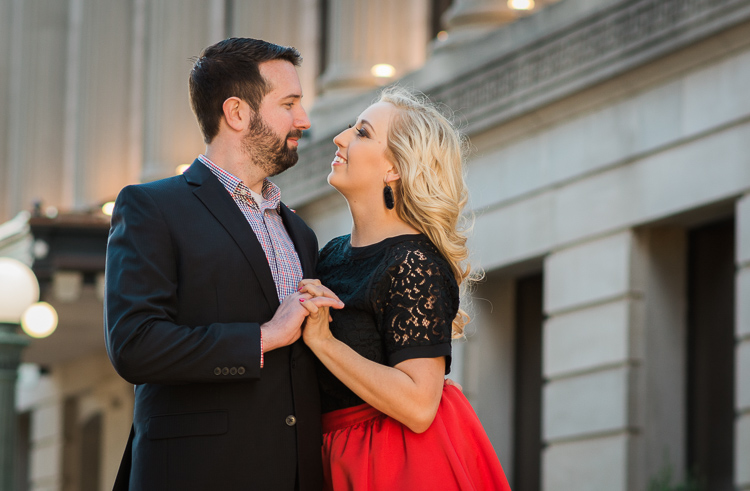
This couple sent me a few ideas for different shots, and since the location was 60 miles away I used Google Maps Street View to investigate things beforehand.

Scout the location ahead of time

Visit the location to make sure you know what it’s like, and how you can use it to frame your shots. Ideally this would be at the same time of day as your photo session, so you can make sure you know what the lighting will look like on the day of the shoot. This will help you see all sorts of things you might miss if you just show up the day of the session, and it will make you look like a confident professional as you direct your clients.

Know your gear

Know your gear inside and out. It sounds silly but you don’t want to freeze up in the middle of a session because you can’t find the menu that lets you change white balance, or you forgot which dial changes the shutter speed. If you find that you need a quick refresher re-read the manual, watch online tutorials, or just spend 15 minutes poring through the menus and buttons. When it comes time to do the photo session, you can rest assured that these planning efforts will have been put to good use.
You don't want to scramble trying to locate menu options and camera buttons. Make sure you know your gear beforehand so you can focus on your clients when you're on the job.

You don’t want to scramble trying to locate menu options and camera buttons. Make sure you know your gear beforehand, so you can focus on your clients when you’re on the job.

Practice with test subjects

If you’re going to do a newborn session, practice with stuffed animals. If you’re on location, get a friend or family member to go out with you a week beforehand and do some test shots, so there are as few surprises as possible when you go out there with the client.

Make a gear packing list

Make a list of all the gear you need and check it off one-by-one as you pack up for the session. You don’t want to get to the location and realize you forgot something at home, or left a battery on the charger. I once did an outdoor shoot and realized all too late that I forgot my lens hoods, and almost immediately started hyperventilating into my camera bag when the clients asked for some shots with the sun behind them, just out of the frame. Things ended up working out, but a simple list would have prevented a great deal of stress during the shoot.

Phase 2: On your mark, get set…
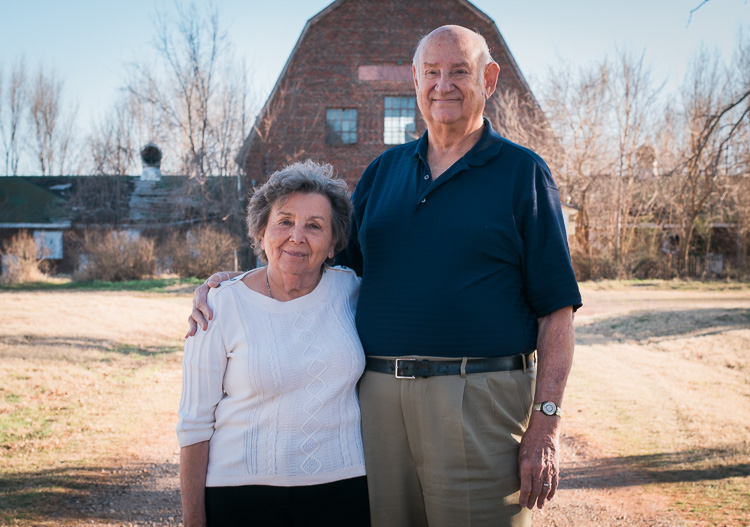
relaxing-for-portrait-session-couple-barn

Chatting with this couple as I set up my gear helped put everyone at ease, including myself.

One of the weirdest parts about a portrait session can be the few minutes when you are visiting with the client before you start actually taking pictures. What do you do? What do you talk about? How do you strike a balance between friendly and professional? It’s enough to send even the most seasoned photographer’s blood pressure to the top of the charts, and messing up this brief pre-session period can send the rest of the gig into a tail spin.

In my experience one of the best ways to help you and the client relax is to go on the offence instead of playing defence. Don’t stand around waiting for people to talk to you, as they are probably feeling just as awkward, and are likely waiting for you, the person in charge, to take the lead. Even if smalltalk is not your forté, you need to be willing to strike up a conversation and have a few things ready to talk about as you are getting set up. In a nutshell, make this time all about the client, and helping them feel comfortable.

As you are getting ready to start taking pictures talk to your clients about their life outside of the photo session, and find out what hobbies they have, what they like doing in their spare time, or even what they are doing over the coming weekend. Ask questions to show you are interested, and use this time to also run some ideas past the client in terms of what you will be doing. This helps build a sense of rapport and respect, and can go a long way towards putting everyone at ease. Your clients might be just as nervous as you, but getting the chance to get to know each other will help put everyone at ease and also help them feel comfortable if you have lots of lighting, lenses, or other gear. If there are kids involved, bring some toys or snacks (nothing crumbly as it will get on their clothes) to win them over. At my most recent family session I gave the two-year-old a fake toy camera and asked if he could help me get some photos. This not only won him over but his parents too, and a week later, before they had even seen their photos, they were telling some friends about how much they enjoyed the picture session.
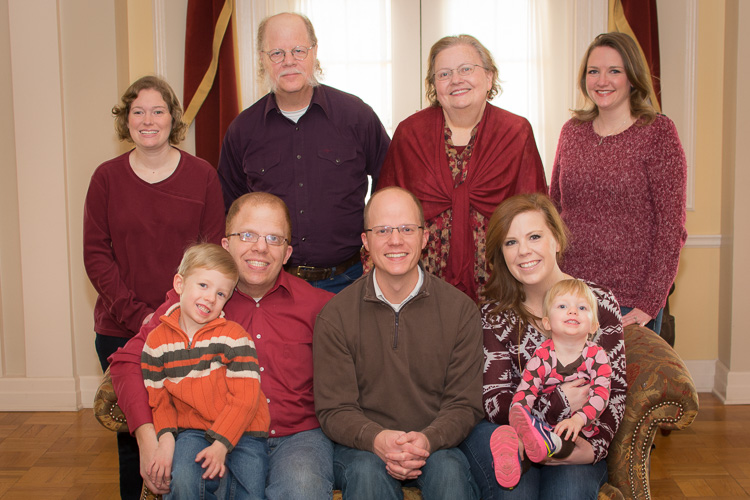
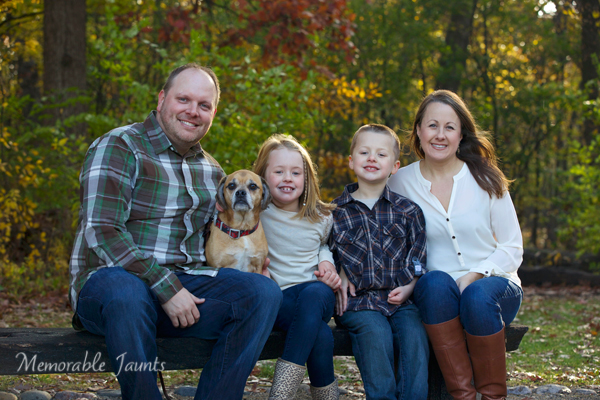
relaxing-for-portrait-session-family

A few minutes chatting sports with the grandparents and playing with the kids went a long way towards a more successful photo session.

Phase 3: Here we go!

Even though you have done everything in your power to chill out, relax, and put your mind at ease leading up to the photo session, things can still be a little nerve-wracking as you go about the process of actually taking pictures. At any moment there are a thousand decisions to be made, and trying to balance everything can be enough to make your palms sweat. My favorite trick for relaxing during a photo session is to simply make things fun. Don’t bark out orders, but instead have your clients do silly things like make faces or try just-for-fun poses. This will help you loosen up, and also give you a chance to build on the rapport you have already established at the beginning. Clients can tell if their photographer is wound up tight and needs to chill out, and if you make things more fun and lighthearted as opposed to all business, you will find yourself loosening up, relaxing, and getting much better results.

These are just a few of my favorite tips and tricks to help me calm my nerves before and during a photo session, but what about you? How do you approach your portrait sessions and what do you do to help yourself relax? Share your thoughts in the comments section below!

People photography week

This week on dPS we’re featuring articles all about different kinds of people photography including portrait, event and travel photography. See all the previous ones below, and watch for more people photography articles over the next few days.

  • How to Take Low Key Head-shots
  • How to Do a One Light Portrait Setup and Use it as Your Back-up Plan
  • Travel People Photography – Tips and Pitfalls
  • 8 Tips for Photographing Men
  • 24 Diverse Images That Showcase People Photography
  • Weekly Photography Challenge – People Photography

googletag.cmd.push(function() {
tablet_slots.push( googletag.defineSlot( “/1005424/_dPSv4_tab-all-article-bottom_(300×250)”, [300, 250], “pb-ad-78623” ).addService( googletag.pubads() ) ); } );

googletag.cmd.push(function() {
mobile_slots.push( googletag.defineSlot( “/1005424/_dPSv4_mob-all-article-bottom_(300×250)”, [300, 250], “pb-ad-78158” ).addService( googletag.pubads() ) ); } );

The post Tips for Getting Yourself to Relax as a Photographer and Have More Successful Portrait Sessions by Simon Ringsmuth appeared first on Digital Photography School.

Digital Photography School

 
Comments Off on Tips for Getting Yourself to Relax as a Photographer and Have More Successful Portrait Sessions

Posted in Photography


Tips to Help You Start a Successful Photo Blog

29 Feb

As you learn more about using your camera, and start taking beautiful pictures, you might also want a way to share them with the rest of the world. There are many social networking platforms that are ideal for this sort of thing like: Instagram, Flickr, Google Photos, Tumblr, and Facebook, along with hundreds more.

However, one of the most popular, and effective ways, to share your pictures is a simple, humble, tried-and-true blog. Even though blogs are sort of like grandpas in our modern internet age, there’s a reason they have stuck around for more than two decades: they’re intuitive, easy to set up, and they allow you to have full control over your content. Many photographers enjoy using blogs because of their flexibility and customizability, and if you want to spent a bit of money for a dedicated blog platform like Squarespace, or a self-hosted WordPress installation, you can get even more creative.

If you are thinking about pursuing this route there there are some things you need to consider before setting up your own photo blog.

There are many sites that let you build photo blogs, several of which do it for free.

There are many sites that let you build photo blogs, several of which are free.

Know why you are doing a blog

This first point seems kind of obvious, but a lot of photographers find their blogs stalling out, and gathering dust after a few months, because they did not define their purpose for doing the blog when they first began. Many people start blogs because they just want to share random pictures, but if you want a viable long-term blogging solution, you’re going to need something more.

Are you starting a photo blog to get your name out there, and generate sales leads (potential customers)? Do you want to make a mark in your community? Do you want to simply post photos you think are interesting? Whatever your reason for doing a photo blog, it’s important to make sure you at least have one, in the first place. If you have never done a photo blog, then it’s likely you are doing it for personal reasons, such as trying to learn and grow as a photographer. That is an outstanding goal, and one that has helped many other bloggers, become much better at photography as well.

Once you know precisely why you are doing your blog, it will serve as a guide for everything you post. Brandon Stanton started the well-known Humans of New York blog with a specific purpose: to photograph 10,000 people living in New York City. This helped him have a sense of purpose and direction when taking and posting photos, and doing the same thing can greatly benefit you as well. If you cannot explicitly state why you are doing a blog, it is much more likely to gather virtual dust after a short time, and any readers you do manage to pick up, will possibly stop investing their time in it as well.

One of the first pictures I ever posted to my blog. It's not even an interesting photo but I was just starting out and can look back on this to see how much I have learned since then.

One of the first pictures I ever posted to my blog. It’s not even an interesting photo, but I was just starting out, and can look back on this to see how much I have learned since then.

In 2008 the web analytics firm Technorati found that roughly 95% of the blogs it tracked, went more than 120 days without being updated. When your blog goes four months without anything new, it is more than likely a failure. So how can you keep your blog not only surviving, but thriving past 120 days, and well beyond? Here are few more tips that might help:

Clearly articulate the purpose of your photo blog to your viewers

Attention spans are short, and people today have a never-ending stream of tweets, news clips, soundbites, app updates, and cat videos coming their way, almost every waking moment. So,how on earth can you make your blog stand out, and get noticed amid all the other sites, apps, and feeds that people check on a daily basis?

New readers should be able to tell within five seconds, what your blog is about. The best option is to have a specific niche that your photo blog serves (e.g. wildlife, surfers, snowflakes, street pictures, etc.). But, even if it’s just pictures you like taking for no particular reason, you should at least make that clear to your readers upfront. You’re basically setting expectations right from the outset, and giving your audience a clear sense of what they will get out of reading your photo blog. Some people do this by having a descriptive name for their blogs, a brief tagline, or a set of pictures that instantly conveys a sense of purpose (e.g. flowers, cattle, cars, sunsets, etc.). Whatever the purpose of your photo blog is, if your readers can’t figure it out, they’re going to quickly move elsewhere.

My blog is specifically for photos I take with my 50mm lens, and I make that clear to my readers immediately when they visit the site. If you don't let your readers know what your blog is about they will probably not stick around very long.

My blog is specifically for photos I take with my 50mm lens, and I make that clear to my readers immediately when they visit the site. If you don’t let your readers know what your blog is about, they will probably not stick around very long.

Post new content regularly

Not every blog that is updated regularly is going to be a success, but every successful blog is updated regularly. I have seen too many photographers start blogs that are updated daily, then weekly, and before long, the rate at which new pictures are posted slows to a trickle. Soon it’s a photo every couple weeks, then one a month, and then a written apology by the blogger about how he or she has just been so busy lately, but they promise to start posting more photos soon. More often than not, soon becomes later, then later becomes never, and a once-promising photo blog becomes another statistic of failure rates.

The best way to combat this problem, is to not post pictures whenever you feel like it, but instead post them on a regular and predictable basis. This gives your readers something to expect, and also imparts upon you, the blogger, a sense of accountability, which helps keep your camera in your hands and out of your closet. My photo blog is titled “Weekly Fifty”, and because it requires me to post a picture every single week, I almost always carry my camera with me, and am constantly looking for photo opportunities. In almost three years I have never failed to post a photo each Wednesday morning, which has helped me build a nice following, with regular commenters as well.

A few years ago I ran out of ideas for pictures to post, but I knew I had to stick with my weekly schedule so I made this image that turned out to be one of my more popular photos.

A few years ago I ran out of ideas for pictures to post, but I knew I had to stick with my weekly schedule. So, I made this image, that turned out to be one of my more popular photos.

One trick I like to recommend for photo bloggers, is to schedule your posts in advance. This doesn’t work well for blogs about news or current events, but as a photo bloggers you do not have to be timely in the same manner. I currently have complete posts (each with a photo, written explanatory text, and an accompanying 4-minute audio commentary) scheduled for the next six weeks. I use WordPress, which allows me to schedule posts in advance, so each of these six posts will be automatically published on subsequent Wednesdays at 1:00 a.m. This gives me a bit of padding, if I ever find myself in a position with lots of things going on in my life, and my readers know that they will get a new picture each week, no matter what.

Of course the catch here, is that I can’t merely sit on my laurels in the meantime. I have to keep taking pictures, and producing new blog posts, so that six weeks from now I don’t run out of material. This type of accountability is enormously helpful for photo bloggers, and if you’re not sure where to start, I always recommend doing one picture each week. If that’s too much you can lower it, and if it’s not often enough you can increase it, but I have found that a weekly schedule is a sweet spot that gives you enough time to take pictures, and doesn’t overload your readers with so much new content that they start ignoring it.

Engage with your audience

Building a loyal audience is the holy grail of almost every blogger, but it’s not easy to do. Your readers have many obligations, alerts, people demanding their time, and often it’s difficult enough just to get them to visit your blog in the first place, much less comment on a photo, or offer some kind of reaction to it. Early in the life of your blog, visitors will usually not be invested in your pictures enough to leave comments. But, as you start to build traffic, and readership over time, you will likely have a few people who start to offer feedback on your images.

When you do get commenters it’s essential that you interact with them, in order to build a sense of community, respect, and mutual sharing. If someone likes one of your pictures, say “Thank you” and ask if you can see some of their photos too. If someone offers a bit of constructive criticism on a picture, try re-taking a similar photo using their suggestions. You can offer a Call to Action by posting a photo, and encouraging your readers to take, and share similar photos in the comments section. This type of audience engagement benefits all parties; by giving you even more reasons to continue your blog, giving your readers a reason to keep coming back, and giving new readers a sense that your photos are interesting and worthy of comments.

I ran my blog for almost a year and a half before getting any regular commenters. Now I get about 40 comments each month, a number with which I am very happy.

This chart shows my comment statistics for calendar year 2015. I ran my blog for almost a year and a half before getting any regular commenters, and now I get about 40 comments each month. It’s not huge, but it’s a number with which I am very happy.

If your blog grows to mammoth proportions, and you start getting hundreds of comments on each picture, it might not be reasonable to reply to every single one, but until that happens you need to take care to give each commenter a personal response. If people are taking time out of their day to leave comments on your pictures, knowing that you personally read and responded, will make them want to keep visiting your blog, and engaging with you as well as other readers.

On my blog I have a few loyal readers who comment on every single picture, and it’s well worth a few minutes of my time each week to respond to the things they write. This helps make my commenters feel valued, and builds a sense of community that would not exist otherwise.

Push content to your readers

People rarely go out of their way to visit a blog, so instead you need to find a way to push your new pictures to them. One of the most effective ways of doing this is to ask your readers to sign up for email updates, but you can also use social networks to get the word out about each new post.

Every Wednesday my email subscribers get that week’s photo in their email inbox, but I also publish a link to my blog on Facebook and Twitter, and put that week’s image in my Instagram feed as well. (With the last option people are not directed to my blog, but I still get to engage with them about my pictures.) If you would like to ultimately generate revenue from your blog you might want to focus on ways of pushing content to your readers that, as often as possible, will bring them directly to your site and not to somewhere else that also has your photos.

I woke up the morning this photo was published and found two comments had already been posted at about 2am. This type of engagement is possible because these people subscribed to email updates. If you don't have a way of pushing content to your readers you will likely not get the same level of engagement as you would otherwise.

I woke up the morning this photo was published and found two comments had already been posted at about 2am. This type of engagement is possible because these people subscribed to email updates. If you don’t have a way of pushing content to your readers you will likely not get the same level of engagement as you would otherwise.

Define your success criteria

I teach a Project Management class at Oklahoma State University. One concept we talk about often is how to tell if a project is successful, and the same holds true for your photo blog. At what point will you know that your blog has succeeded in meeting your goals? Will you be happy if you have two comments, and 10 social media shares for each picture you post? Are you looking for a way to generate a specific amount of revenue from your blog? Or is your success criteria more esoteric, such as using your blog for a sense of personal growth and development?

Having a set of clearly-defined success criteria is not necessarily essential for a blog, but it will give you something to shoot for, and a way of knowing whether you have gotten there or not. Whatever your success criteria is, take care to not compare it to anyone else’s. For example one of your photos might get five comments and 10 social media shares, but then you talk to a friend who just had five thousand visitors to his blog. Whose blog is more successful? The answer is…they both are.

Success depends entirely on how you define it, and thankfully the internet is big enough for millions of photo blogs to coexist. Congratulate your friend, and ask to see the photo that was so popular. Don’t make your blog’s success a competition, because and as long as you are happy with how things are going, then that’s the only thing that matters.

This photo had a great deal of personal meaning to me, but it generated very little traffic and almost no comments. If my success criteria is only quantifiable through numbers I would have been let down, but instead taking this photo forced me out of my comfort zone and made me try something new. Because of that I considered this one of my better photos even though raw numbers might say otherwise.

This photo had a great deal of personal meaning to me, but it generated very little traffic, and almost no comments. If my success criteria was only quantifiable through numbers I would have been let down, but instead the sheer act of taking this photo, forced me out of my comfort zone, and made me try something new. Because of that I considered this one of my better images, even though raw numbers might say otherwise.

Ignore the numbers

Visitor statistics can be so exciting, but they can also lead you down the path to the blogging dark side. It can be fun to log in to your account dashboard, and see that a recent picture generated 200 visitors, but those numbers don’t mean anything, if they don’t translate to reader engagement. Imagine building a store and getting hundreds of people to come see your wares, but having every one of them leave without making a purchase. Not only would your store be a failure, but you would quite likely be disappointed on a deeply personal level.

As a photo blogger you need to strive for quality over quantity, and look for ways to build a loyal following, not just try to increase raw visitor statistics. You might get a nice feeling seeing one of your photos get hundreds or thousands of views, but what happens when a different (or far better) picture you post gets only a couple dozen views? Visitor traffic is a fickle mistress, and if you pin your blogging hopes and dreams on simply making the numbers go up, you could very well be setting yourself up for a painful failure.

February 2015 was a big month for my blog, but the numbers have gone down dramatically ever since. Since my success criteria is not measured in raw numbers this drop in traffic makes no difference to me, but if numbers are your goal then you could very well end up chasing a white whale that can never be captured.

February 2015 was a big month for my blog, but the numbers have gone down dramatically ever since. Since my success criteria is not measured in raw numbers this drop in traffic makes no difference to me, but if numbers are your goal then you could very well end up chasing a white whale that can never be captured.

I used to run a movie and TV review website, and wrote an article about the now-defunct show, “Man versus Food” on The Travel Channel. Somehow the host of the show found out about the article, tweeted it to his followers, and that single article generated more traffic than anything else we had ever posted. The problem was that those visitors did not stick around, and within a few weeks we were back to the same relatively low numbers we always had. At the time I figured blogging success meant getting sky-high traffic numbers, and when those numbers did not pan out I thought we had failed.

When I started my Weekly Fifty photo blog, I took an entirely different route and tried hard to ignore numbers about visitor statistics, and have been much happier as a result. I do my blog because it helps me learn and grow as a photographer, and I get a great deal of personal satisfaction out of it. I appreciate the continual challenge it offers. In short, I’m a happy and successful small-time photo blogger, because I don’t let numbers and statistics define what success means to me.

This is by far the worst photo I have ever posted on my blog, and it's almost painful to look at it now. But early on in my blog I had no idea what I was doing, and it was only through taking lots of bad pictures that I learned how to make a good image. Even though this picture is kind of embarrassing, it served a valuable purpose both on my blog and for me as a photographer.

This is by far the worst photo I have ever posted on my blog and it’s almost painful to look at it now. But early on in my blog, I had no idea what I was doing, and it was only through taking lots of bad pictures that I learned how to make a good image. Though this picture is kind of embarrassing, it served a valuable purpose both on my blog, and for me as a photographer.

Do you have a photo blog, or are you thinking about starting one? I’d love to hear any tips you would like to share, and will try to answer any questions you might have as well. Leave your thoughts in the comments section below and I’ll do my best to engage with you, the dPS readers, so you feel valued and keep coming back to our site. :)

googletag.cmd.push(function() {
tablet_slots.push( googletag.defineSlot( “/1005424/_dPSv4_tab-all-article-bottom_(300×250)”, [300, 250], “pb-ad-78623” ).addService( googletag.pubads() ) ); } );

googletag.cmd.push(function() {
mobile_slots.push( googletag.defineSlot( “/1005424/_dPSv4_mob-all-article-bottom_(300×250)”, [300, 250], “pb-ad-78158” ).addService( googletag.pubads() ) ); } );

The post Tips to Help You Start a Successful Photo Blog by Simon Ringsmuth appeared first on Digital Photography School.

Digital Photography School

 
Comments Off on Tips to Help You Start a Successful Photo Blog

Posted in Photography


6 Tips for Doing a Successful 365 Photo Project

04 Jan

Happy 2016, welcome to the start of a new year. This is a great time to start new projects – be it losing weight, getting fit by regularly exercising, committing to eating right, or improving and growing your photography knowledge and skill.

We all have many different goals when it comes to our passion for photography. A great way to get started is by working on personal and professional photography projects. One simple yet effective way to work on your photography skills is to participate in a 365 Photo Project. Quite simply, a 365, as it is most often called, is a commitment to take a photo a day for 365 days straight. You can get as specific or as general as you like in terms of what you photograph, when you photograph, or even how you photograph. There are no set rules – the only requirement being you must take at least one photo each day, that counts towards your 365.

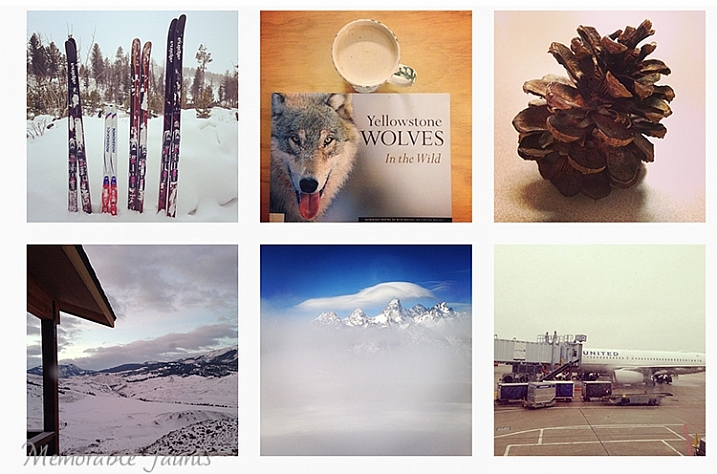
365 Photo Collage

A small collage from my 365 project done in 2014.

That being said, there are some basic guidelines to successfully complete a 365 – a sort of dos and don’ts list, if you will.

#1 Be honest about why you want to do a 365

Talk to anyone, and you are bound to hear many different reasons why you should do a 365 photo project. Some people feel it improves your photography because you are consistently taking at least one picture a day. Others feel it is a fun way to document and record a year in your life. It is also a great way to experiment and learn about light, composition, subject, equipment, and develop and hone in on your observation skills.

Since you know you have to take at least one photo every day, you are constantly looking for good photo opportunities everywhere, and tend to become more observant of your environment. No matter what your reason, be very clear on exactly why you want to start a 365, and document that as part of the process. This will help clarify your goals, and make the process more enjoyable.

Processed with VSCOcam with t1 preset Memorable Jaunts DPS Article 365 Photo a day article 03

#2 Create a routine for your 365

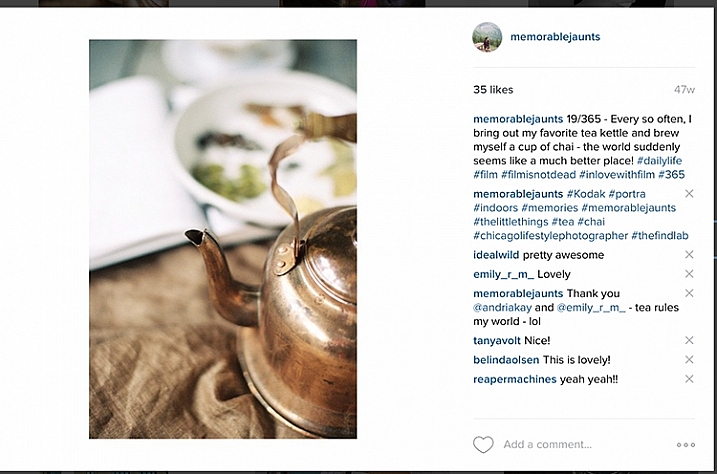
Just like anything else in life, having a routine provides a sense of organization. Figure out when is your best time to photograph, and stick to that routine. For me, the best time is around 9:00-10:30 a.m. It is early enough in the morning when my brain is quite active, there are no distractions, and the morning light is quite clean and bright. Of course that is not to say that I don’t photograph at other times of the day, but when I am working on a project, or an assignment, that’s my go-to time. And yes, I do treat my 365 as an assignment. The only difference is that I am my own client!

Memorable-Jaunts-365-Example

My general task list for my 365 -generally, all it takes is 10 minutes of my time:

  • Shoot 365 photo – five minutes
  • Edit photo – two minutes
  • Load to Dropbox – 30 seconds
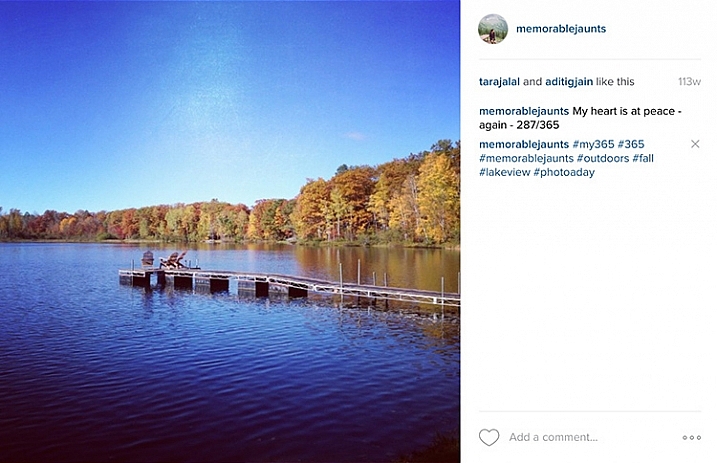
  • Post on Instagram – 30 seconds
  • Write a caption and one line description for the image – one minute
  • Add hashtags – one minute
  • Total – 10 minutes approximately

#3 Set your own prompts or join a 365 group

In my opinion, this is the hardest part of doing a 365. The proverbial, “What do I photograph?”. Luckily there are so many of us doing 365 projects, that there are online groups you can join to get daily or weekly prompts sent to your inbox. Here are a few:

  • Project 365 Flickr group
  • 365 Project website
  • The 365 Make 1 shot per day, for 1 year – Flickr group

The other option is to completely customize the project, and work from your own prompts, or inspirational triggers. You might only want to photograph your breakfast, your pet, or your children. You may want to focus on modes of transportation. No matter what the prompt, I recommend creating a list or a journal to document them. That way you know what you have already photographed, and what comes next.

Memorable Jaunts DPS Article 365 Photo a day article 07

I try to follow this general prompt weekly for my 365. Sometimes, I deviate from it, and for me that’s okay!

  • Monday – Inspire
  • Tuesday – Food
  • Wednesday – Nature of the outdoors
  • Thursday – Indoors
  • Friday – Family
  • Saturday – Personal
  • Sunday – Fun day (anything goes)

Memorable Jaunts DPS Article on 365 photo series 05

#4 Choose the tools of the trade

Choose a camera – any camera! If you want to improve on your mobile camera skills go for it. Did you get a new camera for Christmas? Use a 365 photo project as a great way to learn the workings of your new toy. After all, practice makes perfect, and there is nothing like practicing everyday to get you comfortable with using that new camera.

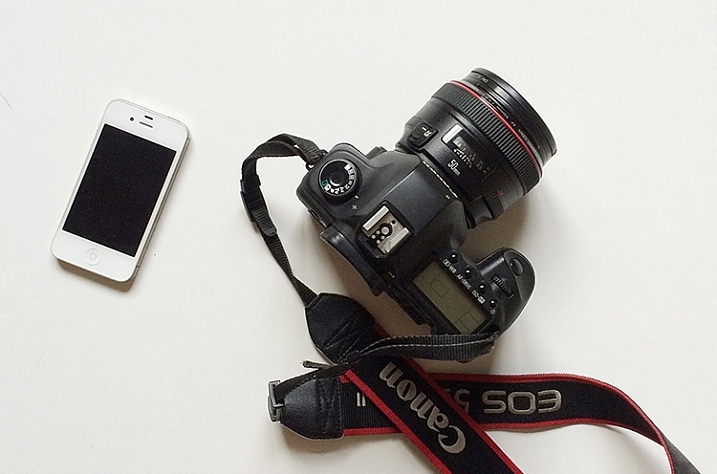
Regardless of what tool you use, makes sure that it is something achievable. I find my DSLR to be cumbersome at times, and not easy to carry around with me for smaller errands in town. So instead, for my 365 photo project, I use a combination of iPhone and DSLR, which gives me the flexibility I need.

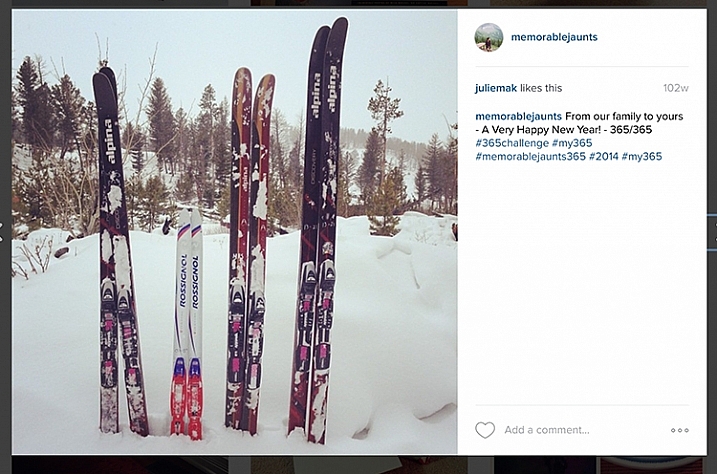
The other common question that most people want to know is how to document the project. My 365 medium of choice is Instagram. I love this platform, as it brings forth a great sense of community and creativity. By posting my images, and using the #365 hashtag, I am instantly part of a large group of people who are in the same project. It keeps me motivated and on track. I know a lot of people who post a collage of images on their social media channels, rather than a picture a day. This does not mean they don’t photograph one picture a day, but rather they just share their images once a week, or a month at a time.

Memorable Jaunts Gear for executing a 365 photo a day series article for DPS

These are the only two tools I use for my 365. When an image is from my DSLR, I can use the #dslr365 in Instagram to separate the two (not a required step but I like to do it just for my reference).

#5 Learn to forgive and move on

Who knew that doing a 365 can also be a great way to learn basic life lessons! The age old adage to forgive and forget is very relevant while participating in a 365. Sometimes things happen and you end up missing a day, or several days in a row. It is not the end of the world. Acknowledge it, accept it and move on. Either you can catch up, and post more than one picture the next day, or just mark it off as missed and go forward. The key here is to keep moving forward. Otherwise days turn into weeks, that turn into months, and before you know it, the 365 has long been forgotten and abandoned.

Memorable Jaunts Photo a day 365 example article for DPS

One of my favorites from my last 365. I did miss a few days here and there but the memories that I was able to capture still make me smile to this day!

#6 Success, completion, and what’s next

A 365 photo project is definitely a commitment. One that takes time and effort on your part, but the rewards are quite satisfying. To me, completing a 365 photo project provides a sense of achievement and accomplishment. In my mind it’s not an easy task, and I do celebrate my success!

Print all, or some of your best images, and create a collage of photos. Create a photo book specific to your 365. The possibilities are endless. My 365 photo project lives on my Instagram feed only, and I like printing my favorites. There are several companies that also provide the option of printing Instagram images. I have used Artifact Uprising in the past, but Blurb and Shutterfly are a few other companies that come to mind.

Memorable Jaunts DPS Article 365 Photo a day article 08 Memorable Jaunts DPS Article 365 Photo a day article 05

Note: If you use Lightroom you can create a Blurb book and order it directly from within the software, all right from your original camera files.

Once you have completed your 365 photo series, my recommendation would be to take a break. Jumping right in to another 365 can be a bit much. That’s not to say that people don’t do it, and be successful. Many people absolutely love doing 365 photo projects, and have consistently done it for several years at a stretch.

Personally, I like a variety of challenges in my photographic journey. After completing a 365 photo project in 2014, I took a break and focused on other things. Now I am ready to get back into the game and will be starting a 365 photo series in 2016 on my Instagram. Join me if you want to and lets motivate each other to take a photo a day for 365 days!

googletag.cmd.push(function() {
tablet_slots.push( googletag.defineSlot( “/1005424/_dPSv4_tab-all-article-bottom_(300×250)”, [300, 250], “pb-ad-78623” ).addService( googletag.pubads() ) ); } );

googletag.cmd.push(function() {
mobile_slots.push( googletag.defineSlot( “/1005424/_dPSv4_mob-all-article-bottom_(300×250)”, [300, 250], “pb-ad-78158” ).addService( googletag.pubads() ) ); } );

The post 6 Tips for Doing a Successful 365 Photo Project by Karthika Gupta appeared first on Digital Photography School.


Digital Photography School

 
Comments Off on 6 Tips for Doing a Successful 365 Photo Project

Posted in Photography


6 Strategies for Launching a Successful Photography Blog

15 Jun

Blogging become one of the most popular pastime and income source for photographers these days. If you’re going to start a photography blog, you have probably faced with a lot of issues which are quite confusing. And the very first question is: where to start out? Fortunately, modern software solutions enable everyone to create a blog easily with no coding Continue Reading

The post 6 Strategies for Launching a Successful Photography Blog appeared first on Photodoto.


Photodoto

 
Comments Off on 6 Strategies for Launching a Successful Photography Blog

Posted in Photography


Preparing for a Successful Client Photo Session

11 Feb

“Watch out”, she yelled a little too late as I slipped on an icy patch of snow and tumbled unceremoniously, almost flat on my face. The first thought racing through my head was, “My camera! Please God let nothing happen to my camera!”. Had I researched the location and the weather prior to my photoshoot, I would have realized that the temperatures had dipped quite a bit the night before, freezing the melting snow on the ground. A few hundred dollars later (my lens took the brunt of my fall and the focus ring got dislodged) with my ego a little bruised, I now always check the weather report before I head out. My car is my traveling studio and has everything I would ever need for any type of situation – photography related or otherwise!

Digital Photography School Preparing for your client photoshoot Memorable Jaunts

No matter what your level of photography expertise, a little anxiety or nervousness before a client photo session is very normal and typical. But with a little preparation ahead of time, you can reduce the anxiety, be confident that you have prepared for almost any eventuality, and actually have fun with your clients. I agree that preparations takes on different meaning for different types of client sessions – these are basic guidelines.

#1 Equipment related preparations

This is almost a no-brainer, but something that needs to be reiterated every single time. Recharge camera batteries, reformat memory cards, and clean lenses and cameras. Always carry spare batteries and extra cards. If you are going to be out for the whole day, carry your battery charger. You never know where you might find an electrical outlet, and those few extra seconds of battery life might just come in handy. I am very particular in downloading my images as soon as I get home from a client session. But that does not always happen, and there have been a couple of times where I had images on my card from prior shoots. There is nothing more unnerving than trying to remember if you have downloaded old images (or not) in front of your clients who are ready to be photographed.

#2 Location related preparations

Being a wedding and family photographer in Chicago means I have to deal with different types of clients, with different needs and expectations. Plus, weather is a huge factor in scheduling photo sessions. I am a natural light, outdoor photographer – that is what I do best. In a pinch, I will photograph indoors but that is not my first choice.

For family photo sessions, I have a few locations where I am very comfortable photographing. Those are my go-to location recommendations for my clients but every once in a while, I will get a client who wants to dictate the location. It could be a special place with special memories. This is where google maps comes in very handy. If it’s a local spot close to home, I will scope out the location prior to the shoot. But that is not always practical, especially with out of town weddings and engagement sessions, so I rely on google maps (any similar map tool will also do). Additionally ask around. I belong to several online groups of photographers and often times a quick question to the group gets me all the information I need about a particular location.

Digital Photography School Preparing for your client photoshoot location scouting Memorable Jaunts

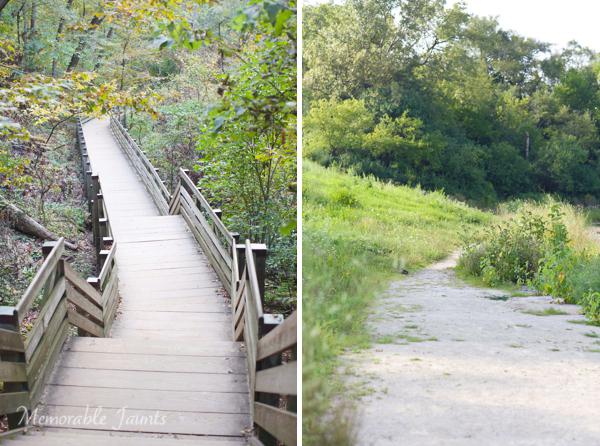
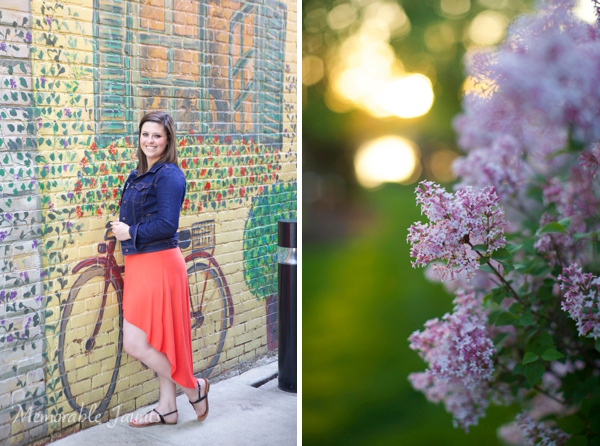
Invest in location scouting ahead of time, you never know what hidden gems you may find.

Digital Photography School Preparing for your client photoshoot Location scounting Memorable Jaunts

The bike mural was hidden in an alleyway and could have been easily missed had I not scouted the location ahead of time.

#3 Business related – contracts, model releases and questionnaires

This might be different based on your own photography business, but generally having a contract and a model release is advisable. This helps in level setting for both parties. My workflow is such that clients are required to sign a contract and a model release form prior to the actual session. But life does get in the way and sometimes they forget. I always carry spare model release forms with me – clients are more than happy to sign the forms at the end of session rather than having to go back home and mail out the materials. With my wedding photography clients, I have the couple fill out a detailed questionnaire – this has specifics like names, relationships of people in the wedding party and wedding photo shot list. The more details I can get from the bride, the better prepared I am, even before the main event.

#4 Visualize and plan your poses

A little preparation goes a long way! Hopefully by following the above tips, you are feeling confident and prepared for the photo shoot. Take it a step further and visualize your session even before it happens. Research poses and looks you want to capture that are a true representation of your work. Mentally walk through the shoot. Having an idea of what, when and where will really help you create a road map of how you want to execute the shoot.

It is also okay to write down must-have poses and shots, and refer to them periodically during the shoot. I always take a few minutes during the shoot to check the back of my camera. I am open and honest with my clients and tell them that I want to make sure I have gotten the shot I visualized. Sometimes I also show them the back of the camera to see what I am seeing. Clients appreciate this feedback and it makes them feel like they are doing the right thing. Happy clients = confident clients = happy photographer! Remember that most clients are not professional models and putting them at ease is as much a part of your job as is taking pictures.

A little preparation and previsualization really helps in getting images that resonate with you and your brand.

A little preparation and previsualization really helps in getting images that resonate with you and your brand.

#5 Save the best for last

This goes hand in hand with #4. Most people get very self-conscious when a camera is pointed at them no matter how prepared they are. Often times the first 10 minutes of the shoot are the most awkward and uncomfortable for both parties. Do your best to set them at ease, talk to them from behind the camera, and encouragement them. Since you have pre-visualized your shoot, and also scoped out the location ahead of time, you know the best poses and the best light and location backdrop.

Save this for the last 10-15 minutes of the session. By this time the clients have warmed up to you and the camera and are having a good time. They are more open and receptive to trying out new things ensuring you have the shots that you want.

Traditional Outdoor Family Portraits Memorable Jaunts

One of the last frames of this outdoor family photoshoot – everyone was really relaxed and happy!

Of course, there are still a lot of things that can go wrong no matter how prepared you are. The weather might take a sudden turn for the worse, your car might have a flat tire 20 minutes before the session, the family might cancel at the last minute (I speak from experience). The key is to be prepared for all the obvious and apparent ones and just roll with the punches for the things you cannot control.

googletag.cmd.push(function() {
tablet_slots.push( googletag.defineSlot( “/1005424/_dPSv4_tab-all-article-bottom_(300×250)”, [300, 250], “pb-ad-78623” ).addService( googletag.pubads() ) ); } );

googletag.cmd.push(function() {
mobile_slots.push( googletag.defineSlot( “/1005424/_dPSv4_mob-all-article-bottom_(300×250)”, [300, 250], “pb-ad-78158” ).addService( googletag.pubads() ) ); } );

The post Preparing for a Successful Client Photo Session by Karthika Gupta appeared first on Digital Photography School.

Digital Photography School

 
Comments Off on Preparing for a Successful Client Photo Session

Posted in Photography


Tips to Help You Prepare for a Successful Portrait Session

08 Dec

One of my favorite types of photo shoots is families with kids. It’s fun to spend an hour talking and laughing with people while taking photos. I enjoy being a small part of creating images that will preserve their precious memories for the rest of their lives. But these types of sessions don’t always work out as you might like, and even when you think you have all your ducks in a row something might pop up at the last minute that sends everything into a tail spin. Fortunately, with a bit of planning and preparation you can put a few things in place that will help your portrait sessions be freeing, fulfilling, and fun for everyone involved.

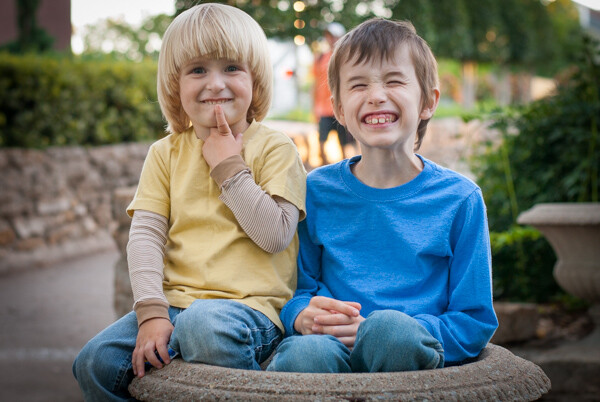
kids-bridge

Set Expectations

Whether you are taking photos of friends, family, clients, or even your own kids, one of the most important things you can do is make sure you are going to deliver what they want. Your subjects will have their own preconceived notions of what types of pictures they are looking for, and they might not always be the same as what you have in mind. If you can make sure everyone is on the same page before you even take out your camera, the entire process from posing, to shooting, to editing, will be much, much smoother.

Whether you know your subjects or not, it’s important to make sure they are familiar with, and approve of, your own picture style and portrait process. Showing your subjects some of your existing work is a good way to give them an idea of your style and help them see if you would be a good fit. This can be as simple as sending them some sample photos by email, directing them to an online portfolio, or sitting down and having a conversation about the type of photo shoot they are wanting.

Every photographer has a unique approach to his or her craft, and interacts with people in their own way. Do you take classic headshot portraits or do you like to experiment with various poses? Do you let subjects, especially kids, run around and play or do you like to control every element of the photo shoot? Do you shoot outdoors, in a studio, or a mix of both? Will they be able to share the photos online with a watermark, or do you require them to order physical prints? This might seem a bit too nitty-gritty, but dealing with these issues up front will save you a lot of hassle and headaches down the line.

couple-sunset

Not all photographers have their own website, but if you do you can include information such as the types of sessions you normally do, how much you charge, where you are willing to travel, etc. This information is good to know, but it often takes a little more to see if you are really the right person for your subjects. Think of the last time you went to a restaurant: did you just order right from the menu, or did you ask your waiter some questions about the food before deciding what you want? To address this, it’s good to have some sort of dialog with your subjects before you take a single photo. You can encourage people to contact you via email or a form on your website, send you a text or tweet, or post questions on a public Facebook page. It might seem like a lot of work to go through all this, but the more you work to set proper expectations for your subjects, the smoother the entire process will go.

One of the best ways to safeguard yourself against liability in case your subjects are unhappy, is to use a contract. This is especially important if you plan on charging money, and critical if you are doing something big like a wedding or bar mitzvah. If people are paying big bucks for your services, it’s essential that everyone is on the same page upfront. Without a formal contract wherein all parties involved agree on the services to be provided, things can devolve into he-said-she-said after your clients get the photos. Don’t think of this as a punitive measure, though – approach the contract as an opportunity for both you and your clients to help safeguard against miscommunication and make sure what you are going to provide aligns with what they want.

kids-flowerpot

Scout the Location

If you shoot indoors, this step is obviously not all that important. But if you plan on taking pictures outdoors it is critical that you know the area first. Just because you drove past a nice park or a friend told you about a rustic barn, doesn’t mean these places will be good locations for photo shoots. Go to the locations in person, get out of your vehicle, and walk around to see what things are like. If at all possible, do this at the same time of day you plan on taking pictures to make sure the light is similar, and ask yourself questions such as:

  • Where is the light coming from?
  • What features of the location are shaded?
  • What background elements can I use in the shots?
  • What existing features (fence, wall, bench, pond, tree, staircase, etc.) can I use for posing my subjects?
  • Are there lots of people around, and if so, what angle can I shoot from to avoid them in the background?
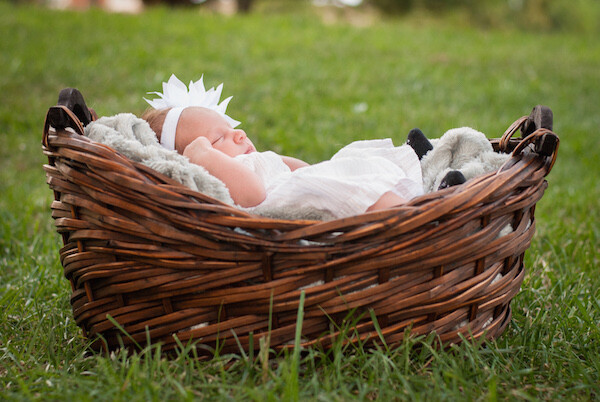
baby-basket

Normally this spot is full of people, but we picked a time to do the shoot when it was relatively quiet.

Even if you have already been to a location such as a field, beach, or alley, it’s still a good idea to check it out before your photo session if you have never used it specifically for taking pictures. If you approach the location with a critical photographer’s eye you will notice many things that have probably escaped your gaze previously, but could severely impact the photo session if not taken into account. It’s also a good idea to have a backup location in mind in case of bad weather, but make sure your clients are well aware of this and are able to meet you there if you do have to change plans.

Bring Blankets (and more)

This last tip might sound trite, but it has saved me on many occasions. And every time I forgot to bring blankets, I wished I had. Since I do most of my photo sessions outdoors there are many things simply out of my control. Some of these can be mitigated, like using reflectors or a flash if the light is poor, or having your subjects wear warm clothes if a cold front comes through the night before, but it’s amazing how many times a simple blanket has saved the day when all hope seemed lost.

Blankets can give your subjects something to sit on, wrap themselves up in, or just play with as you are snapping their photos. Blankets can comfort fussy children, diffuse a tense situation, or even (and yes this has happened to me more than once) cover up the mess left behind by a flock of geese the day before. They can also serve the practical function of adding a bit of color to your photos, or complementing the clothes that your subjects are wearing.

There are other items that come in handy as well. Recently I was photographing a couple and their infant son, and though I had already scouted the location at the specific time the shoot was to take place, I did not take into account one critical element: dew on the ground. I wanted to get some shots of their son holding his head up and looking around, but since the grass was all wet it nearly turned our fun photo shoot into a chore for the parents as well as the child. Thankfully I brought an old piece of canvas along, which not only gave the boy a soft dry surface to lay on, but was also big enough to accommodate the whole family on some wider shots.

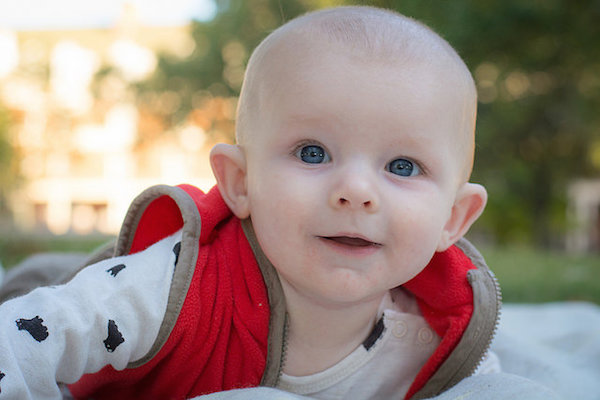
baby-canvas

The ground was too wet to lay on, so I asked his parents if we could use a simple piece of canvas. They obliged, and the final result turned out quite well.

If you are taking pictures of children, bring some toys that they can play with, or kid’s books for them to read. Better yet, contact their parents beforehand and have them bring their own favorite toys and books from home. I also like to have some sundry joke items like fake teeth or googly eyes to help make kids smile, which tend to work well for teens and adults too. If your subjects are a bit older, they might want to wear a favorite jacket, bring an artifact such as a football or set of golf clubs, or even have their photo taken with a pet. While you might not be able to provide all of these yourself, a little bit of preparation beforehand will give you an idea of what they want and help you go about planning for the shoot so you are not caught off guard.

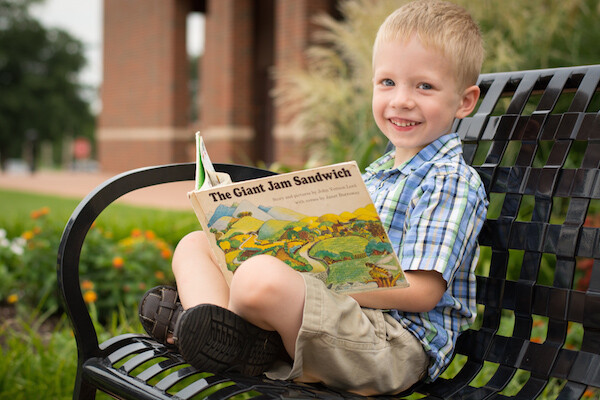
child-book

This boy’s favorite book not only gave him something to do while taking photos, but it will be a nice reminder when his parents look back on this picture years later.

These tips are things that have worked for me, but are there other tips you have for successful photo shoots? Share your ideas in the comments section below.

googletag.cmd.push(function() {
all_slots.push( googletag.defineSlot( “/1005424/_dPSv4_mob-all-article-bottom_(300×250)”, [300, 250], “pb-ad-78623” ).addService( googletag.pubads() ) );
} );

googletag.cmd.push(function() {
mobile_slots.push( googletag.defineSlot( “/1005424/_dPSv4_mob-all-article-bottom_(300×250)”, [300, 250], “pb-ad-78158” ).addService( googletag.pubads() ) );
} );

The post Tips to Help You Prepare for a Successful Portrait Session by Simon Ringsmuth appeared first on Digital Photography School.

Digital Photography School

 
Comments Off on Tips to Help You Prepare for a Successful Portrait Session

Posted in Photography


5 Tips for Stress-free and Successful Child Portraits

12 Nov

DSC 7364dps

Children are the best examples of spontaneity, creativity, and wonder and that is precisely why we all love them so much. Then family picture day comes and you wish they’d just sit down and be still for five seconds. Photographing children comes with its own brand of challenges, but if you arrive to a session with a few tricks in your bag, you’ll come away from that shoot with pictures that perfectly capture that what being a kid is all about. Here are five tips to help you have more stress-free and successful child portraits

1 – Kids Don’t Like Dictators

Children are used to being told what do to. All day long, it’s all they hear. “Sit down,” “Be quiet,” “Don’t hit your sister,” and “Spit that out!” Wven though they don’t like being told what to do, they’ll expect the same treatment from you. You’ll find, however, that you’re more likely to get great photos out of them if you shatter those expectations and treat them as equals.

Children like being helpers and they like being grown-up. So give them what they want. Instead of saying, “Sit down there and look at the camera,” you might try something like, “Hey buddy, would you help me out by sitting right here so I can see if the light is right?” In that phrase, you made them the big helper. You may already know that the light is right, but the child doesn’t know that. All he knows is that you needed his help and you see him as an equal. Another technique is asking the child where they’d like their picture taken. This gives them adult-like control. Give them options though or you run the risk of them picking a bad spot. Point out a few spots that you’re okay with and let them choose from those. Even go as far as to ask their advice when it comes to posing. Give them a little control and they’ll be happy to give some back when you need it. I once had a three year-old tell me that he wanted to do his epic mad face for a pose. I told him, “That’s a great idea! Let’s do it!” After I took a picture of that epic mad face and I then said we should try out a few other faces just to make sure we get them all. He was more than happy to let me pick the next face.

DSC 7130dps DSC 6481dps

2 – They Don’t Need to Look at the Camera

Even with the best psychologist-tested techniques, children are still children. Most children have a hard time looking at a camera. The reason? Because the camera is a big black thing and it doesn’t even come close to resembling a human being. Children like to look at people’s faces, especially their eyes. Older children have an easier time, but younger ones really don’t like looking at the black hole in the middle of our cameras.

That’s okay! Some of your best shots could be the ones where the child isn’t looking at the camera. Being a kid means being on the go, constantly exploring, and living for the very next moment. Allow the child to move around the location and explore. Your job is to follow and click away. Once in a while, they may look directly into your lens and make a connection and that’s awesome. More than not, you’ll get shots of them whizzing past or looking down at a flower or hugging mom’s leg. All great shots that show what being a child is all about.

DSC 1742bwdps

3 – Use Their Inner Actor

Getting genuine smiles out of a child is difficult at times. It seems that as children get older their smiles get more forced. So how do you instruct a child to smile naturally? Even adults have a hard time with that. One effective technique is to work with the little actor that lives at the heart of so many kids. Try asking your kid clients to give you a fake laugh. Go as far as to model how the laugh should go. The awesome thing is that when you ask someone, child or adult, to fake laugh, it’ll make them feel silly and then they’ll really laugh. There is a smile that happens toward the end of a laugh and that is where their natural smile lives. This technique can work even on shy children.

You could also have them imagine something and see what expression you get. You could ask them to give you the smile they get when they’ve just gotten away with something or the smile they get when they get a present. For older children, it seems like asking them about a boy or a girl they like at school, in a playful manner, always elicits a very nice smile. Children like acting and pretending, so use it to your advantage.

DSC 9653dps

4 – Monkey See, Monkey Do

Most children, especially young ones, don’t really excel at following directions. If you’re trying to pose them and you’re giving them the same directions you’d give adults, you’ll end up with a very confused child who pulls off a really weird pose. If you’re photographing children and they’re okay to sit and pose for you, model every pose you want from them. Children can mimic like pros, so use that gift. If you want them to sit cross-legged with their elbows on their knees, get down and do it yourself. This goes for facial expressions too. Say you want them to smile, but not a big toothy smile. Show them the smile you want. They’ll give you their own version of it, but you’ll get what you’re going for. You may be exhausted at the end of the shoot after moving around so much, but in many ways, it’s easier than trying to verbally instruct a child into a pose.

DSC 9414dps

5 – Give Them a Break

DSC 9432dps

We all have our limits. Children are no different. If you find that your kid client is getting tired or upset, it’s time for a break. Take them by the hand and explore your location together. If the parents are okay with it, break out some snacks and have a sit. Talk to them and let them relax. Many photographers are worried about the use of time during a shoot and may be reluctant to do something like smell the flowers with a three year-old when they should be getting those precious shots mom and dad want. That’s understandable. But great photographers understand that you’re more likely to get the shot you’re after if you work with the client, not against them. In fact, you might find the perfect shot during the little break. Perhaps the child is picking flowers or collecting rocks and because they’re so happy, they look at you and click! You’ve got the shot. If you’re doing a family shoot, a break could mean that you go off to photograph another member of the family while the little one gets to sit back and relax a bit.

Children live in their own worlds with their own rules. If you prepare and have the right mindset, they’ll let you in and you’ll both have an awesome time.

The post 5 Tips for Stress-free and Successful Child Portraits by Anna Durfee appeared first on Digital Photography School.


Digital Photography School

 
Comments Off on 5 Tips for Stress-free and Successful Child Portraits

Posted in Photography


5 Tips for More Successful Event Photography Using a Shot List

26 Oct

Company parties. Special galas. Nonprofit fundraisers. When someone asks you to shoot one of these events, you aren’t exactly leaping for joy, right?

Event Photo 04

Corporate event photography can get a bad reputation among creatives, mostly because it sounds like an unglamorous style of photography. While it is true that many aspects of corporate event photos can be very rote, these events actually a huge advantage that can lead to even more creative expression. Here’s why: There is almost always a set structure and schedule to corporate events that rarely deviates, meaning it is incredibly easy to build a shot list to get your essential shots out of the way very quickly. That means you have more time on your hands at the event to get creative with the way you choose to take these shots. Whether you’re a budding event photographer, or taking on an event as a favor, use these tips to build an effective event photography shot list that will make your clients happy and maybe even lead to other photography opportunities with them down the road!

Fact: Most corporate clients will not know what kind of photos they need.

At least in my experience working with west coast corporate clients, most of them can’t give me a clear answer when I ask how many photos they need, what they need shots of, etc. While this may seem frustrating at first, bear in mind that this vagueness from your client gives you the perfect opportunity to shine by filling in the blanks for them, because in general, most corporate clients want the same types of event photos.

So what kinds of photos do corporate clients want?

To answer this question, put yourself in the shoes of the branding or marketing coordinator who put the event together. Often, their whole purpose to having you there to is capture images that show that they did their jobs right by properly setting up the space and making sure the people they invited showed up and had a good time. They want shots that capture:

1. Setup shots of empty rooms, trade show booths, promotional items, signage, etc.

Event Photo 02

Be sure to arrive early to capture any event setup shots. It was someone’s job to put everything together, so he or she will definitely want images that show off all of the hard work that went into it. Generally, setup shots should be taken before guests arrive so that everything is still intact.

2. Candid and posed shots of VIPs or executives that are deemed important by the company.

Event Photo 01

This can be extremely tricky because often times, you won’t have any idea who the company CEO or big wigs are, even if the event coordinator hands you a sheet with all of their names on it. The best way to handle this is to ask the coordinator ahead of time if there is someone from the company who can accompany you and point out their VIPs and executives on site. Don’t be afraid to ask for help so that you can get your job done right.

3. Closeups and wide angle shots of any speakers.

Event Photo 03

As much as possible, get shots of speakers that include branding and signage somewhere in the photo. Also bear in mind that you will not always have a designated spot to shoot from, so bring a telephoto lens and prepare to possibly shoot from farther away. If you’re shooting from up close, make your shots quick so that you don’t block the view of guests.

4. Guests looking engaged and interested at the event.

Barneys New York And The Parkinson's Project Host A Luncheon In Support Of The Parkinson's Project At The Kingfish Cafe

Try not to capture photos of people (especially VIPs and executives) making unflattering expressions or gestures. It can take some patience, but make sure you get images that indicate everyone was having a good time. If you captured any goofy expressions or moments, you might be able to submit them, but be sure to flag them as optional outtakes.

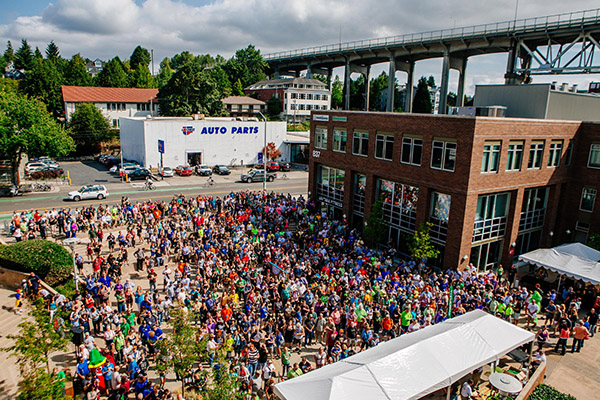
5. Shots that indicate the event was well attended, such as full room shots with lots of people.

Event Photo 07

While it might still be valuable to include full room shots where only half of the seats are filled, you’ll want to pull out your zoom lens and focus in on larger clumps of people to provide shots that indicate the event was well attended.

The photos that corporate clients DON’T want

While event photography can in many ways feel like photojournalism, this is not the time to take too many images that are overly honest. Bear in mind that many times the photos are intended to be used for marketing purposes, so the last thing your clients want to see are ugly, unfavorable photos. Even though events might be poorly attended and the attendees might not be the most interesting people, it’s your job to make the event look and seem as fun as possible, even if you have to act like a hype person or stage photos to do so.

While there are many lessons and creative inspiration that can be obtained by winging it and thinking quick on the spot, professionals know there is generally more value to preparing ahead of time. One way to effectively do this is to think out every aspect of the shoot beforehand and great a comprehensive shot list. This will help you picture the finished shoot even before you step foot on set, greatly reducing any last minute issues that might arise, and giving you more freedom to take your necessary shots with creativity.

Do you photograph events? Do you have any other tips you’d like to share? You could also read 5 Tips for Special Event Photography here on dPS for more tips on covering events.

The post 5 Tips for More Successful Event Photography Using a Shot List by Suzi Pratt appeared first on Digital Photography School.


Digital Photography School

 
Comments Off on 5 Tips for More Successful Event Photography Using a Shot List

Posted in Photography


All That You Need in Your Camera Bag for a Successful Wedding Photography Shoot

16 Dec

There are many challenges to successful wedding photography, and it can be a hectic day, even for skilled photographers.It includes the photography of activities involving the wedding and photographs of the family members, friends and couple before the marriage, as well as coverage of the wedding day and post wedding. It’s a viable endeavor that supports the efforts of many Continue Reading

The post All That You Need in Your Camera Bag for a Successful Wedding Photography Shoot appeared first on Photodoto.


Photodoto

 
Comments Off on All That You Need in Your Camera Bag for a Successful Wedding Photography Shoot

Posted in Photography


5 Tips for Successful HDR Photos

05 Dec

How do you create successful HDR photos? It’s a question that I’ve gotten from time to time, and before we get started with this post I do want to make clear that there’s no question that HDR photography is one of those never ending battle grounds in the photography world. Much like the Windows vs Apple battle of the PC world, HDR vs non-HDR is a battle that continues to stir the pot.

Five tips for successful HDR photos – for those that wish to do it!

While it’s always fun to add fuel to the fire from time to time, let’s put the argument of whether or not it’s a valid form of photography aside for a minute, and simply focus on trying to get those who wish to learn a new technique on the right track from the start.

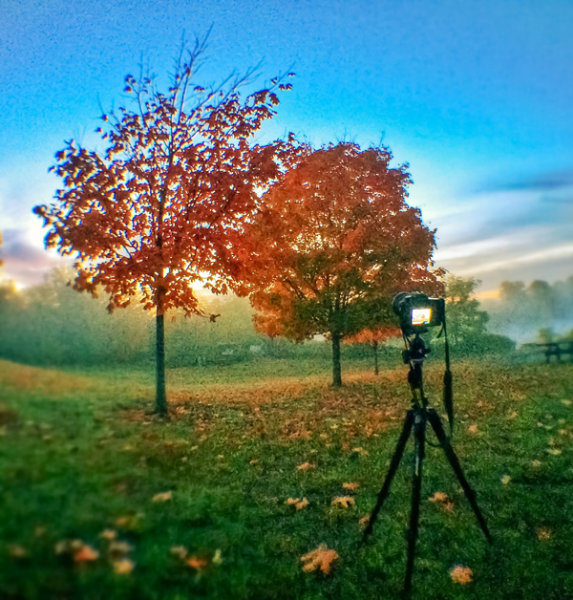
Tip #1 – use a tripod

HDR Photography Tip - Use a Tripod

Using a tripod to photograph HDR brackets helps keep the frames from shifting between shots. (This image was taken with my iPhone using an Olloclip fisheye lens and processed using Snapseed)

This should be a no brainer and I really didn’t even want to put it into this article, but alas, here it is.

A tripod will not only allow you to stabilize each individual image (some of which may be fairly long shutter speeds), but in order to capture the full dynamic range of the scene you will need to take multiple exposures with your camera and it’s vital that these frames line up perfectly. A tripod will ensure that each frame you capture is identical to the previous one, with the only exception being the exposure times.

Tip #2 – don’t tone map a single exposure and call it HDR

I see this all the time, and while I understand it’s a great way to get more out of a single exposure, it’s not really an HDR image. Yes you can create an underexposed, neutral, and over exposed image in Lightroom from the same RAW file, and then merge those three images into one HDR photo, but it’s really not the same as capturing individual images.

Why you ask? Simple. When you capture one exposure at a given set of settings (Exposure Values) on the exposure triangle you are recording data within that given range. No matter what you do to that file in post production the data captured by the camera doesn’t change – you’re only changing the way in which that data is output into an image.

When you capture three or more images at different exposures (EV), then those three images are all going to have different levels of data from which you can pull; allowing for a truly high dynamic range photograph. The more images you capture the more data you’ll have at your disposal. That being said there’s the law of diminishing returns, which basically means that there comes a point when adding more data to the pile doesn’t help improve the photograph.

Tip #3 – know when you need it and when you don’t

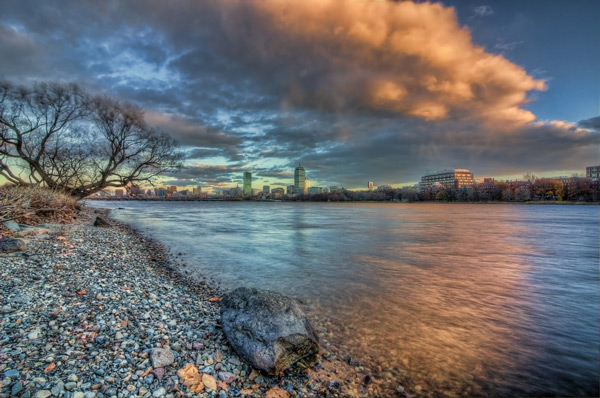
hdr-photography-tips-01

Use HDR only when you need it (IE: when the light range of your scene is too large to capture in a single exposure)

Some people use HDR for every photograph they take. In fact it’s step two on this list of 10 Steps Every HDR Photographer Goes Through. You do not have to do this.

HDR stands for ‘high dynamic range’ so if you’re photographing a scene where the lighting is fairly even from shadows to highlights (the scene fits nicely on the histogram, with nothing clipped at either end of the scale) you don’t need to do HDR. Your camera is capable of pulling out enough detail from the highlights and shadows to cover the scene in its entirety with one exposure. It’s also probably not worth it to try capturing moving objects or people in HDR as they typically don’t look right when they get tonemapped.

So when should you use HDR?

Use it during sunrise or sunset, especially when you are photographing into the sun. Use it to photograph during the middle of the day. Use it to photograph architecture or man-made objects, as HDR has a way of really bringing out the detail of craftsmanship.

Tip #4 – invest in a good tone mapping program

Once you capture your bracketed set of photos you’re going to want to put them together in the best way possible. There are a ton of great programs out there to do this, but I recommend using either HDR Soft’s Photomatix Pro or Nik Software’s HDR Efex Pro. There are free alternatives out there, but I find that they don’t do as good of a job at tone mapping. Remember the tone mapping process is done algorithmically so the more powerful the software’s algorithms, the better the end results.

Tip #5 – control the urge to go big

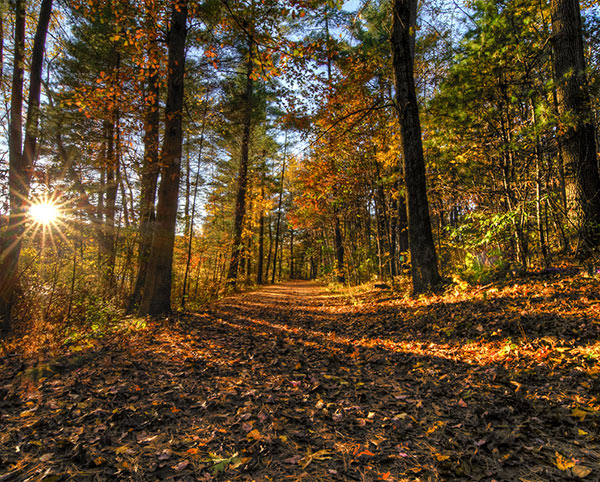
HDR Tip - Avoid Going Too Big

Avoid the urge to create surrealistic photos (unless this is truly the style you wish to go in).

This is where HDR really becomes a touchy subject. Some people say that it’s their style to create over the top, surrealistic style, HDR photography and other’s say that they are destroying the world of photography by creating these highly saturated and oddly lit photographs.

It’s easy to get carried away with tone mapping your images, but if your goal is to recreate what you saw, the best way to do this is to remember to tone it down a bit before you press that process button. It’s also a good idea to watch out for haloing which takes place typically along tree lines (as you see in the photo above above the dark trees on the left side of the image).

hdr-photography-tips-02

Final word

While this is not an exhaustive list of HDR tips, it is a good start to get you on the right track to capture your first high dynamic range photos. That said, if you’re a bit more experienced with HDR and are looking to take your HDR photography to the next level, check out this post Creating HDR Panoramic Photographs written by one of my buddies on his HDR workflow process for creating massive HDR Panoramic images.

Do you have some tips to add to the list? Leave one in the comments below!

Post originally from: Digital Photography Tips.

Check out our more Photography Tips at Photography Tips for Beginners, Portrait Photography Tips and Wedding Photography Tips.

5 Tips for Successful HDR Photos

The post 5 Tips for Successful HDR Photos by John Davenport appeared first on Digital Photography School.


Digital Photography School

 
Comments Off on 5 Tips for Successful HDR Photos

Posted in Photography