RSS
 

Posts Tagged ‘Successful’

How To Prepare For Successful Landscape Shoots [Before You Head Out]

11 Oct

One of the simplest ways to capture great photographs is to prepare yourself for success before you head out the door. I’ve used this process of preparing for shoots for the last few years and it’s worked great for me – I’d love to hear what else people are doing to prepare for their own shoots in the comments below.

How To Prepare For Successful Landscape Shoots: The Day Before

Virtually Scout the Location
How To Prepare For Successful Landscape Shoots

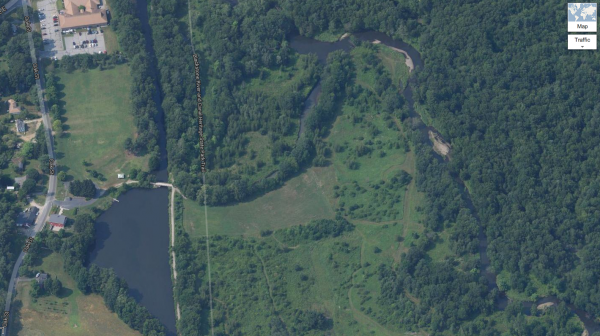
Usually the night before a shoot I will open up Google Earth, Maps and/or various other apps to scout the location for things like parking spots, water features, sun angles and whatever else might be of interest to me for that particular shoot.

It can be helpful to look through Flickr or another location based photography service to get an idea of what other photographers have found interesting before your visit.

Charge Up

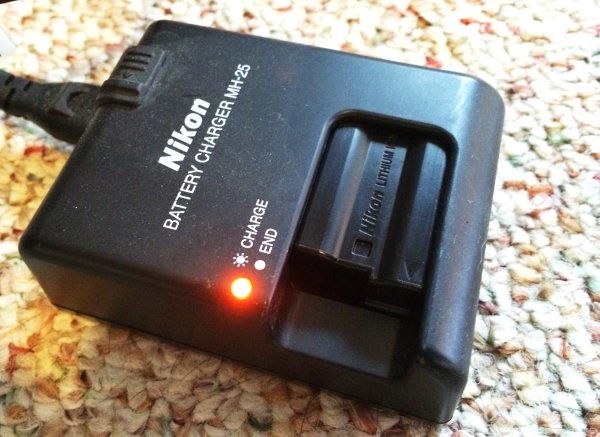
It should go without saying, but make sure you’re camera is fully charged before you go to sleep. The last thing you want is to be ready to head out the door and find out your camera’s got one bar of battery life left in it. On the same note make sure your SD/CF cards are empty and packed as well – that’s a mistake you’ll only make once.
How To Prepare For Successful Landscape Shoots

This step doesn’t just include the camera though – you should make sure that your own body is fully charged as well. Have a good sized dinner and get to bed early, eat a healthy breakfast and pack snacks to take with you. If there’s one thing that will ruin your photos faster than anything it’s an empty belly – you’ll start to get frustrated easy, you’ll care less about what you’re doing, and ultimately you will make mistakes which is the last thing we want to do when we’ve gone through all the effort to get to this location in the first place.

How To Prepare For Successful Landscape Shoots: Before You Leave

Check the Weather Report
How To Prepare For Successful Landscape Shoots

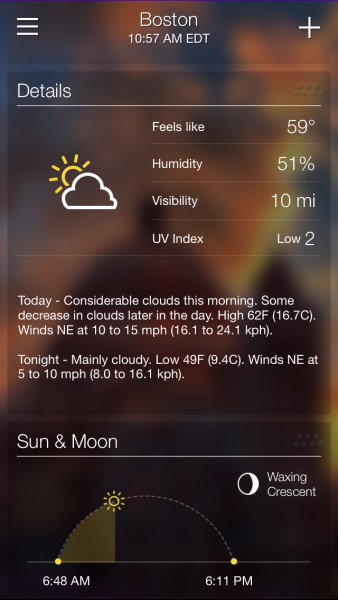
It’s easy to take for granted, but it’s important to get a weather report for the day and area you’re heading before you leave the house. If you’re planning to hike a mountain know that it will be chillier the higher you go and just because the weather is fair in your backyard doesn’t mean that it’s the same at your location of interest.

Dress Accordingly
How To Prepare For Successful Landscape Shoots

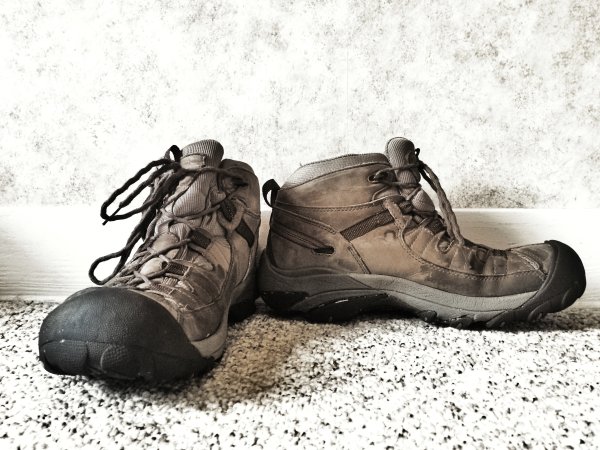
Hiking boots are a must if you want to get into locations off-the-beaten path, but you can do fine in comfortable sneakers if you’re not planning traverse any serious terrain. That said you should plan to wear comfortable and breathable clothing – jeans and cotton shirts are rarely a good option as they don’t keep you warm and if they get wet they will take forever to dry.

How To Prepare For Successful Landscape Shoots: On Scene

Arrive Early

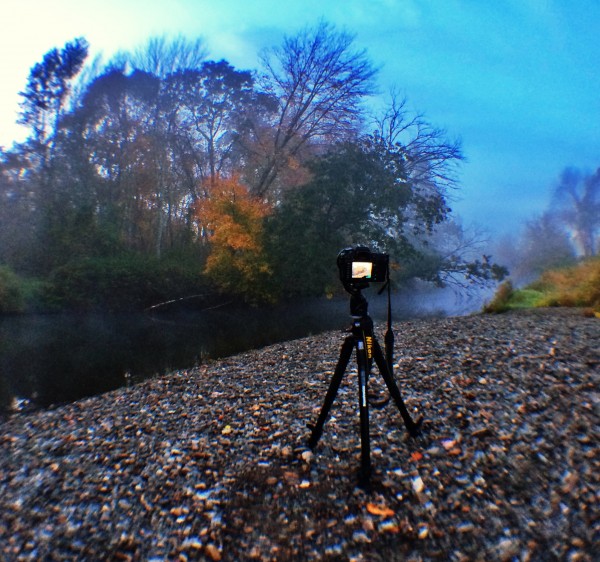
I can’t stress this enough! The last thing you want to do is show up as the sun is setting or after it has risen. If you arrive early you can set up the camera and capture many different locations with the light that you have.
How To Prepare For Successful Landscape Shoots

As the light changes you may want to revisit your previous locations or continue looking for new ones, but as long as you’ve gotten there early, you should end up with a bunch of shots to process when you return home.

Take Your Time

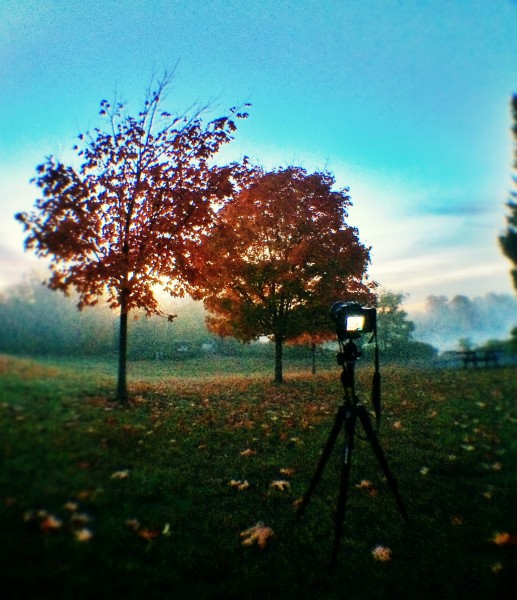
Rushing around will not allow your mind to think properly. When you rush your shots the odds are increased that you’ll get home to find out that you left your ISO at some unusable number or your aperture was at f/2.8 when it was supposed to be at f/11.
How To Prepare For Successful Landscape Shoots

Take each shot as seriously as the last one you took and make the adjustments that are needed to get the best image out of the scene before you. Sometimes I find it helpful to even simply get up and walk away from the camera and give myself a break. Of course, when I do that, I still end up taking photographs with my phone, but those are more  for fun than anything else.

Returning Home

Processing the Results

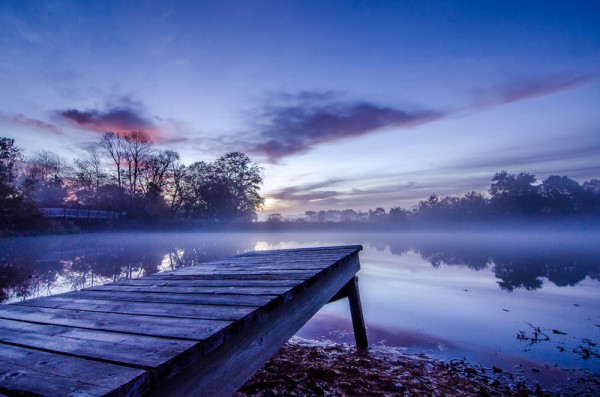
After all is captured and you’ve safely made it back to your house it’s time to process your what you’ve recorded. This part is truly up to you and your creative style, but here is my workflow as a basis point.
How To Prepare For Successful Landscape Shoots

I will start with import the RAW files into Lightroom and going through to clean out the ones I absolutely don’t see any use for. I’ll then make my selections of the ones that are first on the list to get process and do just that. On occasion I will do more processing and clean up in Photoshop, but with how powerful Lightroom has gotten over the last couple iterations of the software I’ve seen less and less need to do so. If you’re curious you can also watch me edit select photos every week on my Let’s Edit series.

To get even more information on landscape photography check out this amazing DPS eBook on the entire process.

Post originally from: Digital Photography Tips.

Check out our more Photography Tips at Photography Tips for Beginners, Portrait Photography Tips and Wedding Photography Tips.

How To Prepare For Successful Landscape Shoots [Before You Head Out]

The post How To Prepare For Successful Landscape Shoots [Before You Head Out] by John Davenport appeared first on Digital Photography School.
Digital Photography School

 
Comments Off on How To Prepare For Successful Landscape Shoots [Before You Head Out]

Posted in Photography


15 Tips for Successful Fireworks Photography

10 Jun

fireworks-tips-dps-08

With the summer coming up and different celebrations you may have the opportunity to photograph some fireworks.  If you’re in the USA you have the 4th of July, in Canada July 1st.  In many other places you can find fireworks festivals or competitions even, or special occasions when fireworks may be set off including weddings, New Years Day or course and of course at Disneyland!

So here’s a few tips to help you photograph fireworks. The biggest thing to remember is that it’s all about practice, experimentation, and the following mantra (say it with me!)

SHOOT – REVIEW – ADJUST – REPEAT

Please remember that if you’ve never tried fireworks before it’s all trial and error and I’ve made a lot of mistakes myself before I got any images that I was happy to show anyone.  Each time I photograph fireworks there’s always some element that’s unpredictable so you have to learn to adapt and learn from your own mistakes, correct for next time and do it again. So take these tips to help you get started.

15 tips for fireworks photography

#1 Use the right equipment: use a sturdy tripod and remote to fire the camera  and bring an extra battery as long exposures tend to use them up quickly.  I say STURDY tripod because it needs to hold your camera steady for several seconds without sinking, tipping, or wobbling. I wrote an article on my site on Tips for buying a tripod of you need more info on what to get.

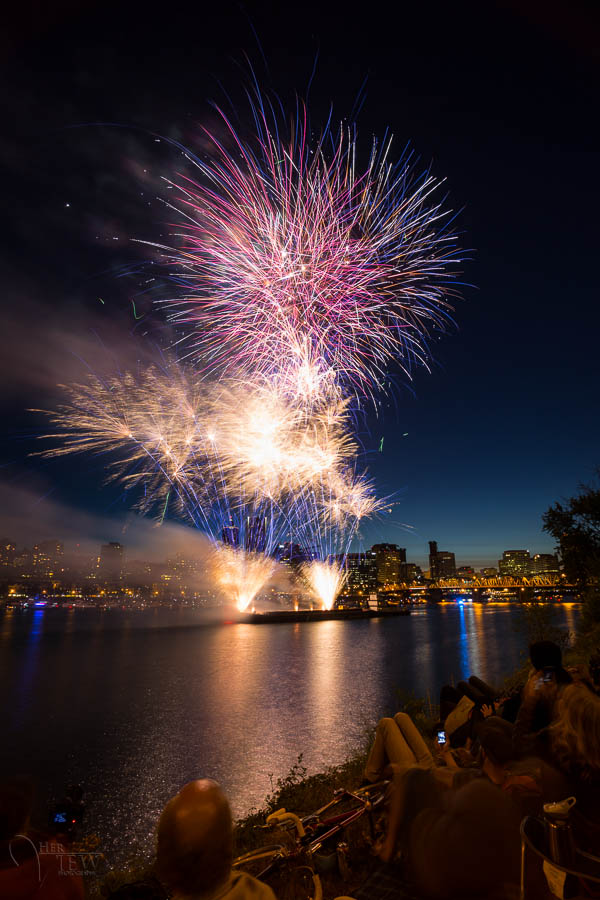
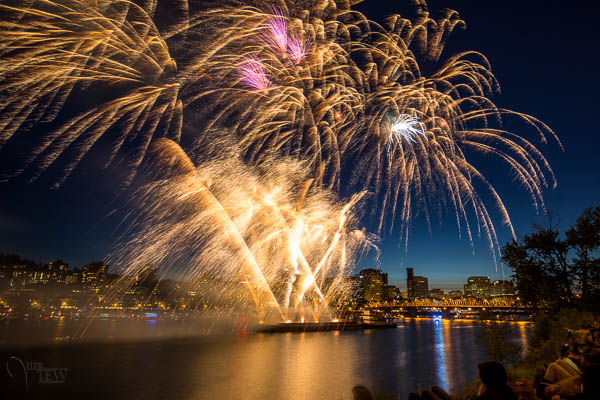
This image was actually purchased by the company that put on the fireworks show in Portland.

This image was actually purchased by the company that put on the fireworks show in Portland.

#2 Set your ISO low like 100 or 200, for a couple reasons. First the higher the ISO you use the more noise you’ll introduce into your images, so keep it low to prevent that. Noise also lives in blue areas of images and nighttime has a lot of blue so that compounds the issue.  Long exposures also tend to increase noise so if you add it all up you get a lot of noise so keep the ISO low to eliminate that variable.

#3 Turn OFF long exposure noise reduction.  This setting, while it does a really good job of noise reduction, adds an extra complication you don’t need when doing photography of fireworks.  The way it works is that if you take say a 10 second exposure, it takes a second one of equal length but just black (the shutter doesn’t open). Then it merges the two together and blends the blank one into the shadow areas of the first one which is where noise typically shows the most. The problem is that fireworks happen so fast you don’t want to have to wait 10 seconds to be able to see your image, make any adjustments and shoot again. I did this once my accident and it was very frustrating and I missed most of the show and did not get the results I wanted because I couldn’t review and correct.

#4 Do NOT use live view if your camera has it. This will eat up your battery really fast. Live view is really for shooting video and using the display screen so much uses a lot of power, as does making long exposures.  Save your battery for actually shooting and set up your shot using the eyecup viewfinder.
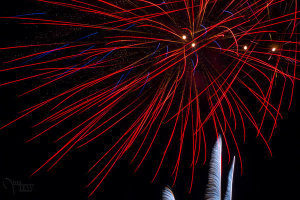
fireworks-tips-dps-09#5 set your camera on Manual mode for exposure and set your aperture to f5.6 or f8.  Those apertures are pretty optimal for fireworks as the light streaks are controlled by the size of the aperture.  Closing down more will make the light trails thinner, opening up more will make them wider and possible too over exposed.  Do some tests but all the times I’ve done fireworks I keep coming back to f8 as my preference.
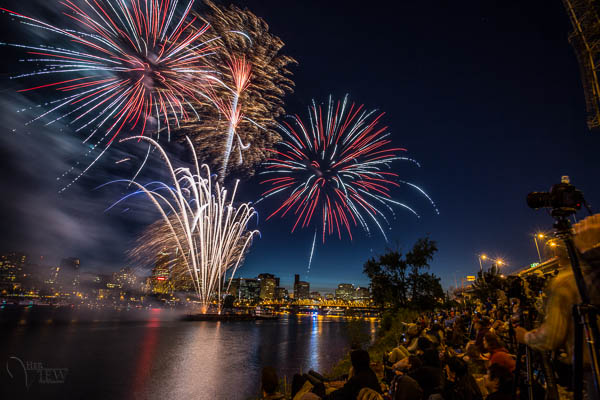
#6 Set your shutter speed to between two and ten seconds.  Do a test shot before the show starts and see if the sky is too dark or too bright and adjust the exposure time accordingly. As long as you’re under 30 seconds you can let the camera time the shots for you.  Or you can switch to Bulb and just open and close manually when you feel you’ve captured enough bursts in one image.

#7 Focus your lens ahead of time, and then turn off AF otherwise the camera will keep trying to refocus every shot and you may end up with missed images or blurry fireworks if the camera misses. Assuming you’re a fair distance away from the fireworks you shouldn’t have to refocus at all unless you change your angle of view or want to focus somewhere else, like the people in front of you.

#8 Use a neutral density filter to get a longer exposure if need be.   If it’s not 100% dark out yet it (the sky still has some light) this will allow you to get a longer exposure and make sure the fireworks bursts have a nice arch.  If your exposure is too short you’ll end up with short stubby looking bursts, not the nice umbrella shaped ones. If yours are too short, just make the exposure time longer. If you are getting too many bursts in one shot and it’s coming out over exposed, shorten the exposure time.  Using the ND filter if it IS dark will also allow you to shoot longer exposures and capture more bursts per image.  Play with that and try it with and without the filter if you have one.  A polarizing filter will work to a lesser degree also.

ISO 100, f/10, 1 second

ISO 100, f/10, 1 second – notice the bursts don’t really make a nice arch? A longer exposure will make your trails longer. You choose how you want them to appear and adjust accordingly.

#9 Shoot most of your shots at the start of the show to avoid the smoke/haze that appears a bit later. Eventually the sky will be filled with smoke and it’s not as pretty looking.  That’s when I’ll try some close ups or abstracts (keep reading for more on that later)

#10 Scout your location ahead of time and get there early to get a good spot, think about background (what’s behind the show) and if you want the people around and in front of you as part of the shot. In general the good viewing areas fill up sometimes 1-2 hours prior to the fireworks show. If you want a good spot with enough room for you and your tripod, go early and take a good book or something to entertain you while you wait.

Notice I've included the crowd to show perspective.

Notice I’ve included the crowd to show perspective.

#11 Make sure you leave enough room in your frame to anticipate the height of the opened bursts. Adjust as necessary if you miss on the first shot – it’s a lot of trial and error and correcting. It’s often hard to tell where the highest fireworks will end up in the sky, you may want to try both horizontal and vertical compositions.

Try a vertical composition for an added sense of power, especially if you can get a reflection like this one.

Try a vertical composition for an added sense of power, especially if you can get a reflection like this.

#12 It takes a bit of practice to time your shots when you hear the fireworks being released, so ideally you capture a few bursts.  Do some testing to see how many bursts is just right for your taste.  Try some with more, and some with less. Having too many may overexpose the overall image, so keep that in mind.

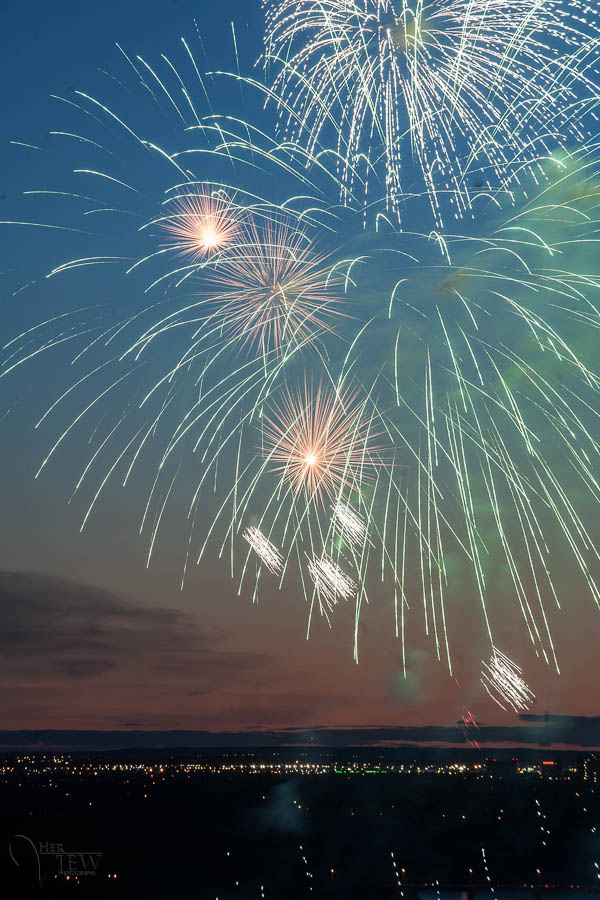
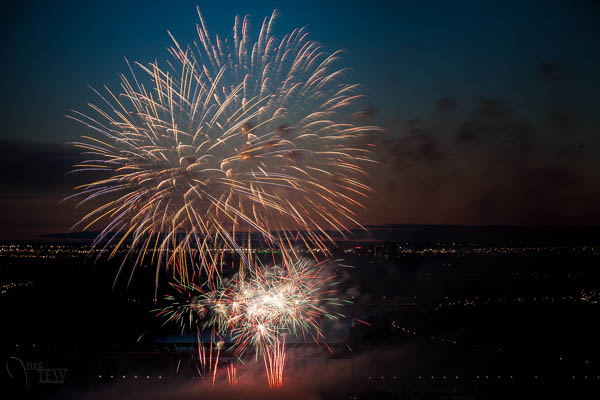
#13 Shoot into the eastern sky not facing west, if you want a darker sky. Here in Edmonton we are quite far north and even by 10:30pm in the summer the sky is not fully dark yet.  I’ve found that when I shoot into the sunset my sky gets too blown out and the lights of the fireworks don’t show up as well as they do against a darker sky.  So try and find a vantage point that has you facing east when possible if that’s an issue for you as well.

Western facing, notice the sky isn't dark enough and the fireworks seem lost against it.

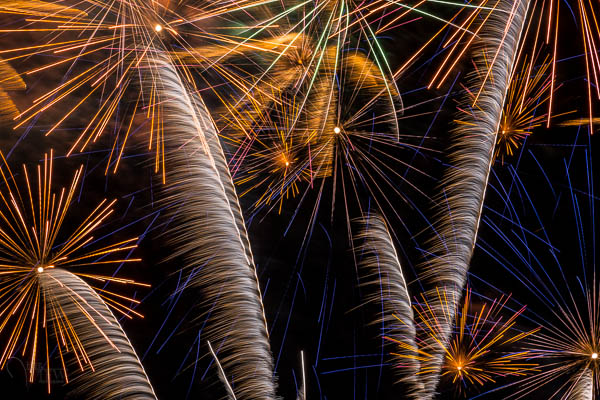
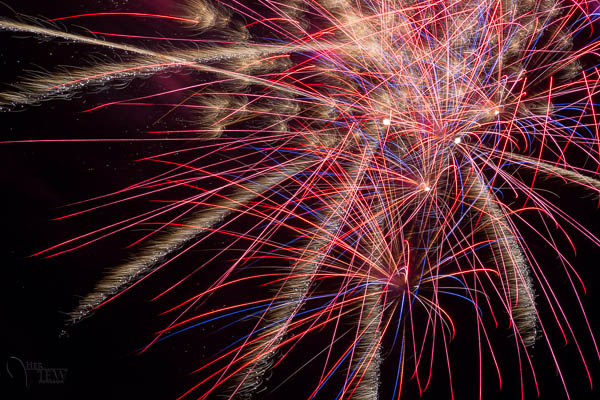
#14 Try some telephoto shots as well as the usual wide, try some close ups zoomed in tighter for something a bit more abstract. For this you will need to aim basically into thin air and try to anticipate where the bursts will open

Abstracted using a longer lens, I think they look like palm trees.

Abstracted using a longer lens, I think they look like palm trees.

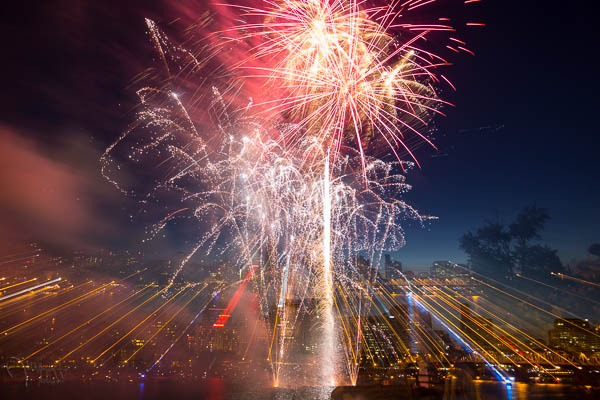
#15 if you have a zoom lens try zooming during the exposure and see what you get!  If you’re going to try this make sure you have focused at the most zoomed in point of the lens.  Try different technique including counting 1/2 the exposure before you zoom, or zooming right away and the last 1/2 is zoomed out. Try zooming fast, then slow. Try more bursts, or less. Get some city lights in the shot too.

ISO 100, f/6.3, 6 seconds - zoomed during exposure.

ISO 100, f/6.3, 6 seconds – lens zoomed during the exposure.

Summary

The biggest tip I can give you overal is experiment with your settings to get the look you want. Use my settings above as a starting point, adapt to your situation and your camera equipment until you’re happy with the results.

Have a great time this summer trying these out and don’t forget to share your images of fireworks, and any additional tips you’d like to add.

Post originally from: Digital Photography Tips.

Check out our more Photography Tips at Photography Tips for Beginners, Portrait Photography Tips and Wedding Photography Tips.

15 Tips for Successful Fireworks Photography


Digital Photography School

 
Comments Off on 15 Tips for Successful Fireworks Photography

Posted in Photography


5 tips for successful wedding photography

06 Feb

After a long day of shooting, here in my hotel room I run through 5 tips that will help things go smoothly on the big day. Not to be alarmist – but it is a tough gig if you want to do it properly, so think things through, plan, and give it your very best. In Australia I recommend Digital Camera Warehouse: goo.gl Outside Australia I recommend Adorama: goo.gl & Amazon: goo.gl ====== Sign up to our mailing list at www.thatnikonguy.com See all the latest photography news & reviews on my second channel here www.youtube.com Join in: www.facebook.com Twitter: twitter.com
Video Rating: 4 / 5


Tips to become a successful pro photographer

07 Dec

6 things to consider to be successful as a professional photographer. Just sharing my 2 cents, what do you think? If you enjoyed this – please FB share, tweet or email to friends! goo.gl Video shot on D5100: goo.gl (Amazon: goo.gl ) 50mm 1.4g: goo.gl (Amazon: goo.gl ) Gitzo GT2540: goo.gl (Amazon: goo.gl ) Join the Flickr forum: www.flickr.com twitter.com www.facebook.com www.thatnikonguy.com
Video Rating: 4 / 5

 
Comments Off on Tips to become a successful pro photographer

Posted in Nikon Videos


Preparing your Model and Background for a Successful Composite

24 Oct

A Guest Post by Tom Di Maggio from Tom Di Maggio Photography.

When I posted the my article about creating Eye Catching Composites I got some comments and a lot of emails asking for more details on my post processing technique.

This article will be more focused on how to achieve the wanted effect. I will describe the technique used for the background as well as the one used on the subject. I used Lightroom 4, Photoshop CS6 and NIK Color Efex Pro 4 to achieve this. I presume that the reader has a basic understanding of Layers and Blending Modes in Photoshop.

Untitled

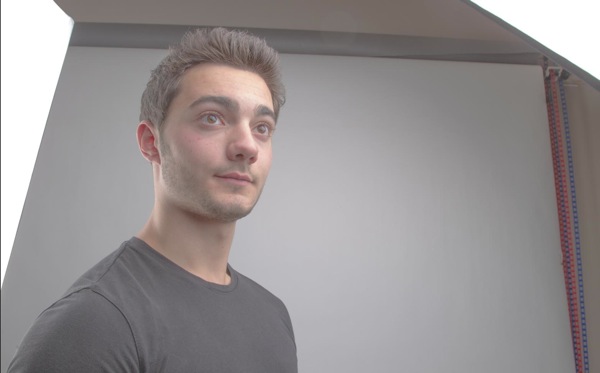
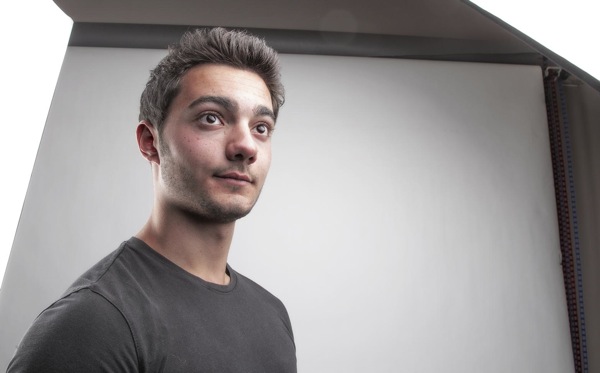
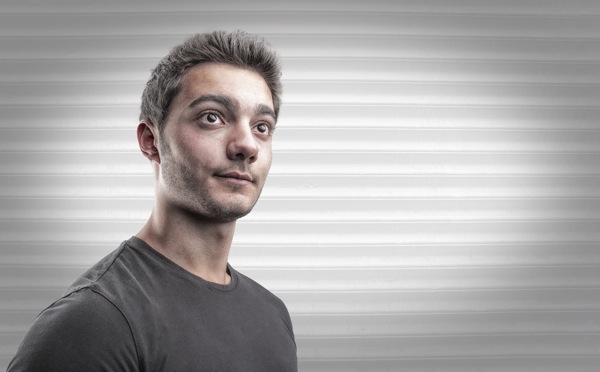
Here’s a picture of the original to the left and the finished picture to the right.

As with any picture the background is very important for the final feel of the image, for this one I choose an old stock photo of a metal door. I didn’t want it to be as hard though, I wanted something bright and soft with a touch of hardness. I placed the picture on top of a white Layer and reduced it’s Opacity until I had the visual impact I was going for. In this case it was 13% only. I could have used a different blending mode but I am a fervent adherent to the “KISS” principle…

As with most of my pictures I tend to darken the borders or lighten the center of the image in order to draw the eye to where I want it to go. In this case the background itself is bright enough, so I use another Layer with a slight vignette. To achieve this I use the elliptical selection too and draw a rough ellipse. I invert the selection and feather it with a value of 250. You can repeat this step a few times until the feather suits your wish. Finally I just fill it with black and adjust it’s opacity to where I think it will fit for the end result. I have to say here that I usually end up readjusting the vignette once the image is finalized. Group the Background Layers into a folder that you will call “Background” and hide it, we won’t need it until after the masking procedure. Actually as I always start with my backgrounds I always end up fine-tuning it after the subject is in place. One could argue that I should start with the subject, but I feel that I slightly adapt the post processing of my subject to the background. I feel that it makes it easier to blend the subject better into the background.

Untitled

The door original on the left, with an Opacity of 13% (over a white Layer) in the middle and the final version with the vignette on the right.

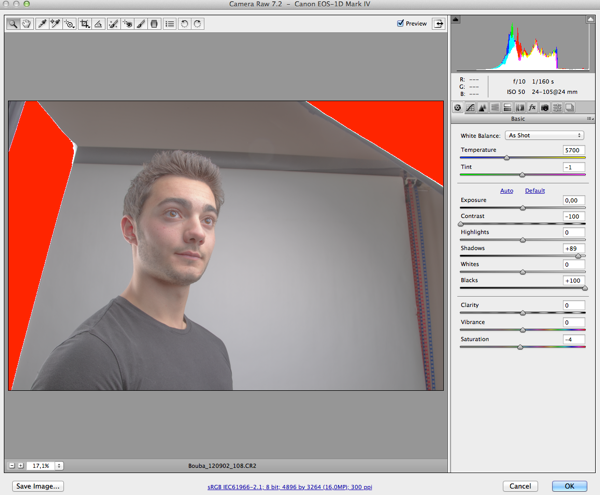
As you can see with the original picture I tend to slightly underexpose my composite pictures. If I wasn’t going to use this picture for a composite it would have lit it a bit lighter than this. For the post processing technique I use it is vital not to loose any detail in the picture. I don’t do any adjustments to the picture at this stage. In Lightroom I simply right click the image and choose the option: Open in Photoshop as Smart Object. You will now see a new Layer in Photoshop that has a small square in it. If you double click on that little square it will open the adjustment panel for that Layer. This is where I remove as much contrast from the image as I can without loosing and detail. I drag the contrast slider all the way down to -100 and the shadows slider to the right until it starts creating artifacts. Depending on the picture I will also drag the Blacks slider to the right. Basically what I want to achieve here is a picture that has the less amount of contrast possible. Once you are happy with the way the picture looks you can click “ok”. Keep in mind that you will be able to come back to this screen and adjust the settings until you are confident with the outcome of the procedure.
?

Subject Layer1
Here’s the first Layer where most of the contrast has been removed.

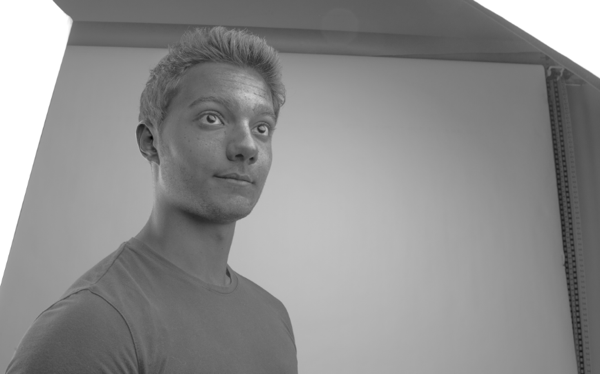
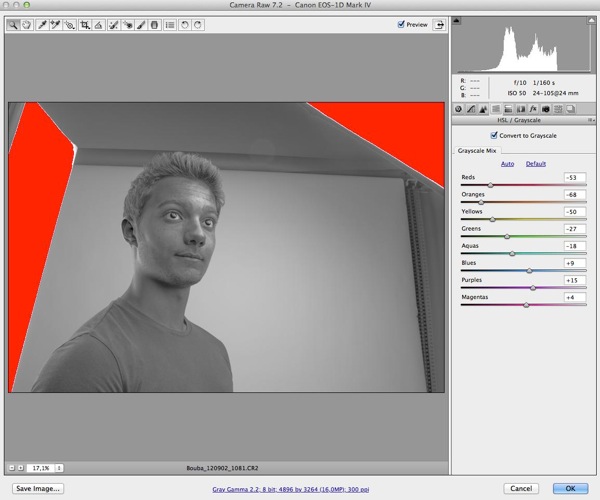
Once done I create a copy of this smart object as another smart object. To do this I right click on the Layer I want to duplicate and choose copy to new Layer as smart object. Double click on the small square again and choose the “HSL” button and switch the image to B&W by checking the “Convert to Grayscale” tick box. You can argue here that there are better ways to get a black and white picture, and I would be the first one to agree with you. But the goal here is not to convert the image to Black & White but to get some contrast and detail back into the picture. Sometimes I slightly adjust the brightness at this step, but that’s about it. Then I change the blending mode of this Layer to overlay and check the result. If I want to fine tune something at this stage I do it on one of the two Layers by double clicking the little square and going back into the adjustments panels. More often than not it will be the saturation and brightness of the picture. I sometimes also play with the opacity of the B&W Layer. It is important at this stage that you like the combination of the two Layers as we will now move on to steps that will make it harder to adjust these things.
?

BW
The Black & White Smart Object Layer
??
Bw adj
The BW adjustment Panel

Color adj
The color adjustment

If you’ve followed these steps you will have two Layers by now. We will merge these two into a new Layer by hitting the Command-Control-Shift-E keys on the keyboard. This will create a third Layer that we will apply a Gaussian blur filter to. I usually choose a value between 10 and 15 here for the blur. Again this is a matter of taste and you should experiment a bit with this. Change the blending mode to Overlay and turn the Opacity down to somewhere around 30 to 40 percent. Hit the Command-Control-Shift-E keys again and choose Filter-Other-High Pass with a value of 3 or 4 and change the Blending Mode to Overlay again. These two Layers will sharpen the image a bit and give it some colors back that went lost during the first steps of the post processing. You can play around with the Opacity of the blurred Layer until it fits your taste. I usually group the four Layers into one Layer Folder at this stage.

Merge BasePicture of the 4 Base Layers merged together.
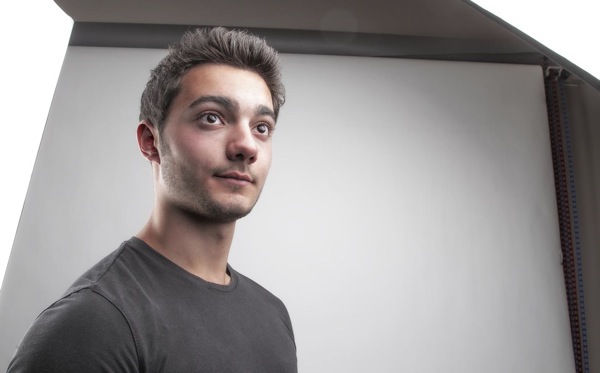
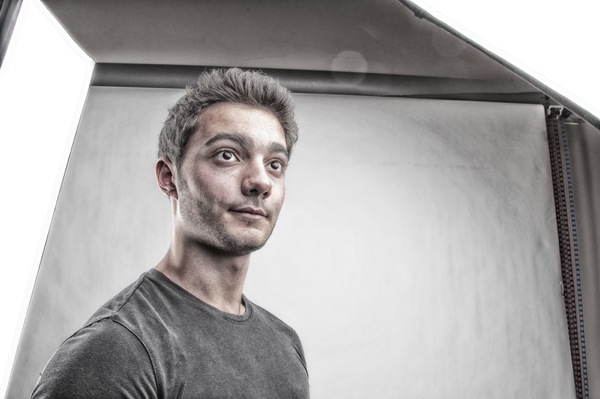
The next steps are purely image/skin corrections and optional. That being said I use them on every picture that includes a face. For this we have to merge the Layers again to a single one. We do this by using the same keyboard shortcut as before: Command-Control-Shift E and name that Layer “Blur”. And then simply duplicate the Layer again with Control-J and name that Layer “Apply”. Group both Layers to a new Folder. Apply a Gaussian Blur with a value of 22 on the “Blur” Layer. (The value has to be 22 for this to work). Select the “Apply” Layer and choose the Menu Image – Apply Image. In the window that just opened choose the “Blur” Layer in Layer and Subtract as Blending. Set the scale to 2 and the offset to 128. (These are the values that you need to use for this to work). Hit ok and change the Blending Mode of the “Apply” Layer to Linear Light. If you’ve done this correctly and with this Group on and off you should see no difference at all. Now you can choose the “Healing Tool” and start cleaning up the skin of the subject on the “Apply” Layer. What this does is to allow you to “heal” the skin without changing the color values. It will only affect texture. It’s a very effective way to clean up skin or other surfaces without loosing or changing the color values of the subject. This is a technique I use a lot and depending on the image this is where I will spend most of the time. As you can see on the image below I also brightened up the image a tiny bit with a Brightness Layer Adjustment.

HL Corr
Picture after the corrections. In this case only the face was retouched.

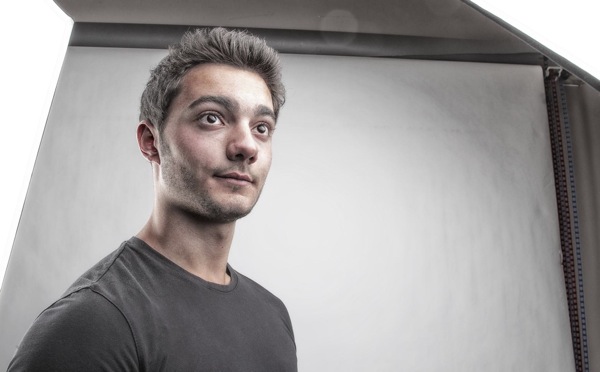
At this point I export a copy of the image into Color Efex Pro 4 and apply the three following effects on it: Bleach Bypass, Tonal Adjustments and Detail Extractor. There are no fixed values for this. I adjust them to the individual picture. I do however overdo this phase on purpose as I will play around with the opacity on the Layer in Photoshop. Once done save the image and import it as a Layer into Photoshop at the top of the Layers. Adjust the Opacity until the effect is as strong as you need it to be. I sometimes use a Layer Mask here if I want to do some fine tuning to the effect.
??
Color Efex Pro
This is the picture after the Color Efex Pro treatment.

CE merge
As you can see it’s hugely overdone, but on the right the final look with the opacity set at ….

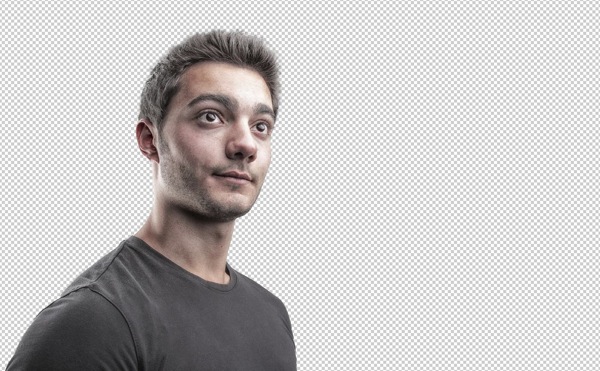
This leaves us with the last part of the workflow. The extraction or masking of the subject. To be honest this is quite fast nowadays. There are multiple ways to extract a subject from it’s background.The method I will describe is the one that works best for me at the moment. I start by creating an automatic selection of the subject with the Quick Selection Tool. Then I zoom in and make sure I didn’t miss anything and try to make the selection as precise as possible. Doing this at this stage will save some time later on in the process. Once happy with the selection click on the “Refine Edges” Button at the top of the screen. This is where a lot of people will do things differently, I check my selection against a white and a black background. This will show me most of the areas I will have to correct later on. I use the Refine Radius Tool around the hair a bit without changing any settings. I then will feather the selection by 1 or 2 pixels and contract it by 1 or 2 pixels. That’s it for the moment….. I will do the rest manually on the Layer Mask. Hit ok and select the Layer Mask. Usually one can notice imperfections around the hair and some fringing around the contours of the body. I use the much underestimated Smudge Tool at this point. Set it’s strength to 20% (average value to start with) and adjust it’s size to fir the area I am fixing and start smudging the mask in the direction of the subject. I usually spend a lot of time at this step to do this carefully and I keep on adjusting the size and strength of the Smudge Brush depending on the area I am working on. I Keep on doing this all around the subject until the extraction is precise enough for the purpose.

Extract

The extraction is done. I verify it against black and white backgrounds to get a better result.

Now I can reactivate the background and check the Layer Mask of the extraction and fine tune it to fit the background exactly. At this stage I am done with the heavy work. Sometimes at this stage you might notice that the subject doesn’t really fit the background, it sticks out in terms of color toning. This can be fixed by using color adjustment Layers on both the subject and the background in Photoshop. Or you can do it the same way I do by doing this in Lightroom. You can do this with manual adjustments or by using presets in Lightroom.

Final noflare
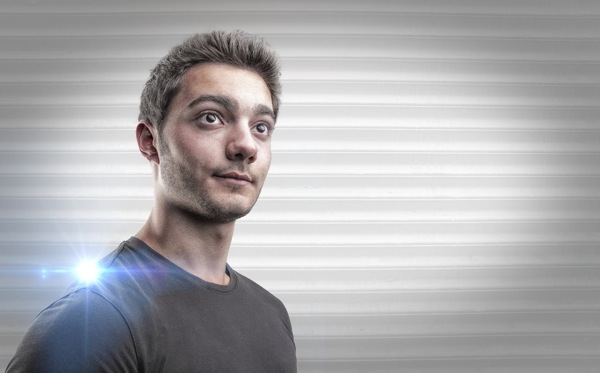
The final image

I wanted to add some flare to the picture as I wanted to make it a bit more attracting to the eye. To do that I used a stock photo of flare on a black background and changed the Blending Mode to “Screen” in order to let through the flare only. And I also noticed at this point that I wanted the subject to be a bit brighter, so I added an adjustment Layer to achieve this.

Final PS
?
The final Photoshop version with Flare and adjusted Brightness.

See more of Tom Di Maggio’s work at Tom Di Maggio Photography, InFocus Photography and on his Flickr Account.

Post originally from: Digital Photography Tips.

Check out our more Photography Tips at Photography Tips for Beginners, Portrait Photography Tips and Wedding Photography Tips.

Preparing your Model and Background for a Successful Composite


Digital Photography School

 
Comments Off on Preparing your Model and Background for a Successful Composite

Posted in Photography


3D Stereoscopic Test 2 – Successful? – YouTube 3D Feature

05 Jun

Testing 3D feature on YouTube. 3D feature was successfully enabled. (There are still problem with accuracy of 2 images position…) 3D stereoscopic photos by Yo Suzuki (lovemushroom.com) Originally shot in parallel format using Canon dSLR & Loreo 3D stereoscopic lens with no post production position alignment of 2 images. I only have parallel 3D glasses(Loreo) and wondering if it really looks 3D on other viewing system, specially interleave interlace format with active shutter glasses system. Your feedback is greatly appreciated. Got no 3D glasses? You can try “Cross-eyed” or “Parallel” viewing method without 3D glasses(free-viewing). www.vision3d.com You can NOT use 3D glasses from Avatar or IMAX theaters to watch this in 3D on computer monitors. They are “Passive Polarized 3D glasses” which usually requires 3D projection system. My past 3D movie DVD(Chromadepth 3D viewing) www.youtube.com Test 1 – 3D mode failed by “AudioSwap” www.youtube.com YouTube 3D official page googlesystem.blogspot.com

 
4 Comments

Posted in 3D Videos