RSS
 

Posts Tagged ‘Location’

Strobist Location Workshops in 2017

06 Dec

Are you more the "learn by doing" type? As in, "Don't tell me, show me?"

Then you may be interested in one of the 2017 Strobist location workshops that are already planned. Or perhaps you would like to know how to schedule an in-person workshop of your own—for your photo exposition, camera club, or right in your damn living room.

Keep reading to learn how to make the monkey dance… Read more »
Strobist

 
Comments Off on Strobist Location Workshops in 2017

Posted in Photography


Broncolor launches battery-powered Siros studio heads for location photographers

18 May

$ (document).ready(function() { SampleGalleryV2({“containerId”:”embeddedSampleGallery_0756565408″,”galleryId”:”0756565408″,”isEmbeddedWidget”:true,”standalone”:false,”selectedImageIndex”:0,”startInCommentsView”:false,”isMobile”:false}) });

Swiss lighting manufacturer bronocolor has announced the Siros 400 L and 800 L, a pair of battery-powered studio heads. Both models use an interchangeable lithium-ion cell that the company says is powerful enough to provide 440 full-power bursts from a single charge in the 400L, and 200 in the 800L. The cells recharge from flat in 75 minutes.

The new heads use the same modifiers as the current Siros range, and the 25-watt LED modeling light matches the color temperature of the bulbs used in the company’s mains-powered heads. The Siros 800 L has a maximum output of 800 joules, while the smaller 400 L head manages half of that. Both can produce flash durations as short as 1/19,000sec, and both can be controlled via Wi-Fi and the broncolor bronControl app for iOS and Android devices. To help the user identify which light is being adjusted from the app, it is possible to color code each head using the LEDs built into the body of the head’s housing.

These new Siros L heads can only be powered via their batteries, which fit inside the head rather than acting as external packs connected by a cable. Spare batteries will cost £215 plus tax. The heads will be available sooner than the press release states.

  • Siros 400 L Head – £1,515 + VAT
  • Siros 800 L Head – £1,755 + VAT
  • Siros 400 Outdoor Kit 2 (Two head kit) – £2,995 + VAT
  • Siros 800 Outdoor Kit 2 (Two head kit) – £3,495 + VAT

For more information visit the broncolor website.


Press release:

broncolor presents its new compact device – battery-powered studio quality

With the Siros 800 L, we have succeeded in producing one of the most powerful compact devices currently available on the market. The Siros 800 L is, like the somewhat smaller version, the Siros 400 L, a true genius in offering discerning photographers optimum lighting both indoors and outdoors.

Siros L – optimum lighting, compact and mobile
The Siros L is broncolor’s new battery-powered compact device, which provides ambitious professional photographers with the opportunity to enjoy the perfect lighting, be this in a mobile form in the studio, or for external shots – offering both very fast, and also long, flash durations.

The device has the most up-to-date lithium ion batteries – thanks to this, the device can achieve 440 flashes at full power; and the lower the power, even more flashes are available. The battery-pack can be used over a very wide temperature range from -10° to 60°C (14° to 140°F). Once its power has been used up, it can be completely recharged in only 75 minutes, allowing just two batteries to be switched and recharged during a shoot if there is a power supply available.

The Siros L uses the Swiss manufacturer’s ECTC technology, which has already been used in the well-known Scoro and Move generators – thus, Siros L has flash durations of up to 1/19’000 s (t0.5) and, of course, a guaranteed constant colour temperature over the entire control range.

All the Siros L’s functions are easily and remotely controlled by the “bronControl” app, which establishes its own WiFi network; this then allows the control of several devices by means of a smartphone or tablet. In order to ensure that the photographer knows which device he is currently addressing, the devices all have different LED colour codes – this ensures that the Siros L is easy to use, both indoors and outdoors.

Thanks to its compact size and battery-operation, the Siros L is absolutely ideal for outdoor use. It can, of course, also be used in the studio where it can be easily integrated into existing broncolor studio equipment.

The 25-watt LED modules offer a bright modelling light with a colour temperature of 3000 K, matching the colour temperature of the halogen modelling lamps of the Siros mains powered units.

In addition to the 800 J version for photographers who refuse to compromise in respect of power, there is the Siros 400 L version which is somewhat smaller and lighter and thus offers about 50% of the energy of its bigger brother.

The Siros L can be used with the entire broncolor light-shaper range. Many light-shapers, such as softboxes, open reflectors and especially Paras, are parabolic and can only guarantee an optimum light output and quality if the light source is placed as close as possible to the focal point in the interior of the reflector. This is why, with the Siros L, broncolor has deliberately opted for an external flash tube, providing perfect lighting.

The Siros L will be available in shops from 1st July 2016.
Would you like to know more? Please visit broncolor’s website at www.broncolor.com

Articles: Digital Photography Review (dpreview.com)

 
Comments Off on Broncolor launches battery-powered Siros studio heads for location photographers

Posted in Uncategorized


How to Find a Great Sunset Photography Location

05 Mar

We all know that one essential ingredient to a great photograph is beautiful light, and that some of the best light happens during sunset. But what truly makes a great sunset photography location?

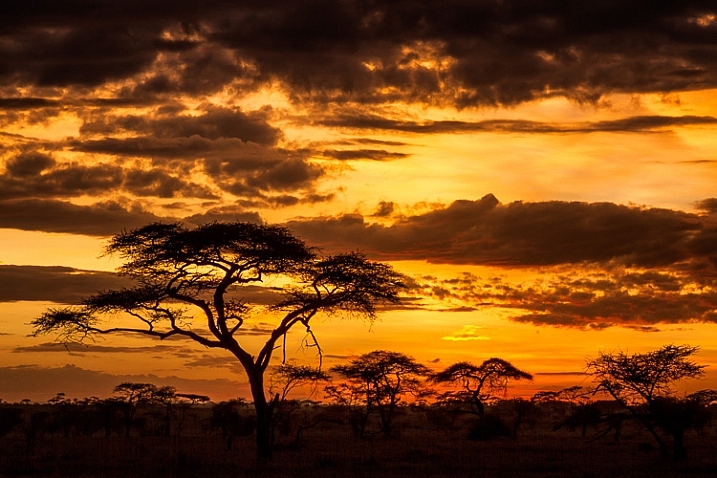
Acacia tree or umbrella thorn in Serengeti National Park, Tanzania.

Acacia tree or umbrella thorn in Serengeti National Park, Tanzania.

In my experience, the best locations are ones where you can find two different compositions, that will work under different lighting situations, to double your chances of making a spectacular sunset image.

To understand what I’m getting at, first think about the direction of light. As the sun descends in the sky and approaches the horizon, the last of the sun’s rays have a wonderful warm hue, that can light up the tips of mountains, and cast a golden glow on the land in the direction opposite the sun. Then there’s usually a lull for a few minutes when nothing much happens, giving you a chance to change position to face the sun. When the sun falls below the horizon, you’ll have an opportunity to make backlit or silhouette photos.

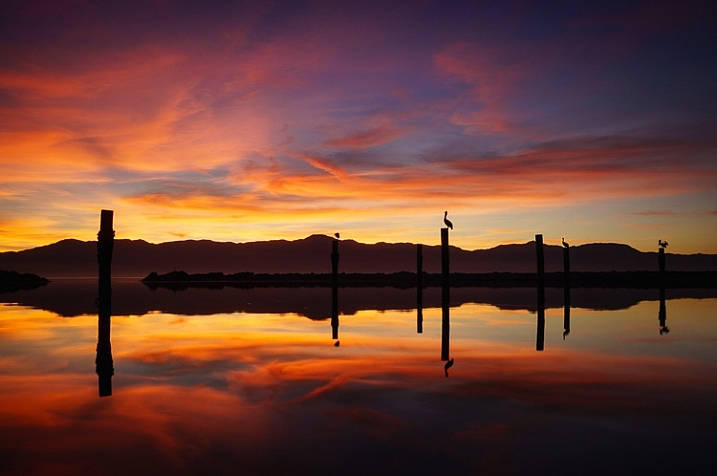
Salton Sea Moments

Finding Your Location

It’s best not to leave location scouting for the last minute, or you won’t have enough time to find a spot with two good compositions, in both directions. Scouting a location is a good activity for mid-afternoon, when you’re probably not going to be photographing anyway, due to the harsh light. Leave your gear at home, or only take minimal equipment to record the scene, so you don’t have a heavy load and you can move quickly and easily.

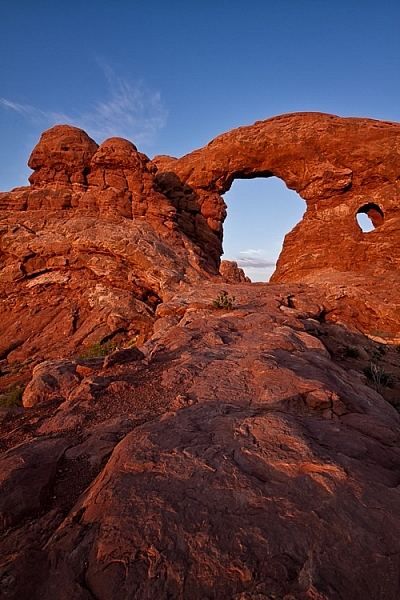
Arches National Park, Utah

Arches National Park, Utah

Before you go scouting, don’t forget to find out the exact direction where the sun will set. This is easy to find with a quick internet search and a compass, or using an app on your phone or tablet.

When you are scouting, what you’re looking for is a good composition for both a front-lit scene and a backlit scene. They don’t necessarily have to be at the exact same spot, but it should take you no more than a few minutes to walk between them.

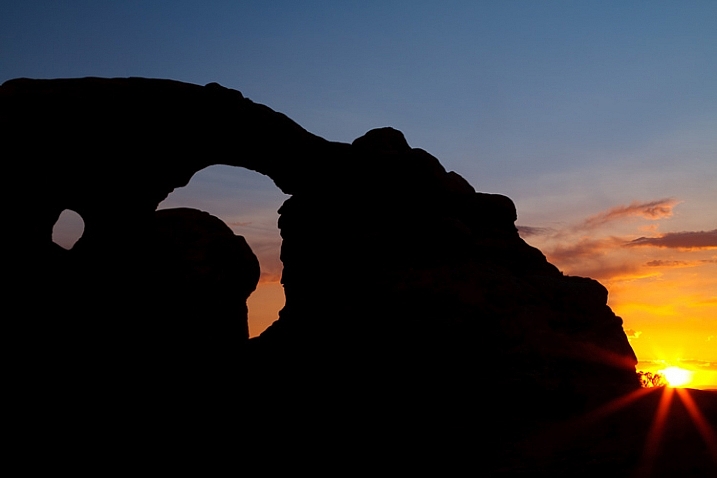
Sunset at Arches National Park, Utah.

Sunset at Arches National Park, Utah.

Composition Tips for Front-lit Scenes

For your front-lit scene, you are going to have nice golden light throughout the landscape, and if there are any mountains in your frame, they will have dramatic bright light on the top. What I usually look for in this kind of a scene is depth, by using foreground elements to emphasize the distance between foreground and background.

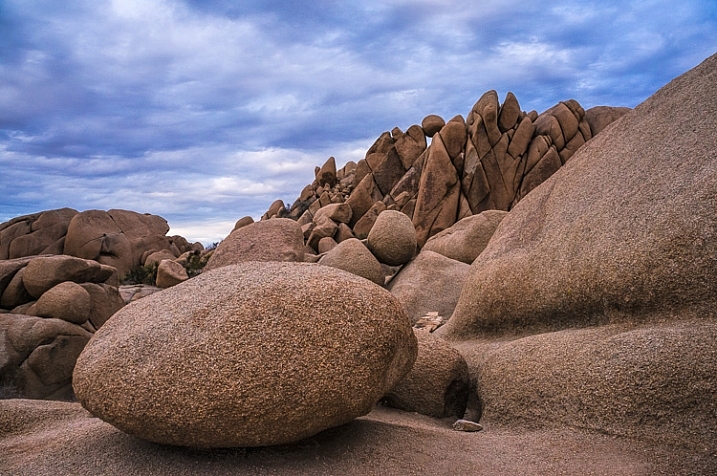
Jumbo Rocks

Try to find some leading lines that will guide the viewer’s eye through the image, and ideally lead to something in the background. Or, find other interesting features, such a plant or colourful rocks, to place in the foreground of the scene.

Composition Tips for Backlit Scenes

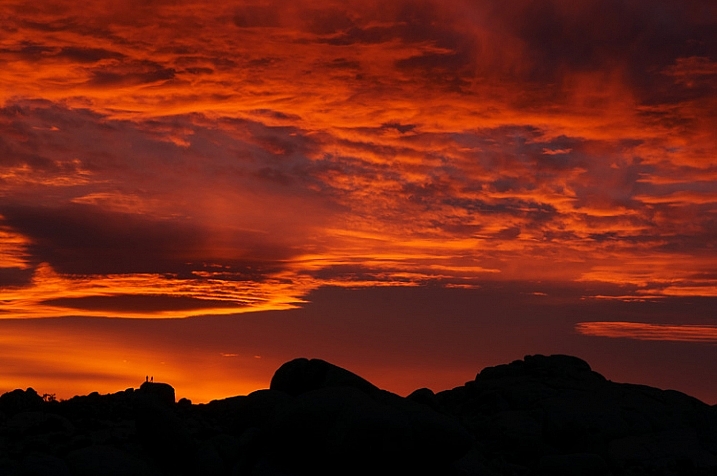
Once those final rays have disappeared from your front-lit scene, you’re ready to change positions and get ready for the backlight. In a backlit scene, everything on the ground is going to be in shadow, so you no longer need to worry about depth – it’s all going to be black anyway. So now what you are looking for is something with a great shape, to make an interesting silhouette against the colourful sky. This can be jagged mountains, sea stacks on the ocean, a cactus, or anything else that has a really strong shape. Don’t pick anything that is going to just look like a vague blob of darkness.

Sunset at Joshua Tree National Park, California

Sunset at Joshua Tree National Park, California

In the Field

Keep these composition ideas in mind when you scout your location, and if you need to, mark your chosen spots with a GPS while you are scouting, to make it easier to find your location when you return to the scene for sunset.

Go early! If there are any clouds on the horizon where the sun will set, the last rays for your front-lit scene will come sooner than expected.

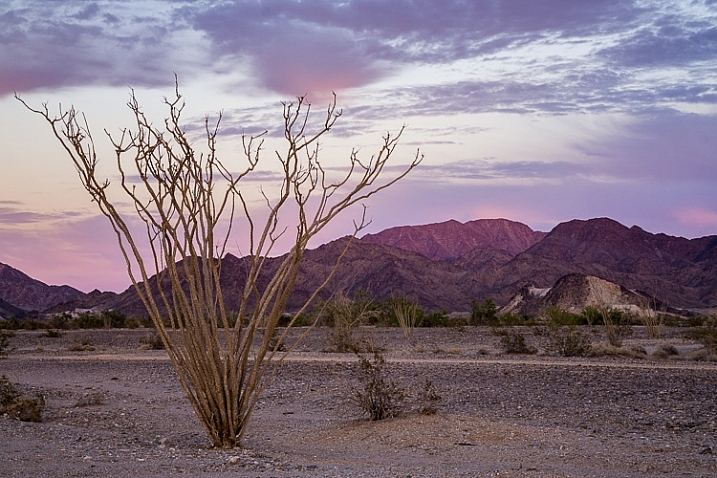
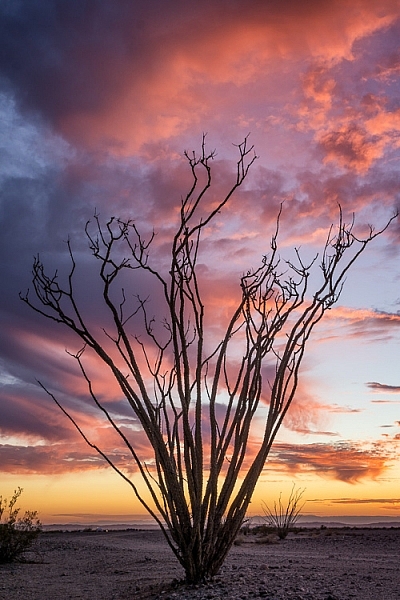
Boondocking spot off Ogilby Road near Yuma, Arizona.

Ogilby Road near Yuma, Arizona.

Exposure for Front-lit Scenes

As the sun descends in the sky and approaches the horizon, your scene will have a more even exposure than it would have earlier in the day. But you still may want to use a graduated neutral density filter, to even out the exposure between the brighter sky and the darker land.

Exposure for Backlit Scenes

When exposing for a backlit scene, it’s important not to use an exposure setting that takes the whole frame into account, like matrix or evaluative metering. Instead use spot metering, and meter on a sky portion of your image, which will capture the dramatic colours in the sky, while allowing your subject in the foreground (the one with the great shape) to become a silhouette.

Ogilby

Conclusion

You can only plan so much when it comes to sunset photography, the rest is up to mother nature. You can only guess what is going to happen with the clouds and the light. When you get there, you may only have clouds for your front-lit scene and not the backlit one. But at least if you plan out two different shots, you’ll double your chances of coming home with a stunning sunset photo.

googletag.cmd.push(function() {
tablet_slots.push( googletag.defineSlot( “/1005424/_dPSv4_tab-all-article-bottom_(300×250)”, [300, 250], “pb-ad-78623” ).addService( googletag.pubads() ) ); } );

googletag.cmd.push(function() {
mobile_slots.push( googletag.defineSlot( “/1005424/_dPSv4_mob-all-article-bottom_(300×250)”, [300, 250], “pb-ad-78158” ).addService( googletag.pubads() ) ); } );

The post How to Find a Great Sunset Photography Location by Anne McKinnell appeared first on Digital Photography School.


Digital Photography School

 
Comments Off on How to Find a Great Sunset Photography Location

Posted in Photography


Getting the Most Out of Each Portrait Location Spot

29 Nov

159

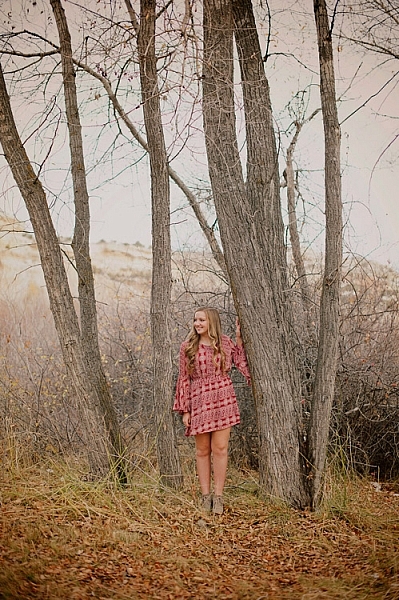
Some photographers are very inefficient when it comes to shooting in a portrait location. They will take a photo here by this tree, then move over to another tree, then by the pathway, and one at the rock. Then they can’t figure out where to shoot next, because they’ve already used every “backdrop” they can see in that area, and they only have a handful of shots to show for their efforts.

I’d like to share a few tips with you for using your locations fully and completely, without leaving any leaf, tree, stone, or pose unturned. You’ll speed up your sessions, and get a lot more useable photos by adopting these habits.

158

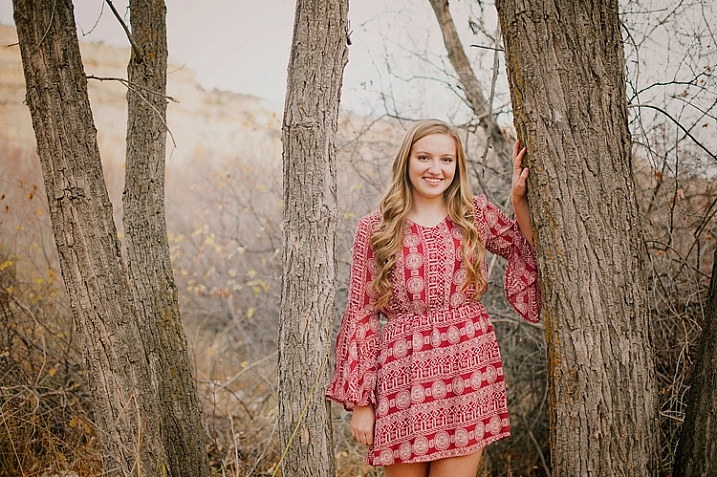
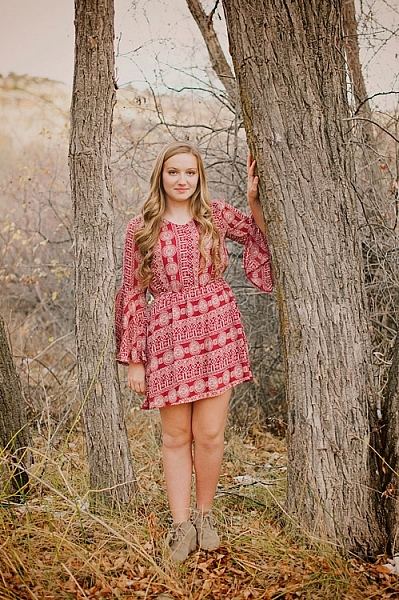
First, find a background that you like. Look for good light, elements that frame your subject, colors that complement, something to lean or sit on, etc. Once you’ve found a spot or background to start with, use it completely and quickly before you move on to a new spot.

161

I’ve created a few lists that can help you remember all the ways that you can pose your subject(s), and use a background fully, before you move on. Use these ideas to create your own list that you can carry with you until “wearing each spot out completely” becomes second nature.

All subjects with any background

  • Standing
  • Seated
  • Smiling
  • Serious
  • Laughing
  • Looking away
  • Close-up
  • Far away
  • Portrait (vertical) orientation
  • Landscape (horizontal) orientation
  • Full body
  • Head shot
  • With a prop
  • Without a prop
  • Unexpected composition (such as subject on the very edge of the frame, subject centered right in the middle, etc.)

162

Families, couples, or groups with any background

  • All looking at the camera  and smiling
  • Looking at each other
  • Hugging
  • Laughing
  • All sitting
  • All standing
  • Some sitting, some standing
  • Parents
  • Kids
  • Boys
  • Girls
  • Parent with child
  • Individual portraits of each family member
  • Couple hugging facing each other
  • Couple hugging, one behind the other
  • Holding hands
  • Walking towards you
  • Walking away from you

171

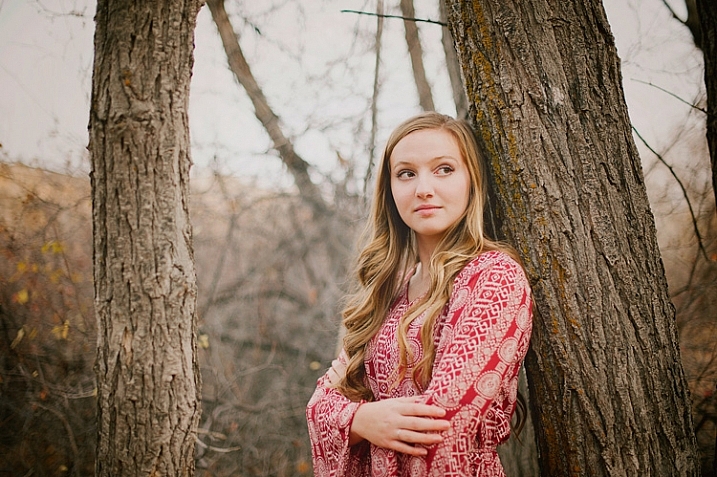
Individual with trees or walls (something to lean against)

  • Shoulder leaning on a wall or tree
  • Back to the wall or tree, looking at the camera
  • Hand to the tree or wall
  • Head leaning on the tree or wall
  • Arms folded
  • Hands in pockets
  • Hand on hip
  • Sitting against the tree or wall
  • Any of the above, looking away from camera
  • Funny/silly looking around tree or wall

169

If you move quickly through each of these poses, your subject won’t feel like she’s stuck in one place forever, but you will have so many options to choose from when you are sorting through the photos later. You might not choose to edit every pose, in every location. But, you may find as you go through the photos later, that you really like the serious face in one location, and you really love the close-up in a different location. Shooting so many options in each location at that moment gives you that choice, instead of being stuck with the one and only option you thought of in that moment.

168

Some of your photos may end up looking very similar to each other, but you may decide that you really like the full body pose better than the tighter shot. If you had only shot that location with a cropped pose, you wouldn’t have that option. Alternatively, if you don’t shoot a cropped-in pose at that time, youhave the option to crop it later, but you will lose photo quality by cropping it the file smaller.

173

As you learn to use each location fully, you will find that you can get many more useable photos in much less time, with less effort, and in locations that you might not have even noticed before. One tree and one person could be one photo, or it could end up being a hundred photos if you are extremely creative and efficient.

Give yourself a challenge to figure out at least 10 different photos in one location spot, and share a couple of your favorites in the comments! I’d love to see what you come up with.

googletag.cmd.push(function() {
tablet_slots.push( googletag.defineSlot( “/1005424/_dPSv4_tab-all-article-bottom_(300×250)”, [300, 250], “pb-ad-78623” ).addService( googletag.pubads() ) ); } );

googletag.cmd.push(function() {
mobile_slots.push( googletag.defineSlot( “/1005424/_dPSv4_mob-all-article-bottom_(300×250)”, [300, 250], “pb-ad-78158” ).addService( googletag.pubads() ) ); } );

The post Getting the Most Out of Each Portrait Location Spot by Melinda Smith appeared first on Digital Photography School.


Digital Photography School

 
Comments Off on Getting the Most Out of Each Portrait Location Spot

Posted in Photography


Landscape Photography – Shooting the Same Location Through the Seasons

06 Sep

2-for-1 special

As part of Landscape Photography Week here on dPS, we’re offering TWO for the price of ONE on our best-selling Living & Loving Landscape Photography ebooks!

Click here to take advantage of this offer.


Put up your hand if you like shooting landscape photography, and are always looking for new places – but only photograph them once, maybe twice, and then think you are done with that area.

I am guilty of the same thing. I go looking for places to photograph, take photos of them, and think I will go back but never do. Perhaps this is something we need to rethink.

Consider how the seasons affect landscapes and what changes happen throughout the year. In Australia the traditional owners of the land, or the indigenous people, have different seasons to the European ones, there are six of them. They are very descriptive of what happens, though the usual seasons of autumn, winter, spring, and summer can still provide lots of differences to give the same place different aspects.

Autumn
Put up your hand if you like shooting landscapes, are always looking for new places, but only photograph them once, maybe twice, and then think you are done with that area.  I am guilty of the same thing. I go looking for places to photograph, take photos of them, and think I will go back but never do. Perhaps this is something we need to rethink.  Consider how the seasons affect landscapes and what changes happen throughout the year. In Australia the traditional owners of the land, or the indigenous people, have different seasons to the European ones and there are six of them. They are very descriptive of what happens. Though the usual seasons of autumn, winter, spring and summer can still provide lots of differences to give the same place different aspects.  Autumn  The most obvious thing about autumn is the changing of the leaves. In some parts of the world, this happens a lot more and nearly all trees lose their leaves. In Australia it doesn’t happen so much and many of the native trees are evergreen and retain their leaves all year round. Having said that, there are also many introduced species that do, and in towns and some areas in the country you can find trees that have those beautiful, golden colors associated with autumn.  The changing of the leaves isn’t the only thing to look for. On billabongs, swamps and dams, you will often find low level mist creating wonderful moods. If you go out early in the morning, wait for the sun to rise and you can get some great effects from the sun rays as they hit the water.  There, sunrises are more interesting and sometimes there is a golden light that is associated with that time of morning that you can only see at that time of year. The golden hour that is normally associated with sunsets is there to give your landscape that rich color. It isn’t too cold in the mornings, but the weather is changing as winter approaches.  Before you go to bed check what the forecast will be the following day. What you are looking for is the weather to get worse, such as rain being forecast. In the morning before the sunrise take a look outside at the sky. If the sky is clear and there are no clouds, you won’t get that beautiful color that you get when the sun reflects off the clouds. If the sky is very grey, go back to bed, the change has already happened.  Winter  In winter the sun doesn’t go so high, so you can get long shadows all day. The shadows are softer and have a moist feel to them, especially in the morning when there is dew all over the ground. You can take photos at any time of the day and it is the best time of the year to photograph.  Frosts and fogs can give the landscape a completely different look, and heading out on a foggy morning can be well worth it. It is cold, but the images will make you glad you went. If you know it is going to be foggy or frosty in the morning you need to just head out, as you may not get many mornings with either of these. If you stay out long enough you might also be rewarded with an amazing sunny afternoon.  Stormy skies and rain can give another dimension to your images. Large storm clouds or grey skies can give a landscape a completely different look to when there are blue skies. Look for cloudy skies and breaks in the sun to give the scene in front of you a great effect.  Winter often means bare trees. Once the leaves have been stripped from them there are branches that can give your images interesting shapes and shadows. If you like photos with lots of mood, it is a perfect time to get it, especially if you get a great fog to go with them.  There is an array of colors that you don’t see at other times of the year. The dew in the early mornings makes everything wet which can bring out the colors and give you wonderful naturally saturated images.  Some of the most beautiful landscapes I have ever seen were taken when there is a blanket of snow. Unfortunately, in most places here, it never snows. If you live somewhere where it does, you should use it, brave the cold and just get out there and make the most of it.  Spring  The most obvious aspect of spring is flowers. It might be flowers in the garden, or wildflowers growing in their natural environment. Having them blooming in the landscape leaves no doubt that it is spring.  It is beginning to warm up as summer approaches, and, while the weather is getting better, there is also going to be lots of rain and more stormy skies as spring is often the wettest time of the year. You could try taking photos of your landscapes in the rain, it will give them a different look.  Spring is also the time that many baby animals are born, so you can see new life everywhere you look.  Waterfalls, creeks and rivers run faster and have more water in them as the snow melts. Go to your favorite waterfalls and see how the extra water adds more volume. You will get something quite different than you would if you photographing them at the end or the height of summer.  Summer  This can be the harshest season in Australia. It is dry and hot. Most of the grasses in the landscape die off, leaving brown grass everywhere. There is an absence of color and the landscape is very different to what you find in winter. The hot sun will also leach out all the color in what you see. A beautiful landscape that you get in other times of the year will look desaturated.  The light is harsh and hard. The sun is higher in the sky and the shadows are shorter. Going out to get nice pictures in the middle of the day is too hard, and often too hot. Though it shouldn’t stop you from trying. See what you can get and see if you can show that heat in the images. If you get those extreme days where the temperature is above 100°F then it won’t matter when you go, it will be horrible.  On a positive note, if you know the next day is going to be a scorcher, check for clouds and head out somewhere great for a landscape as you can be fairly certain that you will get the most magnificent sunset. You need clouds to get a great one and the more the better, but you don’t want overcast or you won’t see the setting sun. Don’t forget to hang around for an hour afterwards to get the best of it. Summer is the best time for those amazing sunsets, and over water means you get double.  In Australia it is very hot at that time of the year, but usually after a few days of intense heat it gets broken by a big thunder storm. You can head out, somewhere where you will be protected, and take some photos of the lightning and thunder clouds as they approach.  Using the Seasons for Your Photography  Think of your favorite places that are nearby, places you can get to easily. What are they like at different times of the year? How can you show those differences? It could give your photography a new focus, give it a try. I’ve been doing it for the last couple of years and it is amazing how you can get very different images from the same location.  If you have an area that you love photographing but feel as though you have exhausted it, consider documenting the change throughout the seasons with your camera.

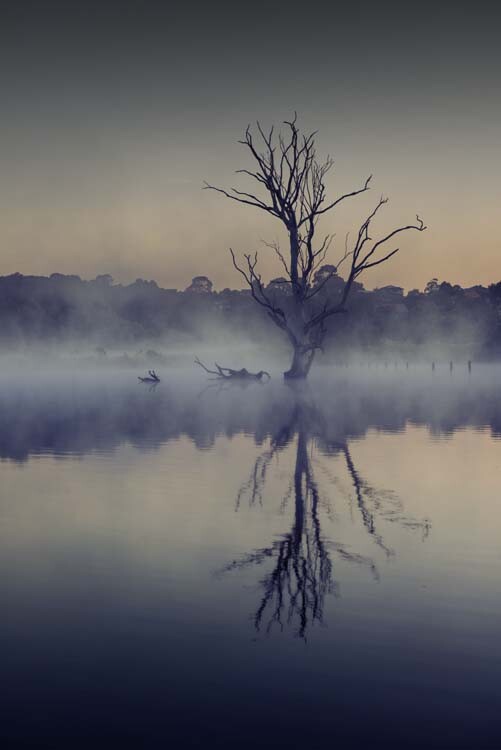
Autumn brings low mist over the water in Banyule Flats.

The most obvious thing about autumn is the changing of the leaves. In some parts of the world, this happens a lot more and nearly all trees lose their leaves. In Australia it doesn’t happen as much, and many of the native trees are evergreen which retain their leaves year round. Having said that, there are also many introduced species that do have color changing leaves, and in some towns and areas in the country you can find trees that have those beautiful, golden colors often associated with autumn.

The changing of the leaves isn’t the only thing to look for. On billabongs, swamps and dams, you will often find low level mist creating wonderful moods. If you go out early in the morning, and wait for the sun to rise, you can get some great effects from the sun rays as they hit the water.

In those types of locations, sunrises are more interesting and sometimes there is a golden light associated with that time of morning, that you can only see at that time of year. The golden hour that is normally associated with sunsets is there to give your landscape that rich color. It isn’t too cold in the mornings, but the weather is changing as winter approaches.
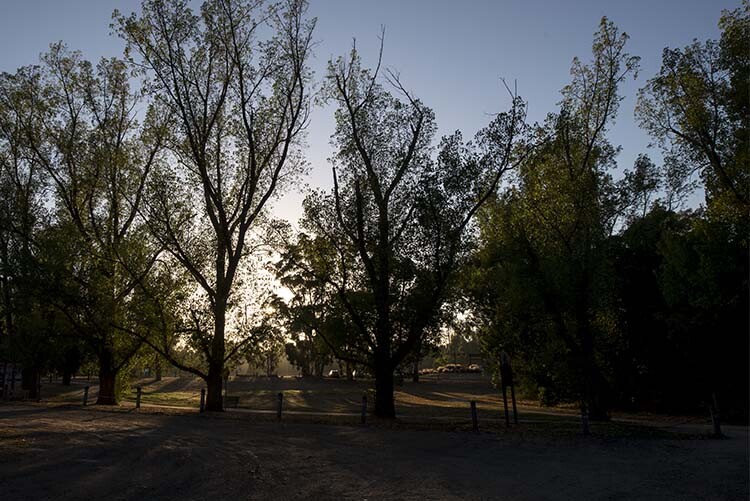
cole-landscape-photography-seasons-0009

Autumn’s early morning golden glow through some trees.

Before you go to bed at night, check what the forecast will be the following day. What you are looking for is the weather to get worse, such as rain in the forecast. In the morning before the sunrise take a look outside at the sky. If the sky is clear and there are no clouds, you won’t get that beautiful color that only happens when the sun reflects off clouds. If the sky is very grey, go back to bed, the change has already happened.

Winter
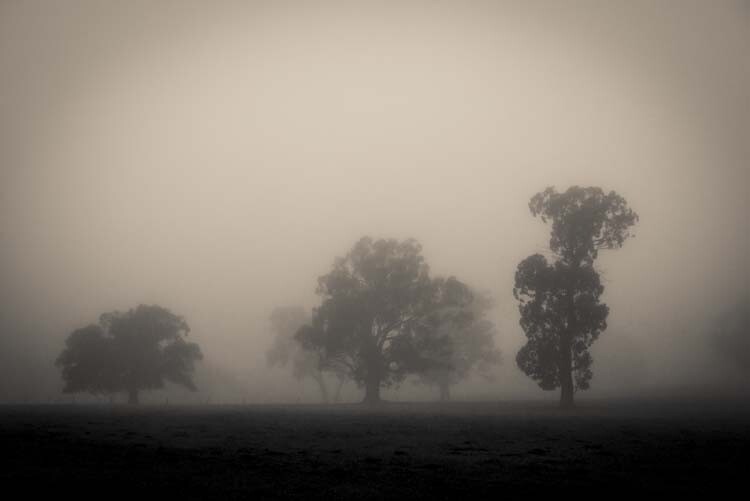
cole-landscape-photography-seasons-0012

Thick fog in the countryside, in the middle of winter.

In winter the sun doesn’t get as high in the sky, so you can get long shadows all day. The shadows are softer and have a moist feel to them, especially in the morning when there is dew all over the ground. You can take photos at any time of the day, it is the best time of the year to photograph.

Frosts and fogs can give the landscape a completely different look, and heading out on a foggy morning can be well worth it. It is cold, but the images will make you glad you went. If you know it is going to be foggy or frosty in the morning you need to just head out, as you may not get many mornings with either of those conditions. If you stay out long enough you might also be rewarded with an amazing sunny afternoon.

Stormy skies and rain can give another dimension to your images. Large storm clouds or grey skies can give a landscape a completely different look compared to those with blue skies. Look for cloudy skies, and breaks in the sun, to give the scene in front of you a great effect.

Winter often means bare trees. Once the leaves have been stripped from them, there are branches that can give your images interesting shapes and shadows. If you like photos with lots of mood, it is a perfect time to get that, especially if you get a great fog to go with the bare trees.
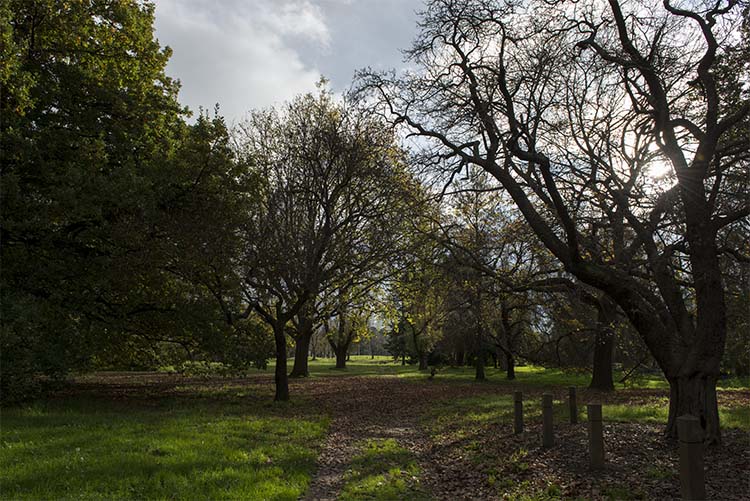
cole-landscape-photography-seasons-0010

A typical Australian winter with some bare trees, long shadows and saturated colors.

There is an array of colors that you don’t see at other times of the year. The dew in the early mornings makes everything wet which can bring out the colors and give you wonderful naturally saturated images.

Some of the most beautiful landscapes I have ever seen were taken when there is a blanket of snow. Unfortunately, in most places here, it never snows. If you live somewhere where that it does, use it. Brave the cold and just get out there and make the most of it.

Spring
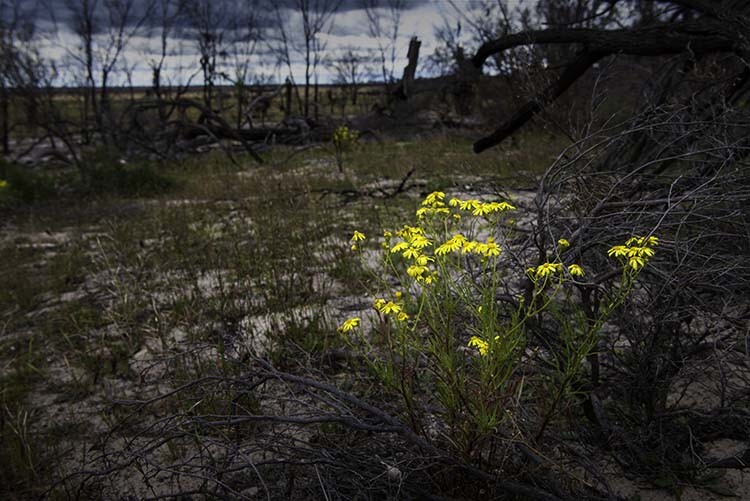
cole-landscape-photography-seasons-0014

Wildflowers add some color during spring.

The most obvious aspect of spring is flowers. It might be flowers in the garden, or wildflowers growing in their natural environment. Having them blooming in the landscape leaves no doubt that it is spring.

It is beginning to warm up as summer approaches, and, while the weather is getting better, there is also going to be lots of rain and more stormy skies, as spring is often the wettest time of the year. You could try taking photos of your landscapes in the rain, it will give them a different look.
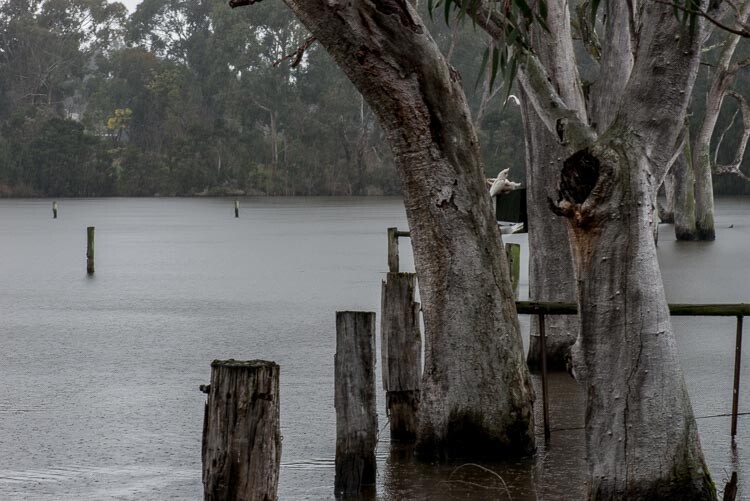
cole-landscape-photography-seasons-0015

A spring rain on Banyule Flats.

Spring is also the time that many baby animals are born, so you can see new life everywhere you look.

Waterfalls, creeks, and rivers run faster, and have more water in them as the snow melts. Go to your favorite waterfall and see how the extra water adds more volume. You will get images that are quite different than you would if you photograph there at the end, or the height, of summer.

Summer
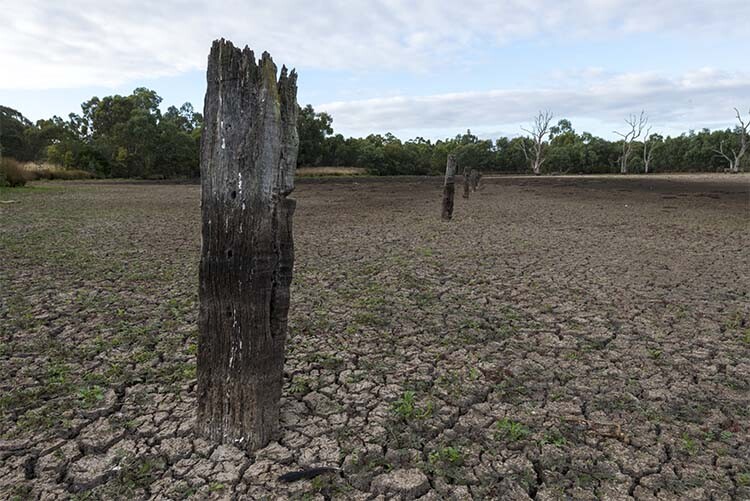
cole-landscape-photography-seasons-0008

Summer often dries out the swamp in Banyule Flats

This can be the harshest season in Australia. It is dry and hot. Most of the grasses in the landscape die off, leaving brown grass everywhere. There is an absence of color and the landscape is very different to what you find in the winter. The hot sun will also leach out all the color in what you see. A beautiful landscape that you get at other times of the year, will look desaturated.

The light is harsh and hard. The sun is higher in the sky and the shadows are shorter. Going out to get nice pictures in the middle of the day is too hard, and often too hot – though it shouldn’t stop you from trying. See what you can get and if you can show that heat in the images. If you have extreme days where the temperature is above 100°F (37.8°C) then it won’t matter when you go, it will be horrible.
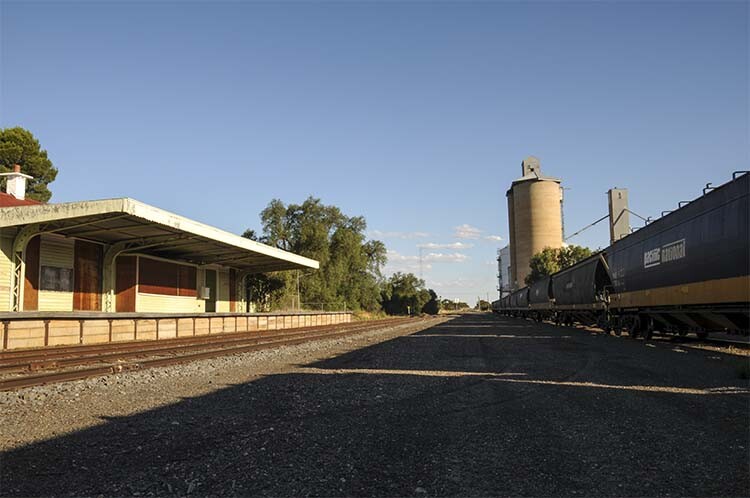
cole-landscape-photography-seasons-0013

On a very hot summer day in the early evening, the sun is still very strong, and the shadows still harsh.

On a positive note, if you know the next day is going to be a scorcher, check for clouds and head out to a great landscape photography location, as you can be fairly certain that you will get the most magnificent sunset. You need clouds to get a great one and the more the better, but you don’t want overcast or you won’t see the setting sun. Don’t forget to hang around for an hour afterwards to get the best of it. Summer is the best time for amazing sunsets, and over water means you get double.

In Australia it is very hot at that time of the year, but usually after a few days of intense heat it gets broken by a big thunder storm. You can head out, somewhere where you will be protected, and take some photos of the lightning and thunder clouds as they approach.

Using the seasons for your photography

Think of your favorite places that are nearby, places you can get to easily. What are they like at different times of the year? How can you show those differences? It might your photography a new focus, give it a try. I’ve been doing it for the last couple of years and it’s amazing how you can get very different images from the same location.

If you have an area that you love photographing but feel as though you have exhausted it, consider documenting the change throughout the seasons with your camera.


Here on dPS this is landscape week – here is list of what we’ve covered so far. Watch for a new article (or two) on landscape photography daily for the next few days.

  • 6 Tips for Better Low-Light Landscape Photography
  • Landscape Photography and the Human Element
  • 5 Ways a Telephoto Lens Can Improve Your Landscape Photography
  • Landscape Photography from the Side of the Road
  • 32 Majestic Landscape Photos to Inspire Your Wanderlust
  • Weekly Photography Challenge – Landscape

googletag.cmd.push(function() {
tablet_slots.push( googletag.defineSlot( “/1005424/_dPSv4_tab-all-article-bottom_(300×250)”, [300, 250], “pb-ad-78623” ).addService( googletag.pubads() ) ); } );

googletag.cmd.push(function() {
mobile_slots.push( googletag.defineSlot( “/1005424/_dPSv4_mob-all-article-bottom_(300×250)”, [300, 250], “pb-ad-78158” ).addService( googletag.pubads() ) ); } );

The post Landscape Photography – Shooting the Same Location Through the Seasons by Leanne Cole appeared first on Digital Photography School.


Digital Photography School

 
Comments Off on Landscape Photography – Shooting the Same Location Through the Seasons

Posted in Photography


7 Essential Tips for Shooting Portraits on Location

22 Apr

I have so many friends who have the good fortune to travel the world, but they always come home frustrated because they either try to take portraits in obvious places, standing on top of the landmark with thousands of people all around, or they don’t show the things that they found interesting or personal about where they were. So let’s Continue Reading

The post 7 Essential Tips for Shooting Portraits on Location appeared first on Photodoto.


Photodoto

 
Comments Off on 7 Essential Tips for Shooting Portraits on Location

Posted in Photography


Small Flash Portraits on Location with Adorama TV

04 Jan

How to light portraits with a small flash or speedlight is a common topic request from our readers here at dPS.

In this video tutorial Daniel at Adorama goes over how to use a speedlight both on-camera and off-camera to take quick and easy portraits on location. He shows tips for modifying the light, balancing with the ambient or available light in the scene, and even using a gel for color balance.

Get some great tips from this video:

Have you tried these techniques before? Had any success? Share any tips you have in the comments below.

googletag.cmd.push(function() {
tablet_slots.push( googletag.defineSlot( “/1005424/_dPSv4_tab-all-article-bottom_(300×250)”, [300, 250], “pb-ad-78623” ).addService( googletag.pubads() ) ); } );

googletag.cmd.push(function() {
mobile_slots.push( googletag.defineSlot( “/1005424/_dPSv4_mob-all-article-bottom_(300×250)”, [300, 250], “pb-ad-78158” ).addService( googletag.pubads() ) ); } );

The post Small Flash Portraits on Location with Adorama TV by Darlene Hildebrandt appeared first on Digital Photography School.


Digital Photography School
 
Comments Off on Small Flash Portraits on Location with Adorama TV

Posted in Photography


Deal 10: 50% Off the Portrait Lighting On Location Course

24 Dec

Today is day 10 in our 12 days of Christmas and we’ve got a deal that is really special to us because it is from our very own Managing Editor – Darlene Hildebrandt.

It’s 50% off her Portrait Lighting on Location Course! (Note: you need to use the coupon code of 12days2014 during the checkout to get the 50% off).

Portrait lighting on location course

Darlene started writing for us as a regular contributor several years ago and to this day some of her posts are among our all time most popular ones.

We liked her so much that we made her the editor!

While working with us Darlene has also been working with pro photographer Bruce Clarke to develop this brand new Portrait Lighting Course which has had some great reviews already from around the web.

You can get a full rundown of what is covered in the course here (don’t forget the 12days2014 coupon code) but in short it is all about giving you the confidence, techniques and tools around lighting your subjects – to be able to take better portraits using natural light and off camera flash.

It is perfect for beginners to intermediate photographers and gives you:

  • over 6 ours of video instruction over 25 lessons
  • over 240 pages of course notes to support the videos
  • quizzes after each lesson to help you cement what you’ve learned
  • printable cheat sheets and diagrams
  • lifetime access and updates
  • ongoing support through regular live webinars

This course can be taken at your own pace – so whip through it in an intense weekend of study or spread it out over the first weeks and months of 2015!

As with all the products in our 12 days of Christmas promotion – this comes with a 60 day money back guarantee. So you can sign up today and get the 50% discount but if you are not satisfied can ask for your money back for a full refund.

Get full details of the course and sign up at 50% off with the coupon code 12days2014 here

But don’t delay – this deal ends in 24 hours from the time this post goes live.

googletag.cmd.push(function() {
tablet_slots.push( googletag.defineSlot( “/1005424/_dPSv4_tab-all-article-bottom_(300×250)”, [300, 250], “pb-ad-78623” ).addService( googletag.pubads() ) ); } );

googletag.cmd.push(function() {
mobile_slots.push( googletag.defineSlot( “/1005424/_dPSv4_mob-all-article-bottom_(300×250)”, [300, 250], “pb-ad-78158” ).addService( googletag.pubads() ) ); } );

The post Deal 10: 50% Off the Portrait Lighting On Location Course by Darren Rowse appeared first on Digital Photography School.


Digital Photography School
 
Comments Off on Deal 10: 50% Off the Portrait Lighting On Location Course

Posted in Photography


6 Tips for Better Portraits on Location

20 Dec

Whew it’s been a while since I actually wrote a tutorial here on dPS so I thought it was time. Some of my most popular articles are about portrait lighting patterns and other aspects of creating great portraits. In this article I want to give you a few tips to help you take better portraits on location, flatter your subjects and make sure you are all happy with the final results.

Mayorga Dec14 0018 600px

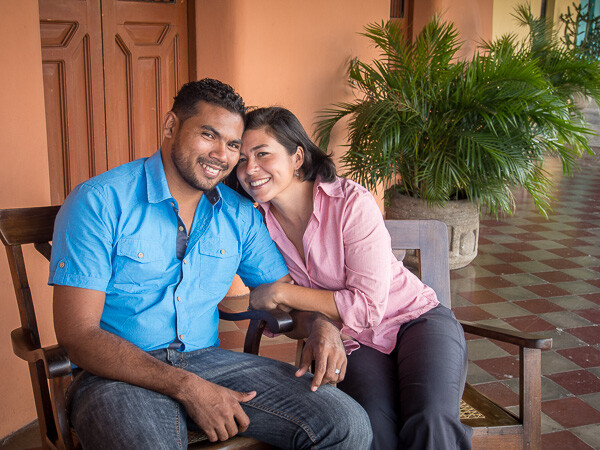
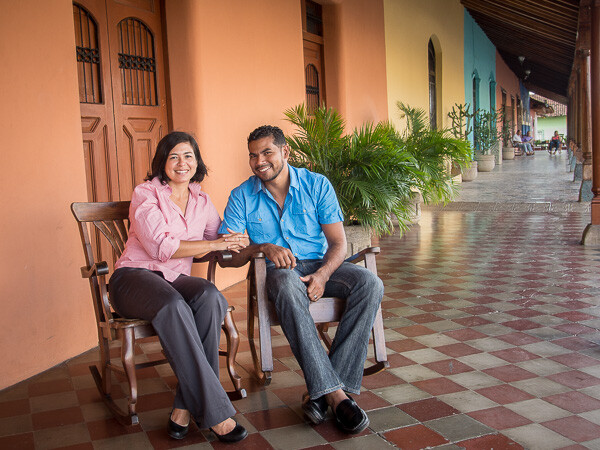
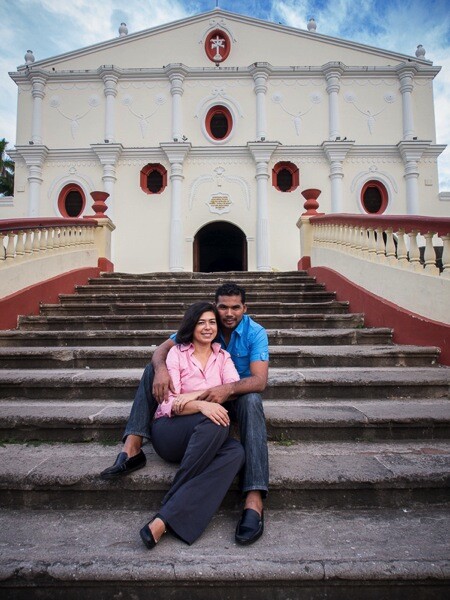
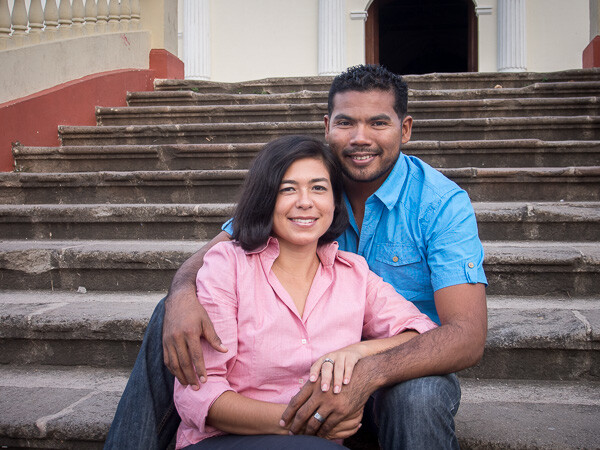
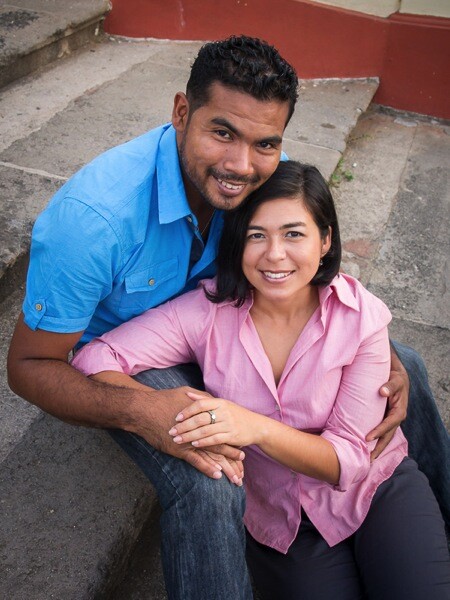
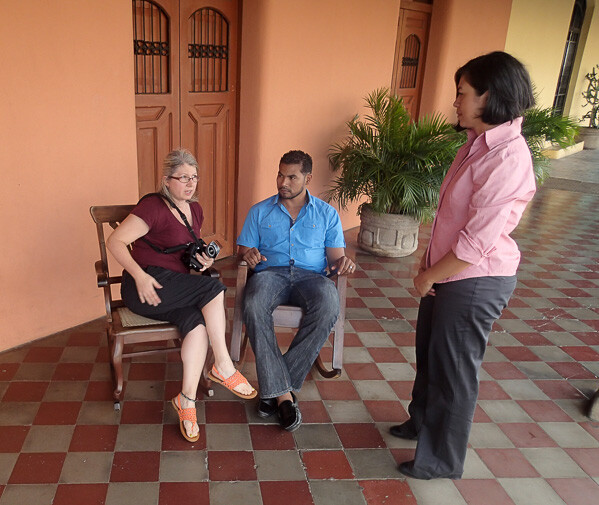
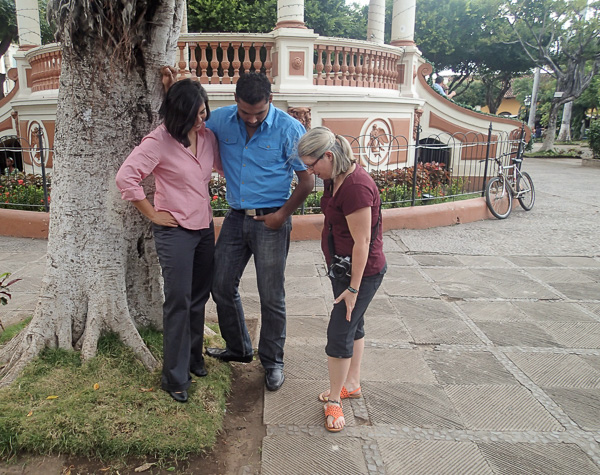
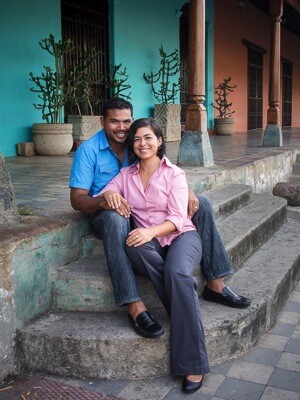
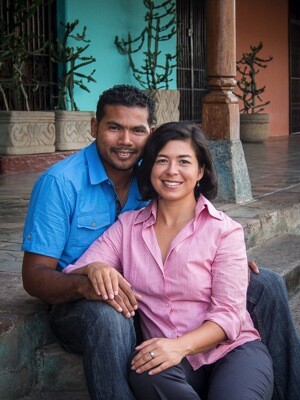
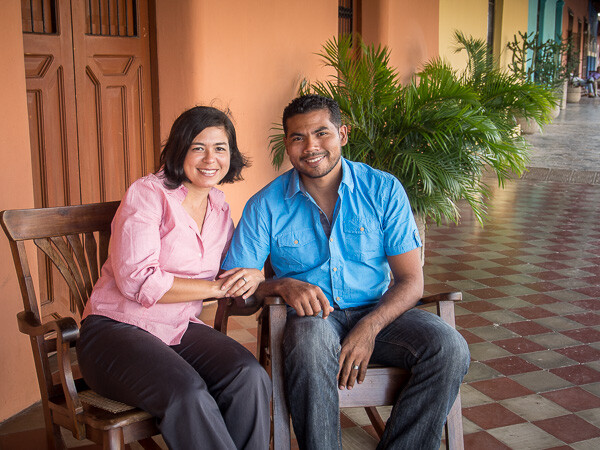
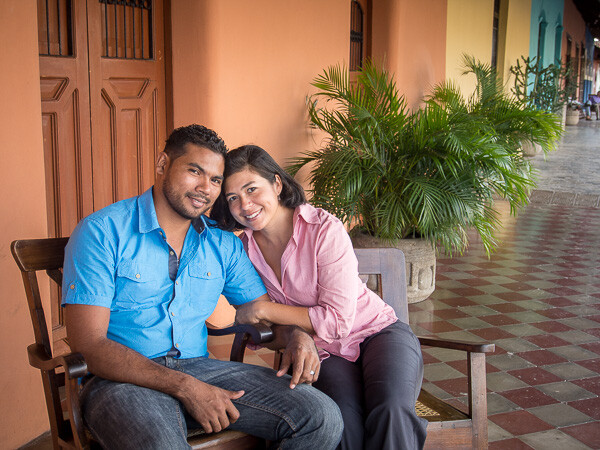
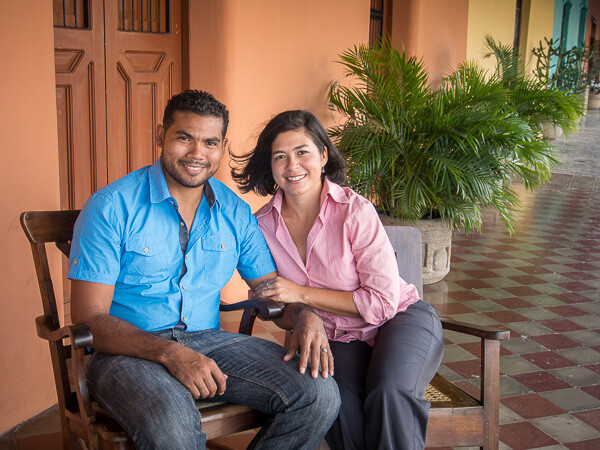
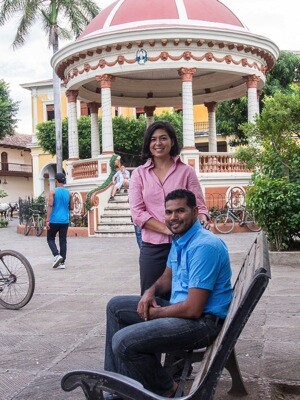
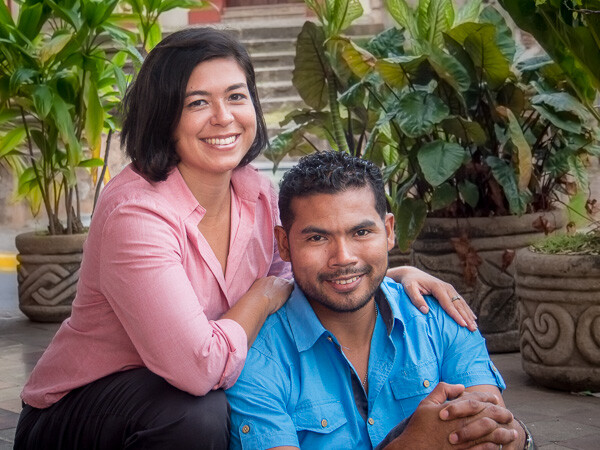
My models for this article are my Nicaraguan friend Luis and his fiancé Sonia. He’s been a great help to us on our tours here and has become a good friend so this was win/win for us as they get a nice portrait of themselves (they don’t have a professional one) and I am allowed to use their photos and their session for teaching purposes here.

Quick summary:

This is a quick list of the five tips, we’ll cover each in more detail and look at some examples.

  1. Ask your subject’s what they like and want
  2. Look for the light
  3. Find a good background
  4. Pose you subjects to flatter them
  5. Communicate with them
  6. Do something they want, even if it’s not art

First a note about gear

A lot of people get hung on up having the top of the line gear, pro lenses, the fancy bells and whistles, and all the extra gizmos. While it is nice to have the best gear, I want to show you it is possible to make great portraits with ANY gear. All the photos in this article were taken in Granada, Nicaragua (where I am currently living/working for 2.5 months) with an Olympus OM-D E-M5 mirrorless camera, and 12-50mm f3.5-6.3 lens (equivalent to a 24-100mm on a full frame camera). NO flash was used only a reflector in a couple situations.

Tip #1 talk to your subjects before the session

Knowing what people want for their portrait, and their expectations is essential to making a portrait they will like. Ask them what kind of clothes they’ll be wearing – formal or casual – that may make certain locations a better choice than others. Talk about feel or mood for the portrait. If it’s a couple are they touchy feely or not. You need to know these things going in, not later when they hate their photos or feel uncomfortable doing something that isn’t really “them”.

For my couple I found out that she liked certain churches here in town, gardens, and the volcano (keep reading to see how I worked some of that into the session). I scouted out a few locations ahead of time with a friend so I could check out the lighting. If you are going to do this, go at the same time of day you want to do the session. I like to work at golden hour with the sun is low and not overhead, which brings us to the next tip.

Tip #2 Look for the light

First and foremost photography is about light. If you have no light or bad light it’s really hard to make good photos. Back to golden hour – this is when the sun is low in the sky either right before sunset or after sunrise. Most portrait photographers choose this time of day as the optimal time to work instead of fighting with midday overhead lighting. Do yourself a favour and make your life easier – whenever possible schedule portraits at golden hour. Find out the sunset time for your area and start an hour or so before that.

Mayorga Dec14 0003 600px

In the first spot for our session we actually started on the porch of the house we’re renting here. Across the street is a big white church reflecting the light back under the porch. There’s an overhang covering the top so there is no direct overhead light. It is the perfect situation for great portrait light and one I seek out wherever I’m shooting. Just by turning the subject’s faces a little bit you can create different lighting on. Read more about that in my first ever dPS article: 6 Portrait Lighting Patterns Every Photographer Should Know.

In the image above you can see the direction of light is coming from camera right (their left). See how he is turned away from the light source slightly and has broad lighting, then watch how it is corrected in the next few images.

Mayorga BTS 0029 600px

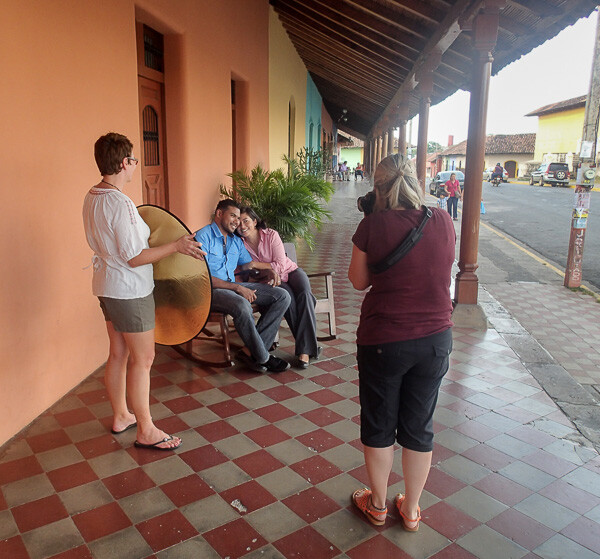
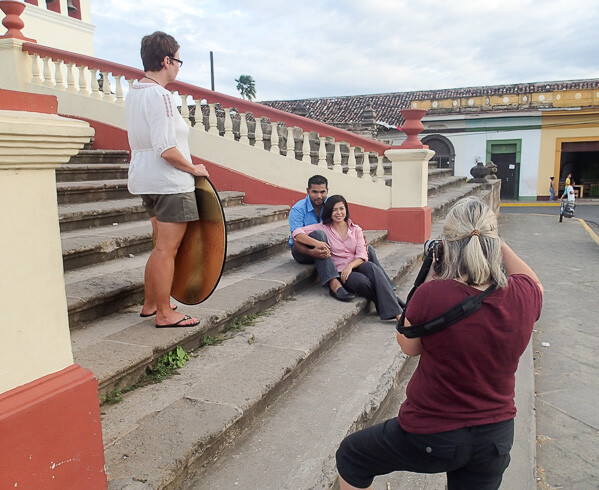
Behind the scenes shot

Mayorga BTS 0041 600px

Use an assistant and reflector when you have a chance. Here I had my assistant holding a white reflector to bounce a bit of light into their faces.

Tip #3 Find a good background

Everything in photography is subjective. So how do we define a good background from a bad one? Well there are a few things that can help:

  • Watch for bright spots (and areas of high contrast) in behind your subjects it will draw the viewers eye, usually as a distraction, which is not desired.
  • Avoid bright colours in the background for the same reason. You want the viewers eye to go direction to the people, not the stuff behind them. This is often a problem when your subjects request a garden or flowers in for their background. They do not know this stuff, so it is your job to educate them and make a portrait that is both pleasing to the eye, and to them!
  • Make it appropriate for the subject. Again the idea of a portrait is to portray the person, so sometimes you need to show more of the environment to do so. Just make sure it is fitting for them and helps either flatter them or tell their story.
  • Keep it simple and blur it when possible. A busy and sharp background will draw attention. Use the KISS principle and a large enough aperture to get that background out of focus. A longer lens also helps – something which was limited for me in this situation so do the best you can with what you have.

In the examples below see how I started with the full church in the background and made a few alterations to simplify and get the focus more on the people.

Mayorga Dec14 0041 600px

First shot at the church. Notice how the wide angle lens makes their lower bodies and feet look larger? This is also the same church that was bouncing the light in the first setup.

Mayorga Dec14 0049 600px

Much better! In this variation I moved back and zoomed in using a longer lens to get less of the background and crop out the lower bodies.

Mayorga Dec14 0030 600px

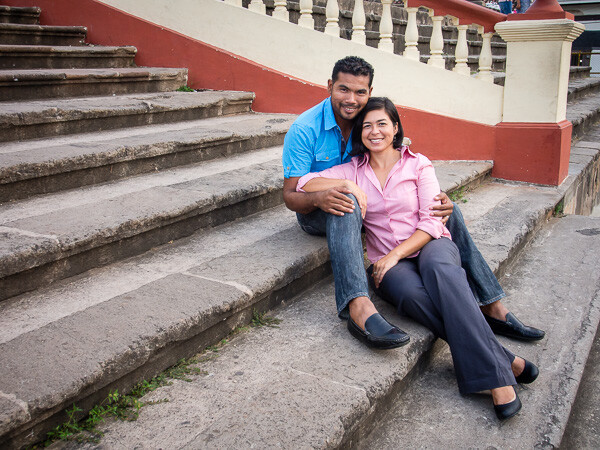
Next angle shooting from the side on the stairs using the nice leading lines. Again the wider lens makes feet or anything closer to the camera look bigger. Not so much desired, but not horrible in this instance.

Mayorga Dec14 0031 600px

Once again zooming to focus more on their faces and in this case a slightly higher camera angle, is far more flattering to them.

Mayorga Dec14 0034 600px

Lastly try something different. A super high angle and them looking up has a completely different feeling.

Tip #4 Pose to flatter people

Posing people is one of the hardest things to learn but also one of the most important. People are nervous about having their photos taken, and that is often reflected in their body position. It is your job to get them to loosen up and to help them look their best.

The best way I know how to show people a pose is to do it for them, then get them to repeat it. So I’ll go stand in their spot, strike the pose I want them to do and then have them copy me. Or you can face them and have them mirror you.

Mayorga BTS 0009 600px

Here I am showing her how to sit and what not to do – stick your butt towards the camera.

Mayorga BTS 0117 600px

And how to position their feet – very important! How the feet are positioned makes a difference to how the body looks. Pay attention from head to toe, literally. If you want them to turn their body – tell them to turn their feet, the body will follow.

Mayorga Dec14 0051 600px Mayorga Dec14 0054 600px

Here are a few general tips for posing people:

  • If it bends bend it! Get them to shift their weight to one leg (ALWAYS the back one and hip away from the camera) and let one leg bend naturally. Stiff legged = boring = they look nervous and won’t like the photos.
  • Arms too: get them to put a hand in a pocket (but only the fingers not the thumb, that way they won’t shove it too far in there pulling their pant leg funny), hook a thumb in a belt loop, or if you’re working with a couple hold hands and touch. Remember you should already know if they are touchy feely or not (see tip #1 above) so you know what they’ll be comfortable with. Having people who are family, close friends, or couples touch in their portrait helps to add a feeling of connection and usually helps them relax too.
  • Observe their natural body positions and use them. If you see that she sits a certain way, or puts a hand on her hip – get her to do that. Often I’ll give more loose posing directions to start and see what they end up with on their own – then refine it a little if necessary. They’ll relate more to the portrait if it something they do naturally, and you may even get comments like “Oh that is SO me!”
  • Get ladies to cross legs at the ankles not knees. Crossing at the knee is how most of us sit normally but it makes the legs look unnecessarily bulky. Trust me on this – NO woman wants to look bulkier! Ankles crossed looks feminine and makes a nice line for the legs to follow.
  • Posing a couple: If you are dealing with a couple with a large height difference (as I was in this session) get the man to sit and have her drape her arms around him from the side. Or in a standing pose have him widen his stance more. Putting his feet farther apart will actually lower his total height – a neat little trick that really works.
  • Avoid cropping off people’s hands and feet, they end up looking amputated. If you’re going to crop in, come in closer to make it more obvious and crop to the knees (or higher) and elbows.

Mayorga Dec14 0006 600px
In this image (above) with her on the left, I felt it wasn’t as flattering when she leaned to the side (exposing more hip area. Remember in the standing pose – hip pushed away from the camera – same with sitting.

Mayorga Dec14 0015 600px

Pose better. He looks bigger, which he is, and her pose is more flattering. At top of the article when we talked about light he was turned away from the church (light source) and had broad lighting. Now that is reversed and he has short and she has broad lighting. I didn’t mind it so much and the pose and expressions were great so I went with it. But a slight head turn changes that:

Mayorga Dec14 0012 600px

Tip #5 Communicate with them

Let’s go back to people are nervous getting their portrait done. The best way to help them relax is to talk to them. It’s not rocket science just talk. Tell them what you’re doing, ask them how their day was, find some common ground to talk about while you fuss with your gear. Just talk!

Novice photographers also being nervous tend to clam up and go about their business setting up their camera, tripod, metering, testing, etc., and forget they have real people standing there waiting for direction. Silence is awkward, build a rapport with them and help them relax at the same time.

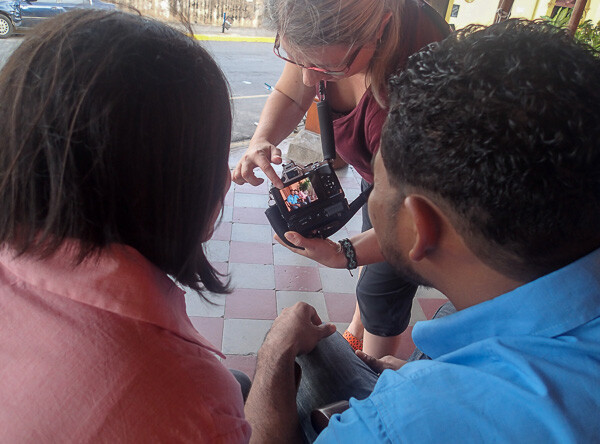
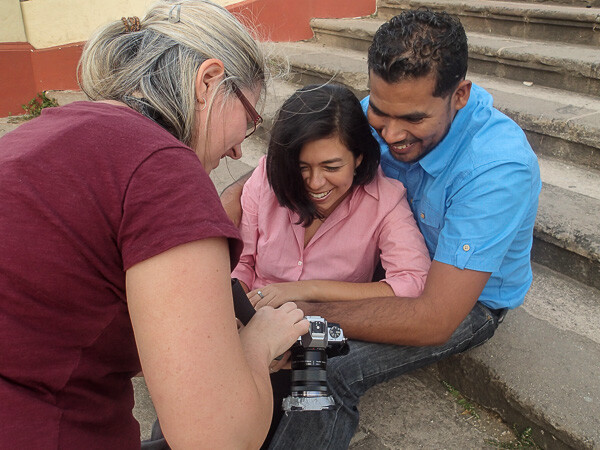
Also show them some of the photos now and then and tell them how great they’re doing and how fantastic they look. When you share with them you think the photo session is going great they almost instantly relax and get into it more. You may even find them wanting to participate more and come up with ideas for photos.

Mayorga BTS 0035 600px

Mayorga BTS 0063 600px

Tip #6 Do one of their ideas

Sometimes people will throw out ideas at the session or in your initial fact finding discussion. Don’t discount these right away. Often the suggestions will have some meaning to them or just simply show their tastes. Try to incorporate at least one or two of their ideas into the portrait session, even if you know it’s not going to be the best shot or come out as art. Do it to have some fun and let them know they are an important part of the process.

In this example remember she said she like a couple of the churches, to see the volcano, and gardens. Let’s see how that came out:

Mayorga Dec14 0075 600px

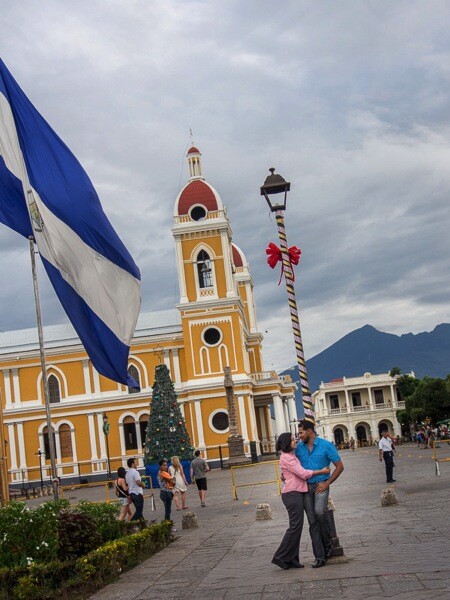
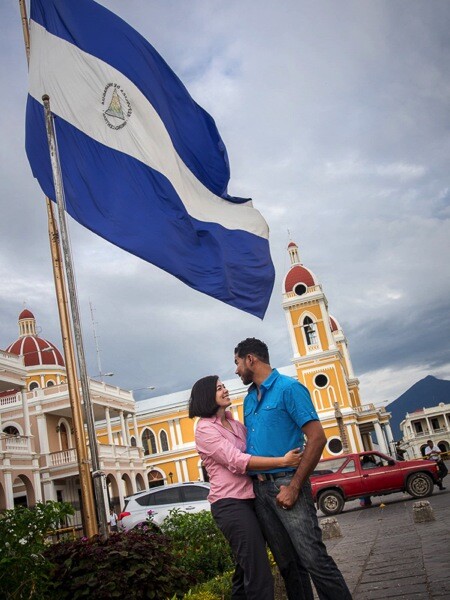
The white church was already used in some of the shots above. We worked the location near our house and then just went for a walk to see what else caught our eyes. The main square here has the big yellow cathedral, and giant Nicaraguan flag, and the volcano in the distance. So I tried to get all of those elements into one shot, and somehow manage to see the couple still. The image above is the result. It doesn’t completely suck but they are pretty small and I wasn’t crazy about the candy cane looking light post.

Once again I zoomed in to a longer focal length and got a bit closer to crop out their feet. Ignoring the annoying cars behind them, I think this is more effective and still shows all the elements. Waiting for the flag to blow was also important to be able to see it. Patience young grasshopper!

Mayorga Dec14 0090 600px

We were losing light fast (happens at sunset) but I wanted to get a few more in for them. Next up they liked the gazebo. I tried to get it in the background but there was a guy sitting there and was near impossible to get him out of the shot and too many people wandering through the background. That and the light just wasn’t working, their eyes and faces were way too dark (below left) and there was no light to get with the reflector (too cloudy).

Mayorga Dec14 0093 600px Mayorga Dec14 0096 600px

Moving them under an overhanging branch of a large tree (above right) helped block some of the overhead light of the cloudy sky and still allowed a portion of the gazebo to show in the image.

Finally walking back to our house we noticed a row of plants on the stoop. So I decided to make it work as a garden-like shot. It’s not my first choice for background but they liked it and that’s all that really matters.

Mayorga Dec14 0125 600px

Final tips

Being a portrait photographer is part lighting technician, part psychologist, and juggler. You have to take all the elements and make them work together including technical, aesthetic and work with real live people at the same time. Like I said – juggling!

If I can give you one tip to sum up doing portraits on location it would be this:

Don’t be afraid to admit it’s not working and try something else. There are lots of possibilities even in one location

Mayorga BTS 0089 600px
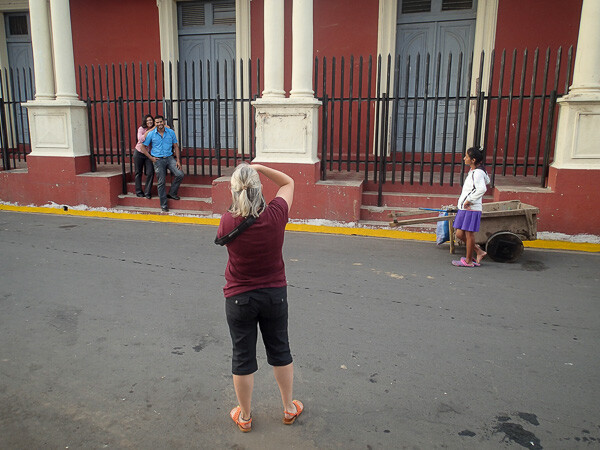
Another behind the scenes shot. I didn’t end up liking the result here but I thought you might like to see the street and a bit of the city of Granada.

googletag.cmd.push(function() {
tablet_slots.push( googletag.defineSlot( “/1005424/_dPSv4_tab-all-article-bottom_(300×250)”, [300, 250], “pb-ad-78623” ).addService( googletag.pubads() ) ); } );

googletag.cmd.push(function() {
mobile_slots.push( googletag.defineSlot( “/1005424/_dPSv4_mob-all-article-bottom_(300×250)”, [300, 250], “pb-ad-78158” ).addService( googletag.pubads() ) ); } );

The post 6 Tips for Better Portraits on Location by Darlene Hildebrandt appeared first on Digital Photography School.


Digital Photography School
 
Comments Off on 6 Tips for Better Portraits on Location

Posted in Photography


How to Balance Off-Camera Flash and Ambient Light on Location

01 Dec

In this Adorama TV video Gavin Hoey takes you on location to learn how to balance flash and ambient light to create some stunning portraits in the forest.

After going through three different setups outdoors he takes you inside for the post-processing stage so see how he completes the images in Photoshop.

Some of the items Gavin used and demonstrated in the video for your convenience:

  • Canon 70-200mm f/2.8L lens
  • BlackRapid Curve RS-7 camera strap
  • Flashpoint RoveLight 600ws monolight
  • Glow ParaPop 28″ R Series
  • Sekonic L-308S Flashmate light meter

You can get the free light ray brushes he mentions in the video here.

In Practice

Have you tried any location portraits using both the natural or ambient light combined with flash? If you have any other tips or want to share your images, please do so in the comments below.

The post How to Balance Off-Camera Flash and Ambient Light on Location by Darlene Hildebrandt appeared first on Digital Photography School.


Digital Photography School
 
Comments Off on How to Balance Off-Camera Flash and Ambient Light on Location

Posted in Photography