Whew it’s been a while since I actually wrote a tutorial here on dPS so I thought it was time. Some of my most popular articles are about portrait lighting patterns and other aspects of creating great portraits. In this article I want to give you a few tips to help you take better portraits on location, flatter your subjects and make sure you are all happy with the final results.
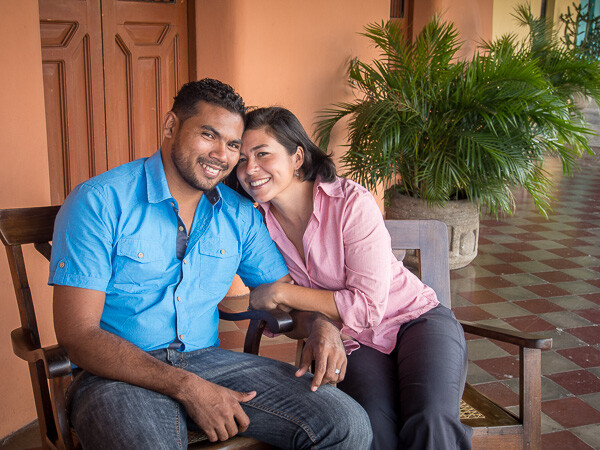
My models for this article are my Nicaraguan friend Luis and his fiancé Sonia. He’s been a great help to us on our tours here and has become a good friend so this was win/win for us as they get a nice portrait of themselves (they don’t have a professional one) and I am allowed to use their photos and their session for teaching purposes here.
Quick summary:
This is a quick list of the five tips, we’ll cover each in more detail and look at some examples.
- Ask your subject’s what they like and want
- Look for the light
- Find a good background
- Pose you subjects to flatter them
- Communicate with them
- Do something they want, even if it’s not art
First a note about gear
A lot of people get hung on up having the top of the line gear, pro lenses, the fancy bells and whistles, and all the extra gizmos. While it is nice to have the best gear, I want to show you it is possible to make great portraits with ANY gear. All the photos in this article were taken in Granada, Nicaragua (where I am currently living/working for 2.5 months) with an Olympus OM-D E-M5 mirrorless camera, and 12-50mm f3.5-6.3 lens (equivalent to a 24-100mm on a full frame camera). NO flash was used only a reflector in a couple situations.
Tip #1 talk to your subjects before the session
Knowing what people want for their portrait, and their expectations is essential to making a portrait they will like. Ask them what kind of clothes they’ll be wearing – formal or casual – that may make certain locations a better choice than others. Talk about feel or mood for the portrait. If it’s a couple are they touchy feely or not. You need to know these things going in, not later when they hate their photos or feel uncomfortable doing something that isn’t really “them”.
For my couple I found out that she liked certain churches here in town, gardens, and the volcano (keep reading to see how I worked some of that into the session). I scouted out a few locations ahead of time with a friend so I could check out the lighting. If you are going to do this, go at the same time of day you want to do the session. I like to work at golden hour with the sun is low and not overhead, which brings us to the next tip.
Tip #2 Look for the light
First and foremost photography is about light. If you have no light or bad light it’s really hard to make good photos. Back to golden hour – this is when the sun is low in the sky either right before sunset or after sunrise. Most portrait photographers choose this time of day as the optimal time to work instead of fighting with midday overhead lighting. Do yourself a favour and make your life easier – whenever possible schedule portraits at golden hour. Find out the sunset time for your area and start an hour or so before that.
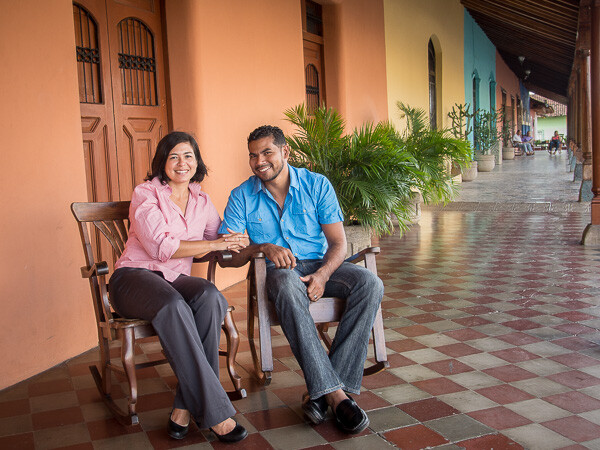
In the first spot for our session we actually started on the porch of the house we’re renting here. Across the street is a big white church reflecting the light back under the porch. There’s an overhang covering the top so there is no direct overhead light. It is the perfect situation for great portrait light and one I seek out wherever I’m shooting. Just by turning the subject’s faces a little bit you can create different lighting on. Read more about that in my first ever dPS article: 6 Portrait Lighting Patterns Every Photographer Should Know.
In the image above you can see the direction of light is coming from camera right (their left). See how he is turned away from the light source slightly and has broad lighting, then watch how it is corrected in the next few images.
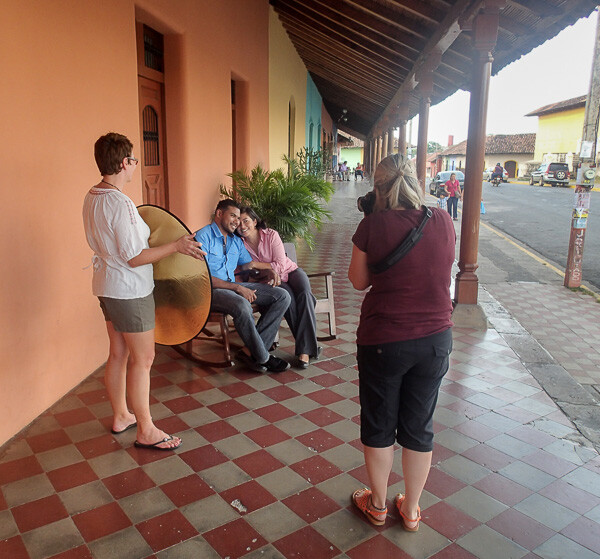
Behind the scenes shot
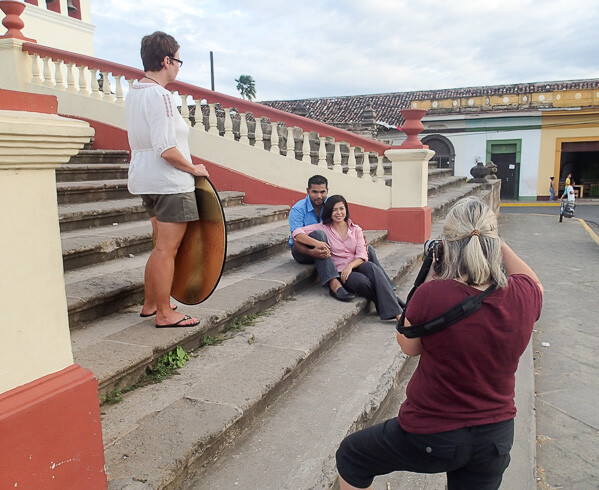
Use an assistant and reflector when you have a chance. Here I had my assistant holding a white reflector to bounce a bit of light into their faces.
Tip #3 Find a good background
Everything in photography is subjective. So how do we define a good background from a bad one? Well there are a few things that can help:
- Watch for bright spots (and areas of high contrast) in behind your subjects it will draw the viewers eye, usually as a distraction, which is not desired.
- Avoid bright colours in the background for the same reason. You want the viewers eye to go direction to the people, not the stuff behind them. This is often a problem when your subjects request a garden or flowers in for their background. They do not know this stuff, so it is your job to educate them and make a portrait that is both pleasing to the eye, and to them!
- Make it appropriate for the subject. Again the idea of a portrait is to portray the person, so sometimes you need to show more of the environment to do so. Just make sure it is fitting for them and helps either flatter them or tell their story.
- Keep it simple and blur it when possible. A busy and sharp background will draw attention. Use the KISS principle and a large enough aperture to get that background out of focus. A longer lens also helps – something which was limited for me in this situation so do the best you can with what you have.
In the examples below see how I started with the full church in the background and made a few alterations to simplify and get the focus more on the people.
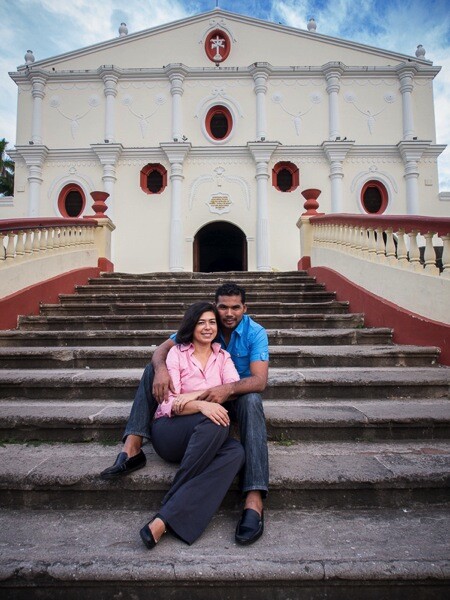
First shot at the church. Notice how the wide angle lens makes their lower bodies and feet look larger? This is also the same church that was bouncing the light in the first setup.
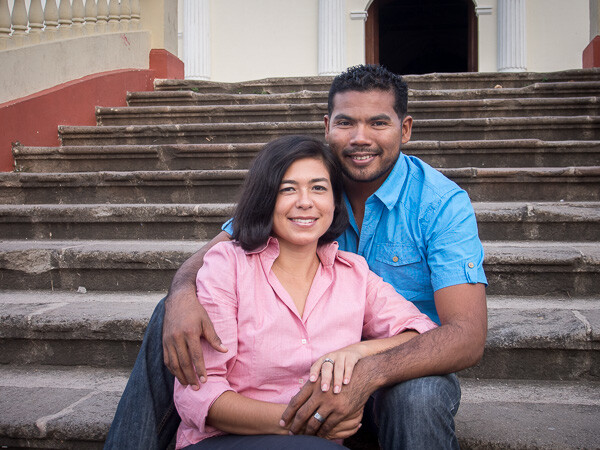
Much better! In this variation I moved back and zoomed in using a longer lens to get less of the background and crop out the lower bodies.
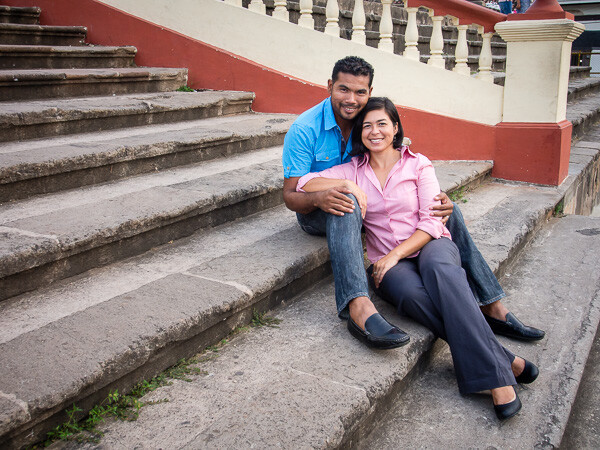
Next angle shooting from the side on the stairs using the nice leading lines. Again the wider lens makes feet or anything closer to the camera look bigger. Not so much desired, but not horrible in this instance.

Once again zooming to focus more on their faces and in this case a slightly higher camera angle, is far more flattering to them.
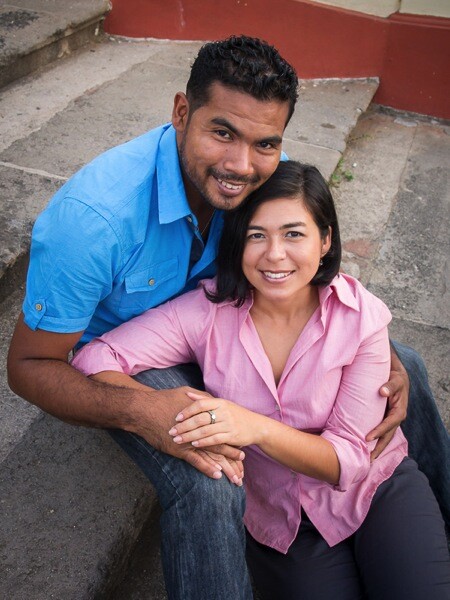
Lastly try something different. A super high angle and them looking up has a completely different feeling.
Tip #4 Pose to flatter people
Posing people is one of the hardest things to learn but also one of the most important. People are nervous about having their photos taken, and that is often reflected in their body position. It is your job to get them to loosen up and to help them look their best.
The best way I know how to show people a pose is to do it for them, then get them to repeat it. So I’ll go stand in their spot, strike the pose I want them to do and then have them copy me. Or you can face them and have them mirror you.
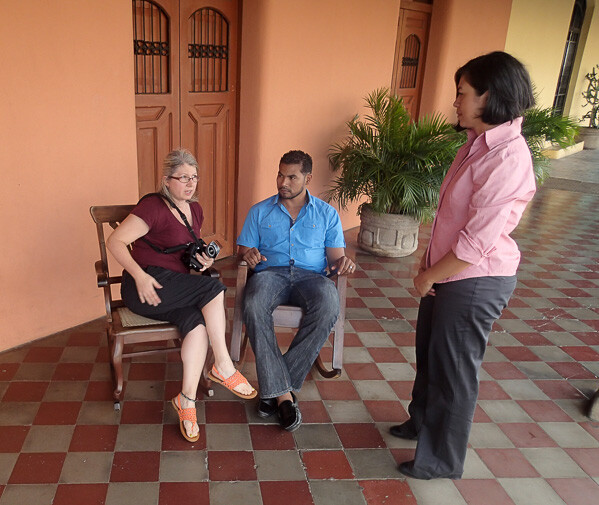
Here I am showing her how to sit and what not to do – stick your butt towards the camera.
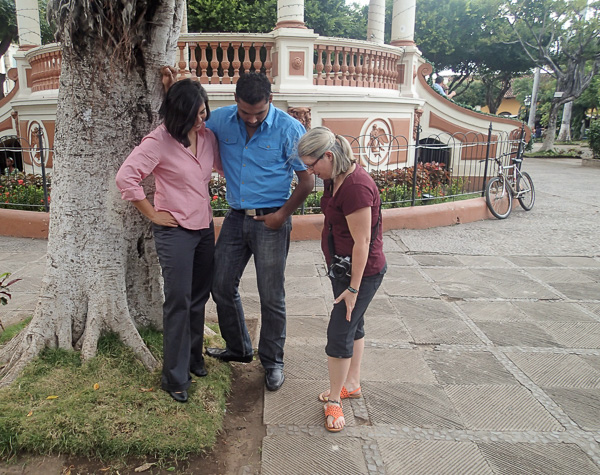
And how to position their feet – very important! How the feet are positioned makes a difference to how the body looks. Pay attention from head to toe, literally. If you want them to turn their body – tell them to turn their feet, the body will follow.
 |
 |
Here are a few general tips for posing people:
- If it bends bend it! Get them to shift their weight to one leg (ALWAYS the back one and hip away from the camera) and let one leg bend naturally. Stiff legged = boring = they look nervous and won’t like the photos.
- Arms too: get them to put a hand in a pocket (but only the fingers not the thumb, that way they won’t shove it too far in there pulling their pant leg funny), hook a thumb in a belt loop, or if you’re working with a couple hold hands and touch. Remember you should already know if they are touchy feely or not (see tip #1 above) so you know what they’ll be comfortable with. Having people who are family, close friends, or couples touch in their portrait helps to add a feeling of connection and usually helps them relax too.
- Observe their natural body positions and use them. If you see that she sits a certain way, or puts a hand on her hip – get her to do that. Often I’ll give more loose posing directions to start and see what they end up with on their own – then refine it a little if necessary. They’ll relate more to the portrait if it something they do naturally, and you may even get comments like “Oh that is SO me!”
- Get ladies to cross legs at the ankles not knees. Crossing at the knee is how most of us sit normally but it makes the legs look unnecessarily bulky. Trust me on this – NO woman wants to look bulkier! Ankles crossed looks feminine and makes a nice line for the legs to follow.
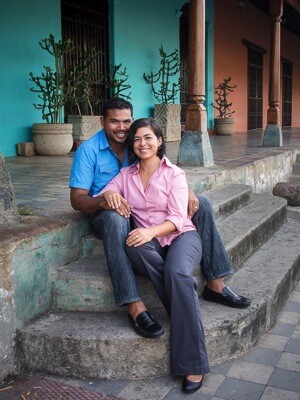
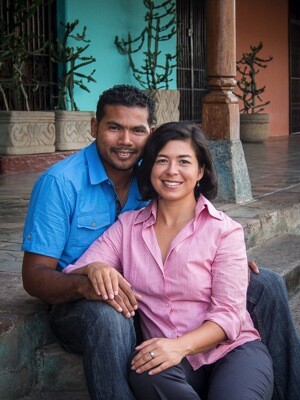
- Posing a couple: If you are dealing with a couple with a large height difference (as I was in this session) get the man to sit and have her drape her arms around him from the side. Or in a standing pose have him widen his stance more. Putting his feet farther apart will actually lower his total height – a neat little trick that really works.
- Avoid cropping off people’s hands and feet, they end up looking amputated. If you’re going to crop in, come in closer to make it more obvious and crop to the knees (or higher) and elbows.
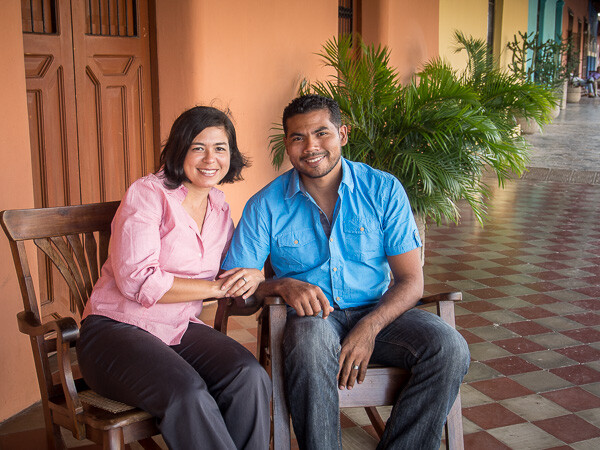
In this image (above) with her on the left, I felt it wasn’t as flattering when she leaned to the side (exposing more hip area. Remember in the standing pose – hip pushed away from the camera – same with sitting.
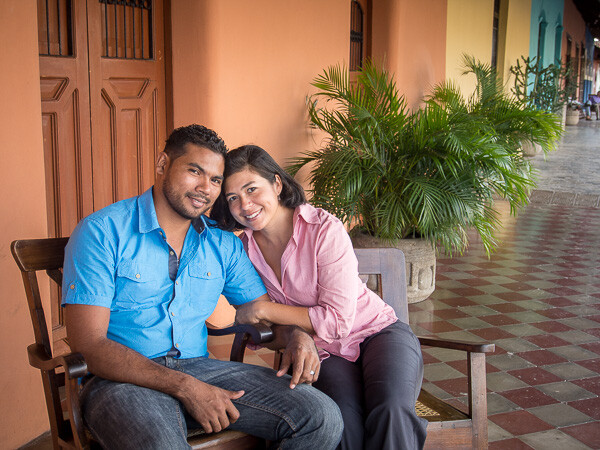
Pose better. He looks bigger, which he is, and her pose is more flattering. At top of the article when we talked about light he was turned away from the church (light source) and had broad lighting. Now that is reversed and he has short and she has broad lighting. I didn’t mind it so much and the pose and expressions were great so I went with it. But a slight head turn changes that:
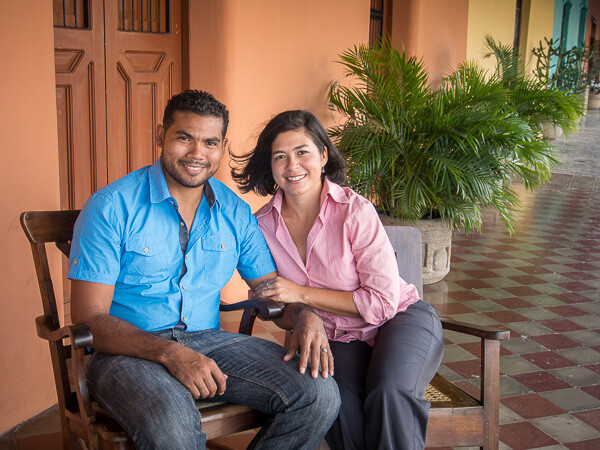
Tip #5 Communicate with them
Let’s go back to people are nervous getting their portrait done. The best way to help them relax is to talk to them. It’s not rocket science just talk. Tell them what you’re doing, ask them how their day was, find some common ground to talk about while you fuss with your gear. Just talk!
Novice photographers also being nervous tend to clam up and go about their business setting up their camera, tripod, metering, testing, etc., and forget they have real people standing there waiting for direction. Silence is awkward, build a rapport with them and help them relax at the same time.
Also show them some of the photos now and then and tell them how great they’re doing and how fantastic they look. When you share with them you think the photo session is going great they almost instantly relax and get into it more. You may even find them wanting to participate more and come up with ideas for photos.
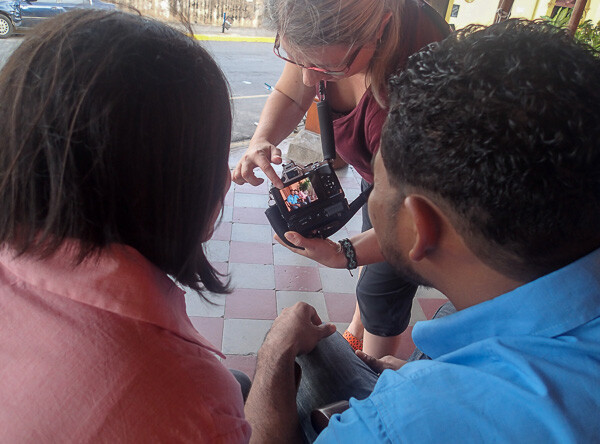
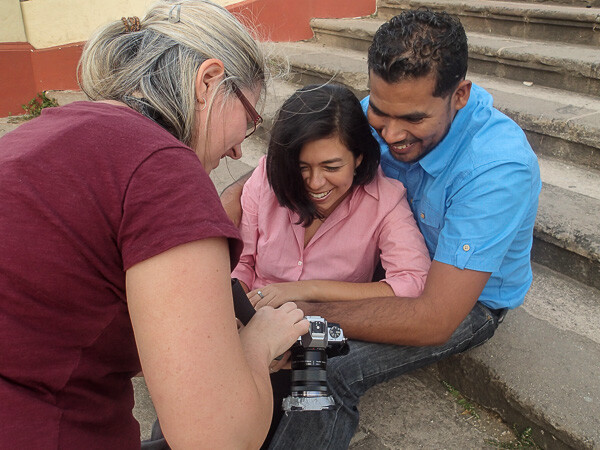
Tip #6 Do one of their ideas
Sometimes people will throw out ideas at the session or in your initial fact finding discussion. Don’t discount these right away. Often the suggestions will have some meaning to them or just simply show their tastes. Try to incorporate at least one or two of their ideas into the portrait session, even if you know it’s not going to be the best shot or come out as art. Do it to have some fun and let them know they are an important part of the process.
In this example remember she said she like a couple of the churches, to see the volcano, and gardens. Let’s see how that came out:
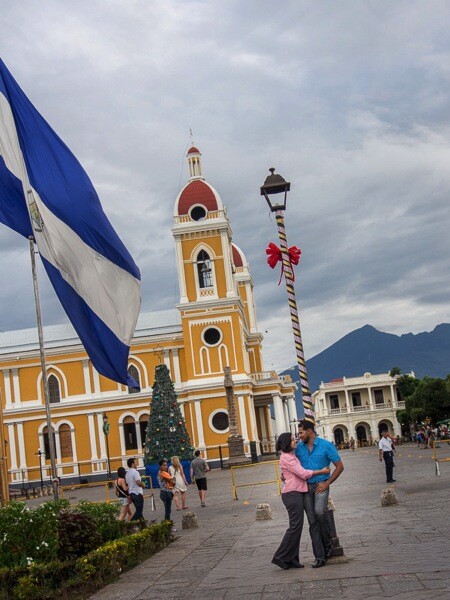
The white church was already used in some of the shots above. We worked the location near our house and then just went for a walk to see what else caught our eyes. The main square here has the big yellow cathedral, and giant Nicaraguan flag, and the volcano in the distance. So I tried to get all of those elements into one shot, and somehow manage to see the couple still. The image above is the result. It doesn’t completely suck but they are pretty small and I wasn’t crazy about the candy cane looking light post.
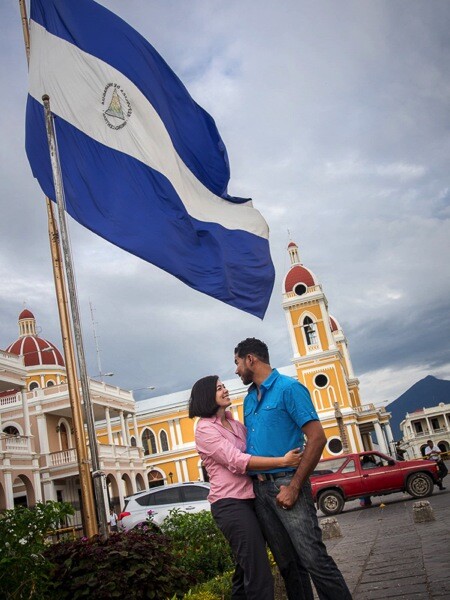
Once again I zoomed in to a longer focal length and got a bit closer to crop out their feet. Ignoring the annoying cars behind them, I think this is more effective and still shows all the elements. Waiting for the flag to blow was also important to be able to see it. Patience young grasshopper!
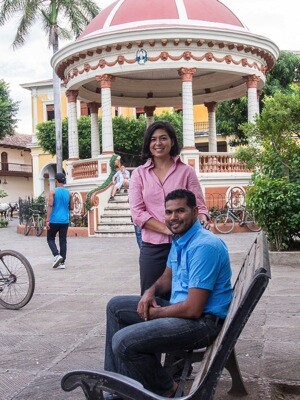
We were losing light fast (happens at sunset) but I wanted to get a few more in for them. Next up they liked the gazebo. I tried to get it in the background but there was a guy sitting there and was near impossible to get him out of the shot and too many people wandering through the background. That and the light just wasn’t working, their eyes and faces were way too dark (below left) and there was no light to get with the reflector (too cloudy).
 |
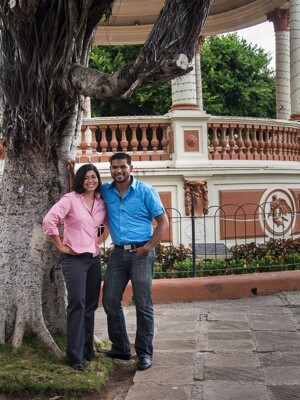 |
Moving them under an overhanging branch of a large tree (above right) helped block some of the overhead light of the cloudy sky and still allowed a portion of the gazebo to show in the image.
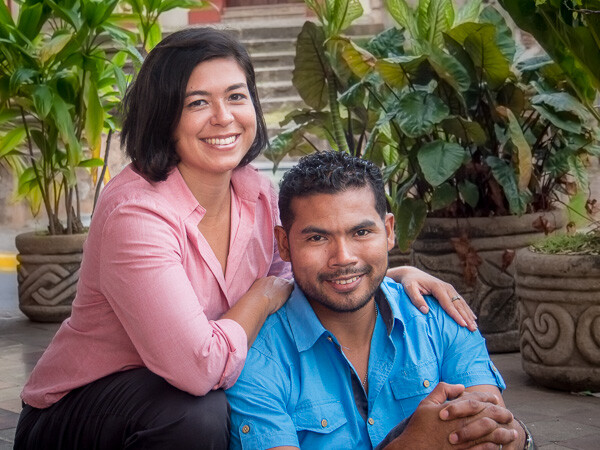
Finally walking back to our house we noticed a row of plants on the stoop. So I decided to make it work as a garden-like shot. It’s not my first choice for background but they liked it and that’s all that really matters.
Final tips
Being a portrait photographer is part lighting technician, part psychologist, and juggler. You have to take all the elements and make them work together including technical, aesthetic and work with real live people at the same time. Like I said – juggling!
If I can give you one tip to sum up doing portraits on location it would be this:
Don’t be afraid to admit it’s not working and try something else. There are lots of possibilities even in one location
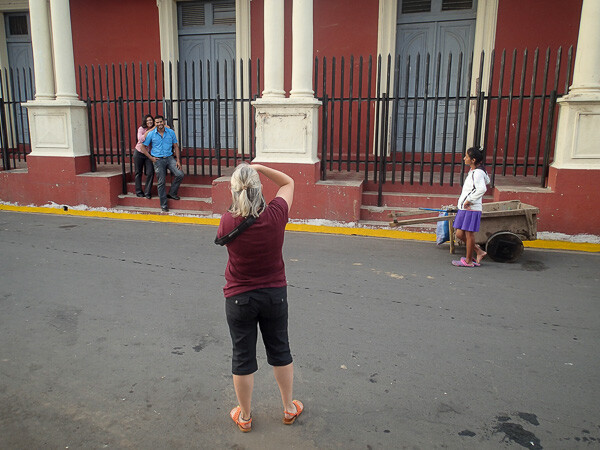
Another behind the scenes shot. I didn’t end up liking the result here but I thought you might like to see the street and a bit of the city of Granada.
googletag.cmd.push(function() {
tablet_slots.push( googletag.defineSlot( “/1005424/_dPSv4_tab-all-article-bottom_(300×250)”, [300, 250], “pb-ad-78623” ).addService( googletag.pubads() ) ); } );
googletag.cmd.push(function() {
mobile_slots.push( googletag.defineSlot( “/1005424/_dPSv4_mob-all-article-bottom_(300×250)”, [300, 250], “pb-ad-78158” ).addService( googletag.pubads() ) ); } );
The post 6 Tips for Better Portraits on Location by Darlene Hildebrandt appeared first on Digital Photography School.