RSS
 

Posts Tagged ‘Location’

How to Choose a Great Portrait Photography Location

14 Jul

There’s an expression in the photography world called ‘ESP’ which stands for ‘Expressions sell photographs’. It’s true, a lovely expression is the single most important thing in any portrait photo (unless it’s a silhouette).

However, portrait photography isn’t as simple as teasing out a beaming smile, or haughty laugh from your subject. If your captivating expression is complemented by delicious light and an intriguing environment then you have all the ingredients for a cracking image.

Whenever I photograph portraits these are some of the things I’m looking for when I scrutinize the location.

How to choose a great portrait location
Meaningful location

Is it a meaningful location?

The first thing to do is ask yourself if the location adds to the story you’re trying to tell. For example, when I’m hired to create family portraits I always ask the family if there’s anywhere they like to go, a location to which they have a strong emotional connection. Sometimes they’re proud of their home or garden and we do the session there. Other times it will be in a wood where they walk their dog, or where they go picnicking on lazy summer days. This is far more meaningful to them than some sanitized image on a white background.

Your goal is to either choose a location that helps tell the story of the people in the portrait, or that gives the photo more emotional meaning to the people you’re photographing.

Areas of open shade
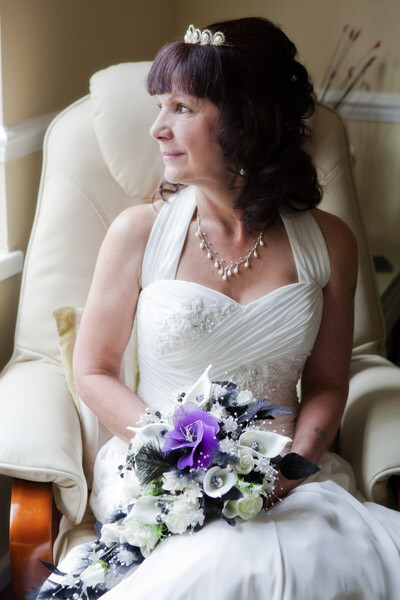
Open shade

Every time a bride tells me they’re praying for a gloriously sunny wedding day I don’t have the heart to tell them I’m praying for some lightly diffused cloud cover with intermittent dashes of sunlight upon my express request.

Glaring sunshine causes harsh shadows, particularly in the most important part of the portrait – the eyes.

Open shade is ideal because it doesn’t have harsh sunlight falling directly on the subject, but because the shade is ‘open’ it means there’s still enough light to give the eyes some sparkle. A tree is a perfect example of open shade, so is window light. The subject is in shade but they’re not completely closed off as they would be in the centre of a room, or in a forest. Open shade offers you some nice, soft directional light that creates enough shadow on the face to create depth, but without being harsh.

Lead in lines
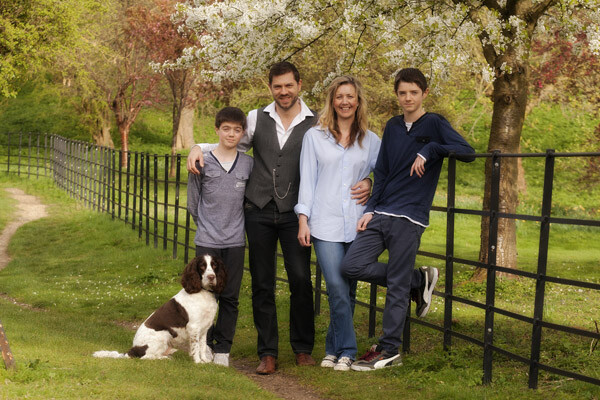
Lead in lines

Lead in lines are just as helpful to portrait photography as they are to landscapes. They create depth to a photograph, lead you towards your subject and give the image a three-dimensional feel.

You can use fences, paths, a long twisting tree branch, the lines in a cornfield – anything that draws the viewer’s eye towards your model.
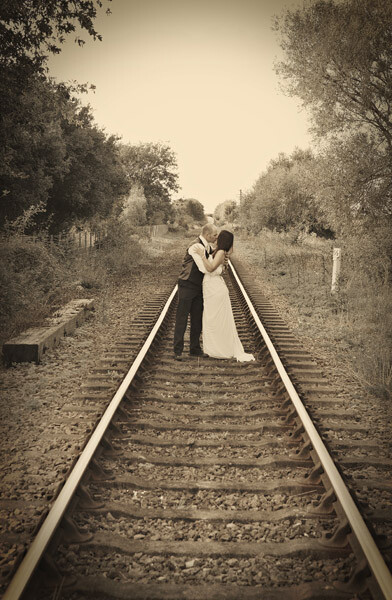
Lead in lines 2

Twinkly leaves

If you position your subject so there are back-lit leaves behind them then you’ll get a beautiful mosaic of green twinkles behind your subject if you use a low f-number on your camera (like f/4 for example).

With backlit subjects like this it’s often wise to use the spot metering mode to help your camera expose correctly for the face and avoid having a silhouette. Using a reflector to bounce some extra light into their face will help even more.
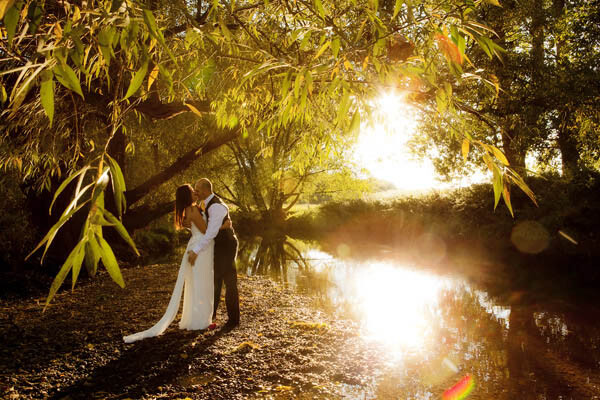
Twinkly leaves

Tantalizing textures

A barn door may not sound like a very exciting background, but rough textures can help the smoothness of your model’s skin pop out of the photograph. I also like rustic walls, and the repeating parallel lines of reeds.
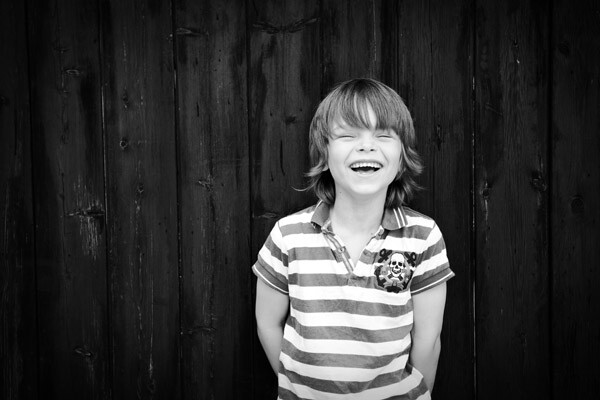
Tantalising textures

Geometric shapes

Our brains like order. We like the pieces of the puzzle to fit together, which is probably why we get so frustrated when putting together flat-pack furniture! This is why our brains like the elements of a photograph to fit together like a completed jigsaw. I look for triangles, circles, rectangles and squares; and compose the image in a way that helps them fit together in harmony. This is also why we like clean, uncluttered hotel rooms that subtly use defined shapes, like the folded triangle of a bed sheet, or the repeating rectangles of a stack of towels.

When you start looking for shapes you’ll see them everywhere. Geometric shapes are often the basis for modern art and when you deconstruct many great photos into line drawings they’ll often look like that.
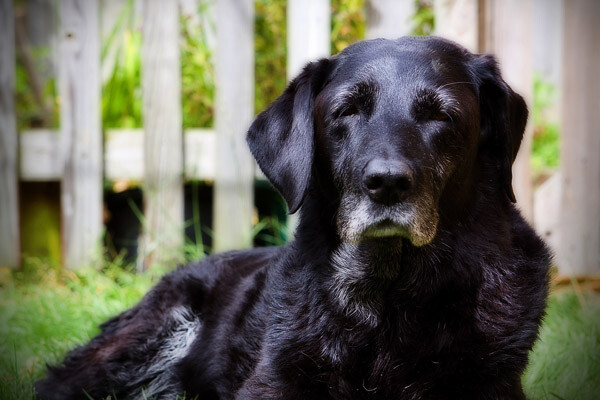
Geometric shapes

Foreground, mid-ground and background

To give your images depth and a three-dimensional feel you need the viewer’s eye to find interest in the front, middle and background of the photo. Diffused blades of grass could be the foreground, a smiling toddler can be the mid-ground and sunlight sparkling through a tree could be the background.
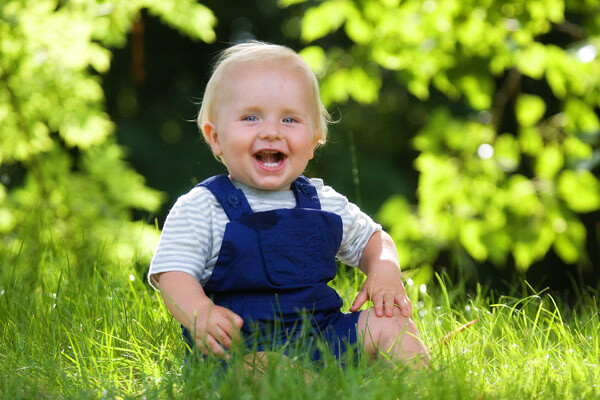
Foreground midground background

Avenues of trees

I love the effect you get when photographing people in an avenue of trees, using a long lens, because it ticks nearly all the boxes in one go. The leaves provide the necessary shade while the path provides a lead in line and creates depth in the photo. The long lens helps produce a fabulous tunnel vision effect that draws you in and helps to frame the photo, along with the trees themselves.
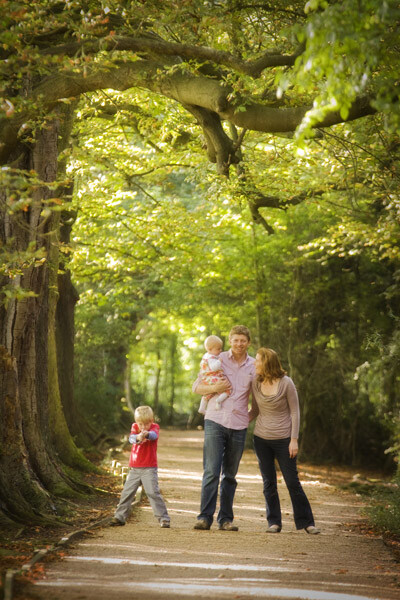
Long avenue of trees

The next time you decide to photograph someone use these tips and place your subject in the best position to ensure great light and cracking composition. If you have any questions then I’ll be happy to answer them below.

The post How to Choose a Great Portrait Photography Location by Dan Waters appeared first on Digital Photography School.
Digital Photography School

 
Comments Off on How to Choose a Great Portrait Photography Location

Posted in Photography


Find the Perfect Photography Location Using Google Maps

25 May

No matter if you’re planning your next photo road trip or you’re scouring the city streets looking for the perfect viewpoint, Google Maps and Google Earth are the most valuable tools to add to your arsenal for finding the perfect photography location.

Planning to Shoot

I usually travel for work, or with family, so I don’t have the luxury of as much time as I might want to search for the perfect vantage point in person. Nor to scout an area to compare locations that I want to dedicate to the one sunset that I’ll have time to shoot. Google Maps to the rescue!

While planning a trip from home, you have much more time to explore the area in a virtual capacity instead of being out there with boots on the ground. Nothing can compare with actually being there, but the tools available to you are getting better every day and the ability to nearly frame your shot is a realistic time saver. Time to turn the volume on your pre-visualization up to 11.

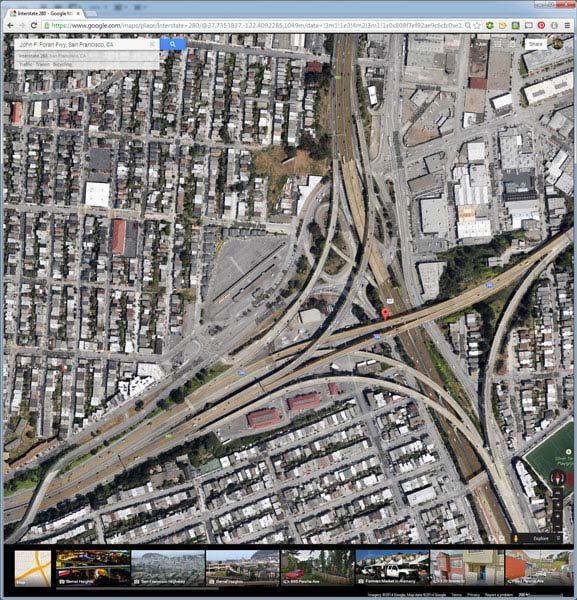
If I’m planning a trip or have an idea for a shot, I’ll start with Google Maps and zero in on the area that I want to shoot. You probably already do this, too, but let’s just take it a step further. Click the icon in the lower left corner labeled “Earth” to start the Google Earth browser plugin. This has replaced the satellite or aerial view for much of the world’s map, but instead of only offering a flat, two dimensional view of the map directly overhead, you can now tilt the map and see an approximation of topography, texture, and elevation.

Default Earth View

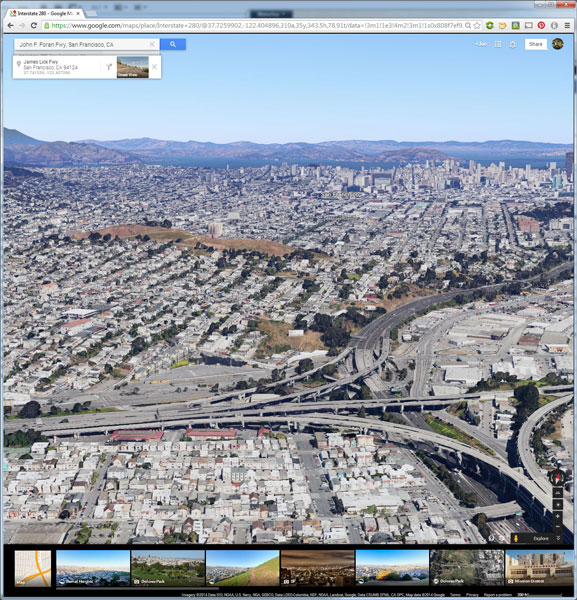
Normal mouse controls on the map let you pan in all directions, and zoom in or out with the mouse wheel. In order to adjust to a view that will help you get a better idea of the terrain, hold down the shift key, click and drag upward. That will rotate your point of view (POV) so that you now have an aerial view looking toward the horizon instead of straight down. Dragging left or right while holding shift will rotate your point of view instead of panning.

Rotated Earth View

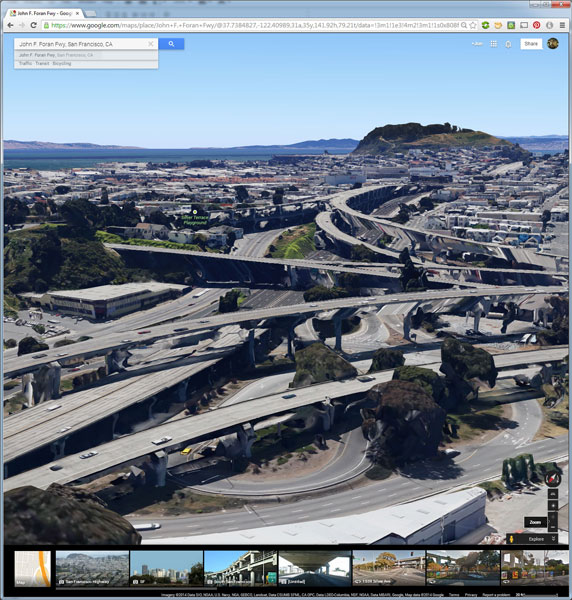
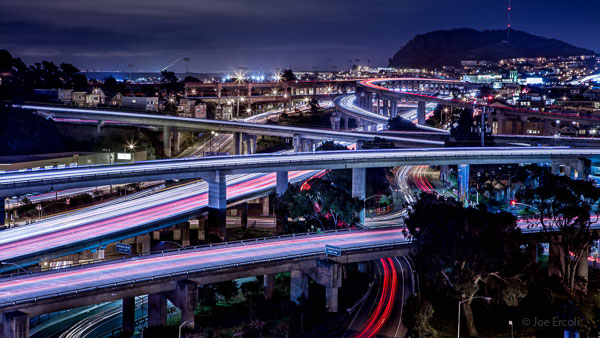
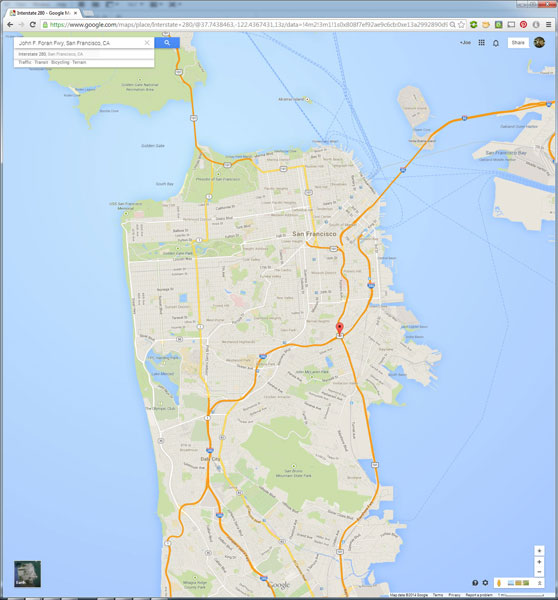
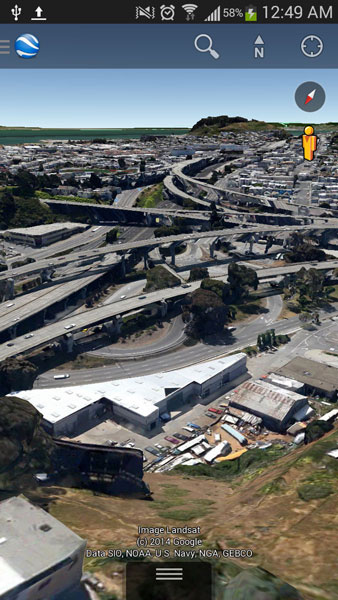
But, you don’t have to be tied down to your desk to do this. Just two weeks ago, I was out with a friend exploring San Francisco and searching for a specific vantage point of the 101/280 freeway interchange. We knew the general area that we wanted to shoot from, but with so many streets winding around, using Google Earth on my mobile phone helped to eliminate some of the trial and error of driving around without a clue how to find what we wanted.

101 280 Framing the Shot Mobile

101 280 Framing the Shot

Desktop interface Google Earth view looking south

Joe Ercoli Land of Confusion 600

Finished image from location scouted using Google Maps/Earth

The example images from this article show the area that we shot in, including a screenshot taken from the mobile interface, and the completed image. Of course the view that you can get from the map interface is never as good as what you’ll see in person, but it’s an excellent way to help you hit the ground running when you get on-site with your camera in hand.

NOTE: The camera is facing South in the final composition, not North as in the initial Google Earth Point of View.

Have you used Google Maps to find any cool locations? What other tips or tricks have you tried? Please share in the comments below.

The post Find the Perfect Photography Location Using Google Maps by Joe Ercoli appeared first on Digital Photography School.

Digital Photography School

 
Comments Off on Find the Perfect Photography Location Using Google Maps

Posted in Photography


The Importance of Location for Outdoor Portraits

02 Apr

By Annie Tao

Just like in Real Estate, Photography is about location, location, location. Well, sort of. It’s not as much the beauty of a location, but rather, the quality of the light at a location.

Case in point, my shoot this past weekend was of a lovely family in a seemingly lovely location. It was a small, narrow park that wrapped around a large lake. Sounds pretty, but the light was not desirable for portraits. Imagine clear skies and a sun that was as bright as can be! There weren’t structures or large trees to provide shade.

Why is this bad? Direct sunlight on clear, bright days means high contrast, squinting subjects, and unflattering shadows.

Can you still make this work? Certainly, but the kinds of shots are not as varied because of the location.

[FYI: For outdoor lifestyle sessions, I shoot entirely in natural light. This is my style of shooting. This article does not apply if you use lighting equipment or accessories outside.]

Since my clients chose the location for sentimental reasons, it was worth starting
there. Then we got in our cars to find a different location… one that has objects to diffuse the sunlight as well as add interest to the images.

First Location

Even from this one image, you can tell that it is a pretty location, but you can see that the trees are thin and the sunlight is super bright.

Annie Tao Photography San Francisco Bay Area lifestyle photography family in the bright sun LOCATION ONE

Second Location

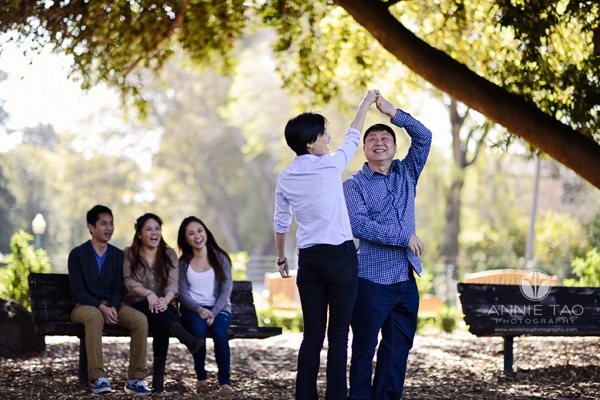
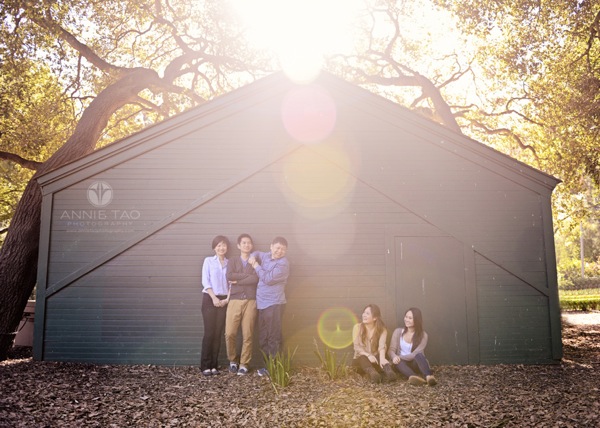
These images are examples of what can be achievable with the right light and location.

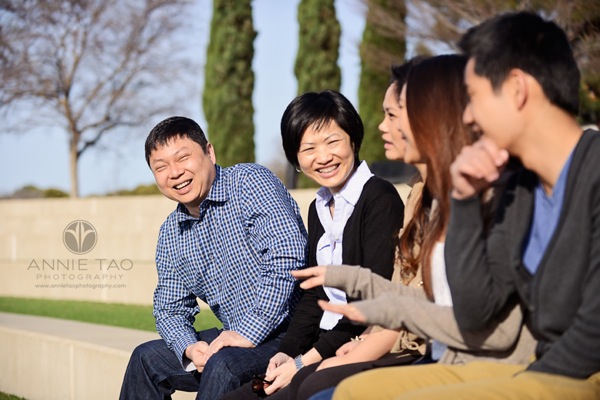
Annie Tao Photography San Francisco Bay Area lifestyle photography mom with her adult daughters

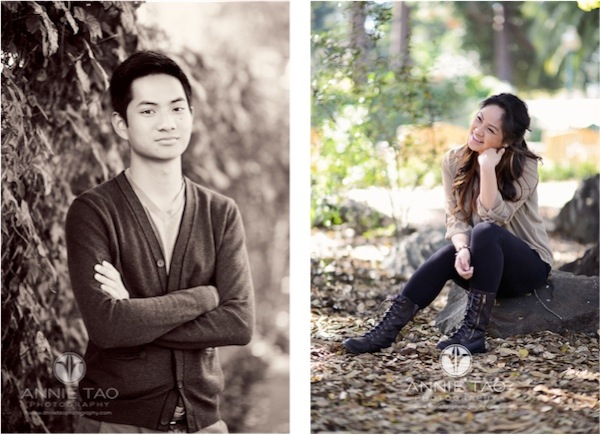
Annie Tao Photography San Francisco Bay Area lifestyle photography young adult sitting on rock

Annie Tao Photography San Francisco Bay Area lifestyle photography parents dancing while their children watch on a bench

Annie Tao Photography San Francisco Bay Area family photography family against a barn with trees and sunflare

Photography Tip:

The key to finding the perfect location for outdoor portraits isn’t to find one that has the prettiest elements, but rather, one that has objects that provide shade when there is bright sun.

That doesn’t mean you have to shoot in the shade the entire time… or even at all!

Having these objects around will give you diversity in backdrops as well as a way to diffuse the harsh light on clear days.

Annie Tao is a Professional Lifestyle Photographer in the San Francisco Bay Area who is best known for capturing genuine smiles, emotions and stories of her subjects. You can visit annietaophotography.com for more tips or inspiration and stay connected with Annie at facebook.com/annietaophotography.

Post originally from: Digital Photography Tips.

Check out our more Photography Tips at Photography Tips for Beginners, Portrait Photography Tips and Wedding Photography Tips.

The Importance of Location for Outdoor Portraits


Digital Photography School

 
Comments Off on The Importance of Location for Outdoor Portraits

Posted in Photography


Google+ app update adds Snapseed editing and location sharing abilities

26 Mar

GooglePlus.png

Google has updated its Google+ social media app for both Android and iOS. The latest version of the iOS app adds some of the company’s Snapseed app features including basic editing tools and a limited selection of filters. While the Android version doesn’t offer the Snapseed features yet, like the iOS app it offers the ability to share location, and improves the way one can see images and interact through posts. Click through to read more about the updates at connect.dpreview.com.

News: Digital Photography Review (dpreview.com)

 
Comments Off on Google+ app update adds Snapseed editing and location sharing abilities

Posted in Uncategorized


Tenba Air Cases: The safest way to move your equipment from location to location

19 Jan

Learn more: www.mac-on-campus.com Tenba Air Cases are an ever-growing family of maximum-protection cases for everything from cameras to computers, light stands to laptops, and much more. A unique assortment of problem solving products with exceptional, exclusive features, and the best protection available. All Transport products are hand made in our Brooklyn, New York factory.

Music: — Angel Beats! – desperation Metal Slug 4 – Secret Place To Aru Majutsu no Index II – Shorthand Original Shakugan no Shana III – Champ de bataille Shinryaku! Ika Musume – Gekitotsu! Ika Musume Part 4 of the High Level Boss Solo series (non-EoC 2012 edition) featuring Nomad from Nomad’s Requiem in the Dominion Tower. Instead of fighting Nomad once, why not fight him twice without banking? or better yet, using all three combat styles! 😀 It is unorthodox but it is a creative way to go all out on your combat stats. Notes about the video: Nomad has a damage cap to how much he can take, which is 750, meaning you cannot hit more than 750 with any attack style, including AGS spec. RuneScape is a trademark to Jagex Ltd. I do not own any of the contents used for this video, but used for the sole purpose of entertainment without profit. All music used in this video is copyrighted to the respective owners.


Making of the Hobbit. Part 5 – On Location

17 Jan

The Hobbit is an upcoming two-part epic fantasy film directed by Peter Jackson. It is a film adaptation of the 1937 novel of the same name by JRR Tolkien and a prequel to The Lord of the Rings film trilogy. Jackson, director of The Lord of the Rings, returns as director of the film and also serves as producer and co-writer. The film will star Martin Freeman as Bilbo Baggins, Richard Armitage as Thorin Oakenshield and Benedict Cumberbatch as Smaug. Several actors from Jackson’s The Lord of the Rings film trilogy will reprise their roles, including Ian McKellen, Andy Serkis, Hugo Weaving, Cate Blanchett, Christopher Lee, Ian Holm, Elijah Wood and Orlando Bloom. Also returning for the production are a big part of the production crew; among others, illustrators John Howe and Alan Lee, art director Dan Hennah and cinematographer Andrew Lesnie. As with the trilogy, props will generally be crafted by Weta Workshop and visual effects managed by Weta Digital. Additionally, composer Howard Shore, who wrote the score for The Lord of the Rings film trilogy, has confirmed his role in both parts of the film project. The two parts, titled The Hobbit: An Unexpected Journey and The Hobbit: There and Back Again, are being filmed back to back and are in production in New Zealand; principal photography began on 21 March 2011. They are scheduled to be released on 14 December 2012 and 13 December 2013, respectively.
Video Rating: 4 / 5


San Francisco Night Photography. On Location with Eric C. Gould: Featuring Doug Peck –

14 Jan

San Francisco Night Photography Tips and Tricks First Segment: Environmental Portrait’s Environmental portrait’s and on location photography are the bread and butter of a successful corporate photographer. Watch Doug and Eric shoot a classic environmental portrait with the Golden Bridge in the background at sunset. Doug uses just one light to balance the image and Eric stands in as the celebrity client. Includes a brief discussion of camera positioning to make your clients’ look taller. You’ll see both before and after images with ideas to create your own two page magazine spread or just fun images of your family and friends. Second Segment: Nighttime Photography Many people believe that night time shots are more difficult to take than those during the day. Here Doug and Eric offer some tips to help you get started and break through the “fear of the dark.” In this video you’ll learn the answer to the question when is the best time to shoot. What equipment to use and what settings you might want to try. If you know how to turn your camera to Manual. Give this quick video a try. It’s not a complete course – but will get you started right away. Video was shoot and edited by Ferguson Sauve-Rogan. Music and some video licensed from Pond5.com.
Video Rating: 0 / 5


Joe McNally Photography – On location with the Nikon D4

21 Oct

Joe McNally Photography – On location with the Nikon D4
Video Rating: 5 / 5

 
Comments Off on Joe McNally Photography – On location with the Nikon D4

Posted in Nikon Videos


On Location: Fighting One’s Inner Voice

02 Sep

One thing I’ve come to terms with over the years is that when in the field no matter how psyched or enthused I am, I end up having a comical internal conversation with myself to wake up for a sunrise photo. Mind you this isn’t all the time, but the frequency is greater when I’ve been putting in long hours the day before. Case and point was my recent trip to Montana and Wyoming where I was frequently putting in 20-22 hour days that included driving, research, hiking, setup, shoots, file transfers and file backups.

Logically I know the time, place and gear to use for sunrise photo shoots, but that doesn’t make getting up any easier. For your entertainment here is a window into one mental conversation I had with myself for the following subject/goal:

Subject
Wild Goose Island, Glacier National Park

Goal
Photograph sunrise for single still images and time-lapse. If circumstances permit shoot short video sequences.

Gear
(2) tripods with tripod heads, (2) Canon 5D Mark II cameras, (2) cable release/intervelometers, Zeiss f/2.8 21mm lens & Canon f/2.8 24mm tilt- shift lenses via Borrowlenses.com, Singh-Ray polarizer and my camera bag with a few other spare lenses just in case.

How the Inner Conversation Unfolded
Alarm clock goes off at 4:30 and I quickly turn it off.
(Note: I set my alarm at 3 different times 15 min apart just in case. I do this to make sure I get up if I’m tired from consecutive long days.)
My eyes open and I instantly get a view of the pitch black sky to see what the weather conditions are so as to evaluate whether the days photo shoot is a wash or not. This always prefaces my inner morning conversations.

Good Jim: Hmm weather looks good.  It’s clear to the west for morning light to pour into the valley, but there is wind. Looks good albeit not perfect for the shot I envisioned.

Bad Jim: Oh man! It is way too early, dark, cold and I’m exhausted. That wind is going to blow any chance for a glass reflection this morning. Let’s do this tomorrow.

Good Jim: Dude! Weather conditions are going to be dramatic with the weather front coming in, especially seeing that it’s clear to the west. Looks likely clouds are going to be hugging mountain peaks that will glow during the blue and later golden hour. No sunrise is ever exactly the same. Let’s go.

Bad Jim: Let’s see how things look in another 15 minutes.

Good Jim: Dude we have no time to waste.
I run a quick mental calculation run to figure out travel and setup time.
I can’t leave any later than 5am if I’m going to get 1st choice in location and properly setup.

Bad Jim: Seriously I can get this in tomorrow. Just a bit more sleep…

Good Jim: I did not come all this way flying 1000 miles and driving 9 hours yesterday to miss an opportunity to photograph this sunrise or the next at Glacier National Park. Get the lead out. There will be no missed opportunities on this trip!

At this point I snap into gear and quickly get my pre-prepped equipment together, run a double check on gear and clothes and drive out to the lookout point. As it turns out there is one car already at the lookout with a photographer resting inside.

Good Jim: Dude! I could have been here first if I wasn’t wasting time debating with myself first thing this morning.

I quickly collect my gear, locate a spot for the best view, set up, take test shots to fine tune focus and exposure, and wait for the light.

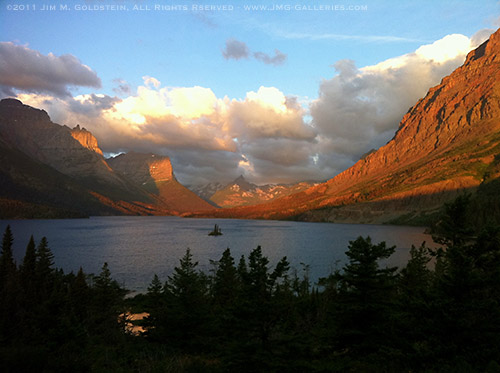
Sunrise at Wild Goose Island, Glacier National Park - via my iPhone

Sunrise at Wild Goose Island, Glacier National Park – via my iPhone
dSLR photos coming soon

As I knew conditions were perfect and sunrise was unbelievably beautiful. Everything went perfectly. I got great stills, a time-lapse and short video sequences.  Thinking back that I’d have opted for sleep rather than being there to photograph this amazing sunrise is beyond me and a reminder that I can be my own worst enemy. The key is not to let that happen with a great deal of discipline.

Sadly I’d like to say this is a one off situation, but it’s not. This type of inner conversation happens more times than I’d like to admit. Fortunately from experience I know that great things happen when you push yourself, get out of your comfort zone and remain disciplined.

Looking back at many of my images I don’t just see the photographed subject, I see the experience and remember back to similar early morning thoughts that I could capture this another day. Nature never shows reruns, every show is one of a kind. I remind myself of that often particularly on cold dark mornings when I’m dead tired and a new sunrise awaits being photographed.

Technorati Tags: photography, philosophy, real-life, inner voice

Copyright Jim M. Goldstein, All Rights Reserved

On Location: Fighting One’s Inner Voice

flattr this!


JMG-Galleries – Jim M. Goldstein Photography

 
Comments Off on On Location: Fighting One’s Inner Voice

Posted in Equipment


On Location: Fighting One’s Inner Voice

22 Aug

One thing I’ve come to terms with over the years is that when in the field no matter how psyched or enthused I am, I end up having a comical internal conversation with myself to wake up for a sunrise photo. Mind you this isn’t all the time, but the frequency is greater when I’ve been putting in long hours the day before. Case and point was my recent trip to Montana and Wyoming where I was frequently putting in 20-22 hour days that included driving, research, hiking, setup, shoots, file transfers and file backups.

Logically I know the time, place and gear to use for sunrise photo shoots, but that doesn’t make getting up any easier. For your entertainment here is a window into one mental conversation I had with myself for the following subject/goal:

Subject
Wild Goose Island, Glacier National Park

Goal
Photograph sunrise for single still images and time-lapse. If circumstances permit shoot short video sequences.

Gear
(2) tripods with tripod heads, (2) Canon 5D Mark II cameras, (2) cable release/intervelometers, Zeiss f/2.8 21mm lens & Canon f/2.8 24mm tilt- shift lenses via Borrowlenses.com, Singh-Ray polarizer and my camera bag with a few other spare lenses just in case.

How the Inner Conversation Unfolded
Alarm clock goes off at 4:30 and I quickly turn it off.
(Note: I set my alarm at 3 different times 15 min apart just in case. I do this to make sure I get up if I’m tired from consecutive long days.)
My eyes open and I instantly get a view of the pitch black sky to see what the weather conditions are so as to evaluate whether the days photo shoot is a wash or not. This always prefaces my inner morning conversations.

Good Jim: Hmm weather looks good.  It’s clear to the west for morning light to pour into the valley, but there is wind. Looks good albeit not perfect for the shot I envisioned.

Bad Jim: Oh man! It is way too early, dark, cold and I’m exhausted. That wind is going to blow any chance for a glass reflection this morning. Let’s do this tomorrow.

Good Jim: Dude! Weather conditions are going to be dramatic with the weather front coming in, especially seeing that it’s clear to the west. Looks likely clouds are going to be hugging mountain peaks that will glow during the blue and later golden hour. No sunrise is ever exactly the same. Let’s go.

Bad Jim: Let’s see how things look in another 15 minutes.

Good Jim: Dude we have no time to waste.
I run a quick mental calculation run to figure out travel and setup time.
I can’t leave any later than 5am if I’m going to get 1st choice in location and properly setup.

Bad Jim: Seriously I can get this in tomorrow. Just a bit more sleep…

Good Jim: I did not come all this way flying 1000 miles and driving 9 hours yesterday to miss an opportunity to photograph this sunrise or the next at Glacier National Park. Get the lead out. There will be no missed opportunities on this trip!

At this point I snap into gear and quickly get my pre-prepped equipment together, run a double check on gear and clothes and drive out to the lookout point. As it turns out there is one car already at the lookout with a photographer resting inside.

Good Jim: Dude! I could have been here first if I wasn’t wasting time debating with myself first thing this morning.

I quickly collect my gear, locate a spot for the best view, set up, take test shots to fine tune focus and exposure, and wait for the light.

Sunrise at Wild Goose Island, Glacier National Park - via my iPhone

Sunrise at Wild Goose Island, Glacier National Park – via my iPhone
dSLR photos coming soon

As I knew conditions were perfect and sunrise was unbelievably beautiful. Everything went perfectly. I got great stills, a time-lapse and short video sequences.  Thinking back that I’d have opted for sleep rather than being there to photograph this amazing sunrise is beyond me and a reminder that I can be my own worst enemy. The key is not to let that happen with a great deal of discipline.

Sadly I’d like to say this is a one off situation, but it’s not. This type of inner conversation happens more times than I’d like to admit. Fortunately from experience I know that great things happen when you push yourself, get out of your comfort zone and remain disciplined.

Looking back at many of my images I don’t just see the photographed subject, I see the experience and remember back to similar early morning thoughts that I could capture this another day. Nature never shows reruns, every show is one of a kind. I remind myself of that often particularly on cold dark mornings when I’m dead tired and a new sunrise awaits being photographed.

Technorati Tags: photography, philosophy, real-life, inner voice

Copyright Jim M. Goldstein, All Rights Reserved

On Location: Fighting One’s Inner Voice

flattr this!


JMG-Galleries – Jim M. Goldstein Photography

 
Comments Off on On Location: Fighting One’s Inner Voice

Posted in Equipment