RSS
 

Posts Tagged ‘Bright’

High Speed Sync Versus a Neutral Density Filter to Overcome Bright Sunlight in Portraits

11 Sep

ND3

For several years now I have used high speed sync (HSS) in order to light portraits in full sunlight at a wide aperture. If you’re unfamiliar with HSS, it allows you to shoot at shutter speeds that are higher than the native sync speed of your camera (usually 1/200 or 1/250 of a second, read your camera and flash manual to find yours) while still using speedlights. The reason this ability is so enticing is that you can shoot flash-lit images at wide open apertures in full sunlight, allowing for a shallow depth of field. Normally if you were using a flash, your maximum shutter speed would be at 1/200 or slower, meaning that you would need to close your aperture down in order to get a proper exposure in the sun.
ApertureOnly

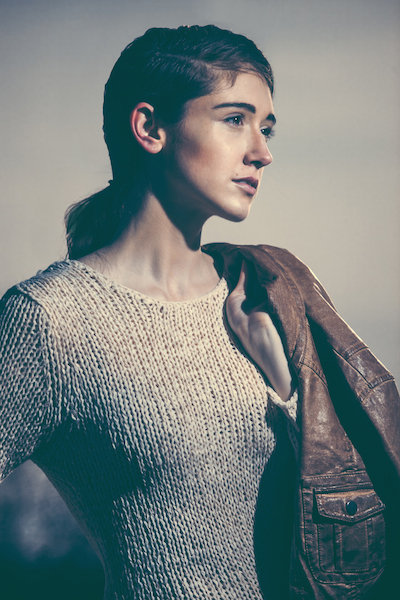
Raw image shot at f/29

How HSS works is that the flash will begin pulsing light, just before the shutter opens, since the exposure is so short. The problem with this is that much of the output of the light is lost in the pulsing process, meaning that you need more flash units to achieve a decent output. For example, when I am shooting at 1/8000th of a second, I need to combine four flashes, on one stand, in order to light a subject that is about five feet away. And that is without any modifiers, like an umbrella or soft box. The other issue with HSS is that not just any flash and trigger system will do the trick. You need to have gear that will communicate information from the camera to the flash.

A couple systems that can do that are the PocketWizard Flex TT5 and Mini TT1, or the RadioPopper PX system. Since most photographers don’t already own one of these triggers systems, this means starting from scratch, which isn’t cheap. I personally opted for the RadioPopper system, since the PocketWizard Flex system for Canon was super glitchy. The RadioPopper system wasn’t perfect either. Just the amount of batteries alone, for four Canon Speedlites with triggers, including a ST-E2 transmitter for the camera, required 27 batteries. Even though they were mostly all rechargeable (the ST-E2 required the hard to find 2CR5 battery), imagine trying to troubleshoot a misfire. Did the batteries need changed in one of the transceivers or was the speedlite misaligned, obscuring the sensor? Or imagine that one of the speedlites’ batteries may be slightly more drained than another, causing only three of four lights to fire. This made the overall exposure fluctuate with every frame.
HSS1

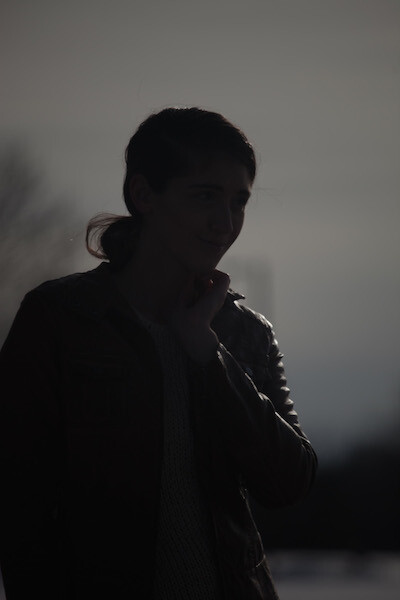
Raw image unlit

HSS2

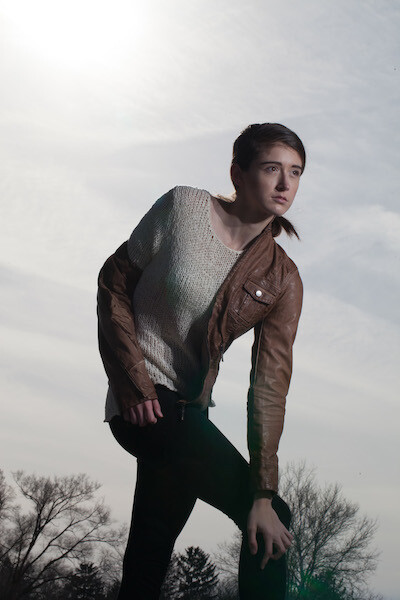
Raw image, 1/8000 @ f/2.8

I recently decided to compare HSS against using a variable neutral density (ND) filter. ND filters screw on to your lens and cut down the light that hits the sensor, thus allowing for a wider aperture in bright light. This allowed my shutter speed to stay at or below the sync speed cutoff, allowing the full strength of the Speedlite to light my subject. This meant that I wouldn’t need to transmit ETTL information (sell the RadioPoppers) and it meant that I would need fewer Speedlites (less batteries).

After setting my ISO as low as it would go (50), my shutter speed as high as was allowed (1/200th on the Canon 5D MarkII), and my Speedlites at their full output, I dialled down the variable ND until the ambient light perfectly balanced with the light from the flash.
ND1

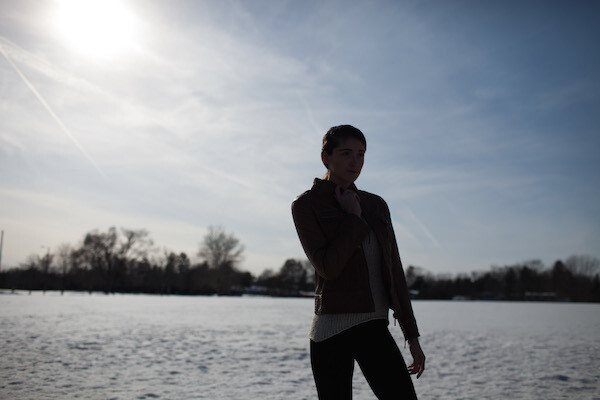
Raw image unlit

ND2

Raw image, 1/200 @ f/4

Some people have pointed out that there could be the issue of a color cast with certain brands of ND filters. I have not experienced any issues with the ProMaster brand. However, it’s important to keep in mind that if you are shooting directly in to the sun, there will likely be glare in your image, causing a possible color cast or the image to appear washed out.

Note that this experiment was done using Canon 430EX Speedlites with RadioPopper PX triggers. I’ve since sold them all, opting for the cheaper, sturdier and more powerful LumoPro LP180 with PocketWizard PlusX triggers. Now with one bare bulb flash, and a variable ND filter, I can effectively cut the ambient light while fully lighting a subject at f/1.4 in full sunlight.

The post High Speed Sync Versus a Neutral Density Filter to Overcome Bright Sunlight in Portraits by Nick Fancher appeared first on Digital Photography School.

Digital Photography School

 
Comments Off on High Speed Sync Versus a Neutral Density Filter to Overcome Bright Sunlight in Portraits

Posted in Photography


Nikon announces service advisory for D810 ‘bright spots’

19 Aug

Nikon has announced a service advisory for the Nikon D810, in response to reports of ‘bright spots’ in images taken at long shutter speeds and in 1.2X crop mode. According to an announcement on Nikon’s website, affected cameras will be serviced free of charge. Apparently, the issue only effects cameras within a certain serial number range, and if you’re lucky enough to have got hold of a D810 already, you can check the serial number of your camera against Nikon’s database via the company’s service and support pages. Click through for a link. 

Articles: Digital Photography Review (dpreview.com)

 
Comments Off on Nikon announces service advisory for D810 ‘bright spots’

Posted in Uncategorized


Three Methods of Making Stunning Photographs in Bright Sunlight

26 May

Location Lighting Masterclass – The Art Of Shooting Into The Sun

Shooting directly into the sun may not be the first thing that pops into your mind when creating a photograph, but the effects it can have on your final image when done correctly can border on magical.

1

#2 The Dreamy Look

There are three primary looks that can be achieved by shooting into the sun.

  1. The first of these takes advantage of lens flare and aims to over-expose the image drastically, creating a ‘dreamy’, almost glowing look. (see image above)
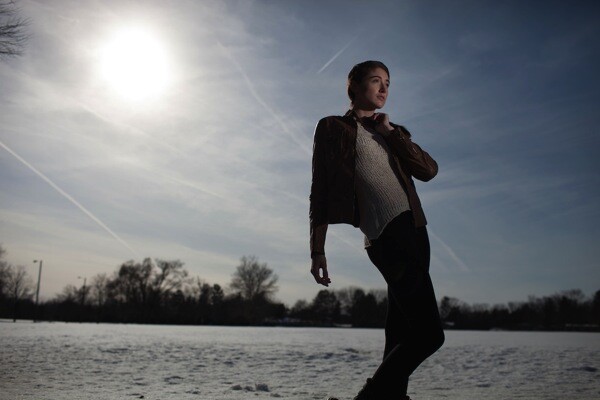
  2. The second ignores the foreground entirely, exposing only for the brightly lit sky and creating foreground silhouettes.
  3. The third comes somewhere in between, exposing for the brightly lit sky and simultaneously using reflection or fill flash to overpower the foreground shadows.
The Silhouette Look

#2 The Silhouette Look

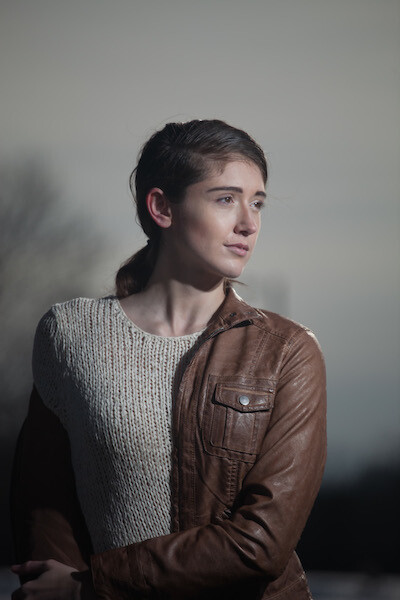
#3 The Balanced Look

#3 The Balanced Look

Let’s work through each of these in turn, how to make stunning photographs in bright sunlight.

#1 – the Dreamy Look

This is not a photographic style I typically aim to produce, however it is nonetheless popular with many photographers. The style aims to expose for the skin tones predominantly, allowing the background to become significantly overexposed; and in the process, create a soft glow around the subject. This style can also take advantage of lens flare (the rings of light that appear in your shot when you shoot directly at bright sunlight) and the varying types of lens flare that different lenses create. To achieve this look, ensure that you have spot metering selected on your camera and measure directly for the skin (you will need to be in aperture priority mode for this). It doesn’t matter if the background overexposes; the primary aim is to expose for the skin and facial features. The brightness of the background will typically create a haze across the rest of the image.

4

#2 – the Silhouette Look

Again, using the camera’s spot meter in Aperture Priority mode, you will need to meter and expose for the background. Select an area (not directly on the sun itself) of sky near to the sun. You can lock the exposure using the AE lock function (usually the “*” button on Canon cameras) to enable recomposition of the image. Alternatively, note the shutter speed reading where you metered on the sky, switch to manual mode and set the camera up with the given shutter speed and aperture manually. Here, the aim is to darken everything in the foreground so be sure to think about the kind of silhouette you’re creating. Less is usually more. Too much in the foreground just creates clutter and loses the focal point.

5

#3 – the Balanced Look

The final, and arguably the most powerful is partway in between, and utilizes flash to fill the image exposure correctly.
Just like the silhouette style, you should meter on the background sky. If you don’t use flash, you’d end up with another silhouette. Instead, crank up the power of the flash as far as it will go (it takes a fair amount of flash power to overcome direct sunlight). About 600w (watt seconds) is preferable, and ensure that the subject you want to light up remains relatively close (due to the inverse square law, light fall-off will very quickly erode the power of the flash). Some post-production boost to the shadows and recovery of the background highlights may be necessary to properly balance the exposure.

6

A few general hints to help with direct sunlight shooting:

1) Autofocus often struggles in direct sun. Try first shading the end of your lens with your hand, focussing on your subject, then switching off autofocus and taking the shot without shading the lens.

2) Colors and white balance can often be thrown by bright sunlight. Be sure to shoot in RAW so that you can true up any color differentials later on.

7

3) Use a polarizer or ND (neutral density) filter where you can. Really bright direct sunlight and long exposures are not good for your camera’s sensor over time, just as they are not good to stare at with your naked eye.

4) Think about the time of day – you want light to fall behind your subject, not on top of it. Therefore, early mornings and late afternoons are best for this type of photography. It is also when the sunlight is weakest, resulting in less overexposure and less risk of damage to the sensor.

8

5) Think about alternative fill light sources. Consider reflective windows, white walls, metallic surfaces – effectively anything that can bounce the direct sun back into the subject to naturally add fill light. This means you will need to have your back to the reflective source.

10

6) Consider some post-production magic, if too much flare is coming into the shot. Mount the camera on a tripod so that the image doesn’t shift, then take two shots of the same scene with the same exposure settings. For one shot, leave the image as is, but for the second, shade the end of the lens with your hand. It doesn’t matter if your hand appears in the image because during post production, you simply join the half from the shaded shot that doesn’t have your hand in it, with the bright half from the unshaded shot. This technique will leave the full effect of the flare around the sun, but enable you to remove the surplus flare from the rest of the image.

9

The post Three Methods of Making Stunning Photographs in Bright Sunlight by Leo Edwards appeared first on Digital Photography School.


Digital Photography School

 
Comments Off on Three Methods of Making Stunning Photographs in Bright Sunlight

Posted in Photography


Modular Bright Idea: Colorful São Paulo Sidewalk Tea Shop

09 May

[ By WebUrbanist in Architecture & Offices & Commercial. ]

colorful storefront

A blend of fun, flexible, efficient and honest, The Gourmet Tea shop design in Brazil’s biggest city is both regional and universal, responding to everyday needs for opening and closing while also attractive to passerby pedestrians.

colorful modular street vendor

Designed by Alan Chu (images by Djan Chu), the storefront is a patchwork of brightly-colored squares and reflects the brand and its rich variety (35 flavors) of organic teas to be found within.

colorful sidewalk tea shop

But the patches are more than decorative – they unfold in various ways to reveal everything from the store’s signage to its purchasing counter and shelves full of wares.

colorful storefront closed configuration

Despite its apparent complexity, it is ultimately built of inexpensive plywood and folds down into a space-saving box in a few simple steps, making it a cost-effective solution for street-side vending.

Share on Facebook


[ By WebUrbanist in Architecture & Offices & Commercial. ]

[ WebUrbanist | Archives | Galleries | Privacy | TOS ]


WebUrbanist

 
Comments Off on Modular Bright Idea: Colorful São Paulo Sidewalk Tea Shop

Posted in Creativity


Stripped to Skeleton, Old Building Becomes Bright Art Lab

06 Dec

[ By Steph in Architecture & Public & Institutional. ]

An unused building at the Monterrey Institute of Technology’s León Campus in Mexico was stripped to its frame and re-imagined as a dynamic ‘creative laboratory’ with transparent walls and an undulating wooden facade. Shine Architecture and TA Arquitectura removed exterior walls, interior partitions, windows and staircases to reconstruct all but the building’s most basic footprint.

The intent of the architects was to create a ‘blank page’ for the students, a 24/7 studio for art, design, model-making and photography. All of the natural daylight that floods the building during the day is ideal for these activities; of course, darkened interior spaces are available for photo processing and similar activities.

The ‘shield’ of jagged timber and steel offers shade and privacy on one side of the building, as well as space for a ramp leading to the second floor. The glass walls let both light and air into the structure.

“Morphologically its inner industrial look like tectonic embracing 3 main parts; a large glazed box in conjunction with a smaller solid volume and external circulation appendix,” say the architects. “In terms of general aesthetic, the purpose was to look as part of a context, respecting existing materials, but be different and recognizable as an experimental-design building.”


Want More? Click for Great Related Content on WebUrbanist:

Alphabet Building Spells Out New Approach to Creative Offices

An old port in Amsterdam will be transformed into the Alphabet Building, an unusual collection of offices for creative companies with letter-shaped windows.
3 Comments – Click Here to Read More »»


Architecture Gets Graphic: 13 Ornamental Building Designs

While most modern architecture cuts out unnecessary details, ornamental elements like gates inspired by graffiti and bold graphic images are creeping in.
2 Comments – Click Here to Read More »»


Share on Facebook


[ By Steph in Architecture & Public & Institutional. ]

[ WebUrbanist | Archives | Galleries | Privacy | TOS ]


WebUrbanist

 
Comments Off on Stripped to Skeleton, Old Building Becomes Bright Art Lab

Posted in Creativity


Photoshop CS5 404: Lighting Light Effects – 8 Bright Bulb – Part 1

04 Nov

Additional videos for this title: j.mp Photoshop CS5 404: Lighting & Light Effects by Mark Stope Video 8 of 64 for Photoshop CS5 404: Lighting & Light Effects A big part of any Photoshop composition is the lighting effects you use to add mood and ambiance to your scene. In this comprehensive tutorial, our resident Film Industry Pro Illustrator Mark Stope shows you how to achieve dramatic, sci-fi & fantasy lighting effects in your Photoshop compositions. In this tutorial you will learn how to create: Basic directional lighting tips Glows and lighting spill techniques Flares, Sparks and beams Neon and back-lit Signage Hologram effects And more This is a comprehensive tutorial, but you don’t have to watch the entire show. Use the detailed menus and keyword search features to quickly find topics of interest – that’s the essence of NonLinear Educating! More info on this title: j.mp

 
Comments Off on Photoshop CS5 404: Lighting Light Effects – 8 Bright Bulb – Part 1

Posted in Retouching in Photoshop


Photoshop: Darkening bright tones | lynda.com

28 Oct

This specific tutorial is a single movie from chapter two of the Photoshop CS3 Portrait Retouching Essentials course presented by lynda.com author Chris Orwig. Watch more at www.lynda.com The complete course has a total duration of 10 hours and 19 minutes. Photoshop CS3 Portrait Retouching Essentials table of contents: Introduction 1. Retouching Roadmap 2. Correcting Color and Tone 3. Cleaning Up Images in Camera Raw 4. Cleaning Up Images in Photoshop 5. Structural Image Enhancements 6. Reducing and Removing Wrinkles 7. Enhancing Eyes 8. Enhancing Eyelashes and Eyebrows 9. Improving Hair 10. Improving Faces and Bodies 11. Fixing Teeth 12. Improving Makeup 13. Enhancing Skin 14. Softening Skin Conclusion
Video Rating: 0 / 5

 
Comments Off on Photoshop: Darkening bright tones | lynda.com

Posted in Retouching in Photoshop