RSS
 

Posts Tagged ‘Awesome’

Using Creative Zoo Photography for Awesome Animal Photos

13 Oct

The post Using Creative Zoo Photography for Awesome Animal Photos appeared first on Digital Photography School. It was authored by Rick Ohnsman.

creative-zoo-photography

Wildlife photographers are a dedicated bunch.  They spend money to travel to exotic places, brave miserable conditions, deal with whatever light conditions are present at the time and then sometimes don’t even see the animals they came to photograph.  Pandas in China, tigers in India, lions on the Serengeti, polar bears in the frozen Yukon or maybe gorillas in the Congo.  You could spend a lifetime photographing wild animals in their native lands.

creative-zoo-photography

Bengal Bath – Photographed in the wilds of India or in a zoo? You tell me.

Or, you could take a cue from Simon and Garfunkel –

“Someone told me it’s all happening at the Zoo”

                     – “At the Zoo” – Paul Simon and Art Garfunkel

I’ll grant you, photographing a lion in the zoo doesn’t have the same thrill as being on safari. If you have the time and the money to do such things, by all means, go for it.  For many of us though, the zoo offers a chance to photograph animals we’d never see otherwise and, using the tips we’re about to cover, you can still make some very nice images.  You don’t have to tell your friends where you took them, right?

creative-zoo-photography

It’s hard to make a zoo photo look like it was taken in the wild with a chainlink fence in the background. Go with a wide aperture to throw the background out of focus if you can.

Challenges

In the bush, the challenges of photographing wildlife are likely finding the animal you’re seeking and, depending on the species, perhaps trying not to get eaten.  At the zoo, there are cages, glass or at least barriers designed to separate you and the creatures.  Safer, yes, but also a little frustrating when you’re trying to make a nice photo.

Let’s look at some workarounds for zoo photography.

Image: Sometimes this is what you encounter when trying to do zoo photography. When the animal is ri...

Sometimes this is what you encounter when trying to do zoo photography. When the animal is right up against the wire, there’s not much you can do.

Image: Get a little separation between the animal and the cage, get close to the wire, use a large a...

Get a little separation between the animal and the cage, get close to the wire, use a large aperture, and you can do this. This could probably be cleaned up further with the cloning tool in post-production.

Cages

Zoos are getting better at designing structures so that the animals aren’t always behind bars or chainlink fences, but sometimes you will still have to deal with this.  If the animal is up close to the fence, you might have no choice but to include it in the shot.

But, if you can wait until the beast moves further away from the barrier, this trick can work.  Get close to the fence if you can, then use a wide aperture.  Zoom into and focus on the animal.  You may find that the limited depth of field pretty much renders the fence as a blur, barely showing up at all.  Often you can clean up what remains of the fence or bars when editing.

Image: Having to work through the glass, the top image is straight out of the camera. But, with some...

Having to work through the glass, the top image is straight out of the camera. But, with some editing, a pretty nice Panda Portrait results.

creative-zoo-photography

An aquarium is a zoo of sorts where all the animals will be behind glass. Note how I rescued the turtle image with editing and monochrome conversion.

Glass

Sometimes the barrier between you and the animal will be glass.  You’ll have to deal with grime, scratches, and reflections.  Carry a cloth in your bag when you go to the zoo and clean a spot on the glass where you’ll be shooting.  Get as close to the glass as you can, again with a wide aperture to help blur any scratches.  If reflections are a problem, consider throwing a jacket or cloth over your head or perhaps just the camera to help eliminate them.  Later in editing, the dehaze tool can be your friend with photos made through glass.

Using Creative Zoo Photography for Awesome Animal Photos

Distance

Many times I’m glad there’s some distance between the animal I’m photographing and I. (The Komodo dragon was a scary guy for sure!). The difficulty becomes making the animal in your photo more than just a speck in the shot.

You’ll have even more difficulty with this if you’re visiting a wild animal park where instead of the animals being in smaller cages or enclosures, they roam a wide area, and you drive through the park on a tour bus. There’s only one solution here – longer telephoto lenses.

More about lenses in a bit, just know that to get those nice portrait shots, you’re often going to need some bigger glass.

Image: Frame tightly as you would with a human portrait, be sure the eyes are in focus and you...

Frame tightly as you would with a human portrait, be sure the eyes are in focus and you’ll capture a more engaging image.

Backgrounds

Though you’ll be photographing animals at the zoo, you’d prefer to have your images look like they were taken in the wild.  Your story about photographing zebra on the Serengeti plains will fall apart if there’s an obvious chainlink fence in the background.  So, a couple of possible options here:

  • Fill the frame with the animal, including as little of the background as possible in the shot.
  • Zoom in and use a wide aperture so the background blurs.
  • Consider your vantage point when composing your shot.  Could you move a little to put natural vegetation, rocks, or something not manmade in the background to better simulate the animals’ natural habitat?
creative-zoo-photography

Watch, wait and be ready, and you can capture animals behaving as they do in the wild.

Capturing behavior

A photo of a lion just standing there might be okay, but a shot of a lion roaring…that’s the one you’d like.  Images that capture animal behavior are the prize winners.  The difference is waiting for the moment. Waiting, waiting, and perhaps waiting some more.

Perhaps you’re not up to being another Dian Fossey living with the mountain gorillas so you can get that unique photo.

Or there’s Guido Sterkendries, who spends weeks in the stifling heat of the Brazilian rainforest on a perch in the treetops to photograph poison dart frogs.

But, rather than just taking the minute or so the average zoo visitor views each exhibit, you might have to wait, watch, and be ready when the animal does something interesting.  Also, watch for animal interactions and make photos that tell a story.

creative-zoo-photography

Mamas and babies can make good photos. Look for animal interactions that tell a story.

Set up, be ready, and perhaps have continuous mode and servo-focus activated. Then, when it happens and the subject does that intriguing behavior, fire off a burst of shots to guarantee you’ve got that one really great shot.

After all, would you rather go home with a boring photo of every animal in the zoo or just one superb shot of one animal engaging in some really interesting behavior?

When to go

Sometimes you get to a particular animal exhibit at the zoo and the animal is nowhere to be seen. Or maybe he’s over in the corner, zonked out and sleeping – hardly a great photo subject.

Often the trick is to go early in the morning or late in the afternoon when it’s cooler, and the animals are apt to be more active.

Photographers are also quite familiar with the “golden hour.” Not only will the light be better during these times, but the animal’s up, about, and ready for their closeup. Feeding time can also provide some action.

If you can, talk with the zookeepers to find out the best time to come, especially if you have your sights set on shots of particular animals. They will be a great source of information.

Including people

Sometimes the action at the zoo can be on the other side of the cages, the antics of people reacting to or aping for the animals.  Keep an eye out for these kinds of behaviors too.  Sometimes people are the funniest animals.

Equipment

If you’re going to spend a day at the zoo, you may not want to bring your whole photo kit. Firstly, it’s not much fun schlepping it around. Secondly, while you’re intent on making a shot, an unscrupulous bandit could help themselves to some of your gear.  Thirdly, you really don’t need that much for zoo photography.

Here are some things you might want:

Camera

Something with the ability to go manual if necessary and, of course, shooting Raw is almost always better.

creative-zoo-photography

A Canon 100-400 zoom was a great lens to have to allow these bird portraits. Wildlife photographers use long lenses and at the zoo, they can help too.

Lenses

You might very well be able to get by with a good wide-range telephoto for zoo photography. Something like a 70-200mm, or if you have something longer like a 70-300 or 100-400, better still.

You’re not apt to need a wide-angle lens at all.

The only other possibility is for zoos that have a butterfly exhibit where a macro could be useful.  One or two lenses should have you covered.

Image: Sometimes zoos will have a butterfly exhibit. If where you’re going has one, take a mac...

Sometimes zoos will have a butterfly exhibit. If where you’re going has one, take a macro lens.

Tripod

You may find that some zoos prohibit tripods, so it would be a good idea to check before you go.  A monopod can be a good substitute.

Flash

Probably not.  Again, some zoos will prohibit them, they spook the animals, and you’re not apt to want a “flash look” anyway.

Polarizing filter

This can be a good idea.  The fur of many animals is shiny and a polarizer can help tame that, also giving you richer colors.

Cloth

Cloth is great for cleaning the glass on animal enclosures that use that.

Settings

You will encounter a variety of lighting situations at the zoo, from dark animals lying in the shade to light animals in the sun, to the dreaded speckled light situation.

Some animals may barely move while others may leap wildly about.

There’s no substitute for knowing your camera and how to deal with varied conditions.  Often going fully manual, both for exposure and focus will be your best option.

Fences or glass in the foreground can too easily fool the autofocus, so be careful there.

Image: Some zoos will have a walk-in aviary. If so, it’s a great opportunity for bird photogra...

Some zoos will have a walk-in aviary. If so, it’s a great opportunity for bird photography. Again, have a long lens and if you’ll be handholding the camera, keep the shutter speed high.

In general, a wide aperture to blur the background, coupled with a fast shutter speed to freeze any animal movement, is good.  You may also be dealing with a long focal length, and having to handhold is a recipe for camera shake/blur.

Try to keep the shutter speed as fast as possible.  Also, keep the ISO low to minimize noise.  In varied lighting conditions, you may also want to consider Auto ISO if you understand how it works with your particular camera.

Continuous mode can be a good option so that when an animal does something interesting, you can fire a burst of shots, helping guarantee you capture the moment.

Composition

If there’s any mistake I see beginners making, it’s not filling the frame with their subject. Of course, not every shot needs to be a tightly cropped “portrait,” but the problem comes in when the subject in the image is so small it’s barely identifiable. Alternatively, the shot is so cluttered with other things that one questions what the real subject is. This is where a long lens can help with zoo photography.

Real wildlife photographers must sneak up on their subjects in places where enclosures don’t restrict the animals. So, often they will use – really – long, (and really expensive), glass. You need not go to that extreme, but you do want to make the animal in your shot the star, so frame accordingly.

Image: The eyes have it. You can have parts of the animal out of focus if you must, but the eyes nee...

The eyes have it. You can have parts of the animal out of focus if you must, but the eyes need to be sharp.

As when making portraits of people, when photographing animals, keep the eyes in sharp focus. Having other parts of the animal out of focus or a very limited depth-of-field is forgivable, but if the eyes are not in focus, the shot is probably a candidate for the delete button.

Use manual focus or learn you use your focus points to force focus on the animal’s eyes. Simply using the default center-focus point will likely fail you almost every time. Be the master of your camera’s focus.

This is a tricky one because enclosures, cages, and places where the animal will be won’t always allow this, but where possible, try to get on the same level as the animal.  Looking down on the subject just won’t be as impressive.  Perhaps you’ll have to put your camera on the ground or use something like a Gorillapod, (appropriate for the zoo, yes?) but do what’s needed to improve your shot.

Image: This could have been even better if I could have got down at the same level as the beast. The...

This could have been even better if I could have got down at the same level as the beast. Then again…

Editing

As with any photo editing, you want to use the tools and tricks in your editing program to improve your shot. Always consider whether a crop may help eliminate distractions or better highlight the animal. Use the exposure, highlights, shadows, whites, and blacks sliders (if editing with Lightroom), to bring out the color and detail of the animal.

The Dehaze option may help, especially where you made a photo through a glass enclosure.

The new Texture slider can also work wonders, bringing out details in an animal’s fur.

Image: Monochrome can give a classy look and in the case of this cheetah, emphasize his spotted camo...

Monochrome can give a classy look and in the case of this cheetah, emphasize his spotted camouflage in his environment.

Don’t forget to take a look at going monochrome with some of your images.  Sometimes a black and white version of an animal image can be especially striking.

Go zoo it!

So grab your gear and get down to your nearest zoo.  You’ll have a great time, get some nice images, and if the song is right, “the animals will love it if you do.”

Do you have any other zoo photography tips? Share with us in the comments! Also, share with us your zoo photography photos.

The post Using Creative Zoo Photography for Awesome Animal Photos appeared first on Digital Photography School. It was authored by Rick Ohnsman.


Digital Photography School

 
Comments Off on Using Creative Zoo Photography for Awesome Animal Photos

Posted in Photography


How to Make Your Photos Awesome in Lightroom or Photoshop Camera RAW

05 Oct

The post How to Make Your Photos Awesome in Lightroom or Photoshop Camera RAW appeared first on Digital Photography School. It was authored by Caz Nowaczyk.

In this video tutorial, Nemanja Sekulic will show you how to make some dramatic editing changes to your RAW photos using Lightroom or Photoshop Camera RAW.

?

During the process, you will learn the following in Lightroom (which you can also translate to Photoshop Camera RAW):

  • How to use the Basic Panel including the Exposure Slider, Highlight Slider, Shadow Slider, Color Temperature Slider,
  • The shortcut for viewing before/after (\)
  • How to use the Radial Filter tool – how to make multiple radial filter selections, reposition, and make adjustments to the selection.
  • How to use the Adjustment Brush Tool – including changing your brush size, flow, and feather amounts.
  • How to use it to make selective adjustments in your image, including color, temperature, exposure, highlights, shadows, clarity, etc. to fine-tune your image.
  • How to use selective color with your Adjustment Brush.
  • How to make new Adjustment Brushes to fine-tune the details in the eyes.
  • How to use Hue and Saturation Panels as well as the Split Toning Panel.
  • How to add a vignette.
  • How to go back and readjust any of your Radial Filter, and Adjustment Brush settings.

You can apply these techniques across any image you choose, or you can download Nemanja’s image file here.

You may also find the following helpful:

  • Photoshop vs Lightroom – the Power of Photoshop
  • Four Lightroom Tips to Enhance Your Landscape Photos
  • Lightroom Texture Slider vs. Skin Smoothing
  • Lightroom Shortcuts Every Photographer Needs to Know
  • 10 Tips to Make Lightroom Classic CC Run Faster


The post How to Make Your Photos Awesome in Lightroom or Photoshop Camera RAW appeared first on Digital Photography School. It was authored by Caz Nowaczyk.


Digital Photography School

 
Comments Off on How to Make Your Photos Awesome in Lightroom or Photoshop Camera RAW

Posted in Photography


5 Awesome Ways to Improve Your Clothing Photography

30 Sep

Clothing photography… it’s chic, it’s in demand, and it can score you a pretty penny if you prove yourself. What’s even better is that clothing photography has weaved itself into numerous popular industries and niches, ranging from fashion and runways (duh), to Ecommerce stores, all the way to social media and its influencers – there is no shortage of gig Continue Reading

The post 5 Awesome Ways to Improve Your Clothing Photography appeared first on Photodoto.


Photodoto

 
Comments Off on 5 Awesome Ways to Improve Your Clothing Photography

Posted in Photography


Tips for Creating Awesome Double Exposures In-Camera

13 Sep

The post Tips for Creating Awesome Double Exposures In-Camera appeared first on Digital Photography School. It was authored by John McIntire.

Tips for Creating Awesome Double Exposures In-Camera

Techniques for creating double exposures have been around since the beginning of film photography. While the days of being able to expose the same frame of film multiple times are mostly gone, a great many digital cameras do offer that functionality. While the technique can be unpredictable and hard to get right, that’s part of the charm of it (in my opinion) and what makes it so fun. This article provides you with a few tips to help you create double exposures in-camera.

What about Photoshop?

double-exposures-in---camera

Photoshop (and alternatives) offer an infinite number of ways to blend exposures, but doing it in-camera can lead to spontaneous and unpredictable results.

Of course, you don’t need to do it in-camera. The almighty powers of Photoshop absolutely give you a great deal of control over blending images. You didn’t need to do it in-camera in the film days either as you could sandwich negatives together in the darkroom before putting them in the enlarger. So yes, by all means, use Photoshop to your heart’s content, but if you want to inject a bit of unpredictability and spontaneity to the process, do think about trying to create a few in the camera.

Understand the functionality in your camera

This first step may seem obvious, but every camera that I’ve run across handles the settings for double exposures in different ways. Taking the time to learn and understand how to set up your camera for multiple exposures ensures that when you get out to start creating the images, you know exactly what’s going on. For example, unless I turn on the right setting, my camera will take a single sequence of images and then revert back to normal settings. This can be (and has been) frustrating when I’m lining up a second exposure of a moving subject and find that I’m back to taking a single image.

This is probably just a matter of reading your manual and then putting it into practice a few times in your backyard or somewhere where the results don’t matter.

Start simple

double-exposures-in---camera

While getting to grips with the technique, you can start simple with just a few moving elements to help you understand the process better.

When getting started with a technique like multiple exposures, it is easy to start snapping away without putting too much thought into it. The results can be less than inspiring and may even make you second guess the technique.

Try to keep it simple in the beginning. Instead of many exposures layered together, try to keep it to a simple double exposure until you figure out how the exposures work with one another. Of course, the results are almost always going to be unpredictable, but once you start to take a lot, you will quickly learn how to judge what two frames might look like on top of one another.

Look for bold shapes and textures

Image: Mixing silhouettes and textures is an effective way of creating bold double exposure images.

Mixing silhouettes and textures is an effective way of creating bold double exposure images.

One of the easiest ways to get results with double exposures is to overlay a texture onto a recognizable shape. Silhouettes of people work great for this. If you start your sequence with a  silhouette, you can then take a photo of something with a lot of texture and the shadows of the silhouette will reveal that texture in the final image.

Another simple one for you to try is to layer your main image on a background of clouds. The whole concept is simple and done a lot, but it is still effective. If you start with these simple processes, you will quickly start to see how you can use the technique for more complicated images.

Think in terms of design

Image: Finding things that match up together to make a cohesive image can be tricky, but when it hap...

Finding things that match up together to make a cohesive image can be tricky, but when it happens, the results speak for themselves.

Because you are layering your images, it can help if they work together with a theme or if the final image helps to convey a message. Keeping the various elements in your images (whether that be the subjects, colors, lighting, etc) in line with your intended end result can help for better images. It also helps to start with your final composition in mind. How will the various elements line up? How will they react and line up with one another? Is there a particular sort of framing that would help tie the whole thing together? Asking yourself these questions before your camera is even out of the bag can help your final images be the best they possibly can.

Go abstract

Image: The double-exposure effect can be weird and sometimes it’s best to embrace that weirdne...

The double-exposure effect can be weird and sometimes it’s best to embrace that weirdness.

Now, your images don’t have to be of anything at all. Don’t be afraid to go for the abstract (or non-objective if you prefer). You can layer a bunch of modern buildings (or the same building) together for some interesting effects where there is no real focal point.

You can do the same with multiple textures. Just roll with it and see what happens. You might find you have a bunch of images that don’t work, but you might also find that one that really, really does. Try looking for things with lines or shapes, without too much texture, that can overlap one another.

Block your lens

double-exposures-in---camera

To manage your backgrounds while creating a double exposure in the studio, cover a portion of your lens with a black card to avoid the background being exposed twice. In the top middle of the frame, you can see where that has happened.

Block your lens if you want to photograph the same subject, human or inanimate, multiple times in one frame. You can use this trick for photographing fireworks to help control your exposure. When you’re lining up your first exposure, cover your lens with a piece of black card so that you are blocking the part of the frame that will contain the subject of your second exposure. In a double exposure, this will stop the background being exposed twice. Your backgrounds will be darker, but your subject will also be clearer where it appears in the frame.

Use grids

double-exposures-in---camera

Turning on guides and grids in your camera can help you line up subjects between the multiple frames.

If your camera has the option for a grid overlay (rule of thirds) in the viewfinder, turning it on can help you to line up various elements throughout the multiple exposures.

It’s okay to post-process

Image: Not everything is going to go right all the time. If something doesn’t line up, like To...

Not everything is going to go right all the time. If something doesn’t line up, like Tower Bridge in this image, don’t be afraid to use Photoshop to help you get the results you were after.

Although this article is about creating double exposures in-camera, there is nothing wrong with taking your results and fine-tuning them afterward.

Did you overlay a silhouette with a texture but you don’t want the texture elsewhere in the frame? Photoshop can help. If it helps you to create what you had in your head, by all means, go for it.

That’s it

Creating double exposures in-camera is a finicky technique, but sometimes the results can be incredible. More important, it’s a technique that’s a lot of fun. I encourage you to go out and give it a try for yourself, and hopefully, some of these tips will make your results a bit more predictable.

Please share your results with us in the comments section – we’d love to see them!


double-exposures-in---camera

The post Tips for Creating Awesome Double Exposures In-Camera appeared first on Digital Photography School. It was authored by John McIntire.


Digital Photography School

 
Comments Off on Tips for Creating Awesome Double Exposures In-Camera

Posted in Photography


How to Use a Pinhole Body Cap for Awesome, Creative Photography

04 Sep

The post How to Use a Pinhole Body Cap for Awesome, Creative Photography appeared first on Digital Photography School. It was authored by Charlie Moss.

Making a pinhole body cap is a rite of passage on any digital photographer’s journey. It’s a great way to get some of the unpredictability of analog photography without spending loads money on film or having to wait for the results to come back from a lab.

pinhole body camera image

But how do you make a pinhole body cap? And what do you shoot once you’ve made your pinhole body cap?

That’s what you’ll discover in this article.

What is a pinhole body cap and how do you make one?

First things first:

Let’s talk about pinhole body caps and how you make one. For that, you need to know what a pinhole camera is.

A pinhole camera is essentially a light-proof box with a small hole in one side. Light passes through the hole and projects an image on the opposite side of the box. It’s a tiny camera obscura – an optical phenomenon that has been known and used for hundreds of years. If you put photographic film or paper inside the box, you can record the image that the camera obscura produces!

So by modifying a camera body cap, you’re essentially creating a digital version of the camera obscura.

It’s very easy to do! You just need to buy a cheap body cap for your camera (don’t worry about it being on-brand and don’t destroy the one that came with your camera) and put a hole in the middle of it.

drilling into a camera body cap

I use a tiny drill bit (and a holder meant for model-making) to put the smallest hole I can create in the center of the body cap. Then I take a small piece of black construction paper and put a hole in it with just the very tip of a skinny sewing needle.

Next, tape the construction paper into place on top of the hole you’ve just drilled, lining up the two holes as carefully as possible.

Finally, place the body cap directly onto the camera body and you should be ready to go!

(Note: On some digital cameras, you may need to use a setting that allows you to shoot without a lens attached. If you’re struggling to find this, check your camera manual.)

What’s so special about pinhole shooting?

There are a few great features of pinhole camera photography that you might want to think about as you plan what to shoot. Using a pinhole body cap is completely different than shooting with a traditional lens.

creative pinhole shot of shapes

Concentrating on shape and texture can create striking pinhole body cap images.

Almost infinite focus

The first thing to note is that pinhole cameras have an incredibly large depth of field. You can’t focus a pinhole body cap, but that’s okay. You don’t need to. You’ll get images that are sharp throughout.

(However, this means you’ll lose any shallow depth of field or bokeh effects.)

Instead of blurring out any inconvenient backgrounds, you need to work with your surroundings in mind when you compose images.

No distortion

If you’re using a wide-angle pinhole body cap (the focal length of your pinhole body cap is the distance from the pinhole to the sensor), then there will be no lens distortion. When you are shooting architecture, the walls of the building will appear completely straight rather than curved as they would with many wide-angle lenses.

building against sky

Using hard light to create contrast can be a way to make images appear sharper.

It is possible to increase the focal length of your pinhole body cap by using extension tubes and the like (or a cardboard toilet roll with the inside painted black).

Test out different focal lengths and see what you can achieve!

Long exposure times

The downside of all that depth of field is that you’ll generally need a pretty long exposure time for most shots. This does mean that you can work with interesting blur effects. If you’re shooting urban spaces you can also blur out most of the people in the image, too.

On the other hand, you generally need to take a tripod with you when you go out shooting with your pinhole body cap. The exposures will probably be too long to handhold your camera.

blurry portrait pinhole body cap camera

Asking your subject to move while photographing them can produce interesting effects.

It can be interesting to explore either intentional camera movement effects or long exposures on moving subjects with a pinhole body cap. I particularly enjoy using a pinhole body cap to shoot portraits of people.

Try looking at the portrait work of Victorian photographers who used wet plates, or the more modern long exposure portraits (with a large format camera) by Sally Mann. These can provide some inspiration for your pinhole photography of people.

Help! All my images are soft!

The sharpness of a pinhole image depends largely on the size and accuracy of the pinhole you create when building your pinhole body cap. Unsurprisingly, putting a hole in a piece of construction paper is a pretty inaccurate way to build photographic equipment.

The smaller the pinhole, the more accurate the image will be. And the neater the edges of the pinhole, the more perfect the circle around your image will be.

comparison of sharp portrait and pinhole portrait

These two images are a direct comparison of a 35mm lens on a Fujifilm body (about a 50mm equivalent) and a pinhole body cap on the same body. The camera wasn’t moved between shots, and both images were cropped the same.

Ultimately, you’re going to need to embrace the heavy imperfections of this style when you plan what you’re going to shoot. Images will be in focus, but they will be very soft – and that’s not something you can correct afterward! If you really enjoy digital pinhole photography then you may want to explore some of the laser cut pinholes that are available on the market. They are very tiny, accurate circles and will create a more technically perfect image.

Of course, the smaller the pinhole, the longer the exposure you’ll need. This is because less light is hitting the sensor, so everything is a trade-off. With extremely tiny pinholes you can be looking at exposures of many minutes rather than a few seconds.

Seeing the world differently

I find that using a pinhole body cap forces me to approach photography differently. Because of the soft quality of the images and the large depth of field, I tend to focus on things like color and shape rather than the subject matter itself. It’s a great way to think about different kinds of composition rules.

tree in pinhole shot

If you end up with a pinhole that isn’t quite circular (like most of mine), that can also be a good thing to experiment with. Finding objects that fit inside the pinhole shape you’ve made can create some really unusual images.

What are you waiting for?

Time to get out and shoot! One of the best ways to improve your pinhole body cap photography is simply to head out and start capturing a ton of images. You need to learn how the things around you will translate into pinhole images. It’s only then that you’ll start to see the possibilities for pinhole photography.

Don’t be discouraged at first. It takes time to hit your stride with this style of photography. You may need to let go of some ingrained inhibitions and embrace the imperfections and flaws instead of aiming for technical excellence.

But eventually, you’ll be capturing some stunning photos!

We’d love to see your pinhole images! Share with us in the comments section.

pinhole-body-cap-photography

The post How to Use a Pinhole Body Cap for Awesome, Creative Photography appeared first on Digital Photography School. It was authored by Charlie Moss.


Digital Photography School

 
Comments Off on How to Use a Pinhole Body Cap for Awesome, Creative Photography

Posted in Photography


How to Make an Awesome Pop-Up Card with your Photos

25 Aug

The post How to Make an Awesome Pop-Up Card with your Photos appeared first on Digital Photography School. It was authored by Ana Mireles.

If you can cut and fold a piece of paper to make a pop-up, why can’t you make it to an image? A photograph translates our three-dimensional world into a two-dimensional representation. With a pop-up card, you can present it with tridimensionality. Here are some ideas to bring your photos to life by turning them into an awesome pop-up card!

How-to-Make-an-Awesome-Pop-Up-Card-with-your-Photos

From paper crafting to paper engineering, this creative practice can be as complex as you want. I will show you two basic techniques that you can apply to your own images. Keep in mind that each image will need specific measures and some testing before you get it right, so be patient!

What you need to make your awesome pop-up card

I recommend you print some copies of the photo in black and white on a cheap paper so you can do your testing without spending much. Then get scissors, a precision cutter, ruler or measuring tape, double-sided tape, and a cutting board.

How-to-Make-an-Awesome-Pop-Up-Card-with-your-Photos

1.Single image pop-up card

Choose the right image

Because you want to give it a third dimension, images that have a clear separation of elements will work best. For some guidelines on this check out the article How to Use Figure to Ground Art Theory in Photography. Print your image at least two times, and one for each layer you want to add.

Foreground and Background are separated for a better pop-up card

Layers and more layers

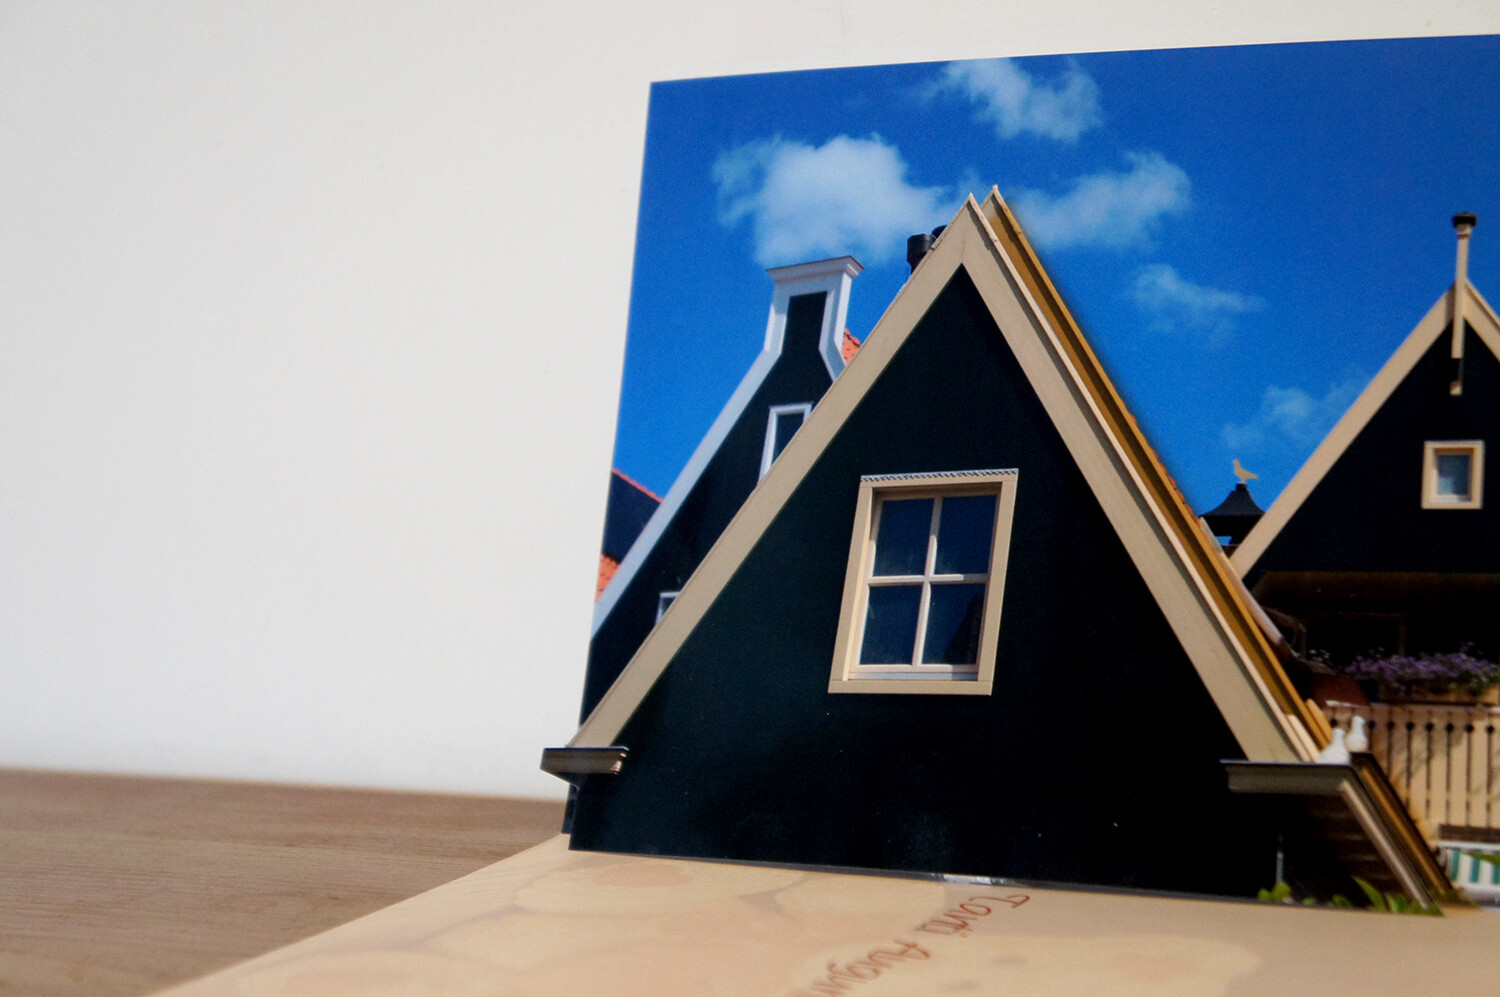
The more elements you separate into layers, the more interesting and elaborate your card will look. I promised to keep it simple so I’ll just add one layer to show you the process, then just repeat it as many times as you want. Cut out the element of the layer that will pop up. In this case, I’ll cut the house in the front.

How-to-Make-an-Awesome-Pop-Up-Card-with-your-Photos

Cut also a stripe of paper, either from the photo or any other thick paper that will hold the layer up. The longer you make it, the bigger the separation to the background.

Fold and paste

Now paste the background to the card which can be store-bought or just a piece of colored paper folded in two that you can later write your message on. Place the base of the photo on the crease where the card folds.

paste background into card

Fold the paper stripe into a square. Then paste one side to the background and one to the bottom side of the card. This will serve as support to the pop-up cutout.

piece of paper to hold the pop-up piece

Paste the other side of the square to the background, and the bottom part to the card. Making sure the cutout matches the original image when you position it. That’s it. Do the same for any elements you want popping out.

How-to-Make-an-Awesome-Pop-Up-Card-with-your-Photos

2. Multiple image pop-up card

This technique is great when you want to showcase many images. For example, an anniversary or a birthday where you want to sum up the highlights of the year. It’s also useful when you want to make a themed card to communicate a concept.

Create the layout

The first thing you want to do is choose your images. Then arrange your images in a grid. To automatize this process you can use Lightroom. If you need some direction just follow the instructions of How to Create Contact Sheets in Lightroom. Set it to the size of the card you’re going to use: for me is an A3 so 4 columns and 3 rows should look nice, but this is entirely up to you.

Print thumbnail images to use

Note that the outer images of the middle row will get folded in half, so use images that fit this crease, or leave it black.

Fold

Fold the paper vertically in half, and then each side again in half towards the opposite direction. As a result, you will have an accordion where the folds separate the columns.

Fold contact sheet as accordion

Cut

Unfold the accordion and just leave it in half. If you do it in a way that the images are towards the outside, you won’t have to measure and just guide yourself by the images. Cut horizontally between rows reaching the middle of the outer image. Then fold inwards the piece you just cut.

How-to-Make-an-Awesome-Pop-Up-Card-with-your-Photos

Paste

Now put some double-sided tape into the side edges and fix it to the card. Make sure the fold in the middle of the accordion coincides with the fold of the card.

pop-up card with accordion photo album

I hope you enjoyed reading How to Make an Awesome Pop-Up Card with your Photos and that you enjoy making pop-up cards yourself! For future occasions, if you want to go deeper into this craft side of photography I’ll leave you some links to check out.

Additional reading

If you’re feeling creative and want to do other types of cards, check out these amazing tutorials:

  • How to Make Your Own Postcards: Cheap!
  • Greeting Card Templates in PS or PSE
  • How to Make Great Photo Invitations in Photoshop


How-to-Make-an-Awesome-Pop-Up-Card-with-your-Photos

The post How to Make an Awesome Pop-Up Card with your Photos appeared first on Digital Photography School. It was authored by Ana Mireles.


Digital Photography School

 
Comments Off on How to Make an Awesome Pop-Up Card with your Photos

Posted in Photography


9 of the Best Apps to Help You Do Awesome Mobile Phone Photography

05 Nov

They say the best camera is the one that you have with you. Even though I love my digital SLR, quite frequently, I shoot with my smartphone. This is why mobile phone photography is so popular.

There is a collection of stunning oak trees near where I live. Each time I go there, the trees look different based on the weather and time of year. Did I need an expensive $ 5,000 camera to get these pictures? No, because I know some tricks for shooting with my smartphone.

9 of the Best Apps to Help You Do Awesome Phone Photography

For these types of images, it doesn’t matter what type of camera you have. If you’ve got a camera, the inspiration, and the time, you can create some great images with your smartphone. Great images come from a good eye and a basic knowledge of composition and light. If you practice with these elements, you can take awesome pictures with any device even if it’s a phone camera. In this article, I will give you some of my favorite apps that will inspire you to have some fun with the camera that is always with you.

Is the era of the compact camera coming to a close?

9 of the Best Apps to Help You Do Awesome Mobile Phone Photography

Either people shoot with their smartphones or they use an advanced digital SLR.  There’s not much in between. Why is this happening?

For the general public, smartphones have more capacity and are easier to use than the current lower-end point and shoot cameras on the market. People are getting better results with less effort. When someone asks for a recommendation on a camera and they only have a couple hundred dollars to spend, I usually recommend that they use their cellphone.

As a photography educator, I find my iPhone to be easier to use and more consistent across multiple models. Some Android models work differently and don’t have the same capabilities as other phones. Some apps don’t work on all Androids, so please take that into account when trying out the apps mentioned in this article.

Smartphone-workshop 9 of the Best Apps to Help You Do Awesome Mobile Phone Photography

The current compact cameras are more menu-driven than most people can handle. And if their photography skills are not up to snuff, it is hard to get past the automatic modes on those cameras. I have had clients in my classes with these lower-end compact cameras where the manual modes do not work at all. These little gadgets are almost as complicated as the advanced digital SLRs, but without the quality results. The only things that are of benefit are their size and price point, but even then it means a smaller lens, a smaller sensor and diminished results.

Smartphone photography

I discovered smartphone photography after attending a professional photographic trade show. I took a little seminar on an app called Hipstamatic for iPhone and I was hooked. I was no longer a photo snob! All of a sudden, I realized I could create stunning photos in moments that would take hours in Photoshop.

Over the next year or so, I shot thousands of pictures on my smartphone and I got really familiar with the ins and outs of this type of photography.

San Simeon Hipstamatic - 9 of the Best Apps to Help You Do Awesome Mobile Phone Photography

I also realized this was the future of social media and photography for the general public. You could create little masterpieces that were appreciated online. They were not high resolution and the use of these images was limited, but that works just fine for most people. As a photographer, you don’t want to post images that can be stolen and easily used somewhere else, so the smartphone low-resolution image size is perfect.

I knew then there was a huge future in this art form for the general public. I continued to research new apps, reading everything I could and staying updated. Here are some of my favorite apps for mobile phone photography.

Shooting apps

Camera+Camera+ for IOS

This app allows you to control separate focus and exposure points, one of the secrets to good mobile phone photography. You can also use additional features such as selective focus, exposure compensation, and exposure lock. I use Camera+ on every picture I take.

Unfortunately, Camera+ is not available for Android.

Big Sur-iPhone  9 of the Best Apps to Help You Do Awesome Mobile Phone Photography

ProshotProShot – for IOS and Android

This app has all of the auto, program and manual modes that Camera+ has and is available for both IOS and Android (as well as Windows phones). With ProShot you have full manual control over exposure, ISO, and shutter speed. The most important aspect here is the ability to separate focus and exposure like you can with the Camera+ app.

My go-to editing app

Snapseed

Snapseed

This app is a must for both IOS and Android users! Snapseed is a go-to app for processing photos. It has such an easy interface, that you can make it part of your normal workflow and literally do your editing in seconds when taking a shot with your mobile phone. There are so many options in this app, but my favorite is the selective contrast and exposure settings. It allows you to go into the image and change exposure, contrast, and saturation in specific parts of your picture. Other settings such as grunge, HDR and Retroux let you create a variety of special effects.

Snapseed is available for both iPhone and Android.

Graphic Apps

wordswagWordswag – for IOS and Android

Are you looking for a simple text app where you can create text overlay or a watermark? Wordswag will help you create professional looking graphics like this in just seconds!

wordswag 9 of the Best Apps to Help You Do Awesome Mobile Phone Photography

Retro Apps

HipstamaticHipstamatic –  for IOS

This app allows you to select “film” and “lenses” in the “classic mode” before you shoot to create the perfect effect. Hipstamatic also added a modern interface with the ability to change your “lenses” and “filters” after you have taken the shot. Find one combination you like to create your own shooting style.

Hipstamatic - 9 of the Best Apps to Help You Do Awesome Mobile Phone Photography

Retro Camera – for Android

Retro

With Retro Camera you can take Hipstamatic-style images with five cameras, five sets of vintage vignetting, film scratch and cross-processing options.

Creative art apps

 Prisma – for IOS and Android
Prisma

Here’s a fun app that will turn your images into works of art in seconds. Lots of different options to create in this app. Each option in Prisma is preset and instant with very little custom editing needed.

9 of the Best Apps to Help You Do Awesome Mobile Phone Photography

Diana

 Diana – for IOS and Android
This app is an easy way to create double-exposure images in seconds. You can create images by selecting specific photos to combine, or you can randomly let Diana select for you. It works better if you have a vision in mind before working with this app, but sometimes a random selection works as well!

Diana app - 9 of the Best Apps to Help You Do Awesome Mobile Phone Photography

Waterlogue – for IOS and Windows 10 devices
Waterlogue

Create beautiful watercolor style images with Waterlogue. Select from a number of different styles to create your own masterpiece!

waterlogue

Conclusion

The beautiful thing about photography with the smartphone is that it expands your creativity and can even help with your Digital SLR photography. You can use more than one app to create even more customized effects. Take each image through a series of apps before getting the final look you want. You never know where you’re going to end up, and you might just like that.

What are your favorite Smartphone apps? Has it changed the way you shoot with your Digital SLR? Which of these apps is going to become a regular part of your smartphone photography workflow?

The post 9 of the Best Apps to Help You Do Awesome Mobile Phone Photography by Holly Higbee-Jansen appeared first on Digital Photography School.


Digital Photography School

 
Comments Off on 9 of the Best Apps to Help You Do Awesome Mobile Phone Photography

Posted in Photography


I Don’t Carioca: Awesome Abandonments Of Rio de Janeiro

15 Aug

[ By Steve in Abandoned Places & Architecture. ]

abandoned-rio-1a

Rio de Janeiro may host the 2016 Olympics but Brazil‘s most picturesque and second-most populous city also boasts a host of infamous abandoned buildings.

abandoned-rio-1d

Perhaps the most notorious and obvious abandonment in Rio de Janeiro, the 37-story Torre Abraham Lincoln (also known as Torre H) sticks out of western Rio’s Barra da Tijuca district like a sore thumb. Sealed off by plywood hoardings and guarded by round-the-clock security to keep squatters out, the Oscar Niemeyer-designed apartment building is collectively owned by its roughly 250 (out of 454) individual unit owners… who have owed property taxes on their units for decades though they’ve never moved in.

abandoned-rio-1c

abandoned-rio-1b

abandoned-rio-1e

The second of a proposed 76 residential apartment buildings meant to transform Barra da Tijuca before the advent of unrestrained development, Torre H has sat frozen in time since 1972 when construction was halted due to concerns about the building’s structural integrity. The neighboring Torre Charles de Gaulle, fully occupied and functional, offers a clue of what a utopian Rio de Janeiro might have looked like.

Above & Beyond

abandoned-rio-2a

You’d think a hotel built in the mountains overlooking metro Rio de Janeiro would be a sure thing… and you’d be wrong, at least in this case. Modern Brazil brings us this stark image of an abandoned hotel that once offered unparalleled views but is now itself the focus of visual interest.

No Park King

abandoned-rio-4a

abandoned-rio-4b

Park Albanoel is an abandoned Christmas-themed fun park located in Itaguai, just west of metro Rio de Janeiro. The park was the brainchild of the late entrepreneur Albano Reis, known affectionately as Santa Claus Quintino. Unfortunately, however, the founder’s heirs did not share his vision and the park is now home to four families invited to homestead there by the owners.

abandoned-rio-4c

abandoned-rio-4c

abandoned-rio-4d

Unfortunately for those families, the park’s swampy and low-lying landscape is also home to mosquitoes carrying the Dengue fever virus. Kudos to Flickr user chrisgj6 for posted the above images taken at Park Albanoel in mid-August of 2013.

Next Page – Click Below to Read More:
I Dont Carioca Awesome Abandonments Of Rio De Janeiro

Share on Facebook


[ By Steve in Abandoned Places & Architecture. ]

[ WebUrbanist | Archives | Galleries | Privacy | TOS ]

WebUrbanist

 
Comments Off on I Don’t Carioca: Awesome Abandonments Of Rio de Janeiro

Posted in Creativity


20 Awesome Mother’s Day Gifts for Photographers

05 May

If you’re like me, you love Mother’s Day, don’t you? We love it not only for a chance to greet our dearest women (or accept greetings if you’re a Mom), but merely for a reminder of what really matters in life. Every Mother’s Day is another chance for us to see that life is not about the number of figures Continue Reading

The post 20 Awesome Mother’s Day Gifts for Photographers appeared first on Photodoto.


Photodoto

 
Comments Off on 20 Awesome Mother’s Day Gifts for Photographers

Posted in Photography


Intentional Blur- How to Create it and Why it’s Awesome

18 Feb

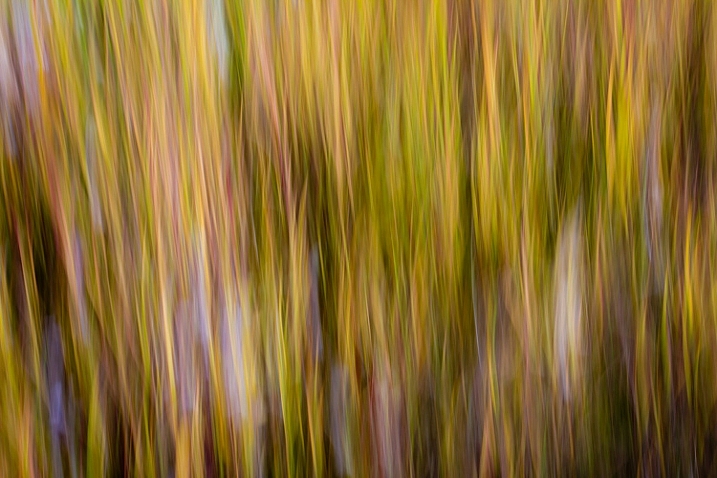
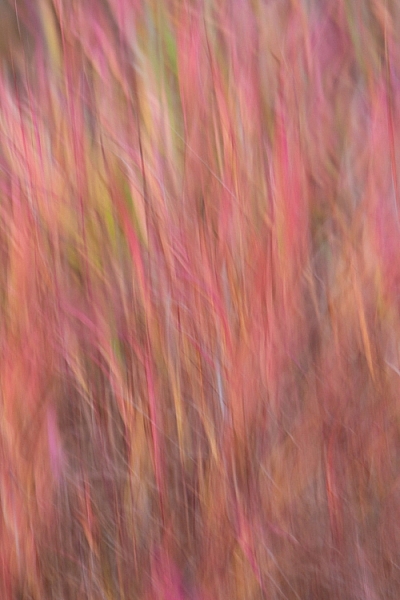
An abstract blur of cotton grass, Fairbanks, Alaska, in autumn.

Open up any photography magazine or website, and I promise there will be at least one article, and a half dozen ads, discussing image sharpness and how to get it through technique or gear. Don’t get me wrong, sharpness is great. When I’m shooting a classic landscape or portrait, if the image is a hair out of focus, it goes in the trash. But, at times, blur is exactly what you want, and occasionally, it’s exactly what your sharpness-obsessed brain needs. All you need, is a camera that allows you to manually control shutter speed.

Abstract Panning Blur

Creating abstract blurs is a chance to explore color, and pattern, and forget about the nit-picky details of composition. Frankly, it’s a fun way to screw around with your camera, and the results can be very cool.

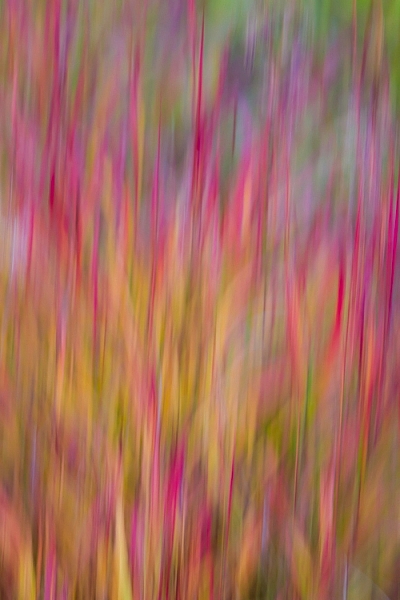
An abstract blur of Fireweed, Fairbanks, Alaska, in autumn.

I made the above image in the small wetland below my home in Alaska. In the autumn, the fireweed fades from green, to orange and red, and these plants erupted from the background. Photographically, I didn’t care about the fireweed itself, I wanted to create an image with the feeling of an explosion. After a moment of pondering, I decided a blur might do the trick. I set the camera shutter to 1/10th second, and panned the camera parallel to the direction of the stems (up and down).

The process is simple, but can feel strange. The camera must be in motion for the entire length of the exposure (usually longer than 1/15th of a second). If you pause, start too soon, or end too early, then elements of the image will retain detail, and the clean washes of color will become confused.

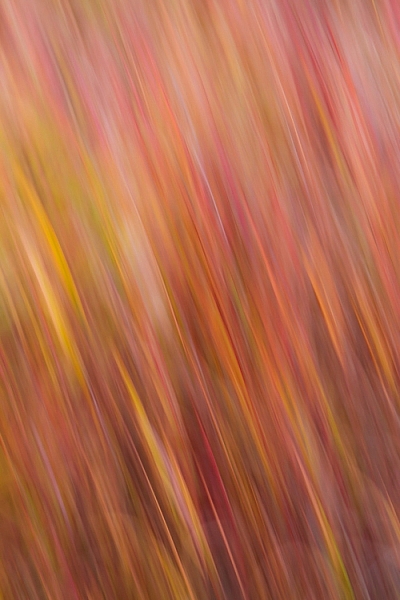
Below are a couple of examples using a patch of autumn foliage. In the first (below left), I moved the camera slowly, while the second (below right) is a quicker motion:

AK-FAI-autumn-blur-abstract-11 An abstract blur of Fireweed, Fairbanks, Alaska, in autumn.

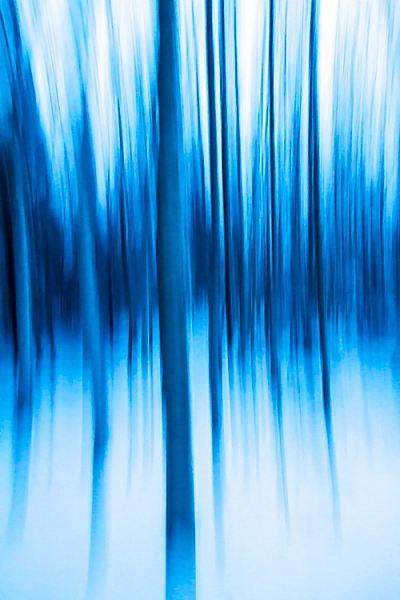
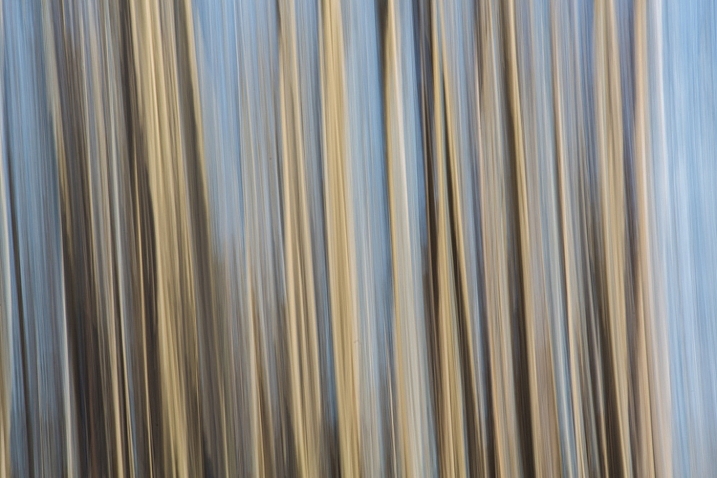
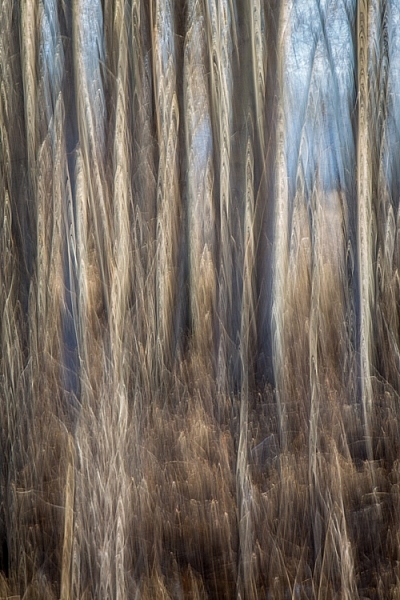
Linear patterns, like the fireweed stems I noted above, or trunks of trees, make great subjects for this kind of image. Below are two interpretations of a forest. The first of these images was made during the blue hour of a snowy winter morning, the second is a very fast vertical pan of cottonwoods, on a bright spring day.

AK-FAI-winter-abstract-6
AK-FAI-CreamersField-abstract-104284-25

You can also experiment with jiggling the camera as I did in the image below. The results can be very painting-like, and are quite unlike any other type of image I know how to create.

AK-FAI-CreamersField-abstract-104284-33
Zoom Blurs

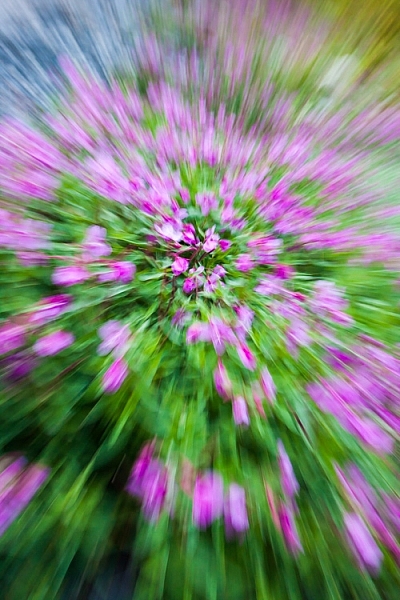
A zoom blur, as is obvious from the name, requires a zoom lens to execute. The result is an image that appears to blur outward, from a comparatively sharp center point. Often, it gives the impression of forward motion, or viewing the subject down a long tunnel of color and pattern. Bright subjects, like flowers, often work well. When done properly, this technique yields an image that is a celebration of color.

AK-Girdwood-fireweed-abstract-3

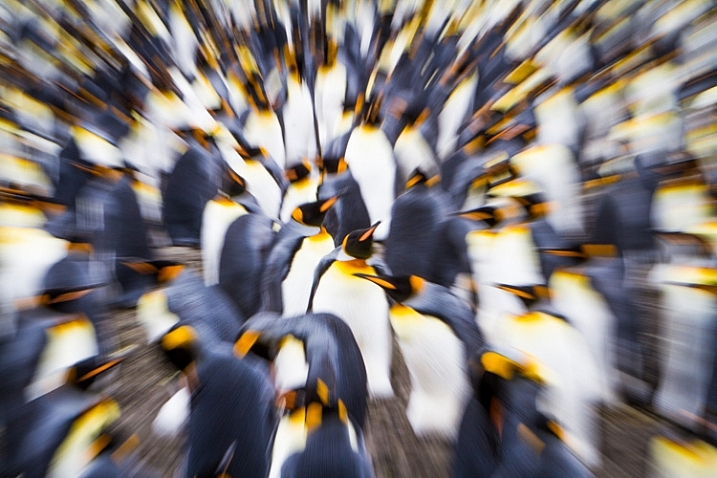
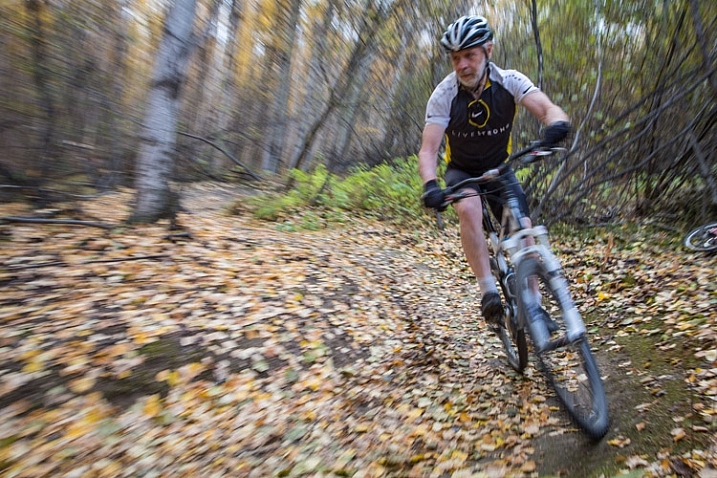
Just as you need the camera in constant motion to create an effective panning blur, you’ll need to make sure the zoom is activated throughout the exposure. Try 1/10th second as a starting point. I’ve experimented with this technique in a variety of situations, even on a colony of King Penguins (below), where I think the technique emphasizes the chaos and noise of the tightly packed birds. It can also be effective for portraying motion, as I did in the image of the mountain biker (second image below). For this image I used a small zooming motion, instead of a dramatic pull back, as the cyclist approached me.

SGeorgia-9Jan10-SalisburyPlains-53
AK-FAI-GoldstreamSports-Sep13-121

Subject Blur

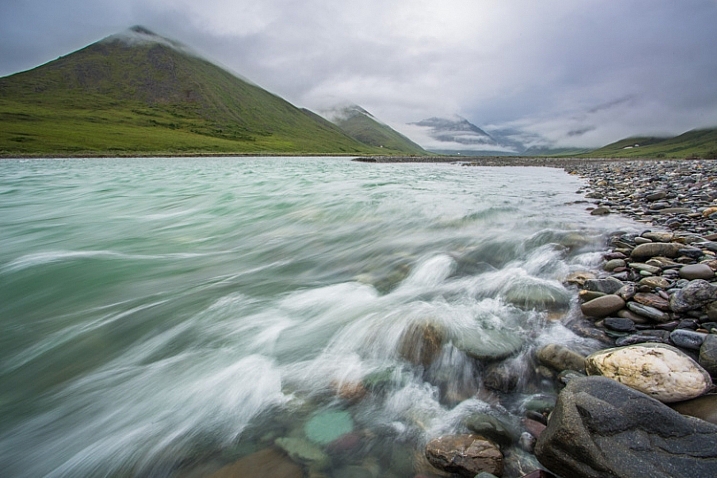
In the techniques I described above, either the camera, the lens, or both must be in motion, but blurs can also be effective when it’s the subject that’s moving. Most landscape photographers will already be familiar with the technique of blurring moving water through the use of a slow shutter speed. This technique requires a tripod to be effective, and composition, unlike in abstract blurs, now plays an important role.

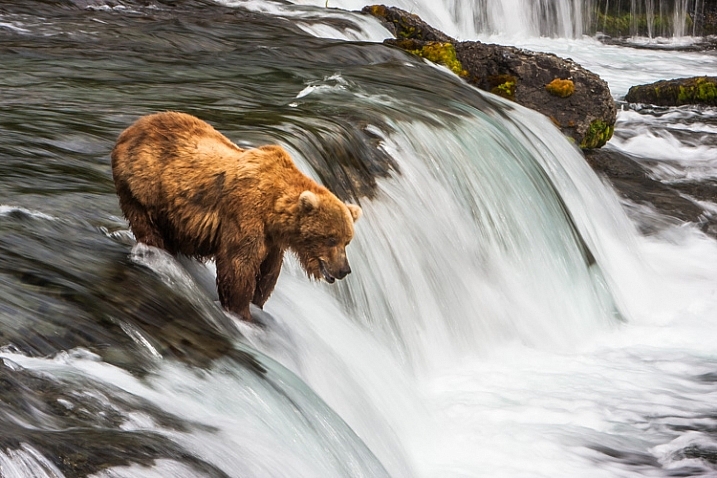
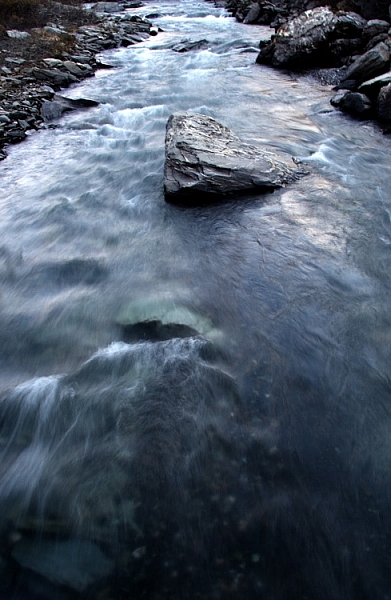
Your shutter speed will dictate how the blur appears in your final image. Slowly moving subjects like rippling waves, may require several seconds to blur, while a fast tumbling creek or waterfall may only need 1/15th second. Experiment, and see what you get. In the two images below, the bear and waterfall required only 1/15 second to blur, while the slower moving creek required nearly a half second.

A Brown Bear fishes for salmon at Brooks Falls in Katmai National Park, AK, USA.

AK-Denpark-Savageriver-01

1/8th second at f16

1/8th second at f16

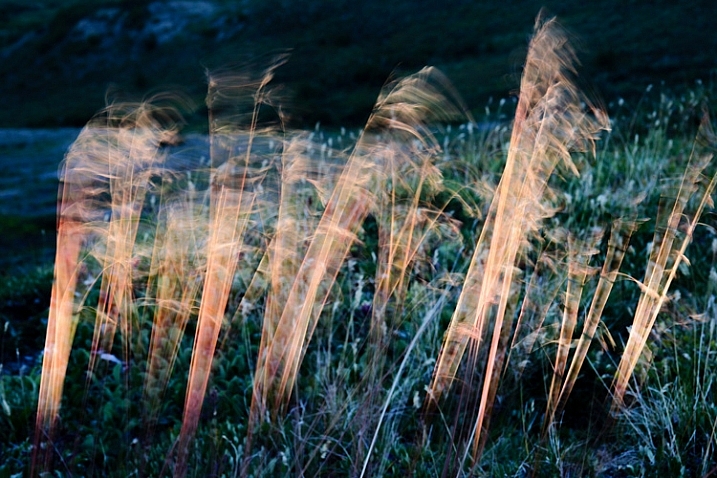
Water is the obvious subject for this kind of photography, but don’t limit yourself. Several years ago, I was hiking atop a ridge in the Alaska Range. It was mid-summer, a few minutes before midnight, and the sun was just setting behind the mountains. It was windy, and tufts of golden tundra grass were waving rapidly back and forth in the breeze. I knew that when the last light of day departed, those tufts of grass would be lit up, and all the rest of the world would be shadowed. Quickly, I set up: tripod placed low, long shutter speed (1/4 second), and waited. Sure enough, for just a moment, the only thing lit by the sun was the blowing grass stems:

Blowing tundra grass lit by evening sun, Alaska.

Action Blurs

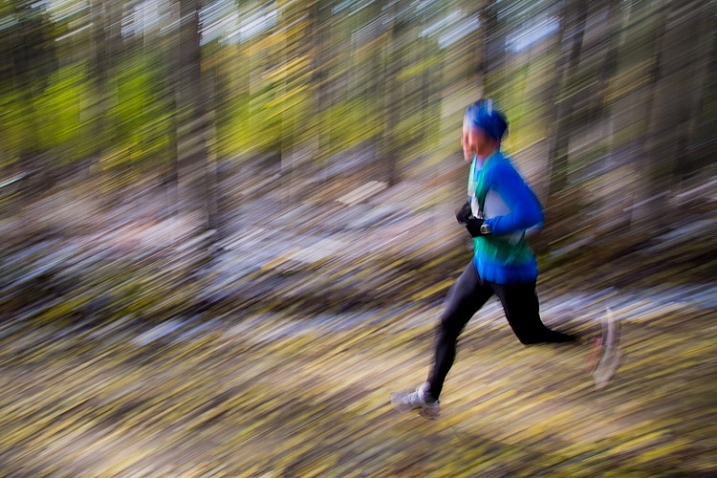
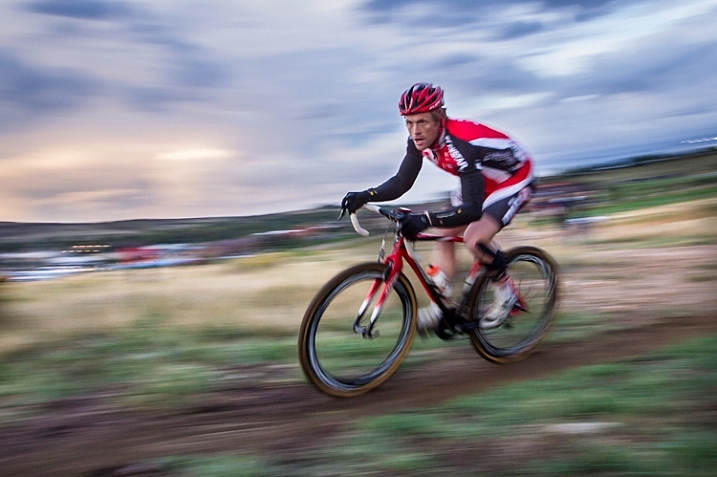
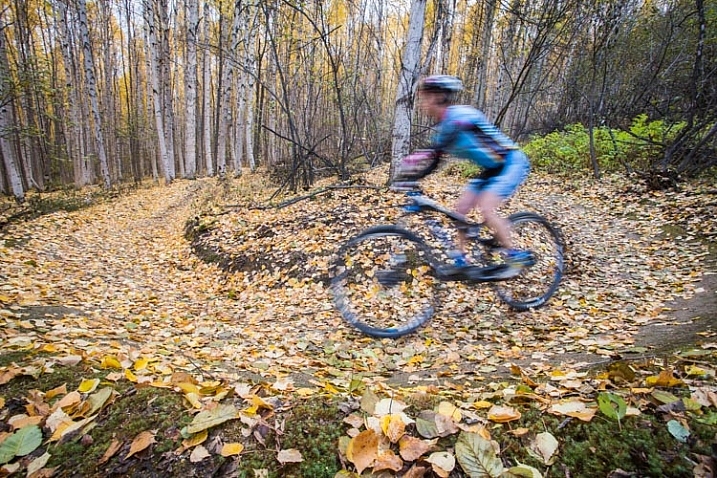
This last technique is frequently used to give the impression of movement and speed, and is often used in sports and wildlife photography. There are two flavors of action blurs. The first is when the camera is panned to track a moving subject. This results in an image with a sharp, or semi-sharp subject, and blurred background like the image below.

AK-FAI-Equinox-marathon-109203-3

The second is when the camera is still, and the subject is in motion. The outcome is a blurred subject, with a sharp background. Both result in an image that clearly tells the story of motion.

AK-FAI-GoldstreamSports-Sep13-128

Results using this technique are hard to predict. The combination of long shutter speeds, and moving cameras and subjects, can result in many failed images. But when it works, the results can be awesome.

CO-Golden-Cyclocross-26Sep2012-87

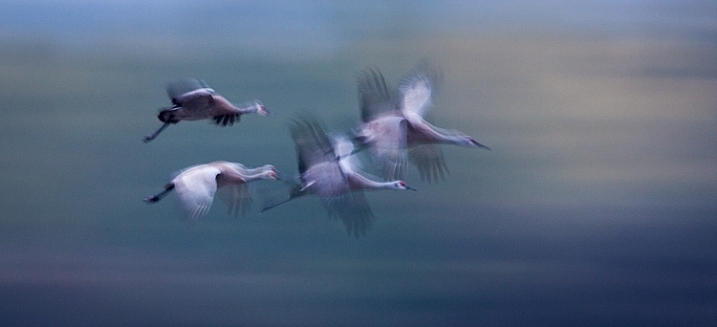
Rapidly moving subjects may require only 1/60th of second (or faster) to provide blurred motion, but slow subjects may need substantially longer shutter speeds. It’s a game of trial and error. Running and cycling races, or other sporting events, are great places to practice the technique, as you can shoot again and again while experimenting with different shutter speeds. Once you’ve mastered the method, you can break it out on higher stakes subjects like fast moving wildlife, where you may only get one opportunity to get the shot.

AK-FAI-CreamersField-Migration-Aug2009-54

Go out and experiment. Blurs, be they abstract, impressionist, or realistic, can be great fun to play with. For me, it’s a fallback technique when I need to jumpstart my creativity.

Have you tried making blurs? I’d love to see what you get. Feel free to post them in the comments below.

googletag.cmd.push(function() {
tablet_slots.push( googletag.defineSlot( “/1005424/_dPSv4_tab-all-article-bottom_(300×250)”, [300, 250], “pb-ad-78623” ).addService( googletag.pubads() ) ); } );

googletag.cmd.push(function() {
mobile_slots.push( googletag.defineSlot( “/1005424/_dPSv4_mob-all-article-bottom_(300×250)”, [300, 250], “pb-ad-78158” ).addService( googletag.pubads() ) ); } );

The post Intentional Blur- How to Create it and Why it’s Awesome by David Shaw appeared first on Digital Photography School.


Digital Photography School

 
Comments Off on Intentional Blur- How to Create it and Why it’s Awesome

Posted in Photography