The post How to Make an Awesome Pop-Up Card with your Photos appeared first on Digital Photography School. It was authored by Ana Mireles.
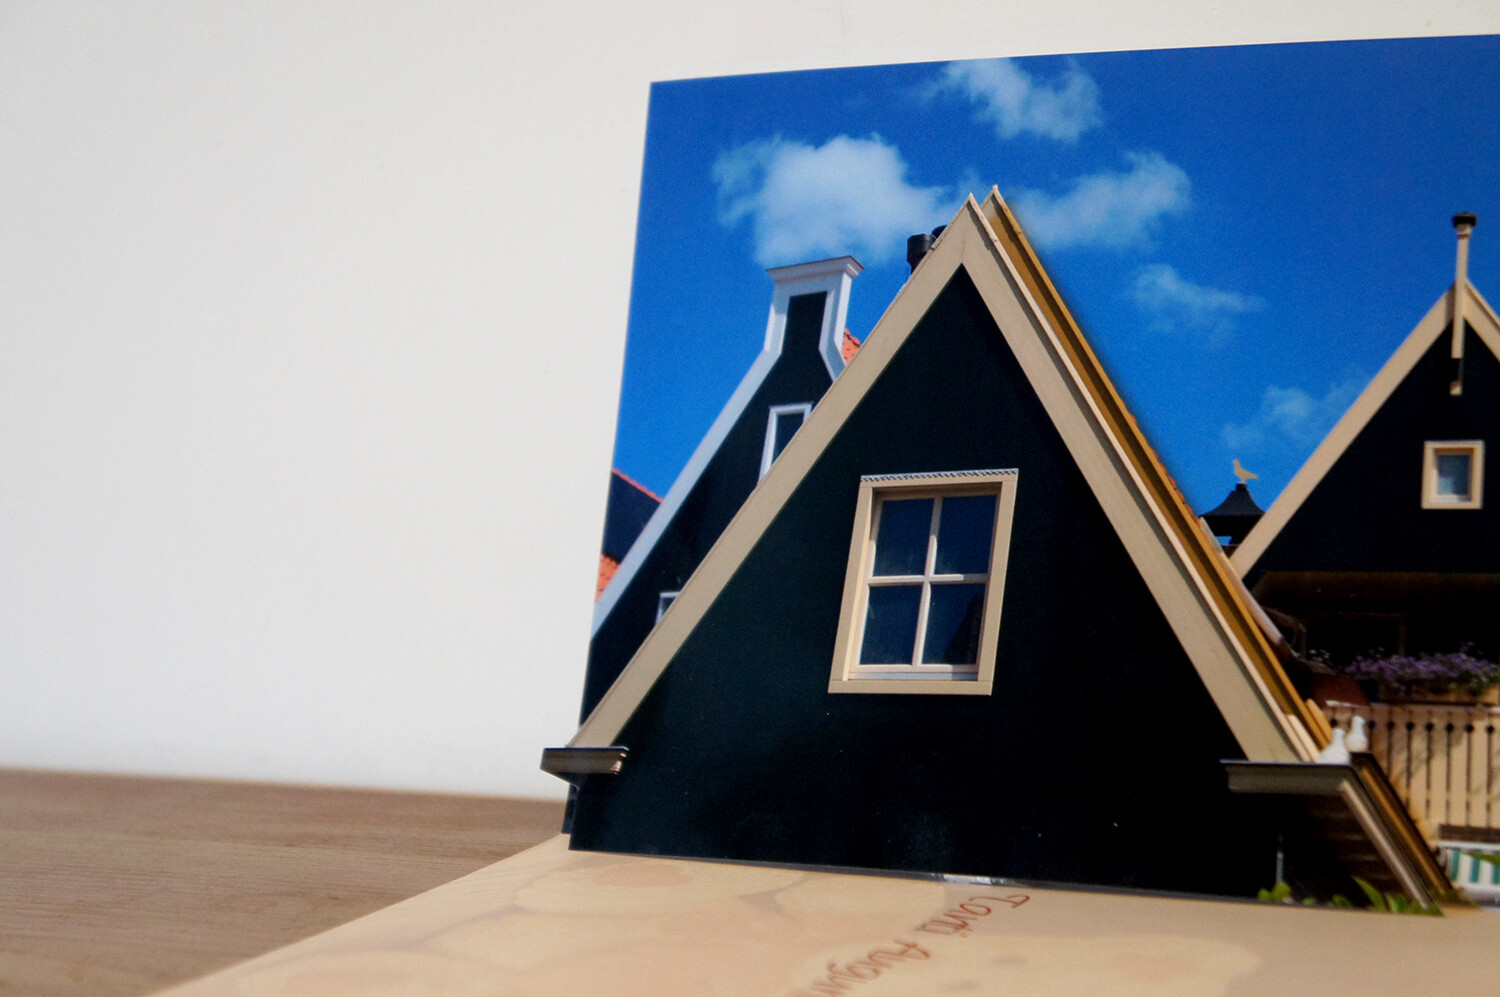
If you can cut and fold a piece of paper to make a pop-up, why can’t you make it to an image? A photograph translates our three-dimensional world into a two-dimensional representation. With a pop-up card, you can present it with tridimensionality. Here are some ideas to bring your photos to life by turning them into an awesome pop-up card!

From paper crafting to paper engineering, this creative practice can be as complex as you want. I will show you two basic techniques that you can apply to your own images. Keep in mind that each image will need specific measures and some testing before you get it right, so be patient!
What you need to make your awesome pop-up card
I recommend you print some copies of the photo in black and white on a cheap paper so you can do your testing without spending much. Then get scissors, a precision cutter, ruler or measuring tape, double-sided tape, and a cutting board.

1.Single image pop-up card
Choose the right image
Because you want to give it a third dimension, images that have a clear separation of elements will work best. For some guidelines on this check out the article How to Use Figure to Ground Art Theory in Photography. Print your image at least two times, and one for each layer you want to add.

Layers and more layers
The more elements you separate into layers, the more interesting and elaborate your card will look. I promised to keep it simple so I’ll just add one layer to show you the process, then just repeat it as many times as you want. Cut out the element of the layer that will pop up. In this case, I’ll cut the house in the front.

Cut also a stripe of paper, either from the photo or any other thick paper that will hold the layer up. The longer you make it, the bigger the separation to the background.
Fold and paste
Now paste the background to the card which can be store-bought or just a piece of colored paper folded in two that you can later write your message on. Place the base of the photo on the crease where the card folds.

Fold the paper stripe into a square. Then paste one side to the background and one to the bottom side of the card. This will serve as support to the pop-up cutout.

Paste the other side of the square to the background, and the bottom part to the card. Making sure the cutout matches the original image when you position it. That’s it. Do the same for any elements you want popping out.

2. Multiple image pop-up card
This technique is great when you want to showcase many images. For example, an anniversary or a birthday where you want to sum up the highlights of the year. It’s also useful when you want to make a themed card to communicate a concept.
Create the layout
The first thing you want to do is choose your images. Then arrange your images in a grid. To automatize this process you can use Lightroom. If you need some direction just follow the instructions of How to Create Contact Sheets in Lightroom. Set it to the size of the card you’re going to use: for me is an A3 so 4 columns and 3 rows should look nice, but this is entirely up to you.

Note that the outer images of the middle row will get folded in half, so use images that fit this crease, or leave it black.
Fold
Fold the paper vertically in half, and then each side again in half towards the opposite direction. As a result, you will have an accordion where the folds separate the columns.

Cut
Unfold the accordion and just leave it in half. If you do it in a way that the images are towards the outside, you won’t have to measure and just guide yourself by the images. Cut horizontally between rows reaching the middle of the outer image. Then fold inwards the piece you just cut.

Paste
Now put some double-sided tape into the side edges and fix it to the card. Make sure the fold in the middle of the accordion coincides with the fold of the card.

I hope you enjoyed reading How to Make an Awesome Pop-Up Card with your Photos and that you enjoy making pop-up cards yourself! For future occasions, if you want to go deeper into this craft side of photography I’ll leave you some links to check out.
Additional reading
If you’re feeling creative and want to do other types of cards, check out these amazing tutorials:
- How to Make Your Own Postcards: Cheap!
- Greeting Card Templates in PS or PSE
- How to Make Great Photo Invitations in Photoshop

The post How to Make an Awesome Pop-Up Card with your Photos appeared first on Digital Photography School. It was authored by Ana Mireles.
You must be logged in to post a comment.