RSS
 

Posts Tagged ‘Awesome’

8 Ideas for Awesome Abstract Photography

02 Feb

The post 8 Ideas for Awesome Abstract Photography appeared first on Digital Photography School. It was authored by Anthony Epes.

8 ideas for abstract photos

In this article, I plan to share some inspiring abstract photography ideas.

Now, I would never describe myself as an abstract photographer, yet I seem to have shot countless abstract photographs. In fact, I try not to assign myself to any genre. To me, that feels like the opposite of what photography should be – which is a place to have fun, to be curious, to explore, and most importantly, to give your imagination free rein.

I start the article like this because I want to encourage you not to be intimidated by this genre. Don’t worry about getting it right. Abstract photography should be a place of complete freedom. 

And this is why the most important quality for abstract photography is imagination

broken down wall

What is abstract photography?

For me, abstraction is about removing what’s in the world around us from its familiar context. It involves playing with elements and subjects, moving them away from their usual settings and placing them into new situations – so that they become something else entirely.

I find that doing abstract photography brings us into that childlike realm of imagination and makes us often think, “What is that?” Or, “That reminds me of…” Then our minds go off into dreamlike worlds.

smashed vegetable abstract photography ideas

“Abstraction demands more from me than realism. Instead of reproducing something outside of me, now I go inward and use everything I’ve learned thus far in my life.” – Susan Avishai

Therefore, I like to approach this genre as a way for us to have fun with our photos, the world around us, and ourselves. I’ll share eight abstract photo ideas that I hope ignite your imagination, and get you excited about exploring abstract photography!

Let’s get started.

abstract photography ideas balloon

1. Use your imagination as much as possible

abstract photography ideas

“Abstraction allows man to see with his mind what he cannot see physically with his eyes…Abstract art enables the artist to perceive beyond the tangible, to extract the infinite out of the finite. It is the emancipation of the mind. It is an exploration into unknown areas.” – Arshile Gorky

Doing abstract photography feels like I am trying to detach myself from reality and delve into a space where everything around me is a new sight, a new sensation, or a new experience.

I look around and see elements, colors, shapes, lines, textures – each is almost separate from the other. I am looking for things that are connected, but in a different way to how my mind usually puts things together.

Then it’s my imagination that kicks in and starts creating all kinds of ideas about what things look like. To me, the photo above looks like something coming from the cosmos, the beginnings of a new world.

(In reality, it’s some slime floating around in water, which I played with in Lightroom.)

So use your imagination constantly. When doing abstract photography, don’t let “conventional” thinking get in the way!

haunting idea for abstract photography

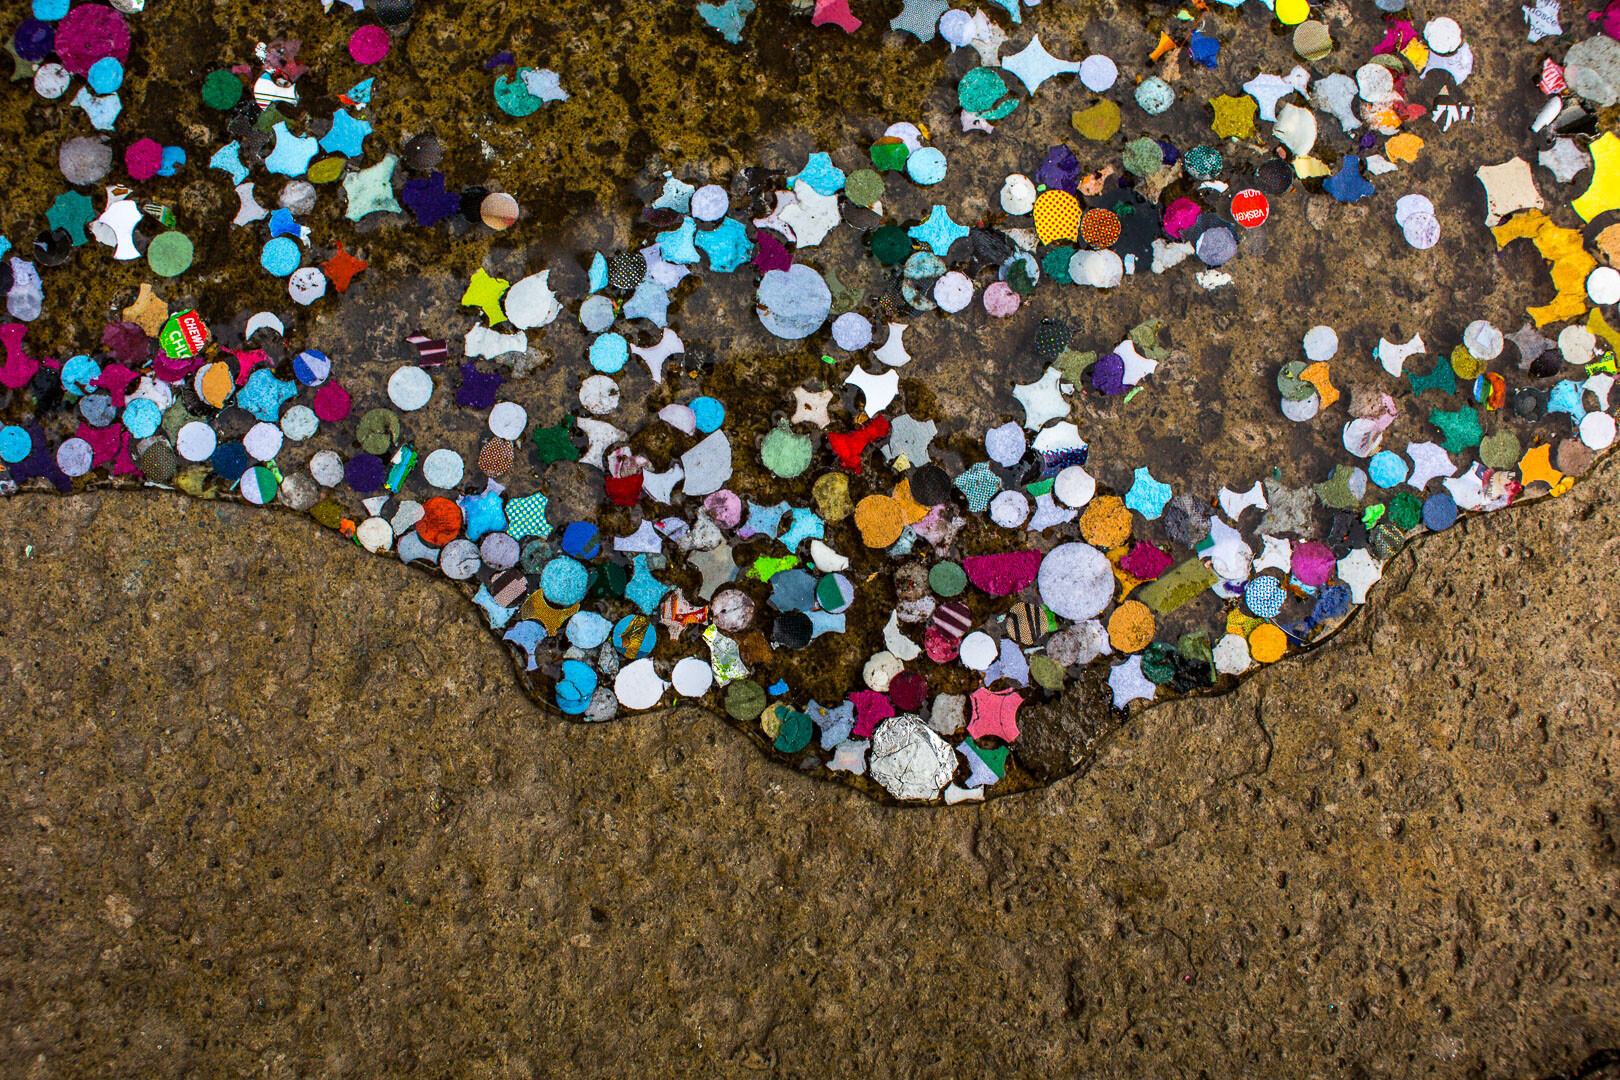
2. Search for textures

Textures are a fascinating subject to explore. When you focus on textures, you capture a tactile quality in your photos. You make people want to lean in and touch something.

And you often give very ordinary things – water, brick, wires, or stone – an inviting feeling.

Today, we are often so disconnected from the ordinary (i.e., what we perceive as the boring world around us). We are so often lost in thought that we’re only jolted out of it when we see spectacular things – like beautiful views, intense sunsets, etc.

But all around us are terribly ordinary subjects that can be so very intriguing, if only we viewed them with our sense of wonder! So instead of capturing a snapshot of an intense sunset, try looking more closely at some “boring” subjects to see what textures you can find!
abstract photography ideas

3. Shoot the ordinary

“The longer you look at an object, the more abstract it becomes, and, ironically, the more real.” – Lucian Freud

I love to shoot random, day-to-day subjects that I find all around me. I challenge myself to make these subjects seem interesting.

For instance, I am always on the lookout for torn posters on a wall – especially when they are bathed in beautiful light – as well as weird things I find on the street at my feet.

In fact, starting with what you find at your feet is a great way to do abstract photography! 

abstract photography ideas

Here’s why:

Everything, when you pay attention to it, can reveal different qualities than what we first notice. And our challenge as photographers- as artists, no less – is to find the most interesting way to shoot whatever catches our attention.

Maybe you need to take a different perspective – lying on the floor, getting up high, or changing angles. Or maybe, by using the quality of the light, you can turn the subject from ordinary to fascinating. 

yellow on blue shapes

Or perhaps you could even use color to give boring, unoriginal subjects interest and depth:

tangled wires against a wall

4. Include mystery in your abstract photos

“Abstraction generally involves implication, suggestion and mystery, rather than obvious description.” – Robert Genn

The appeal of abstract photos for me is very much about mystery. Creating something that doesn’t look as it should, displacing your subject, mixing up reflections, creating contrasts and jarring juxtapositions – it’s all a fun part of making the world less real and more mysterious. 

You can combine shapes together to create something that makes no real sense, but still sparks ideas and thoughts in the mind of the viewer. 

abstract photography ideas

In the photo below, I captured this reflection of a man on what I like to think is a moon landscape inhabited by interesting-looking creatures.

abstract photography ideas

At least, that’s what I see when I look at the photo. What do you see? It might be completely different!

5. Aim to capture the feeling of your subject 

“Of all the arts, abstract painting is the most difficult. It demands that you know how to draw well, that you have a heightened sensitivity for composition and for colors, and that you be a true poet. This last is essential.” – Wassily Kandinsky

In my photo teaching, I talk a lot about having a heightened awareness and sensitivity to the world.

Because if you want to find incredible photos wherever you go, you must have the ability to see more of what’s around you than you can when you are lost in your thoughts.

Now, with that heightened sensitivity comes increased feelings and impressions of what you see.

And thinking about the feeling you have when you look at your subject is so important. If you aren’t feeling anything, you won’t be able to communicate anything in your photos.

But if you do feel something when you look at your subject…

…you can channel it into the photo for a beautiful result! 

stones in water abstract

I like the sensations I get when I look at the texture photos above. It’s perhaps a sense of awe at the water and the beautiful colored stones. I can almost feel the water, and that feeling is translated through the photo. 

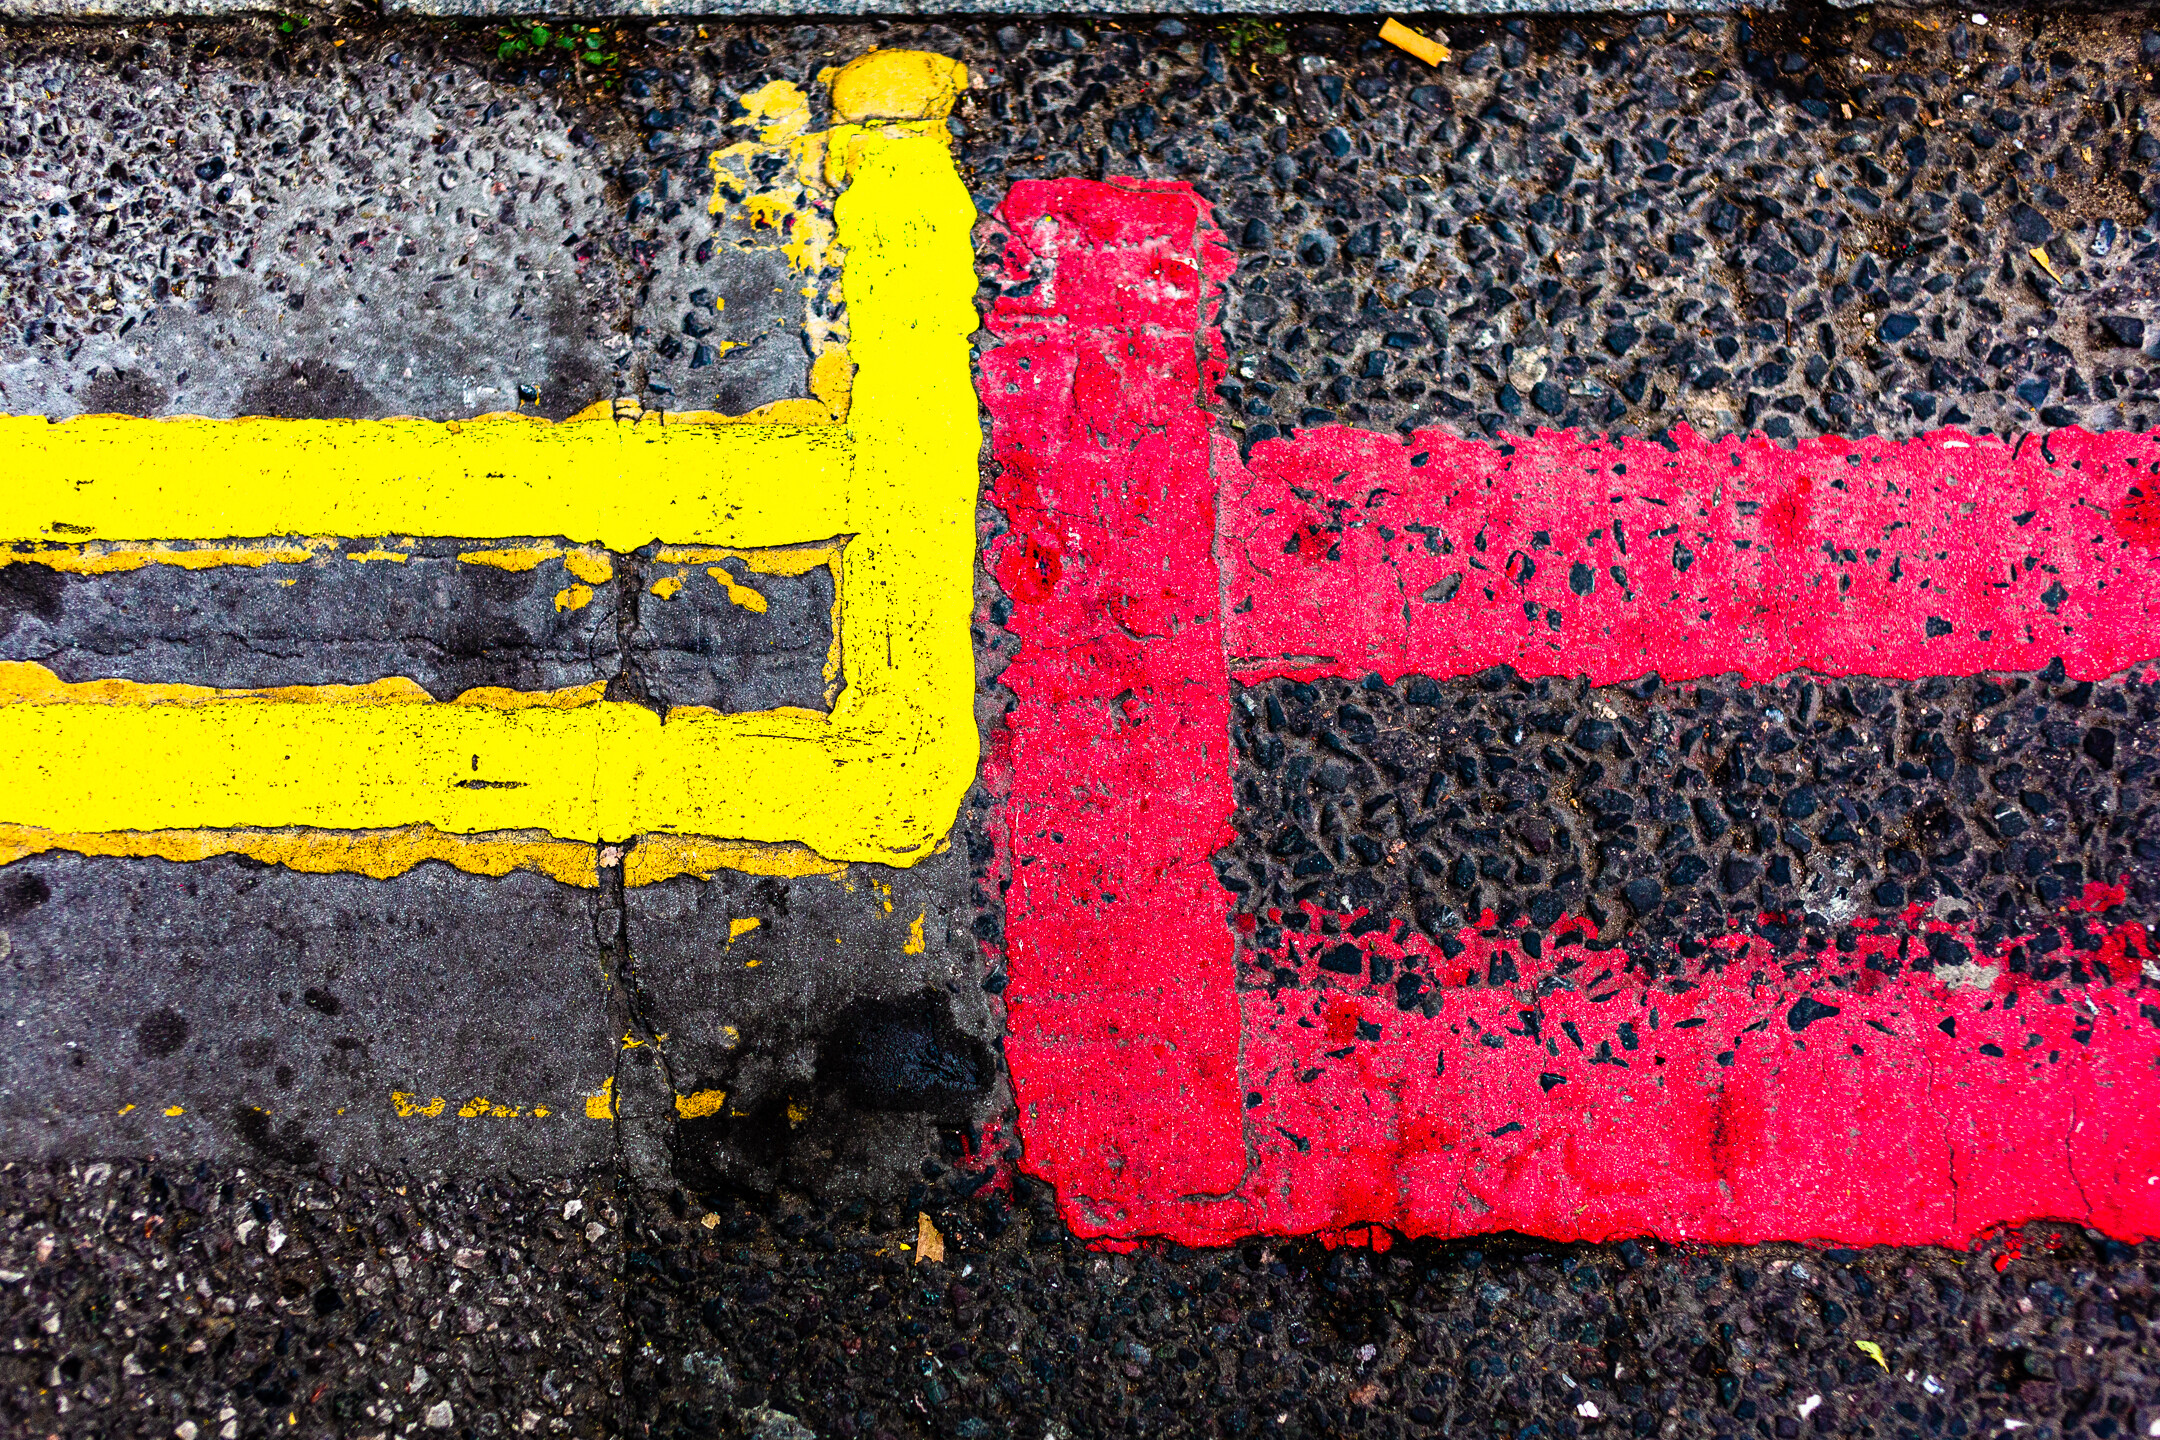
In the photo below, perhaps I get a feeling of fun, thanks to some bright colors on what I remember to be a dull London day:
red and yellow road labels

6. Find subjects that stop you in your tracks 

I strongly urge you to cultivate a sense of wonder.

Why?

I think we often get so jaded by the world around us – that is, we are so busy with our lives and worries and things to do – that we stop finding things awe-inspiring. It takes more and more to make us stop in our tracks and say “Wow!”

But we photographers have a gift:

We are visual people.

We just have to make sure we’re always refreshing our vision and our sense of wonder at the world around us.

And we must go seek subjects that makes us feel awe. 

rocks on water with reflection

I believe that we don’t always need new subjects and exotic locations. We can be impressed by things that are right on our doorstep. Therefore, going out with the intention of finding something that makes you go “Wow!” or “Cool” or “Interesting!” is a great thing to do.

Work on always trying refresh your eyes, so that you can be impressed by mundane subjects (this also refreshes the spirit!).

In the photo below, the faded street markings look like a sign in an unknown language. Maybe even a secret message.

abstract photography ideas

I find that the easiest way to refresh your eyes is to go out with the goal of having fun in your photography. Try to find something that makes you laugh. 

In this shot of gnarly wood below, I might have photographed a frog, or maybe an alien! 

tree trunk knots

That, for me, is the essence of abstract photography:

Creating a new world, a new vision, and a new experience from this very familiar (yet still awe-inspiring!) world around us. 

7. Use perspective for an unusual take on your subject

By changing perspective, you can create cool new images of otherwise dull subjects. 

building with sky reflection

By shooting upward and not focusing on the entire scene, I captured this image:

lights on the ceiling with surrounding windows

So make sure you don’t always shoot using the same boring, eye-level perspective.

Instead, mix things up a bit! Experiment with changing your vantage point or your angle.

Make sense?

8. Break down the world into elements 

In photography, you must learn how to see the world as a series of elements, and then learn to arrange these elements in pleasing and interesting ways.

Ultimately, you should be looking at the world as a series of elements, and not as a vast, interconnected whole. 

This is relevant to all genres of photography. Gaining a sense of control over the elements you place in your scene, what elements you use to support your subject, and what elements you remove from the composition is a great way to improve your abstract photos. 

abstract photography ideas

This idea of breaking the world down into elements is particularly useful when doing abstract shooting, because you are looking at the world afresh and trying to use your imagination to create something that is super interesting – and also super unique! 

Abstract photography ideas: Conclusion

Hopefully, you’ve found some exciting abstract photography ideas to try – and you’re ready to get out and start shooting!

So grab your camera and take some photos.

And make sure to have lots of fun while you’re at it!

Now over to you:

Have these abstract photography ideas helped you see what’s possible in your photography? Do you shoot abstracts, or will you now? Let me know in the comments below!

The post 8 Ideas for Awesome Abstract Photography appeared first on Digital Photography School. It was authored by Anthony Epes.


Digital Photography School

 
Comments Off on 8 Ideas for Awesome Abstract Photography

Posted in Photography


7 Awesome Tips for Black and White Still Life Photography

06 Aug

Great black and white photography is stunning. It’s eye catching, emotive, and expressive. Usually, it’s also wonderfully simple. So is still life photography. In this article, I’ll give you seven tips on how to create stunning black and white still life photographs. Before we get into the tips I’d first like to answer a couple of foundational questions: What makes Continue Reading

The post 7 Awesome Tips for Black and White Still Life Photography appeared first on Photodoto.


Photodoto

 
Comments Off on 7 Awesome Tips for Black and White Still Life Photography

Posted in Photography


4 Ways to Create Awesome Infrared Images

10 Jul

The post 4 Ways to Create Awesome Infrared Images appeared first on Digital Photography School. It was authored by Simon Bond.

ways to create infrared images

A really interesting form of photography that can transform your images is infrared photography. This form of photography has been around for a long time, and today, you’ll discover how to make your own infrared images. Anyone can do this, and it’s possible to do with minimal or even no extra equipment at all. So read on and find out how you can enhance your photographs today.

4 Ways to Create Awesome Infrared Images
Infrared works very well as a long exposure, especially with moving water.

1. Infrared photography with an infrared filter

The first and most accessible way for photographers with a digital camera to get into infrared photography is to buy a filter. Filters work by filtering out all light except infrared. This will lead to an infrared image rendered onto your camera sensor.

The imperfect solution

Using a filter is the quickest route into this genre of photography, but it’s not without it’s problems. The fact is your camera is built to resist infrared light, a fact that has both positive and negative results for you as a photographer. Let’s take a look at some of the factors you’ll need to consider.

  • Camera sensor – Different cameras will work better or worse when it comes to infrared photography with a filter. This comes down to how strong the filter that blocks infra-red light hitting your camera sensor is. A strong filter will mean you’ll need longer exposures, and the results are not always as strong.
  • Light leaking – With the long exposures needed it’s important to cover area’s of the camera that allow light in, other than of course the lens. If you fail to do this you’ll find light leaks in, effecting the outer area’s of your image. The most obvious area that needs covering on a dSLR camera is the viewfinder.
  • Camera noise – If your camera is not sensitive to infrared light you’re going to have two choices, both will lead to digital noise on your image. Those choices are upping the ISO, to allow a shorter long exposure, or exposing for several minutes in bulb mode.
4 Ways to Create Awesome Infrared Images
In this photo the clouds in the sky work very well for infrared. There is also a lot of green leaves photosynthesizing.

The need for long exposure

As mentioned infrared photography with a filter requires long exposure, however this can often really add to your image. You’ll need a tripod, a way for triggering your shutter remotely, and you’ll need to cover your camera to prevent light leaking in. Using long exposure is often the choice of many landscape photographers anyway, so what will you gain? If you’re photographing anywhere with moving water or clouds, then you’ll capture their movement with long exposure. Coastlines and seawater are somewhat different in that it will flatten the water, again often a desirable effect.

4 Ways to Create Awesome Infrared Images
This image shows an infrared photo without white balance adjustment.

Which filter?

There are plenty of options when it comes to filters you can buy. Obviously, as with different manufacturers, the results will vary, and you’ll need to choose a filter that suits your style. However, all of these filters will do the same thing, and that is filter out infrared light. The photos in this article were produced using the Hoya R72 filter.

The white balance

To get to your desired result with an infrared filter, you’re going to need to adjust the white balance. You’ll usually want to do this in post-processing, however, it’s also possible to do it in-camera.

The method needed to do this in-camera is as follows:

  1. Compose your photo and aim at some grass that is well-lit by the sun – it needs to be photosynthesizing.
  2. Use an exposure of 10 or 20 seconds – enough to correctly expose the photo.
  3. During the exposure, which in this case can be handheld, move the camera around so you get a blurred photo.
  4. Your image should now be red, with no sharp portions to your photo.
  5. Now go to your camera’s white balance settings.
  6. Select the custom white balance option.
  7. Select the photo you have just taken, and use this to set the custom white balance. It will now set everything that is red in your image and make it white.
4 Ways to Create Awesome Infrared Images
In this scene, I adjusted the camera’s custom white balance.

Post-processing required

If you chose not to use the camera’s custom white balance, then you’ll now need to process your image. You’ll have a RAW image that is mostly red. You can now decide whether to process for a color infrared image, or a black and white one. In both cases, you’ll need to adjust the red and blue channels to achieve this.

4 Ways to Create Awesome Infrared Images
Post-processing is used here from the red image above, and a color infrared was produced.

2. Modify your camera to produce infrared images

Those more serious about infrared photography can look into modifying their camera. It’s important to mention that once modified, your camera will only be useful for infrared photography, so don’t get this done with your main camera.

Those that go down this road often have a second camera body, which they’re prepared to dedicate to infrared photography.

What’s involved?

Remember that most camera manufacturers produce cameras that block out infrared light? You will modify your camera to remove that infrared blocking filter in front of your camera sensor and put an infrared filter in place. That’s the process, and now your camera will be sensitive to infrared light.

What are the advantages?

You can now use this camera more like a regular camera, instead of only being able to take long exposure photos. That means techniques like panning and infrared are possible. You’ll be able to use fast exposures to capture moments. In other words, you will regain full artistic control of your camera, just now it only photographs in infrared.

4 Ways to Create Awesome Infrared Images
Cityscapes can work well with infrared. This one has a sepia tone.

3. Film photography and infrared

Infrared images have been produced for a long time, and certainly predate digital photography. It’s possible to take beautiful infrared images with film, though you’ll need to get film that specifically for this form of photography.

An infrared filter used on a digital camera won’t be needed this time, as the film itself exposes for infrared light. However, you may well consider using filters anyway. The same filters that enhance regular black and white photos can also do the same for infrared. That means the classic yellow, orange, and red filters should be in your camera bag. Should you choose to use an infrared filter this will certainly work, but again it will block most of the light, meaning you’ll be taking a long exposure.

4 Ways to Create Awesome Infrared Images
The technique creates a dreamscape mood for your photos.

4. Producing infrared images in post-processing

The last method to produce infrared images is post processing.

That means you can choose any of your existing photos, and process them to replicate the infrared effect. It’s worth choosing a photo that would work well if it were photographed as an infrared.

Think of a landscape photo with plenty of green foliage, and a blue sky with one or two clouds. Those wishing to learn how to process their images in this way can do so by reading this article.

4 Ways to Create Awesome Infrared Images
Long exposure and reflection on water is a good combination.

Time to create your infrared image dreamscapes!

This article has given you all the information needed to create infrared images, or where to find that information.

Have you tried out this form of photography? If so, which of the above methods did you use, and do you have a preference?

Infrared photography is fun. If you’re waiting to get out on a sunny day, why not try the post-processing route? If you have any infrared images already, why not share them in the comments? We love to see your images!

The post 4 Ways to Create Awesome Infrared Images appeared first on Digital Photography School. It was authored by Simon Bond.


Digital Photography School

 
Comments Off on 4 Ways to Create Awesome Infrared Images

Posted in Photography


Lightroom Moon Editing Tips for Awesome Moon Photos

14 Jun

The post Lightroom Moon Editing Tips for Awesome Moon Photos appeared first on Digital Photography School. It was authored by Simon Ringsmuth.

dps-lightroom-moon-editing-tips

One of the most fascinating photos you can take is a crystal-clear shot of the full moon. Pictures like this don’t require a lot of fancy gear, but you do have to be in the right place at the right time. To make matters even more tricky, you only have a handful of opportunities each year to even attempt a moon shot. Getting a picture is just the beginning, though. If you want to make your shot stand out, it helps to follow these simple Lightroom moon editing tips.

moon editing tips
Nikon D500, Nikon 70-200mm f2.8, 200mm, 1/200 second, f/4.8, ISO 640.

Shoot in RAW

The benefits of RAW over lossy formats like JPG are well documented. While there are certainly times where JPG is useful, RAW is essential when taking shots of the moon. You need all the editing leeway you can get to adjust colors, exposure, and other parameters.

For example, the photo below might not look like much, but it’s fairly typical of the types of moon shots most people would get with some basic camera gear. I shot this with a crop-sensor camera, which is much more common than expensive full-frame models. I also only zoomed to 200mm, and a lot of kit zoom lenses can easily reach this far.

moon editing tips
This is straight out the camera with no postprocessing applied. Nikon D500, Nikon 70-200mm f2.8, 200mm, 1/200 second, f/5.6, ISO 720.

At first glance, it probably looks like there’s not much that I can do here. The moon is overexposed and a little blurry. It’s way too small, and the power lines cut right through the frame. Also, the sky has a weird blue tint to it that’s a bit unnatural.

However, hope is not lost! Thanks to the power of RAW files, and a little bit of editing prowess in Lightroom, this photo can be turned into a frame-worthy image.

Crop

Back in the early days of digital photography, people often debated the importance of megapixels. A common, though incorrect perception was that more megapixels equal better photos. While that is not necessarily true, having a higher megapixel count does allow you to have significant room for cropping, which is great when your subject is far away – 239,000 miles, to be exact.

Most cameras today have upwards of 20 megapixels, which gives you a huge amount of freedom to crop your photos. If you don’t have a huge telephoto zoom lens to zoom into individual moon craters, use Lightroom instead. Crop your image until it’s nice and tight with the moon right in the center.

moon editing tips lightroom crop
Go ahead and crop your photo. If you have a modern camera you have plenty of leeway.

In this example, I cropped the image tight enough to get rid of everything but the moon and the sky. Gone are the power lines and trees, and what’s left is just the moon in all its glory. Even cropped in this much, the resulting image is 4.3 megapixels – more than enough to get an 8×10″ print made.

moon editing tips
There’s still a lot of work to do, but cropping already helped a great deal.

White Balance

At this point the picture is better, but still has a long way to go.

The next step is to adjust the white balance. The reason I recommend doing this after you crop your moon photo is that it helps you focus on just the important part of the image. If you adjust the white balance before cropping, you might be focusing your edits on parts of the image that you discard after cropping.

There’s no right or wrong way to adjust the white balance on a moon photo. It all depends on how you want the final image to look and what you want your viewers to feel when they see it. If you want a starting point, here are two options I recommend.

  1. Use the Daylight preset
  2. Use the Eyedropper and click on the moon.
moon editing tips white balance

Both of these produce vastly different results. You can also play around with the sliders until you get a look that you like. One thing to remember is that the moon itself produces no light. It’s just a ball of rock falling through the sky. The light you see is sunlight reflecting off the surface, which is why some people prefer to use a white balance suited for sunlight. The choice is yours, though, and you can set the white balance however you want.

Another option is to combine the best of both worlds. Click the eyedropper tool on the moon, but then use the Brush tool to change the white balance of the moon. This will give you rich, deep blues for the sky but a yellow tint for the moon. However, this can be a little tricky. If not done right, you will see a weird color halo around the moon. So just make sure to use the Brush tool as precisely as possible.

moon editing tips
You can use the Brush tool to change the white balance of the moon, but not the rest of the image if you choose.

Exposure adjustments

Nailing the exposure when shooting the moon is tricky. It’s a giant bright ball against a dark sky, which means a lot of the conventional rules don’t apply. I usually prefer to under-expose the moon and then adjust it in Lightroom. That way you preserve your highlights, but even if your picture is a little overexposed you can still salvage it if you shoot in RAW.

In this example, my shot is overexposed by about one stop. To fix it, I entered a -0.75 value in the Exposure slider in the Basic panel. This darkens everything: the moon and the sky. If you want the sky to stay the same level of brightness but just adjust the moon, use the Highlights slider. Drag it left to lower the exposure of the brightest portions of your image – in this case, the moon.

moon editing tips
Raise or lowering the exposure in Lightroom to get just the right appearance.

Adjusting the exposure isn’t one of the most mind-blowing moon editing tips, but it’s an essential step in the process of getting your final shot to look good.

Texture and Sharpening

When you take a picture of the moon, you have to contend with all sorts of variables that can lead to a soft or fuzzy appearance. From earth, we see the moon through miles of atmosphere, which often contains dust and other particles. Your lens might not be tack-sharp either, especially if you got your zoom lens as part of a camera kit. Lightroom can help fix these issues with a few simple sliders.

Normally, I would recommend starting with the Sharpening slider, but not when shooting the moon. In this case, you want to bring out the moon’s texture and surface details, so the texture slider is a great place to start. You can find it at the bottom of the Basic panel. Alternatively, you can use the Brush tool to adjust the texture if you want a little more precision in your editing.

moon editing tips
Raising the texture slider makes the surface look clear and crisp. I used a value of +80 which is a bit extreme, but I wanted to illustrate the impact of the Texture slider.

The Sharpening slider is great for fine-tuning your image after adjusting the texture. However, I do not recommend using the Clarity slider. That will result in a false, unnatural look with moon shots and can show some unwanted noise in the sky as well.

Final touches

At this point, you have several options to polish your image. While you can use any number of editing tools, some that I recommend trying are:

  • Adding a vignette
  • Use the Brush tool to reduce noise in the sky
  • Adjust the tone curve to have a very slight S-shape
  • Raise and lower the blue saturation
  • Convert your picture to Black and White. Click “Black and White” in the top-right corner of the Basic panel
moon editing tips
Final moon shot. I added a vignette and brushed some noise reduction in the sky.

When it comes to moon editing tips, the sky is quite literally the limit. These should be enough to get you started, but I recommend spending time just experimenting with some of the sliders in Lightroom to see what you can do.

moon editing tips
Nikon D7100, 200mm, f/8, 1/180 second, ISO 640. I used the editing tips in this article to process this shot.

What about you? DO you have any other moon editing tips you’d like to share? Do you have any favorite shots of the moon? Share your favorites in the comments below!

The post Lightroom Moon Editing Tips for Awesome Moon Photos appeared first on Digital Photography School. It was authored by Simon Ringsmuth.


Digital Photography School

 
Comments Off on Lightroom Moon Editing Tips for Awesome Moon Photos

Posted in Photography


How to Use Radial Composition in Photography to Create Awesome Images!

29 Feb

The post How to Use Radial Composition in Photography to Create Awesome Images! appeared first on Digital Photography School. It was authored by Megan Kennedy.

how-to-use-radial-composition-in-photography

Radial composition (also known as radial balance) is a tool used to influence balance and impact within a photograph. In this article, we’ll look at some of the in’s and out’s of radial composition in photography.

Image: f/2.8 1/1000 ISO 500

f/2.8 1/1000 ISO 500

What is radial composition?

The term radius refers to the distance between the center of a circle and its outer edge. Therefore, radial composition means imagery that radiates outward from a particular point.

One common example of this is the wheel, with spokes radiating away from the central hub.

Another example would be flowers, with petals fanning out from the flower head.

radial composition diagram radius

By using radially orientated lines, shapes and forms, the eye is attracted to a central point within an image, creating emphasis. In this way, radial composition can appeal to our sense of momentum, generating visual movement. Some radial compositions even trick the eye into perceiving actual movement within in a fixed image.

In addition, lines that diverge into a central point also cultivate a greater sense of depth within a photograph. However, keep in mind that not all radial compositions need to be constructed of circles!

In the right context, you can use rectangles, triangles, waves, lines, spirals, or other forms to cultivate radial composition.

radial composition diagram

The history of radial composition

Because of its visual energy, radial compositions have been an enduring presence in visual art and culture. For example, ancient petroglyphs carved into rocks depict spirals and labyrinths as well as lines radiating out from a central focal point.

Rich with symbolism and sacred meaning, the mandala features in numerous religions and beliefs. In Greek mythology, the Sun god Helios was often depicted with a crown of radiating lines. These lines were understood to indicate radiant light, signifying the rays of the sun.

During the Renaissance, radial composition was used to emphasize important figures within a scene. In Assumption of the Virgin by Titian, subjects are seen to radiate away from the main figure (Mary) and a circle of radiant light frames her upper body. In Raphael’s School of Athens, famous philosophers are emphasized by the radial properties of the surrounding architecture.

radial composition smashed glass

f/4.0 1/640 ISO 320

Modern art

Inevitably, radial composition has been a strong compositional feature in modern visual art. A famous example is Kandinsky’s circle paintings that radiate pulses of color. Dada artist Marcel Duchamp’s Bicycle Wheel also takes advantage of the radial structure of the wheel to evoke both a sense of motion and stasis.

In photography, there are countless variations on the use of radial composition. Taken in 1920, Edward Steichen’s Isadora Duncan at the Portal of the Parthenon makes use of radial composition to emphasize the subject within the ancient Parthenon. In Henri Cartier-Bresson’s Children Playing in Ruins, the child subjects are framed by a hole in a wall within the ruins of a city.

How to Use Radial Composition in Photography to Create Awesome Images!

How to cultivate radial compositions

Radial composition relates to visual elements that expand from or center around a central point in an image. Eyes, flowers, snail shells, doorways, fireworks, tree rings…there is an abundance of opportunities to capture radial subject matter.

Fluid radial elements create a harmonious flow throughout the image, whereas sharp, erratic lines generate a scene of energetic movement.

Archways, staircases, reflections, plants…you can find radial features in all genres of photography. You can even create radial imagery through camera movement or abstraction.

radial composition camera tossing2 seconds f/4.0 ISO 100

You can also use radial composition as a tool to emphasize a given subject. Framing an aircraft aligned with the halo of the sun’s rays, or photographing a portrait with the sitter positioned within a window or door frame can seem easy enough. However, incorporating simple radial elements into your composition can add much more depth and impact to your image.

Image: f/6.3 1/400 ISO 100

f/6.3 1/400 ISO 100

Conclusion

From landscapes to architecture and everything in between, radial composition can add impact and depth to your photography.

Keeping an eye out for radial compositional opportunities can lead to engaging material that guides the viewer’s eye around the image more effectively.

Do you make use of radial composition? Share your images in the comments below!

The post How to Use Radial Composition in Photography to Create Awesome Images! appeared first on Digital Photography School. It was authored by Megan Kennedy.


Digital Photography School

 
Comments Off on How to Use Radial Composition in Photography to Create Awesome Images!

Posted in Photography


How to Achieve Awesome Black and White Photos with Digital Filters

06 Dec

The post How to Achieve Awesome Black and White Photos with Digital Filters appeared first on Digital Photography School. It was authored by Adam Welch.

black-and-white-digital-filters-photography

When we think about black and white photographs, we generally associate them with an absence of color.

This is certainly not the case.

Like all photographs, black and white images are made from light, and light consists of innumerable wavelengths that produce the colors we see with our eyes. With black and white photography, we might not see the saturation of colors the same way, but the luminance values of these colors remain the same whether we view them in color or black and white.

This is why it’s so important to shoot digital black and white photos in RAW mode so that we can later manipulate these intact luminance values to control the contrasts within our digitally-converted black and white photos.

Black-and-White-digital-filters

All of this is based on the use of physical “color” lens filters, which filter out different wavelengths of light to produce varying contrast effects in black and white photography.

A red filter produces dark, dramatic skies in landscape photos while orange filters can radically reduce the appearance of freckles and other skin blemishes in your portraits.

Of course, this means carrying a set of filters with you constantly and also compensating for the slight reduction in light with adjustments to your exposures.

Black-and-White-digital-filters

But what if I told you that your DSLR or MDC (mirrorless digital camera) most likely has all of the color filters you will need for outstanding black and white work right at your fingertips?

I know, I was initially just as surprised as you are. Read on.

Black and white digital filters

Real black and white color filters work to filter out other wavelengths of light that don’t fall into the color spectrum of the filter. This means red filters allow red wavelengths to pass, blue allows blue, etc.

The cool thing is, many major camera manufacturers have seen fit to include digital amalgamations of these color filters. They could very well be slightly buried in your camera’s settings, but Canon, Nikon, Olympus, and Panasonic all offer models which sport built-in black and white color filters.

As always, your camera user manual is your best friend. However, you may often find these filter options (if you have them) in the monochrome settings of your digital camera. In our example, I’ll be using a Canon 5D MKIII.

Black-and-White-digital-filters

I’m about to say something not usually encountered when it comes to digital photography these days – when using these digital black and white filters, it can be best to shoot JPEG…not RAW.

Sure, you’re going to lose some post-processing leverage, but seeing that you can see the effects of your filter choices and you likely intend to end up with a black and white photo anyway, there’s not much reason to save the color information with a RAW file.

The wonderful thing about digital black and white filters is that you can enjoy real-time feedback of the filter effects.

Which filter to use?

We’ve touched on a few of the circumstances where color black and white filters are best suited. In most cases, your digital camera will have a set of digital color filters from which to choose: red, yellow, orange, green and blue. These options, however, will vary. For instance, my 5D MKIII has no blue filter option.

Have a look at some examples and each of these below. I’ve used the same scene to show the varying effects of each filter. I’ve also listed a few quick scenarios that may help you choose a particular filter setting.

Here’s the original color photo for reference:

Image: Color image with no in-camera black and white filters applied.

Color image with no in-camera black and white filters applied.

Red Filter

This filter is a great way to pump in instant drama to most black and white landscape photos.

Black-and-White-digital-filters

Notice the immediate darkening of the blue sky with the red filter

The red filter drastically reduces the transmission of blue wavelengths, thus darkening blue skies and making clouds pop. Some scenes can take on an almost infrared appearance.

Orange Filter

Taking it down a notch from the heavily-apparent effects of the red filter, the orange filter produce similar, yet subdued, contrasts to its red cousin.

How to Achieve Awesome Black and White Photos with Digital Filters

Orange color filters are great “general purpose filters” for adding in contrast to your black and white photos. They darken blue skies and help to bring out the appearance of clouds.

For portraits, they work great for reducing skin blemishes like moles and freckles.

Orange filters are also great for reducing atmospheric haze and fog.

Yellow Filter

A yellow color filter produces effects even less “in your face” than the orange filter. A yellow filter is a good option for bringing out the contrasts of foliage and can also be a good choice for a general black and white photography filter when the orange filter is a bit too harsh.

How to Achieve Awesome Black and White Photos with Digital Filters

The next two filters are less useful for most shooters but still bear mentioning. Well, not less useful, but perhaps not found as commonly in black and white photography as the other color filters I’ve mentioned.

Green Filter

Of course, this filter allows the transmission of green light. This makes it a good choice for flower and foliage photography as it helps to add contrast between the often green-colored stems and leaves of the plants. All while providing separation from the different-colored flowers and blossoms.

How to Achieve Awesome Black and White Photos with Digital Filters

Green filters can also brighten blue skies but not as much as the last filter we’re about to discuss.

Final thoughts on in-camera digital filters…

Digital photography has made many things easier and more accessible for photographers. Even more fortunate, many of the same tried-and-true technical and optical principles still apply to our digital cameras. Built-in digital black and white color filters are just one of the many benefits of our brave new digital age.

Black-and-White-digital-filters

Many popular camera manufacturers have included digital black and white color filters with their digital camera offerings, so check your particular model.

Black and white color filters allow you to add instant strength and contrast to your black and white photos.

Depending on your particular scene or subject, you can produce amazingly powerful black and whites before you ever download them from your camera. Color black and white filters have long been a standby of serious photographers, and it’s great to see them still holding their own, albeit in a more modern, digital incarnation.

So go out and try these black and white digital filters, and share your photos with us in the comments section!

The post How to Achieve Awesome Black and White Photos with Digital Filters appeared first on Digital Photography School. It was authored by Adam Welch.


Digital Photography School

 
Comments Off on How to Achieve Awesome Black and White Photos with Digital Filters

Posted in Photography


Create Awesome Reflections in Photoshop with Ease (Step-by-Step Guide)

18 Nov

The post Create Awesome Reflections in Photoshop with Ease (Step-by-Step Guide) appeared first on Digital Photography School. It was authored by Kevin Landwer-Johan.

reflections-in-photoshop

Attractive reflections can be challenging to capture naturally in your photographs. Sometimes it’s easier to create reflections in Photoshop. You will have more control over how the photo looks and you can avoid the difficulties that photographing reflections can bring.

Often you can’t find just the right place to stand to catch the best reflection. Sometimes the light is wrong and a natural reflection will look too dark. Choosing to make reflections in Photoshop gives you much more flexibility to get the look you want.

It’s really not that difficult to do. In this article, I’ll walk you through a series of steps you can use to make a mirror image in Photoshop.

Reflections in Photoshop

© Kevin Landwer-Johan

Step 1: Selecting your photo

When making reflections in Photoshop, it’s important to start out by choosing a photo that’s suitable. Not every photo will look good or natural when you make a mirror image of it.

When you’re looking for a photo to use with this technique, think about how it will look. You ideally want to use a photo where the main subject has a distinct line along where the reflection will appear.

Open your photo in Photoshop. You may need to crop the bottom of the photo to create a clean line where the reflection can be placed.

Step 2: Adjust the canvas size

You need to adjust the canvas size to make room for the reflection you will create.

Go to the top menu and select Image->Canvas Size. In the pop-up that appears in the box next to the Height option, click the drop-down and choose Percent. Make the Height percentage 200.

Click the top center of the Anchor options grid. This will force the new canvas space you are creating to appear underneath your photo.

Click OK.

Create Awesome Reflections in Photoshop with Ease (Step-by-Step Guide)

Step 3: Duplicate the layer

In the Layers panel, unlock the base layer. To do this, click on the padlock icon. Now you can duplicate this layer by going to the top menu and selecting Layer->New->Layer Via Copy.

Convert both the layers to Smart Objects by right-clicking on each of them and selecting Convert To Smart Object. Now rename both layers to make it easier to keep track of which one is which.

Reflections in Photoshop

Step 4: Position the new layer

Drag the new layer to the space you created under your main image.

Now you need to flip the lower layer. This will be your reflection. From the top menu select Edit->Transform->Flip Vertical and press Enter.

Reflections in Photoshop

Step 5: Add blur to the reflection layer

With your reflection layer selected, from the top menu select Filter->Blur->Motion Blur. Set the Angle to 90-degrees and use the Distance slider to add a suitable amount of blur. How much you add is up to you and will vary depending on the resolution of the photo you are working with. In my example, I have set it to 30.

You may need to reposition your reflection layer by nudging it up slightly if a gap has appeared between your two layers.

Create Awesome Reflections in Photoshop with Ease (Step-by-Step Guide)

Step 6: Make a new file

Duplicate your file by going to the top menu and selecting Image->Duplicate. Crop the image so you are left only with the reflection.

Delete one layer so you are left with a blank canvas. Resize the canvas to 30%, otherwise, it will be too big to manage easily. Select the paint bucket and fill the image with black.

This file you have created will be added to the reflection layer to make it look more realistic like water.

Reflections in Photoshop

Step 7: Add blur and noise for texture

From the top menu select Filter->Noise->Add Noise. Make the amount 350% and check the boxes Uniform and Monochromatic. Click OK.

Now add some blur. Select Filter->Blur->Gaussian Blur from the top menu and set the Radius to 1.5 pixels and click OK.

Create Awesome Reflections in Photoshop with Ease (Step-by-Step Guide)

Step 8: Emboss your texture

In the Channels panel click on the Red channel.

Next, go to the top menu again and select Filter->Stylize->Emboss. Set the Angle to 90, the Height to 5, and the Amount to 500. Of course, you can experiment with any of these amounts. Click OK.

Now select the Green channel and Filter->Stylize->Emboss from the top menu. Set the Angle to 0, the Height to 5, and the Amount to 500. Click OK.

Turn on all the channels by clicking RGB. Go back to your Layers Panel, right-click the layer and Convert To Smart Object.

Create Awesome Reflections in Photoshop with Ease (Step-by-Step Guide)

Step 9: Stretch the perspective of the distortion

Select Edit->Free Transform from the top menu. Right-click inside the image and select Perspective. Make sure you are zoomed out a long way so your image is small in the center of your monitor.

Click on one of the bottom corners of the frame and drag it out horizontally. This will stretch and distort the lower part of the texture. Don’t worry if it looks weird, once you incorporate it into your reflection it will make it look more natural.

Zoom back to 100%. Save this image as a .PSD where you can find it easily and name it something recognizable.

Create Awesome Reflections in Photoshop with Ease (Step-by-Step Guide)

Step 10: Make an adjustment layer on your main image

Click on the reflection layer on your main image and duplicate it by pressing Ctrl (Cmd)+j on your keyboard. Name it “Reflection Copy.” With the new layer selected (which should be above the other reflection layer), from the top menu, choose Filter->Distort->Displace. Set the vertical and horizontal scales to about 10.

You may need to alter these if it does not look good, depending on your image size and resolution. Click OK.

From the window that opens, find and select the distortion image you just created and saved. This will use the texture image as a displacement layer. If the ripple effect is too large or too small, undo that step. Redo the step again, but this time choose a higher or lower number for the displacement scale.

Experiment with this until you are satisfied with the way it looks. It’s entirely up to your taste.

Reflections in Photoshop

Step 11: Adjust the reflection

With your Reflection Copy layer selected, click on the layer mask icon, which is at the bottom of the Layers Panel. Select the Brush tool with the color set to Black and a large brush size and Hardness of 0%.

From the options panel above your image, set the brush opacity to 20%. Select your layer mask, not the main reflection layer. Paint from side to side over the top half of your reflection layer, where it meets the top layer until it looks natural.

What you are doing is erasing 20% of the distortion each time you paint. You want to make the reflection look smoother in what appears to be the distance.

Reflections in Photoshop

Step 12: Merge the reflection layers

Select both the reflection layers in the Layers Panel. Right-click on one of them and select Merge Layers. Make sure your main image is not selected. You should now have one reflection layer and your main layer.

Step 13: Darken the reflection

With the reflection layer selected, go to your top menu and choose Image->Adjustments->Curves. Click in the middle of the curves adjustment line and drag it down to darken the reflection. Adjust it until it looks natural. A reflection in water is typically darker than the scene it’s reflecting.

Reflections in Photoshop

Conclusion

Follow through these steps a few times and experiment with the variables. There is no right or wrong way to do this. Your personal preference and the photos you choose will determine the outcome.

You will find reflections in Photoshop look better on some images than on others.

Try out this technique for making reflections in Photoshop, and share your images with us in the comments below!

The post Create Awesome Reflections in Photoshop with Ease (Step-by-Step Guide) appeared first on Digital Photography School. It was authored by Kevin Landwer-Johan.


Digital Photography School

 
Comments Off on Create Awesome Reflections in Photoshop with Ease (Step-by-Step Guide)

Posted in Photography


10 Awesome Photoshop CC Tricks You Wish You Knew

27 Oct

The post 10 Awesome Photoshop CC Tricks You Wish You Knew appeared first on Digital Photography School. It was authored by Kevin Landwer-Johan.

photoshop-cc-tricks

All photographers want their photos to look fantastic and part of the path to great images is the post-processing. You can do so much with the right tools if you know how to use them well. Photoshop is such an amazing tool for photographers. The more you use it the more you find that it can do. The more you realize you have to study to be able to make the most of it. In this article, I will share with you ten cool Photoshop CC tricks I love using when I work on my photos in Adobe Photoshop.

1. Photoshop search

10 Awesome Photoshop CC Tricks You Wish You Knew

Photoshop articles like this or video tutorials often suggest tools to use that you may not be familiar with. It’s easy enough to remember the tool but forget its location within photoshop. This is where the Photoshop search comes in helpful.

Up in the top right of the main photoshop window, you will find a search icon. Click on it to search not only to find that tool you want but other things too. You can also search for tutorials, Lightroom and Adobe stock images.

2. Manage keyboard shortcuts

10 Awesome Photoshop CC Tricks You Wish You Knew

When working with any complicated software, it pays to learn at least some of the keyboard shortcuts. Knowing the shortcuts for the tools you use the most will help speed up your workflow.

In photoshop you have the capacity to customize your keyboard shortcuts. It’s easy enough to do. If you’ve been using photoshop for a while you will know which tools you use often and will want to know the shortcuts.

To find them, all you need to do is go to the top menu and select Edit->Keyboard Shortcuts. This opens up a window where you’ll see all the information you need to learn the shortcuts and change them.

Most keys and many combinations have shortcuts assigned. These can be customized to suit your working style.

One key that has no default shortcut assigned is the ‘n’ key. You can assign your favorite tool to it without disrupting any of the other shortcut keys.

3. Temporary tool select

Another helpful trick that aids smooth workflow is being able to temporarily select a tool.

Say you’re working on an image with the Burn tool and you see a small blemish you want to remove with the Clone tool. You can simply press and hold the ‘s’ key to select the Clone tool. Once you’ve removed the blemish, release the ‘s’ key and your cursor will revert back to the Burn tool.

This can be used with most keyboard shortcuts.

4. Open the same image in two windows

Photoshop-CC-tricks

Opening the same image document in two windows gives you some great flexibility. You can have one instance of the file zoomed and be working on the details and the other showing the entire frame. This lets you see the changes you make in the detailed view as they happen in the full-frame window also.

To open two image documents, go to ‘Window’ in the top menu and select Arrange->New Window for [the file name of the opened file]. Click on this file, and a new instance of the file will open. Now you can select Window->Arrange and select the display option you prefer. Here I have selected to show 2-up Vertical.

This trick is very cool if you are working with two or more monitors.

5. Creating selections of Highlights and Shadows

Photoshop-CC-tricks

Selecting only the highlights or dark areas of an image can give you more control when making certain adjustments.

To do this, choose the type of adjustment you want to make. For this example, I have added a Curve Adjustment Layer. This is from the menu at the bottom of the Layers panel. Once I have the new adjustment layer, I then delete the layer mask.

Here’s where the magic happens. Press Ctrl+Alt+2 (Cmd+Opt+2 on Mac) and all the bright pixels will be selected. When you click on the Curves icon in the Layers panel, you will not only be making adjustments to the brightest pixels. In the Properties panel of the mask, you can choose to invert the selection and work on the darker pixels.

6. Pen tool tips

Photoshop-CC-tricks

Learning to use the Pen tool in photoshop is frustrating for many people. At first, it can be difficult to make the line go where you want it to. Here are some tweaks you can make so your learning curve is not so steep.

When you have the Pen tool selected, click the Cog icon on the top menu. Here you can alter the settings for how the line looks and responds. You can determine the weight and color of the line. This can be helpful in allowing you to see where you’re drawing more easily.

Probably the most helpful aspect of the Pen tool settings is the Rubber Band checkbox. With this setting active, you can see where your line is as you draw. This allows you to see where your line will be in real-time. Without the Rubber Band box checked, you will not see where your line will be drawn until you click on a point.

Two more helpful tips with the Pen tool are:

  1. Use the spacebar as you click. Hold the spacebar to allow you to place the point precisely where you want it to be.
  2. Once your line is complete, use Alt+Click to modify the handles on a point so you can alter the curve of the line.

7. Select colors from any application

10 Awesome Photoshop CC Tricks You Wish You Knew

Matching a color you want to use in photoshop with a color in another program or app is easy and can be very useful. Pulling the same color and applying it to text, a brush or fill means you can precisely color match what you are working on.

Shrink your photoshop window and place it over the area you want to select the color from. Simply select the tool for how you want to apply the color. In my example, I want to fill the background of my logo with a specific color from a photo on my website. Click and hold the Alt key as you drag your mouse to hover over the color you want to match.

When you release your mouse, Photoshop will use it as the selected foreground color. Now you can apply it as you wish.

8. Control Color Luminosity

Photoshop-CC-tricks

By creating a new black and white Adjustment Layer and setting the Blend mode to Luminosity, you can darken or brighten each color in your image. Simple drag the slider for each color you want to adjust until you are satisfied with its luminosity.

9. Transparency using ‘Blend If’

10 Awesome Photoshop CC Tricks You Wish You Knew

The ‘Blend If’ mode is a powerful tool when you know how to use it. Selecting and manipulating layers using the Blend If functions allow you to alter the luminosity or color channel of a layer.

In this example, I wanted to eliminate the black background from my logo and replace it with an image. The image is on the layer underneath my logo. Bring up the Layer Style panel by double-clicking on the layer you want to work on. With the Blend If mode set to Gray, use the slider below it to remove the darker or lighter pixels. In this example, I have moved the slider on the left towards the right to take out the black background of the logo.

Making the altered layer a Smart Object will make those hidden pixels transparent for even more flexibility.

10. Non-destructive Spot Healing Brush

10 Awesome Photoshop CC Tricks You Wish You Knew

Adding a new layer above the image you are working on allows you to work non-destructively with the Spot Healing Brush. Often with highly textured images, the Spot Healing Brush provides an unsatisfactory result. Adding an extra blank layer gives you more flexibility.

The key to making this work is to ensure you check the Sample All Layers checkbox in the top menu bar.

Conclusion

I hope there are a few new tips and tricks on this list of Photoshop CC tricks that you can find helpful. As with all things Photoshop, everyone works differently. There are also many ways to reach the same end result.

If you know of some other cool Photoshop CC tips or tricks let us know what they are in the comments below.

The post 10 Awesome Photoshop CC Tricks You Wish You Knew appeared first on Digital Photography School. It was authored by Kevin Landwer-Johan.


Digital Photography School

 
Comments Off on 10 Awesome Photoshop CC Tricks You Wish You Knew

Posted in Photography


A Step-by-Step Guide to Using Light in Flower Photography for Awesome Photos

23 Oct

The post A Step-by-Step Guide to Using Light in Flower Photography for Awesome Photos appeared first on Digital Photography School. It was authored by Simon Ringsmuth.

using-light-in-flower-photography

Flowers are brilliant subjects for photography. They are bright, colorful, and are stay perfectly still for you as long as the wind is calm. You don’t need any special equipment or lenses to take great photos of flowers either. You can get great photos with just a mobile phone or a basic DSLR with a kit lens. If you really want to elevate your flower photography to the next level, you need to pay very close attention to one thing – the sun – because the light in flower photography is everything.

Image: 85mm, f/2.8, 1/3000 second, ISO 2200

85mm, f/2.8, 1/3000 second, ISO 2200

Of course, there are other sources of light besides the sun, but this is the most obvious and easily-accessible one when considering flower photography. Unfortunately, you can’t position the sun exactly where you want it, but you can position yourself to make the best use of it. You can also take note of the lighting conditions when you go out to shoot flower pictures. Understanding how the sunlight, and your angle of view, affect the finished product is key to getting great shots.

Don’t let anyone tell you that if you want to get good pictures of flowers you have to do it in certain conditions like a cloudy day or the evening. In truth, you can get great flower photos almost any time as long as you pay attention to the sun and the shot you are trying to get. Let’s take a look at some different scenarios and see how they affect flower photography.

Time of day

The time at which you shoot, such as early morning or mid-afternoon, can have a huge impact on your flower photos. In addition to altering the amount of light available, shooting in the morning or evening changes the type of light. It also changes the angle at which it hits your flowers and the surrounding area.

I shot the picture below just as the sun was coming up. The blurry triad in the background is a street lamp that had not yet turned off. It added a nice background touch to the picture. This would have looked entirely different had I taken the picture a few hours later.

Image: 50mm, f/1.8, 1/180 second, ISO 400.

50mm, f/1.8, 1/180 second, ISO 400.

If you want your flowers gently illuminated for a soft, almost hazy appearance, then early morning or late evening is going to work great. However, if you want your flowers bright, sharp, and punchy, then harsh overhead lighting is ideal.

It all depends on the type of picture you want to take and knowing how the lighting conditions affect the final image.

using-light-in-flower-photography

50mm, f/2.8, 1/1500 second, ISO 200

A monarch butterfly joined me as I was taking the above picture in the afternoon. The bright overhead sun made the reds, yellows, and greens bright and crisp, which doesn’t happen in the early morning or late in the day.

The sun was directly overhead when I took the picture below. This caused each of the colors in this picture to shine. It turned out I wasn’t the only one interested in this particular magnolia flower.

using-light-in-flower-photography

50mm, f/1.8, 1/6400 second, ISO 200

You can get great pictures of flowers at any time of the day. Just make sure you know where the sun is and how it will impact your pictures. Armed with that knowledge, you’ll be able to make better choices about the pictures you are going for.

Types of light in flower photography

Backlighting vs. front lighting

Backlight is when the main source of light comes from behind your subject. This can lead to some creative scenarios, especially when used to shoot subjects with rim lighting. Conversely, front light is when the main source of light comes from the front of your subject, usually behind the photographer.

Either one of these types of lighting works great for flower photography. However, you need to understand how backlighting and front lighting affect your flower pictures, so you know which one to use. I photographed the flower below with front lighting. The sun was behind me as I took the picture.

using-light-in-flower-photography

85mm, f/1.8, 1/3000 second, ISO 100

Front lighting makes the purples really stand out, especially against the background. There are also some prominent shadows along the left-hand side and at the base. These are neither good nor bad, just a result of using front lighting.

A similar flower, shot in the same location a few minutes later, reveals a much different image when employing backlighting.

Image: 85mm, f/2.8, 1/500 second, ISO 560

85mm, f/2.8, 1/500 second, ISO 560

Notice how the petals almost look like they are glowing as the sun shines through them. The shadows are more diffused, which is also due to the late hour of the day at which this was shot. Both pictures are good but in different ways. If you traditionally shoot flowers with front lighting, try doing some backlit shots and see if you like the results.

Image: Another backlit flower, where the shining sun made the yellow flower appear bright and radian...

Another backlit flower, where the shining sun made the yellow flower appear bright and radiant.

Sunny vs. overcast

There’s a common perception among photographers that cloudy, overcast skies make for some of the best lighting conditions. While I certainly enjoy shooting on days like that, the truth is, you can make any lighting condition work for flower photography. You just need to know how the light will affect your images.

One of my favorite flower photos I have ever taken was in the middle of the day just after a bit of rain. It’s a few coneflowers low to the ground. The overcast sky led to even lighting across the entire frame and rich, deep colors. There are no harsh shadows, no translucent petals, and no bright spots in the background. Instead, the frame is a mix of saturated greens, purples, and reds that I really like.

using-light-in-flower-photography

50mm, f/1.8, 1/640 second, ISO 200

Another example of this is the following picture, which I took in the morning after a night of thunderstorms. The clouds overhead dispersed the sunlight into all directions, which gave me an evenly-lit scene that worked great for this particular show.

Image: 85mm, f/1.8, 1/200 second, ISO 125

85mm, f/1.8, 1/200 second, ISO 125

However, these two pictures don’t mean you can’t take great flower pictures in bright sunlight. Far from it! Just know that flower images in bright sunlight will look much different than their cloudy-skied counterparts. The picture below is similar to the one above, but I took it on a bright sunny day.

using-light-in-flower-photography

50mm, f/1.8, 1/8000 second, ISO 360

This picture is neither better nor worse than the one above it, just different. Bright sunlight makes the red petals leap out of the frame. The rich blue sky and deep shadows of the grove of trees add a sense of space and depth that is missing in this picture’s counterpart.

Similarly, I photographed the purple magnolia flower below on a bright sunny day, but with just a bit of cloud cover. It’s kind of a cross between sunny and overcast and yields an interesting picture.

using-light-in-flower-photography

85mm, f/1.8, 1/200 second, ISO 140

The sun was off to the left, making the white inside of the flower petal shine out and compete with the purple in the foreground for the viewer’s attention.

I show all these examples as an illustration that you can get great shots of flowers in a variety of lighting conditions. The key is to use the sunlight (however it happens to be at the moment) to your advantage by knowing how it will affect your flower photos.

A comparison

If you can’t control the light in your flower photography, you can still control the angle from which you shoot your pictures. This has an amazing impact on how your flower photos turn out.

I shot the three photos below on a bright sunny day in about three minutes. The same flower is in each shot, and I used a 50mm lens with an f/2.8 aperture. The only difference is the angle from which I took each photo but that one simple thing changes each picture a great deal.

In this first picture, the flower is front-lit, meaning the sun was behind me and almost directly overhead as I took the photo. Notice the bright orange colors and stark shadows, which create a sense of depth and isolation. The background is shrouded in shadow because of the overhead light and the angle from which I took the picture. I see a lot of pictures similar to this online, especially on social media sites.

Image: 50mm, f/2.8, 1/2000 second, ISO 100

50mm, f/2.8, 1/2000 second, ISO 100

For this next photo, I stood in the exact opposite spot, looking up from below into the sun. Notice how the petals have become brilliantly translucent, and the greenery on the left is bursting with blurry bokeh.

It’s an entirely different version of the same flower and didn’t require anything on my part other than a simple perspective change.

Unlike the first picture, I don’t often see flower shots like this on social media. This is most likely because it’s just not something a lot of people think about doing.

Image: 50mm, f/2.8, 1/2000 second, ISO 100

50mm, f/2.8, 1/2000 second, ISO 100

I photographed this final image from the side, and what’s interesting here isn’t necessarily the flower but the background. From this angle, the background was entirely green, making the oranges and reds of the flower scream out by comparison. The lighting is similar to the first image, but this one is a lot more interesting to me because it’s a mix of colors instead of a flower against a mostly black background.

using-light-in-flower-photography

50mm, f/2.8, 1/2000 second, ISO 100

I really want to stress that none of the pictures in this tutorial are objectively better than any others. What I hope to have illustrated is that paying attention to the light in flower photography, as well as considering alternative viewpoints from which to shoot, can dramatically impact your flower photos.

Image: 23mm, f/5.6, 1/160 second, ISO 200. I had to hold my camera high above my head and fire off a...

23mm, f/5.6, 1/160 second, ISO 200. I had to hold my camera high above my head and fire off a series of shots hoping one of them would turn out. It did, and I’m so glad I didn’t just shoot a single sunflower from my normal eye level.

If you enjoy taking pictures of flowers, hopefully these images will give you some new ideas to consider. And if you haven’t spent much time out in nature capturing the beauty of blossoms like this, I hope you can find some time to go out, look at the lighting in flower photography and give it a try. You might be surprised at what you can get!

I’d love to see some of your shots – please share them with us in the comments below.

The post A Step-by-Step Guide to Using Light in Flower Photography for Awesome Photos appeared first on Digital Photography School. It was authored by Simon Ringsmuth.


Digital Photography School

 
Comments Off on A Step-by-Step Guide to Using Light in Flower Photography for Awesome Photos

Posted in Photography


Try Out These Awesome Photography Printing Mediums for Fantastic-Looking Photos

14 Oct

The post Try Out These Awesome Photography Printing Mediums for Fantastic-Looking Photos appeared first on Digital Photography School. It was authored by Erin Fitzgibbon.

photography-printing-mediums

An awful lot of blog posts focus on the mechanics of the photograph. They discuss composition, shutter speed, aperture, etc.  Other posts talk about post-processing and making an image into a piece of art. Do a search and you’ll find hundreds of articles that show you how to clone, or how to use HDR. There’s a third section to this whole process of photography that so many forget to discuss. The digital age and social media have given us another way to share our art. We post the photograph online-only worrying about how it appears on the screen. We’ve forgotten that part of the beauty of our work is more concrete. We have forgotten how amazing it is to print our work, so this article will look at photography printing mediums.

Photography-Printing-Mediums

Image by andreas160578 from Pixabay

If we do print our work, we tend to choose something standard. We upload our work and look for a cheap frame. It’s done. We don’t think very much about the photography printing mediums we use when printing our work. There’s so much we can do now. The media used to print a photograph is just as important when creating art as the first two stages of the process. We should consider all three as vital to the process.

Let’s consider some of the following photo printing mediums and the effect they can have on your work. The same photograph print on two different types of photo printing mediums can have a totally different look.

Luster photo paper

Luster paper has a slight sheen to it. The paper is similar to the idea of semi-gloss paint. Luster paper is easy to find in standard photo printing locations. The paper will produce beautiful colors, and it’s cost-effective. There is a subtle texture to the paper, and when framed, there’s less glare.

These factors are important when considering the look you want to create. Luster works well for portraits. Quite often family and wedding photographers recommend it to clients.

Glossy photo paper

Glossy used to be the go-to photo paper. Most of the photographs around my parent’s house are printed on glossy paper. Glossy tends to produce colors that are richer than luster. The details are also very sharp. In general, the image feels bright.

Many people don’t like the glossy feel of the paper. The sheen, depending on the angle can make it hard to see the photograph. Glossy also has a tendency to show scratches.

Portrait photograph printed on lustre paper

For family photos like this one, I usually recommend a luster or matte paper.

Matte photo paper

Matte paper has no sheen. The look is flat. That’s not to mean it’s boring. Matte paper can be very beautiful. It tends to create a somewhat softer look. Prints on matte paper tend to age better than those on luster and glossy paper, and the paper doesn’t show fingerprints the way glossy products will. You can also get some very beautiful prints from matte papers.

Uses for these papers

These papers tend to be used for nature photography, portraits, and weddings. Some photographers also use them for art prints. It’s important to consider the effect you want to create.

As an example, I printed the image below on a glossy paper. The fabric of these ribbon skirt has a natural sheen to it. If I had used a paper with no sheen I would have lost this element, and I wanted to represent the skirt as accurately as possible.

A woman's traditional ribbon skirt

If you notice the sheen on the fabric you’ll see why I specifically chose gloss paper for printing.

Textured art paper

I will admit that textured papers are my favorite type to use when printing art photographs. I love the effect the paper creates. My favorite brand is Epson Cold Press Natural, but there are many available. A little experimentation will help you find your favorite.

Epson Cold Press is a textured matte paper that feels similar to watercolor paper. It’s thick and it absorbs a lot of ink. This paper tends to evoke an emotional response from viewers. I know that sounds strange, but I find the colors richer, and they have more depth. As a result, people tend to be drawn to the work. People often ask how the colors in the work are so rich. Good quality paper really helps produce a striking image.

Photography-Printing-Mediums

In the following photograph, you’ll notice the rich black background. Printing on this paper lets me lay down a lot of ink to create an intensity I wouldn’t be able to otherwise produce.

Photography-Printing-Mediums

This still life was shot with a piece of black velvet in the background. The intense black is important to the composition.


Still life photographs on black velvet

Printing on wood

This is a unique process.

You’ll have to look online to find a company that prints right onto the wood. I’ve used Posterjack in the past.

Photography-Printing-Mediums

I’ve used Posterjack to do wood prints.

The effect is interesting. The wood grain will show through your images. It’s a unique look that can elevate the right photograph to new levels. One artist used wood prints quite effectively for an exhibition. The exhibition focused on the destruction of the rainforest for the production of beef. He photographed cattle then used the wood prints to help emphasize his message. In this case, the wood medium added to his exhibition.

While you may not be creating an exhibition for a gallery, the medium could still enhance your photographs. The wood grain works nicely with nature images as well as something with a retro feel to it.

Photography-Printing-Mediums-Rocks and birch bark for a nature photograph

This image works well with the wood grain. Images with limited texture that needs boosting, also work printed on wood.

Acrylic prints

Beautiful rich colors with sharp details work brilliantly on acrylic.

The images will pop and get noticed by anyone who walks into the room. The downfall with acrylic is you have to be very careful – it’s easy to chip the corners on an acrylic print.

Acrylic works very well with images shot at night. The bright lights of a city set against a dark sky can be breathtaking in acrylic.

Night image

This image works so well on acrylic. The glossy nature brings out the intensity of the city lights.

Metal prints

Metal prints, when used with the right image, can create amazing, jaw-dropping images.

Wherever an image has pure white, the silver of the metal will show through.

When used with black and white images, this creates a very unique look. The image also feels very modern. Content like urban landscapes or abstracts of machinery looks striking on this type of media.

Industrial feel to this image

This image looks awesome on metal. The silver works so well and adds depth to the image.

In conclusion

There are loads of photography printing mediums out there for your photographs.  I haven’t even mentioned canvas prints or printing on fabric. Both are pretty awesome options as well.

The reality is, the sky’s the limit.

It’s more important to consider what each medium could do for your work. You should also think about how the medium affects the look of your work. Do you want a retro feel? Maybe you want something muted and understated? Think of a photograph as something with its own unique voice. Let the image, and the message you want to convey, speak to you then consider how you can make the work shine. As I’m sure Yoda told Luke at some point in Starwars, “Choose wisely, have patience, the answer will come to you.”

Do you have any other photography printing mediums tips you’d like to share with us? Do so in the comments!

The post Try Out These Awesome Photography Printing Mediums for Fantastic-Looking Photos appeared first on Digital Photography School. It was authored by Erin Fitzgibbon.


Digital Photography School

 
Comments Off on Try Out These Awesome Photography Printing Mediums for Fantastic-Looking Photos

Posted in Photography