RSS
 

Archive for August, 2016

Canon EOS 5D IV: What you need to know

28 Aug

Canon EOS 5D IV: What you need to know

It’s been more than four years since the launch of the Canon EOS 5D Mark III, and just head of this year’s Photokina trade show in Cologne we finally have a successor: the EOS 5D Mark IV.

While externally similar to the 5D III, and the higher-resolution 5DS/5DS R, the new EOS 5D Mark IV offers some significant internal improvements. We got our hands on a pre-production camera recently, and in this slideshow we’ll be giving you a quick overview of the key features. 

The EOS 5D Mark IV will come in three kits: body only ($ 3499), with the 24-70 IS USM lens ($ 4399) or with the 24-105 IS II USM lens ($ 4599).

Canon EOS 5D IV: What you need to know

The Canon EOS 5D Mark IV offers a roughly 30% increase in pixel count over its predecessor, and sits midway in terms of resolution between the EOS 5D III and the EOS 5DS/R, currently ‘best in class’ at 50MP. Nikon’s current ‘resolution’ flagship, the 36MP D810, offers a few more pixels but practically speaking the difference between 30MP and 36MP is likely to be pretty much academic.

The 5D Mark IV’s native ISO sensitivity span extends a touch higher than that of the EOS 5D III, covering ISO 100-32000. Its extended ISO sensitivity span, however, is identical to that of its predecessor, at 50-102400. Both cameras offer greater nominal low light sensitivity than the Nikon D810, which is capped at ISO 12800 natively, and can be extended to 51200.

Canon EOS 5D IV: What you need to know

New (and currently exclusive) to the EOS 5D IV is what Canon is calling ‘Dual Pixel Raw’. This mode uses the sensor’s Dual Pixel photo sites (more on that below) to effectively create two 30MP files from a single exposure. The resulting file can be adjusted in Canon’s Digital Photo Professional Software to slightly shift the point of critical focus.

The technology behind this feature is complex – it isn’t light field imagery, although the user experience is similar – and we’ll be digging into it more when we receive a fully reviewable camera.

Canon EOS 5D IV: What you need to know

Something old, something new, something borrowed… the EOS 5D Mark IV’s AF system is very closely related to that of the EOS 5D III, which itself inherited the 61-point AF array from the (then) flagship EOS-1D X. New in the EOS 5D IV is the addition of Canon’s iTR (Intelligent Tracking and Recognition) system which incorporates data from a 150,000-pixel metering sensor, to assist subject recognition.

In theory this should make the 5D IV better at identifying and maintaining focus on moving subjects, but from our (admittedly limited) use so far it seems to offer roughly the same performance as the EOS 5DS/R. Which is to say: not bad, but not great. The EOS 5D IV might prove somewhat more useful for fast action photographers than its predecessor, but when it comes to tracking, the Nikon D810 probably still offers the most capable autofocus system in this class. Obviously though, this is something we’ll be testing as soon as possible.

Canon EOS 5D IV: What you need to know

One key area where the EOS 5D IV outshines the D810 is autofocus in live view and video. The Mark IV’s Dual Pixel AF system brings rapid and consistently reliable focus in both modes, and unlike the flagship EOS-1D X II, the 5D IV can offer continuous tracking in live view mode, in addition to the incredible capable movie servo AF during video recording. Based on the time we’ve spent with preproduction Mark IV’s, we are very impressed with just how responsive the Dual Pixel system is.

By comparison, the EOS 5D III’s contrast-detection live view and video AF system is slow, prone to hunting, and cannot offer any kind of continuous focusing. The same applies to the D810, which offers a similarly basic contrast-detection autofocus system in these modes.

Canon EOS 5D IV: What you need to know

As far as handling is concerned, the EOS 5D IV offers a broadly similar experience to its predecessor. This is simple common sense on Canon’s part, but the new camera isn’t just a re-heated version of the same old 5D-series ergonomics. For one thing, the 5D IV features a touch-sensitive, 3.2″ rear screen which, unlike the EOS-1D X II, is tightly incorporated into all key areas of the camera’s feature set. 

From touching to focus in live view and video to quickly tapping to zoom into images after a shoot, the EOS 5D IV’s touchscreen makes a real – and very positive – difference to the camera’s handling compared to both the EOS 5D III and also competitive cameras like the Nikon D810 and Sony a7R II.

Canon EOS 5D IV: What you need to know

In classic Canon style, for all of the brand new features that the EOS 5D IV brings to the table, it inherits a few, too. One of the more welcome additions is an EOS 7D II-style AF area selection button, just below and to the right of to the AF joystick on the rear of the camera. As with the 7D II, this button can be customized to fulfill one of various other functions, depending on the preferences of the photographer.

Canon EOS 5D IV: What you need to know

Hiding inside that comfy grip are dual slots for SD and CompactFlash media. As usual, media can be configured so that when two cards are installed, one acts as overflow storage, backup storage, or can be dedicated to either stills or video. 

That molding line on the EOS 5D Mark II’s pentaprism might look like the camera boasts a built-in flash, but it doesn’t. The very top of the pentaprism is polycarbonate, to accommodate the requirements of built-in WiFi and GPS. The EOS 5D IV is fully weather-sealed, and when paired with one of Canon’s L-series lenses, it should withstand shooting in tough conditions.

Canon EOS 5D IV: What you need to know

There are plenty of holes in the EOS 5D IV, but fortunately they’re physical, not figurative. As well as microphone and headphone monitoring sockets you’ll also find HDMI out, USB 3.0 and a conventional flash sync socket. Just under our hand model’s thumb is the port for a wired remote shutter release.

Speaking of video, the EOS 5D Mark IV becomes only Canon’s third DSLR to offer 4K video capture, in addition to a solid HD video feature set. As we’ve come to expect from 4K-capable DSLRs there is a crop factor at play in 4K video mode, though, and it’s fairly aggressive at around 1.7X – somewhat more aggressive than Super 35mm format.

Canon EOS 5D IV: What you need to know

Neither the EOS 5D III nor Nikon D810 offer 4K, of course, and the EOS 5D IV’s combination of high-resolution video, full-time touchscreen interface and Dual Pixel AF make it – at least on paper – the most capable full-frame DSLR for video at this point in time.

Clean HDMI out is possible, not for 4K. Like the EOS-1D X Mark II, 4K recording is only possible in the highly inefficient Motion JPEG format, but according to Canon, this is deliberate, as it offers easy stills extraction from a 4K timeline – essentially enabling 30 fps 8MP capture (assuming favorable shooting conditions).

The Canon EOS 5D Mark II uses the very familiar LP-E6N battery, rated at 900 shots per charge (CIPA).

Canon EOS 5D IV: What you need to know

A new dedicated grip, known as the BG-E20 ($ 349), doubles your battery life and offers additional controls for shooting in the portrait orientation.

Canon EOS 5D IV: What you need to know

The EOS 5D IV is launched alongside a brand new 24-105mm F4 IS L II USM kit zoom, and a Mark III version of the 16-35mm F2.8 (pictured above). These lenses retail for $ 1099 and $ 2199 respectively, and both are scheduled for October availability.

Canon EOS 5D IV: What you need to know

Compared to its predecessor, the EOS 5D IV is improved in virtually every way. Compared to the EOS 5DS/R, while the Mark IV can’t quite match their resolving power, it outpaces them in terms of speed, and of course a much richer video feature set.

Nikon’s D810 is the EOS 5D Mark IV’s most obvious competitor, but although it’s been on the market for quite some time, it’s still very competitive in several areas. Where the EOS 5D IV scores over the D810 is video specification (obviously) and some aspects of handling. Thanks to Dual Pixel AF, the EOS 5D IV much more fun to use in video and live view modes, but the addition of a touchscreen makes some operations – like image review – quicker and easier than they are with the D810’s more traditional button-based ergonomics. 

Let us know what you think of Canon’s new EOS 5D Mark IV in the comments.

Articles: Digital Photography Review (dpreview.com)

 
Comments Off on Canon EOS 5D IV: What you need to know

Posted in Uncategorized


Open-Air Hotel: Infinite-Star Accommodations on the Swiss Alps

28 Aug

[ By WebUrbanist in Boutique & Art Hotels & Travel. ]

open air hotel

Above and beyond your typical five-star hotel, this open-air room sits at nearly 6,500 feet in the mountains of Switzerland with panoramic views of the Alps.

wall free bedroom

A bed, side tables and lamps are not quite all visitors need to enjoy their stay at Null Stern (translated: Zero Star), but bathrooms are just a few minutes down the slope and meals are delivered by a butler. The name is a little misleading, since in most hotels one would have greatly reduced access to the infinite stars in the night sky.

boutique mountain hotel

At around $ 250 per night, the space and its amenities are a steal and reservations are refunded in case of inclement weather. The wall-and-ceiling-free room is available in spring and fall but closed during the winter.

wall free hotel

The Null Stern is part art experiment and part boutique hotel, using the sky as a ceiling and mountains as walls.

alps panoramic view

“Even though this version is radically different from the first one in the nuclear bunker,” a previous project by the same creators, “the essence and the spirit of the concept remains the same,” said one of the artists behind Null Stern “To put the guest at the centre of the experience and to focus on the intangible by reducing everything else to the minimum.”

Share on Facebook


[ By WebUrbanist in Boutique & Art Hotels & Travel. ]

[ WebUrbanist | Archives | Galleries | Privacy | TOS ]


WebUrbanist

 
Comments Off on Open-Air Hotel: Infinite-Star Accommodations on the Swiss Alps

Posted in Creativity


6 Still Life Photography Mistakes and How to Avoid Them

28 Aug

As a beginner photographer, I still remember experimenting with random photo-shoots of colorful fruits, leave,s and flowers. Believe it or not, capturing the inanimate has always been one of our favorite pass time activities as photographers. But, not anymore! With so much demand for lively product shoots in magazines and websites, still life photography is a million dollar business today.

Capturing the still life is a very unique photographic experience. With your subject being inanimate, you get enough time to play with all the creative controls on your camera, and keep snapping until you end up with a shot to which you say – Woah! That is the perfect one.

Rikaguite 225579 compressed

Capturing still life photographs seems easy, but breathing life into those inanimate objects requires a great deal of creativity and obviously, a lot of practice. Should you mess up with the lighting and framing, it’s fairly easy to end up with an austere shot of that already dull bunch of keys. Here are the six most common mistakes that photographers make while doing still life photography.

Still Life Mistake #1 – Improper Lighting

Rule one, your subject needs to be well lit up. After-all, it is the central theme of your photo-shoot. Using natural light generally gives superb results.

In case you are shooting inside a room, you need to be a little creative with the way light falls on your subject. One of the most common mistakes is to photograph your subject under full blown artificial light sources like LEDs and fluorescent tube-lights. Why? Because such light sources add a color temperature to your subject that makes it look less natural. Moreover, they make your inanimate object look just what they are – lifeless and boring.

Rikaguite 846293 compressed

Solution

Place your subject near a natural light source, such as an open window. Get creative with the light falling on the subject. Does it look amazing when light falls on it from the side? Or does it look more attractive with light falling on it from behind? I personally find natural light from the side to look more attractive. The subtle shadows and visible details under the natural light, sparks interest in the otherwise dull object.

Rikaguite 552047 compressed 1

Another important thing to take care of is the intensity of the natural light falling on your subject. Avoid shooting it under direct sunlight. The bright sunlight may washout the otherwise delicate details and colors of your subject. As a remedy, in case you really need to shoot under broad sunlight, use a light modifier such as a soft-box (or translucent reflector) that will help produce an overcast effect, and will direct the light to softly diffuse over your subject.

Still Life Mistake #2 – A Distracting Background

Placing your subject on a backdrop full of distractions is another potential mistake in still life photographs. Your product being the central theme, deserves all the attention. Therefore, you need to ensure that the background is free from all such distractions. By this, I mean anything that shifts your attention from the main product to the backdrop behind it. For example: capturing a vase of flowers in a background of a home furniture shot.

Rikaguite 336911 compressed 1

Solution

Choose a wall that’s simple, and painted with a plain color. If your wall is not plain, use a piece of white chart paper to cover the wall, so that it doesn’t interfere with your main subject. One more tip, if you’re shooting your product over a table top, again make sure that the table is neatly covered with a white piece of cloth or paper. The main idea is to focus as much attention on your product as possible.

Still Life Mistake #3 – Not Using a Tripod

In case you need to shoot your subject with longer shutter speed, you need to make sure that you do not end up with a blurry shot. An example under this kind of setup can be a decorative indoor water fountain. You may want to use longer shutter speed to capturing the motion of the falling water. So in this case, it makes any sense to use a tripod because even a slight camera shake can result in a blurry shot.

With a tripod, you may also wish to use a wireless remote control for shutter release. This makes sure that not even the slightest of the shakes can blur your photo. Alternatively, in case you do not have a remote control shutter release, you can capture the shot by setting your camera on the 2-second timer mode.

Still Life Mistake #4 – Improper Framing

Rikaguite 534724 compressed 1

Framing your shot helps focus and arrest the attention of the viewers on your main subject. While framing the shot, determine whether the subject fills the frame in a way that draws the required attention. Utilize the rule of thirds, move around and experiment with different possible angles. You’ll definitely come up with that perfect shot.

Still Life Mistake #5 – Not Experimenting

Rikaguite 486072 compressed

Being fastidious really pays off when it comes to taking still life photographs for professional and commercial purpose. When you’ve finished setting everything up for the shoot, take a few good clicks and randomize the entire setup – shift your subject to a little different location, add something to the scene that complements the subject, use different angles and lights, try framing the shots all over again. You’ll end up with a unique piece of art each time.

Still Life Mistake #6 – Wrong Choice of Lens

Still life photography is all about creating depth, and bringing out the subject in a way that directly interacts with the viewer. How will you achieve this level of focus? By utilizing the shallow depth of field.

This works great with subjects with high levels of detail such as: flowers, leaves, and fruits. Under this kind of a setup, you will want to come closer to your subject, set the camera to AV mode (Aperture Priority), and keep the focal length as long as possible. A telephoto lens is your best bet for this kind of a setup, because the longer focal length compresses perspective, helping your subject stand out more.

Rikaguite 868377 compressed 2

This doesn’t mean that only telephoto lenses work for still life photography. If you wish to bring out, and focus on the delicate details of your subject, go ahead and shoot with a telephoto lens. On the flip side, if you wish to capture everything on your table top setup, you would be fine with a either a standard 50mm lens or a wide angle.

How do you capture the still life?

What has been your experience with still life photography? Do you have any other useful tip to share? We look forward to your thoughts and suggestions on this article.

googletag.cmd.push(function() {
tablet_slots.push( googletag.defineSlot( “/1005424/_dPSv4_tab-all-article-bottom_(300×250)”, [300, 250], “pb-ad-78623” ).addService( googletag.pubads() ) ); } );

googletag.cmd.push(function() {
mobile_slots.push( googletag.defineSlot( “/1005424/_dPSv4_mob-all-article-bottom_(300×250)”, [300, 250], “pb-ad-78158” ).addService( googletag.pubads() ) ); } );

The post 6 Still Life Photography Mistakes and How to Avoid Them by Rika Guite appeared first on Digital Photography School.


Digital Photography School

 
Comments Off on 6 Still Life Photography Mistakes and How to Avoid Them

Posted in Photography


How to Create an Effective Workflow and Image Organization

28 Aug

Lets face it, we all love to take pictures, basically to get out there and photograph what makes us happy and gets our creative juices flowing. Many of us, myself included, hate sitting in front of the computer, sorting and sifting through images from a session, wedding, or just personal work. From busy professionals to active hobbyists, having a good solid workflow and method of organizing images is crucial. I am a wedding, lifestyle and travel photographer. So my workflow is slightly different based on the type of session I am photographing, but for the most part I follow the same series of steps. Here are some tips on how to create an effective workflow that can work for your style of photography.

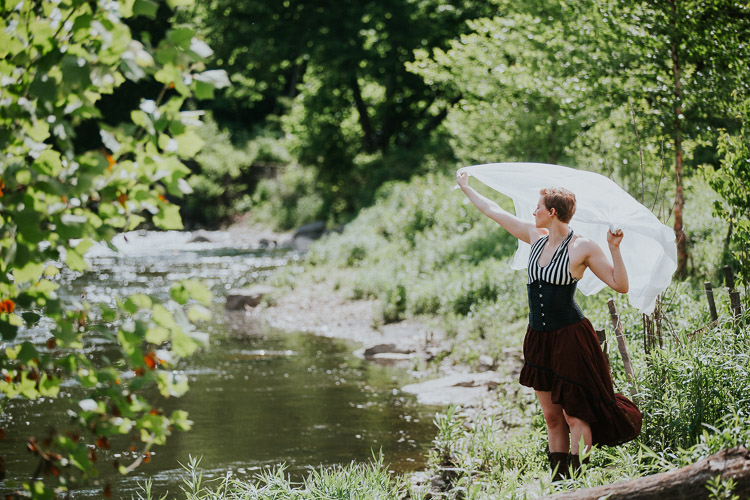
Memorable Jaunts DPS Article Editing and Workflow -4-2

Camera gear

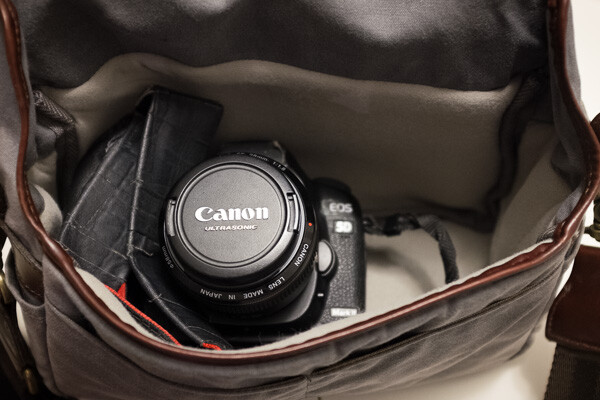
My camera of choice is a Canon 5D MKIII with a Canon 5D MKII as a backup camera. I have to admit, 90 percent of my sessions are shot using the MKIII. I very rarely use the MKII, but when I am photographing a wedding, the MKII is fully loaded and ready to go, in case I need it. I start of each session (wedding or lifestyle) with a fully charged battery and a Transcend 32GB CF card. I own four 32GB CF cards, three 16GB CF cards and two 8GB CF cards.

For weddings that are over 10 hours long, I carry all my cards with me. Each camera will start with formatted 32GB CF card. When I am traveling for work or pleasure domestically, I carry my MKIII but when I am traveling internationally I typically carry both MKIII and MKII. The night before any photoshoot (either wedding, travel, or lifestyle), I charge all my batteries (I have five batteries between my two cameras and luckily they are the same configuration) and format all my CF cards. My bag is packed and ready to go in my office.

Fits a Canon 5D Mark II with 28mm lens.

During the shoot

Depending on the photoshoot timeline, I will swap out my cards during a logical break in the shoot. For example – the bridal portraits, first look, etc., will be on one or more CF cards. I will swap out the used card before the ceremony (even if it is only partially used), so I can photograph the ceremony on a fresh card. I learned this the hard way early on, when I lost an entire session on a card that failed. Luckily it was not a wedding, but a personal shoot that I was able to recreate. Since then I don’t take any chances with failed CF cards, especially for important events like weddings. Used CF cards from a photoshoot are placed in a separate pouch, from fresh CF cards which are placed in another pouch in my camera bag.

After the shoot (local)

When I am back home from a wedding or a lifestyle shoot, the first thing I do is pack away my gear. I separate my camera bodies from my lenses, and pack them away separately. All batteries are removed, including those from my flash. I have heard horror stories where batteries, especially AAAs, have leaked into the flash socket, so I don’t want to have to deal with that mess!

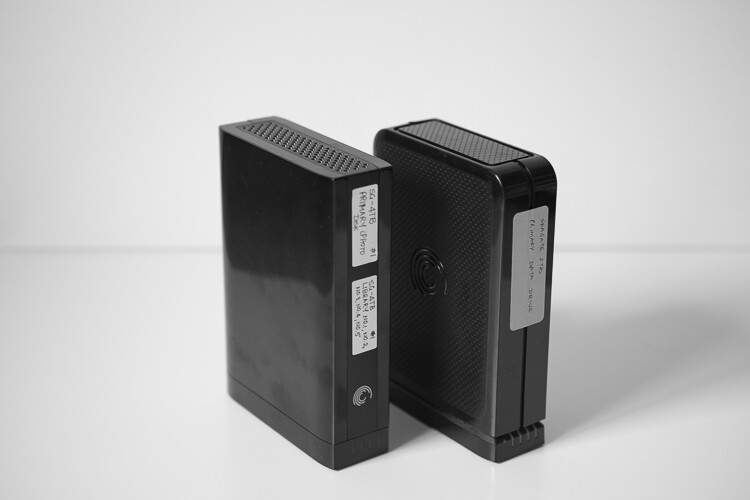
I download the images from my CF cards onto an external hard drive, that acts as a storage for my RAW images. Once the RAW images are transferred to my external hard drive, I then format the cards in camera (not via the computer). I use Seagate external hard drives to store my images. I also download my images into the Photos app on my iMac computer. The Photos library resides on another Seagate external hard drive.

Memorable Jaunts DPS Article Editing and Workflow -2

My external hard drives from Seagate are used to store RAW files from my cards and my Photos library. The RAW files are not deleted but the Photos library are deleted at the end of every year.

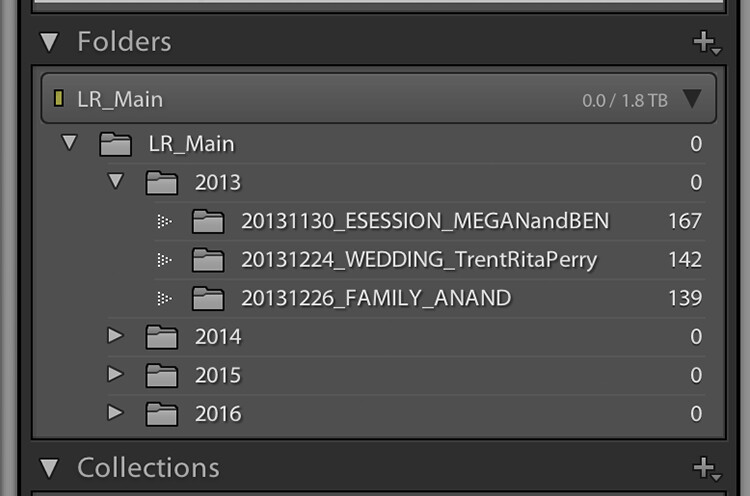
I use iPhoto (now Photos) and quickly sort through the images that I like. Those images are exported as Originals to a folder on my iMac (I name my folders based on the date of the shoot. For example: YYYYMMDD_ClientName_TypeoftheShoot. These selected images are then imported into Lightroom, my preferred editing software.

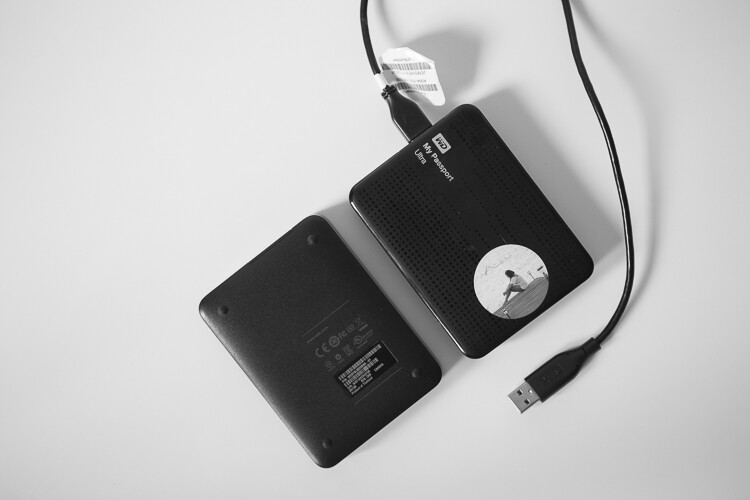
My Lightroom catalog also resides on a WD My Passport Ultra, external hard drive. I understand you may have some concerns over running a LR Catalog on an external HD, because of potential LR speed issues. So far, I have not experienced any issues with LR in terms of speed by having the catalog on an external HD. But if you are concerned about speed then your LR catalog can be put on your computer’s hard drive, and keep a backup on the external HD.

This is more portable than a Seagate and I carry it on extended trips, especially international travel. Once the images are imported into Lightroom (I retain the same name of the folder in Lightroom as well), I delete the folder containing the RAW images from my iMac hard drive. If you are keeping track, my RAW images are stored on two separate external hard drives – one that is a dump of the card and the other in a Photos catalog.

After the shoot (on the road)

When I am traveling for work or pleasure, I carry two WD My Passport Ultra external hard drives. One holds the RAW files from my CF cards, the other holds my Lightroom catalog. My original LR catalog is also backed up on one of my Seagate external hard drives. Once I copy the Raw files over, I follow the similar process as when I’m at home.

When I get home, the raw files from the CF cards used during the trip are copied over to the Seagate that houses all my RAW images, and deleted from the WD Ultra so that it is ready for my next trip. I carry my Lightroom catalog only for extended travel trips, when I know I will be editing images and posting them on social media and/or my blog. For short weekend getaways, I either carry just the WD Ultra just for the raw files or nothing at all, based on the duration of the trip.

Memorable Jaunts DPS Article Editing and Workflow -3

My portable hard drives are used to save my RAW files when I am traveling, as well as my Lightroom catalog when I am traveling for an extended period of time.

Editing and delivery workflow

80% of my editing is done in Lightroom. I use Photoshop sparingly if I have to make any advanced editing like head swapping, and or removing large objects from images. I have invested in the Adobe Creative Cloud for LR and Photoshop. It’s the bundle package deal for $ 10 per month for photographers (get both for only $ 7.99 as a dPS reader). I am able to use both on both my iMac, which is my primary editing device, as well as my MacBook Pro, which is my travel companion.

After editing is complete, I export my client images onto the same WD Ultra external hard drive as my Lightroom catalog. The client folders are also arranged by date of the session. This time my naming standard is as follows: Memorable Jaunts_ClientName_YYYYMMDD – all images will have the same naming convention as the folder, along with an image sequence number. The images are also uploaded to my portfolio site, in a gallery which is password protected. I share the password with my clients, for viewing their images and ordering any prints. I use Zenfolio to host my client galleries. I have been with them since I launched my business in 2010, and have had a very good experience with them (and no, I did not get paid to say this about them, my views are my own).

Memorable Jaunts DPS Article Editing and Workflow 01

My naming convention for my Lightroom Catalog – the folders are ordered by Year and then by date for each of my sessions

When I am traveling, I follow the same process, and edited images are saved in the same WD Ultra external hard drive. Should I need to touch-up or re-edit an image when I am back home, I simply connect the same external hard drive to my iMAC, launch the LR catalog, and I am good to go.

Client galleries are live online for two weeks, and then they are deleted. At the end of every year, I delete old client processed images from my external hard drive. I retain client session raw files for three years before I delete them from my Seagate external drives (both the original CF card download as well as the Photos catalog) to make room for new sessions. My personal images (images of my family and personal travel) follow the same process as my client sessions. Except these images are never deleted, they are too precious to me and live on forever on my external hard drives!

Client galleries are live online at Zenfolio for two weeks, and are then deleted from that site. At the end of every year, I delete client processed images from my external hard drive. I retain client session RAW files for three years before I delete them from my Seagate external drives, to make room for new sessions. This is something that I communicate with all my clients when when they receive the link for their online gallery. If any of my clients request additional time to store and/or purchase their images, that is something I will most certainly accommodate 

My wedding photography packages all include edited images on a personalized flash drive. Whereas my family portraiture clients have the option of purchasing digital images, if they want them for future use. If you don’t want to delete client images in the event that a client may come back to you after a few years (for example in case of death in the family, etc.), you can invest in a large external storage unit like Synology system for backing up, or use Amazon s3 in a cloud environment. 

Memorable Jaunts DPS Article Editing and Workflow -4

The naming convention for my processed files

Summary

As you can see, my workflow and image organization is not too complicated. I tried a few different variations, both in terms of file naming conventions, as well as file storage options, but I find working off external hard drives is fast, easy, and safe. It does require investment in external hard drives, but I typically pick some up when they are on sale.

I encourage you to use this, or some variation of this workflow, and tweak it to make it your own. Having a workflow will help you be better organized, spend less time in front of the computer, and more time out there doing what you love the most – shooting.

googletag.cmd.push(function() {
tablet_slots.push( googletag.defineSlot( “/1005424/_dPSv4_tab-all-article-bottom_(300×250)”, [300, 250], “pb-ad-78623” ).addService( googletag.pubads() ) ); } );

googletag.cmd.push(function() {
mobile_slots.push( googletag.defineSlot( “/1005424/_dPSv4_mob-all-article-bottom_(300×250)”, [300, 250], “pb-ad-78158” ).addService( googletag.pubads() ) ); } );

The post How to Create an Effective Workflow and Image Organization by Karthika Gupta appeared first on Digital Photography School.


Digital Photography School

 
Comments Off on How to Create an Effective Workflow and Image Organization

Posted in Photography


Drone footage of aurora over Iceland is just what your weekend needs

27 Aug

Maybe it’s unreasonably hot where you live, like it is here. Maybe you just smashed your phone screen on a sidewalk (and you KNEW you should have paid for that Apple Care). It’s none of our business why, but if your troubled mind needs soothing, we found just the thing for it: this video of the Northern Lights shot from a drone soaring over Iceland. 

The footage comes from OZZO Photography and a Sony a7S II with Sigma 20mm F1.4 strapped to a DJI Matrice 600 (that’s a $ 4600 pro-grade drone, for those keeping score at home). It all adds up to one sweet, nerve-calming minute and a half.

Articles: Digital Photography Review (dpreview.com)

 
Comments Off on Drone footage of aurora over Iceland is just what your weekend needs

Posted in Uncategorized


Canon EOS M10 real-world samples

27 Aug

The Canon EOS M10 is the most beginner-friendly camera of that manufacturer’s mirrorless family, doing away with many physical controls and embracing touchscreen functionality. Its 18MP APS-C sensor, built-in Wi-Fi and compact size help make it a compelling go-everywhere camera, especially when you add Canon’s svelte 22m F2 to the mix.

We’ve had it on hand for strolls through the neighborhood, shows in dim bars and in the stands watching some world-class tennis. Take a look at the samples we’ve gathered so far.

Canon EOS M10 real-world samples

Articles: Digital Photography Review (dpreview.com)

 
Comments Off on Canon EOS M10 real-world samples

Posted in Uncategorized


Don’t get ahead of yourself: Canon EOS 5D Mark IV rolling shutter test

27 Aug

Much of the initial concern about the EOS 5D Mark IV’s video has been about its substantial 1.64x crop (relative to the full width of the sensor, 1.74x compared to the 3:2 region) and its use of the inefficient Motion JPEG compression system (which limits the ability to use SD cards with any dependability).

However, upon shooting with the camera we found it to have significant rolling shutter. We’ve demonstrated the effect alongside the EOS-1D X Mark II, which reads out its sensor fast enough to exhibit pretty low levels of rolling shutter, and the Sony a6300, which shows a relatively high level of rolling shutter.

Obviously we’ve panned faster than you ever sensibly would, to make the difference clearer. If you’re careful with the way you move the camera, this rolling shutter effect may not be too apparent however, for some kinds of shooting, it can be distracting.

Articles: Digital Photography Review (dpreview.com)

 
Comments Off on Don’t get ahead of yourself: Canon EOS 5D Mark IV rolling shutter test

Posted in Uncategorized


Google uses neural networks to improve image compression

27 Aug

A research team at Google has developed a way to use neural networks to compress image files in a more efficient way than current methods, such as the JPEG standard. The team built an artificial intelligence system using Google’s open source TensorFlow machine learning system, and then used 6 million random reference photos from the internet that had been compressed using conventional methods to train it.

The images were split into small pieces measuring 32 x 32 pixels each. The system then analyzed the 100 pieces with the least efficient compression; the idea being that it could learn from looking at the most complex areas of an image, making compression of less complex sections much easier.

After the initial training process the AI system is then able to predict how the image would look like after compression and then generates that image. What makes this method really stand out from others is that the network can intelligently decide which is the best way to compress individual areas of a given photo for the best overall result. The method still needs some work, as final results can sometimes look unpleasant to the human eye and the system are not yet capable of testing for this. Nevertheless, the project looks like an important step into the right direction and if the algorithms can be further refined you might soon be able to save even more images on your memory card or built-in device storage.

Articles: Digital Photography Review (dpreview.com)

 
Comments Off on Google uses neural networks to improve image compression

Posted in Uncategorized


Weekly Photography Challenge – Neon

27 Aug

Sign Sign Everywhere a Sign – check out these images of neon signs.

Wbeem

By wbeem

Weekly Photography Challenge – Neon

If you live in an urban center or city, chances are you can find some neon nearby somewhere. Look for old diners, city center squares, movie theatres (especially old marquees like this one).

Mike Boening Photography

By Mike Boening Photography

There are a number of ways you can approach this subject, but if you choose to shoot it after dark you will most likely need a tripod and a long exposure, you may also want to incorporate some bracketing and do some HDR or exposure blending to help combat the contrast problem (the dynamic range between night sky and neon is very high, hard to keep detail in all areas).

You can also add in some extra things like car trails (as seen above) or do a zoom during your exposure. Perhaps shoot just a portion of the sign even. Those are just a few ideas to get you started.

Tip: if you want some color in the sky and background try shooting just after sunset at dusk, during the blue hour. The sky will be a dark rich blue and not totally black yet, and the lights should start to come on and show up better. It’s about finding the right balance for your exposure.

Oz Dean

By oz dean

Hernan Seoane

By Hernan Seoane

Charlie Essers

By Charlie Essers

Jeremy Brooks

By Jeremy Brooks

Share your images below:

Simply upload your shot into the comment field (look for the little camera icon in the Disqus comments section) and they’ll get embedded for us all to see or if you’d prefer upload them to your favourite photo sharing site and leave the link to them. Show me your best images in this week’s challenge. Sometimes it takes a while for an image to appear so be patient and try not to post the same image twice.

Share in the dPS Facebook Group

You can also share your images on the dPS Facebook group as the challenge is posted there each week as well.

Patrick Brosset

By Patrick Brosset

Roadsidepictures

By Roadsidepictures

Tim Carter

By Tim Carter

Brett Monroe

By Brett Monroe

Jeremy Brooks

By Jeremy Brooks

googletag.cmd.push(function() {
tablet_slots.push( googletag.defineSlot( “/1005424/_dPSv4_tab-all-article-bottom_(300×250)”, [300, 250], “pb-ad-78623” ).addService( googletag.pubads() ) ); } );

googletag.cmd.push(function() {
mobile_slots.push( googletag.defineSlot( “/1005424/_dPSv4_mob-all-article-bottom_(300×250)”, [300, 250], “pb-ad-78158” ).addService( googletag.pubads() ) ); } );

The post Weekly Photography Challenge – Neon by Darlene Hildebrandt appeared first on Digital Photography School.


Digital Photography School

 
Comments Off on Weekly Photography Challenge – Neon

Posted in Photography


‘The Darkroom’ bar for photographers to offer a photo studio, functional darkroom… and booze

27 Aug
via Google Street View

A new bar called ‘The Darkroom’ is planned for construction on Florida Ave. in Washington D.C., according to a local news report, and it’ll cater specifically to photographers. The bar’s nature was revealed in a liquor license application submitted to the Alcoholic Beverage Administration in D.C.

According to the application, ‘The Darkroom’ will include a functional darkroom, photo studio, bar, and art gallery. The application also indicates the bar would be used to host classes, lectures, screenings and art shows. Those classes would be ‘designed to preserve the history and explore the future of the medium.’ The individual who filed the application, however, hasn’t issued any comments on the plan.

Via: PetaPixel

Articles: Digital Photography Review (dpreview.com)

 
Comments Off on ‘The Darkroom’ bar for photographers to offer a photo studio, functional darkroom… and booze

Posted in Uncategorized