RSS
 

Archive for August, 2016

Display your camera collection in style with these 3D-printed wall mounts

30 Aug

$ (document).ready(function() { SampleGalleryV2({“containerId”:”embeddedSampleGallery_4952012233″,”galleryId”:”4952012233″,”isEmbeddedWidget”:true,”standalone”:false,”selectedImageIndex”:0,”startInCommentsView”:false,”isMobile”:false}) });

Looking for a sleek, minimalist display for your vintage camera collection? LaudWorks, a purveyor of DIY project tools, has launched a small accessory called Hangie for easily mounting a camera on a wall. The 3D-printed mount is offered in both steel and plastic versions with multiple color options, and is nearly invisible when used, giving the impression that the camera is floating on the wall.

The Hangie mount is simple to install: first, attach the mount to a wall using two screws, then secure the camera using a tripod mount screw. The metal version of Hangie is made from bronze-infused stainless steel and is designed for heavier cameras; LaudWorks says it tested this version with a Canon EOS 7D and a EF-S 17-55mm lens attachment (1500g / 3.3lb). The plastic version, meanwhile, is made from white nylon plastic and is made for ‘small, lightweight cameras.’

Both products are available from Shapeways; the plastic version is $ 4 and the metal version is $ 21. 

Via: PetaPixel

Articles: Digital Photography Review (dpreview.com)

 
Comments Off on Display your camera collection in style with these 3D-printed wall mounts

Posted in Uncategorized


PRVKE 21 is a rugged and versatile camera backpack

30 Aug

Recently we have seen several camera bags that look like anything but camera bags, and Wandrd’s new Prvke 21 is the latest example for this trend. With its roll-top and rugged style it looks like a cross between a bike messenger bag and a mountaineering backpack. The Prvke 21 is made from ballistic nylon, water-resistant Tarpaulin and rugged YKK zippers, the combination of which should keep all your gear dry and safe. Magnetic loops and large buckles allow for easy conversion from backpack to tote. 

The Prvke 21’s design has been based on feedback from users of the original Prvke bag, many of whom were looking for a smaller version. The interior is customizable and its 21 liter capacity, that can be expanded to 25 liters, makes it a good option for the commute bag, for the occasional hike or even a quick weekend trip.  

That said, photographers will probably be most interested in the Prvke 21’s removable camera cube. It holds a mirrorless camera with up to four lenses or a full-frame DSLR body plus two lenses. Integrated straps allow for “hands-free” access to your camera gear and a camera sling keeps your camera ready without having it dangling from your neck. In addition the bag comes with a hidden passport pocket, front pockets for the small stuff, a padded laptop-sleeve and various other small pockets, for keys, mobile phone and memory cards. 

If you like the look of the bag you can now secure one by pledging $ 149 for the early-bird option on the Prvke 21’s Kickstarter page. Delivery is planned by Christmas 2016. More information can also be found on the Wandrd website.

Key specifications:

  • 21 liters capacity (expandable to 25)
  • 2.8 lbs / 1.3kg empty weight
  • 17 × 11 × 6.5 inches / 43 x 28 x 16.5 cm
  • water-resistant
  • $ 149 early-bird price on Kickstarter

Articles: Digital Photography Review (dpreview.com)

 
Comments Off on PRVKE 21 is a rugged and versatile camera backpack

Posted in Uncategorized


4 Tips to Creating More Unique Images

30 Aug

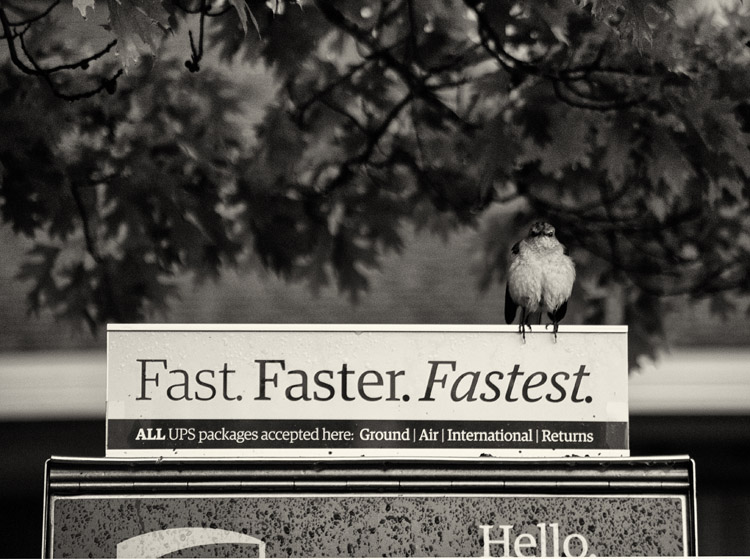
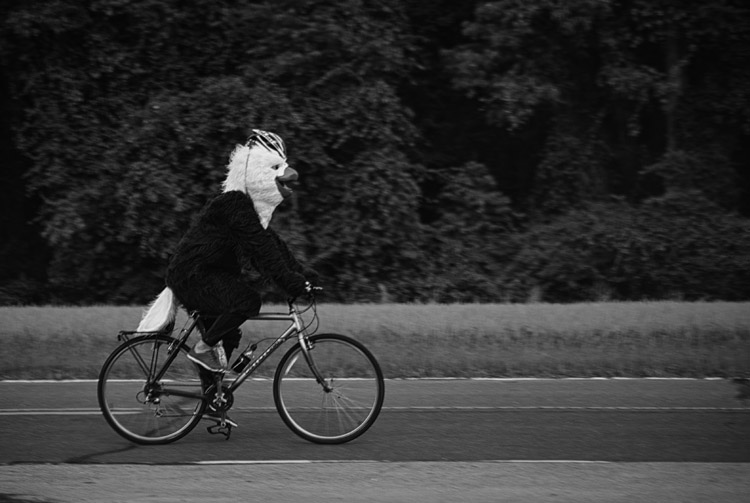
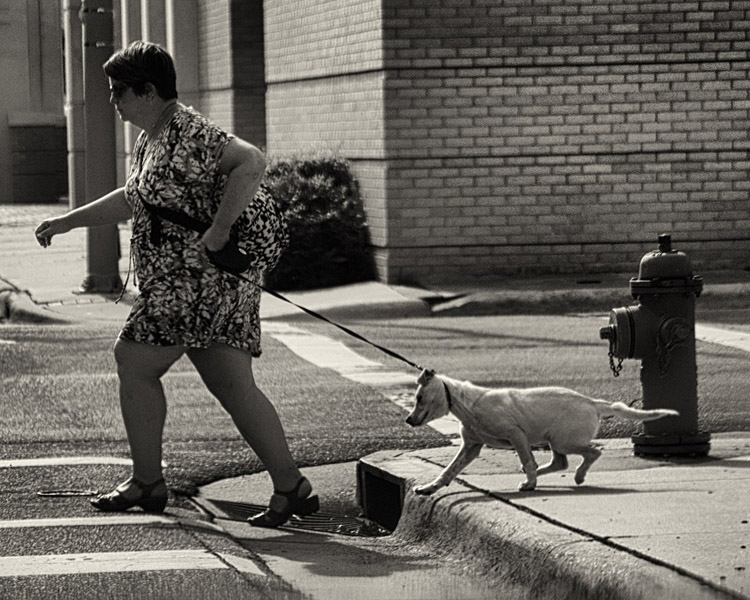
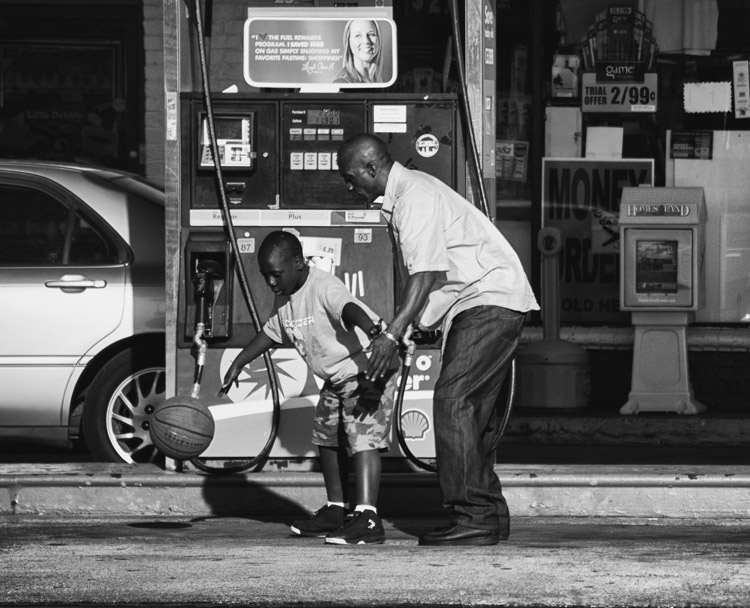
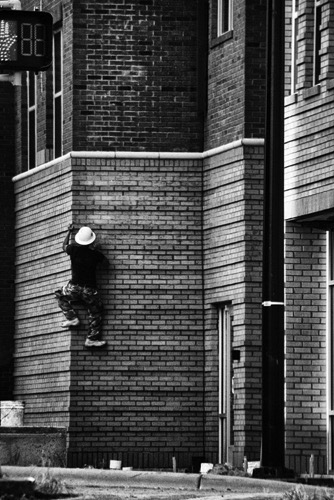
You can call it the “Intelligent Eye”. The ability of you, the photographer, to see something unique, unusual or comical in your surroundings, then have the awareness to capture it for storytelling. With practice, you can develop the skill of capturing those interesting moments or opportunities, that many would miss or otherwise ignore. As a result, your photography will stand out from the rest because it will be distinctive and specific to your own personal experience. It’s good to be different! Read on to get tips for creating more unique images.

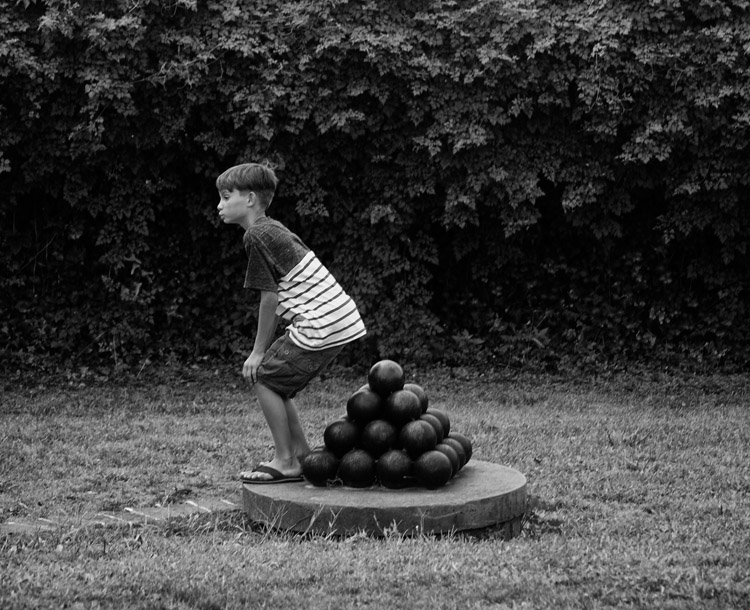
Photograph 10

Okay, so how do you achieve, or improve this ability to see unique things, and all of the interesting opportunities in your environment?

TIP #1 – Practice Observing

Practice observing. To be great at just about anything requires practice, or actually doing that thing. Yes, some people have natural talents and they don’t require extensive practice, but for others, myself included, practice is the best way to improve.

Photograph 3

Take some time, daily if you can, and throw yourself into a busy street (not literally!) and observe. Walk slowly, or sit, and simply observe your environment. Notice the colours, shadows, words, and the things people do. People do the most fascinating things if you pay attention.

My only gripe is people staring at their smart phones, and yes, I can be guilty of that at times too. Imagine all of the interesting things people could be doing, if only they put down their phones. Of course, they may say the same thing about us standing there with our cameras.

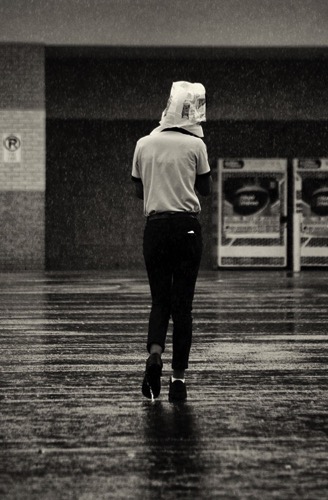
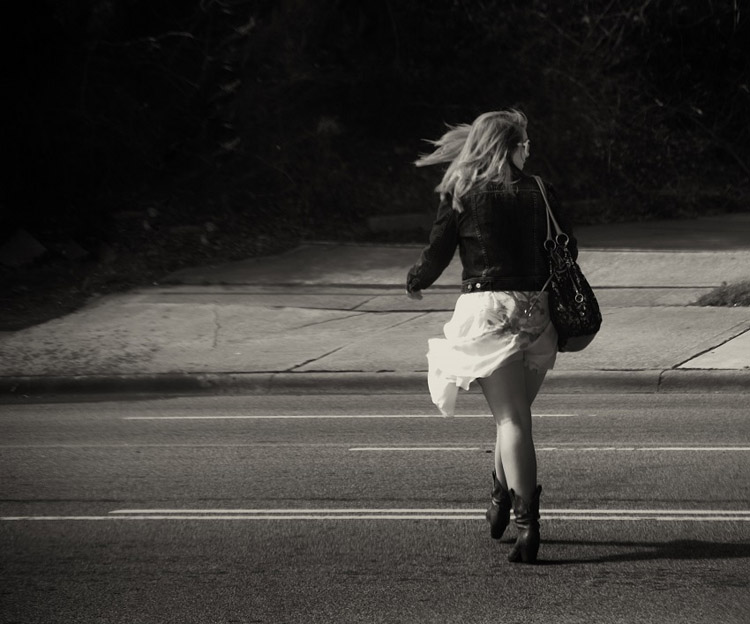
Focus on the smallest of details. Maybe you notice someone walking across the street without shoes, or someone with interesting hair or clothes, or maybe there is nothing interesting and that’s okay too. Move on, remain aware of your environment, and keep practicing the skill of observation. Over time, you will begin to notice more opportunities for some great photographs, and you’ll make unique images.

Photograph 5

TIP#2 – Practice Without a Camera

More practice. Okay, this may seem redundant, but I’m talking about practice without a camera. You can practice this skill at any time, no matter where you are in the world, or what you are doing. Carefully observe and study your environment.

I don’t know how many times I’ve seen something clever or interesting, and got a little frustrated because I didn’t have a camera. You must begin to make a habit out of always observing, seeking out the unusual, studying the world and people around you.

Photograph 9

Keep in mind, the greatest artists become obsessed with their work, so make it a habit to always be focused on your skill of seeing, with or without a camera. Over time, you will be amazed at how many things you would have missed or ignored without this improved skill.

TIP #3 – Be Different

It’s good to be different. Share your work, and enjoy the works of others, but please, don’t become overly concerned about how many likes or hearts or comments you get. It’s not important! You can conform, and begin to manipulate your work to become popular and fit with what is expected, or you can be original and create something unique to your own personal experience and creative spirit.

Photograph 12

There are some great online communities, but it’s disappointing to see so many works of art looking the same, lacking originality. Yes, the basics of post-processing are important, but it will be difficult for you to stand out from the crowd if your artwork looks the same as every other artist.

Capturing your unique experience and environment will help you stand out. You may or may not become famous, but at least you had the courage to be different, to tap into your own unique creative abilities. Finally, embrace your uniqueness, and remember that life is complex and messy, so it’s okay to create photographs not in line with what is expected. Focus on tapping into your personal and unique creative spirit.

Photograph 7 Photograph 6

TIP #4 – Be Present

This is the most important tip. Enjoy living and creating in the present moment as much as possible. Whether you are in the field, in a darkroom, or behind a computer – get lost in the moment, focus on your environment and enjoy the experience of life and witnessing the world as it unfolds.

Photograph 15

Do you have any other tips for finding and creating more unique images? Please share in the comments below.

googletag.cmd.push(function() {
tablet_slots.push( googletag.defineSlot( “/1005424/_dPSv4_tab-all-article-bottom_(300×250)”, [300, 250], “pb-ad-78623” ).addService( googletag.pubads() ) ); } );

googletag.cmd.push(function() {
mobile_slots.push( googletag.defineSlot( “/1005424/_dPSv4_mob-all-article-bottom_(300×250)”, [300, 250], “pb-ad-78158” ).addService( googletag.pubads() ) ); } );

The post 4 Tips to Creating More Unique Images by Jason Lowry appeared first on Digital Photography School.


Digital Photography School

 
Comments Off on 4 Tips to Creating More Unique Images

Posted in Photography


Tips for Doing City Photography from Above

30 Aug

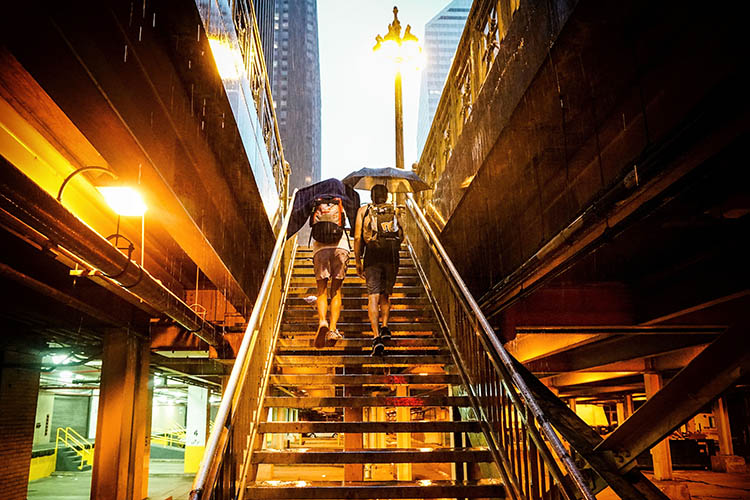
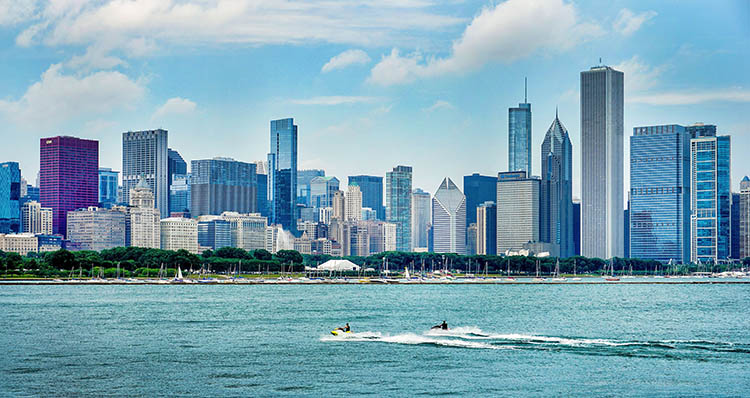
Many cities have places with great panoramic views of the city vistas from above. For example, in the U.S., New York has the top of the Empire State Building or Rockefeller Center. Similarly, Chicago has observation decks in both the Willis Tower (formerly the Sears Tower) and the Hancock Building. In Europe, there are great views of Paris from Montparnasse Tower. You can capture London from the top of St. Paul’s Cathedral, or now the observation deck of the Shard (the new tallest building in London), and the list goes on.
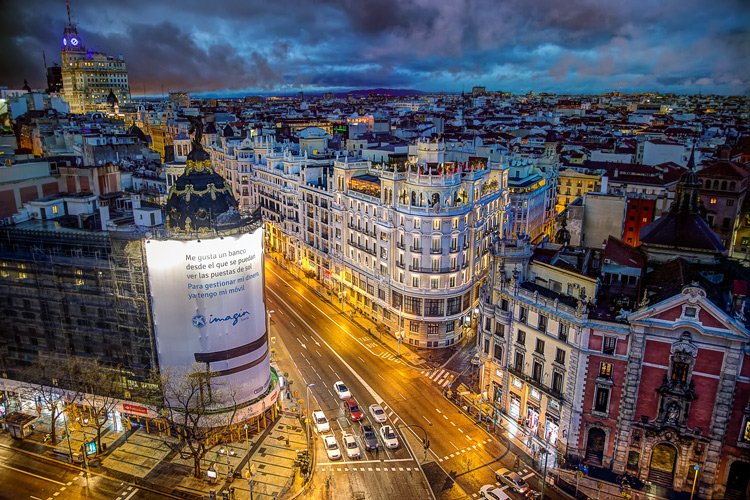
Madrid, Spain, from the Circulo des Bellas Artes

The Gran Via in Madrid, Spain, from the Circulo des Bellas Artes

But these shots present certain challenges. Often tripods are not allowed. Sometimes you have to shoot through glass. And when should you go? What settings should you use? In this article, we’ll work through these issues so you can get great shots from these city overlooks.

What? I Can’t Use My Tripod?

Sometimes you are allowed to use a tripod, and sometimes not. Each building has its own rules. To make things even more interesting, some buildings seem to have different rules depending on when you visit (or perhaps the mood of the security guards). So you will need to be prepared to shoot without a tripod.

If you go up the building in the middle of the day, that might not matter very much. There will be enough light to support a fast shutter speed, and you can get away with hand holding. But if you are shooting in dim light or at night, you will want to use a longer shutter speed. That will require some sort of stabilization.
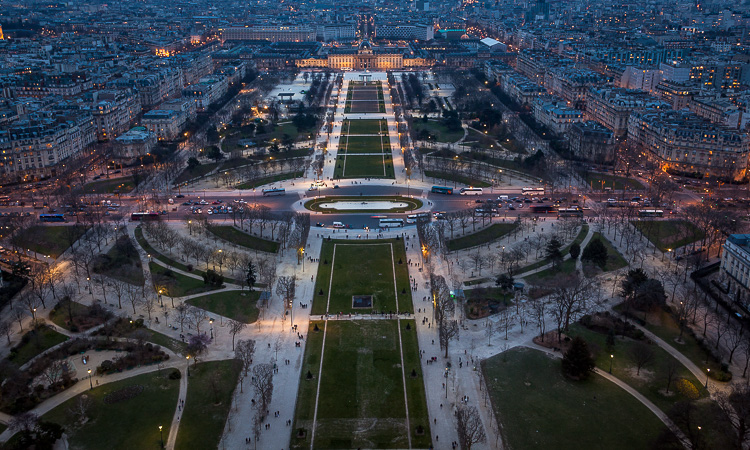
Paris from the Eiffel Tower

Paris from the Eiffel Tower

In almost every case, you will find something available at the top of the building to support your camera. Sometimes you have to resort to using the the floor (which can work if you press your lens up against the window), but often there is some sort of shelf to use. Many buildings have plexiglass panels at the top, with small gaps between them, and you can hold your camera against the sides of the panels to steady it.

Shooting Through Glass

Oftentimes, you are photographing from an enclosed structure surrounded by glass. That means reflections are going to be a problem. I wish there was a magic bullet to solve this problem, but there isn’t. I do have a few tips to help you minimize the reflections though.
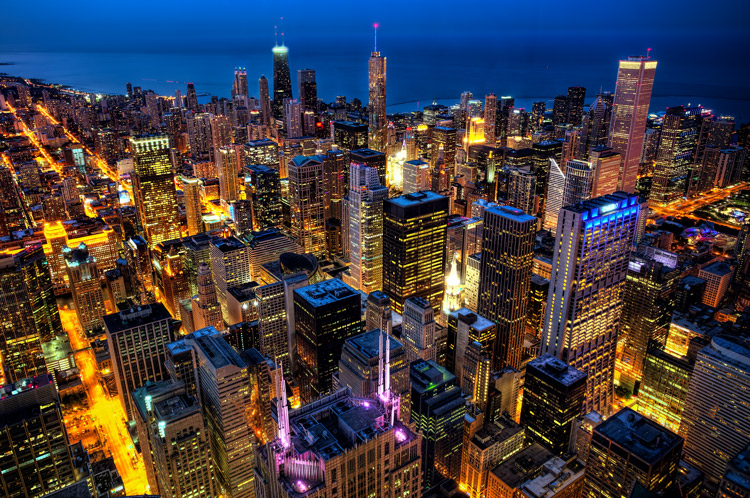
Chicago from the Willis Tower (formerly known as the Sears Tower)

Chicago from the Willis Tower (formerly known as the Sears Tower)

Before resorting to that, see if there is any way to shoot unobstructed. As mentioned above, some buildings have plexiglass panels on top. There are often carve-outs in the panels that you can shoot through, which you should definitely use. If not, check to see if you can shoot between the panels. That will avoid the whole issue with reflections.

If not, you are going to need to take steps to minimize reflections. Let’s start with one that should be obvious (but I always see people doing it). Do not use your camera’s flash. First of all, the flash is useless in this situation. Everything will be too far away for the flash to have any effect. More importantly, the flash will cause reflections and glare in the glass.

Next, hold your camera directly up against the glass. This will minimize reflections. In addition, make sure your point of focus is set far away from you and that your camera is not trying to focus on the reflections.
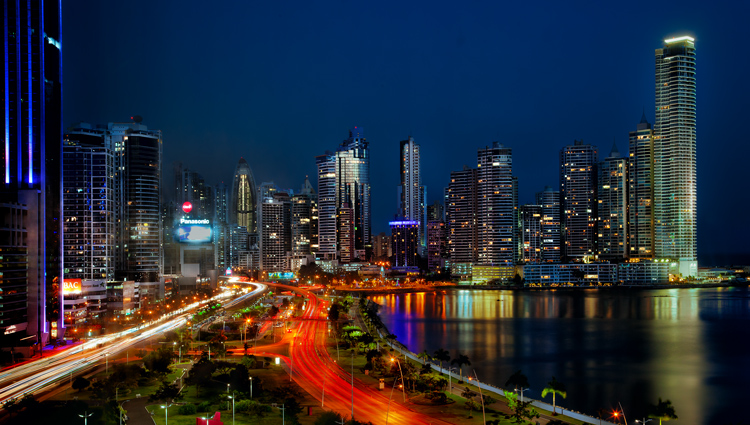
Panama City, Panama from the Intercontinental Hotel (shot through glass)

Panama City, Panama from the Intercontinental Hotel (shot through glass)


If you are on your own (like in a hotel room or somewhere you can set up), then make sure all the inside lights are off, and use the curtains to block any light coming from the room. Some photographers hold a black cloth against the window with a hole cut in the center to shoot through. If you have the opportunity and time to prepare, that is the best option.

Usually, you will find yourself in a public place where such steps are not possible. In that case, just use your body or hand to block any areas of glare or bright light.

After that, just take a few pictures and see if there are any reflections in the final result. Zoom in on your LCD to take a close look. If you find any reflections or glare, just adjust your position slightly to try to get it out and shoot again. You would also try a polarizing filter.
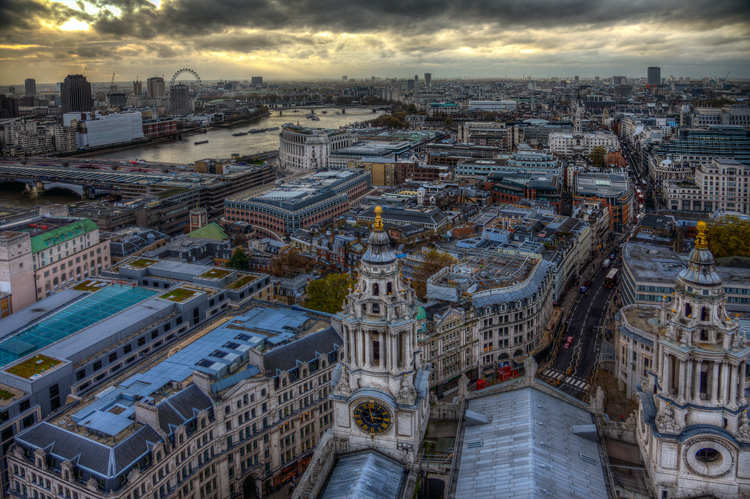
London from the top of St. Paul's Cathedral

London from the top of St. Paul’s Cathedral

What Camera Settings Should I Use?

Your exposure settings will depend on how much light is available at the time you are shooting. While I obviously cannot give you exact exposure settings, I can give you a few ideas to maximize your light and get the best exposure.

First and foremost, remember that you don’t need to use a small aperture for these shots because you do not need a deep depth of field. Your focus will be set at infinity. Nothing in your shot will be within 50 feet/15 meters of you. Too see this for yourself, take a look at the distance scale on the top of your lens (assuming it has one). It will show you that everything farther than about 30 feet/10 meters is set at infinity (in fact, the focus will be at infinity even sooner for wide angle lenses). There will not be a wide range of distances in your shot that require a deep depth of field. Therefore, if you find yourself in need of more light to create your exposure, widening the aperture is a good place to start.
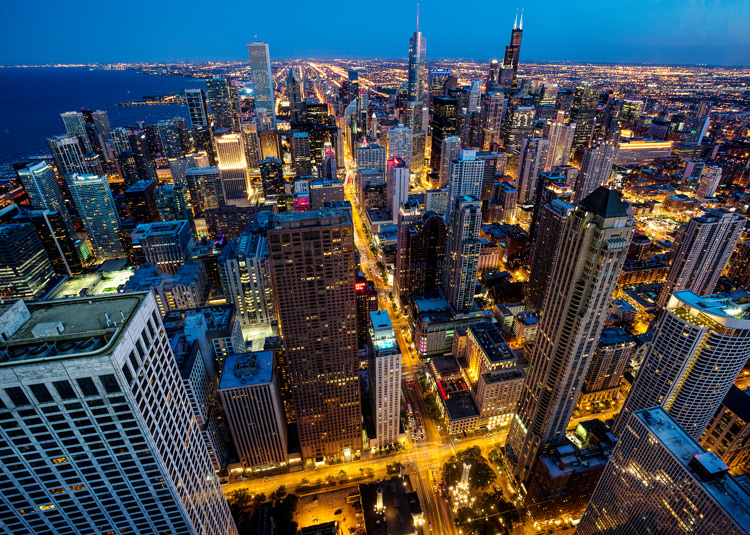
Chicago from the Hancock Building

Chicago from the Hancock Building

Your other two exposure settings (shutter speed and ISO) will depend entirely on whether you can use a tripod. If you cannot use a tripod, raise the ISO until your shutter speed is fast enough to hand hold. Remember you can cheat a little bit and use a slower shutter speed than usual by propping your camera on something. But blur from movement during the exposure will ruin the picture. Remember that digital noise can be fixed in post-processing, but camera shake cannot. Raise the ISO as much as you need to get a supportable shutter speed.

If a tripod is allowed, things are much easier when it comes to exposure settings. You can use as slow a shutter speed as you want. That will also allow you to reduce the ISO, and use a smaller aperture as well. In fact, you may want to keep the the ISO low and the aperture small to force the camera to use a long shutter speed. That will capture traffic trails, create some movement in the clouds, and other effects.
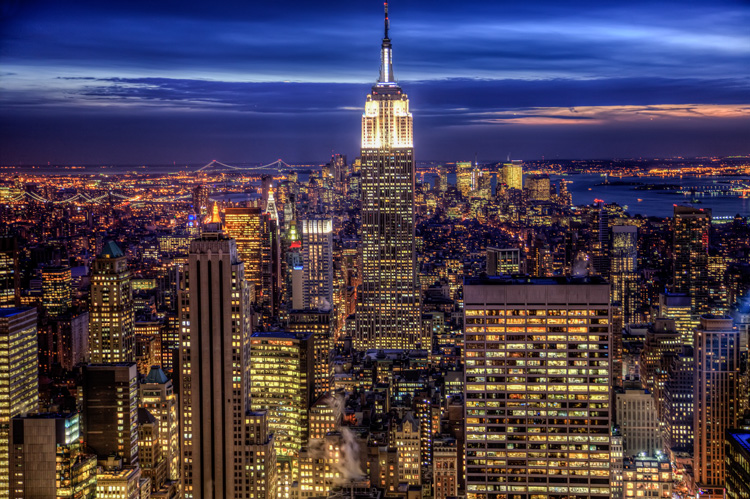
New York, from Rockefeller Center (Top of the Rock)

New York, from Rockefeller Center (Top of the Rock)

Finally, consider bracketing your photos, especially if you are shooting at night. The scene before you will contain bright lights and dark portions. This will challenge your camera’s dynamic range. Even if you will never use any sort of blending or HDR, you might be pleasantly surprised by the overexposed or underexposed images.

Making a Composition from a Jumble of Buildings

When you are up high in a building overlooking the city, you will have a great view, but that doesn’t necessarily mean a great picture. The key to success is creating a composition out of what is before you, in other words to generally find a center of interest. That is, find something to key on that will anchor the picture. Sometimes it is obvious – like when you are staring at the Empire State Building or the Eiffel Tower – but other times it isn’t. You’ll just have to find something to center your picture on. It could be a building that stands out, perhaps a bridge, or even a leading line.

In doing so, don’t overlook the usual compositional rules. Start with the Rule of Thirds. Put your horizon line on either the top third or the bottom third. After that, you might consider placing an important, or prominent, feature on one of the vertical third lines.
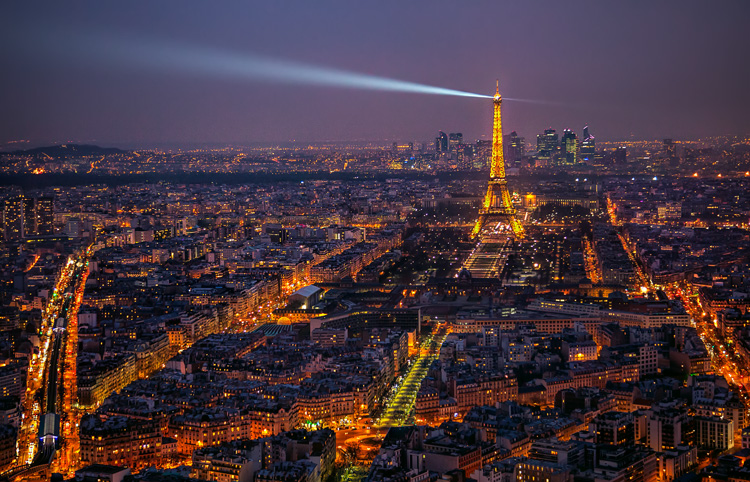
Paris from the Montparnasse Tower

Paris from the Montparnasse Tower

Just these two concepts – ensuring you have a center of interest and following the Rule of Thirds – will go a long way to ensuring success. After that, you can find lines, shapes, and forms to work around. Experiment with different focal lengths and angles. Remember that nothing is moving so you can keep experimenting all you want.

When to Go

Deciding when to go capture you city view from above will have more to do with how the pictures turn out, than anything else you do. Avoid going in the middle of the day. Travel schedules don’t always allow that, but that is the worst time for these pictures.

If you are going to a public observation deck, when you can go will be limited by the opening hours of the building. They are generally not open early enough for sunrise, so that won’t be an option. Almost all locations are open for sunset and a few hours of darkness, so that is often an option.
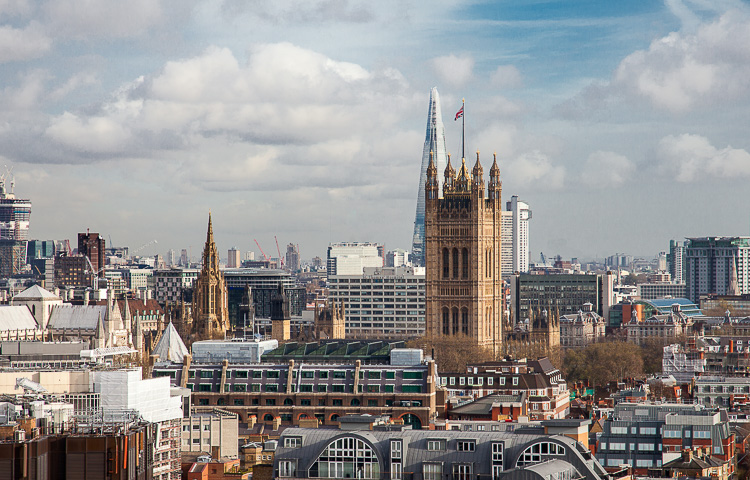
London from the tower of Westminster Cathedral

London from the tower of Westminster Cathedral

The best time to go is just before sunset. You will have the best of all worlds with one ticket. You can capture the sunset and twilight. After that, just wait around for a little while for some night shots.

But in any case, go. It is an easy way to get great shots of whatever city you happen to be visiting. Get up high and capture the city from above.

googletag.cmd.push(function() {
tablet_slots.push( googletag.defineSlot( “/1005424/_dPSv4_tab-all-article-bottom_(300×250)”, [300, 250], “pb-ad-78623” ).addService( googletag.pubads() ) ); } );

googletag.cmd.push(function() {
mobile_slots.push( googletag.defineSlot( “/1005424/_dPSv4_mob-all-article-bottom_(300×250)”, [300, 250], “pb-ad-78158” ).addService( googletag.pubads() ) ); } );

The post Tips for Doing City Photography from Above by Jim Hamel appeared first on Digital Photography School.


Digital Photography School

 
Comments Off on Tips for Doing City Photography from Above

Posted in Photography


Canon EOS 5D Mark IV added to studio scene comparison

30 Aug

As soon as our Canon EOS 5D IV test unit arrived we put it straight to work, both out and about in Seattle and in the studio. The EOS 5D IV has just been added to our studio test scene comparison tool, so you can easily compare it to its peers. Our dynamic range test results will be following shortly.

For now, check out how the EOS 5D IV compares to its peers and competitors in our studio by clicking on the link below.

Canon EOS 5D Mark IV studio test scene

*Raw images have been processed with an early beta build of Adobe Camera Raw. Image quality may not represent the final version of the plugin, but is likely to be close.

Articles: Digital Photography Review (dpreview.com)

 
Comments Off on Canon EOS 5D Mark IV added to studio scene comparison

Posted in Uncategorized


Canon EOS 5D Mark IV real-world sample gallery

29 Aug

We’ve only had the 5D Mark IV for a couple days, but that hasn’t stopped us from taking it out for a bit of shooting. Take a look at some sample images from Canon’s latest full-frame DSLR.

*Raw conversions have been performed with a very early beta build of Adobe Camera Raw. Image quality may not represent the final shipping version.

Articles: Digital Photography Review (dpreview.com)

 
Comments Off on Canon EOS 5D Mark IV real-world sample gallery

Posted in Uncategorized


Solar-Powered Pipe to Desalinate 1.5 Billion Gallons for California

29 Aug

[ By WebUrbanist in Conceptual & Futuristic & Technology. ]

coastal water purifying pipe

Designed to address the pervasive drought and long-term water problems of the West Coast, The Pipe is an offshore water purification plant that combines sustainable energy, public works and experiential architecture.

solar pipe

A finalist of the 2016 Land Art Generator Initiative design competition, focused on projects around the Santa Monica Pier, the solar-powered Pipe filters brine and channels drinking water to the adjacent city. Saltwater is returned to the Pacific Ocean. Khalini Engineers, a Canadian company, employed an electromagnetic desalination system for their entry, driven by energy from the sun (10,00 MWh/year). With that power and overall system capacity, the Pipe could produce 1.5 billion gallons of fresh potable water annually.

pipe interior

“The sustainable infrastructure that is required to meet California’s development goals and growing population will have a profound influence on the landscape, ” say Rob Ferry and Elizabeth Monoian, co-founders of the Land Art Generator Initiative. “The Paris Climate Accord from COP 21 has united the world around a goal … which will require a massive investment in clean energy infrastructure.”

technical

“Above, solar panels provide power to pump seawater through an electromagnetic filtration process below the pool deck,” writes the design team, “quietly providing the salt bath with its healing water and the city with clean drinking water. The Pipe represents a change in the future of water.”

pipe view

“What results are two products: pure drinkable water that is directed into the city’s primary water piping grid, and clear water with twelve percent salinity. The drinking water is piped to shore, while the salt water supplies the thermal baths before it is redirected back to the ocean through a smart release system, mitigating most of the usual problems associated with returning brine water to the sea.” In addition to its primary functions, The Pipe also represents an aesthetically pleasing offshore object that would change viewer’s conceptions of near-coastal rigs, conventionally associated with oil production.

Share on Facebook


[ By WebUrbanist in Conceptual & Futuristic & Technology. ]

[ WebUrbanist | Archives | Galleries | Privacy | TOS ]


WebUrbanist

 
Comments Off on Solar-Powered Pipe to Desalinate 1.5 Billion Gallons for California

Posted in Creativity


3 Tough Photography Client Questions and How to Answer Them

29 Aug

Ah yes, the priceless questions photographers get from their clients. If your work involves human subjects, you may occasionally feel that you’re locked in the eternal struggle of staying true to your vision, while still making your clients happy. Any of these photography client questions sound familiar:

  • Can we have all the RAW files?
  • Wouldn’t a jumping shot near this cliché tourist destination be awesome?
  • Can’t you just fix this in Photoshop?

DPS 3

While it may feel like you can only have either one or the other, I’m convinced you can have it both ways: happy, well-served clients, and a strong standard for how you shoot and share your own work. Here’s how we tackle the three tough client questions we get most often:

1 – Can you to deliver all the RAW files in the final package?

I KNOW, I KNOW, when you get this question your first instinct may be to delete their email and never respond again (or am I the only dramatic one?). But this one is an easy one to tease apart. The goal here is to get to the bottom of what the client really wants. So, before you launch into your response, ask them leading questions to find out real the root of the issue.

DPS 1

The first possibility is one of sheer numbers: Do they fear that they won’t get enough images? Are they hoping to go through them to make sure that you really did select the best ones for them? This is the time to gently explain your process to them. Explain ow you carefully cull, deliver only the best image, and spare them the misery of pawing through all the shots of their double chin or half-closed eyes.

Client education is key

Conversely, they might not even know what a RAW file actually is. Some clients think that RAW is a synonym for unedited, and want to try out their own iPhoto tricks on their images later. Now’s the time to lay down some education about the advanced programs that can open RAW files, including the fact that they require quite a bit of training to use them correctly. Normally that’s more information than the average client has ever gotten about photo editing, and they are able to reframe their question to express their needs more specifically.

DPS 5

This is also a good time to throw out the old “It’s industry standard to not provide RAW files, so that we photographers can provide you with the exact final product that is worthy of your time.” They wouldn’t walk into a chef’s kitchen and judge their work based on the raw meat in the fridge, the same holds true for their photographer.

Once you hear their concerns, and educate them through your process in a professional and kind way, most sane clients realize that asking for the RAW files just isn’t realistic.

2 – Wouldn’t this jumping shot in front of the Space Needle be awesome?

DPS 6

Okay, the late 90s jumping shots aren’t our bag either (if it is yours though, I hope the clients who ask for this are finding you!). However, we make it a firm policy to never say no to a client’s idea. Not only does it throw off the energy of the shoot, it makes the client feel that they are separated from the process of creating images; that their ideas aren’t as good as the professionals. In short, it makes them feel bad, and a subject who feels bad will never create the bomb images you want.

Always say yes client ideas

We always say yes if a client has an idea for an image that we aren’t particularly into. It lets them know they’re an integral part of the process, and encourages everyone to get creative with the shoot. Not only that, but sometimes we think a particular pose or scene isn’t going to look good, and it ends up being an awesome idea that we never would have come up with ourselves. That kind of discovery is golden. Never think that your style is so entrenched that you can’t hear new ideas, and always be ready to learn and experiment when you have clients who are in it with you.

DPS 7

All that being said, sometimes you do end up with shots that are just not you, not your look, and not something you necessarily want to represent you. Guess what? You get to choose what you share, how you blog, what your social media will show off, and how you want your portfolio to look. Deliver the client’s images with a smile, make the client happy, and share the ones you love on your own pages. There’s no rule that you have to share every image from a shoot. Select your favorites and move along.

3 – Can’t you just fix this in Photoshop?

I will be the first to admit that I’m abnormally flattered when people assume that I’m a Photoshop wizard, just because I’m the photographer. Thanks for the vote of confidence, guys.

DPS 4

However, the reality is that I am fairly abysmal at it. I would rather spend my time out shooting, than inside glued to my computer, making people look ten pounds thinner, or removing the billboard from behind the venue. Just no thank you.

So when the Photoshop question comes up, I try to manage of expectations ahead of time, as much as possible. When the parent at a wedding asks very seriously if you’ll make them look thinner, I respond with something like, “There’s absolutely no need for Photoshop on a perfect day like today. Everyone here loves you and wants to keep you just as you are. Also, no.”

If there’s an object that could easily be moved from a scene (garbage cans, a sign, trash) then I make a point to move them before shooting, so the client is aware that not everything is post-production magic.

Follow this general rule of thumb

DPS 2

Our general policy for retouching in Lightroom is that if something will not be there in two weeks (e.g. a bruise, zit, etc.) we’ll do a light erase, no problem. If there are larger things that the client requests be handled in Photshop, like the mother of the groom who insisted that I edit all the photos of her scowling in the background (you can’t make this stuff up) we let them know individually that we do have a per-image rate for Photoshopping. If they want to go ahead with it, fine by me, but it’s a friendly reminder to clients that Photoshop isn’t a magic button that photographers press behind the scenes to turn every Furbie into a Victoria’s Secret model.

Plan moving forward

The moral of the story is to be kind, ask questions, and get to the bottom of what your clients really want when they ask you these dreaded things.

Then let me know in the comments below. What questions do you dread? How do you respond to them? I’d love to hear how you tackle the tough ones.

googletag.cmd.push(function() {
tablet_slots.push( googletag.defineSlot( “/1005424/_dPSv4_tab-all-article-bottom_(300×250)”, [300, 250], “pb-ad-78623” ).addService( googletag.pubads() ) ); } );

googletag.cmd.push(function() {
mobile_slots.push( googletag.defineSlot( “/1005424/_dPSv4_mob-all-article-bottom_(300×250)”, [300, 250], “pb-ad-78158” ).addService( googletag.pubads() ) ); } );

The post 3 Tough Photography Client Questions and How to Answer Them by Laura Sullivan appeared first on Digital Photography School.


Digital Photography School

 
Comments Off on 3 Tough Photography Client Questions and How to Answer Them

Posted in Photography


FotodioX Lens Adapter – How to Put Your Canon EF Lens on Your Sony E-Mount Camera

29 Aug

One of the big hurdles for DSLR camera owners considering the switch to mirrorless, is the notion of having to buy brand new lenses to accompany their new purchase. While it’s ideal to have brand name lenses that match your camera body, it’s not at all necessary, thanks to third-party lens makers and lens adapters. This article discusses the latter option, specifically, a lens adapter that allows just about any Canon EF lens, to be used with a Sony E-Mount camera.
ony Canon Lens Converter

My Camera Background

As a corporate event and food photographer, the Canon 5D Mark III, plus an array of Canon zoom lenses and a handful of primes, are my go-to choices for professional photo work. However, the desire to carry a smaller camera while traveling casually, led to my recent purchase of a Sony a6300 camera, my first investment in a mirrorless system. While I did opt for a Sony 16-50mm kit lens and a 20mm f/2.8 prime lens, I wasn’t financially ready to invest in any more Sony brand lenses. Instead, research and recommendations from other fellow photographers led me to purchase a lens adapter, which promised the ability to use my existing Canon EF lenses with my new Sony E-Mount camera body.

If you’re in a similar position, where you’ve accumulated a collection of DSLR lenses and are considering adding the Sony a6300 to your kit, this article is for you!

ony Canon Lens Converter

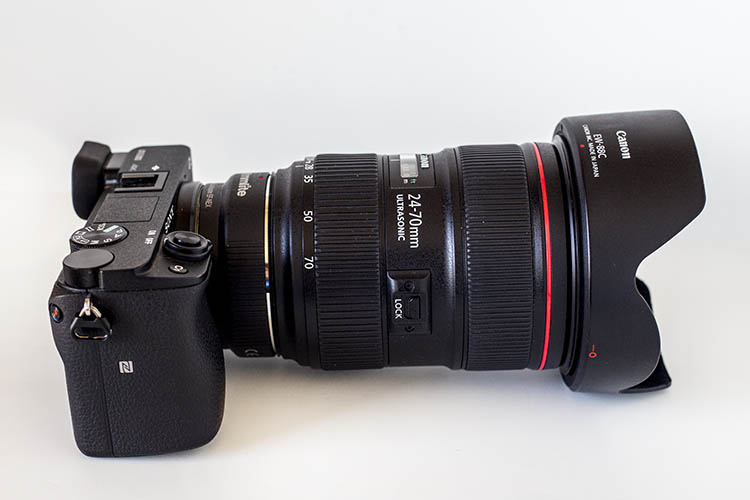
Sony a6300 body with a Canon 24-70mm f/2.8 lens, mounted using the Fotodiox adapter.

Lens Adapter Options

Third-party brands have already hopped on the lens adapter train, and there are quite a few options available, but two main ones that came up in research were the Metabones Smart Adapter IV and the FotodioX AF Adapter. At first glance, both options seemed comparable in their offerings:

  • Compact, lightweight, all-metal design.
  • Allows for automatic focus and aperture control from the Sony E-Mount camera body.
  • Infinity focus allowed if needed.
  • Removable tripod mount included to help distribute the weight.

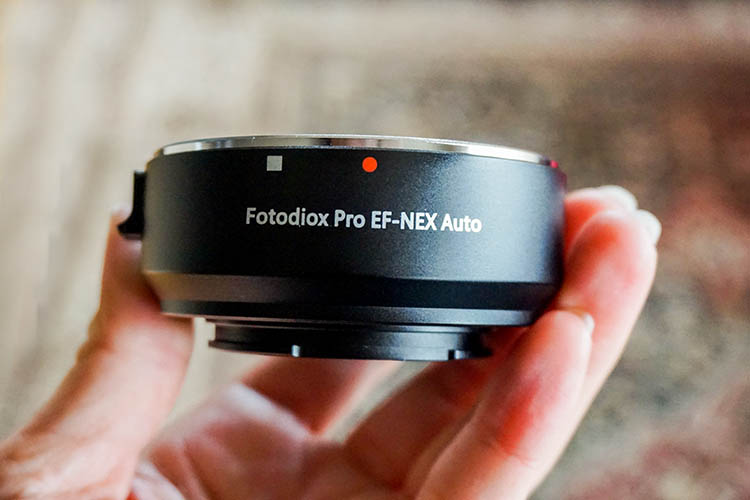
The main difference between the two products came down to price: the Metabones version is priced at $ 385.99, while the FotodioX option is considerably cheaper at just $ 99.99. In the end, the price was the determining factor, and I went for the FotodioX lens adapter.

ony Canon Lens Converter

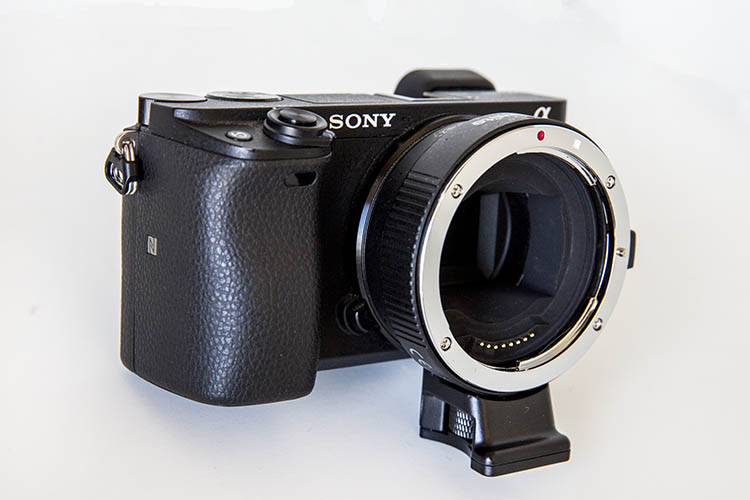
Sony a6300 with the FotodioX AF Adapter attached.

How did it perform?

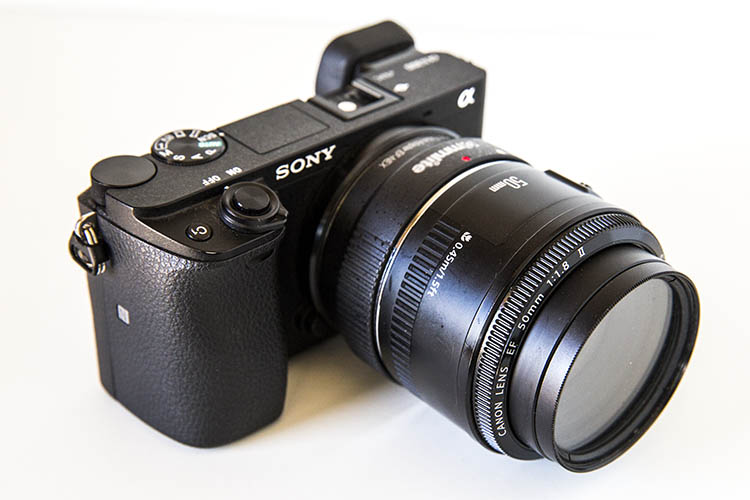
The first thing to note about using an adapter is how it will impact the overall heaviness, bulk, and appearance of your system. The FotodioX adapter itself is truly compact, and isn’t much larger than the Sony a6300 kit lens. As a result, it looks like a natural complement to the a6300 when it’s connected. Adding on Canon EF lenses changes the look and feel of the a6300, depending of course, and which lenses are paired. Small, lightweight, prime lenses such as the Canon 50mm f/1.8 don’t add a lot of bulk to the camera, and also look like a natural fit.

ony Canon Lens Converter

Sony a6300, FotodioX AF Adapter, and Canon 50mm f/1.8 lens.

However, adding larger zoom lenses such as the Canon 24-70mm f/2.8 definitely make the camera more front-heavy, to the point that it makes sense to grip the rig by the lens rather than the camera body. Still, the rig is considerably lighter than pairing the same Canon lenses with a DSLR such as the 5D Mark III.

ony Canon Lens Converter

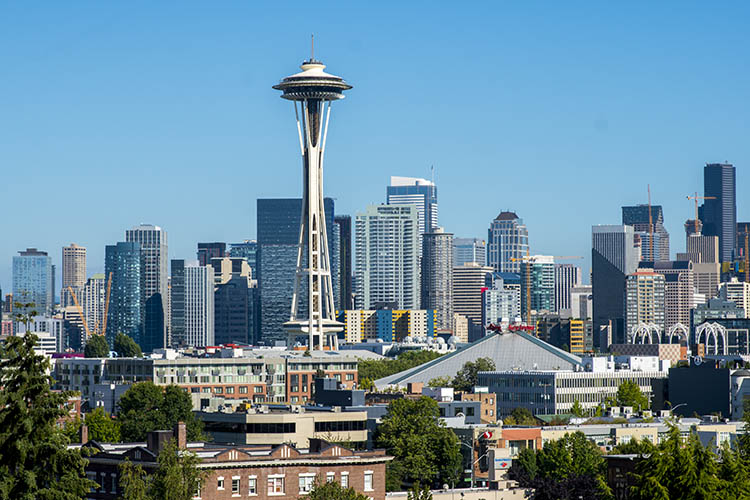
Apart from aesthetics, the adapter actually performed surprisingly well! There are many reports of adapters causing autofocus to be either painfully slow, or lost altogether. While autofocus was not as snappy and accurate as it was using a Sony brand lens, the a6300 was still decently responsive, even with the FotodioX adapter and a Canon EF lens attached. If autofocus wasn’t working properly, which tended to happen for close-range shots, it was easy to switch the lens to manual focus and still capture a photo. Image quality was also tack-sharp, here are some image examples:

ony Canon Lens Converter

ony Canon Lens Converter

ony Canon Lens Converter

ony Canon Lens Converter

ony Canon Lens Converter

ony Canon Lens Converter

Overall thoughts

Using a lens adapter isn’t a perfect solution. The lagging autofocus was fine for casual use, but eventually became more noticeable and cumbersome when trying to shoot anything that moved. I’d hesitate to rely on an adapter when shooting something where quick autofocus mattered. It also felt like a pretty big tradeoff to not be able to take full advantage of what Sony purports to be the “world’s fastest autofocus” in the a6300. But other than that, the ability to use my existing DSLR lenses with a new camera body made by another manufacturer is a convenient luxury.

Have you tried a lens adapter before? What was your experience like?

googletag.cmd.push(function() {
tablet_slots.push( googletag.defineSlot( “/1005424/_dPSv4_tab-all-article-bottom_(300×250)”, [300, 250], “pb-ad-78623” ).addService( googletag.pubads() ) ); } );

googletag.cmd.push(function() {
mobile_slots.push( googletag.defineSlot( “/1005424/_dPSv4_mob-all-article-bottom_(300×250)”, [300, 250], “pb-ad-78158” ).addService( googletag.pubads() ) ); } );

The post FotodioX Lens Adapter – How to Put Your Canon EF Lens on Your Sony E-Mount Camera by Suzi Pratt appeared first on Digital Photography School.


Digital Photography School

 
Comments Off on FotodioX Lens Adapter – How to Put Your Canon EF Lens on Your Sony E-Mount Camera

Posted in Photography


My Space: 15 Creatively Painted High School Parking Spots

29 Aug

[ By Steve in Art & Street Art & Graffiti. ]

senior-parking-1aa

So custom-painted assigned high school senior parking spots are a thing now, and it appears students are expressing a LOT (ahem) of creativity.

senior-parking-1b

senior-parking-1c

The concept looks to be a win-win for both schools and students: the former collect fees for each space and nip parking spot rage in the bud; the latter get to be creative and take pride in their work. Take Martha Caldera’s take on Drake’s “If Youre Reading This Its Too Late” mixtape, which garnered her (and others as well) a measure of Twitter fame and thousands of shares.

States Caldera, “The only thing that’s going to motivate me to wake up for school tomorrow is pulling up in my parking spot.” One wonders if Drake – who played high school student Jimmy Brooks in Degrassi: The Next Generation – would approve.

PokeSpot

senior-parking-2a

Topics and themes for the parking spaces are pretty much left up to the individual students. Many choose to express their currents interests as illustrated by Reddit-user mrpopper96 above. Trends are fleeting, of course, but no worries since next year’s senior class simply paints over the work of their predecessors.

School Of Fish
senior-parking-9a

senior-parking-9b

This parking space may be slippery even when it’s NOT wet. We’re not sure what kind of car this student drives but please, please, please let it be the one in the second image.

Tread On Me

senior-parking-4a

Jeep Patriot parking only? We’ve come a long way since Peter Fonda’s character was hassled for his Stars & Stripes motorcycle gas tank. We’d hassle the dude above over his spelling but hey, that’s the school’s job.

Reece Witherspot

senior-parking-5a

senior-parking-5b

When the Good Lord gives you lemons, make lemonade. When your parents name you “Reece“, well, see above. By the way, is that a space painted like a Rebel Flag just intruding into the top of the second photo? Who knows, Reece might go to Robert E. Lee High School.

Next Page – Click Below to Read More:
My Space 15 Creatively Painted High School Parking Spots
Share on Facebook


[ By Steve in Art & Street Art & Graffiti. ]

[ WebUrbanist | Archives | Galleries | Privacy | TOS ]


WebUrbanist

 
Comments Off on My Space: 15 Creatively Painted High School Parking Spots

Posted in Creativity