RSS
 

Archive for April, 2015

Putting You Into Your Landscape Photography

28 Apr

Photographing the landscape is one of the oldest forms of photography, along with others like portrait and street photography. Since the advent of digital photography the possibilities of what can be done seem almost endless. It also means that photography has become more accessible, so with more people taking it up it is becoming harder to be original, and make your images your own. There are ways of creating landscapes that have your style, but it usually means throwing away a lot of what you first learn about photography.

Perhaps the only time a photographer is really free to do whatever they please is when they first begin, before they are told what they should or shouldn’t be doing.

Learning About Photography

However, that might be true, but it isn’t long before the beginner starts to learn what we all learn. We start wanting to know how to use the camera properly, and how to get the best out of it. So they might begin by doing a course to learn about aperture, shutter speed and ISO. No one is denying how important it is to learn about those things, and learning how to correctly expose an image is not something that anyone ever regrets.
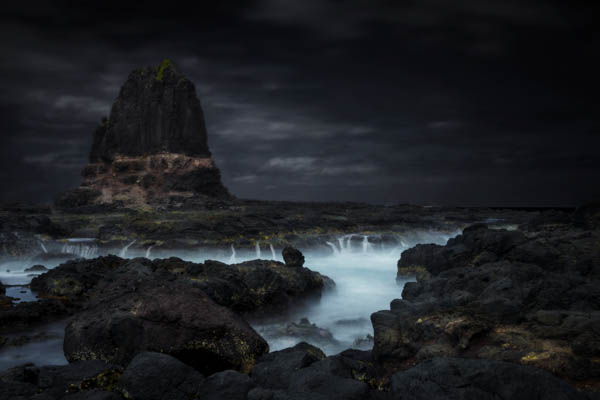
image1-cape-schanck-leannecole

Then there is composition and what is meant to make a good or perfect image. There is the rule of thirds – placing everything in that third, or on the third lines. You learn that when you are composing the image that the horizon should be on one of those thirds, or that the lone tree in the paddock or field should also be on one. Never put things in the middle of an image.

If you really get into it then you might learn about the golden ratio or the Fibonacci Spiral. This principle is about using a curve that determines where the subject should be placed for the perfect image; the spiral placement is very similar to the intersection of the third lines.

Then there is post-processing and again, there are rules about what is appropriate for landscape photography and what isn’t. Landscape photography is steeped in history and your photos should be true to what you see.

There are theories or rules that suggest you shouldn’t do any more processing to your images other than the very basic; that your images should represent the reality of what you saw. It is okay to fix exposure, horizon line, but you shouldn’t move pixels, like removing things from the image, or replace a sky.

No one is going to deny that learning all of that is wrong, and we should all learn it all. The next stop is working out if you are happy to follow the rules and do the same images that everyone else is doing.

The first thing you will find is that other people will start to criticize you. The tree is in the middle of the photo, or you shouldn’t have the horizon line in the middle. The one I get all the time is that I over process or my images are too dark.
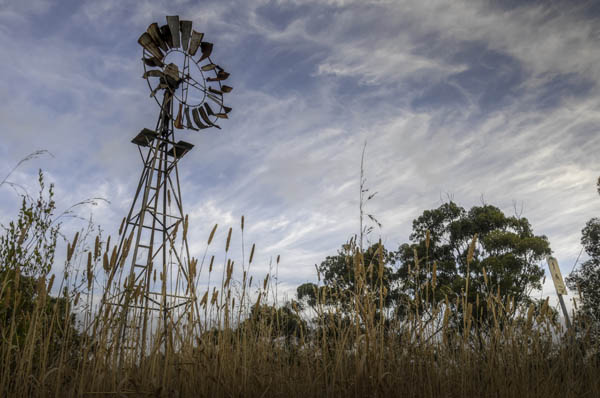
image2-inverleight-windmill-leannecole

My answer to that is: don’t listen.

Creating Your Own Style

There is a growing movement of photographers doing work that is not traditional and pushes the concept of landscape photography a whole lot more. It is where rules are broken, and new things are done that change what is considered traditional landscape photography.

Things like the rule of thirds are often forgotten, and you might see the subject placed firmly in the middle of the image. The horizon line may be in the middle of the image, cutting the image in half, as we’ve constantly been told is wrong and we shouldn’t do it.

How often do you get told that an image needs to be in focus, that if the subject isn’t sharp then you should delete the image? There are art photographers who take out of focus images and use them for art. Perhaps you shouldn’t go around taking a heap of photos that are out of focus, but sometimes the feeling or something else is just as important.

If we consider those things, then what does it mean for landscape photography, and how does it affect us? Perhaps it means that the world is your oyster and fine art is more about your interpretation of the world around you than the reality of it, then the possibilities of what you can do are endless. You can do whatever you like.
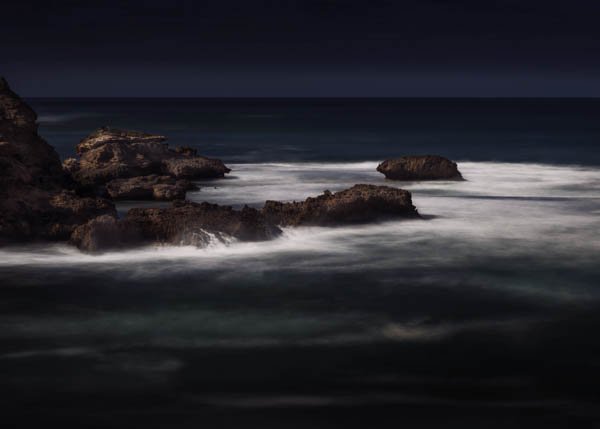
image3-flinders-blowhole-leannecole

Let’s look at what you can do, first out in the field and then back at home with post-processing.

Out in the Field

When you are out taking photos, look for odd angles. Think about how everyone else would take the image and see if you can come up with other ways to do it that are different. It isn’t always going to be possible, but it is a good practice to get into.

You could try using props in your images. I’ve heard of a couple of photographers that will place a person in their landscapes to help give it scale. You could do something like that, or start adding a prop of some sort that gives you a signature.

Photographing the same area time and time again can give you an edge too. You learn the area and discover things that people who rarely go there would find. Of course you have to also open your mind to the idea of finding new things. Try photographing the same thing over and over; see if you can find different ways of interpreting it.

It can help looking at what other photographers are doing to find styles you like. Study what they do. Work out what it is that you like about their work. I wouldn’t recommend copying them, but take some of it and use bits to help make your work your own.

An important thing to remember is that you don’t have to use photo editing to create images that are uniquely yours.
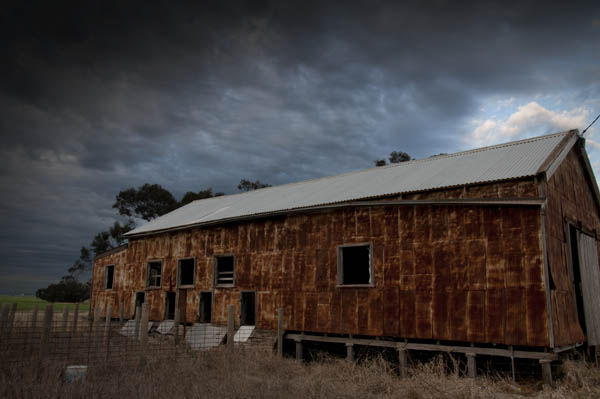
image4-woomelang-shearingshed-leannecole

Back in the Digital Darkroom

Once you get your images onto the computer, anything goes really. How far you take your images is completely up to you, but you also have to be prepared for heavy criticism from others. You are always free to ignore that – I do – but be polite about it.

You can do so many things in post-processing, such as selective focusing. Really make the viewer look where you want them to look. You can do this in many ways, with added blur or with lighting. It can be a strong technique; one that is used by painters all the time.

Selective saturation is a style that a few landscape photographers have started employing as well. You select areas of focus and give them a little more saturation, or you can desaturate the area around it. Make that area brighter or give it more vibrancy so it will stand out and attract attention, which is what you want.
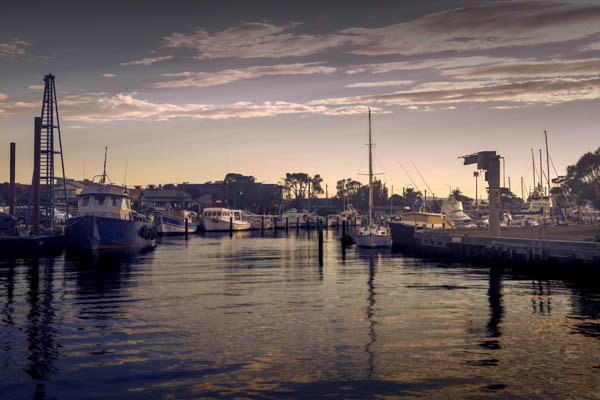
image5-mordialloc-marina-leannecole

Controlling the lighting is another technique that many use, myself included, meaning you take an image then try to find a way of completely changing the lighting so that the viewer can’t work out when it was taken.

Having an idea of what you want to achieve is also good, describing what you want people to see, or how you want your audience to view your work. Telling stories with your images is a great thing to do.

Again finding other photographers whose style you like is good too. Learn from them and see what you can do; it is encouraged in art schools all the time. Do what they do, but don’t pass it off as yours, find your own style, your own voice.

Through fine art landscapes you are showing an interpretation of the landscape around you, or wherever you take photos. The rules don’t always apply, but if you want to break them then do so in a way that will help you develop your own unique style.

Good luck.
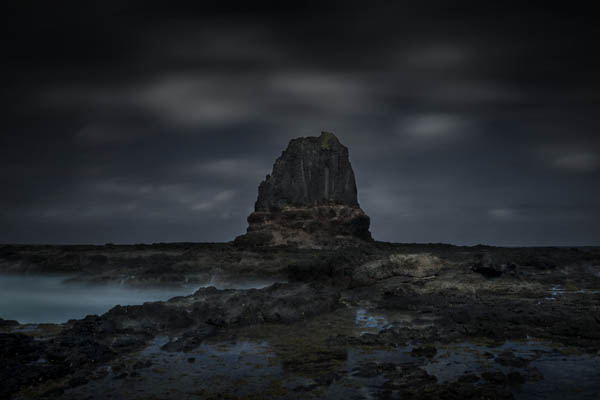
image6-capes-schanck-leannecole

If you have any other comments or tips please share in the comments section below.

googletag.cmd.push(function() {
tablet_slots.push( googletag.defineSlot( “/1005424/_dPSv4_tab-all-article-bottom_(300×250)”, [300, 250], “pb-ad-78623” ).addService( googletag.pubads() ) ); } );

googletag.cmd.push(function() {
mobile_slots.push( googletag.defineSlot( “/1005424/_dPSv4_mob-all-article-bottom_(300×250)”, [300, 250], “pb-ad-78158” ).addService( googletag.pubads() ) ); } );

The post Putting You Into Your Landscape Photography by Leanne Cole appeared first on Digital Photography School.
Digital Photography School

 
Comments Off on Putting You Into Your Landscape Photography

Posted in Photography


How to do Frequency Separation Portrait Retouching in Photoshop

27 Apr
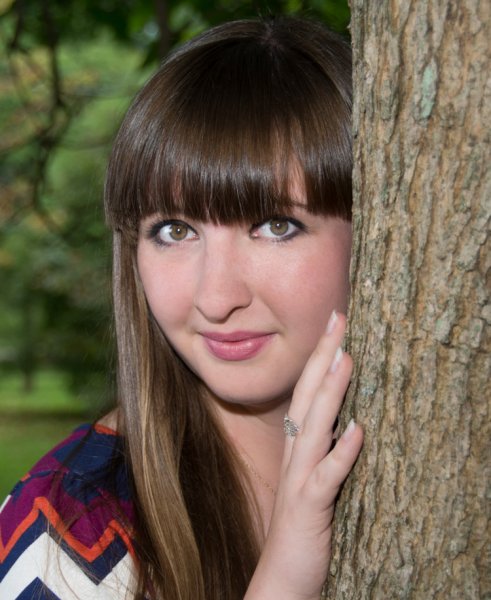
The goal of portrait retouching is to bring out the most naturally pleasing image of the subject. This image is the finished result of Frequency Separation Retouching in Photoshop.

The goal of portrait retouching is to bring out the most naturally pleasing image of the subject. This image is the finished result of Frequency Separation Retouching in Photoshop.

Portrait retouching may be accomplished using many different methods. Still, how often have you seen a portrait image that has been retouched to the point that the subject’s face looks unnatural? Even many of the software packages available for portrait retouching result in an airbrushed effect to skin tones.

What if the detail and color of a portrait could be separated for retouching? Frequency Separation Retouching will allow you to do just that! It will allow you to fix all the usual facial issues like removing wrinkles, bags under eyes, and blemishes. By dividing your image into two separate frequency layers, one layer being high frequency digital data, which contains the information of detail in the image, and a low frequency layer which contains the tonal and color information of the image.  However, the neat thing with Frequency Separation Retouching is that it allows you to make these corrections and retain the natural textures of the skin. By separating the colors and the details you can work on one aspect without affecting the other. Sure, some people will prefer the usual retouching methods, including airbrushing, but Frequency Separation Retouching gives you another option to use for enhancing your portraits. If you have a working knowledge of Photoshop, here’s how to get started:

Setup

#1 Make two copies of the background layer

In Photoshop, open your image, then make two copies of the background layer. Label the first layer “color” as this will be your low frequency layer, then name the second layer “detail” to become your high frequency layer.

#2 Apply a blur to the color layer

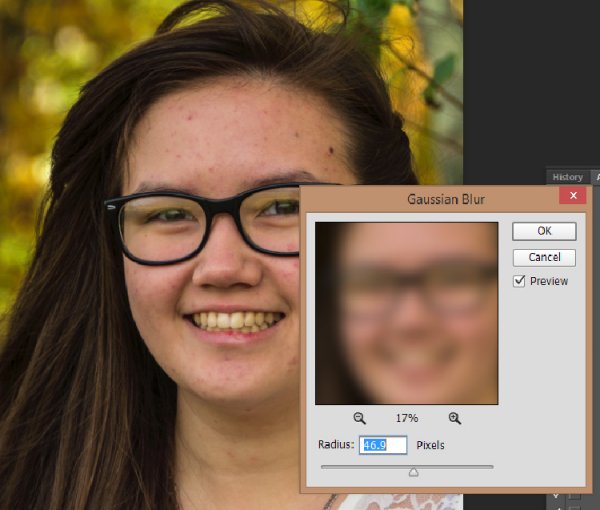
Turn off the detail layer and select the color layer. Apply a Gaussian Blur (found under the Filter menu>Blur) to a setting that blurs all the detail of the image, but leaves features intact (see sample below). This setting will vary from one image to another depending of the size of the image.

3-7-2015-2-21-56-PM750

#3 Setup the detail layer

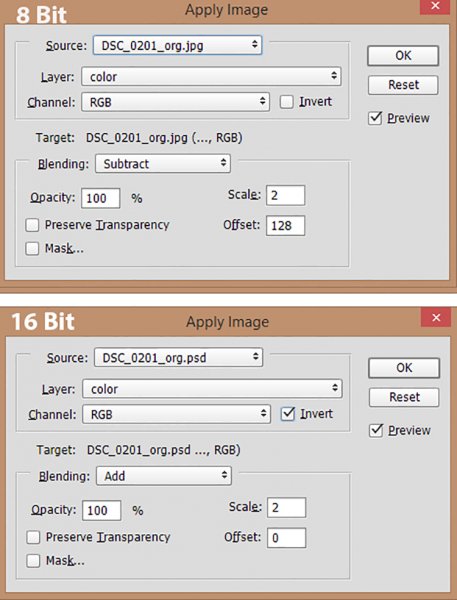
Turn the detail layer back on and select it, then go to Apply Image under the Image tab. Depending on which color depth you are working with, 8 bit or 16 bit, see settings below for Apply Image.

apply-image3Set your Layer to color. For 8 bit images set the Blending to Subtract, Scale to 2 and Offset. For 16 bit images set the Blending to Add, Scale to 2, Offset to 0 and check the Invert box.

Set your Layer to color. For 8 bit images set the Blending to Subtract, Scale to 2 and Offset. For 16 bit images set the Blending to Add, Scale to 2, Offset to 0 and check the Invert box.

  1. Change the blending mode of the detail layer to Linear Light.
  2. Create a layer group, and drag the color and detail layers into the new layer group.

Once you get the hang of this setup, it’s easy to make a Photoshop action to take care of these steps with one click. Download my Photoshop action for the setup HERE (the file is zipped, just unzip and load into Photoshop)

Now you’re ready to start the fun part!

Retouch the Color layer

By retouching the color layer, you are going to even out all the color tones of your subject’s complexion and to remove dark and light areas.

Clone Tool – the Clone tool can be used to even out the color tones or experiment with different blending modes. Normal, Darken and Lighten are very good effect modes to use on the color layer. You may also need to adjust the opacity (the degree of transparency) of these blending modes.

Dodge and Burn Tools are a couple of other useful tools to even out dark and light tones of the skin tones.

As with almost any Photoshop function, there are various ways to get the results you desire. The tools mentioned above are good starting points for working on the color layer, but the possibilities are endless! Don’t be afraid to experiment.

Retouch the Detail layer

Click on the Detail layer, which contains every detail of your portrait image. There are a wide variety of tools you can use to fix skin imperfections, ranging from wrinkles to acne.

Clone Tool – Use the Clone tool with mode set to normal and just clone out imperfections, sampling (ALT/OPT key click) from a desirable area to paint over an imperfection in another area.

Healing Brush Tool –  The Healing Brush tool works similarly to the Clone tool and will sample textures from nearby areas to make a seamless patch.

Spot Healing Brush –  Spot Healing Brush works similarly to the Clone tool and Healing brush, but does not require you to sample a source area. It will automatically sample from another area to repair the target imperfection. Use the adjustable brush sizes to paint over spots and remove them.

Patch Tool – Like the Healing tool, the Patch tool will match the texture of the near-by area for a seamless repair. Make a selection over the area to be repaired and drag the selection over a good area. For best results work on small areas at a time.

Content-Aware Patch –  Similar to the Patch Tool, but with the Content-Aware Patch you select a good area and drag it over area to be repaired, and the tool will match the texture.

After image

After image

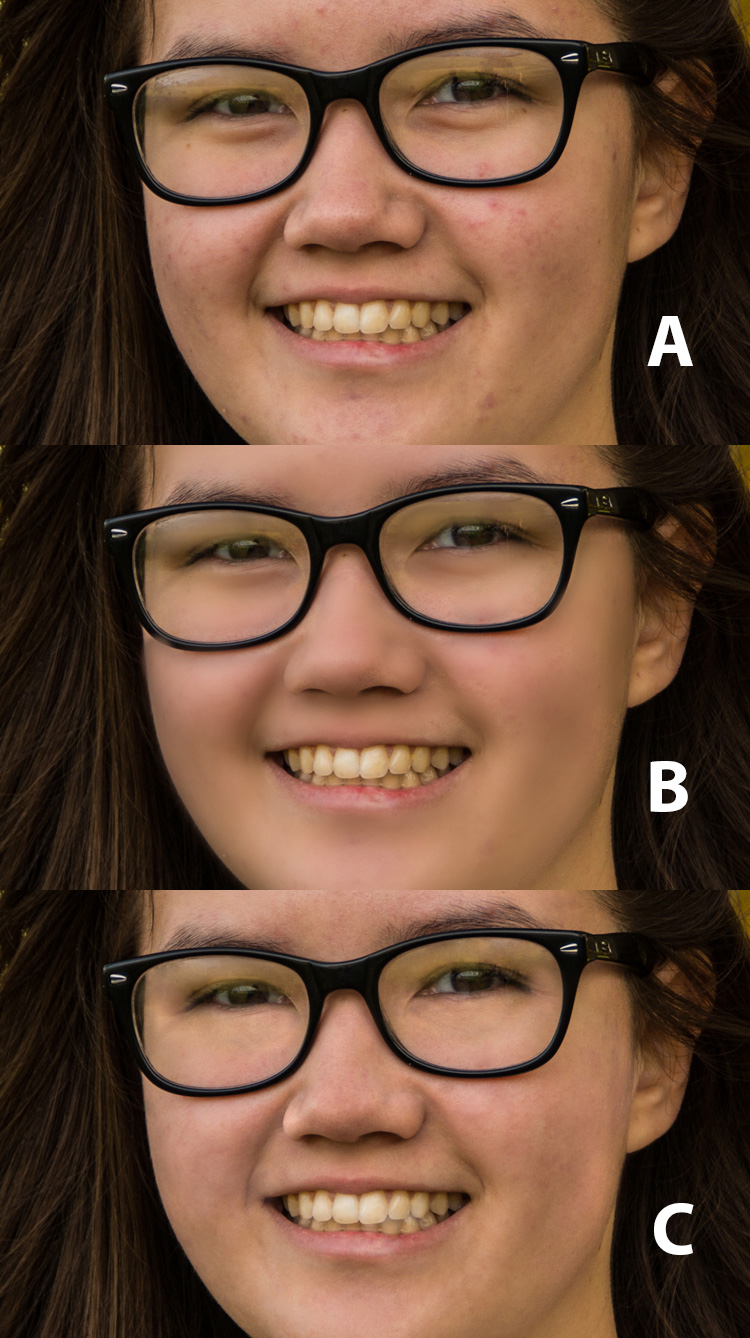
Once you have finished retouching the color and detail layers of your image, you can simply turn off the layer group to see the before and after of your work. (This is also a handy review tactic as you are working, to see how your adjustments are affecting the image.) Because all the retouching you have done are applied to the two new layers, it is completely non-destructive to the original image.  So, if you are unhappy with your first results, you can simply delete the retouched group and start over.

frequency-retouching-2-750

A – Original image B – Air-Brushed look retouching C – Frequency Separation retouching


Conclusion

Portrait retouching can be accomplished by using many different methods, and various software and plugins designed especially for that purpose. This article is meant to give you a Photoshop option for retouching and enhancing your portrait photography. The great feature of this method is the ability to separate the detail from the color and tones before retouching. Do you have any tips for portrait retouching?

googletag.cmd.push(function() {
tablet_slots.push( googletag.defineSlot( “/1005424/_dPSv4_tab-all-article-bottom_(300×250)”, [300, 250], “pb-ad-78623” ).addService( googletag.pubads() ) ); } );

googletag.cmd.push(function() {
mobile_slots.push( googletag.defineSlot( “/1005424/_dPSv4_mob-all-article-bottom_(300×250)”, [300, 250], “pb-ad-78158” ).addService( googletag.pubads() ) ); } );

The post How to do Frequency Separation Portrait Retouching in Photoshop by Bruce Wunderlich appeared first on Digital Photography School.


Digital Photography School

 
Comments Off on How to do Frequency Separation Portrait Retouching in Photoshop

Posted in Photography


18 Awe-Inspiring Tips to Take Better Photos

27 Apr

Today all of us play the role of photographers – using small electronic cameras, smartphones or tablets, we document each and every moment of our lives. If you’d like to take better photos and memorize moments in your life in a more professional way, have a look at those 18 key tips. 1. Keep it to the eye level Just Continue Reading

The post 18 Awe-Inspiring Tips to Take Better Photos appeared first on Photodoto.


Photodoto

 
Comments Off on 18 Awe-Inspiring Tips to Take Better Photos

Posted in Photography


What’s that noise? Shedding some light on the sources of noise

27 Apr

How would you react if you were told that the aperture and shutter speed you choose make more difference to image noise than the ISO setting? You might be surprised to discover that a lot of the noise in your images doesn’t come from your camera at all: it comes from the light you’re capturing. Our own Richard Butler explains. Read more

Articles: Digital Photography Review (dpreview.com)

 
Comments Off on What’s that noise? Shedding some light on the sources of noise

Posted in Uncategorized


27. April 2015

27 Apr

Das Bild des Tages von: traveller sam

17067075937_traveller sam

Im Ausblick: Autochrome von 1913, zentrierte Portraits und selbstvergessene Fotografen.
kwerfeldein – Fotografie Magazin | Fotocommunity

 
Comments Off on 27. April 2015

Posted in Equipment


Free Pennant Party w/ Every Instant Camera!

27 Apr

Let’s get your pennant party started, hip-hip-huzzah!

Today only, we’re giving you a pennant pack FREE when you buy any one of seven incredible instant cameras. If you’ve been waiting to pull the trigger on buying your favorite instant camera, today is the day!

Use the pennants for an impromptu photo booth and pop off prints instantly. Insta-fun, right?

Get Your Pennant Party Here!
(…)
Read the rest of Free Pennant Party w/ Every Instant Camera! (0 words)


© Erin for Photojojo, 2015. |
Permalink |
No comment |
Add to
del.icio.us

Post tags:


Photojojo

 
Comments Off on Free Pennant Party w/ Every Instant Camera!

Posted in Equipment


Söl’ring – Gesichter des Sylter Urdialekts

27 Apr

Sölring-©-Wiebke_Mörig_Artikelbild

Ein Beitrag von: Wiebke Mörig

Die Insel Sylt war im Januar von einem weißen Mantel bedeckt. Wegen des eisigen Windes traf ich auf leere Straßen. Die Kontaktaufnahme zu den Einheimischen war kein leichtes Unterfangen.
kwerfeldein – Fotografie Magazin | Fotocommunity

 
Comments Off on Söl’ring – Gesichter des Sylter Urdialekts

Posted in Equipment


3D Farming: Trees Grown into Fully Shaped & Formed Furniture

27 Apr

[ By WebUrbanist in Design & Furniture & Decor. ]

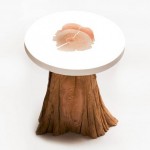
molded tree furniture design

Taking arborsculpture to new levels of efficiency and functionality, this furniture designer creates plastic molds in which his designs are grown without needing to be sawed and shaped after the fact, reducing waste and streamlining the production process. Light, soil and air are the equivalent of filament in this organic 3D printing analog, and even more directly: the molds can be 3D-printed as well.

molded organic furniture plants

While requiring careful planning and additional work upfront, taking young willow, oak, ash and sycamore trees and turning them as they grow into chairs, tables and lamps both shortens the construction cycle and eliminates the need to reconnect disparate pieces.

molded furniture forest field

molded plastic tree furniture

Founder of Full Grown in Derbyshire, England, Gavin Munro aims to challenge “the way we create products as well as how we see the items with which we surround ourselves, the Grown Furniture has an immediate tactile, visceral and organic appeal.”

growing tree furniture set

Gavin thinks of this process as a kind of “organic 3D printing that uses air, soil and sunshine as its source materials. After it’s grown into the shape we want, we continue to care for and nurture the tree, while it thickens and matures, before harvesting it in the Winter and then letting it season and dry. It’s then a matter of planing and finishing to show off the wood and grain inside.”

molded tree chair prototype_edited-1

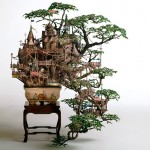
The notion of shaping trees as they grow on a massive scale is not a novel one – similar techniques have long been employed in vineyards to maximize growth and optimize grape picking. Even the idea of growing fully-formed furniture is not new – artists and designers have long shaped living trees to create objects of use. As far back as Ancient Greece, chairs were ‘built’ by digging out chair-shaped holes and allowing them to fill with root structures before being ‘harvested’ from the ground.

molded plant lamp shape

Still, the scale and ambitions here are, however, much bigger – creating full crops of grown furniture, turning a one-off idea into a potentially mass-produced (but always unique) product line.

molded shaped table design

Each furniture piece takes a few years to grow and maintaining this ‘forest of furniture’ is nothing if not challenging: “I’m only making 50 or so pieces per year but for every 100 trees you grow there are a 1,000 branches you need to care for, and 10,000 shoots you have to prune at the right time.”

molded root grown chair

Still, the results are worth the effort in the mind of this maker: “They’re still growing now, but when harvested and finished we expect them to be not just fully functional and ergonomic but grown, grafted and fastened into one solid piece, [meaning] no joints that only ever loosen over time. These could last for centuries. We hope and trust that this will eventually become an improvement on current methods.”

Share on Facebook


[ By WebUrbanist in Design & Furniture & Decor. ]

[ WebUrbanist | Archives | Galleries | Privacy | TOS ]


WebUrbanist

 
Comments Off on 3D Farming: Trees Grown into Fully Shaped & Formed Furniture

Posted in Creativity


Why You Should Make Dark Images

27 Apr

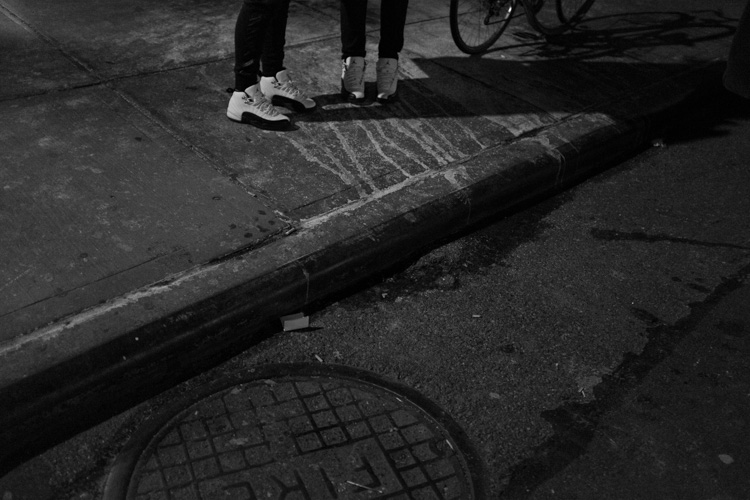
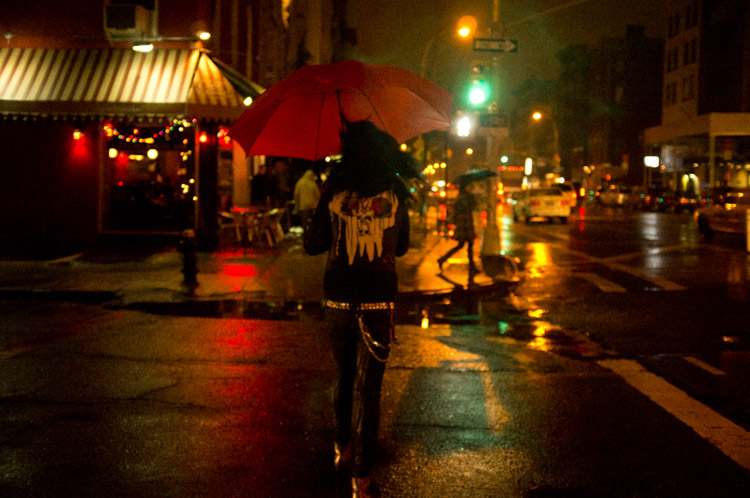
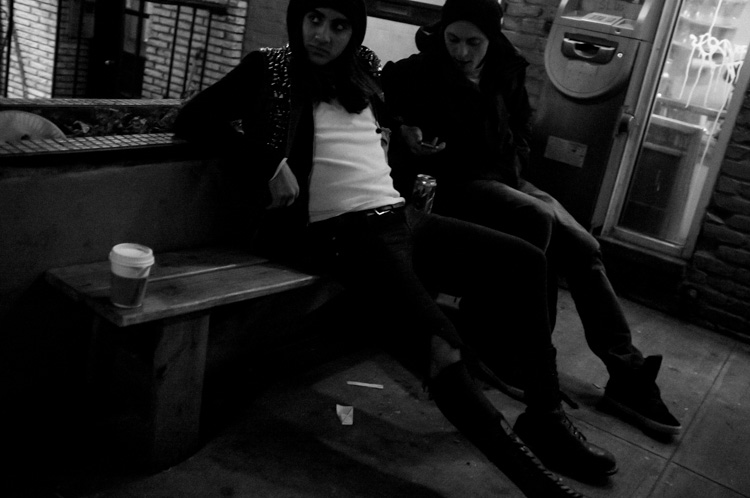
Street scene

One of the most unexplored aspects in digital photography is the dark image.

With digital, we have built-in light meters, histograms, incredible ISO capabilities, and processing programs, which make it much easier to expose our images brightly in all different lighting situations. This can have the effect of making photographers feel that they need to expose all of their images with a neutral histogram, where you can see the image perfectly well, with some information in the highlights, mid-tones, and shadows.

This is often what you want to do, but not always.

When you are using Aperture Priority, Shutter Priority, or the Automatic modes, your camera’s light meter has the aim of making whatever it is focusing on a neutral grey. Thus, it has the tendency to overly darken scenes with a lot of bright highlights or to overly brighten scenes with lots of dark tones.

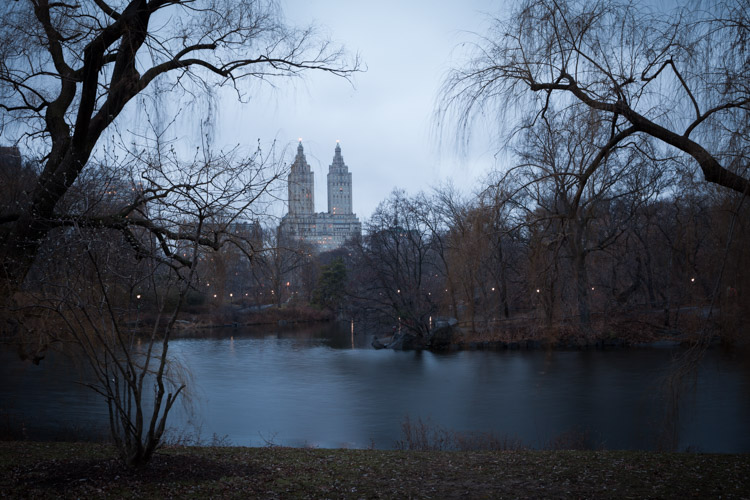
The Lake, Central Park – NYC

Because of this, when you photograph in dark situations your exposures can end up being bright as if they were taken during the day. It’s easy to think that this is okay, and often it is, but it also makes it easy to forget that sometimes a dark image is a good thing too. There is nothing wrong with making an image look like it was taken at night. There is nothing wrong with making the image tougher to see, like the scene was to your eye as you captured it.

For me, it was an experience when I started to look at older photography books and came across images that I couldn’t quite make out. ‘They should have been brighter”, I immediately thought, but then I realized that I liked them. I realized how natural and moody it made the images feel. I had to put in more effort to make out what was going on, and I liked that. It felt moody and real.

This image could have been made brighter and still worked.

Technically, to achieve this on Aperture or Shutter Priority, you need to lower your exposure compensation (+/-) setting when you are photographing subjects or areas with a lot of darker tones. I usually default to -2/3 or -1 stop, then tweak from there depending on the situation. You can even take it further by going into full Manual mode to override the camera’s light meter. Since the lighting is fairly consistent in many dark situations, this is often a great way to shoot.  I do this when shooting at night, in train stations, alleyways and many indoor situations. You can even shoot like this during the day by strongly underexposing your image.

If you notice, in the images in the article, the highlights are represented as middle grey tones. This is called exposing for the highlights and that is a key for making a dark image. Get used to seeing lots of deep blacks and mid greys. It can help to take a file into Lightroom and play around with the exposure to get a feel for how an image can look at different exposures. When shooting in dark situations, which means you will probably be using a very high ISO, you will want to make sure to get the image as close as possible to the prime exposure in the camera. But when you are learning it can only help to experiment in Lightroom to find the exposure that you like the best.

Nightlife Street Scene, East Village, NYC.

But what is the purpose of making an image dark? There are a few reasons. The first is that in many situations it can feel more realistic. Night images that look dark feel more like the viewer is actually there. They feel accurate and that can go along way for the viewer. Dark images can feel moody, eerie, dangerous, quiet, romantic, scary, weird, or contemplative. Many backgrounds look more beautiful with the dark shadows and moody lighting at night.

In addition, dark images draw the viewer in. Often with photography, the devil is in the details and sometimes it can be hard to draw viewers in to really look around an image. Dark images do that. As the viewer tries to make out the details, they inadvertently start exploring the image in more depth.

So next time you are shooting at night or in a dark area, think about making that image a bit darker.

Nightlife Street Scene, NYC.

googletag.cmd.push(function() {
tablet_slots.push( googletag.defineSlot( “/1005424/_dPSv4_tab-all-article-bottom_(300×250)”, [300, 250], “pb-ad-78623” ).addService( googletag.pubads() ) ); } );

googletag.cmd.push(function() {
mobile_slots.push( googletag.defineSlot( “/1005424/_dPSv4_mob-all-article-bottom_(300×250)”, [300, 250], “pb-ad-78158” ).addService( googletag.pubads() ) ); } );

The post Why You Should Make Dark Images by James Maher appeared first on Digital Photography School.

Digital Photography School

 
Comments Off on Why You Should Make Dark Images

Posted in Photography


26. April 2015

27 Apr

Das Bild des Tages von: Alexander May

Frau in einem See stehend vor Bergkulisse

Im Ausblick: Ein Portrait voller Ruhe und Freiheit.
kwerfeldein – Fotografie Magazin | Fotocommunity

 
Comments Off on 26. April 2015

Posted in Equipment