RSS
 

Archive for April, 2015

Deserted Aisles: 11 More Creepy Abandoned Supermarkets

26 Apr

[ By Steve in Abandoned Places & Architecture. ]

abandoned supermarket pripyat 1a
Supermarkets? More like Stupor Markets, amiright? That’s the case with these 11 abandoned supermarkets where “checkout” is more than a state of mind.

abandoned supermarket pripyat 1b

abandoned supermarket pripyat 1c

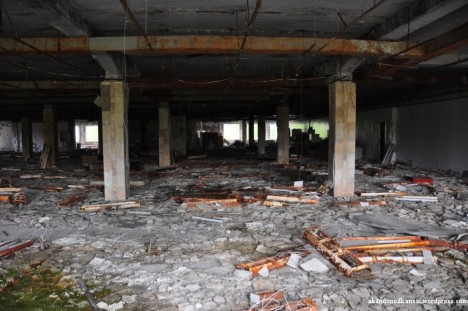
Cleanup in aisle… well, all of ‘em actually, and you’d better bring a hazmat suit along with a bucket & mop. Almost 30 years after the Chernobyl nuclear accident turned Pripyat into a creepy radioactive ghost town, the city’s snazzy supermarket recalls the good old days – Soviet style – when the shelves were stocked and the shopping carts had wheels.

abandoned supermarket pripyat 1d

abandoned supermarket pripyat 1e

Urbex ubergeek Florian from Abandoned Kansai visited the abandoned supermarket just off Lenin Square back in January of 2011 and lived to tell the tale – and post the images above. According to Florian’s native guide Maxim, Pripyat was a privileged place before the 1986 disaster and the central supermarket “was one of the few places in the Soviet Union that actually sold Chanel Nº 5.” Now it just stinks.

Well, ByeVee

abandoned supermarket hyvee newton 2

The soaring “V for Victory” signpost standing resolutely Ozymandias-like in the Iowa summer sun indicates the above abandoned supermarket above was once a HyVee. Flickr user Andrew T…has left the building captured the forlorn state of the place in June of 2012, sometime after HyVee consolidated their two existing Newton, IA stores into a newer, larger complex.

Howard’s End

abandoned supermarket baltimore 3a

Abandoned in 1999, the old Howard Park Super Pride supermarket on Liberty Heights Avenue finally succumbed to the wrecking ball after ShopRite selected the site for their new store.

abandoned supermarket baltimore 3b

abandoned supermarket baltimore 3c

Though it’s good to see any neighborhood revitalized, the oddly gentle demolition of the Super Pride’s landmark sign had to bring a tear to more than a few local eyes.

Next Page – Click Below to Read More:
Deserted Aisles 11 More Creepy Abandoned Supermarkets

Share on Facebook


[ By Steve in Abandoned Places & Architecture. ]

[ WebUrbanist | Archives | Galleries | Privacy | TOS ]


WebUrbanist

 
Comments Off on Deserted Aisles: 11 More Creepy Abandoned Supermarkets

Posted in Creativity


Das Spiel mit dem Licht

26 Apr

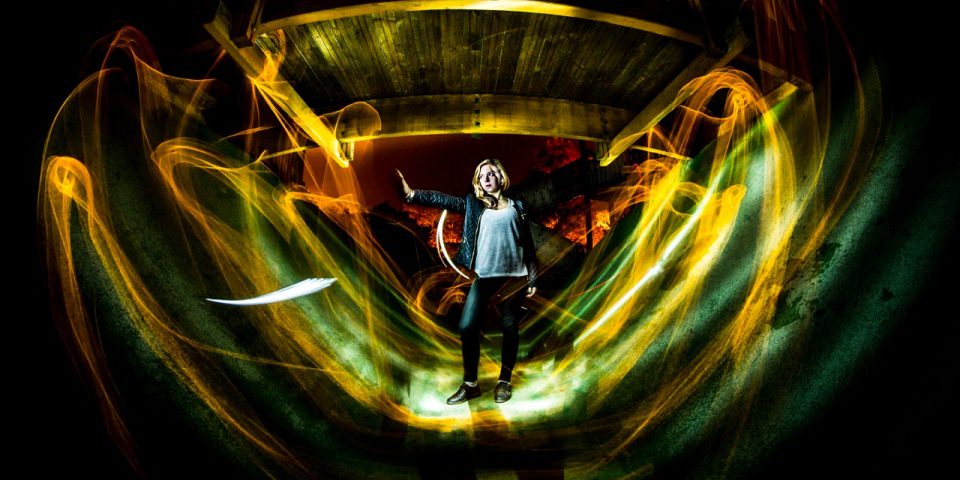
Frau steht in gelben und grünen Lichtern.

Ein Beitrag von: Alexandre Lefebvre

Ich mag es, Momente meines Lebens einzufrieren und besonders die Menschen, die ich treffe. Überhaupt habe ich eine starke Präferenz für Menschen in meinen Bildern. Ich bin einfach weniger empfänglich für Landschaften als für Gesichter. Für mich ist Fotografie eine Mischung aus Empfindsamkeit, Technik und Technologie.
kwerfeldein – Fotografie Magazin | Fotocommunity

 
Comments Off on Das Spiel mit dem Licht

Posted in Equipment


Winds of Change: Shooting changing landscapes

26 Apr

There are more people taking pictures now than ever before, and as a consequence, some of the world’s most beautiful views have been photographed to death. In this article, nature and landscape photographer Erez Marom explains the value of shooting ‘changing’ landscapes, which offer different perspectives every time you visit – or even from day to day, or minute to minute. Click through to read his article

Articles: Digital Photography Review (dpreview.com)

 
Comments Off on Winds of Change: Shooting changing landscapes

Posted in Uncategorized


9 Tips for Photographing Mountain Lake Reflections

26 Apr

How to Photograph Mountain Landscapes

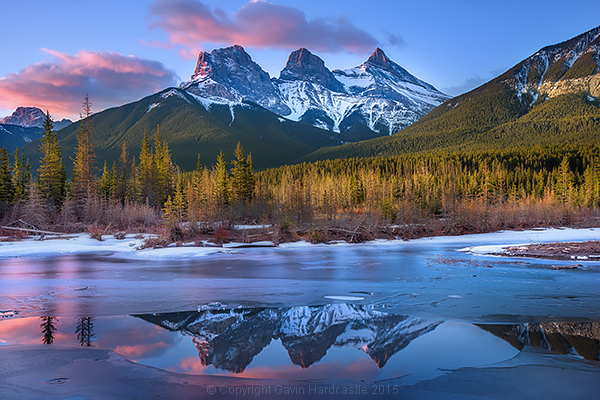
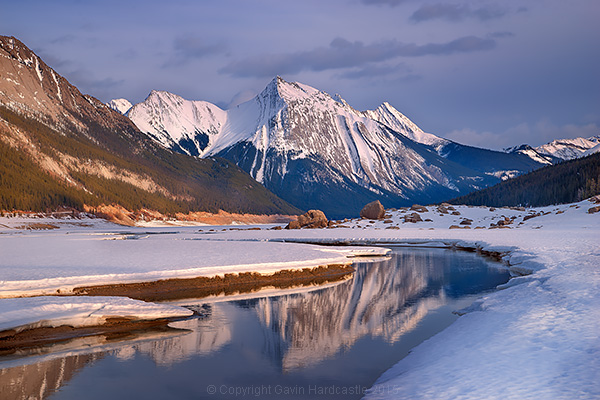
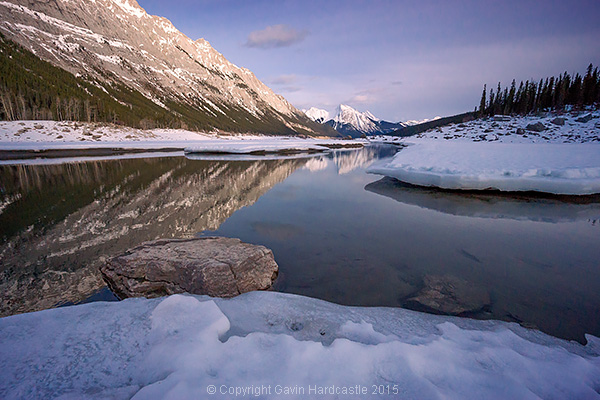
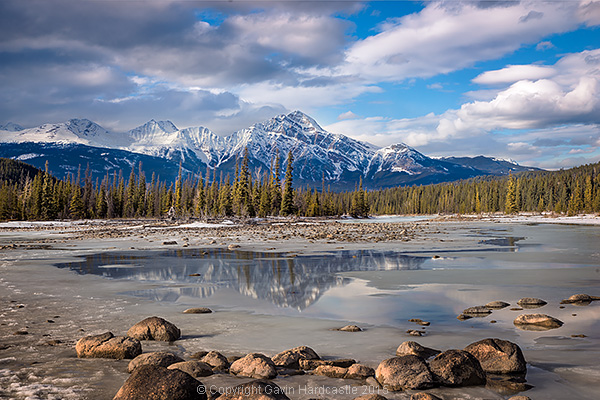
There’s something ultimately alluring about lake and river reflections in landscape photography, especially when surrounded by majestic snow capped mountains that glow hot from the light of the setting sun.

Here’s a little time-lapse video I put together using some of my recent lake reflection still shots in Alberta, Canada. Each frame is from a still image shot with a small mirrorless digital camera. Read on to learn the methods I use when trying to capture stunning lake and river reflections in my photography.

1 – Don’t shoot super wide

Regardless of whether your camera is full frame, APS-C or MFT (micro four thirds), it’s important to realize that when shooting mountain reflections you might not need your widest lens to capture the most pleasing composition.

A lot of the time I shoot in the super wide realm but that doesn’t work so well when shooting mountain reflections. A super wide lens tends to reduce the epic size of the distant mountains and magnifies the foreground.

That’s great when you can get fairly close to my central subject, but when that subject is a snow capped mountain a few kilometers away, it’s time to strap on a lens that gets you closer to the action.

At my most recent visit to Banff and Jasper in Alberta I found that I rarely shot with anything wider than 35mm on full frame. In many cases I was zoomed in past 50mm, and often beyond 100mm. Here’s an example.

This first shot is at a focal length of 70mm.

How to shoot mountain lake reflections

This second shot is at 16mm, super wide. There are a few minutes of light change in between the shots but otherwise it’s the exact same scene, from almost exactly the same position. I don’t know about you, but I much prefer the simpler, cleaner composition of the first, zoomed image.

How to shoot mountain river scenes

2 – Fill your frame with what’s cool

This is good advice for any kind of photography but with mountain lake reflections it’s easy to get wowed by the colourful clouds that are reflecting in the mirror surface lake. If they really are doing something impressive then by all means, devote some frame space to the clouds.

You’ll find however, that when you zoom closer to fill your frame with your most impressive mountain range and reflection, your image may have much more impact. At times this isn’t too obvious when you look through the viewfinder or LCD but when you view that zoomed image back on a large computer screen it often has more wow factor than your wider, cloud filled image.

How to Photograph River Landscapes

3 – Waiting for the wind to stop

If you’re out on a gale force windy day, don’t expect any lake reflections. You need that water to be perfectly still for good reflections. A mild, occasional wind is fine, just stick around and wait for it to periodically die down. You only need a few minutes. Bring a camp chair and thermos, then chill out while you wait for the perfect moment. It’ll come.

4 – Shoot two versions – adjust the polarizer

If you shoot lake scenes without a polarizer you’ll get a lovely mirror-like reflection, but you might be missing out on some interesting details under the water in the foreground. I like to take at least two shots with my polarizer in different positions. One shot will give me the maximum reflection while the other shot will reduce that reflection to reveal the details under the water.

I can then easily blend these two exposures in Photoshop to get the best mixture of reflection and water detail.

5 – Interrupt the reflection

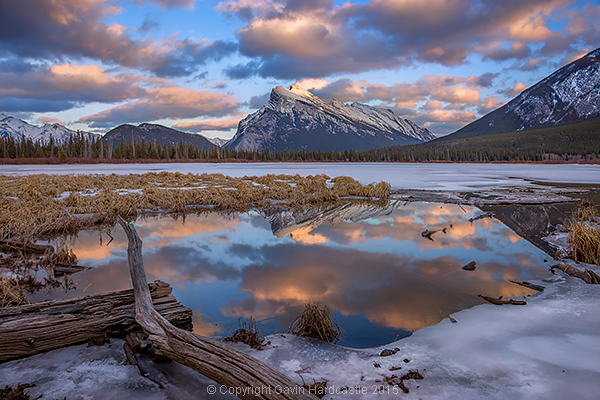
Vermillion Lakes, Banff - Mirror World by Gavin Hardcastle

I have a thing for the interrupted reflection. I find it more interesting to have my mountain reflection interrupted by ice formations, river bends, rocks and branches as apposed to a completely whole and perfect reflection. Try and avoid that obvious BAM reflection. Be a bit clever and put some thought into how you can make the reflection more interesting.

6 – Get down low

I like to pick the most interesting point of my mountain range then find a spot in my foreground that reflects that interesting point. I often need to get the camera down lower to achieve this, sometimes adjusting the tripod to its lowest point. At times you might not need to get so low and maybe just step back a few feet to place your reflection where you need it to be.

You can’t change where the mountain is, but you can change your position relative to it to capture the most interesting foreground and reflection.

7 – Look for framing elements in the foreground

If possible, try to incorporate elements in your foreground than frame the scene. It creates a window into your scene that we humans find very appealing.

8 – Look for leading lines in your foreground

Lake Photography Tutorial

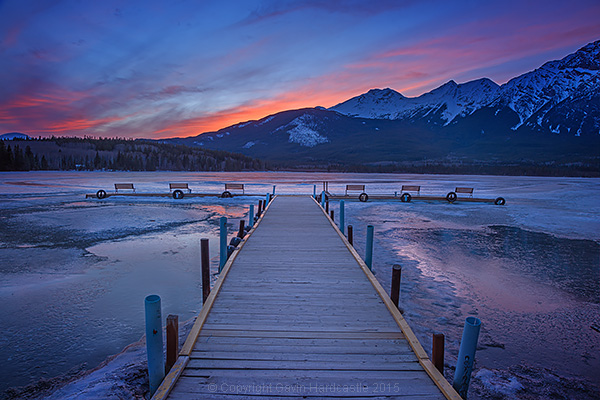
Try and find foreground elements that suck the eye in to the centre of your image. Use rocks, logs and branches to blatantly point at the mountain scene in your image. Obviously you’ve got to work with what you have but there’s almost always something there.

9 – Star reflections are gold

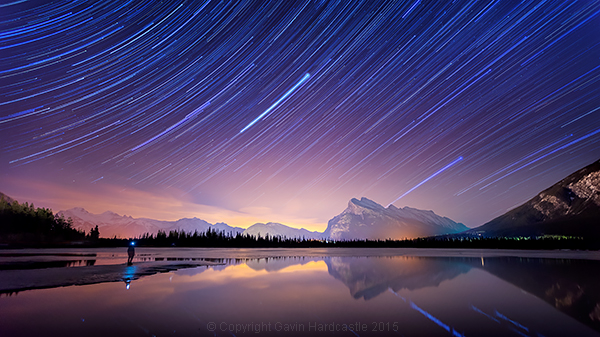
If you’ve got a calm, clear night that is the perfect chance to capture the Milky Way or star trails in your lake reflection. Place a colossal mountain range in the centre of that and you’ve got yourself a killer shot. For tips on how to shoot star trails like this, view my tutorial How to Shoot a Star Trails Selfie.

Star Trails Selfie Tutorial

googletag.cmd.push(function() {
tablet_slots.push( googletag.defineSlot( “/1005424/_dPSv4_tab-all-article-bottom_(300×250)”, [300, 250], “pb-ad-78623” ).addService( googletag.pubads() ) ); } );

googletag.cmd.push(function() {
mobile_slots.push( googletag.defineSlot( “/1005424/_dPSv4_mob-all-article-bottom_(300×250)”, [300, 250], “pb-ad-78158” ).addService( googletag.pubads() ) ); } );

The post 9 Tips for Photographing Mountain Lake Reflections by Gavin Hardcastle appeared first on Digital Photography School.


Digital Photography School

 
Comments Off on 9 Tips for Photographing Mountain Lake Reflections

Posted in Photography


5 Fotowettbewerbe des Monats

26 Apr

Seifenkistenrennen

Bis jetzt noch keinen Erfolg bei Wettbewerben gehabt? Hier haben wir Nachschub für Euch. Aber passt auf, ein gewisses Suchtpotenzial haben sie ja schon und man muss gut auswählen, denn da einige Teilnahmegebühren verlangen, verliert man auch schnell Geld bei der Hoffnung auf einen Gewinn.
kwerfeldein – Fotografie Magazin | Fotocommunity

 
Comments Off on 5 Fotowettbewerbe des Monats

Posted in Equipment


Landskating: Giant Chinese Landscapes Drawn with Roller Blades

26 Apr

[ By WebUrbanist in Art & Drawing & Digital. ]

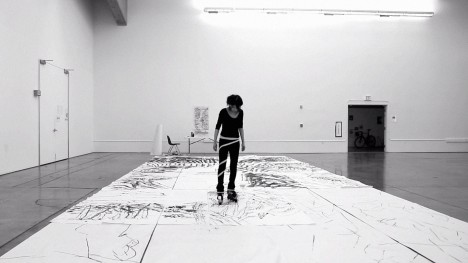
landskating creative drawing process

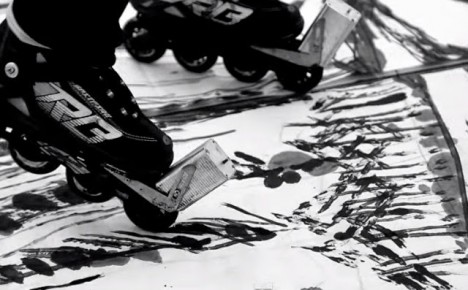
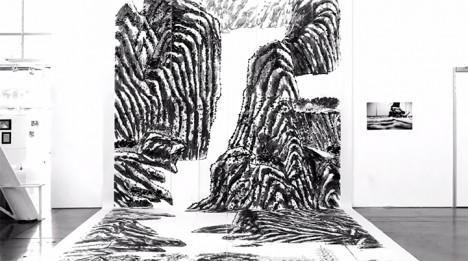
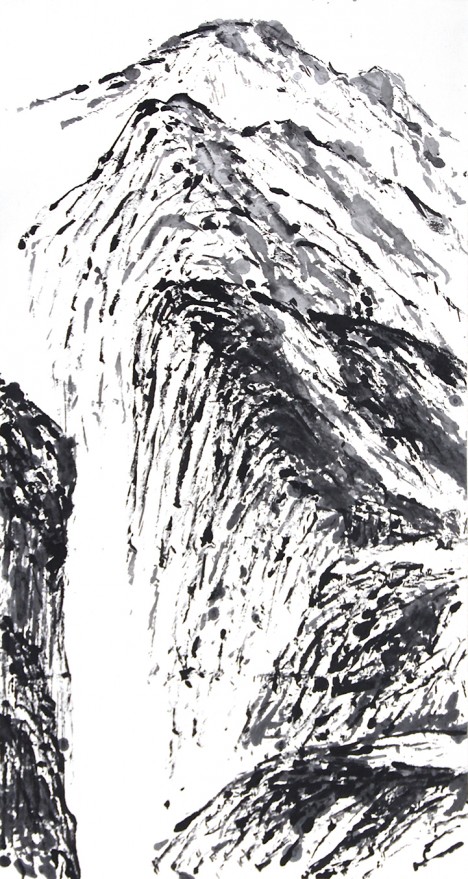
Modified inline skates holding pots of black pigment allow this artist to create her huge works (up to 40 feet or more) while rolling around the room, with results that look remarkably like smaller-scale works of hand-drawn calligraphy.

landskating art landscape making

giant calligraphy style drawing

A student at the California College of art, Tian Haisu has dubbed her approach Landskating. She notes that her “whole body is involved” in this unusual process, filling her creations with a unique kind of “power, speed and rhythm.”

landskating artist sketches

giant landskating art work

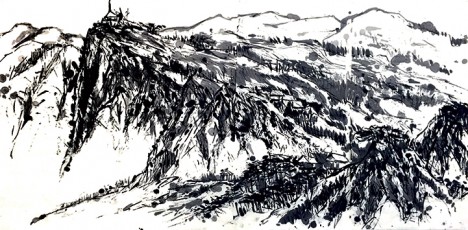
Her works feature landscapes, plants and architecture, all created by pressing down on giant unrolled sheets of paper deployed after she has sketched out and thought through these larger compositions on small sheets.

giant mountain scene

As with any artistic approach, it took the artist time to learn the medium, executing with her feet rather than her hands in a way that both liberates the creative process but also involves complexities and stylistic impacts that are not always easy to predict or control.

Share on Facebook


[ By WebUrbanist in Art & Drawing & Digital. ]

[ WebUrbanist | Archives | Galleries | Privacy | TOS ]


WebUrbanist

 
Comments Off on Landskating: Giant Chinese Landscapes Drawn with Roller Blades

Posted in Creativity


25. April 2015

26 Apr

Das Bild des Tages von: tarcitaxx

Stuttgarter Fruehlingsfest © Tarcitaxx

Kleiner Nachtausflug aufs Stuttgarter Flühlingsfest? Hier entlang.
kwerfeldein – Fotografie Magazin | Fotocommunity

 
Comments Off on 25. April 2015

Posted in Equipment


The Ultimate On-Location Storage Solution – ioSafe Rugged Portable SSD Review

26 Apr

That’s a big call really, isn’t it? “Ultimate on-location storage” what does that even mean, and do you need it? Well, dear reader, read on and we’ll get to the bottom of this relatively new, bomb proof storage device from ioSafe.com

The aptly named Rugged Portable is an external solid state drive that connects to your computer via USB 3.0 to store all of your files – in my case, raw images photographed on location. We have the 1TB version on a trial and that’s going to be (much) more than enough for most photography adventures.

slideshow_rugged-portable_3

Transfer speeds via USB 3.0 are usually more than enough under the two circumstances I’ve used the drive. The first being to copy from my 32GB Sandisk Extreme Pro CF card via a Lexar USB3 card reader, through the Macbook Air and out the other side into the compact ioSafe drive. I also use a couple of Thunderbolt drives at home, and the noted difference between Thunderbolt and USB3 transfer speeds isn’t actually all that noticeable under real world conditions.

The second scenario was while shooting for an agency that’s recently hired me to be the photographer for a series of shoots. When tethered, and shooting on location, I find myself importing the images to my WD Passport Pro and running a second copy off to the ioSafe – Why? This client takes my CR2 files at the end of each shoot and the designer handles the processing and editing, so I unplug the WD and hand it to the producer and he takes it away with him until next shoot, the ioSafe comes with me. You’re still sitting there scratching your forehead?

Six of the shoots I’ve done so far for this client, four of them have been of scenarios I can’t recreate for one reason or another. If those images are lost by me between location (sometimes on set for two days, away from home and the comfort of backing up to my Promise R8 – yes, I love storage) and the client has a mishap – well, frankly, we’re stuffed. Obviously this is a worst case scenario, but these are the ones that we like to avoid!

s123

Sure, you find a way to work around it – you’re a professional, and that’s why I think it’s nice to not have to “get around it” and to take as much risk out of your shoot days as possible.

When I say “if those images are lost by me” I’m hoping to never have a catastrophic failure that involves my gear melting down, drowning or being driven over, but human error involves dropping drives, spilling a glass of wine on your laptop – the list goes on.

I can see this drive being the perfect storage and transport for destination wedding photographers, commercial photographers travelling to shoot, pretty much anyone that really cares about their, or their clients’ images, between shoot and final delivery.

The ioSafe Rugged portable has some pretty impressive statistics and while I’ve not tested these personally* I know the ioSafe crew are pretty serious about their gear and have a data recovery guarantee attached to their products (more on that after the stats).

slideshow_rugged-portable_2

  • Crush Protection up to 5,000 lbs.
  • Drop Protection up to 10 feet
  • Immersion protection up to 30′ for three days
  • USB 3.0 SuperSpeed (like Superman, you know)
  • Data Recovery Service up to $ 5,000/TB
  • World’s best warranty
  • Mac or PC

Like I said, pretty impressive… But then, it’s not really impressive unless I test some of this stuff, right? (This was an afterthought and, now *I have tried some of them!)

Enlisting the services of Filmmaker and Educator, Lee Herbet of Capturing Passion We’re going to try show you what makes the ioSafe Rugged Portable the little beast that it is.

So, for some examples! In most of these examples I was either tethered shooting to the drive (crush test) or it was at least plugged in and powered up (water and drop tests)

1. Crush test

I’m on set, shooting the OutdoorTech van (Thanks to Blonde Robot!) when one of the directors glides in silently in his Tesla S… Clearly the Tesla has a great rear facing camera, but this one doesn’t have a front facing camera and well, you can see how that played out!

2. Submersion test

We’re back shooting some images for a water conservation company here in Melbourne, thankfully not into 30′ of water, but you get the idea!

3. Drop test

I’d forgotten to simply use my CamRanger with the 7.3m (24′) tall Kupo LookOut stand while shooting a lifestyle image… Watching this back almost reminds me of a Mr Bean sketch!

So, even though the shooting situations above were staged, the drive really did get run over, dropped, and drowned multiple times to make these short films. The footage was also saved onto the drive and the films edited together on location at my favourite cafe right after we wrapped the final filming. You can even see the drive data light flashing in the Tesla video as I was shooting to it just before it was run over!

In closing , do you need the ultimate on-location storage solution? Only your business requirements can answer that question for you, but if you’re after an easily portable SSD external drive for your photography, that will look danger in the face and laugh – this is it.

This drive leaves me nothing to complain about and so I give it five gold stars.

Thanks for reading! Hope you enjoyed my take on the ioSafe Rugged Portable!  –Simon

googletag.cmd.push(function() {
tablet_slots.push( googletag.defineSlot( “/1005424/_dPSv4_tab-all-article-bottom_(300×250)”, [300, 250], “pb-ad-78623” ).addService( googletag.pubads() ) ); } );

googletag.cmd.push(function() {
mobile_slots.push( googletag.defineSlot( “/1005424/_dPSv4_mob-all-article-bottom_(300×250)”, [300, 250], “pb-ad-78158” ).addService( googletag.pubads() ) ); } );

The post The Ultimate On-Location Storage Solution – ioSafe Rugged Portable SSD Review by Sime appeared first on Digital Photography School.


Digital Photography School

 
Comments Off on The Ultimate On-Location Storage Solution – ioSafe Rugged Portable SSD Review

Posted in Photography


5 Photoshop Layer Mask Tricks – Video Tutorial

26 Apr

Photoshop has many features that can make photo editing both non-destructive and creative. Using Layer masks is one such feature. Masks can also be confusing to understand and they have many ways to apply and use them.

In this video tutorial Joshua Cripps goes over five layer mask tricks – I even learned a couple things I hadn’t seen before, so thanks for that! See if you can pick up some things you can use for post-processing your images:

Menu > Image > Apply image = brilliant!

Try and see for yourself. Do you have any other Photoshop layer masking tips or tricks? Please share with us in the comments below. There are a million ways to do things in Photoshop, no one can know them all so show me something else I haven’t seen!

googletag.cmd.push(function() {
tablet_slots.push( googletag.defineSlot( “/1005424/_dPSv4_tab-all-article-bottom_(300×250)”, [300, 250], “pb-ad-78623” ).addService( googletag.pubads() ) ); } );

googletag.cmd.push(function() {
mobile_slots.push( googletag.defineSlot( “/1005424/_dPSv4_mob-all-article-bottom_(300×250)”, [300, 250], “pb-ad-78158” ).addService( googletag.pubads() ) ); } );

The post 5 Photoshop Layer Mask Tricks – Video Tutorial by Darlene Hildebrandt appeared first on Digital Photography School.


Digital Photography School

 
Comments Off on 5 Photoshop Layer Mask Tricks – Video Tutorial

Posted in Photography


Sony introduces touchless shutter app and we go hands-on (off?)

25 Apr

Sony has released a beta version of its Touchless Shutter app, immediately available for download through the PlayMemories app store. The app makes use of the eyepiece sensor as a shutter release mechanism and brings all the advantages of a traditional cable release without needing any extra camera gear. All that is needed is a hand wave near the eyepiece and the shutter will release. Read more

Articles: Digital Photography Review (dpreview.com)

 
Comments Off on Sony introduces touchless shutter app and we go hands-on (off?)

Posted in Uncategorized