RSS
 

Archive for April, 2013

Roger Cicala compares Zeiss 135mm and Canon 135mm f/2 lenses

30 Apr

canon135.png

LensRentals’ Roger Cicala has published an interesting comparison of the Zeiss ZE 135mm F2 APO-Sonnar and the Canon 135mm F/2L lens, with both optics mounted on a Canon EOS 5D Mark II. While you’d expect nothing less than excellent results from the Zeiss optic, just what advantages can the heavier and much more expensive lens offer compared to Canon’s well-regarded prime lens? Click through to read Cicala’s findings.

News: Digital Photography Review (dpreview.com)

 
Comments Off on Roger Cicala compares Zeiss 135mm and Canon 135mm f/2 lenses

Posted in Uncategorized


Good Stuff, Free: Joey L. on Creative Live, Now

29 Apr

Just a quick heads-up: for three full days, photographer Joey L. is teaching all day live on Creative Live. And it’s free.

So far, it looks like really good stuff, and definitely worth your time.

:: CreativeLive.com ::

-30-


Strobist

 
Comments Off on Good Stuff, Free: Joey L. on Creative Live, Now

Posted in Photography


Lighting Setup: The Athlete

29 Apr
For this shot, only the strip box was used, to camera left. The back light was also used, but I turned the kicker light off for more dramatic lighting.

For this shot, only the strip box was used, to camera left. The back light was also used, but I turned the kicker light off for more dramatic lighting.

I was contacted by a local model who also happened to be a tennis player, and she wanted to do a tennis shoot for her portfolio. We discussed ideas, as well as location.  A tennis court was the obvious choice for location.  I had decided I wanted dramatic lighting, similar to what’s seen in sports drink ads, or athletic apparel ads.  I knew that would require two or three lights, and a darkened overall scene to get the look I was after.

Since the shoot took place in the later afternoon, when there was still plenty of daylight, in order to get the darkened look, I needed to play around with my exposure. I was using the EOS-1D Mark IV, which has a top sync speed of 1/300. For lighting I used two Canon 580 EX II speedlites off camera in softboxes. One softbox was a Westcott Apollo 28″ softbox, while the other was a Westcott 18×42 strip box.  For the shots where the model was backlit as well, I used a Canon 430 EX II speedlite on a light stand with no modifier.  The 18×42 strip box is asymmetrical offers the ability to light a full length figure with soft falloff at the lower legs, while the 28″ Apollo softbox lights the upper half well when close up, or when pulled back can light a full length figure.  I used the strip box to light the model from the front, and the 28″ softbox as the kicker light from the right rear. For the dramatic backlight, I used a bare Canon 430 EX II speedlite pointed back towards the camera.

In order to allow the speedlites to be the main source of light, I needed to deaden the daylight.  I did this by setting the flash to E-TTL, and the camera to shutter priority.  I then dialed back the camera’s exposure compensation to -3.  This served to darken the ambient exposure, allowing the speedlites to provide lighting at the proper exposure.  This made it appear I was shooting at night, or in a darkened stadium.  It’s important to understand that there is a difference between exposure compensation and Flash Exposure Compensation.  Exposure compensation will affect the exposure of ambient light, but will not affect flash output. This allows you to balance the flash exposure with the ambient exposure in any way you prefer. The speedlites were set to ratio their exposure based on E-TTL metering.  Canon speedlites can ratio A:B. If a third group of speedlites is set to Group C, these can be adjusted using flash exposure compensation.  The main ratio used was 4:1, but I did vary this throughout the shoot.  The backlight was set to E-TTL, Group C, with Flash Exposure Compensation set to +3.

For athletes, in order to give them that larger than life look, it’s best to shoot from a low angle. I instructed the model to vary her poses between intimidating looks and stances.  I used tennis balls to add to the theme, and by sending the backlight through the net, added a dramatic shadow to the foreground. This ended up being a set I was really happy with, and the model was happy with her shots.

In this shot, the backlight was turned off, and the 28" softbox was positioned behind and to camera right of the model. This created a dramatic shadow to the front of the model while strip box lit her left side. The backlight was turned off for this shot.

In this shot, the backlight was turned off, and the 28″ softbox was positioned behind and to camera right of the model. This created a dramatic shadow to the front of the model while strip box lit her left side. The backlight was turned off for this shot.

For this shot, all three lights were in play.  The backlight caused the dramatic shadows and a highlight effect, while the kicker illuminated the model's right rear, and the strip box lit her face and front side.

For this shot, all three lights were in play. The backlight caused the dramatic shadows and a highlight effect, while the kicker illuminated the model’s right rear, and the strip box lit her face and front side.

Post originally from: Digital Photography Tips.

Check out our more Photography Tips at Photography Tips for Beginners, Portrait Photography Tips and Wedding Photography Tips.

Lighting Setup: The Athlete


Digital Photography School

 
Comments Off on Lighting Setup: The Athlete

Posted in Photography


Private Playgrounds: 13 Amazingly Fun Houses

29 Apr

[ By Steph in Architecture & Houses & Residential. ]

Private Playgrounds Fun Houses Main

If you had your own pirate ship fort, multi-story slide, climbing wall or indoor skate park, would you ever want to leave your house? Some homeowners have turned their residences into private playgrounds and theme parks, incorporating fun elements to liven up home life for kids and adults alike.

Home Library with a Wooden Slide

Private Playgrounds Library Slide 2

Private Playgrounds Library Slide 1

Bookshelves and a slide are built into a set of stairs in the Panorama House by architect Moon Hoon from South Korea, encouraging kids to spend a lot more time in this fun little space. And as if those three functions weren’t enough, the steps also offer a stadium-style home theater seating area. Says Hoon, “The multi-use stair and slide space brings much active energy to the house, not only children, but also grown ups love the slide staircase. An action filled playful house for all ages.”

Indoor Skate Park House

Private Playgrounds Skate Villa

An abandoned hunting lodge in the woods of Salzburg, Austria was remodeled into a skater’s dream, filled with ramps and curving surfaces to make it an indoor skate park and residence in one. Designed by professional skateboarder Philipp Schuster, Skate Villa retains its lodge character with antlers, rifles and rustic furniture.

Colorful Home with Spiral Stairs, Slides and Trap Doors

Private Playgrounds Three Story Slide 1

Private Playgrounds Three Story Slide 3
Trap doors, slides, bridges and bright three-story spiral staircases make this ‘magical oasis’ by AB Rogers and DA Studio much more enjoyable for kids and adults alike than an average home. Not only does the house feature secret doors that can be thrown open to slide down to the next floor, it has a special oversized sofa designed specifically for jumping and bouncing.

Pirate-Themed Playground with Treehouse and Slides

Private Playgrounds Pirate Ship

Private Playgrounds Pirate Ship 2

Private Playgrounds Pirate Ship 3

A floating pirate ship bedroom with a rope bridge, offering a magical place to sleep, is just the beginning in this fun-centric house by Kuhl Design. A hidden slide spirals three stories down to a basement with a climbing wall and video golf room.

Tokyo Three-Story Slide and Ball Pit

Private Playgrounds Tokyo Slide 1

Private Playgrounds Tokyo Slide 2

Would you rather take the slide, or the stairs? This Tokyo house by Japanese studio Level Architects lets you choose at each of the three floors. Stairs wrap around one side and the slide wraps around another. Another fun feature is a small light-filled ball pit.

Amazing Indoor/Outdoor Home Climbing Wall

Private Playgrounds Tokyo Climbing Wall 1

Private Playgrounds Tokyo Climbing Wall 2

Tired of taking the stairs? Climb from one floor to the next instead. The 3-Way House in Tokyo by Naf Architect & Design incorporates a modern climbing wall as a main visual component, placed in a glassed interior courtyard that can be seen from various rooms in the house.

Next Page:
Private Playgrounds 13 Amazingly Fun Houses

Share on Facebook


[ By Steph in Architecture & Houses & Residential. ]

[ WebUrbanist | Archives | Galleries | Privacy | TOS ]


WebUrbanist

 
Comments Off on Private Playgrounds: 13 Amazingly Fun Houses

Posted in Creativity


The Awful Truth of Photo Theft, and What You Can Do About It

29 Apr

Stop what you’re doing for a second. Think about how content you are with your photography. The accolades. The compliments. Even if you think the only person who really appreciates the results is you. Think about how much work you put in to get those things. Experimentation with different filters, formats, and shooting locations, not to mention countless hours of Continue Reading

The post The Awful Truth of Photo Theft, and What You Can Do About It appeared first on Photodoto.


Photodoto

 
Comments Off on The Awful Truth of Photo Theft, and What You Can Do About It

Posted in Photography


Olympus opens “OM-D: Photography Playground” in Berlin

29 Apr

omdplayground.jpg

Olympus has opened an exhibition that it’s calling the “OM-D: Photography Playground” in Berlin, Germany. Situated in the Opernwerkstaetten gallery space, it’s an installation of works by 12 artists and collectives that visitors are encouraged to explore, interact with, and photograph.  It’s open daily from 11am to 7pm until 24 May 2013, and entry is free. Visitors can also borrow an OM-D E-M5 during their visit, to try out the camera at no charge.  

News: Digital Photography Review (dpreview.com)

 
Comments Off on Olympus opens “OM-D: Photography Playground” in Berlin

Posted in Uncategorized


29. April 2013

29 Apr

Ein Beitrag von: Alexander Kopatz

Bear_©_Alexander-Kopatz


kwerfeldein – Fotografie Magazin

 
Comments Off on 29. April 2013

Posted in Equipment


Bildvorstellung: Pre-birth

29 Apr

Eigentlich wollte ich eines meiner Tanzbilder vorstellen, da heute ja Tag des Tanzes ist. Ich hatte schon fast angefangen zu schreiben, als mir klar wurde, dass das nicht das Bild war, das ich vorstellen wollte. Es war zwar schön und ich war zufrieden damit, aber es war einfach nicht das richtig Bild.

Vor allem deshalb, weil sich ein anderes Bild bereits in meinem Hinterkopf festgesetzt hatte. Dieses.

© Laura Zalenga

Ich würde jetzt gern erzählen, dass ich das Konzept dazu schon lange im Kopf hatte, dass alles genau geplant war und eine Leiter schon bereit stand, dass die Visagistin, das Model und der Stylist vor Ort waren und tolle Utensilien dabei hatten. Naja, so war es eher nicht.

In Wirklichkeit war ich in einem kleinen Secondhandladen gewesen, hatte mir drei alte Vorhänge gekauft und saß ein paar Tage später uninspiriert mit einem Stoffhaufen im Wohnzimmer. Das ist also die Realität.

Woher dann diese Idee kam, kann ich gar nicht sagen. Vielleicht muss man nur lange genug auf Dinge starren, dann formt sich von selbst eine Idee aus ihnen. Aber wenn die Idee erst einmal da ist, geht es ganz schnell: Stoffe bügeln und ausbreiten, Kamera auf’s Stativ, Funkauslöser suchen, sich hinlegen, zudecken, Pose, abdrücken!

Leider stieß ich mit meinem 50mm-Objektiv trotz Stativ schnell an gewisse Bildausschnittgrenzen. Das Stativ zusätzlich auf einen der wackeligen Stühle zu stellen war mir dann aber doch zu mutig, also gab ich mich mit dem nahen Ausschnitt zufrieden.

Dachte ich zumindest. Als ich dann später die Bilder durchsah, wurde klar, was ich schon vermutet hatte: Der Ausschnitt war einfach nicht das, was ich mir eigentlich vorgestellt hatte.

Also machte ich mich an die Arbeit, das Bild zu kreieren, das ich in meinem Kopf hatte. Ich baute Haare und Füße aus einem anderen Bild der Serie ein, bastelte ein zweites Knie und fügte eine leere Hintergrundaufnahme ein, um das Bild zu erweitern.

Hier ein kleiner Eindruck des Zwischenstandes, bei dem noch deutlich das Originalbild am inneren Rahmen zu erkennen ist:

© Laura Zalenga

Schließlich stimmten nach einer Stunde Überarbeitung – statt geplanten fünf Minuten – das Bild in meinem Kopf und das auf dem Bildschirm doch noch überein.

Ich glaube, dieses Bild ist für mich so wichtig, weil es mir einmal mehr gezeigt hat, dass ich noch am Anfang meiner Entwicklungsphase stehe. Pre-birth eben. Eingewickelt in eine Hülle aus Träumen, Wünschen und Illusionen, aber auch aus Blockaden, Ängsten und Unsicherheit.

In das Gefühl, teilweise eher unprofessionell und improvisiert zu arbeiten, mischt sich der Stolz, es aber ganz allein zu schaffen. Früher hätte ich entschuldigend erklärt, dass es nicht ohne die Bearbeitung ging. Heute bin ich mehr denn je verliebt in die modernen Möglichkeiten der Bildbearbeitung, die ich mir selbst beigebracht habe und stolz darauf, was ich damit realisieren kann.

Trotzdem begreife ich, dass sich langsam meine künsterlischen Wehen einleiten. Raus aus meiner von Illusionen getränkten Hülle – also quasi raus aus meinem Wohnzimmer – rein in die echte Welt. Das könnte eine lange, schwierige Geburt werden, aber ich bin gespannt, was mich da draußen alles erwartet.


kwerfeldein – Fotografie Magazin

 
Comments Off on Bildvorstellung: Pre-birth

Posted in Equipment


A Simple 3 Step Culling Workflow: The “Editing Out” Culling System

29 Apr

Introduction

This tutorial has been transcribed from the SLR Lounge Lightroom 4 Workshop on DVD, a 14 hour Lightroom 4 A – Z guide with over 130 tutorials for mastering Lightroom from start to finish. The Digital download can be purchased from SLR Lounge while the physical copy is available through Amazon Prime.

Overview

In this article, we will go over one of our culling systems that we use at Lin and Jirsa Photography. We currently use the “Editing In” System at our studio, but in this article, we will go over the “Editing Out” System. Both systems are fast and effective; however, the “Editing In” System works a bit better for us (We will cover that “Editing In” workflow in an upcoming tutorial). Keep in mind that there is no one right culling system, so feel free to set up one that works best for you.

Either way, it is a good idea to keep your culling system as streamlined as possible. Our “Editing Out” System is a quick way to cull through images, so keep reading to see how you can save time in your production workflow!

KISS – Keep It Simple Stupid

As mentioned before, it is best to have a simple culling system because it can save you a lot of time. In most cases, the KISS acronym is quite fitting. Keep it simple, stupid. Seconds saved per image can end up being hours by the time you work through a large image catalog. Sometimes, photographers create rather complex culling systems to try and keep their images meticulously organized right from the start. For example, they may use the 5-star rating system like the one below.

  • 5 stars = Portfolio photo
  • 4 stars = Blog photo
  • 3 stars = Average photo (delivered)
  • 2 stars = A little potential but unsure (undelivered)
  • 1 star = Reject image

While this kind of a rating system sounds great in theory, it can become too cumbersome when working from image to image since it requires you to carefully analyze each image and make too many decisions at once. “Is it good enough to keep, if so, is it blog worthy, or portfolio worthy, etc.” This is why we stress creating a simple culling system. We won’t truly know what images are blog or portfolio worthy until we are done culling, editing and finishing our images. At that point, we can scan through and quickly select and mark our blog/portfolio images in just a minute or two. Trying to make that decision during the initial culling is not only time consuming, it is impossible to make correctly.

So, let’s go over the 3 steps of the “Editing Out” System that you can adopt into your workflow to help speed things up.

The 3 Step “Editing Out” Culling Process

If you have seen our Lightroom 4 Workflow System DVD, you know that Lin & Jirsa Photography currently uses the “Editing In” System, which we mentioned earlier. In the “Editing Out” System, we will select all of our images in the catalog as a “pick” by pressing “P”. Then, we will go through each individual image and reject the images we do not want to deliver. The “Editing Out” System is simple because we now only have 1 choice : keep the image and move to the next or reject the image by pressing “X.”

Immediately, our workflow process has moved from 5 possible decisions with 5 different keystrokes, to only 1 decision and 1 keystroke.

Step 1: Flag All Images as Picks
We need to flag all images in our catalog as a Pick. Return to the Grid View by pressing “G.” Then, select all of your images by pressing “Ctrl + A.” Next, press “P” to flag all images as Picks. Then deselect your images by pressing “Ctrl + D.” This will allow us to go through our images and un-flag them during the culling process.

Step 2: Filter by Flag Status
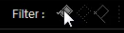
Next, we need to filter our images, so that when we “reject” an image it disappears from view. We are going to filter by flag status, so click on the first flag, as shown below. Now, we can only see flagged images. Anytime we press “X” to mark an image as a “reject” it will disappear from view.

11_filter-flag-status

Step 3: Culling Images
While we view and cull our images, we want to have as much screen space as possible. Press “F” twice to go into Full Screen Mode. Then press “Tab” to get rid of the left and right panels. Double-click on your image to view the image in full screen. Now, we are going to start culling our images. If you want to reject an image, press “X.” Since the Filter is set to only display “Flagged” images, any rejected image will automatically disappear from the lineup. Continue moving through your images by pressing the Right Arrow on your keyboard.

With the “Editing Out” System, we only have 1 option to consider, is the photo deliverable, or is it not. Is it worth keeping, or is it not. Deciding on whether it belongs on your blog, or portfolio should really come after all the images have been finalized and edited, not during the initial culling.

If you turn off all filters, you can see that the rejected images are grayed out. If you want to look at the rejected photos, just turn on the Rejected Filter, down in Filters.

So, hopefully this article was helpful to you. In the next culling article, we will show you are simple “Editing In” workflow. Just remember to keep your culling system simple, and it will save you many hours of time!

Learn More with the Lightroom 4 Workshop Collection!

This was a sample tutorial from the Lightroom 4 A to Z DVD which is one of the DVDs in the Lightroom 4 Workshop Collection. A collection of nearly 30 hours of video education teaching everything from Lightroom basics to advanced raw processing techniques.

The LR4 Workshop Collection also includes the critically acclaimed Lightroom 4 Preset System which is designed to enable users to achieve virtually any look and effect within 3-5 simple clicks. From basic color correction, vintage fades, black & white effects, tilt-shift effects, faux HDR, retouching, detail enhancing, and so much more. Click the links above to learn more.

Post originally from: Digital Photography Tips.

Check out our more Photography Tips at Photography Tips for Beginners, Portrait Photography Tips and Wedding Photography Tips.

A Simple 3 Step Culling Workflow: The “Editing Out” Culling System


Digital Photography School

 
Comments Off on A Simple 3 Step Culling Workflow: The “Editing Out” Culling System

Posted in Photography


DISCUSS: What Type of Camera Bag Do You Use?

29 Apr

photography-bags-5.jpegWhat type of camera bad do you use and recommend?

We have asked this question every couple of years so I’m interested to see how things have changed since last time was there are a lot of newer bags and brands coming onto the market.

What camera bag do you use and recommend – and why?

  • Do you use a brand like Think Tank Crumpler, Tamrac or Lowepro OR do you prefer a more anonymous brand that looks less like a camera bag (and makes it less attractive to thieves)?
  • Do you use a bag that is not really a camera bag at all?
  • Do you prefer a backpack, a sling bag or even a roller bag?
  • What features do you look for in a camera bag?
  • Do you have more than one bag for different situations?

Looking forward to hearing what bag/s you use!

Post originally from: Digital Photography Tips.

Check out our more Photography Tips at Photography Tips for Beginners, Portrait Photography Tips and Wedding Photography Tips.

DISCUSS: What Type of Camera Bag Do You Use?


Digital Photography School

 
Comments Off on DISCUSS: What Type of Camera Bag Do You Use?

Posted in Photography