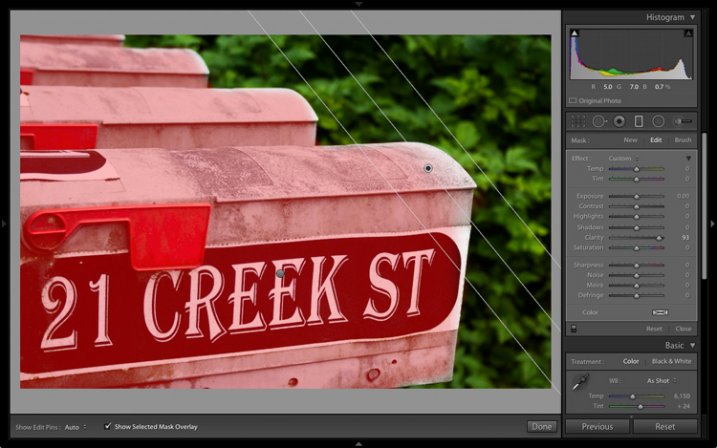
Every time a new version of Lightroom comes out the first thing I look for are features that make the Develop module better, or easier to use. The ones I like best in Lightroom 6/CC are the improvements to the Graduated and Radial Filters. Let’s take a look at them.
Addition of mask overlay
In earlier versions of Lightroom you couldn’t tell with any precision which parts of the image were affected by the Graduated and Radial filters.
In Lightroom 6 you can toggle the mask overlay with the O keyboard shortcut, or by ticking the Show Selected Mask Overlay box in the Toolbar. Previously this was only available in the Adjustment Brush, it has now been added to both the Graduated and Radial Filters.
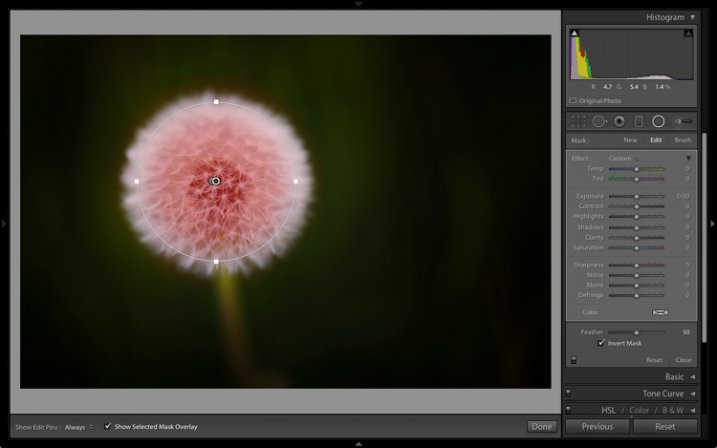
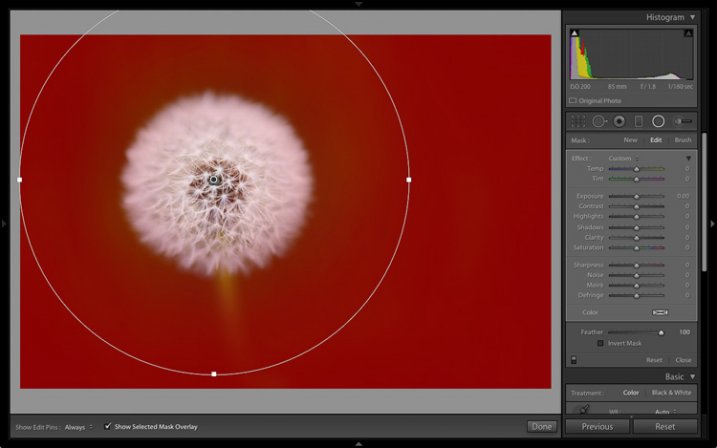
This screenshot below shows how it works. I wanted to make the background darker without affecting the dandelion head. The best tool to use for this is the Radial filter, but you need to be able to place it precisely. The mask overlay makes this easy.
As you can see, the effect of feathering meant that I needed to create a much bigger Radial filter than you might at first think.
Note: The Radial Filter was introduced in Lightroom 5 and is not available in earlier versions.
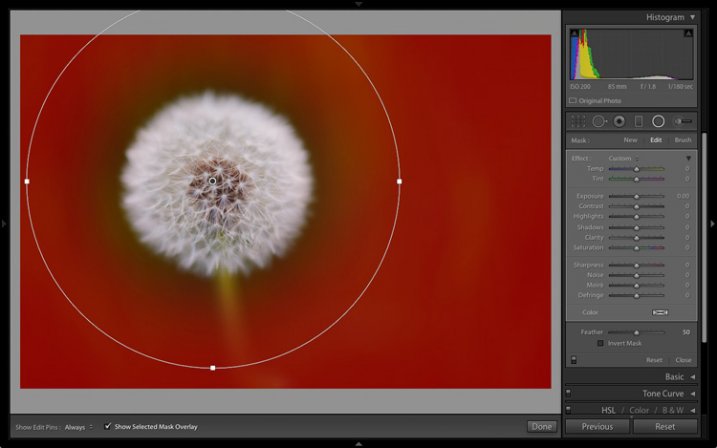
Mask overlay enabled.
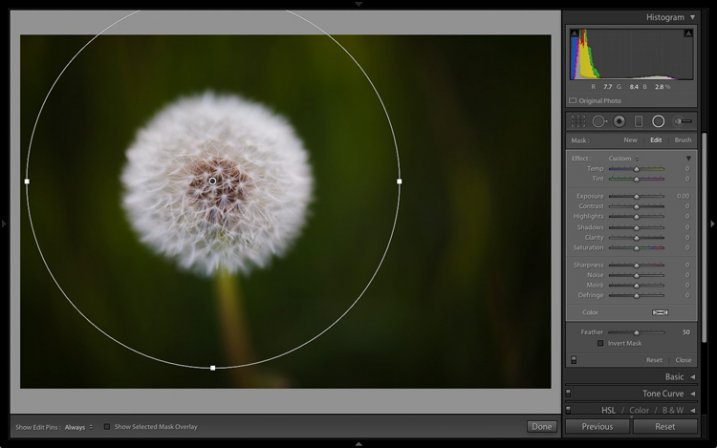
Mask overlay disabled.
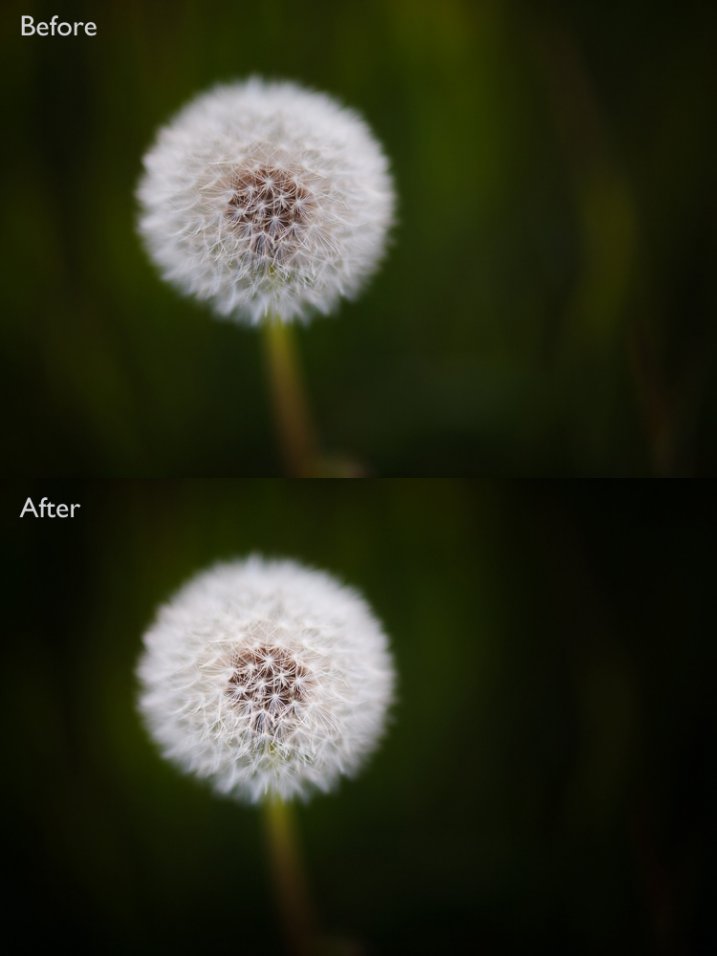
With the Radial filter in place, it is easy to make the required local adjustment. I moved the Exposure slider left to make the background darker.
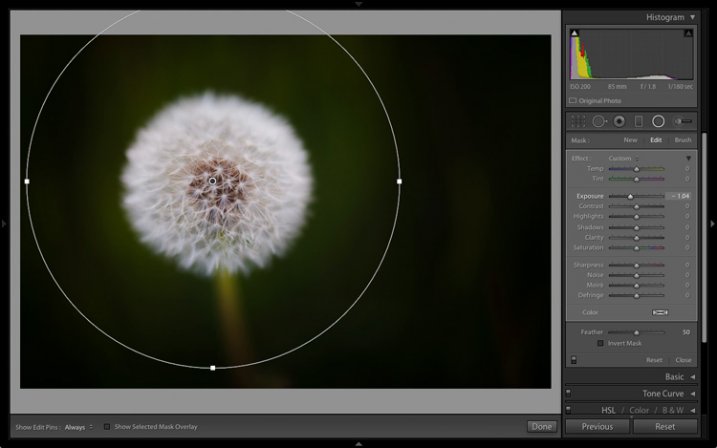
This also works when you tick the Invert Mask box to apply the effect inside the Radial filter. In this situation the effect of feathering means you need to make the filter smaller than the area you want to cover. With the mask overlay enabled it is easy to place it precisely.
Then I increased Clarity and Exposure to bring out the texture of the dandelion head and make it brighter.
The other benefit of adding the mask overlay to the Radial filter is that it enables you to see the effect of the Feather setting. This was very difficult to judge before.
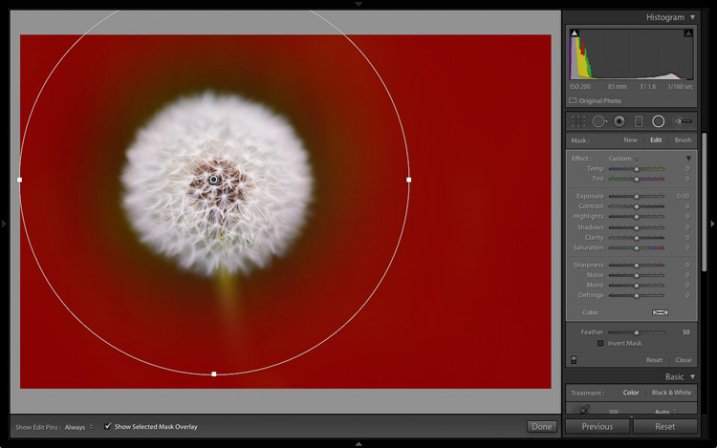
Feather: 50
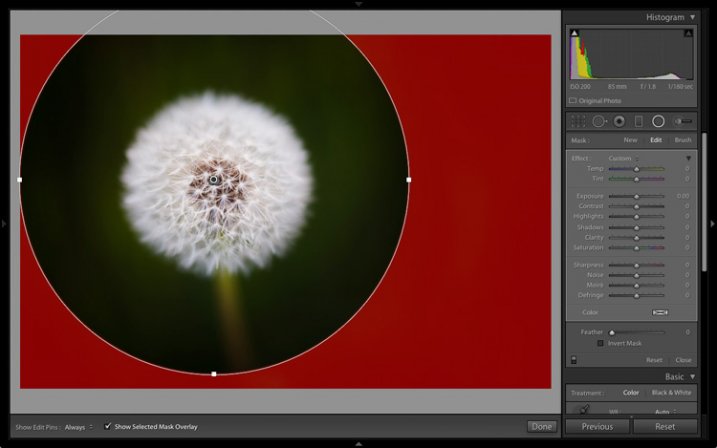
Feather: 0
Feather: 100
Note: You can use the Shift+O shortcut to change the colour of the mask overlay.
Addition of Adjustment brush
A problem with the Graduated and Radial filters in earlier versions of Lightroom is that the shape of the mask is fixed. In Lightroom 6/CC Adobe has added the ability to combine the Adjustment brush, with both the Graduated and Radial filters.
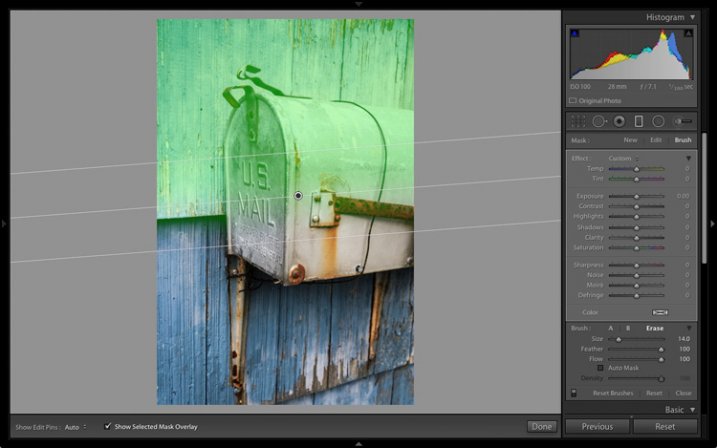
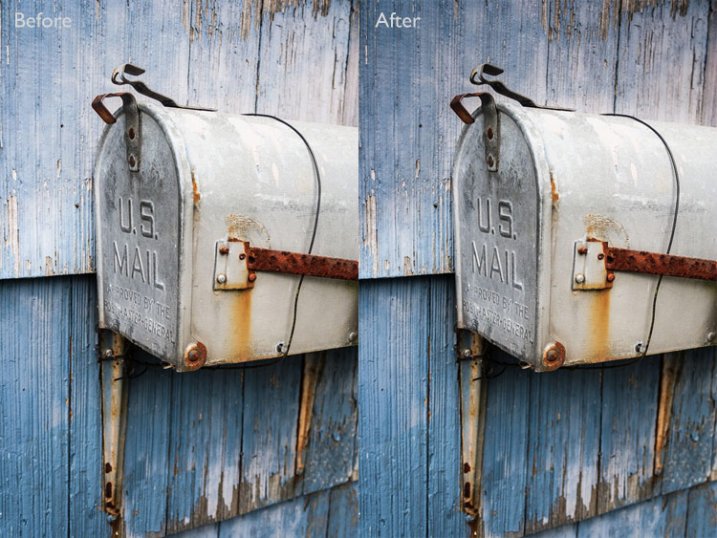
Here’s an example of how it works. In this photo I wanted to make the top half of the wall darker without affecting the mailbox. In previous versions of Lightroom the only option was to use the Adjustment brush to paint in the irregular area. Now you can use the Graduated Filter instead.
This screenshot shows the area affected by the Graduated Filter (I changed the overlay colour to green as it’s easier to see on this image).
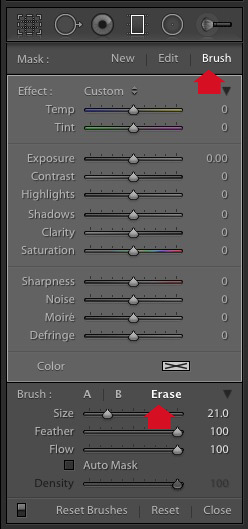
To apply an Adjustment brush, got to the Graduated filter panel and click the Brush option at top right. In this example I also chose the Erase option as I wanted to remove some of the mask overlay.
This the amended mask overlay, revealing the mailbox.
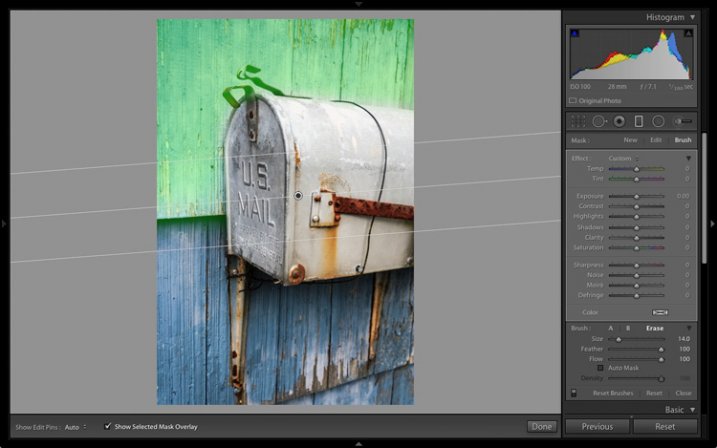
This is the result.
Your turn
These improvements are my favourite as they will make it much easier to process my photos in the Develop module. But what about you? Have you upgraded to Lightroom 6/CC yet? If you have, what are your favourite new features? Please let us know in the comments.
The Mastering Lightroom Collection
My Mastering Lightroom ebooks will help you get the most out of Lightroom. They cover every aspect of the software from the Library module through to creating beautiful images in the Develop module. Click the link to learn more or buy.
googletag.cmd.push(function() {
tablet_slots.push( googletag.defineSlot( “/1005424/_dPSv4_tab-all-article-bottom_(300×250)”, [300, 250], “pb-ad-78623” ).addService( googletag.pubads() ) ); } );
googletag.cmd.push(function() {
mobile_slots.push( googletag.defineSlot( “/1005424/_dPSv4_mob-all-article-bottom_(300×250)”, [300, 250], “pb-ad-78158” ).addService( googletag.pubads() ) ); } );
The post New Graduated and Radial Filter Features in Lightroom 6 by Andrew S. Gibson appeared first on Digital Photography School.
You must be logged in to post a comment.