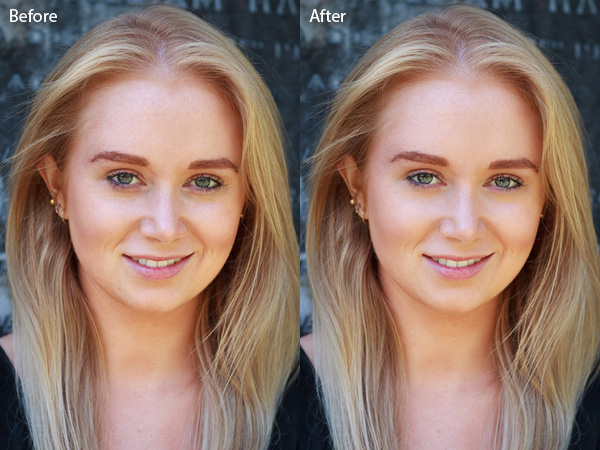
You have probably seen several portrait retouching programs advertised in magazines or online, and wondered if they were worth buying. The answer is no. I have tried out quite a few, and the truth is that the Soften Skin preset in Lightroom does just as good a job as any of them. For most photographers Lightroom’s retouching tools all are you will ever need. For high end retouching purposes you can go to Photoshop.
It’s worthwhile taking some time to think about your personal approach to portrait retouching. Some photographers seem to like the airbrushed, almost plastic look of heavy processing. It’s a style you see used a lot in commercial photography or movie posters.
Others will go for a more natural effect, and use the retouching tools with a light touch. That’s definitely my approach, and it fits with my preference for natural light and for creating portraits that capture character.
Either way,the Adjustment Brush in Lightroom can accommodate your needs.
Retouching portraits of women
When retouching portraits of women it is conventional to use a skin smoothing technique to make the portrait look more flattering. There are exceptions of course, sometimes skin smoothing is not necessary, especially if your model has good skin and you shoot in soft light, or use a wide aperture to throw some of the face out of focus.
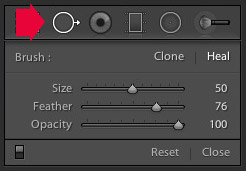 The first step in portrait retouching is to remove any blemishes with the Spot Removal tool. To do so, click on the Spot Removal tool icon to activate it, adjust the size of the brush with the square bracket keys on the keyboard, and click on the spot you want to remove.
Lightroom automatically selects another area of the portrait to sample from, healing the blemish. Sometimes Lightroom won’t select the most appropriate area – in this case you can click on the circle representing the sample and move it to a more suitable location.
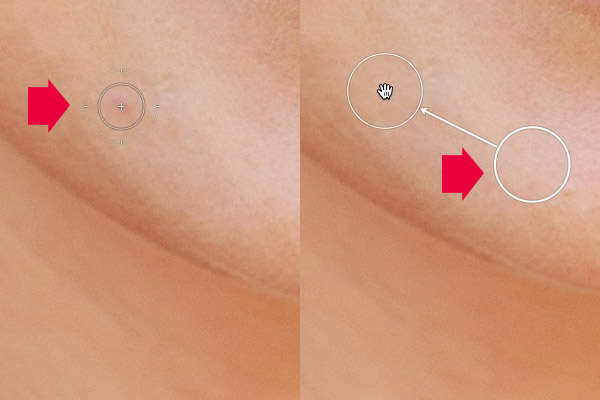
Click on a blemish with the Spot Removal tool (left). In this case Lightroom’s healing algorithm worked perfectly, but if it doesn’t then click on the circle representing the sampled area and move it to a location where the skin matches the tone and texture of the area to be healed (right).
Adjustment Brush adjustments
Now it’s time to look closely at the portrait and decide what other retouching is required. It’s important that you have already made the required adjustments to tone and contrast in the Basic panel before you get to this stage. Increasing Contrast and Clarity, for example, will emphasize skin texture, wrinkles and blemishes. On the other hand, you can move the Exposure or Highlights sliders right to brighten the skin, making wrinkles and skin texture less obvious. Retouching with the Adjustment Brush should be left until last, so you know what you’re working with.
I like to start with the area underneath the model’s eyes. The skin here is thinner than the rest of the face which is why people get dark patches there. There may also be wrinkles, and some people have a strong crease along the lower eyelid.
The idea is not to eliminate these completely (unless you’re going for the heavily retouched, airbrushed look) but to minimize them. They’re a natural part of the skin’s texture and it will look unnatural if they are not there.
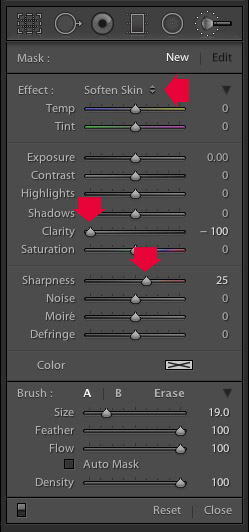 Click on the Adjustment Brush icon to activate it. Select the Soften Skin preset from the Effect menu. Lightroom sets Clarity to -100 and Sharpness to +25. Make sure Feather, Flow and Density are set to 100, use the square bracket keys on the keyboard to adjust the size of the brush and paint over the areas under the eyes. The Soften Skin preset blurs the area that you paint in with the brush.
If the effect is too strong, hover the mouse over the Adjustment Brush pin (a grey circle with a black dot in the middle) until a double arrow icon appears (below). Hold the left mouse button down and move the mouse left. Lightroom reduces the value of the Clarity and Sharpness sliders, effectively lessening the strength of the Soften Skin preset. Stop when it looks about right. You can also reduce shadows by moving the Shadows slider (in the Adjustment Brush sliders) to the right. Every portrait is different so you have to adjust the effect by eye.
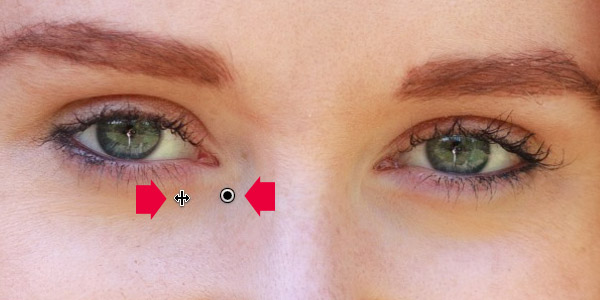
These are the results.
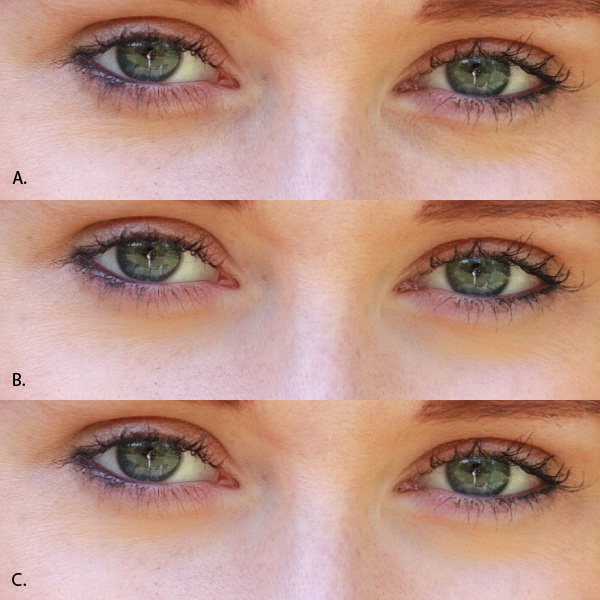
A. Original, unretouched portrait.
B. Retouched, with Soften Skin preset at full strength.
C. Retouched, with strength of Soften Skin preset reduced and Shadows slider moved to the right (subtle difference only).
Enhancing eyes
You can also use the Adjustment Brush tool to enhance your model’s eyes. This is useful if the eyes are dark due to the lighting. Be careful of overdoing this effect as it may not look natural.
Click New at the top of the Adjustment Brush panel to create a new Adjustment Brush. Set Feather to around 50 and paint in the pupils of the model’s eyes. If you need to, press O (the letter) on the keyboard to see the masked area (it is displayed in red shown below).
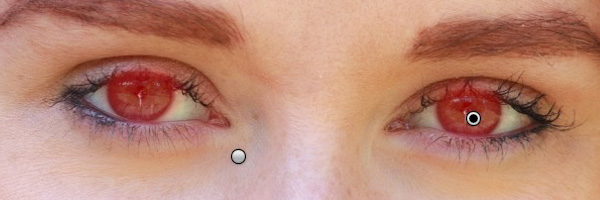
Now set Exposure to around 0.50 and Clarity to 30. The effect will vary depending on the colour of your model’s pupils and the amount of light on them. It’s a good idea to zoom out and look at the entire portrait to see if the effect is too strong. You can see this adjustment on the model’s eyes below, which I think is about right.
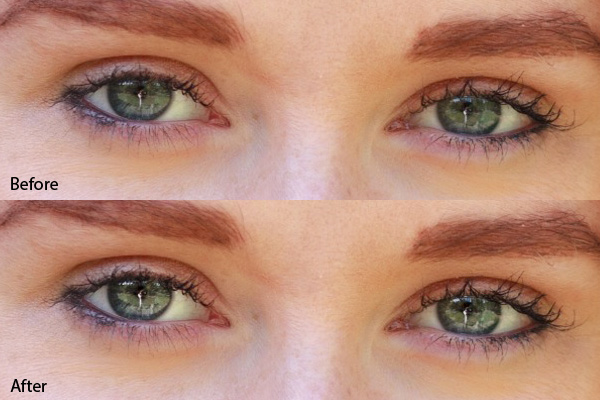
You can make the effect stronger or weaker on your photo using the technique described above. Hover over the Adjustment Brush pin until the double arrow icon appears, move the mouse left to make the effect weaker, and right to make it stronger (you can also just drag the sliders one by one to change the settings)
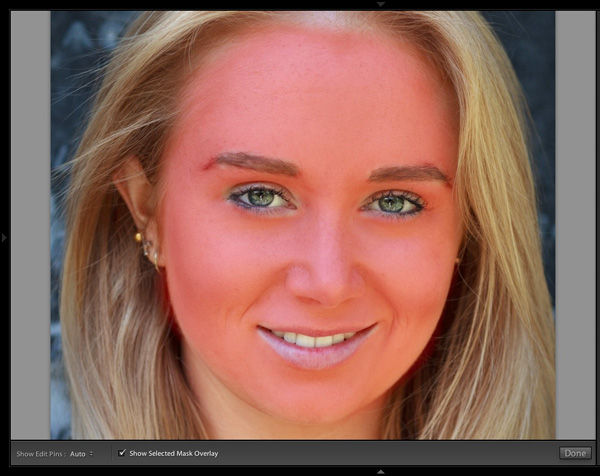
The final step is to apply gentle skin softening to the rest of the face. Create another Adjustment Brush, set Feather to 100 and paint the entire face (use the O keyboard shortcut to display the red overlay). Then select Erase in the Adjustment brush panel, set Feather to 50 and erase the eyebrows, mouth and eyes. The idea is that you only want to soften the skin, not these parts of the face. It should look something like the mask below.
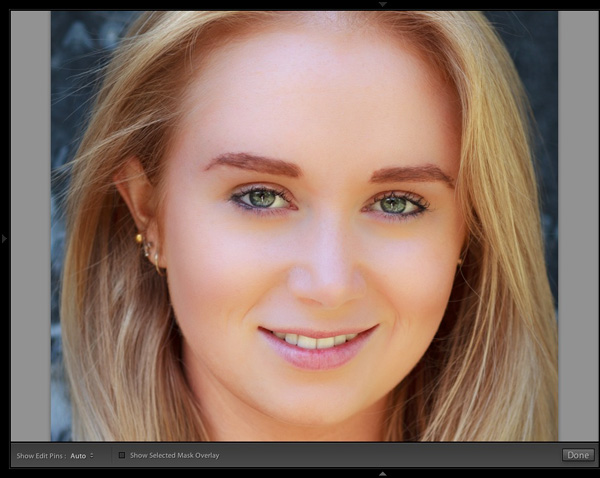
Go to the Effect menu and select the Soften Skin preset. Press O to hide the mask overlay and you will see something like the screenshot below. Remember, this is the Soften Skin preset at maximum strength so it has a strong effect on the photo.
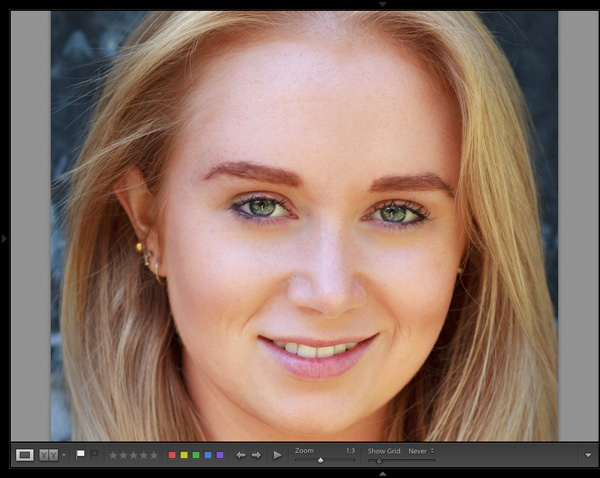
Use the technique we learned earlier to reduce the strength of the effect. How far you go is up to you. I like to apply the Soften Skin preset subtly to retain as much skin texture as possible. Here’s the result with Clarity reduced to -20 and Sharpness to +5.
This video shows how I retouched another portrait, using the Adjustment Brush tool to enhance the model’s eyes and facial hair.
I’ve only touched on the number of ways you can use Adjustment Brushes in Lightroom for portrait retouching. What techniques do you use? Please let us know in the comments.
The Mastering Lightroom Collection
 My Mastering Lightroom ebooks will help you get the most out of Lightroom 4 and Lightroom 5. They cover every aspect of the software from the Library module through to creating beautiful images in the Develop module. Click the link to learn more or buy.
googletag.cmd.push(function() {
tablet_slots.push( googletag.defineSlot( “/1005424/_dPSv4_tab-all-article-bottom_(300×250)”, [300, 250], “pb-ad-78623” ).addService( googletag.pubads() ) ); } );
googletag.cmd.push(function() {
mobile_slots.push( googletag.defineSlot( “/1005424/_dPSv4_mob-all-article-bottom_(300×250)”, [300, 250], “pb-ad-78158” ).addService( googletag.pubads() ) ); } );
The post How to Retouch a Portrait with the Adjustment Brush in Lightroom by Andrew S. Gibson appeared first on Digital Photography School.
You must be logged in to post a comment.