RSS
 

Posts Tagged ‘retouch’

How to Edit and Retouch Images Using Capture One Pro

16 Mar

The post How to Edit and Retouch Images Using Capture One Pro appeared first on Digital Photography School. It was authored by Carl Spring.

Before and after split screen of edit

Whilst we all flock to Photoshop for our retouching, Capture One now has a lot of great tools. But is it possible to do a full image edit including retouching? More so, if it is, should you do it and avoid Photoshop altogether?

To find out, I closed Photoshop and settled myself down for a full edit using only Capture One Pro. Lets go through the process and see what I learnt.

Annotate

Capture One’s built-in annotation tools make it easy to plan your retouching for your images. A variety of colors can easily be added to the image should you wish. I really like this tool. It allows you to make simple notes on screen. While it may look like I am practicing my abstract expressionism, I am actually highlighting what I want to improve. In this case, the red is for retouching and yellow is for exposure issues. I love this tool! So far so good.

The annotate tool is great for making notes before you start the edit.

Colour balance

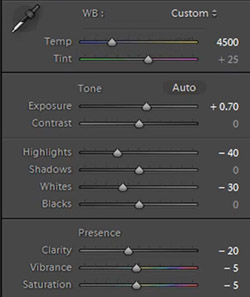
When the image comes into Capture One, the first thing is to get a good neutral color balance. I always start by letting Capture One get me into the ballpark via the Auto tool in White Balance. While not perfect, it gives a good starting point.  I then tweak the color to taste. In most cases, it is only a small tweak from the auto white balance to get a starting point I am happy with.

Exposure

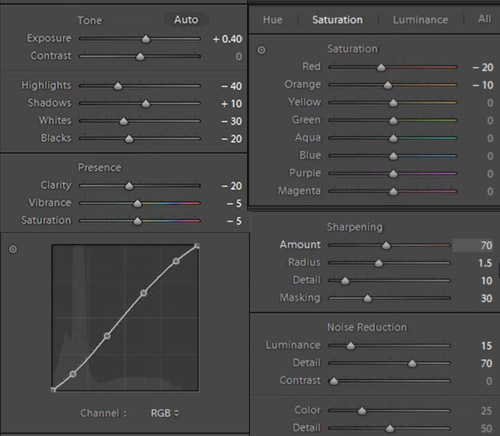
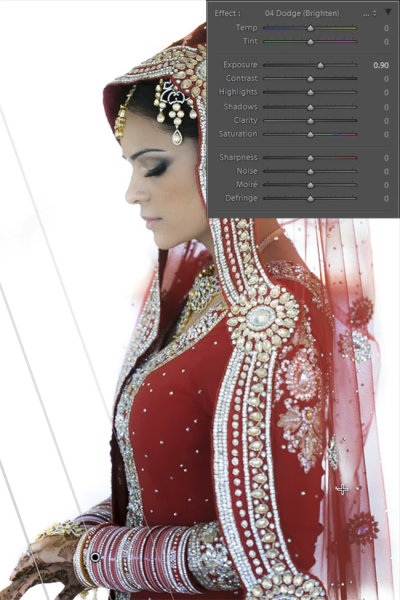
Continuing with the basics, next up is exposure. It always pays to get as close as you can in-camera, and this case required very little. For this image, I pushed up the exposure just under 0.5 stops and added a slight amount of contrast and saturation to my taste. All that was left was a slight highlight recovery to take away the worst of the hot spots. The worst highlights will be taken care of in the next step (and first layer) Luma masking.

Layer One: Luma Mask

New in Capture One 12 is Luma masking. I love this tool! It is such a great time saver for masking highlights. I use it here to mask out the highest highlights in the image and then use the High Dynamic Range sliders to pull back the highlights. Subtly is the key here. I only want to take the harshness out of the bright spots.

An image showing the luma mask in Capture One Pro 12

Possibly my favourite tool in Capture One 12. The Luma mask

Layer two (and three and four): Blemish Retouching

Trying to do any amount of blemish retouching in Capture One soon tells you that it wasn’t designed for this task. The system is clunky. You sample using the alt key (the same way as Photoshop); however, you cannot resample a different area on the same layer. Instead, you need to create a new layer and a new sample. I ended up using 3 layers merely to do basic spot removal (and this wasn’t even going as far as I would in Photoshop). Capture One isn’t effective for any serious blemish removal. I tried this process out on another image to see if it fared better, but it was worse. It got to the point where I just gave up. Yes, it works for simple items, but in the future, blemishes will be worked on in Photoshop only.

Layer five: Skin smoothing

The Skin Smoothing tool is a super-great way to improve skin with a simple mask and a couple of sliders. I use this tool all the time when editing wedding photography. It gives a great effect with such little effort.

The first step is to create a mask using a new layer and the Brush tool. Make sure you leave out areas of detail, such as the eyes and lips. You can then refine the mask to get it more accurate. I tend to use a number between 100-150 for most situations. After this, I go back in with the brush and erase tools until I am happy with the mask. A little tip here is to change the mask color from the default of red when working with people. It just makes the mask stand out more against the skin.

Next, the special sauce. A.K.A The Clarity tool. Just go to the clarity section, choose Natural as the clarity type and slide the numbers into the negatives. I generally find the sweet spot for this technique to be between -60 to -70. Much more than this and it can become a little fake. It comes down to the image you are working on. Simply adjust the sliders until you are happy with the result.

This on its own has a massive difference on the image, but when you add in the Color Editor tool, it takes this to another level.

Layer five continued: Skin Colour

The ability to work with color so precisely is one of Capture One’s greatest strengths. Editing skin tone is a great way to make your model’s skin glow. You can find this tool located in the Color Editor section. To start, click the icon and sample a skin tone. Next, you work with the two sections of this tool, Amount and Uniformity. The amount sliders are to get a skin tone that you are happy with. You then move onto the uniformity sliders to even out the skin tone through the whole face. As with much retouching, it is easy to go over the top. My tip for this is to do the edit, then take a break for a couple of minutes and come back. You instantly see if the image is over done and you can dial back accordingly.

We now have an even, soft skin tone through the image. This layer has made a huge difference to our image. It’s now time to finesse the details.

Capture One screen grab showing mask and colour tools

As you can see, the combination of the clarity slider and the Skin colour editor has really made a difference. The blue mask, maybe not so flattering.
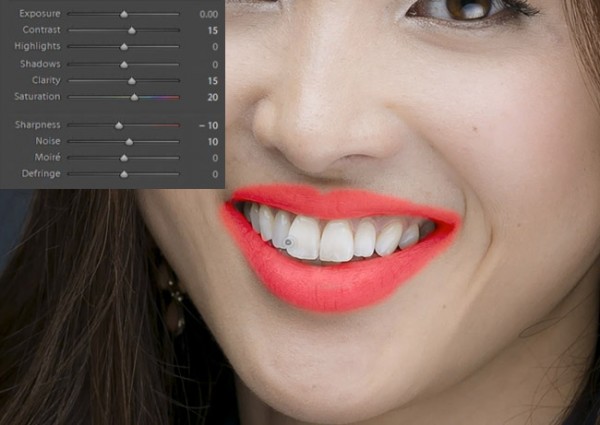
Layer six: Teeth

The teeth need to be slightly whitened. This is as simple as a mask, followed by reducing the saturation. Again, don’t take it down to zero – it will look weird. Take it down just enough so that the teeth look naturally white. In this image, the sweet spot was -51. I then pushed the exposure just slightly to give a whiter smile. But again, as with all retouching, less is more.
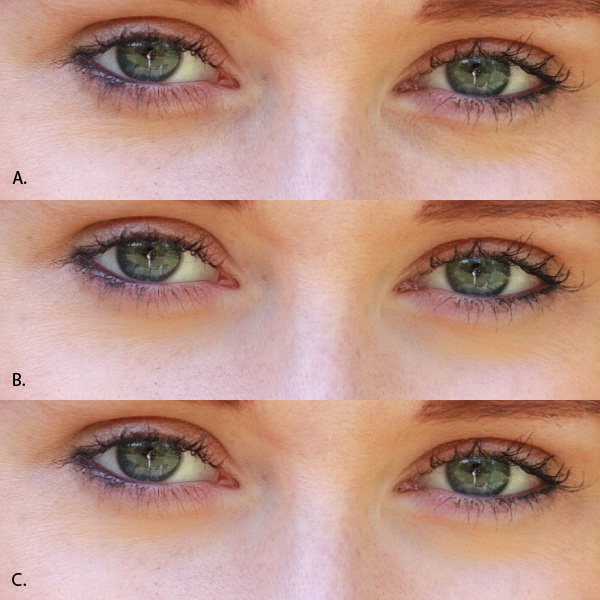
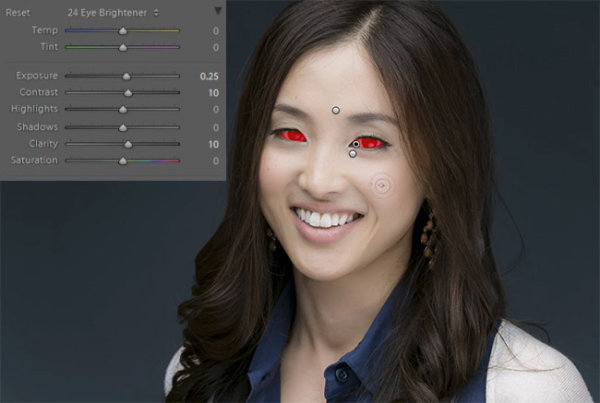
Layer seven: Eyes

You sense a theme yet? I created another mask for the eyes. This time I added a very slight bump in exposure and some clarity to give them a subtle pop that was missing before.

Layer eight: The top

The red top the model wore in this shoot was just too bright. Using a combination of a mask and the color editor, I was able to easily reduce the red tone to something less overpowering.

Capture One screen shots showing before and after the colour editor

Toning down the red top means it is not quite as powerful in the image.

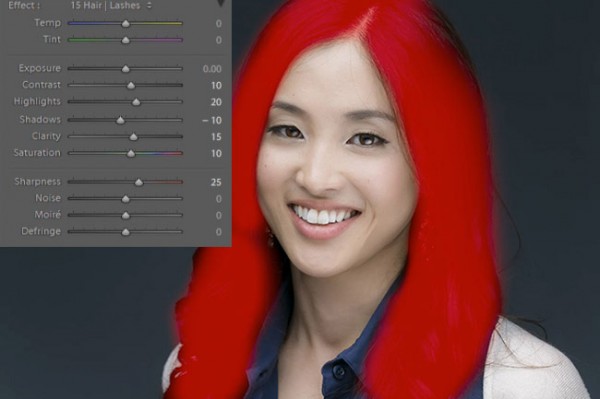
Layers nine and ten: The Hair

As the old saying goes; in for a penny, in for a pound. Having worked on the heal and clone layers for basic spot removal, this was going to be something that I was unsure would work. However, with a lot of trial and error, I produced something that was okay. Would I do it again? No. But, I did manage to improve the hair significantly from the previous state.

I ended up using a clone layer for one side of the hair and a heal layer for the other. Again, editing like this shows the limitations of Capture One for high-end retouching. However, after some trial and error, it did an okay job.

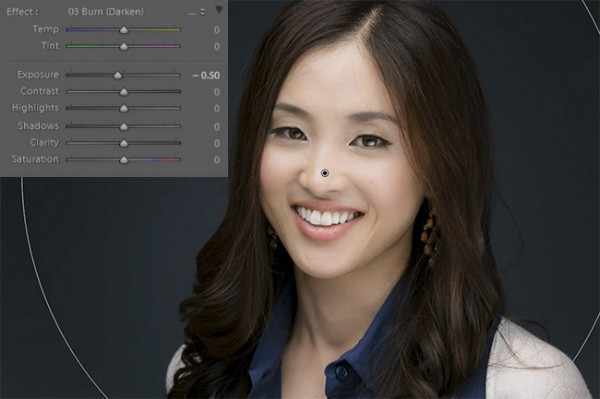
Layer eleven: Colour Grade

I generally don’t color grade images heavily – if at all. I usually prefer a natural look. But for this tutorial, I added a color grade. To do this, you add a new fill layer and add your grading there. This also allows you to reduce the effect by opacity or simply turn it on or off quickly to give different looks.

For this image, I decided to use Capture One’s excellent film grain emulations to add some soft grain. Next, I spent some time with the Color Balance tools pulling the shadows into the blues and highlights slightly into the orange. Finally, I used the levels to give a slightly faded look to the final color grade. That’s it. It’s done!
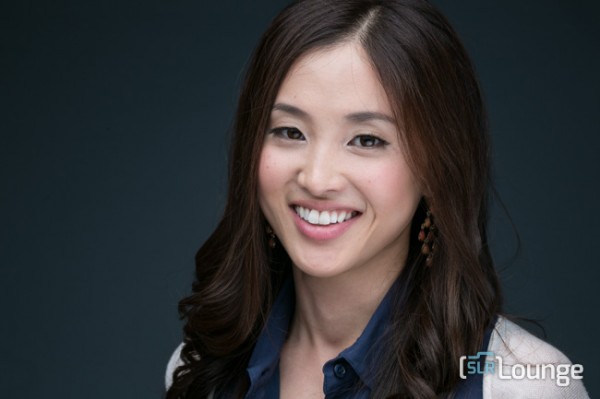
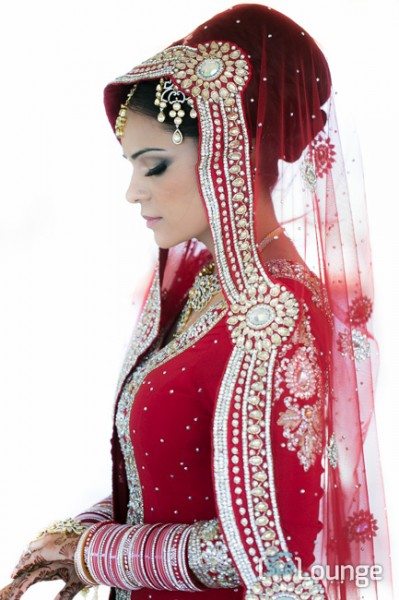
Final photo after retouching

The final edit.

What did I learn?

Well, it is possible to do a full retouch in Capture One. However, in reality, it is clunky and nowhere near as powerful as Photoshop.

The worst part of this was the blemish removals. It was painful to use for more than a couple of blemishes in an image. Also when trying this on another image to remove an eyelash, it was impossible to get it to give a pleasing result.

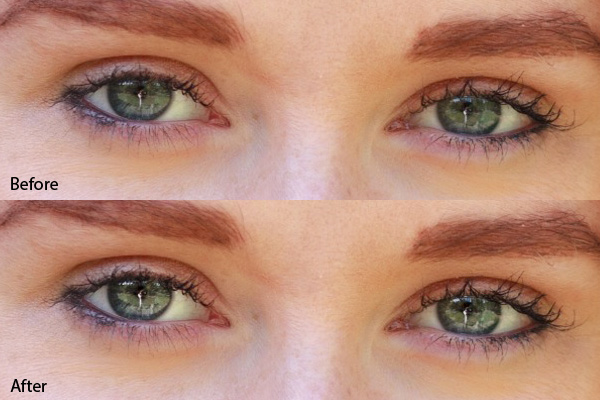
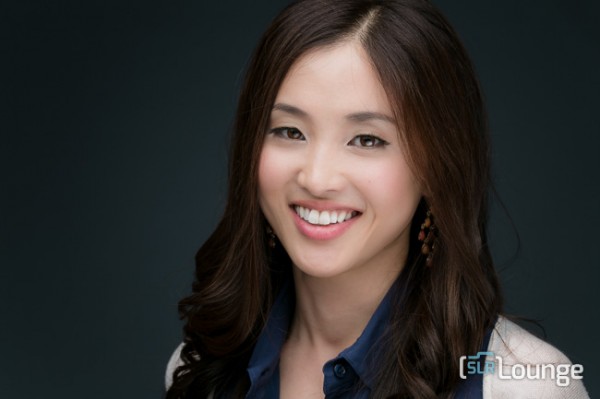
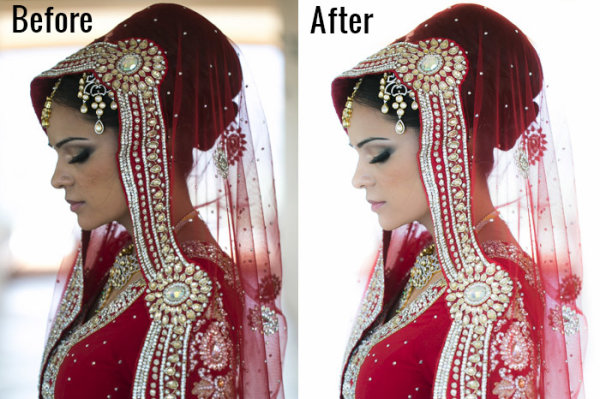
The standout of this edit is a process I use all the time: the Skin Smoothing and Skin Color combination. These two tools can quickly take care of many skin problems you may see. As a wedding photographer, this is a powerful tool. I can make a bride’s skin look glowing, quickly and easily without the need to round trip to Photoshop. To give you an example, check out this before and after using only this combination. You can achieve quick, simple and powerful results in just a couple of minutes.

A comparison of before and after skin reoutching in Capture One

Such a vast improvement only using two tools.

Conclusion

In general, the color tools in Capture One are amazing, and as well as working well on the skin, they were great for color grading the final image. My regular workflow for an image like this would be a trip to Photoshop for the skin, then back into Capture One for color grading.

Overall, Capture One did give a good final result, but at the cost of time and with some frustration.

Can Capture One Pro do a full edit with retouching? It can – kind of.

Would I recommend it? No.

It’s just not quite precise enough to be able to use regularly for this type of edit. That skin trick though is gold!

Do you use Capture One for your retouching? What are your experiences?


The post How to Edit and Retouch Images Using Capture One Pro appeared first on Digital Photography School. It was authored by Carl Spring.


Digital Photography School

 
Comments Off on How to Edit and Retouch Images Using Capture One Pro

Posted in Photography


Darktable 2.6.0 update brings new retouch, color balance modules and much more

25 Dec

Darktable, an open source Lightroom alternative, has released a major update with a number of new modules, features and updates.

Darktable version 2.6.0 is the result of more than 6 months of work, consisting of more than 1600 commits, 260 pull requests and 250 issues that have been resolved. The resulting updates include a new retouch module, a filmic module, a redesign of the color balance module and more.

The updated retouch module is essentially an updated version of the spot removal tool that includes a whole new collection of tools to get unwanted artifacts out of images. Cloning has been drastically improved and a built-in split frequency module makes it easy to remove blemishes without losing texture.

A subsection of the retouch module new to darktable 2.6.0

The new filmic module in darktable ‘was designed to reproduce the good properties of analog film, while giving you the easy controls of digital photography,’ according to the darktable 2.6.0 announcement post. The filmic module is effectively a spin-off of the curves tool with more adjustments to precisely dial in the exposure. Blacks, whites, contrast, local contrast and more can all be adjusted within the new filmic module.

A subsection of the new filmic module in darktable 2.6.0

Also added in darktable version 2.6.0 is a new duplicate manager. This new tool makes it easy to create multiple versions of Raw files and keep them in a stack for simple organization. Other features include new zoom options, mask previews and an updated color picker tool.

For a full rundown of all the new features, modules and tools, head over to darktable’s announcement post. It’s a long read, but full of the wonderfully geeky insights we’ve come to expect from the darktable team.

Darktable is available to download for free for a macOS, Windows, and a number of Linux distros. Find out more information on how to download darktable here.

Articles: Digital Photography Review (dpreview.com)

 
Comments Off on Darktable 2.6.0 update brings new retouch, color balance modules and much more

Posted in Uncategorized


How To Retouch Old Photos In Photoshop

15 Sep

Family photos can be incredibly precious keepsakes. Most of us have in our possession old pictures of our parents, our grandparents, or ourselves, but unfortunately, as a result of time and poor protection, these photos often become scratched or torn, or lose their original spark. Thanks to Photoshop, we can easily restore our old photos in a fun and creative Continue Reading

The post How To Retouch Old Photos In Photoshop appeared first on Photodoto.


Photodoto

 
Comments Off on How To Retouch Old Photos In Photoshop

Posted in Photography


MIT’s newest photography tech can retouch an image before it’s captured

04 Aug

MIT has developed a new machine learning technology that is able to retouch an image in real-time, presenting the photographer with the final product before they snap the photo. The system, which is being presented by both Google and MIT researchers at the digital graphics conference Siggraph in Los Angeles, was trained using thousands of both raw and retouched images that comprise a dataset created by MIT and Adobe, among others.

The automatic image retouching system is lightweight enough to be used on an ordinary smartphone, and it can be equipped with multiple different styles. While real-time image retouching isn’t a new idea, the ability to perform it on a smartphone is. Talking about this, researcher Jon Barron explains:

Using machine learning for computational photography is an exciting prospect but is limited by the severe computational and power constraints of mobile phones. This paper may provide us with a way to sidestep these issues and produce new, compelling, real-time photographic experiences without draining your battery or giving you a laggy viewfinder experience.

In order for the image retouching to work in real-time on low power devices like smartphones, the researchers developed a system that modifies a low-resolution version of the final image, then translates those edits to the full-resolution photo.

With this method arose a big problem, however. Namely, that the low-resolution image doesn’t contain enough data to adequately determine edits for the full-resolution version. Two different solutions were found to solve this problem, the first being that the system outputs ‘a set of simple formulae’ rather than the low-res image itself, and the second being a method for applying the formulae to the full-resolution photo. The team explains that technology in detail in the video below:

Articles: Digital Photography Review (dpreview.com)

 
Comments Off on MIT’s newest photography tech can retouch an image before it’s captured

Posted in Uncategorized


How To Retouch Skin And Still Look Natural

20 Jul

Skin Retouching for Dummies


Hey FashionPhotographyBlog.com readers. Retouching… A LOT of people have asked for it so here it is:


When it comes to retouching skin, it’s really quite simple. In fact, you can do it in two simple steps. However, it’s also really quite time consuming. Take your time and don’t rush through it. Following these few simple steps will pay off in the end!


Whatever you do: DON’T BLUR YOUR SUBJECT’S SKIN! Skin is full of texture – keep it that way. Eliminating pores is an obvious sign of someone who doesn’t know what they’re doing. Study your face in the mirror. Texture changes as you move throughout the face and body, be conscious of this when retouching skin.


Don’t blur your subject’s skin! Skin is full of texture – Keep it that way #fpblog
Click To Tweet


(Remember: It always helps to have a good makeup artist and start with an even base of foundation. A good makeup artist can drastically cut down your time spent retouching skin in Photoshop.)


How To Retouch Skin


First things first, NEVER-EVER work directly on your background layer. This is an extremely bad habit most people have. This is considered destructive. Once you work directly on your background layer, there is no going back. Whereas, if you work on layers independent from your background layer, you can always delete them and start from scratch.


1. Select your image and open it up in Photoshop.


retouching_skin_original_image
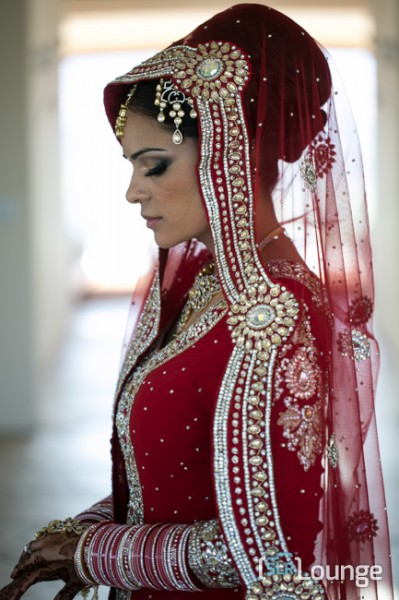
Original, untouched image


2. Start by removing blemishes. To do this, I typically switch between the Healing Brush and the Clone Stamp.


The Healing Brush (band-aid tool) works by merging texture, color and luminosity from the sample area to the destination area.


The Clone Stamp (stamp) takes the information from the sample area and moves it to the destination area (no automatic blending in of texture, color and luminosity.)


retouching_skin_heal_patch_clone_stamp


Create a new, empty layer and at the top change the setting from “Current Layer” to “Current & Below.”


To remove blemishes and wrinkles, make the brush size just a bit larger than the size of the blemish. To select a source point, hold down “Option” (Mac) or “Alt” (PC) and click, then paint over the blemish to remove it. The healing brush tends to spread out a bit so it works best by using a harder brush rather than a softer brush.


BE CAREFUL* When healing, many people have a tendency to pull source areas from right next to the destination area. Doing this will create repetitions in texture. This is a major no-no. Repetitions in texture make it known that the image has been manipulated. It’s a sign of an amateur. If you see this, take a step back and try again. Are there naturally occurring patterns? Break them up. Keep your hand light – a heavy hand is also a sign of an amateur and leaves your subject looking unnatural. 


retouching_skin_after_healing_cloningAfter Healing/Cloning


2. Next up: Dodge and Burn! Dodging and Burning is the process of manipulating tone in order to even out blotches in skin. This is fantastic for (painstakingly) taking out goosebumps or evening out the blotches most people have on their skin.


Dodging and Burning is derived from a darkroom process. Dodging is lightning of tones and burning is the darkening of tones. By dodging and burning simultaneously, you’re able to even out tones and create smooth, perfect looking skin.


To begin, create a new layer set “mode” to “soft light” and select “fill with 50% grey.”


retouching skin photoshop new options

New layer options: Mode: Soft Light, Select “Fill with 50% grey”


Using the Dodge/Burn tool (J) you can choose which tones to work with – highlights, midtones or shadows. I typically start with midtones and then work my way around the image switching between midtones, highlights and shadows. Keep your exposure low. I usually work around 9%. Start small and you can gradually build your way up. 


Continuously switch between Dodge and Burn – an easy way to do this is to hold down the “Option” key. If you’re dodging midtones at an exposure of 9% and hold down the “option” key, you’ll burn midtones at 9% as long as the option key is held down. Essentially, it gives you the opposite tool of what you’re working on, however whatever settings you already have chosen (midtone/shadow/highlight and exposure) will remain the same.


*Dodging and Burning can be tricky! Until you train your eyes to see the difference between tones, it’s really easy to over-do your dodging and burning. In order to help you better see the differences in tone, you can create a guide to help train your eyes! To do this, create a “Hue/Saturation” adjustment layer and desaturate the image. Then, create a new “Curve” adjustment layer and make a deep curve. This will separate the tones and make it easier to see where you need to dodge and where you need to burn.


retouching_skin_photoshop_eye_guide_d&b_curveEye Guide: Deep Curve


retouching skin eye guide help before dodge and burnretouching_skin_eye_guide_help_before_dodge_and_burnWith Eye Guide on: Before Dodging and Burning. Notice the blotchy patches.


retouching_skin_eye_guide_help_after_dodge_and_burnWith Eye Guide on: After Dodging and Burning. Notice the smooth transitions between tones.


retouching_skin_eye_guide_help_after_dodging_and_burningAfter Dodging & Burning


Over-do it? That’s okay. Lower the opacity of your layer until it looks right. This is the beauty of working on a layer independent from your background layer.


3. After Healing, Dodging and Burning, now is time for color! ALWAYS be careful of where you place your color layers. For those just starting out, it’s best to do color last. If you manipulate color before you retouch, make sure your color layers stay on top of all the retouching layers you create.  IF YOU RETOUCH ON TOP OF COLOR MANIPULATIONS, YOU CAN’T UNDO THE COLOR. 


If you retouch on top of color manipulations, you can’t undo the color #fpblog
Click To Tweet


If you decide you don’t like the color and try to remove or change it, you’ll have to re-do all of your retouching work. Since the healing layer is set to “current and below” it is pulling color and texture from the layers below it (this would include your color layers). When you delete the color layer, the color remains in the areas which have been healed or cloned above it, leaving you with a mess that looks like this:


retouching_skin_on_top_color_manipulationsImage that has had retouching done on-top of color manipulations. The colour manipulations were removed resulting in an unusable mess!


So, those just starting out with this method of skin retouching, play it safe and work with color last.


retouching_final_skin_retouch_with_color_appliedFinal skin retouching with color applied


So – as a reminder, the order you retouch skin:

1. Heal/Clone – Remove wrinkles and blemishes

2. Dodge/Burn – Even out skin tone

3. Manipulate Color


Stay as organized as possible! It helps to make a group for retouching and a group for color to keep everything straight.

retouching_skin_layers_from_completed_retouched_imageLayers from completed retouched image (pictured above)


Good luck! Remember to take your time and practice. It takes a long time to be able to really see what you’re doing. Train your eye and you’ll be able to pick apart tones and see imperfections in skin more easily. Feel free to share your retouching here in the comments for feedback and critique!


And remember, if you have any questions, feel free to ask!


Alana


retouching_skin_animation


IMAGE SOURCE:

Feature image and images 1-12: courtesy of Alana Tyler Slutsky


Fashion Photography Blog

 
Comments Off on How To Retouch Skin And Still Look Natural

Posted in Uncategorized


How to Retouch a Portrait with the Adjustment Brush in Lightroom

04 Mar

Portrait retouching Lightroom

You have probably seen several portrait retouching programs advertised in magazines or online, and wondered if they were worth buying. The answer is no. I have tried out quite a few, and the truth is that the Soften Skin preset in Lightroom does just as good a job as any of them. For most photographers Lightroom’s retouching tools all are you will ever need. For high end retouching purposes you can go to Photoshop.

It’s worthwhile taking some time to think about your personal approach to portrait retouching. Some photographers seem to like the airbrushed, almost plastic look of heavy processing. It’s a style you see used a lot in commercial photography or movie posters.

Others will go for a more natural effect, and use the retouching tools with a light touch. That’s definitely my approach, and it fits with my preference for natural light and for creating portraits that capture character.

Either way,the Adjustment Brush in Lightroom can accommodate your needs.

Retouching portraits of women

When retouching portraits of women it is conventional to use a skin smoothing technique to make the portrait look more flattering. There are exceptions of course, sometimes skin smoothing is not necessary, especially if your model has good skin and you shoot in soft light, or use a wide aperture to throw some of the face out of focus.

Portrait retouching Lightroom
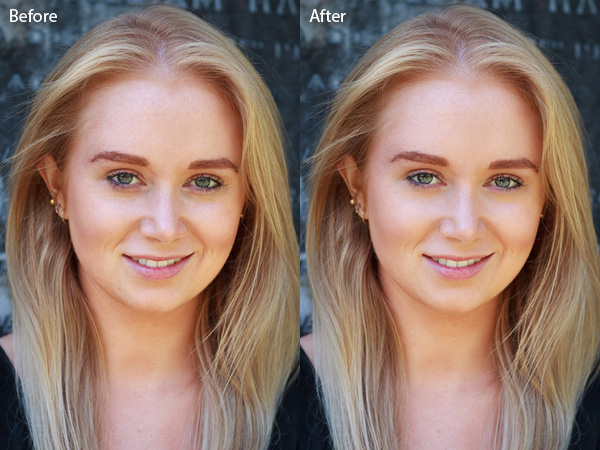
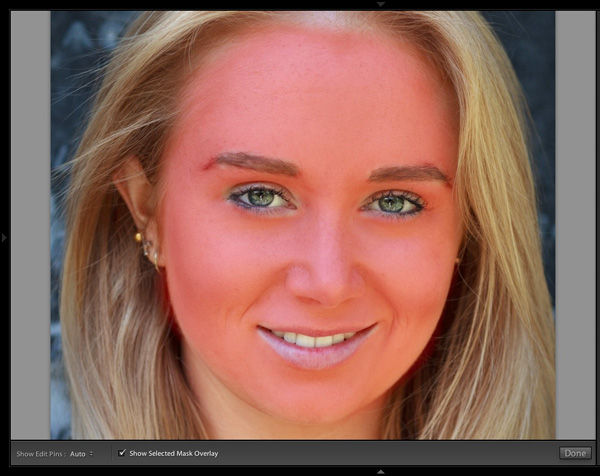
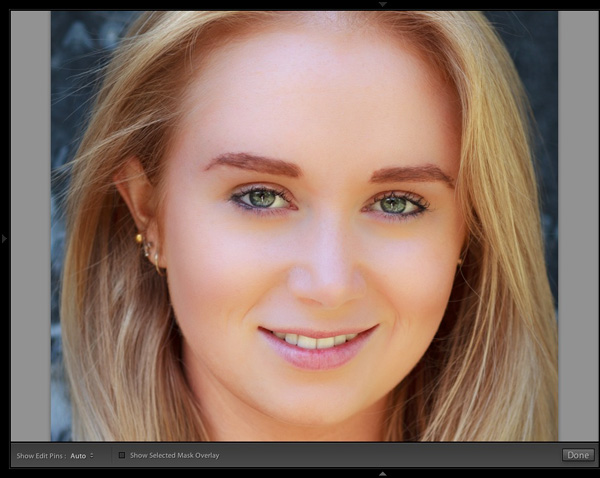
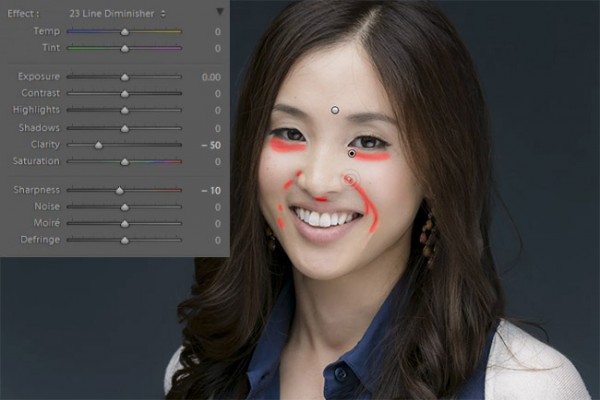
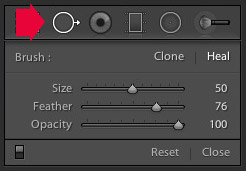
The first step in portrait retouching is to remove any blemishes with the Spot Removal tool. To do so, click on the Spot Removal tool icon to activate it, adjust the size of the  brush with the square bracket keys on the keyboard, and click on the spot you want to remove.

Lightroom automatically selects another area of the portrait to sample from, healing the blemish. Sometimes Lightroom won’t select the most appropriate area – in this case you can click on the circle representing the sample and move it to a more suitable location.

Portrait retouching Lightroom

Click on a blemish with the Spot Removal tool (left). In this case Lightroom’s healing algorithm worked perfectly, but if it doesn’t then click on the circle representing the sampled area and move it to a location where the skin matches the tone and texture of the area to be healed (right).

Adjustment Brush adjustments

Now it’s time to look closely at the portrait and decide what other retouching is required. It’s important that you have already made the required adjustments to tone and contrast in the Basic panel before you get to this stage. Increasing Contrast and Clarity, for example, will emphasize skin texture, wrinkles and blemishes. On the other hand, you can move the Exposure or Highlights sliders right to brighten the skin, making wrinkles and skin texture less obvious. Retouching with the Adjustment Brush should be left until last, so you know what you’re working with.

I like to start with the area underneath the model’s eyes. The skin here is thinner than the rest of the face which is why people get dark patches there. There may also be wrinkles, and some people have a strong crease along the lower eyelid.

The idea is not to eliminate these completely (unless you’re going for the heavily retouched, airbrushed look) but to minimize them. They’re a natural part of the skin’s texture and it will look unnatural if they are not there.

Portrait retouching Lightroom
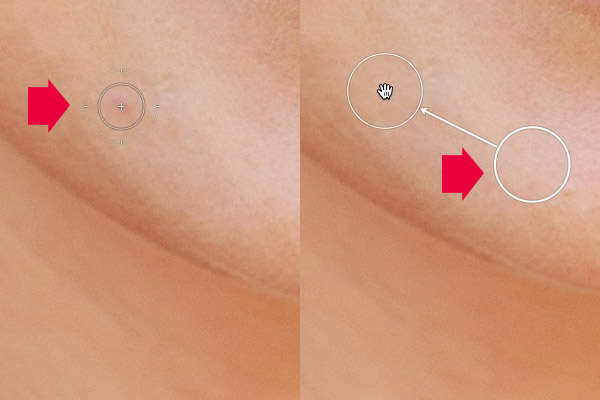
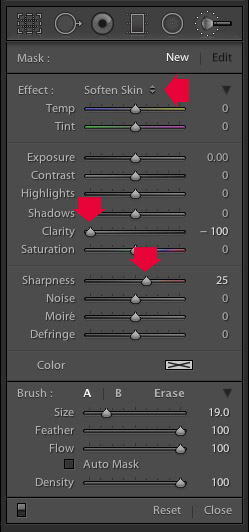
Click on the Adjustment Brush icon to activate it. Select the Soften Skin preset from the Effect menu. Lightroom sets Clarity to -100 and Sharpness to +25. Make sure Feather, Flow and Density are set to 100, use the square bracket keys on the keyboard to adjust the size of the brush and paint over the areas under the eyes. The Soften Skin preset blurs the area that you paint in with the brush.

If the effect is too strong, hover the mouse over the Adjustment Brush pin (a grey circle with a black dot in the middle) until a double arrow icon appears (below). Hold the left mouse button down and move the mouse left. Lightroom reduces the value of the Clarity and Sharpness sliders, effectively lessening the strength of the Soften Skin preset. Stop when it looks about right. You can also reduce shadows by moving the Shadows slider (in the Adjustment Brush sliders) to the right. Every portrait is different so you have to adjust the effect by eye.

Portrait retouching Lightroom

These are the results.

Portrait retouching Lightroom

A. Original, unretouched portrait.
B. Retouched, with Soften Skin preset at full strength.
C. Retouched, with strength of Soften Skin preset reduced and Shadows slider moved to the right (subtle difference only).

Enhancing eyes

You can also use the Adjustment Brush tool to enhance your model’s eyes. This is useful if the eyes are dark due to the lighting. Be careful of overdoing this effect as it may not look natural.

Click New at the top of the Adjustment Brush panel to create a new Adjustment Brush. Set Feather to around 50 and paint in the pupils of the model’s eyes. If you need to, press O (the letter) on the keyboard to see the masked area (it is displayed in red shown below).

Portrait retouching Lightroom

Now set Exposure to around 0.50 and Clarity to 30. The effect will vary depending on the colour of your model’s pupils and the amount of light on them. It’s a good idea to zoom out and look at the entire portrait to see if the effect is too strong. You can see this adjustment on the model’s eyes below, which I think is about right.

Portrait retouching Lightroom

You can make the effect stronger or weaker on your photo using the technique described above. Hover over the Adjustment Brush pin until the double arrow icon appears, move the mouse left to make the effect weaker, and right to make it stronger (you can also just drag the sliders one by one to change the settings)

The final step is to apply gentle skin softening to the rest of the face. Create another Adjustment Brush, set Feather to 100 and paint the entire face (use the O keyboard shortcut to display the red overlay). Then select Erase in the Adjustment brush panel, set Feather to 50 and erase the eyebrows, mouth and eyes. The idea is that you only want to soften the skin, not these parts of the face. It should look something like the mask below.

Portrait retouching Lightroom

Go to the Effect menu and select the Soften Skin preset. Press O to hide the mask overlay and you will see something like the screenshot below. Remember, this is the Soften Skin preset at maximum strength so it has a strong effect on the photo.

Portrait retouching Lightroom

Use the technique we learned earlier to reduce the strength of the effect. How far you go is up to you. I like to apply the Soften Skin preset subtly to retain as much skin texture as possible. Here’s the result with Clarity reduced to -20 and Sharpness to +5.

Portrait retouching Lightroom

This video shows how I retouched another portrait, using the Adjustment Brush tool to enhance the model’s eyes and facial hair.

I’ve only touched on the number of ways you can use Adjustment Brushes in Lightroom for portrait retouching. What techniques do you use? Please let us know in the comments.


The Mastering Lightroom Collection

Mastering Lightroom ebooks
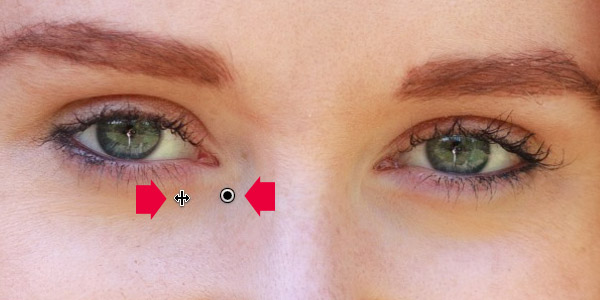
My Mastering Lightroom ebooks will help you get the most out of Lightroom 4 and Lightroom 5. They cover every aspect of the software from the Library module through to creating beautiful images in the Develop module. Click the link to learn more or buy.
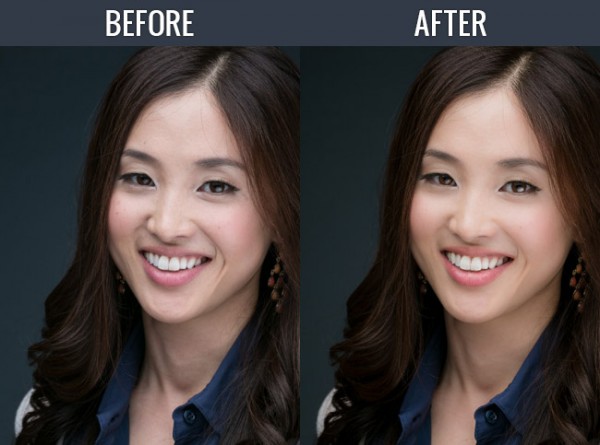
googletag.cmd.push(function() {
tablet_slots.push( googletag.defineSlot( “/1005424/_dPSv4_tab-all-article-bottom_(300×250)”, [300, 250], “pb-ad-78623” ).addService( googletag.pubads() ) ); } );

googletag.cmd.push(function() {
mobile_slots.push( googletag.defineSlot( “/1005424/_dPSv4_mob-all-article-bottom_(300×250)”, [300, 250], “pb-ad-78158” ).addService( googletag.pubads() ) ); } );

The post How to Retouch a Portrait with the Adjustment Brush in Lightroom by Andrew S. Gibson appeared first on Digital Photography School.


Digital Photography School

 
Comments Off on How to Retouch a Portrait with the Adjustment Brush in Lightroom

Posted in Photography


How to Professionally Retouch Portraits in Lightroom

22 Sep

The Following is an excerpt from the SLR Lounge Lightroom Preset System v5 and accompanying workshop from the Lightroom Workshop Collection v5.  The Lightroom Preset System is designed to take you from Ordinary to Extraordinary photos in just a few seconds and clicks.

In this article we’re going to do a headshot retouch to show how capable Lightroom is. Of course for a professional headshot retouch Photoshop is necessary, but Lightroom is also surprisingly capable. We’re going to utilize one of our “Soft Portrait” presets, similar to the one we used in our Color Portraiture with Retouch and Enhancement Tutorial, and then we’re going to utilize our brush presets to make our retouches. The complete written tutorial is below, and you can also watched the video tutorial at the end of this article.

Here’s a sneak peak at what our image will look like before and after the retouch.

beforeafter


Read the Written Tutorial

The first thing we’re going to do is select our “01-10 BASE – SOFT: 11a. Extra Soft – Skin Desat” which will soften the skin by decreasing the Clarity and adjusting the Noise Reduction settings. The preset also adjusted the Red and Orange in our HSL, lowering them slightly so we get desaturated skin tones. We also added a little bit of contrast using the  “03-40 ADJUST – SHADOW BLACKS: 43 Darken – Light (+10,-20)” preset. The Tone Curve is set in s subtle “S” shape, giving us a slight contrast boost, and we have our standard amount of Sharpening applied to this photo. We’re going to set our Color Temperature to 4900 and add +0.40 to the Exposure to give the skin a nice bright look. For those that don’t have the Preset System, here are what our Develop Settings look like after our presets and adjustments are applied.

alldevelopsettings

The first brush adjustment we’re going to be making is for her skin. We’re using our “21 Skin Softener” preset, and you can see settings of our brush in the photo below. These settings will smooth skin without destroying skin texture. We want to make sure we’re only applying this brush to the skin, and you can press “O” to bring up the overlay so you can see exactly where the brush is being applied as shown below. You can also delete  areas of brush application by holding down “alt on a PC or “opt” on a MAC to erase the adjustments.

skinbrush

Moving on, we’re going to hit “New” to  make new brush adjustments, and we’re going to select our “23 Line Diminisher” preset. We want to diminish some of the smile lines and lines under the eyes. This part of the retouch should be subtle, diminishing the lines and not removing them completely. Once again, you can see the brush preset settings and the area of affect in the image below.

linediminisher

Now we’re going to hit “New” and select the  ”24 Eye Brightener” preset. We’re going to brighten up the eyes and we want it to be subtle because if the eyes are too bright it will have an abnormal look. The best way to check if eyes are too bright is to simply zoom out to a thumbnail view and check to see if the eyes look like they are glowing or unusually bright based on the surrounding tones.

eyebrightener

Furthering our edit on the eyes, we want to brighten up the iris’ to add nice colors to them and to exaggerate some of the nice catch light. We’re using our “25 Iris Enhancer” and we want to make sure we’re only making adjustments on the iris’ and nothing else.

irisenhance

Now we’re going to move onto our lips. Our “26 Lip Enhancer” preset adds nice color and contrast to the lips.

lipenhance

The last brush we’re going to use is for the hair. With our “15 Hair | Lashes” preset, we’re going to pull out some nice color and texture from her hair.

wendyhair

At this point we’re done with our retouches. If you like you can do some additional blemish removal. When doing blemish removal we recommend keeping blemishes that are apart of their look. The last thing we’re going to do is add a Radial Filter with the Exposure set to -0.50.

radialfilter

And now we are left with our final image. Here’s a before and after of our portrait.

Before

lightroom-5-tutorial-professional-headshot-retouch-0001

After

lightroom-5-tutorial-professional-headshot-retouch-0002

Watch the Video Tutorial

[EMBED VIDEO HERE]

If you would like to see exactly how all of the settings and adjustments were applied, please watch the video below from the SLR Lounge YouTube Channel.

Conclusion and Learn More

We hope you all enjoyed this tutorial. If you are interested in learning more or purchasing the SLR Lounge Lightroom Preset System v5 or the newly released Lightroom Workshop Collection v5, please click any of the links in this article.

Post originally from: Digital Photography Tips.

Check out our more Photography Tips at Photography Tips for Beginners, Portrait Photography Tips and Wedding Photography Tips.

How to Professionally Retouch Portraits in Lightroom


Digital Photography School

 
Comments Off on How to Professionally Retouch Portraits in Lightroom

Posted in Photography


Color Portraiture with Retouch and Enhancement in Lightroom 4 and 5

25 Aug

The Following is an excerpt from the SLR Lounge Lightroom Preset System v5, a preset system designed to take you from Ordinary to Extraordinary photos in just a few seconds and clicks.

In this article, we have a beautiful bride who designed an amazing red dress with a lot of great details and jewelry. We want to edit this photo so that she has a nice soft portrait look and the details in her dress remain sharp and crisp. To do this, we’re going to be utilizing similar techniques in production as we covered in the previous Soft Flattering Color Portrait tutorial. But, we are going to go through the added step this time of utilizing our brush presets to make the image details pop. The written article is below, and if you like, you can also watch the original video tutorial towards the end of the article.

Here’s a quick sneak peak of our image before and after we’re done with our edit.

beforeafter copy

Read the Written Tutorial

Since this is a portrait, we have a preset that gets us to a nice soft portrait look quickly which we discussed in detail in the previous Soft Flattering Color Portraits tutorial. This preset adjusts the develop settings so that portrait skin tones looks nice and soft, and it also desaturates skin tones via a slight modification to Vibrance and Saturation to help even out skin tone colors. We also increased our exposure to +0.70 because an overall brighter image will look more flattering on our bride. Personally, I want to go with a more neutral/white look for the image, so that the red in the dress truly pops. So we’re going to adjust our Temperature to 4500. Here’s what our develop settings look after our preset and manual adjustments are applied.

developesettings

In the HSL our Red and Orange have been decreased slightly because once again, we want to subtly even out skin tone colors.

HSL

  • Red: -20
  • Orange: -10

In the Details our preset gave us the perfect amount of Sharpening and Noise Reduction. The Sharpening settings are doing a great job of showing the intricate details in the dress, while using a little bit of Noise Reduction to smooth out pores and fine detail in our subjects skin.

Sharpening

  • Amount: 70
  • Radius: 1.5
  • Detail: 10
  • Masking: 30

Noise Reduction

  • Luminance: 15
  • Detail: 70
  • Contrast: 0
  • Color: 25
  • Detail: 50

Our preset also adjusted our Lens Vignetting to +30, because we want a nice even edge to edge toning.

Lens Vignetting

  • Amount: +30
  • Midpoint: 30

Now we’re going to do some more post processing with our Brush. The first thing we want to focus on is the beautiful red dress. We’re going to set our Brush settings for Clothing and Texture and apply it everywhere but her skin. If you press “O” you can bring up the brush mask overlay and see where the brush is being applied. (See video tutorial below for reference)

When you apply a brush onto your image, a “pin” will appear on your image (Press “H” on your keyboard to hide/reveal pins). If you click on the pin you can decrease or increase the strength of the brush settings by left-clicking and dragging to the left (weaken) or right (strengthen). We want our adjustments to be a little more subtle so we slightly decreased the strength of the brush.

bothclothingbrushsettings

Original Brush Settings on Left, Lowered Brush Strength Settings on Right

We like the window in the background because it helps compose our frame, but there’s a distracting bar in the middle. For this particular image, we could keep the frame since it does a great job framing our subject. But, just to illustrate how capable Lightroom is, we’re going to remove the window entirely, making this a high key image with a nice bright background. To do this we’re going to use our Brush with strong dodge settings and apply it to the window.

Screen Shot 2013-08-21 at 1.12.48 PM

If you have additional questions, watch the video tutorial below to see exactly how this affect was applied.

Dodge Brush Settings

  • Exposure: 4.00
  • Contrast: 1.00
  • Highlights: 1.00

We want to apply the brush to the inside of her hands, but it’s a tough spot to reach because the area is very small. This is a great place to use Lightroom’s Auto Mask function.

automask

Her hands are slightly underexposed so we’re going to add a graduated filter and set the exposure to +0.90. We are then going to drag the filter from the bottom left of the image to her bracelets.

firstgraduatedfilter

We also want another subtle graduated filter for the back of her veil, so we’re going to set the exposure on this filter to +0.30. We want to drag this up from the bottom right of the image to her bicep area just as we did for the previous graduated filter shown above.

Now that we’re done with the dress, we’re going to go back and touch up some details on our bride. The first thing we’re going to do is select our “Hair and Lashes” preset. This will give some nice contrast and sharpness in her eyes and eyebrows.

Hair and Lashes Brush Settings

  • Contrast: 10
  • Highlights: 20
  • Shadows: -10
  • Clarity: 15
  • Saturation: 10
  • Sharpness: 25

After the eyes, we’re going to move onto the lips. We’re going to select our Brush preset for lips which will give us some nice color and contrast on the lips.

Lip Brush Settings

  • Contrast: 15
  • Clarity: 15
  • Saturation: 20
  • Sharpness: -10
  • Noise: 10

And now we are left with our final image. Here’s a before and after of our portrait.

Before

lightroom-5-tutorial-high-key-retouch-0001

After

lightroom-5-tutorial-high-key-retouch-0002

Watch the Video Tutorial

If you would like to see exactly how all of the settings and adjustments were applied, please watch the video below from the SLR Lounge YouTube Channel.

Conclusion and Learn More

We hope you all enjoyed this tutorial. If you are interested in learning more or purchasing the SLR Lounge Lightroom Preset System v5

Post originally from: Digital Photography Tips.

Check out our more Photography Tips at Photography Tips for Beginners, Portrait Photography Tips and Wedding Photography Tips.

Color Portraiture with Retouch and Enhancement in Lightroom 4 and 5


Digital Photography School

 
Comments Off on Color Portraiture with Retouch and Enhancement in Lightroom 4 and 5

Posted in Photography


Street Retouch: Bus Riders Get Live Photoshop Treatment

24 Jun

[ By Steph in Art & Photography & Video. ]

Street Retouch Live Photoshop 1

Unsuspecting travelers waiting to catch a ride were shocked to see their own photos integrated into humorous advertisements on the walls of the bus stop shelter. Berlin-based Photoshop artist Erik Johansson took surreptitious photos from a van across the street, altered them in Photoshop, and projected the edited images onto the ad space on the shelter.

Street Retouch Live Photoshop 2

Johansson had to work fast, getting only a few minutes to take the photo, make his changes, insert it into a funny pre-made background and transmit it to the bus shelter. He also filmed the reactions of the surprised subjects, who suddenly found themselves integrated into ads for fictional films and products.

Street Retouch Live Photoshop 3

Street Retouch Live Photoshop 4

Street Retouch Prank was developed for Adobe Creative Days, an annual event that showcases creativity and innovation using Adobe products. It may be a prank, but it’s also an interesting look at how interactive the future of advertising is likely to be.

Share on Facebook


[ By Steph in Art & Photography & Video. ]

[ WebUrbanist | Archives | Galleries | Privacy | TOS ]


WebUrbanist

 
Comments Off on Street Retouch: Bus Riders Get Live Photoshop Treatment

Posted in Creativity


Retouch images faster with new Content-Aware Patch

14 Jan

Bringing imaging magic to Adobe® Photoshop® CS6 software, the acclaimed Content-Aware family of tools lets you retouch or recompose images with astonishing ease, control, and speed. One of the newest of these intelligent editing tools, Content-Aware Patch, was just introduced in Photoshop CS6.

What is Content-Aware Patch?

Content-Aware Patch is designed for times when you want to remove unwanted content from a photo and then replace it with a precise and seamless patch. The tool automatically creates the patch for you, but only after you’ve shown it exactly which area of your image you’d like it to sample from.

And it uses Content-Aware technology to blend the patch into the surrounding area.

Patching challenges

The Content-Aware Fill option introduced in Photoshop CS5 is a great choice when you want to remove unwanted content from an image. Once you’ve deleted your selected content, it can analyze the surrounding pixels and then fill the space with content that matches those pixels. In some cases, though, Content-Aware Fill doesn’t return the desired results. For example, it can fill the space with poorly matched content if the area surrounding the deleted content lacks consistency or a discernible pattern.
How does Content-Aware Patch solve the problem?

Content-Aware Patch gives you superior results by letting you determine the area it will sample from to create your patch. For example, if you want to remove an object from a tight row of similar objects, you can tell Content-Aware Patch to sample from a nearby background area to create a precise and natural-looking patch.

Retouch with greater precision

Content-Aware Patch gives you a fast and easy way to perfect your images. Simply delete the content you don’t want, direct the tool to the patch material you think will work best, and then watch as it uses Content-Aware technology to magically create a stunning result.

Any suggestions, ideas? Feel free to comment on this article!

Back to Top

BlogPhoto

 
Comments Off on Retouch images faster with new Content-Aware Patch

Posted in Equipment