RSS
 

Posts Tagged ‘Brush’

Adobe updates Photoshop for iPad with Refine Edge Brush, Rotate Canvas feature

27 Jul

Adobe has announced an update to Photoshop for iPad that adds the popular Refine Edge Brush and Rotate Canvas feature.

The new Refine Edge Brush in Photoshop for iPad makes it easier to precisely select parts of an image, particularly those involving fine fabrics, hair or fur. Underneath, the technology is the same as used in its Desktop feature, but Adobe tweaked the interface a bit to make it more intuitive for the iPad’s touch-first design.

Below are a few of the examples Adobe has shared in its announcement blog post. Keep in mind these are specifically-chosen images, so your results may vary.

Adobe has an entire user guide on how to use the new Refine Edge Brush in Photoshop for iPad to help get you up and running if you aren’t familiar with the feature.

Another much-requested feature Adobe has added is the Rotate Canvas tool. Now, using a two-finger gesture, you can rotate the canvas you’re working on, making it easier to precisely edit and make changes to your work.

The feature works in conjunction with the zoom gesture, so you can quickly pinch in and out while also rotating the canvas. Rotation can snap at 0, 90, 180 and 270 degrees, and resetting the rotation and zoom is as simple as quickly pinching out on the canvas.

Adobe has created a user guide for the Rotate Canvas function as well.

The update should be live in the App Store to download today. If it isn’t, turn off and turn on your iPad before revisiting the App Store.

Articles: Digital Photography Review (dpreview.com)

 
Comments Off on Adobe updates Photoshop for iPad with Refine Edge Brush, Rotate Canvas feature

Posted in Uncategorized


How to Fix Photoshop Brush Lag: 5 Steps

07 Jul

One of the most frustrating things that can happen while editing photos is lag. Especially photoshop brush lag. Imagine, you’re right in the middle of doing some intricate touch-up edits to finalise an amazing photo for your portfolio or for a client and you cannot get the photoshop brush to do the edits in the exact place that you want Continue Reading

The post How to Fix Photoshop Brush Lag: 5 Steps appeared first on Photodoto.


Photodoto

 
Comments Off on How to Fix Photoshop Brush Lag: 5 Steps

Posted in Photography


Lightroom Local Adjustments – Radial Filter Versus the Adjustment Brush

18 Aug

Adobe Lightroom is image editing software that allows you to edit and make color adjustments to your photos. Among many, the Radial Filter and Adjustment Brush are two very useful local adjustment tools in Lightroom.

But often people get confused between both of these tools and are not sure which one to use in which situation. So I thought I’d share a few tips on the basis of which you can easily figure out the importance of each respective tool.

Radial Filter Tool

This tool is a blessing for portrait, event, wedding, and wildlife photographers. The reason why I am pointing to these genres of photography is that such photos usually have a single subject in the frame which needs to be highlighted.

The Radial Filter allows you to select an area using an elliptical mask. Then the shape of the ellipse can be changed by dragging one of the points. Once the area is selected, you can make adjustments inside or outside the shape using the new Brush component depending on your requirements.

radial filter Lightroom local adjustments

Adjustment Brush Tool

The Adjustment Brush is like painting the image canvas with the required adjustments. You can use the mouse pointer, drag and select the area manually where you wish to make desired adjustments. You have the ability to increase or reduce the size of the brush to make a fine and precise selection.

 Lightroom local adjustments - adjustment brush

Radial Filter or Adjustment Brush? How to Decide?

As you saw in the example above, using the Radial Filter allows you to select a particular area using the elliptical mask whereas the Adjustment Brush allows you to manually select the area using the cursor.

As a photographer and a creative person, you have to first visualize the result you want to achieve for your picture. If you believe that using the Radial Filter would suffice for your editing needs, go ahead with it. But if you feel that you need more manual and precise control over the selection of the area where you need desired changes, go with the Adjustment Brush.

It may sound easy but it might be challenging in some situations, so let me help you with this by looking at two examples.

Example 1: When to use the Radial Filter

 Lightroom local adjustments - radial filter image of an Indian boy

In the image above, my intention was to make changes to the area around the face of the boy. Now as the shape of the face is defined, I can easily select the area using the elliptical shape of the Radial Filter tool. Later, if I feel that I need to change the shape of the selection I can easily do that by dragging the points or using the Brush feature.

It does not make any sense to use the Adjustment Brush in this particular scenario as I can save my time by simply using the Radial Filter.

Basically, you should use the Radial Filter when the shape of your subject is defined and you can easily make the selection using the ellipse. Weddings, portraits, wildlife, events, and sports are some of the genres of photography where you can use the Radial filter to make changes faster.

Example 2: When to use the Adjustment Brush Tool

 Lightroom local adjustments - landscape scene sky selected

In this particular image, I wanted to make exposure and highlight changes selectively in the sky region. As you can clearly see, the shape of the sky area in this photo is not defined therefore I can not use the Radial Filter. If I use the Radial Filter I would either select unwanted areas of the mountains or would miss out some parts of the sky.

But by using the Adjustment Tool I can manually select the area I want to make changes in and I was able to do that precisely. Though this approach is a bit time consuming as compared to the Radial Filter, but you surely get an accurate selection. Now whatever changes I make would perfectly be made only on the sky region.

Conclusion

So the conclusion is that you should be using the Adjustment Brush when the shape of the area that you wish to select is not well defined. Landscapes, Cityscapes, or any photo where the shape of the subject is very complex, the Adjustment Tool would give you much accurate selection than the Radial Filter.

If you want to read more about each of these tools check out these dPS articles:

  • Creative Use of the Radial Filter in Lightroom
  • Lightroom’s Secret Weapon: The Radial Filter and How to Use it
  • Lightroom Mastery: The Power of the Adjustment Brush
  • 5 Tips for Using the Lightroom Adjustment Brush Tool
  • How to Use the Local Adjustments Tools Inside Lightroom

The post Lightroom Local Adjustments – Radial Filter Versus the Adjustment Brush appeared first on Digital Photography School.


Digital Photography School

 
Comments Off on Lightroom Local Adjustments – Radial Filter Versus the Adjustment Brush

Posted in Photography


Tips for Doing Digital Painting with the Mixer Brush in Photoshop

26 Jan

If you have ever felt the need to be a bit more creative with your photos, then Photoshop contains a multitude of ways to make that happen. In fact, it offers such a variety of options it can be a bit overwhelming to figure out which one might be the right one for you in a given situation. In this article, I will go over a method of digital painting using Photoshop to give you one technique you can add to your toolbox.

Mostly you can get some great effects without having to purchase any other software or features, but those options are available and can extend your portfolio of choices.

Perhaps you might want to create a birthday card or give someone an extra special present. This digital painting technique is ideal for use on an image which is not 100% in focus. Everything else might be perfect but if it’s a tiny bit blurry, apply a painting technique and no one will notice.

Tips for Doing Digital Painting Techniques with Photoshop

NOTE: Please be advised I am using CS6 so things may be in different places if you are using the CC subscription model.

Mixer Brush

The Mixer Brush is a very effective way of getting a painted look for your image because you actually paint over your image in Photoshop. It can be quite fiddly and time-consuming but the end result can look really good. My recommendation would be to do this with a graphics tablet and a pen, otherwise, you will get a cramp in your hand from the mouse. Plus you have more control in areas of fine detail with a tablet.

Any image can be used, but because the mixer brush picks up colors from your image and adds paint texture, you need to keep that in mind. All the brush strokes will be visible so the direction in which you paint may affect the final visual outcome. It took me 2-3 goes before I finally got the hang of this, so stick with it.

STEPS

Step #1. Open your image, add a new layer and select that one as your active layer. You can delete this later if you need to without affecting the original image.

Step #2. The Mixer Brush is found on the toolbar, left mouse click on the Brush icon, it should be in the drop-down box.

Mixer Brush open, showing settings on Adjustment Tool Bar

Step #3. On the top toolbar, you can make adjustments to the settings. Set them up as follows (as a starting point):

  • The drop-down box set to Custom.
  • Wet: 100%.
  • Load: 1% (this sets the paint color load on the brush to a minimal setting).
  • Mix: 100% (this uses the color from the original file – Load and Mix work opposite each other that way).
  • Flow: 50% (medium pressure on the brush).
  • Airbrush set to OFF.
  • Sample All Layers must be ticked – this is important as it allows us to pick up the color from the original image.

NOTE – all these settings are adjustable depending on what works for you, so feel free to experiment.

Choose your brush, make sure you are working on the new layer, and begin to paint.

Tips

  • Start with the dark areas of the image first.
  • Use the textures in the image to help direct the flow of the brush strokes.
  • The paint is very wet and colors will mix and blend readily which can be used to your advantage where colors change in the image. It can be a bit tricky to get the hang of at first.
  • Adjust your Flow value to get harder or softer strokes.
  • You may want to use a layer mask to show fine details like eyes or whiskers after painting to bring back a bit of sharpness in those areas.
  • Adjust the brush size to suit the areas you are working in, fine detail needs a smaller brush, and larger areas may support bigger brush strokes (a bigger brush covers more area quicker which is an added bonus).
  • If the background is not ideal, you can also replace it with a painterly texture instead. This is a great treatment for when you have a really good shot but not the cleanest background. So do a background replacement, add the painting and it becomes artistic instead.

Image results using the Mixer Brush

Tips for Doing Digital Painting Techniques with Photoshop

Photo of a Jabiru bird, with digital painting done over the feathers.

This image of a Jabiru I quickly painted for this article. The lovely colors in the feathers, plus all the different directions they lay in made it a good choice for digital painting.

Tips for Doing Digital Painting Techniques with Photoshop - Jabiru bird

Original Jabiru image

This is the original photo for comparison. You can see how the feathers around the eyes are much smaller and finer and you can see the different directions in which the feathers lie. In the painted image where the rainbow colors are on the top of the head, it’s visible how they have blended in softly, even picking up the hints of gold in the purple feathers at the top.

Tips for Doing Digital Painting Techniques with Photoshop

When you view the digitally painted layer by itself, you can see all the brush strokes, plus the areas that might have been missed. This is a useful step to check and make sure you have enough coverage. Additionally, this layer can have its opacity adjusted down if you wanted to bring back some of the original feather detail.

I tend to adjust the flow down to around 30% and fill in the gaps. It can also help to soften the transitions in direction as well. Also useful for extra blending across areas where colors change.

My first experiment with using the Mixer Brush was this portrait of my cat Cognac. You will notice I have left the whiskers, eyelashes and fine hairs around his ears unpainted as I felt it looked better that way. I was careful to follow the flow of the fur so it looked natural and picked up the subtle color differences.

This was probably my third go at this technique – so be patient with yourself if you aren’t happy with the first one you try. Keep at it.

Summary

This technique isn’t complicated, is fully contained within Photoshop and requires only one extra layer. A graphics tablet will make it much more comfortable to do as it is a lot easier to use than a mouse. The thing you need most is time and a careful steady hand. With those things you can elevate your photo to a new creative level, perhaps print it out on canvas as a gift.

Have you tried this method of digital painting before? Please share your results in the comments below.

The post Tips for Doing Digital Painting with the Mixer Brush in Photoshop by Stacey Hill appeared first on Digital Photography School.


Digital Photography School

 
Comments Off on Tips for Doing Digital Painting with the Mixer Brush in Photoshop

Posted in Photography


How to Super-Charge the Spot Healing Brush Tool in Photoshop

28 Oct

The Spot Healing Brush Tool is often used in portrait photography to remove blemishes, wrinkles, and other distracting elements. By default, this tool works great, but sometimes you will need to add an extra level of control to get the results that you want.

In this tutorial, you will learn how to use the Spot Healing Brush Tool with Content-Aware to quickly remove blemishes and other imperfections from your photos.

Getting Started

First, create a new layer to work non-destructively (Shift + Ctrl/Command + N).

Then select the Spot Healing Brush from the Toolbar. Make sure that “Content-Aware” is the selected Type and that “Sample All Layers” is checked in the Options Bar.

How to Super-Charge the Spot Healing Brush Tool in Photoshop

Spot Healing Brush Tool – Normal Mode

With the Spot Healing Brush Tool active, just paint over any distraction to remove it. In most cases, the Spot Healing Brush Tool will do an excellent job in eliminating the problem.

02 spot healing comparison

However, there are times where the Spot Healing Brush Tool will destroy the original detail and texture found in the photo, giving you very unrealistic results.

In the example below, the Spot Healing Brush Tool removed the wrinkles under the eye by adding a skin texture that made the image and problem worse.

03 spot healing normal

Left before using the Spot Healing Brush. Right – after using it in Normal mode.

Using Modes to Enhance the Spot Healing Brush

For a more realistic result, you need to keep as much of the original detail as possible and only remove the distracting element.

To do so, first consider the blemish, wrinkle, or distraction you are trying to remove. Is it darker than the skin tone? Or is it brighter than the skin tone?

If the distraction is lighter, select Darken from the Mode in the Options bar. If the distraction is darker, select Lighten. In this case, the wrinkle is darker than the skin tone. That means that we want to lighten the wrinkles. So in the Options Bar, under Mode, select Lighten.

04 lighten

With the brush mode set to Lighten, Photoshop will only replace pixels that are darker than the good portion of the skin. Since the wrinkles and other skin distractions in this photo are darker than normal skin tone, only the distracting elements are removed, leaving more of the original texture surrounding it intact.

Notice that as you paint over a wrinkle, you don’t lose the original highlights and you keep a lot of detail. The example below shows the results between using Normal and Lighten to apply the same correction.

05 spot healing normal

Comparing results from different brush modes. Left: Spot Healing Brush in Normal Mode. Right: Spot Healing Brush in Lighten mode.

Additional Notes

To work faster, keep in mind that you can switch between Modes by holding the Shift key and pressing the + or – keys.

This technique also helps you remove blemishes in areas that contain detail that you would like to keep.

In the example, below you can see how by using the Lighten mode we were able to remove the skin blemishes while leaving the white hair strands intact.

06 spot healing forehead

This technique works in this case because the hair strands are lighter than the skin tone, and the blemishes are darker than the skin tone. The Lighten Mode makes the Spot Healing Brush target only darker pixels, so the fine white strands of hair are left intact.

This tutorial is part of my Content-Aware series on YouTube. There are more videos there if you would like to learn more about how content-aware works in Photoshop.

The post How to Super-Charge the Spot Healing Brush Tool in Photoshop by Jesus Ramirez appeared first on Digital Photography School.


Digital Photography School

 
Comments Off on How to Super-Charge the Spot Healing Brush Tool in Photoshop

Posted in Photography


Quick and Dirty Method of Using the Photoshop Spot Healing Brush Tool

21 Jul

Let’s say you use Lightroom and you’ve tried and tried to get rid of those distracting spots using Lightroom’s Spot Removal Tool but no matter how you set it – using Clone or Heal or changing the Opacity or increasing the Feather – you have a giant, obvious repair on your image. Not good!

Photoshop Spot Healing Brush Tool - wild horses

This is my final, processed image but I had to dive into Photoshop to get there.

You’re a good photographer

For kicks, let’s agree that in addition to knowing your way around Lightroom, you’re a skilled photographer. You also subscribe to Adobe CC, but honestly, you don’t use Photoshop much. Perhaps you’re even a little bit afraid of it. You loaded the software and update it whenever Adobe tells you to but other than the PS icon looking cool and professional in your dock, you don’t actually use it.

You just don’t use Photoshop

I mean, Layers, Masks, Blending? Ugh. I know. I do 90% of my work in Lightroom. No one has ever called me out on that so I keep on keepin’ on with Lightroom. I love Lightroom but – and it’s a great big but – LR’s Spot Removal Tool is no match for Photoshop’s Spot Healing Brush Tool.

Because I know this issue affects so many of us, I’m going to teach you the quick and dirty method for how to Spot Heal in Photoshop. No layers. No tricky stuff. Just easy, quick simple repairs for the problem areas in your images.

Practice as you read this

Grab an image that has a problem area that you can’t seem to fix in Lightroom and follow along with me. Practice is the best way to learn so repeat these steps a few times today. After you Spot Heal a few images in PS, it will naturally become part of your image processing tool kit.

Step #1 – Process the image in Lightroom

In Lightroom, process your image as normal. Here’s my RAW  image before I’ve made any adjustments.

Photoshop Spot Healing Brush Tool - raw image

Canon 7D Mark II, 70-200 plus 1.4x @ 280mm, f/6/3, 1/1600, ISO 400.

Below is a screenshot of all the adjustments I’ve made on my image. I started with a pretty aggressive crop. You can see the White Balance and Basic adjustments but I also dropped in several Radial Filters to add clarity and brightness to key elements like the horses’ eyes. However, I struggled to get rid of the flecks of mud around the black horse’s eye.

Photoshop Spot Healing Brush Tool - Lightroom adjustments

Step #2 – Edit in > Photoshop

Right-click on your image. Select Edit in Adobe Photoshop CC.

Photoshop Spot Healing Brush Tool - Edit in Photoshop

It is very important that you don’t skip this step. Do not open your image directly in Photoshop. For the down and dirty method to be most effective, you must start this process in Lightroom.

NOTE: If you haven’t updated to PS CC 2017 or if you use an older version of PS, you might need to modify these steps. Instead of Edit in Adobe Photoshop CC 2017, you might see Edit a Copy in PS.

Step #3 – Select the Spot Healing Brush

It takes a minute, but eventually, your image will appear in the Photoshop window. Here’s the image I’m working on. Check and make sure your screen looks pretty similar to mine.

Photoshop Spot Healing Brush Tool - PS interface

Click on the Spot Healing Brush Tool. It looks like a band-aid except that it has a little semi-circle handle over it.

Photoshop Spot Healing Brush Tool - band-aid icon

If you can’t find this tool, count seven icons down on the tools pallet and right-click on that. Once you right-click, you should see the rest of the tools. Hover your cursor over the band-aid icon that says Spot Healing Brush Tool. Click to select it. It will now show as the active tool.

Step #4 – Setup the Spot Healing Brush

Review the settings for the tool bar that runs across the top of your Photoshop window.

Photoshop Spot Healing Brush Tool - mode and type

If your Spot Healing Brush Tool doesn’t default to these settings, change them to:

  • Mode = Normal
  • Type = Content Aware

Step #5 – Zoom in

Zoom in and increase the size of your image so you can see the problem area more clearly. Click the Command/Alt key and the + (plus) key simultaneously. Click again to zoom in more. If you’ve zoomed in too far, click the Command/Alt Key and the – (minus) key simultaneously to zoom back out. Grab the drag bars on the bottom and right side of the image to reposition the problem area so that it’s in the middle of the screen and easy to see and repair.

Photoshop Spot Healing Brush Tool - zoom in

Zoomed into 200%, I can see the problem area clearly.

Step #6 – Size the Brush Tool

Hover the Spot Healing Brush Tool over the problem area. You may need to change the size of the brush. The easiest way to do that is to use the square bracket keys on your keyboard.

  • Click the Left Bracket Key [ to decrease the size of the brush.
  • Click the Right Bracket Key ] to increase the size.

Notice that as you click on the bracket keys, the Size number in the bar that runs across the top of your image increases or decreases. (If you click on that number, you’ll get more tool options. Don’t worry about those for now.)

Photoshop Spot Healing Brush Tool - 20px brush

Using the Left Bracket Key, I adjusted my Spot Healing Brush Tool to 20 pixels and started making small repairs around the eye.

Step #7 – Brush over the bad area

After you’ve adjusted the size of your brush, start clicking on the area of your image that you want to repair. You can also drag the brush to make short strokes.

Photoshop is smart and should fill in the area with an appropriate selection but if it doesn’t, click Edit > Undo Spot Healing Brush in the top menu (or Cmd/Ctrl+Z will also undo). That will undo the last thing that you did.

If you want to undo multiple things, go to Edit and click Step Backward repeatedly till you’re at the last point that you liked. Step Backward does have limitations so work slowly and check your repair work often. Note: you can aslo open the History panel and go back to any previous step.

Photoshop Spot Healing Brush Tool - undo

Step #8 – Save

Evaluate your work. Do you like the repairs? If Yes, go to File > Save in the top menu. Photoshop defaults to saving images as a TIFF file. If it doesn’t, select the TIFF option if/when the menu pops up. This will also import the newly edited image into Lightroom.

Photoshop Spot Healing Brush Tool - save

If you don’t like the repairs you made, quit Photoshop without doing anything. Photoshop will ask if you want to save your work. Just say No. Go sip some coffee and try again another day when you’re fresh.

Step #9 – Head back to Lightroom

Almost done!

Go back to Lightroom. You’ll still be in the Develop Module with the original RAW image that you were working on still open. Press G for Grid which will take you to the Library Module. Check to make sure that next to your original RAW file is a new TIFF file. Select the two images and view them in Survey Mode so that you can look at them side by side (N on your keyboard).

If the two files don’t show up right next to each other in Lightroom resort your images by Capture Time (or file name), or drag and drop so that they do.

Photoshop Spot Healing Brush Tool - compare

Side by side of RAW file adjusted in LR (on the left) and TIFF with the addition of spot healing (on the right).

Wait, don’t you have to use layers in Photoshop?

That’s the down and dirty part. When you’re doing simple fixes like this, you don’t need to worry about layers. Why? Well, layers are excellent if you’re doing quite a few things to your image and you want to be able to turn different effects on and off. They’re also important so that you preserve your original image in a background layer (non-destructive editing).

But with this method, you still have your original RAW file. That’s why you want to start in Lightroom and then open your image from there into Photoshop. Lightroom sends a copy of your image to Photoshop. When you save your work in Photoshop in step #8, Photoshop generates a totally separate image file. That new TIFF file shows up in your Lightroom catalog next to your original RAW file.

NOTE: If you haven’t updated to PS CC 2017 or if you use an older version of PS, you might need to modify these steps. You might need to select “Edit a copy” and not “Edit Original.”

Photoshop Spot Healing Brush Tool - final image

This is a wild horse so I didn’t go too crazy fixing every little thing, but the distracting mud around the eye and on the neck is cleaned away nicely, don’t you think?

What if the down and dirty method doesn’t work?

This might not work for your image. Some repairs are finicky and this is definitely a hack method that won’t work for everything. My advice is to experiment. Remember the other tools that were grouped with the Spot Healing Brush Tool? Try one of those. Or, keep using the Spot Healing Brush Tool but change the Mode from Normal to Replace or even Multiply.

Remember when we clicked the Size number? Click that again and adjust the Hardness of the brush or the Roundness. Make only one change at a time and make notes on what each change does. If something works, click File, then Save and remember what you did. If nothing works, exit out of Photoshop without saving (and go have more coffee).

You can always experiment again another day because you still have your RAW image. It’s cataloged in Lightroom right next to the TIFF file. As long as you always start in Lightroom, you’ll be able to try again later.

Photoshop Spot Healing Brush Tool - Essaouira cafe

In this image of an outdoor seafood market in Essaouira, I experimented with a variety of tools to zip out the distracting bit of tree on the left, the construction equipment and the light posts. The RAW image, with Lightroom only adjustments, is on the left. The spot-healed TIFF is on the right.

Share with the dPS community: What hack or down and dirty methods do you use when you process your images?

The post Quick and Dirty Method of Using the Photoshop Spot Healing Brush Tool by Lara Joy Brynildssen appeared first on Digital Photography School.


Digital Photography School

 
Comments Off on Quick and Dirty Method of Using the Photoshop Spot Healing Brush Tool

Posted in Photography


Lightroom Mastery: The Power of the Adjustment Brush

10 Aug

If there is one thing I wish I would have spent more time learning early on in my time with Lightroom, it’s the adjustment brush.

Lightroom is an incredible editing tool, arguably the easiest one to use, and the quickest to learn. The one thing that took me a while to wrap my head around when starting out, was how to use the Adjustment Brush. In this article I’d like to share a quick excerpt from the new Lightroom Mastery course I created for Digital Photography School. I hope you find it helpful.

Why the Adjustment Brush is Great

Lightroom excels at making changes to the entire image (global adjustments) super simple and effective. It really becomes a joy to use Lightroom once you get the hang of it. Need to pull up the shadows in an overly-contrasty image?  No problem; just pull up the shadow slider.  Need to correct for overexposure?  Easy – just drop the exposure slider.

But what do you do when you need to make a change to a very specific area (local adjustments), and you don’t want that to affect the rest of the image? This is exactly when you want to call upon the power of the Adjustment Brush.

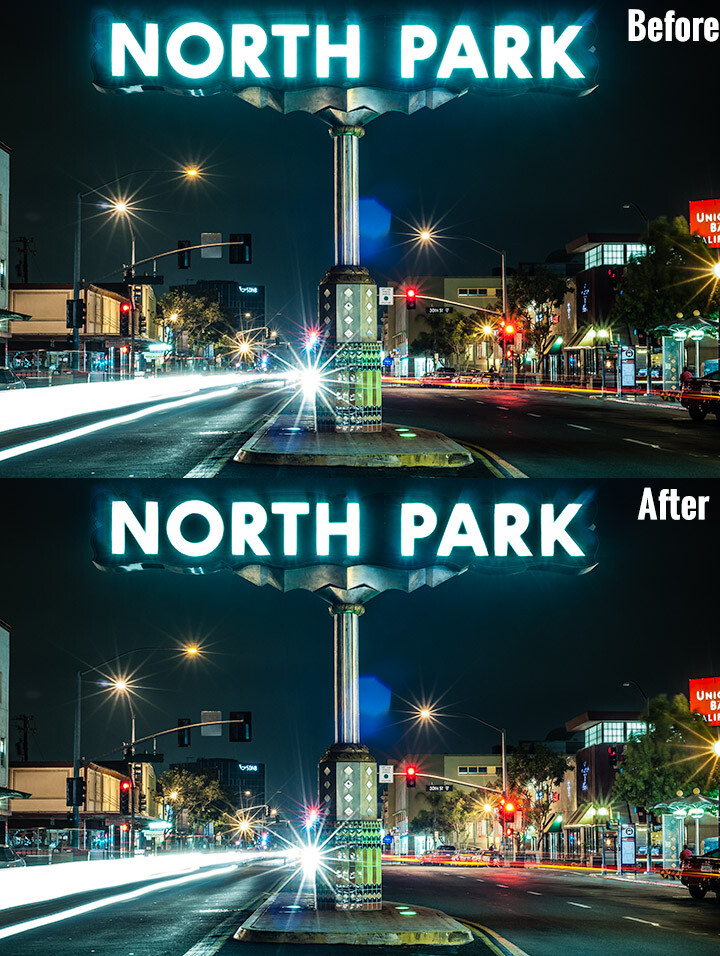
Look at the difference an adjustment brush made in the sign, as well as brightening up the lower right corner.

Look at the difference an adjustment brush made in the sign, as well as brightening up the lower right corner of this image.

How the Adjustment Brush Works

Instead of making a global change to the entire canvas, the Adjustment Brush enables you to get very specific and just paint over where you would like to make changes.

This sounds simple, but is incredibly powerful – you now have the ability to affect big change in many different areas of your image, without resorting to bouncing the image over to Photoshop. Hey, I’m all about simplicity, and if I can get all my edits done in one program versus two, I’m all in!

A Perfect Example – Corvettes and Chrome

A good friend had just come to visit me from China, we decided to walk around the neighborhood and managed to catch a parade. It may not look like it, but this was in November in San Diego, one of the benefits of fair weather every day. I caught this image of this beautiful car driving by:

Lightroom adjustment brush, lightroom mastery course, lightroom mastery, dps, corvette, chrome, parade

I darkened the sky a bit and applied some more contrast to the ground and ended up with this:

Lightroom adjustment brush, lightroom mastery course, lightroom mastery, dps, corvette, chrome, parade

That looks good, but the photo really wasn’t capturing how bright the chrome wheels and bumper accents were. In short, I needed to do some local editing on just those pieces. Adjustment brush to the rescue!

Time to Shine – Creating a Chrome Adjustment Brush

Deciding where to start when creating your custom brush

I knew the key to making this photo pop was getting that chrome to come back to life. I first clicked into my Adjustment Brush window (hit K on your keyboard or select the Brush tool from the top of the right hand panel in the Develop Module) and reset all the sliders back to zero. Since the wheels were not facing the sun, they were underexposed and caught in shadow.

Creating the brush itself

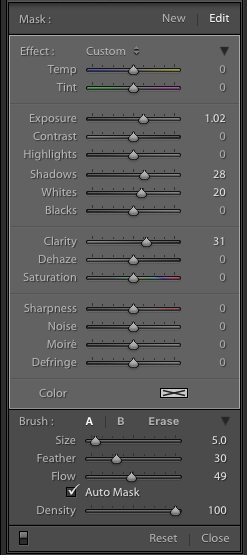
Lightroom adjustment brush, lightroom mastery course, lightroom mastery, dps, corvette, chrome, paradeI decided to increase the exposure +1 stop, bump the shadows up to +28 to correct the darkness, and increase the whites to +20 to make the highlights in the chrome pop.

For good measure I increased the clarity to +30 to make sure the edges in that chrome highlights were nice and snappy. Here is what the adjustment window looked like before I started painting (see right)

This was an educated guess as to what I thought would work. If this worked well, I could leave it. If it didn’t, I could always move the sliders after painting, to change it as necessary.

Painting with the Adjustment Brush – best practices

There are a few guidelines I like to follow when painting with the Adjustment Brush. Here a few helpful tips to make this easy:

  • Use a brush size that is a bit smaller than the area you are trying to paint.  It helps if you don’t “color outside the lines”, although that is an easy fix if you do. A quick tip here: if you use a mouse with a scroll wheel you can change the size of your brush by scrolling up and down. It works the same with my Apple magic mouse.
  • Check the box for Auto Mask if you are painting something with fine edges you don’t want to go over. Auto Mask does a good job of keeping your brush inside the lines even if you go outside, which saves time.
  • I like to see the mask I’m painting versus the effects of the mask I’m painting. To have the mask show up in red either click Show selected mask overlay or simply click the O key on the keyboard to toggle the mask on and off.

Let’s get painting!

I quickly painted over the wheels, front bumper, headlights, and any other chrome I could find. It’s a bit difficult to see, since the mask is nearly the same color as the car (you can change the mask color by clicking Shift+O repeated times until you find a better color) but here is what the mask looked like after my initial run:

Lightroom adjustment brush, lightroom mastery course, lightroom mastery, dps, corvette, chrome, parade

Using the eraser tool to clean up mistakes

Wow, I’m apparently terrible at coloring inside the lines! In all reality, going outside the lines on this image didn’t make a noticeable difference, but we might as well do this right.

To clean up areas where you’ve overpainted all you have to do is click Erase in your Adjustment Brush window. This will pull up a brush that will erase the mask area when you paint over it. This is important: make sure to click click the A or B brush after using the eraser so you don’t forget and start painting over areas with the eraser versus the brush by accident!

After a quick clean-up I ended up with this, which is much better:

Lightroom adjustment brush, lightroom mastery course, lightroom mastery, dps, corvette, chrome, parade

Let’s turn off the mask and see how it looks

Remember, to turn off the mask you can simply click the O key on your keyboard. Here you see my image after the adjustment brush has been applied:

Lightroom adjustment brush, lightroom mastery course, lightroom mastery, dps, corvette, chrome, parade

Much better!  The chrome wheels and bumper are much brighter now, and look a lot better.  The only thing I don’t like now, is how dark the drivers-side door is.

It’s a pretty easy fix to create a new brush to bring up the shadows, so I’ll do that.

Starting a new mask in the same image

It’s important to think of masks like layers. The wheels and bumpers are painted with one mask, that has one group of settings.

If I want to make a new adjustment brush with different settings for the door, I need to create a new mask, as opposed to just moving the sliders around. If I move the sliders around without creating a new mask, that will make changes to the current active mask (my wheels and bumpers).

To make a new mask just click New at the top of the mask menu. I only increased the exposure setting to +1 to add a full stop of light to the side, painted over the door and rear of the car, and got this:

Lightroom adjustment brush, lightroom mastery course, lightroom mastery, dps, corvette, chrome, parade

Let’s compare that to the second edit before I used any adjustment brushes:

Lightroom adjustment brush, lightroom mastery course, lightroom mastery, dps, corvette, chrome, parade

Before Adjustment Brushes were applied.

Much better!

This is just one simple example, the sky’s the limit!

There are endless possibilities with the adjustment brush. I could have changed the color of this entire car if I wanted to as well.

You can lighten up dark areas of images and vice versa. You can apply sharpening or clarify to individual areas. You can do a whole host of beauty editing like whitening teeth, giving eyes more color,  and more.

If you found this helpful, you will LOVE the new DPS Lightroom Mastery course!

lightroom-mastery.jpg

There are far too many excellent tips to learning how to master Lightroom to include in a blog post, so Digital Photography tasked me with creating the best and most comprehensive Lightroom video course on the web!

In Lightroom Mastery I break down everything in Lightroom and teach you more in three hours, than most photographers learn in years. I cover every module, tool, tip, and trick from my 10 years using Lightroom.

During the initial launch, dPS is doing a huge 50% discount on the course!  The price will regularly be $ 99, but during this special launch it’s only $ 49!

Go grab the course before the sale is over

You can click this link to learn more about what is included in the course, watch a preview video, and purchase the course!

googletag.cmd.push(function() {
tablet_slots.push( googletag.defineSlot( “/1005424/_dPSv4_tab-all-article-bottom_(300×250)”, [300, 250], “pb-ad-78623” ).addService( googletag.pubads() ) ); } );

googletag.cmd.push(function() {
mobile_slots.push( googletag.defineSlot( “/1005424/_dPSv4_mob-all-article-bottom_(300×250)”, [300, 250], “pb-ad-78158” ).addService( googletag.pubads() ) ); } );

The post Lightroom Mastery: The Power of the Adjustment Brush by Mike Newton appeared first on Digital Photography School.


Digital Photography School

 
Comments Off on Lightroom Mastery: The Power of the Adjustment Brush

Posted in Photography


Painting in VR: Kingspray Graffiti Simulator & Google Tilt Brush

24 May

[ By WebUrbanist in Art & Drawing & Digital. ]

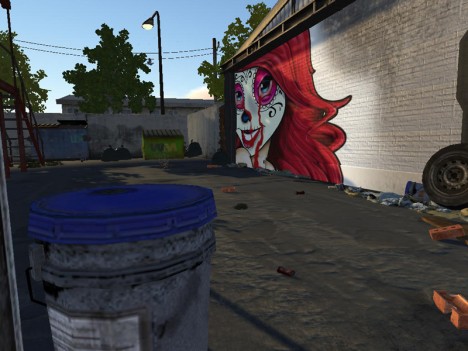
graffiti simulator

Virtual reality is not just about interacting with people at distance, or engaging with static worlds designed by others – it can also be a place where users are invited to create their own works of art and design. Games and apps like the two featured here (in videos below) are opening up new digital worlds for creatives to explore and shape.

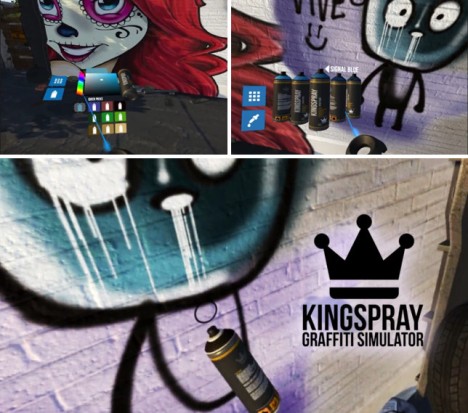
graffiti simulator experience

The Kingspray Graffiti Simulator, currently in development, gives players a palette and can of spray paint, adding realism through trips and spraying effects. Walking around the simulated world, artists can paint over and re-tag, then walk around to view other works and step back to enjoy the view.

tilt brush artworks

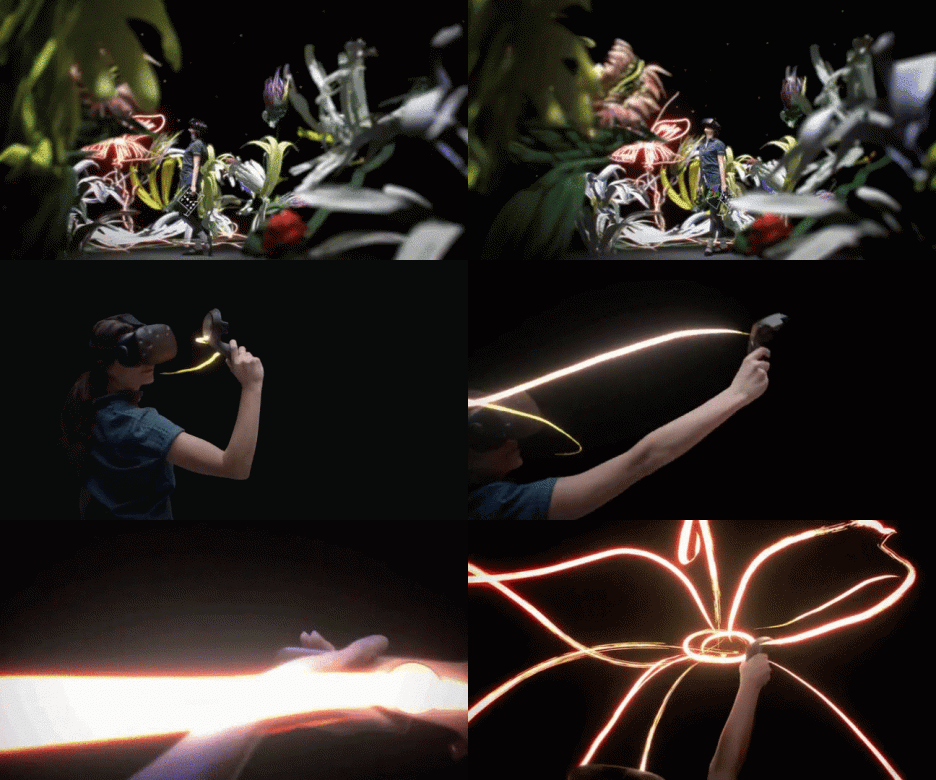
The Tilt Brush app from Google lets users sketch and draw in three dimensions. While the Graffiti Simulator places you in 3D space painting 2D surfaces, the Tilt brush actually lets you paint in space all around you. In turn, the finished pieces can be experienced from various perspectives by the artist and viewers invited to share the experience.

3d art

light painting

“Tilt Brush, at its core, is a virtual reality painting application. It creates something anyone can use, intuitively, for kids, artists, and absolutely anyone,” say the app’s developers. “Within the first 30 or 45 seconds, anyone can start VR painting and making marks in space all around them… It allows everyone to see how powerful VR is and how transformative it will be.”

Share on Facebook


[ By WebUrbanist in Art & Drawing & Digital. ]

[ WebUrbanist | Archives | Galleries | Privacy | TOS ]


WebUrbanist

 
Comments Off on Painting in VR: Kingspray Graffiti Simulator & Google Tilt Brush

Posted in Creativity


5 Tips for Using the Lightroom Adjustment Brush Tool

03 Apr

One of Lightroom’s most useful tools is tucked away at the top of the Develop panel, under a rather strange-looking icon that looks like a magic wand from Harry Potter. Clicking this Adjustment Brush icon, gives you access to many of the macro-scale alterations and edits available on some of the other Develop panels, but lets you control them on a micro level. It’s a fantastic tool for editing specific portions of an image, as opposed to the whole picture, but figuring out how to use it can be a bit overwhelming.

Here are my five favorite tips and tricks for using the Lightroom Adjustment Brush tool, and hopefully some of these will be useful to you as you explore how to use it for your own editing.

five-tips-brush-tool-woman-portrait

1. Use the A/B brush options to alternate between different types of brushes

My wife and I have done a great deal of painting in our house over the years. From hallways, to walkways, to bedrooms, we have spent more time and money on painting than I ever thought possible before we became homeowners. One of the most valuable lessons we have learned is that different types of painting jobs require different brushes. Sometimes you need a large roller, other times you need a small one. Sometimes you need a two-inch angled brush, and other times you need a small foam one. Each brush has its own purpose, and all are required to properly complete a painting task.

The same principle holds true in Lightroom, and you often need more than one brush to make the adjustments necessary on a given image. This problem is easily remedied by switching between the A and B brushes near the bottom of the Adjustment Brush panel.

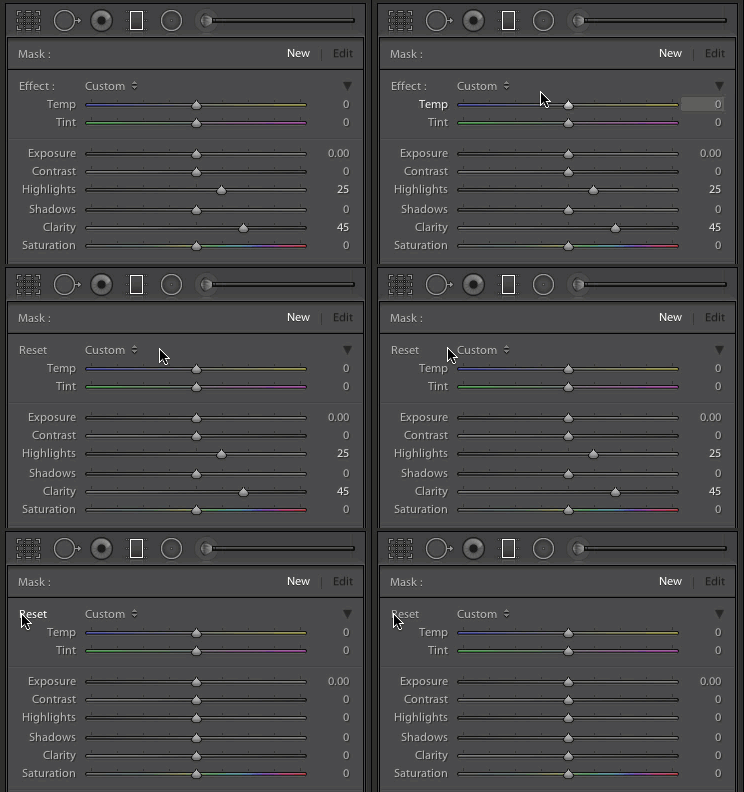
five-tips-brush-tool-a-b-brushes

Brush A is highlighted by default when you click on the Adjustment Brush panel, which means that any size, feather, flow, mask, and density settings you use will be automatically applied to that brush. When you click on Brush B you can use an entirely different set of options, then cycle between the two brushes just by clicking A and B. In the example above, Brush A is small with a medium feather and flow rate. Brush B is larger with a much lower flow rate and no Auto Mask, which makes it better suited for large-scale edits, whereas Brush A would be better suited for fine-tuning specific parts of an image. Setting up two different brushes is a great way to speed up your editing workflow, since you won’t need to continually change the parameters of a single brush, and you can instantly switch between the brushes by pressing the forward slash (/) key.

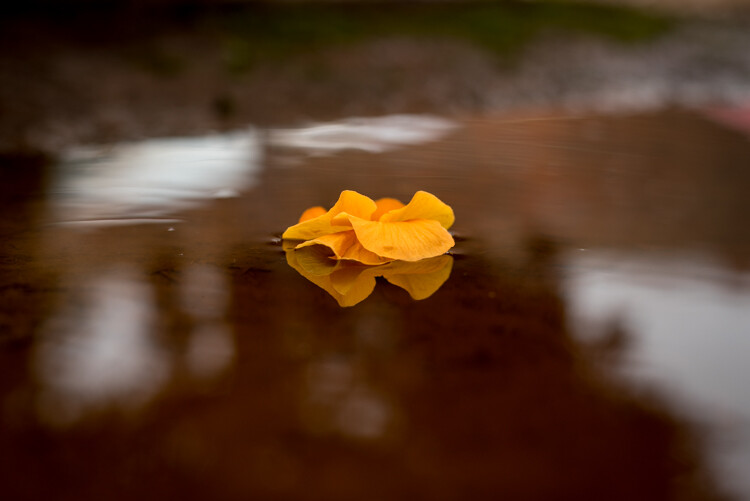
I used a large brush on the background and a smaller brush on the flower petals, and was able to switch between the two easily to get the edits I needed quickly.

I used a large brush on the background and a smaller brush on the flower petals, and was able to switch between the two easily to get the edits I needed quickly.

2. Create custom brush effect presets

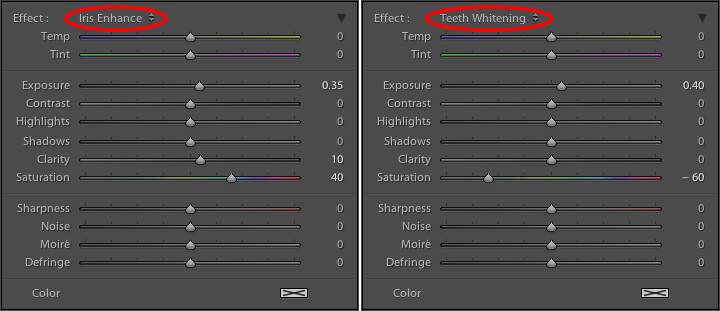
If the A/B brushes are similar to choosing different physical brushes at a hardware store, then the brush effect presets are like picking out different types of paint. Lightroom has several different presets that are available as default options, and they have names like “Highlights,” “Temp,” and “Teeth Whitening.” These presets are just default values that Lightroom thinks would work well to accomplish specific tasks like: adjusting exposure, adding contrast, or reducing noise. You can see how they work just by looking at the sliders, as you change from one preset to another.

These presets don't inherently do anything special, they just adjust various sliders in different ways.

These presets don’t inherently do anything special, they just adjust various sliders in different ways. You can create your own presets to do unique tasks as well.

The beauty of these presets is you are free to add new ones that suit your own workflow. You would never select from only a dozen colors when choosing how to paint a room in your house, and neither should you be forced to stay within the confines of the existing presets in Lightroom. To add your own presets, adjust the sliders how you want, click the name of the existing preset to pull down the list, and choose “Save Current Settings as New Preset.” Give your new collection of slider settings a name, and you can now select it whenever you want, right alongside the rest of the presets.

For example, I have found that on many of my portraits I need to brush in some sharpness while reducing the noise so I created a preset to do exactly that. I also have custom skin smoothing and teeth whitening presets that are a bit different from the default set Lightroom uses, and it’s very handy to switch over to these brushes whenever I need to, instead of configuring the sliders from scratch every single time.

3. Adding color to a brush

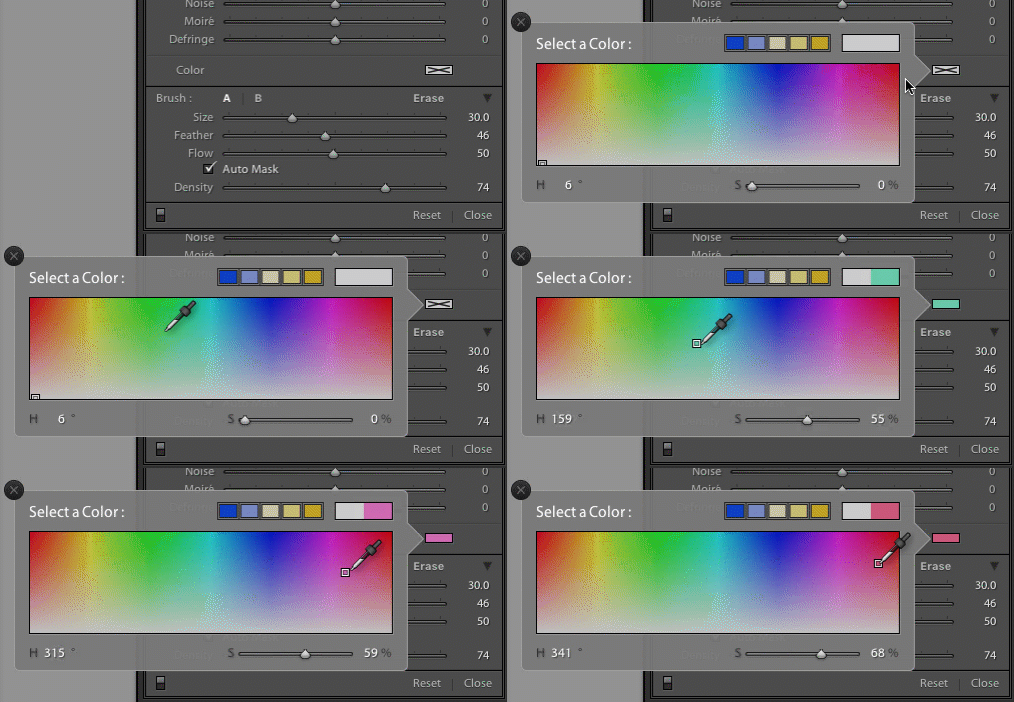
I started this article with an analogy comparing the Adjustment Brush tool in Lightroom to a literal paint brush, but what some people don’t realize is you actually can use the tool exactly like a paint brush to add color to your images. Near the bottom of the color panel is a rectangular box with a large X through it, and if you click on that you will see a color picker with an eyedropper tool that you can use to give your brush strokes a bit of color.

five-tips-brush-tool-color-selection-animated

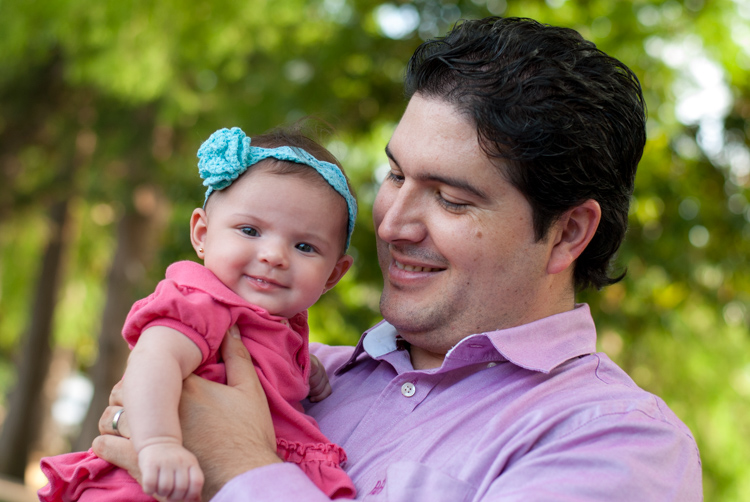
Once you apply a color, the Lightroom Adjustment Brush tool now functions just like the paintbrush in any standard painting application on your computer. It applies any effects you are already using such as exposure, clarity, or saturation while also painting in the color you specified. In the following picture I used this technique to add a subtle splash of color to the baby’s face, but you can also use it on much larger edits like changing the color of flowers or altering the eyes on a portrait.

five-tips-brush-tool-man-baby

4. Use Auto Mask to contain the brush to specific areas

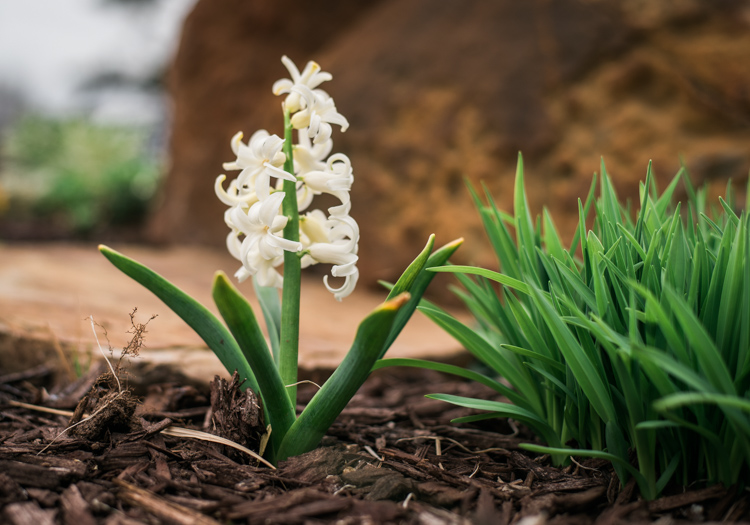
One of the most frustrating parts about the Adjustment Brush tool is that, unlike regular paintbrushes, it only comes in one shape: a circle, which can present a bit of a problem when editing photos with hard lines and angles. How do you confine your brush edits to just a specific area? The key to this lies in the Auto Mask feature which, when checked, tries to keep all the brush edits to places on the image that are similar to where you started painting. In the following picture I used some custom brush settings involving highlights and clarity and then clicked the Auto Mask function to keep these edits within the petals only, and not the surrounding areas.

five-tips-brush-tool-white-yellow-flower

An easy way to make sure the Auto Mask is doing what you want is to hover your mouse over the black dot that appears where you started brushing in your edits (hit the H key if you do not see it). You will then see a red overlay that shows precisely where your edits for that particular brush have been applied, and as you can see below they were confined to the precise area that I wanted, the flower petals. This type of precision is very difficult without the Auto Mask option, but with the click of a button Lightroom makes it very easy for you to do as your kindergarten teacher likely admonished years ago, color inside the lines.

five-tips-brush-tool-white-yellow-flower-edits

5. Changing brush size, resetting settings, and fixing mistakes

There are so many useful elements to the brush tool that it’s kind of difficult to distill everything down to five points. As such, here are a few more tips and tricks that I have found quite handy and you might too.

  • Use the scroll wheel on your mouse to quickly change the size of your brush. For fine-grain adjustments you can click the numbers in the brush parameters that indicate Size, Feather, Flow, and Density and increase or decrease them with the arrow keys on your keyboard. To go up and down in units of ten, hold the [shift] key while pressing arrow-up or arrow-down.
  • five-tips-brush-tool-resetAfter you have brushed in a particular set of edits, click “New” on the top-right of the Brush panel to create a new brush, but notice that all your sliders and adjustments remain unchanged. To reset all your parameters to their default values, hold down the alt key (option on a Mac) and you will see the Effect label at the top change to Reset. Click on that and everything will be set back to zero for you to start creating a fresh set of edits.
  • Pencils have erasers, but fixing errors when painting with brushes and pigment is not so easy. Fortunately the Brush tool in Lightroom has a feature that makes it much more like its wood-and-graphite counterpart in the real world, and makes fixing mistakes as simple as pressing a button. No, I’m not talking about Edit > Undo. If you’re brushing away with some edits and realized that you made a mistake or two, press and hold the Alt key (option on a Mac) and your brush will instantly switch over to eraser mode. Now, just like using the rubber end of a pencil, clicking and brushing will remove any edits you have made to the photo with the current brush. If you have used several different brush edits within one photo, your edits will mercifully be confined to the whatever brush is currently selected, and you can also adjust parameters of the eraser like size, feather, and so on.

five-tips-brush-tool-white-flower
As I mentioned earlier there are enough tricks with the Adjustment Brush tool to fill several articles, but I’m going to stop here and instead ask you for your favorite tips and hidden features. Leave your thoughts in the comments section below and I’m sure I will learn a thing or two from your experiences as well!

googletag.cmd.push(function() {
tablet_slots.push( googletag.defineSlot( “/1005424/_dPSv4_tab-all-article-bottom_(300×250)”, [300, 250], “pb-ad-78623” ).addService( googletag.pubads() ) ); } );

googletag.cmd.push(function() {
mobile_slots.push( googletag.defineSlot( “/1005424/_dPSv4_mob-all-article-bottom_(300×250)”, [300, 250], “pb-ad-78158” ).addService( googletag.pubads() ) ); } );

The post 5 Tips for Using the Lightroom Adjustment Brush Tool by Simon Ringsmuth appeared first on Digital Photography School.


Digital Photography School

 
Comments Off on 5 Tips for Using the Lightroom Adjustment Brush Tool

Posted in Photography


PaintShop Pro launches faster brush tools, in-app guide and tutorials with version X8.1

05 Jan

Software provider Corel has updated its PaintShop Pro X8 image manipulation program to include more help and guidance to enable users to find their way around the tools and features of the application. A new welcome screen has been added to version X8.1 that offers links to tutorials and inspirational features, as well as to partner paid-for content from the online training site Udemy. The idea is to help photographers get more from the program by making it clear what tools are available and how they should be used. 

The application features links to on-line training company Udemy

The update also brings what Corel describes as ‘performance enhancements’ across the application, but especially faster brush speeds. The company claims nine brushes, including Paintbrush, dodge/burn and clone, are now on average twice as fast, while the Wet Paint brush is four times faster than it was previously. There are also over 100 additional enhancements that the company has made based on feedback from its user community. 

On the download page of the Corel website there is a list of ten issues that the new version addresses, including color problems with Raw files from the Nikon D810. 

Issues addressed

  • Burn Brush: Fixed edge result (previously showed darker result along brush edges)
  • Color Replacer: No color bleed when using the Round brush to fill shapes
  • Text wrapping: Left and Center alignment results fixed. Stability improved when saving layered text wrapping files to a .pspimage format compatible with legacy versions of PaintShop Pro.
  • Nikon D810: Fixed raw image color issue
  • Resize dialog box: Now retains settings last used for Based on One Side
  • Magic Move in scripts: Fixed reported issues related to accurate rendering of script commands
  • Material Properties palette: Improved stability when adding custom swatches
  • Organizer palette: Restored drag-and-drop functionality between the palette and the workspace
  • Script selection: Fixed script selection issue in the Batch Process dialog box
  • Adjust workspace: Restored ability to set Save As option once per session (dialog box does not open for each photo edited)

The update is free to download and install for current users of PaintShop Pro X8 and X8 Ultimate. Suggested retail pricing (SRP) for PaintShop Pro X8 is $ 79.99 (USD/CAN) / EUR 69.99 / £59.99 / $ 99.95 AUD. Qualifying registered users can purchase for the upgrade price of $ 59.99 (USD/CAN) / EUR 49.99 / £44.99 / $ 69.95 AUD. 

SRP for PaintShop Pro X8 Ultimate is $ 99.99 (USD/CAN) / EUR 89.99 / £79.99/ $ 129.95 AUD. Qualifying registered users can purchase for the upgrade price of $ 79.99 (USD/CAN) / EUR 69.99 / £64.99 / $ 89.95 AUD.

For more information visit the PaintShop Pro website. 


Press release: 

Free PaintShop Pro X8 Update Adds In-App Learning With New Ways to Access Complementary Tools & Content, Plus Increased Performance

X8.1 brings dramatic brush acceleration and performance enhancements app-wide

Today, Corel announced the latest update to its photo-editing and graphic design software, PaintShop® Pro X8.1. This release introduces the Welcome Guide, an all-new in-app learning tool that makes it easier than ever to access helpful tips and tricks. Users will also find new ways to discover content to enrich the PaintShop Pro experience, plus significant performance enhancements app-wide, including major improvements to brush speeds. The X8.1 update is available now and is free to all registered users of PaintShop Pro X8. 
New Welcome Guide & Add-on Content 

Continuing PaintShop Pro’s drive to make photo editing and graphic design more accessible, the new Welcome Guide makes getting started quick and easy. Fire up X8.1 and you are presented with a dedicated window linking to several tutorials and new project ideas. 

Users can now discover additional brushes, plug-ins, complementary programs, and plenty more to extend PaintShop Pro’s already strong photo and design toolkit, with new tools and content to be added on an ongoing basis. The new features in X8.1 come as part of Corel’s commitment to deliver continuous updates and improvements to PaintShop Pro without requiring a subscription. 

“A lot of people get intimidated when using a full-fledged photo-editor, often because they don’t know where to start,” says Greg Wood, Senior Product Director for Photo at Corel. “We want everyone to feel comfortable when they open PaintShop Pro, even if it’s their first time. The new Welcome Guide provides users with video and training content to help them explore PaintShop Pro’s many features, as well as direct access to a brand new learning series from our friends at Udemy.” 

Faster Brushes & Performance Enhancements 

PaintShop Pro X8.1 also delivers major performance improvements, including dramatically accelerated brush speeds when working with larger images. Nine brushes, including the Paintbrush, Dodge/Burn, Clone and others have seen an average improvement of 2x faster than before, with the Paintbrush’s Wet Paint look getting a boost of up to 4x faster! 

Building on PaintShop Pro’s performance, this latest update also includes more than 100 enhancements based on feedback from the PaintShop Pro user community. For more details on the latest improvements to PaintShop Pro X8, please visit our updates page for additional info. 

Articles: Digital Photography Review (dpreview.com)

 
Comments Off on PaintShop Pro launches faster brush tools, in-app guide and tutorials with version X8.1

Posted in Uncategorized