RSS
 

Posts Tagged ‘Transform’

How to Use Upright Guided Tools in Lightroom’s New Transform Section

27 Jul

In their latest release of Lightroom 6.6 (or CC 2015.6 if you are using the Creative Cloud subscription package), Adobe has added a new feature, allowing us photographers to straighten our images even easier than before.
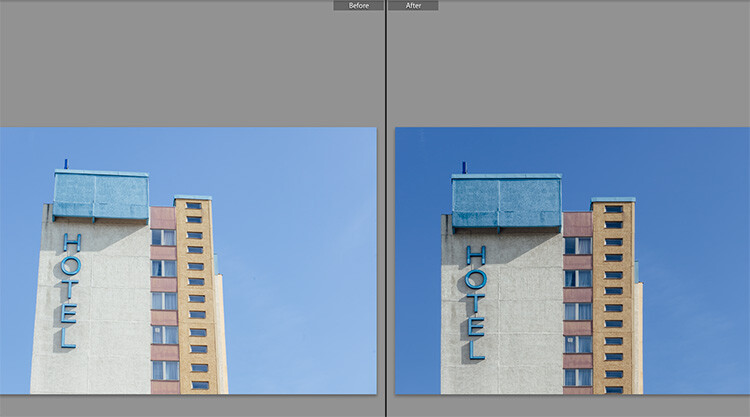
Dps LR Transform 01

The image above is a typical example of a photo that can use some straightening. A tall building, shot from the ground, will always look tilted or skewed (unless you have the budget to buy a tilt-shift lens, designed to overcome these issues right in camera).

The latest update of Lightroom comes with a new Transform section

For these purposes, Adobe Lightroom had already offered an Upright feature within the Lens Corrections tab in its Develop module. In the newest version 6.6/CC 2015.6, this feature was extended, and is now in its own section called Transform.
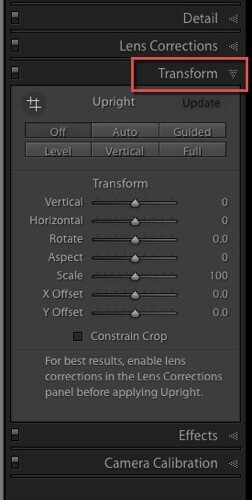
Tansform panel LR

In this new Transform section, some of the known Upright features from the old Manual section can be found again. The image shown below is a good and easy sample to test the new features. I shot it slightly tilted against the wall, and there is also a slight barrel distortion visible, due to the mild wide angle lens used.
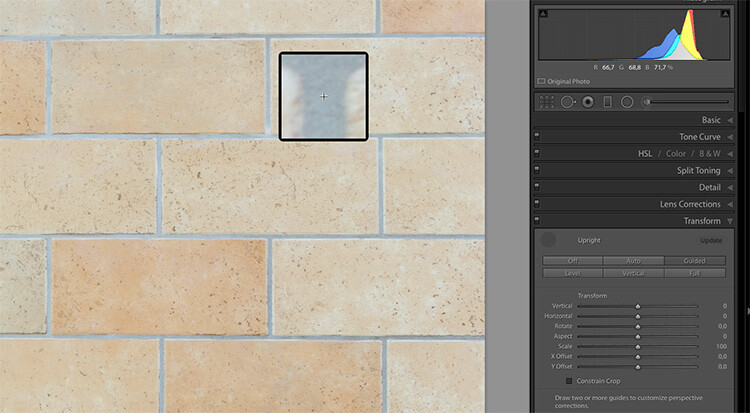
Dps LR Transform 03

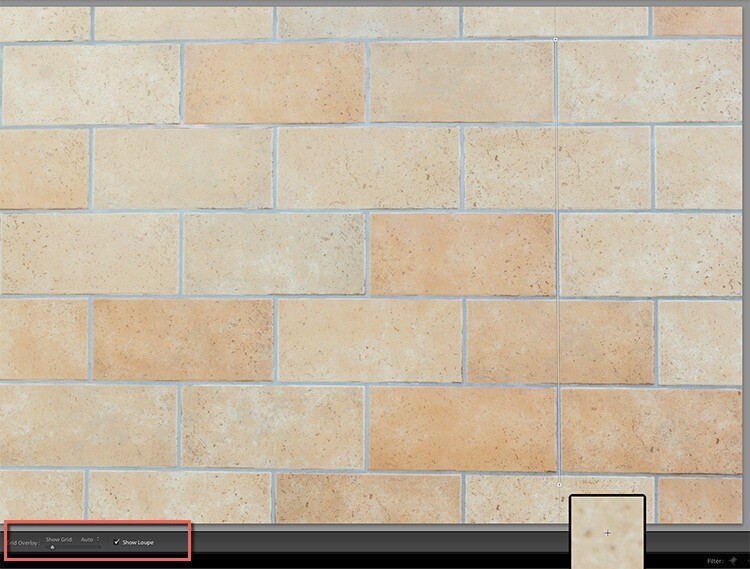
Most interesting for us is the new Guided button, that allows us to show Lightroom which lines we want to have straightened. When you click on this button, Lightroom allows you to draw lines on the image, that show the software where and how you think your image is supposed to look straight.
dps-LR-Transform-04c

When you turn on the Show Loupe checkbox below the image (if you don’t see that on your screen hit T on your keyboard to toggle the toolbar), you can now move the mouse over the image, and Lightroom will close in on the details you are hovering over. This can help you find the perfect spots to click on, and make your lines.

The first click (click and hold it down) starts a new line that now moves along with your mouse. Move the line to a second spot in the image (and let go of the mouse) and Lightroom will have drawn the first line. You can click on both of the endpoints of this line if you want to correct it.
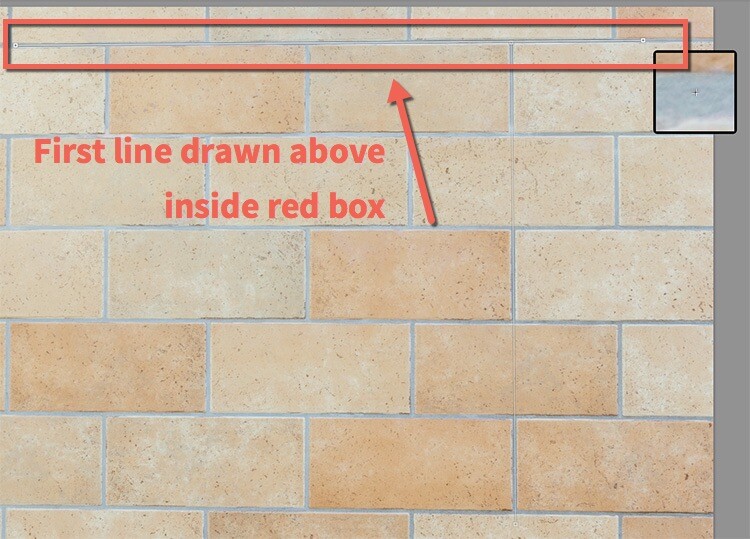
dps-LR-Transform-05c

As soon as you draw a second line, Lightroom starts correcting the image. The best way to use this tool is to draw one vertical, and one horizontal line at the start. You may notice the improvement already in this but if you look closely, not all of the tilt, nor the distortion, has been corrected yet.

You can then draw two more lines (it accepts up to four guide lines in total) to help Lightroom catch the last perspective issues and resolve them.
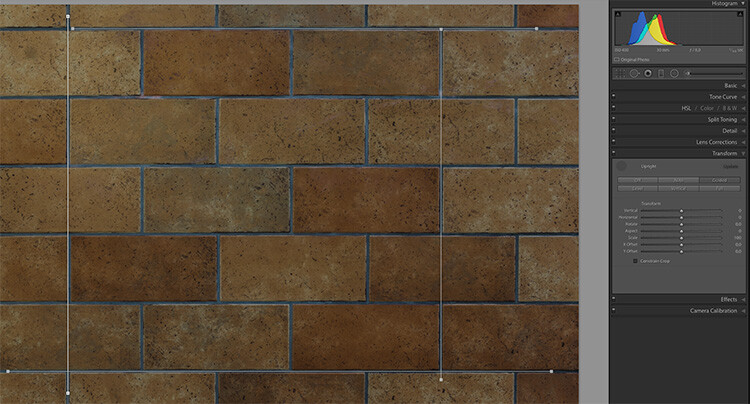
Dps LR Transform 06

Bonus tip: To make the lines more visible, I have temporarily reduced the Exposure value for the image, as you may notice in the last image (above). As the lines are thin and white, I found it easier to use when I darkened the photo to allow for good contrast with the tool.

Example image – correct a building tilt

Now, I will show you how I used the guides in the architectural image I showed on top of this article. Once again I have lowered the exposure to show the lines. As you can see, I have used two vertical and two horizontal lines, each of them way off the center of the image, to get the best results of this new feature.
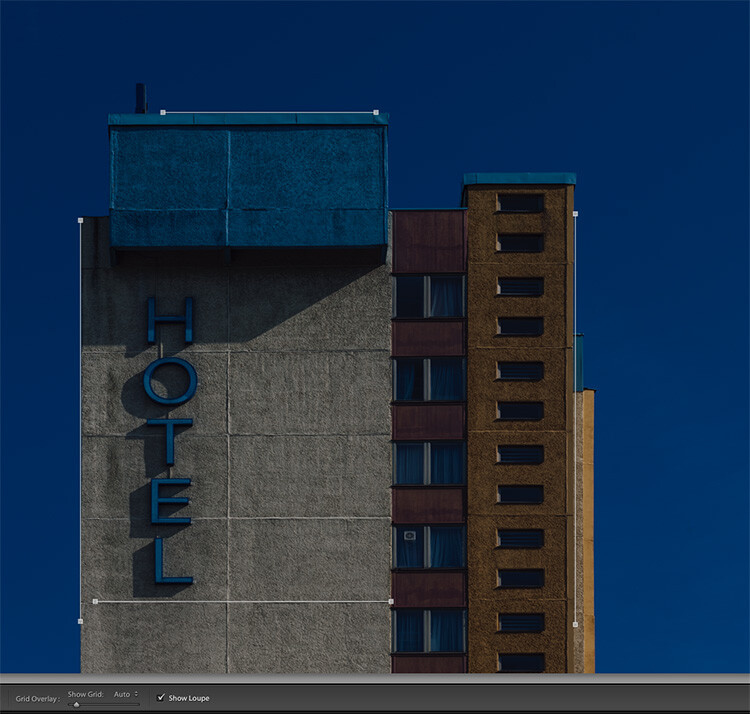
Dps LR Transform 07

Finally, you might want to use the sliders to change the Aspect, Scale and the X and Y Offset to compensate for the changes in perspective that might turn the objects in your image into looking slightly wider or slimmer form, than would be seen in real life.

Additional tool tips for using Guided Upright

Adobe found the Guided Upright tool to be valuable enough to define a keyboard short cut for it. Shift-T will bring you to this tool directly from either the Develop module or even from the Library.

If you ever wish to reset the upright guides, or the whole Transform section, you can right-click into the image while using this tool. Lightroom will show two settings on top of the context menu offering you the option to reset the guides only, or all Transform settings.
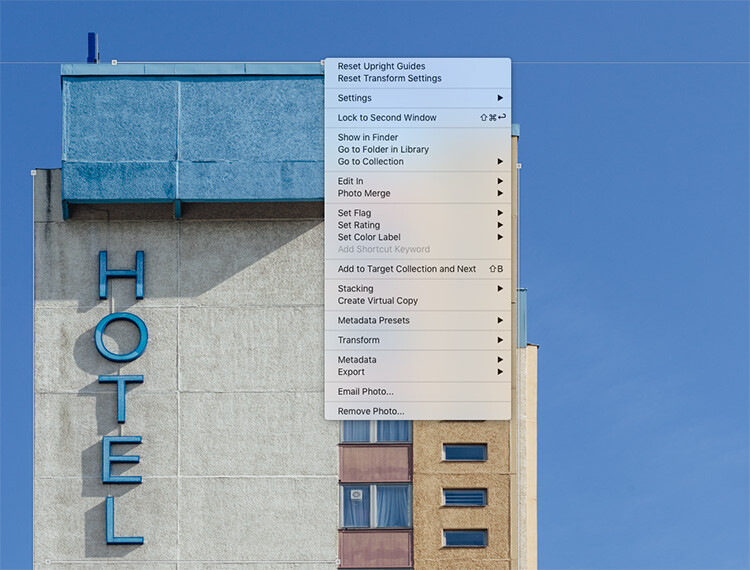
Dps LR Transform 08

Do you shoot architecture? Has this been a feature you’ve found useful? How have you applied it to your images? Let us know in the comments below. If you have any questions post them there as well.

googletag.cmd.push(function() {
tablet_slots.push( googletag.defineSlot( “/1005424/_dPSv4_tab-all-article-bottom_(300×250)”, [300, 250], “pb-ad-78623” ).addService( googletag.pubads() ) ); } );

googletag.cmd.push(function() {
mobile_slots.push( googletag.defineSlot( “/1005424/_dPSv4_mob-all-article-bottom_(300×250)”, [300, 250], “pb-ad-78158” ).addService( googletag.pubads() ) ); } );

The post How to Use Upright Guided Tools in Lightroom’s New Transform Section by Michael Zwahlen appeared first on Digital Photography School.

Digital Photography School

 
Comments Off on How to Use Upright Guided Tools in Lightroom’s New Transform Section

Posted in Photography


Transform Your Landscape Photography in a Click with our New Lightroom Presets (60% off Today)

12 May

NewImageDo you take landscape photos? Are you a Lightroom* user? Do you need a little help to lift your landscape shots to the next level?

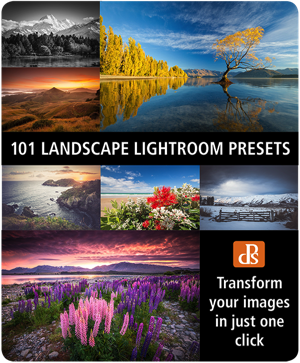
Today we’re excited to announce the launch of our all new Adobe Lightroom® presets bundle: 101 Landscape Lightroom presets.

With our new presets pack, transforming your landscape shots is a breeze.

And for a limited time, the pack can be yours for the special introductory price of just USD $ 20 (that’s 60% off).

Check them out here.

In this massive pack of 101 presets you’ll get these 6 collections to suit all scenery seasons:

  • Spring / Summer collection
  • Fantastic Fall
  • Wonderous Winter
  • Stunning Black & Whites
  • Creative Horizons
  • Mono Toned
  • Plus you get a bonus Toolbox collection with 29 presets designed to be stackable for making simple adjustments.

Created by professional landscape photographer Sarah Sisson (co author of our best selling eBooks Living Landscapes which is all about how to take great landscapes and Loving Landscapes which is a guide to post processing landscapes), she’s done all the hard work for you so you can get the perfect edit for every photo without the fuss.

Simply apply the effect and adjust as desired… It’s that easy!

You’ll save a whole heap of processing time, while giving your images an instant “pop”. See Sarah demonstrate in the video below.

101 Landscape Lightroom Presets from Digital Photography School on Vimeo.

Transform your photos in just one click. Pick up our 101 Landscape Lightroom Presets today – while we’re still offering it at the introductory price.

*Please note: a copy of Adobe Lightroom is required to use these presets.

Also: Haven’t used presets before? No worries. Full instructions are included in the pack.
googletag.cmd.push(function() {
tablet_slots.push( googletag.defineSlot( “/1005424/_dPSv4_tab-all-article-bottom_(300×250)”, [300, 250], “pb-ad-78623” ).addService( googletag.pubads() ) ); } );

googletag.cmd.push(function() {
mobile_slots.push( googletag.defineSlot( “/1005424/_dPSv4_mob-all-article-bottom_(300×250)”, [300, 250], “pb-ad-78158” ).addService( googletag.pubads() ) ); } );

The post Transform Your Landscape Photography in a Click with our New Lightroom Presets (60% off Today) by Darren Rowse appeared first on Digital Photography School.


Digital Photography School

 
Comments Off on Transform Your Landscape Photography in a Click with our New Lightroom Presets (60% off Today)

Posted in Photography


Rugged Landscapes: 3D Art Carpets Transform Indoor Environments

14 Feb

[ By WebUrbanist in Design & Furniture & Decor. ]

3d carpet art

Inspired by natural landscapes and crafted with carpet factory remnants, these labor-intensive creations are as much terrains as textiles.

3d room rug

Alexandra Kehayoglou is an artist from Argentina who uses leftover scraps from the family business, a carpet factory in Buenos Aires, to build her wool room-wrapping creations.

3d landscape carpet

3d island design

3d landscape tufted

Her use of materials mimics natural textures of natural moss, water, trees and ice, providing the functions of a traditional rug with a layer of artistic flair via memory-evoking scenery, often on creations that wrap vertically to become tapestries.

3d chair flowing

3d rug factory

3d creation proces

The source material, she says, are the landscapes of her homeland, from grasslands to deserts, lakes to glaciers. They are richly-textured when on the floor, but gain additional dimensions as they wrap up walls or onto furniture, becoming more than just a horizontal surface.

Share on Facebook


[ By WebUrbanist in Design & Furniture & Decor. ]

[ WebUrbanist | Archives | Galleries | Privacy | TOS ]


WebUrbanist

 
Comments Off on Rugged Landscapes: 3D Art Carpets Transform Indoor Environments

Posted in Creativity


One Compositional Technique to Transform Your Landscape Photos

09 Nov

GreenRocks

Turning the corner from taking snapshots into taking actual compositions is a hard thing to do. It doesn’t come naturally, and it takes experience. Another reason it is difficult to learn composition is that there is no one, hard and fast rule. You can get caught up in looking for various shapes, patterns, leading lines, and other compositional elements until your head is spinning.

To avoid all of this, I want to share one concrete technique for you to use when you are out shooting landscape photos. It is one way to go about setting up your shot, that will give you a path to setting up a successful composition. Of course, it isn’t the only way to set up your shot, and you won’t use this all the time, but it is great for helping when you are stuck.

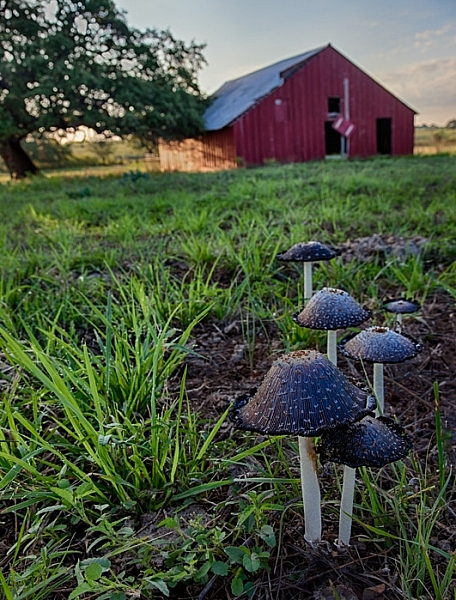
Mushrooms

And the tip is . . .

. . . the next time you are out shooting it a scenic location, just put on your widest angle lens and get right behind something on the ground to take the shot.

I mean right behind it. That something on the ground can be anything from a flower, to a rock, to a pattern in the sand. It does not matter. What matters is that you are down on your knees with your wide-angle lens right behind it.

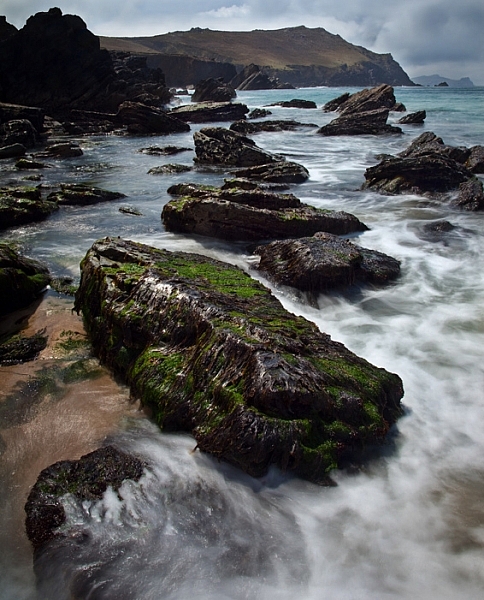
Clogher

Why it works

The wide-angle lens will give the foreground object an exaggerated sense of proportion, but will also pick up the background. By getting right behind something, you are adding a subject to your picture. You are creating a center of interest. You are going beyond just showing the general scenery. The background will still be in your picture as well, you just do not need to focus on that.

Another benefit is that it gives the viewer a sense that they can walk into the picture. It is providing a real foreground, that adds depth and interest to your photo.

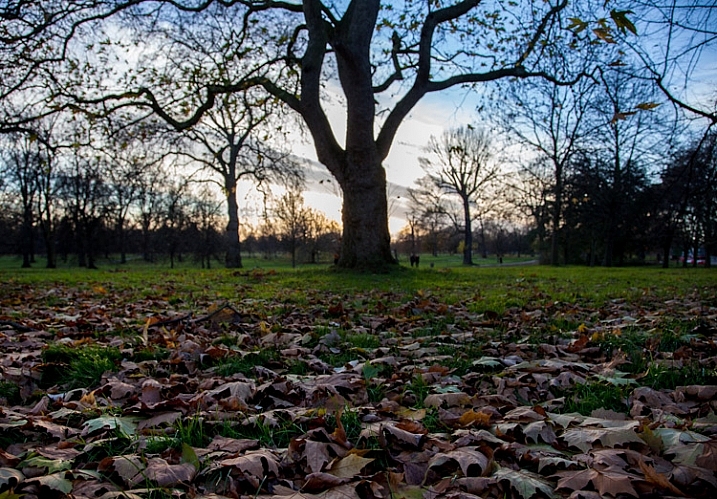
HydePark

What typifies a snapshot, is standing at eye level trying to capture the entire scene before you. For many of us when we are just starting with photography, that just intuitively seems like the way to take pictures. We want to capture the whole scene, and not have it blocked by something on the ground immediately in front of us. The problem is that there is no foreground, subject, or center of interest to speak of. In addition, you are presenting the world in the exact same way as the viewer is used to seeing it, which is bound to be rather boring to them.

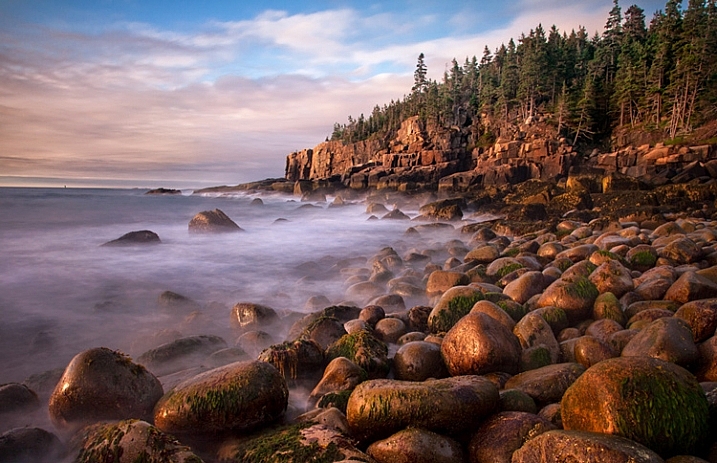
Acadia-low

Putting the tip into action

How you determine what items on the ground will work as your foreground elements, that is the hard part. There is no right answer. You will just have to look. In fact, it will not be obvious even when you are out in the field looking around. There are times when you might have to walk around while looking at the LCD in Live View mode, or with the viewfinder to your face to find something on the ground to use as a foreground.

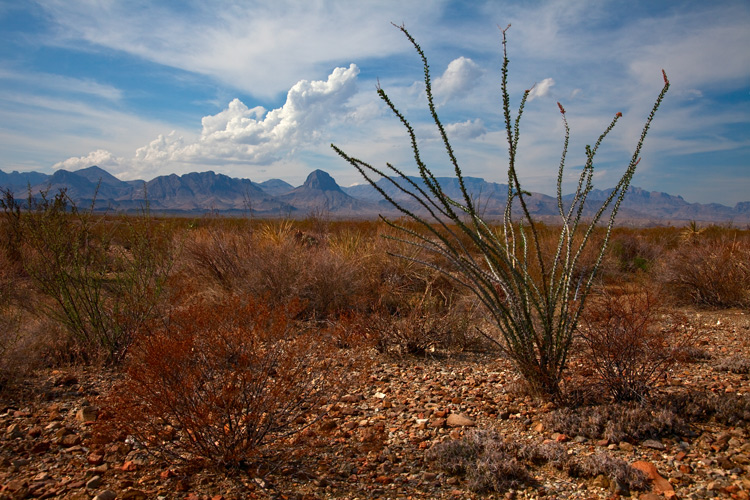
BigBend

Here are some examples of things you can use as foregrounds in different contexts:

  • When photographing water – use a reflection in the water
  • When at the beach or desert – find a pattern in the sand
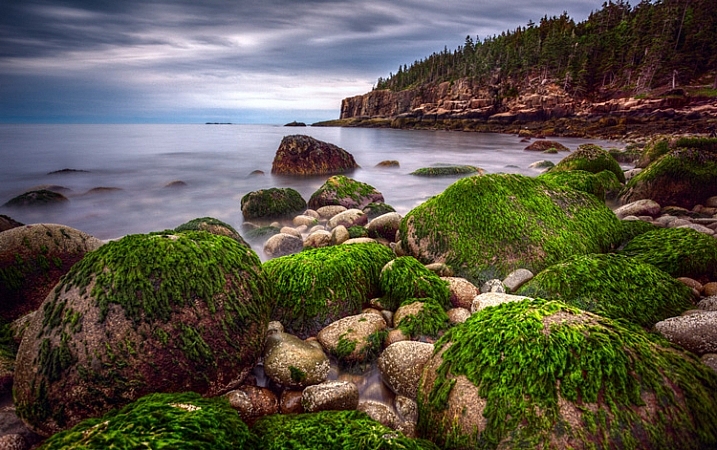
  • When photographing creeks or coasts – use rocks
  • At midday – use shadows
  • In the fall – use leaves

There are obviously a variety of subjects you can use. Go out and try it next time you are shooting, and if you come across a good item to use in the foreground, leave it in the comments and share your images with us.

googletag.cmd.push(function() {
tablet_slots.push( googletag.defineSlot( “/1005424/_dPSv4_tab-all-article-bottom_(300×250)”, [300, 250], “pb-ad-78623” ).addService( googletag.pubads() ) ); } );

googletag.cmd.push(function() {
mobile_slots.push( googletag.defineSlot( “/1005424/_dPSv4_mob-all-article-bottom_(300×250)”, [300, 250], “pb-ad-78158” ).addService( googletag.pubads() ) ); } );

The post One Compositional Technique to Transform Your Landscape Photos by Jim Hamel appeared first on Digital Photography School.


Digital Photography School

 
Comments Off on One Compositional Technique to Transform Your Landscape Photos

Posted in Photography


How To Transform Your Photos In Just One Click

06 Aug

We’re super-excited to let you know about a brand new dPS product that’s just launched, to help you transform your photos into stunning images with a single click:

A mega pack of 101 Lightroom® presets (Please note: a copy of Adobe Lightroom is required to use these presets.)

NewImage

Best of all, for a limited time, the pack can be yours for the special introductory price of just USD $ 20 (that’s 60% off).

Check it out now!

Final Portraits 1

Following the incredibly popular preset offerings in our 12 Days of Christmas and Mid-Year Summer sales, we’ve been inundated with requests for more…

So we decided to bring in pro photographer and Lightroom expert, Cole Joseph, to handcraft the first ever dPS set, including 7 high quality collections:

  • Plush Portraits – bring the “wow” factor to your portraits while preserving natural skin tones
  • Lively Landscapes – add vibrance to your lush landscape images
  • Street Grit & Grunge – give your photos a unique and cutting-edge look
  • Bangin’ Black & White – for images with classic charm, romance and soul
  • Sleek Sepia – stylize with a cross-toned black and white edit
  • Classic Vintage – step back in time and relive the good ol’ days
  • Quick Adjustments – quick and easy fine-tuning to simplify your editing process

Final quick adjustments

With 101 presets to choose from, Cole’s done the hard work for you so you can get the perfect edit for every photo without any fuss.

Simply apply the effect and adjust as desired… It’s that easy!

Final Vintage 2

You’ll save a whole heap of processing time, while giving your images an instant “pop”.

See Cole demonstrate in this video:

If you haven’t used presets before? No worries. Full instructions are included in the pack and as with all our products if you pick it up and don’t find it’s for you – you can ask for your money back anytime within 60 days and we’ll give you a full refund.

Transform your photos in just one click.
Pick up our 101 Lightroom Presets Pack today!

*Please note: a copy of Adobe Lightroom is required to use these presets.

googletag.cmd.push(function() {
tablet_slots.push( googletag.defineSlot( “/1005424/_dPSv4_tab-all-article-bottom_(300×250)”, [300, 250], “pb-ad-78623” ).addService( googletag.pubads() ) ); } );

googletag.cmd.push(function() {
mobile_slots.push( googletag.defineSlot( “/1005424/_dPSv4_mob-all-article-bottom_(300×250)”, [300, 250], “pb-ad-78158” ).addService( googletag.pubads() ) ); } );

The post How To Transform Your Photos In Just One Click by Darren Rowse appeared first on Digital Photography School.


Digital Photography School

 
Comments Off on How To Transform Your Photos In Just One Click

Posted in Photography


Illusions in Iran: Surreal 3D Murals Transform Urban Tehran

25 Jul

[ By Steph in Art & Street Art & Graffiti. ]

Iran Street Art Illusions 1

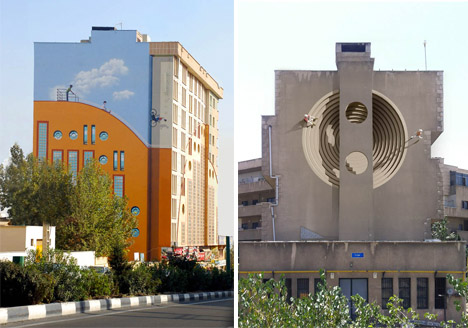
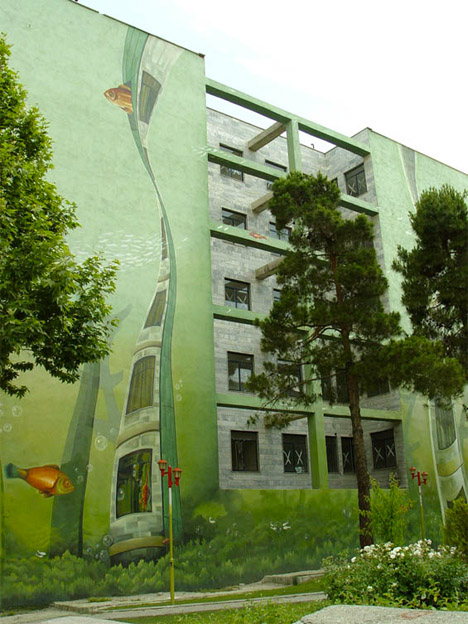
The blank concrete facades of urban Tehran offer an irresistible canvas for playful large-scale murals that seem to bend reality in unexpected ways. A city of 12 million people that has been politically and economically isolated by Western powers for decades, Iran’s capital isn’t exactly known for a sense of warmth and fun. But artist Mehdi Ghandyanloo is helping to change that, with the blessing of Tehran officials.

Iran Street Art Illusions 2

Street Art Illusions Iran 3

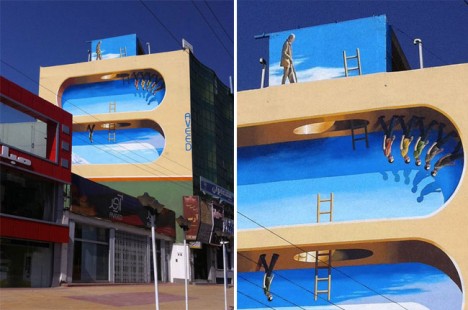
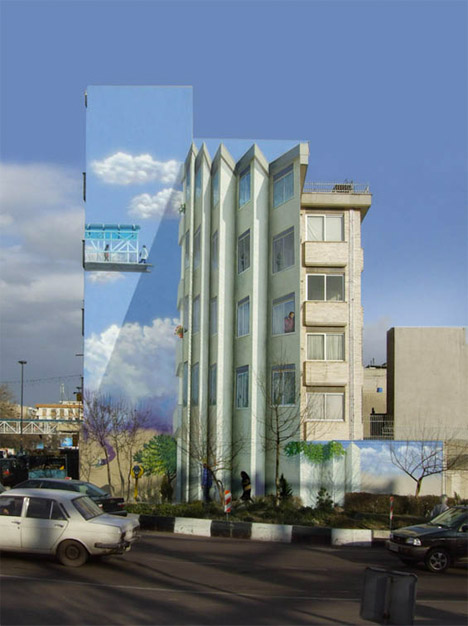
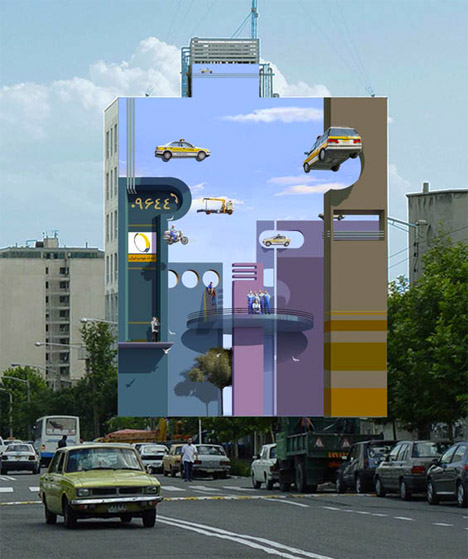
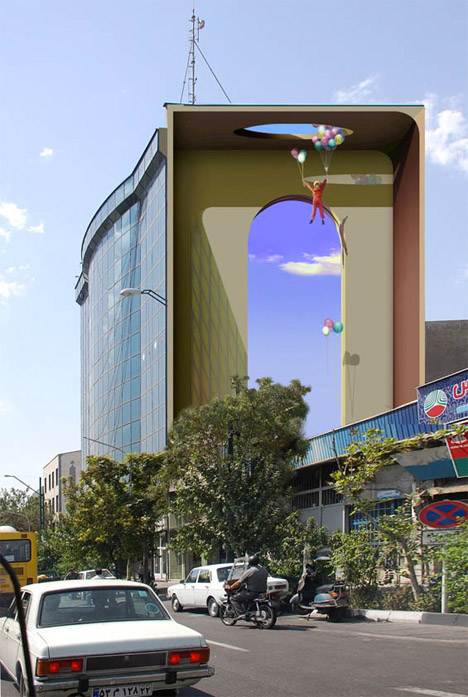
Optical illusions make it look as if bicyclists are riding up the sides of buildings, children climbing sixth-story window frames, monstrous goldfish emerging from underwater structures in oversized aquariums. Some buildings appear to be folded like accordions, others playing host to all sorts of gravity-defying activities.

Street Art Illusions Iran 4

Many of the murals have a decidedly Dali-esque feel. In ‘Life Cycle,’ ladders float within ocular cut-outs connecting one level of an open elliptical space to the other, while men walk along the ceiling against a bright blue sky.

Street Art Illusions Iran 5

“The city is an architectural mishmash with buildings often having only one facade and the other three just left blank and grey. This doesn’t make for a beautiful city but it is a great environment for mural work. I think the municipality really felt the need to bring some cohesion or at least colour to the often confused and smog-smeared architectural face of the city.”

Street Art Illusions Iran 6

Detailed views of dozens of these murals can be seen on the artist’s Behance page.

Share on Facebook


[ By Steph in Art & Street Art & Graffiti. ]

[ WebUrbanist | Archives | Galleries | Privacy | TOS ]


WebUrbanist

 
Comments Off on Illusions in Iran: Surreal 3D Murals Transform Urban Tehran

Posted in Creativity


Flip for Fun: 4 Clever Pool Tables that Convert & Transform

08 Jul

[ By Delana in Design & Furniture & Decor. ]

rollover pool dining table

Pool is one of those great American hobbies that never seems to get old. As much as we might want to play every day, not everyone has the space to fit an entire pool table into their home. These three brilliant solutions (plus a bonus pool table that wouldn’t save any space, but would definitely be a conversation piece) might finally be enough to convince you to save your quarters and play at home instead.

Disappearing Pool Table

There’s honestly no better solution for hiding something than having it pop out of the floor only when you need it. The Disappearing Pool Table from Stage Engineering does just that: when it’s hidden away, the only clue that it’s there is a huge rectangular cutout in the floor. When you activate some sort of mechanism, the cutout floor drops down and slides away, exposing a full-size pool table that then rises up on a platform to floor level. There isn’t much information available other than this video, but the video is enough to convince us: we want one.

Dining Table Conversion Kit

fusion pool dining table

elegant fusion pool table converts to dining table

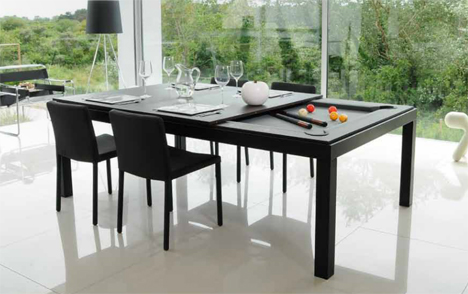
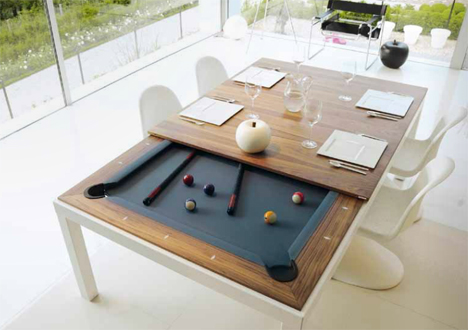
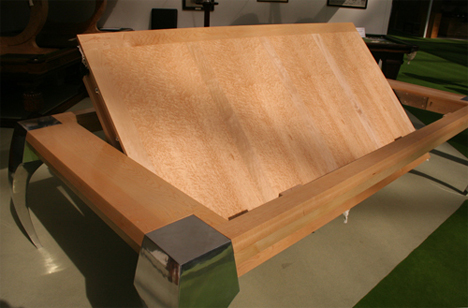
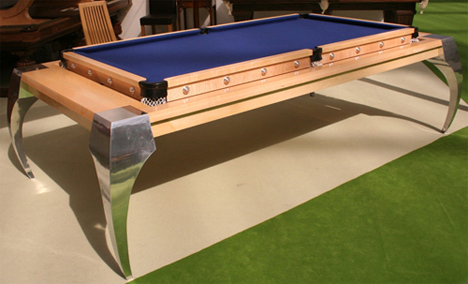
Pool table covers are nothing new – you unfold a foam mat or plop a piece of wood down onto the pool table and it becomes a place for dining or playing ping-pong. But the Fusion collection of tables offers a slightly more high-class approach to the idea. The high-quality pool tables come with wooden leaves that slide on securely to stay put for the purposes of eating at the table. The resulting dining table is quite elegant and not at all what you might expect of covered-over pool table.

Rotating Table

dolphin flip over pool dining table

rotating dining pool table

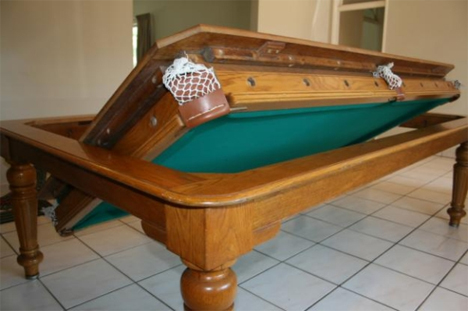
The Bentley Dolphin Rollover Pool Dining Table might be a mouthful, but it’s a fun piece of furniture that leads a double life. On one side it’s a standard-size pool, snooker, or billiards table. Undo the security latches and spin the tabletop upside-down in the frame and it becomes a dining table with a solid wood top or a beautiful inlaid pattern top. The makers suggest that the flat top can also be used as a conference table, but we suspect there wouldn’t be much business going on when there are clearly games of pool to be played.

Converted VW Bus

volkswagen pool table

vw bus pool table conversion

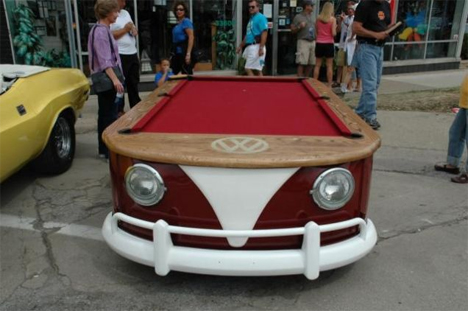
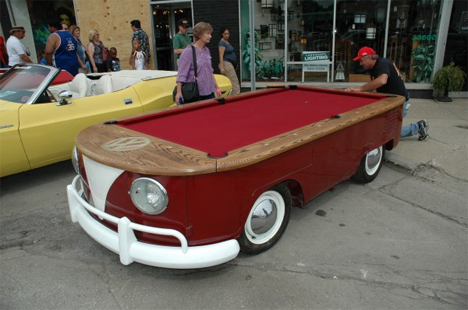
The VW Bus pool table is different from the others here because its transformation was one-way and permanent, but it did once serve a very different purpose so deserves a mention. It is made from the real chassis of an old Volkswagen that was then fitted with a wood and felt top. It’s probably not regulation size and it definitely won’t be level, but those are small details. What really matters is that someone took the time and care to craft this seriously awesome one-of-a-kind Volkswagen/pool table mashup, which is an undeniably beautiful thing.

Share on Facebook


[ By Delana in Design & Furniture & Decor. ]

[ WebUrbanist | Archives | Galleries | Privacy | TOS ]


WebUrbanist

 
Comments Off on Flip for Fun: 4 Clever Pool Tables that Convert & Transform

Posted in Creativity


Body Paint Illusions Transform Human Models into Animals

22 Mar

[ By Steph in Art & Drawing & Digital. ]

Body Paint Illusion Marwedel 1
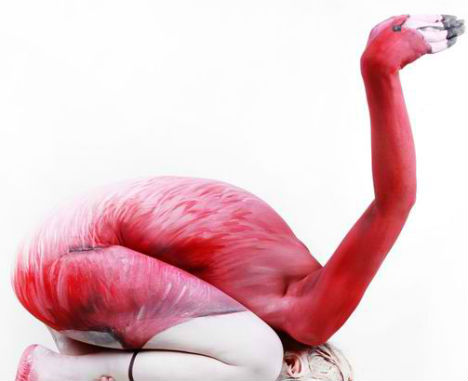
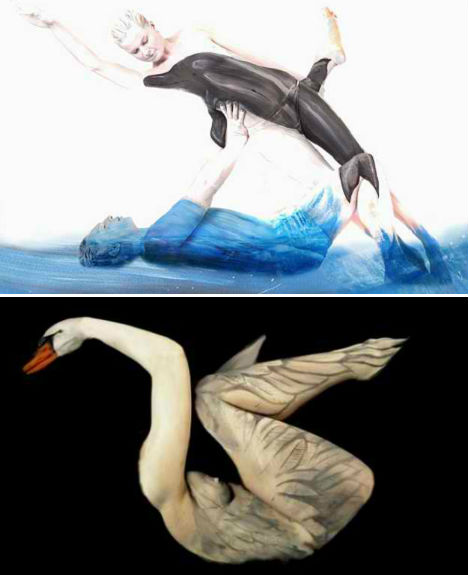
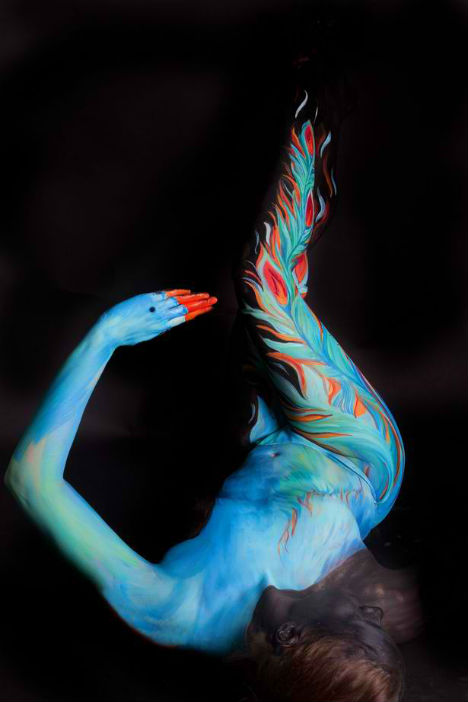
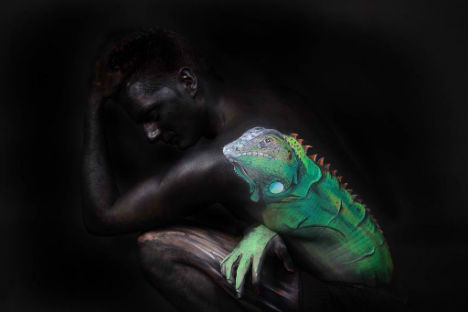
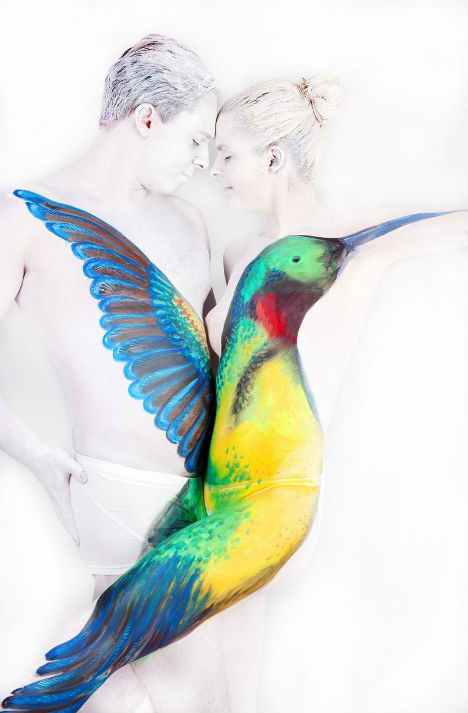
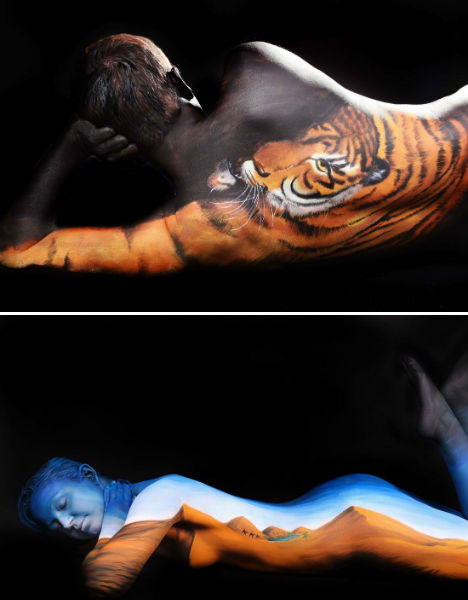
Intricately painted and carefully posed, the human bodies serving as canvases for artist Gesine Marwedel are virtually unrecognizable as they morph into swans, flamingos and iguanas. The 25-year-old German painter employs performance artists to bring her colorful illusions to life, leaving their faces and other body parts visible as part of each composition.

Body Paint Illusion Marwedel 2

The ability to contort into unusual positions is a crucial element of making each of these incredible three-dimensional paintings work. Each photograph depicts not only the painted animal, but also its grace and movement.

Body Paint Illusion Marwedel 3

Body Paint Illusion Marwedel 4

“Body painting is not just paint on a living canvas, it is picking up the body shapes in a subject and the painting on the body,” Marwedel told PSFK. “It is the transformation of a human being into a breathing, moving, living work of art.”

Body Paint Illusion Marwedel 5

Body Paint Illusion Marwedel 6

Marwedel began to explore body art after providing therapy for disabled and autistic children through speech and music. See more of her work at her website, or in person at the World Body Painting Festival, to be held in Austria in July 2013.

Share on Facebook


[ By Steph in Art & Drawing & Digital. ]

[ WebUrbanist | Archives | Galleries | Privacy | TOS ]


WebUrbanist

 
Comments Off on Body Paint Illusions Transform Human Models into Animals

Posted in Creativity


5 Uncommon Snow Photography Tips That Can Transform Your Winter Scenes.

24 Nov
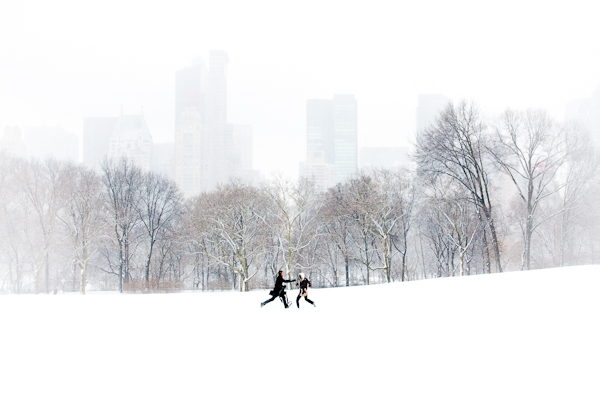
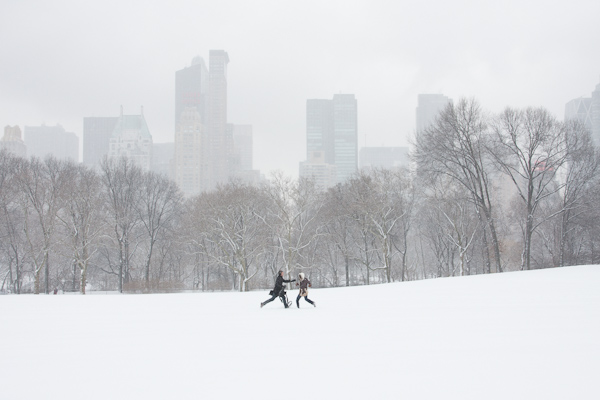
Couple in Sheep Meadow, Central Park

Couple in Sheep Meadow, Central Park

It’s that time again when we get to burn off those holiday pounds by trudging through the snow to capture those stunning winter shots.  I’ve got a few extra ones this year, so you’ll see me out there a bit more than usual.

In this article, I want to share with you a few, fairly uncommon tips that I often use, which can make the difference between an average snow photo and an epic one.  Do you do any of these things?

1.  Use a Reverse, ‘White’ Vignette.

The purpose of a vignette is to keep the eyes from falling off the edge of an image and to lead the eyes back to the center of it.  With the amount of white and grey in snow photos, you generally can’t use a traditional dark vignette, since it will be too obvious and look out of place.

So use a white one!  White vignettes can add a magical quality to snow photographs and can further enhance the middle-of-the-storm effect.  Adobe Lightroom is the tool I use to add my vignettes and it works well.

This is such a simple tip, but it can make all the difference, as seen in the photo above.


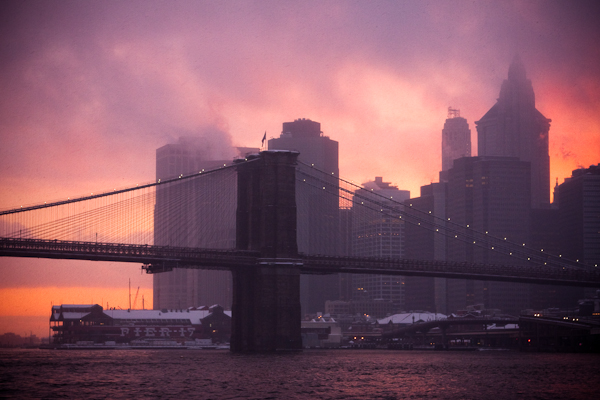
Brooklyn Bridge at Sunset, During Snowstorm

Brooklyn Bridge at Sunset, During Snowstorm

2.  Colorize and Add Contrast (Lots of it).

I’m usually one to hold back a bit when retouching photos, but for winter captures I often throw all of that out the window.

When you photograph in the middle of a snowstorm, the photos will often come out grey and lack contrast and will have the streaks of snow that will give the capture a painterly texture and quality.  Use this quality to your advantage and enhance this look by increasing the contrast and saturation to help the photo become even closer to the look of a painting.  Over-saturating photographs is generally a bad idea, but for snowstorm scenes it can be a great one.

Compare the untouched negative below to the print at the top of the post.  Enhanced color, added contrast, and a white vignette were pretty much all that was needed to completely transform the scene.

Couple in Sheep Meadow, Original Negative

Couple in Sheep Meadow, Original Negative

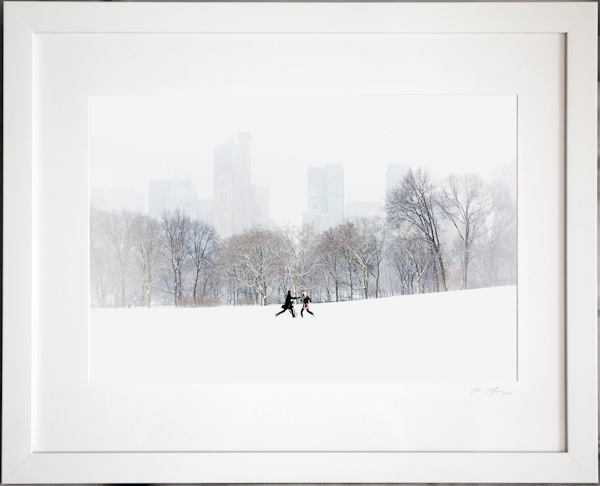
3.  White Mat, White Frame.

If you’ve got a photograph with a lot of white snow and especially one where you have add a white vignette, further emphasize the look by adding a white mat and white frame to it.  The frame will merge to become part of the effect.

Couple in Sheep Meadow, Framed

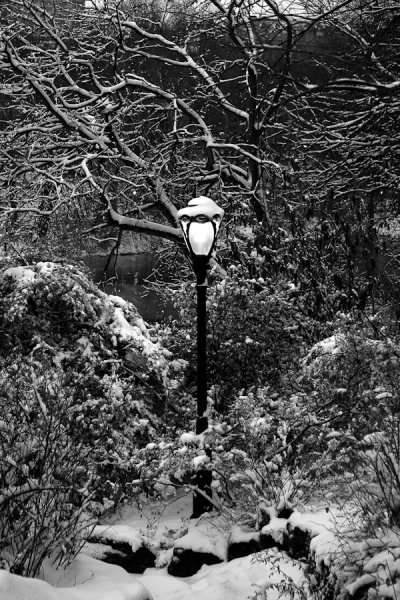
4.  Photograph at Dusk and into the Night to Create Menacing Winter Scenes

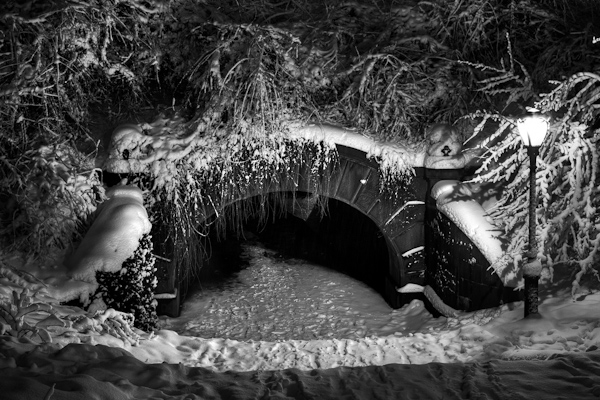
Snow doesn’t only have to be portrayed as friendly, peaceful, and simple.  It can often have a dark and menacing feel when captured in the right way, particularly at dusk or night.

When the light levels go down, the contrast between the white of the snow and the dark of everything else becomes further emphasized.  This can lead things like tree branches to look like tentacles or mangled fingers swirling through the scene.  The contrast between the beautiful quality of the snow and the menacing quality of the scene is unique and different.

Lamppost at Dusk, Central Park

Lamppost at Dusk, Central Park

5. Use HDR

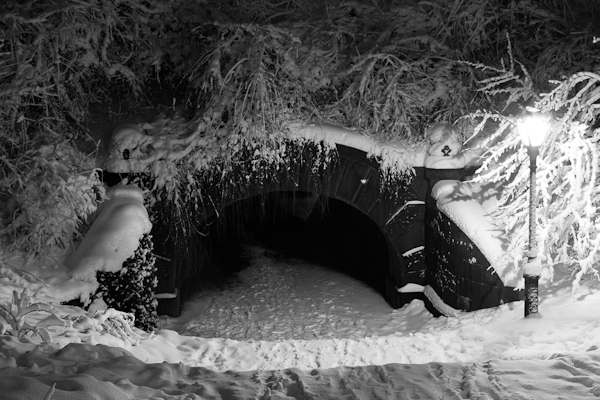
I’ll admit, I don’t typically do much HDR.  However, I do use it sometimes for black and white photographs and particularly for black and white snow photos.  I prefer to use HDR with black and white scenes because it can add that great, textural HDR quality, without the unrealistic HDR colors.  Depending on the lighting, snow can often lack texture, and the difference between the bright whites and deep shadows within these scenes can be so pronounced that it just doesn’t work well.  For scenes like this, HDR is the perfect tool to make them work.

Here is a before and after, made with Photomatix, to show you an example.

Central Park Tunnel at Night

Central Park Tunnel at Night, Original Negative

Central Park Tunnel at Night, HDR

Central Park Tunnel at Night, HDR

And don’t forget a sled!  Here are a few more snow photographs to take a look at.

Happy trudging!

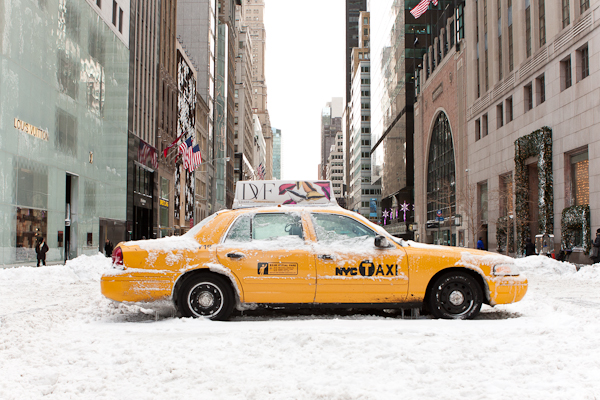
Stuck Cab, 5th Avenue

Stuck Cab, 5th Avenue

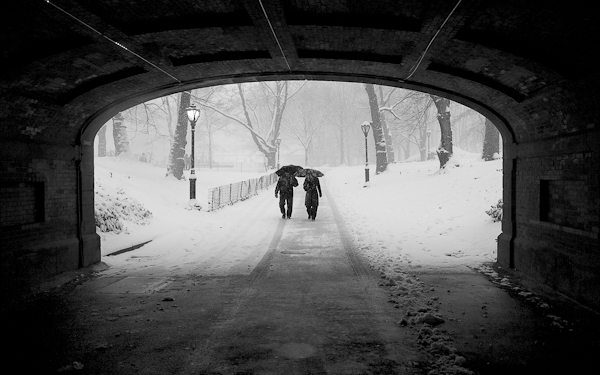
Couple in Snowstorm

Couple in Snowstorm

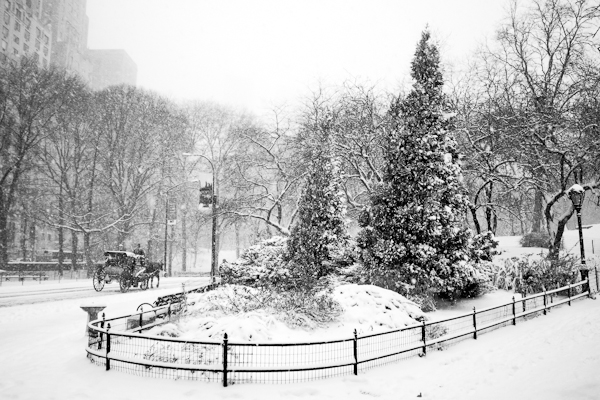
Carriage and Trees

Carriage and Trees

Post originally from: Digital Photography Tips.

Check out our more Photography Tips at Photography Tips for Beginners, Portrait Photography Tips and Wedding Photography Tips.

5 Uncommon Snow Photography Tips That Can Transform Your Winter Scenes.


Digital Photography School

 
Comments Off on 5 Uncommon Snow Photography Tips That Can Transform Your Winter Scenes.

Posted in Photography


Photography Tips, Essential Skills, Quickly Transform Your Photos, by Karl Taylor

23 Mar

www.photography-tips-online.com Photography tips revealed by professional photographer Karl Taylor. This knowledge will probably change the way you plan your photography composition from now on! Get More FREE Training at my website: www.photography-tips-online.com
Video Rating: 4 / 5