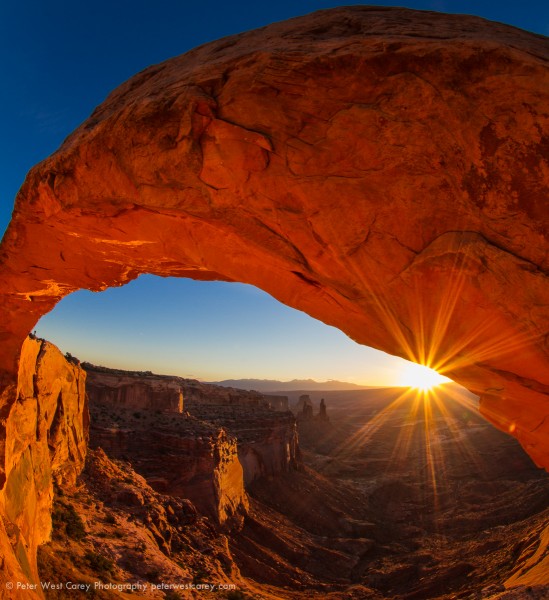
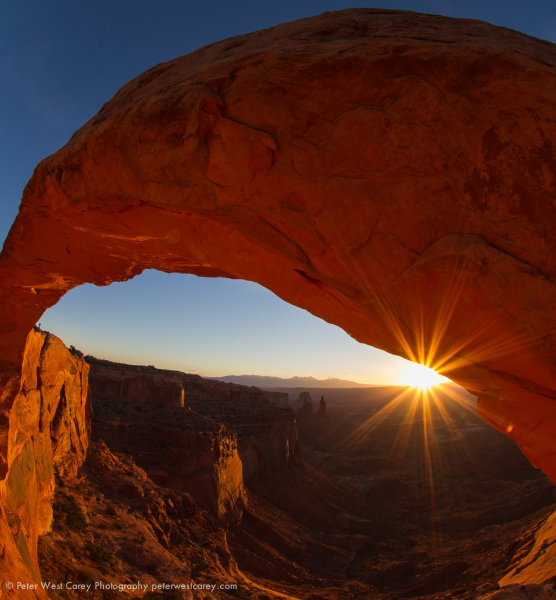
Of the images I brought back from a trip to Utah’s Canyonlands and Arches National Parks this past Fall, the one above recieved the most comments and requests for info. For starters, this is a shot of Mesa Arch in Canyonlands National Park, which is famous for the fact that the bottom of the arch glows from reflected sunlight just after sunrise on most mornings. Most shots look like this:
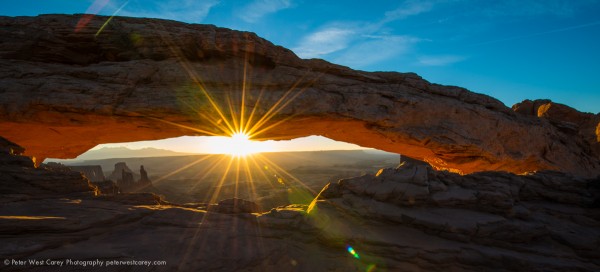
I had seen images of this arch before and was keen to shoot it with fellow Puget Sound photographer Michael Riffle when he suggested it. He made the suggestion and knew the location so I trusted in his judgement (while he noted it would be crowded) and I did little other prep.
Setup
Getting to the location is straight forward. But the catch: Michael tells me we need to leave early from Moab, the nearest town where we are staying. I think we left at 4:30am, but the details of the clock are fuzzy. There is a short walk from the parking lot and the whole setup is fairly accessible.
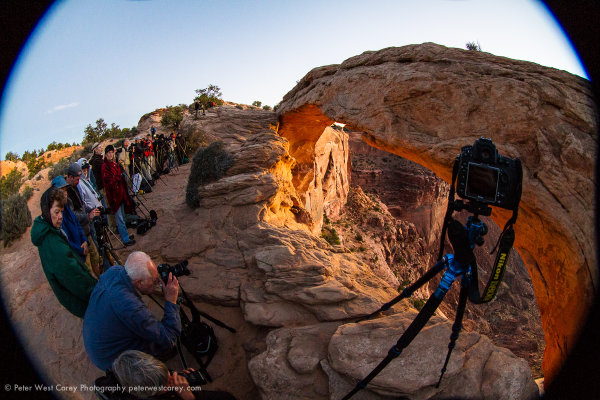
Why did we need to leave so early? Two reasons: 1) This location is popular and 2) it is small. I didn’t realize how small this arch was. I was thinking it was on the order of Landscape Arch in neighboring Arches National Park, which is at least a hundred meters long. Not so with Mesa Arch. To give you a frame of reference, here is what we were greeted with upon arrival.
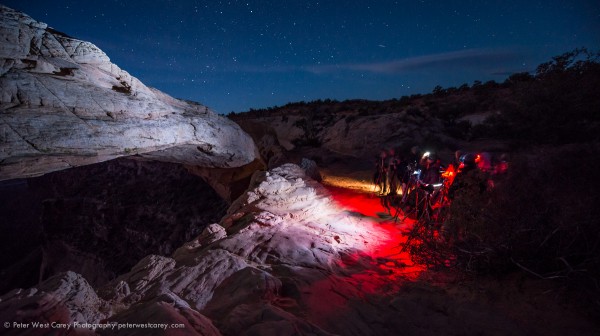
For someone who loves shooting far-off places with not so many people, this scene astounded me. I can count a dozen cameras in this setup. This is at 6:30am and the sun is not due for another hour.
I decided to set my camera on the far side of the arch in this image and Michael strong armed (politely) his way into the middle of the crowd. By the time I was set up, another six photographers arrived. In the end, over two dozen would be shooting.
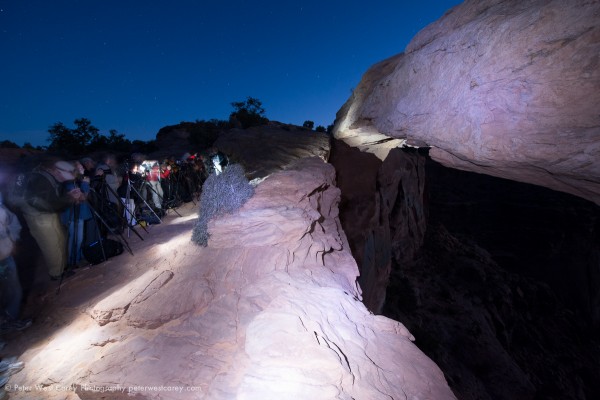
I was lucky this day as BorrowLenes.com had lent me a Nikon D800E and 14-24mm lens for this trip. As well as a Canon 8-15mm L fisheye. This meant I was able to setup the Nikon at the location you see above and wait for the sun. I was then able to use the 8-15mm on my Canon 7D and walk around for different composures. It is possible the setup kept me sane.
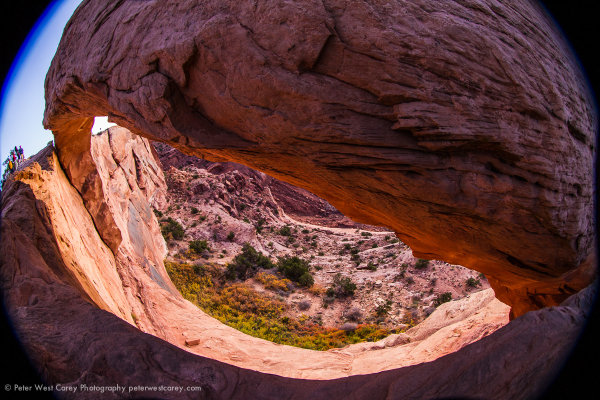
I tested some shot ideas with the 8-15mm L and liked one where I was right at the edge of the cliff and below and to the right of my tripod as in the picture above. Here’s a test shot before the sun came up.
Shooting
After fiddling with the location, the sun finally broke the horizon. You would think Tom Cruise was seen walking naked through LA with the sound of snapping shutters behind and to the side of me. The long, long wait for some was finally paying off. I wasn’t happy with the Nikon shots at the time so I kept experimenting with the fisheye.
It was then that a local Utahan noted he got great shots by hanging over the edge. I love rock climbing and am comfortable on cliffs so, making sure I wasn’t in anyone’s shot (amazingly enough, it was possible) I leaned to the edge and hung my arm down.
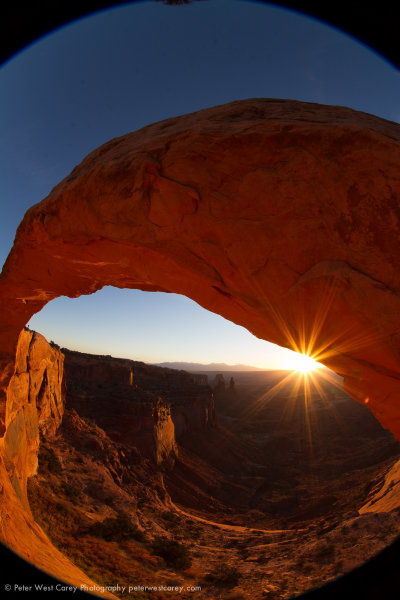
Taking a couple test shots, I switched to Manual Mode and chose ISO 100 for the best quality image now that the sun was up, 8mm for the widest wide angle I could get, f/20 because I wanted a nice star burst pattern to the sun and 1/10 of a second to balance things out.
It took a number of tries to get the shot I wanted and I would take a few, move the camera slightly, take a few more. It was really shooting in the dark as my torso was over the edge with my arm hanging down and wrist bent back, while trying to avoid getting my body in the shot (at 8mm, the field of view is 180 degrees).
This is the resultant image, straight out of the camera:
Satisfied, we shot for a few minutes more and then headed back to town.
Editing
Upon arriving home it was time to play with the image. I knew what I wanted and I started by straightening and cropping the image to cut out the black areas. All the edits below are handled in Adobe Lightroom.
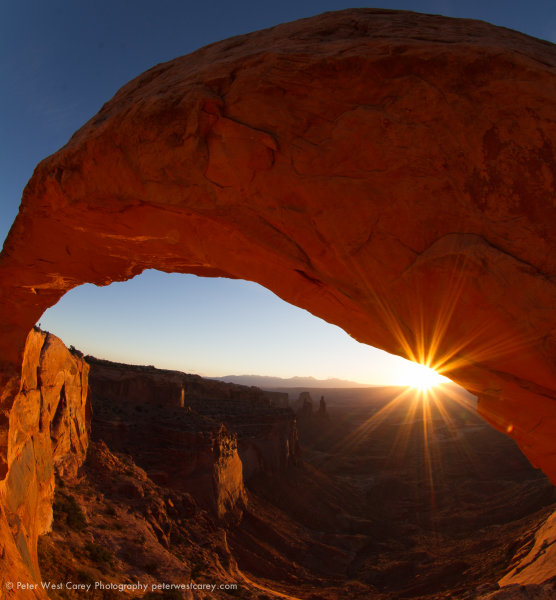
I then adjusted the Tone Curve to add some contrast, but I didn’t pull in the sides as the image was already pushing the edge of the Histogram. I cut Highlights by 44 and enhanced Shadow detail by +48.

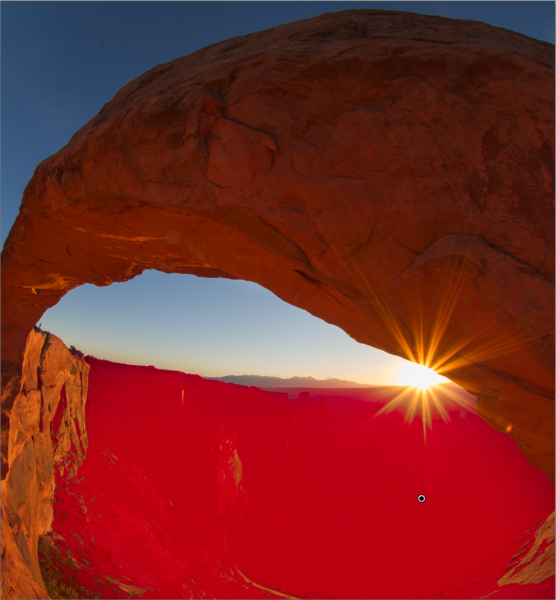
After that, it was time to liven up the valley floor. Using the Adjustment Brush, I painted over the valley floor and increased exposure by +.73 and Clarity by +48 to add some sharpness. I like to use the Clarity often on rock features to make them ‘harder’. The red in the image below represents the painted area for those settings.
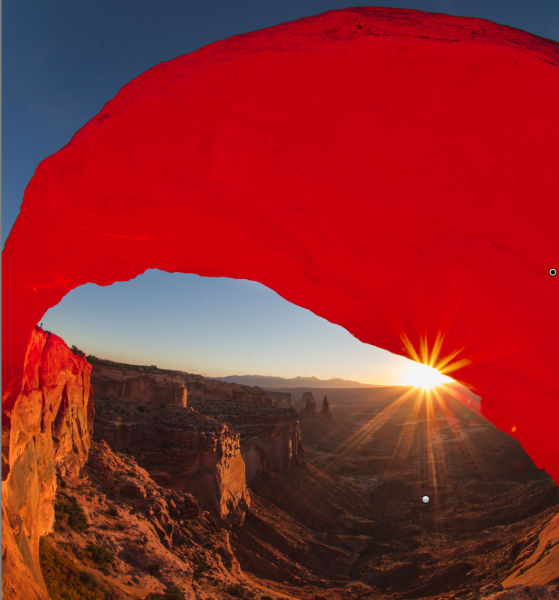
Now I want more life in the arch itself and I use a new brush to paint that. Exposure is +.73 and Clarity is +43.
After removing some dust spots (I’ll spare you the screen shots, but if you click through the images above you can probably spot them), I adjusted the crop angle slightly before the last set of adjustments.
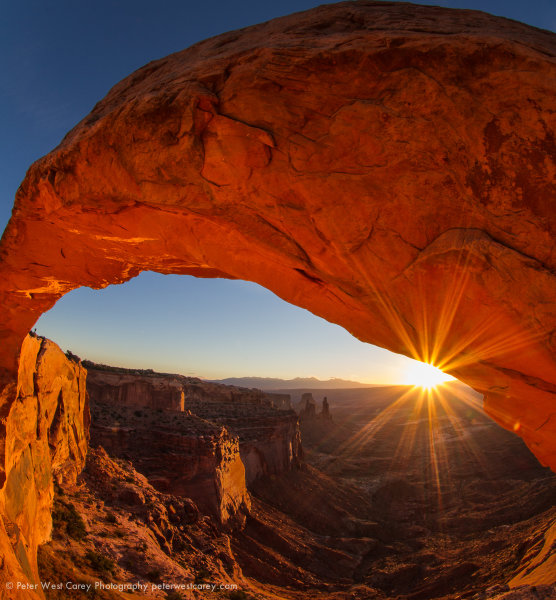
Both the face of the arch and the valley floor are brighter and more vivid. Wanting a little more ‘pop’, I increased the overall Vibrance by +31 (this brings more blue to the sky and orange to the rock and sun) as well as a Blue Saturation of +40 to help the sky.
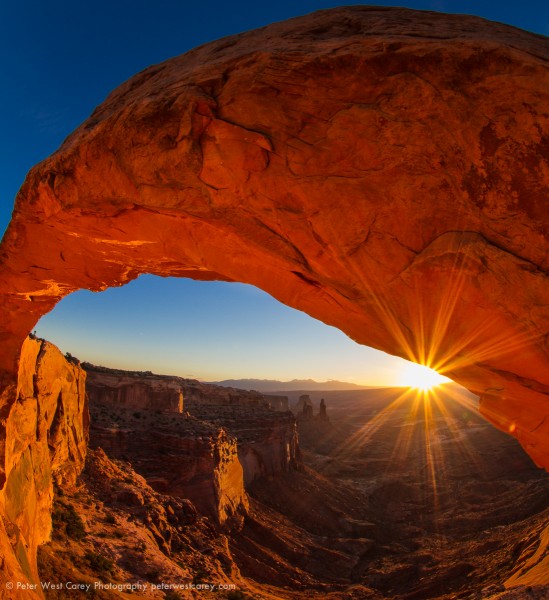
And that was it!
The keys for me for this shot were:
- Knowing the space I would be able to crop using the Canon 8-15mm L Fisheye on a cropped sensor camera.
- Stopping down my aperture to get the star burst effect.
- Placing the sun near the rock to gain the most from the burst (it works best when there is something for the sun rays to contrast with).
- Taking a chance and shooting blind from a unique angle.
- Listening to the advice of others.
- Being courteous to others wishing to get their own shot.
- Minor edits to bring the vision to fruition.
- Borrowing the right gear (thanks again to BorrowLenses.com)
If you have question, please ask. I will do my best to address them.
Post originally from: Digital Photography Tips.
Check out our more Photography Tips at Photography Tips for Beginners, Portrait Photography Tips and Wedding Photography Tips.
How I Shot And Edited It – Mesa Arch At Sunrise

Digital Photography School




.gif)


.gif)
You must be logged in to post a comment.