RSS
 

Posts Tagged ‘Sunrise’

Sunrise, sunset: Sigma 24-35mm F2 DG HSM Art gallery updated

02 Nov

Sunset is coming early in the day again, and while that marks the start of a grey season here, the beginning of fall makes for some glorious golden hours. Recently, Tech Editor Rishi Sanyal ventured out with the Sigma 24-35mm F2 Art for a sunset portrait session. Take a look at our expanded real-world samples. Read more

Articles: Digital Photography Review (dpreview.com)

 
Comments Off on Sunrise, sunset: Sigma 24-35mm F2 DG HSM Art gallery updated

Posted in Uncategorized


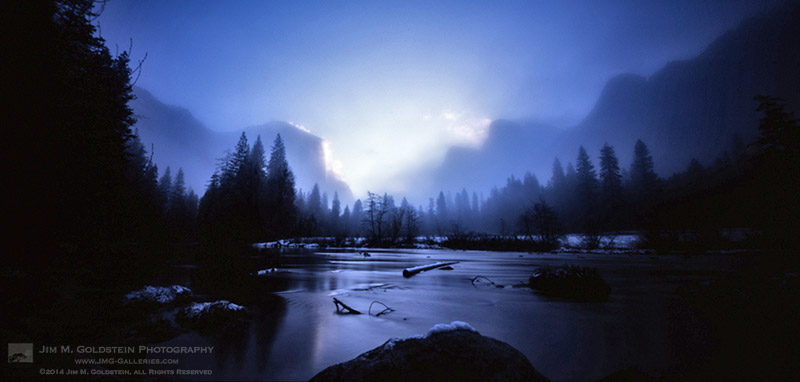
Snowy Sunrise at Gates of the Valley

29 May
Snowy Sunrise at Gates of the Valley, Yosemite National Park

Snowy Sunrise at Gates of the Valley, Yosemite National Park

via 6×12 ONDU pinhole camera

I never thought I’d say it, but it’s been fun dabbling with film again. While I still haven’t resorted to 35mm film in my old SLR I have been enjoying my time with an ONDU pinhole camera. I bought this camera via a Kickstarter campaign in 2013. Turns out ONDU is running a Kickstarter campaign for their 2nd generation pinhole cameras. If this type of photography interests you I highly recommend their cameras.

Copyright Jim M. Goldstein, All Rights Reserved

Snowy Sunrise at Gates of the Valley

The post Snowy Sunrise at Gates of the Valley appeared first on JMG-Galleries – Landscape, Nature & Travel Photography.


Related Stories

  • Snowy Sunrise at Gates of the Valley – Enclosure
  • Return of Film: Snowy Sunrise at Gates of the Valley
  • Before the Tempest, Yosemite
Feed Ads by FeedBlitz
powered by ad choices


JMG-Galleries

 
Comments Off on Snowy Sunrise at Gates of the Valley

Posted in Equipment


4 Reasons Shooting at Sunrise and Sunset Will Help You Take Better Photos

10 Mar


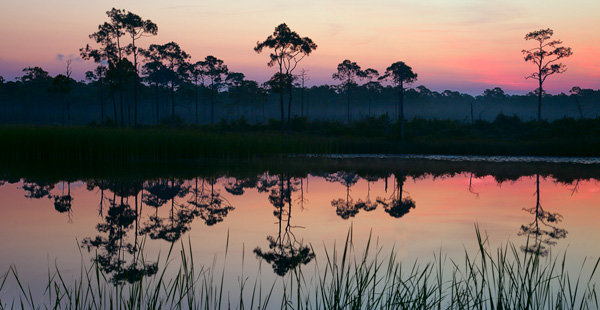
Tree-2

Perhaps the most important change you can make to improve your photography is to change the time of day you are shooting. It is as simple as that. Photos taken in the middle of the day all have problems that can be avoided if you photograph near sunrise or sunset. Photographers agree on very little, but they all seem to agree that the times around sunrise and sunset are the best for photography. In fact, many photographers go so far as to put their cameras away during the hours between 9 a.m. and 5 p.m.

Getting up at dawn, or hanging around after sunset, is generally not convenient. It is no fun to get up well before sunrise, especially in the summer when sunrise comes early. But if you want to elevate your photography, that is how to do it.

You may have heard all this before, but in this article I will explain why, and show you some of the reasons why sunrise and sunset can help you take better photos.

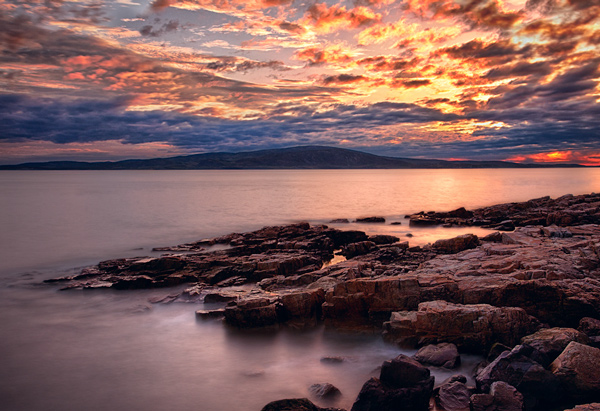
Schoodic

Reason #1: Avoid harsh contrast

The bright light of the midday sun creates harsh shadows in your photography. Nearly every object within your view will create harsh shadows. Obviously large objects like trees and buildings create such shadows, but it goes at lot further. When photographing a person, for example, you will likely encounter harsh shadows on their faces. Even something as small as grass or leaves will leave unsightly black shadows in your pictures.

Photographing near sunrise or sunset fixes this problem. At those times, the sun’s rays are coming from a more horizontal angle, which means that the rays have to pass through a lot more of the earth’s atmosphere before reaching you.  That makes the light more diffused.

In addition, the times just before sunrise and after sunset don’t involve any direct rays at all. At those times you are dealing only with indirect rays of the sun. You will not have a problem with harsh shadows.


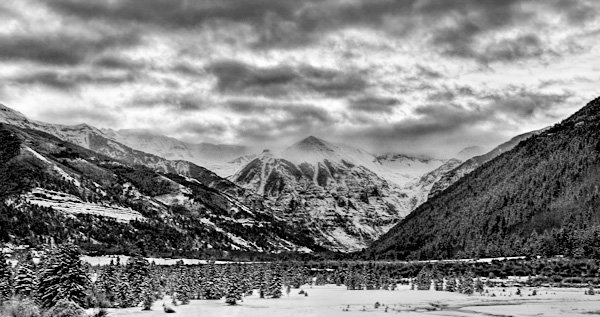
Telluride-2

Reason #2: Maintain tones within your camera’s dynamic range

In all outdoor photography you have to cope with the problem that the sky is invariably brighter than the foreground. Sometimes it is much, much, brighter. If you meter light based on the brightest part of your camera’s view, which is inevitably the sky, the shadows in your picture will end up as pure black. Conversely, if you meter light based on the foreground or shadows in your camera’s view, the brighter portions of your picture will be overexposed or even blown out (pure white).

For pictures taken during the middle of the day, this problem can be exacerbated. That is when the sky is at its brightest. If your foreground is not as bright, you are will have a problem where the scene is beyond the dynamic range of your camera.

When photographing around sunrise or sunset the sky is not quite as bright as it is when the sun is high in the sky. This cuts down the dynamic range your camera has to capture, so it is possible to capture the entire scene in full detail.


WesternLake-2

Reason #3: Avoid the commonplace

You simply cannot take a unique picture by photographing the same places, at the same time, from the same angles as everyone else. If you want your pictures to stand out from the crowd, you need to do something different. Photographing at sunrise and sunset goes part of the way in giving you that something different.

Most people are used to seeing the world as it exists in the middle of the day, they are not used to seeing it at sunrise and sunset. A typical day will have 10 hours of midday lighting, but the sunrise and sunset last only a little while. Further, people often miss them entirely. People are usually sleeping at dawn, or if not, are getting ready for work and not focused on the sky.

By photographing at sunrise and sunset, you are showing your viewers something they don’t see all the time. It avoids the commonplace. It will make your pictures more interesting to your viewers.

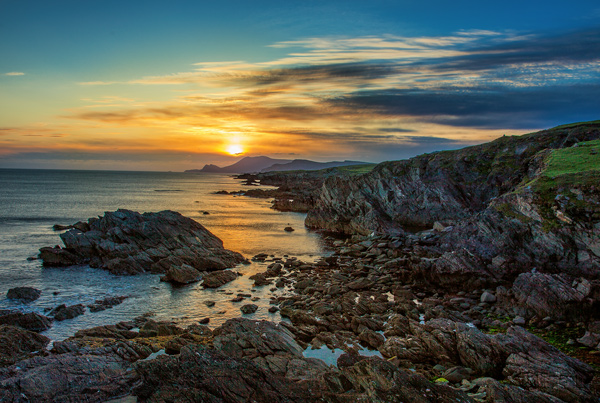
Achill

Reason #4: Capture the sky at its most vibrant

People often go to scenic locations to watch the sunrise or the sunset. There is a reason for that: because those are the times when the sky is at its most dramatic. As a photographer, that is the sky that you want to capture.

Skies at sunrise and sunset are full of color. The orange of the sun combines with the blue of the sky and creates interesting colors. When there are clouds in the picture as well, there can be a variety of different colors. Conversely, in the middle of the day, the sky is blue (if you are lucky, otherwise it is grey). By photographing at sunrise and sunset, you can capture those colors in your pictures. To make sure you are capturing the colors at their most vibrant, set your camera to meter off the sky and then underexpose a little bit.

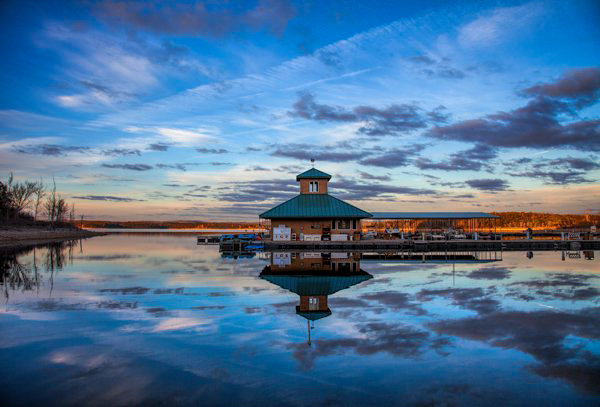
Marina-2


Conclusion

I hope this article explains the advantages of photographing around sunrise and sunset. It is one thing – and perhaps the only thing – that I can guarantee will improve your photography. But one final note to help you maximize the benefit, is that you should not arrive at your location at sunrise and/or leave at sunset. Rather, arrive about 45 minutes before sunrise and hang around at least that long after sunset. These periods when the sky is bright, but the sun is beyond the horizon, sometimes result in more dramatic images than the sunrise/sunset itself. I have often seen people pack up when the sun dips over the horizon, only to miss the most dramatic colors of the day.

I would also encourage you to check out the importance of photographing at these times for yourself. The next time you are on your favorite photo sharing website, look at your most-liked photos. Make a quick note of how many of them were taken at sunrise or sunset. My bet is that it will be a lot of them.

So if you want to take more dramatic and interesting photos, take them at sunrise or sunset. The good news is that it doesn’t cost you anything. You don’t have to buy any special gear. Yet this one change will make more difference than any new camera or lens.

googletag.cmd.push(function() {
tablet_slots.push( googletag.defineSlot( “/1005424/_dPSv4_tab-all-article-bottom_(300×250)”, [300, 250], “pb-ad-78623” ).addService( googletag.pubads() ) ); } );

googletag.cmd.push(function() {
mobile_slots.push( googletag.defineSlot( “/1005424/_dPSv4_mob-all-article-bottom_(300×250)”, [300, 250], “pb-ad-78158” ).addService( googletag.pubads() ) ); } );

The post 4 Reasons Shooting at Sunrise and Sunset Will Help You Take Better Photos by Jim Hamel appeared first on Digital Photography School.


Digital Photography School

 
Comments Off on 4 Reasons Shooting at Sunrise and Sunset Will Help You Take Better Photos

Posted in Photography


7 Uncommon Tips for Winter Sunrise Photos Near Water

26 Feb

DPS3

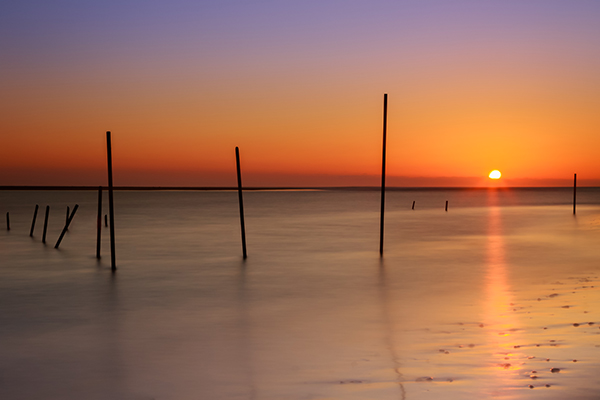
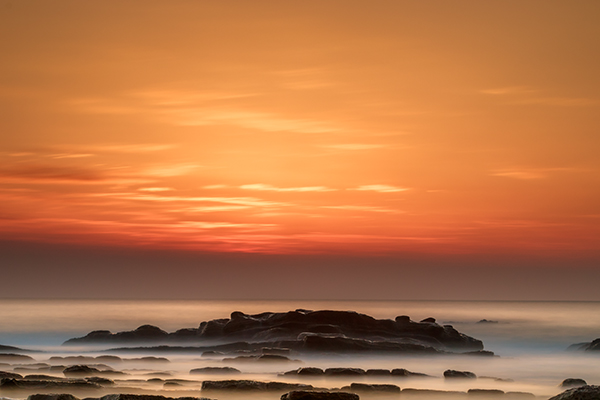
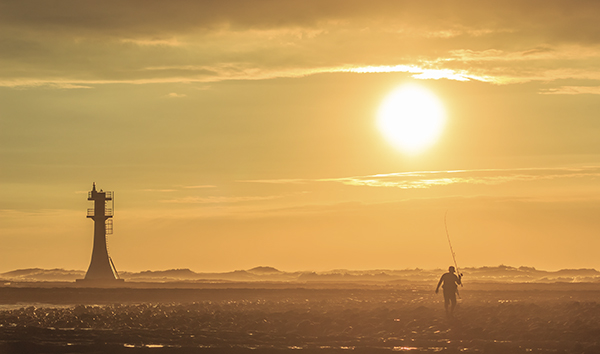
There are few things in photography that people love more than dreamy sunrise shots full of bold oranges, big suns, washing waters, and burnt horizons. The dawn of a new day is a spiritually significant event as our past misdeeds of yesterday are forgotten under the promise of fresh beginnings. Sunrise also affords us some of the best light to work with in photography.

However, if you live near the coast and you plan to get up early to take some sunrise shots that involve you being in or around rocks on the water’s edge, there are some key things you must remember, especially in the cold, winter months.

1. Set the alarm earlier than you think.

This is stage one. You’ve calculated that the sun rises at 6:00 a.m., you want to get there by 5:30 to set up, it takes you 10 minutes to get there, so you set the alarm for 5:10. But be honest, it never works like this does it? The alarm goes off at 5:10, it’s cold, you’re snug in bed, it’s dark outside, you were in the midst of a dream, and you roll back over. Missed sunrise. How often do you ever jump straight out of bed at 5:10 to take photos, in the midst of winter? By learning this mistake, I set the alarm for 4:40 then give myself three hits on the snooze button to take me to 5:10. It never fails (unless it’s cloudy!!)

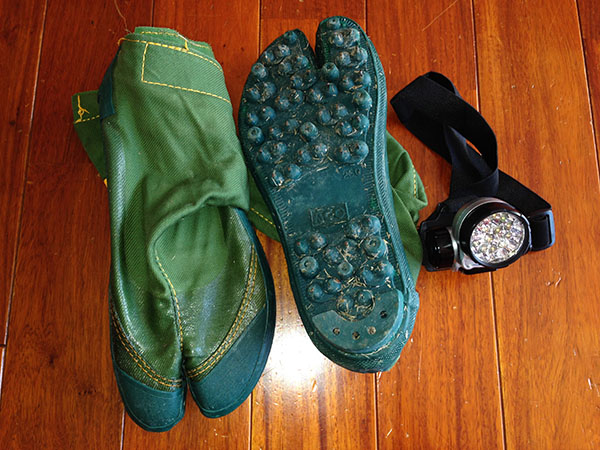
2. Make sure you have shoes with spikes on the bottom.

Think about it – you’re an avid photographer who has set up a kit to your liking with lenses, filters, batteries and your camera. You put it in your bag, put your shoes on, head to the wet, rocky location then bammo, you fall over on the freezing, slippery moss. Either you or your bag gets wet, and neither is a desired result. There’s nothing scarier than trying to keep your bag on your back and out of the water as you slip around the rocks on ill-equipped shoes.

I have fisherman’s boots that cost $ 40. They have small metal spikes on the sole, perfect for getting across the rocks, and for scurrying to new locations quickly. They’re waterproof too. Alternatively, you could try the little clamp-ons that hikers use in icy conditions. They work well too, but your shoes will get cold and wet.

3. Use a head torch (headlamp).

The first time I brought mine I felt utterly ridiculous, like I was a miner heading down into the pits. Now, I wouldn’t dream of not having one. The convenience of having both hands free to see where you’re going, to open and close your bag, and set your camera up in the dark is without comparison. Especially if you are trying to get filters and holders attached to the ends of lenses.

DPS5

4. Have at least two lens cloths and other lens cleaners or pens.

Imagine this scenario: you are changing your lens out on the rocks and you put your cleaning cloth down to free your hands. There is a little bit of residue on the rocks so when you pick up your cloth and started wiping the lens, it gets coated in a film of goo. You may be able to clean the lens with different parts of the cloth (depending on the type of rock goo!) but it will likely leave most of the cloth dirty. Therefore, you will be unable to clean other lenses later on when they inevitably get hit by sea-spray.

How can I picture such a scenario? Sadly, I have lived it, and there is nothing worse than getting up early to a prime location, only to have your single cleaning cloth ruined before your shooting appetite has been satisfied, leaving you unable to do anything with other lenses that need cleaning. Now I always carry at least three cleaning implements in my bag.

5. Study the tides.

Ideally, you should know exactly what you want to shoot, so you can frame the shot before you go and know where the water will be. This is not always possible, but at least you should know what the tide will be at sunrise. You might go somewhere the day before and see a perfect shot in your head, only to return at dawn the next day and find those beautiful rocks covered in two metres of water. There’s no point setting the alarm for 4:40am if the subject you want in your shot is submerged like a sunken ship.

DPS1

6. Know where the sun rises. This may seem ridiculous – east you say! Well yeah, the sun rises in the east, but exactly where on the horizon will it rise for you? The angle changes every day. I once woke at 4:00 a.m. to get a shot in at sunrise only to realize after setting up that even my Sigma 10-20mm couldn’t get the sun and subject in my frame. East isn’t just east. Know exactly where the sun rises on the horizon in order to frame the shot you want.

DPS2

7. Mittens not gloves.

In the wintertime, near the coast, you need something to cover your hands. But not gloves. Mittens are those cute, little gloves that have all the tops of the fingers cut off. The very reason you need mittens is to keep the tips of your fingers free to play with the camera and to get everything set up. This is very difficult with padded, woolly gloves on. Also, don’t make the mistake of buying woollen gloves, then cutting the tops off yourself. This leaves threads hanging that get longer and longer every day, and more and more annoying.

DPS6

The joy of getting those early morning shots makes a perfect start to the day. Follow these tips and all you’ll have to worry about is framing that perfect shot.

googletag.cmd.push(function() {
tablet_slots.push( googletag.defineSlot( “/1005424/_dPSv4_tab-all-article-bottom_(300×250)”, [300, 250], “pb-ad-78623” ).addService( googletag.pubads() ) ); } );

googletag.cmd.push(function() {
mobile_slots.push( googletag.defineSlot( “/1005424/_dPSv4_mob-all-article-bottom_(300×250)”, [300, 250], “pb-ad-78158” ).addService( googletag.pubads() ) ); } );

The post 7 Uncommon Tips for Winter Sunrise Photos Near Water by Iain Stanley appeared first on Digital Photography School.


Digital Photography School

 
Comments Off on 7 Uncommon Tips for Winter Sunrise Photos Near Water

Posted in Photography


Return of Film: Snowy Sunrise at Gates of the Valley

22 Aug

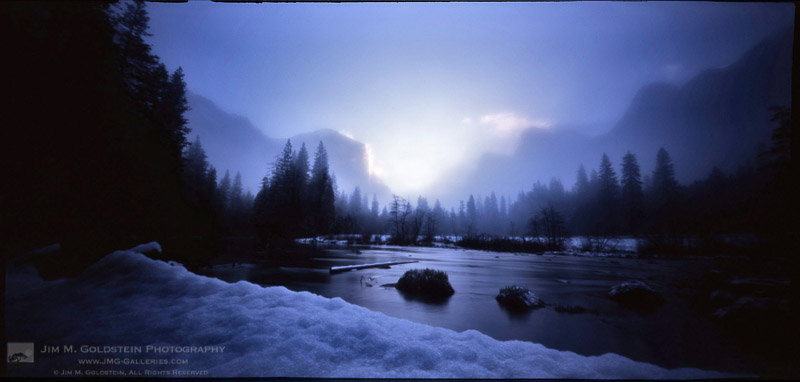
It’s been 10 years since I last took photographs with film. My backing a pinhole camera Kickstarter project, the Ondu camera, is what swayed me to take another stab at shooting film. The camera I chose from the project is a 6×12 medium format pinhole camera. It has an aperture equivalent to f/133 and a focal length of roughly 40mm (in 35mm camera terms).  I’ve never used a pinhole camera so it’s been quite an exciting exploration of a very primitive form of photography. No view finder, no glass lens, no CF cards, no histogram and being an extended piece of the camera as the human shutter (I open and close it) is a sure fire way to kick oneself into a new way of thinking and seeing.

Even with my digital camera I’ve been in a “slow photography” mode. Ironic considering I have been shooting a lot of time-lapse work. While my camera is running capturing a time-lapse I usually have a second camera in the wings where I very selectively take a dozen or so photos. To take that approach to another extreme I picked up the pinhole camera to capture a few frames here and there. I get 6 photos per roll with this camera so depending on the lighting conditions I’ll run through a roll quickly during the day or use the same roll of film over a few night shoots.

The photo above of a very foggy and snowy view of Gates of the Valley in Yosemite National Park was taken this past March. This brief window in the fog lasted but a minute. This was one instance when I was in the right place at the right time. Expect to see a few more pinhole photos in the future. As I venture around in the coming months we’ll see what other “right place at the right time” photos come about.


Copyright Jim M. Goldstein, All Rights Reserved

Return of Film: Snowy Sunrise at Gates of the Valley

The post Return of Film: Snowy Sunrise at Gates of the Valley appeared first on JMG-Galleries – Landscape, Nature & Travel Photography.


Related Stories

  • Exhibit & Book Not To Miss – Carleton Watkins: The Stanford Albums
  • Exhibit & Book Not To Miss – Carleton Watkins: The Stanford Albums – Enclosure
  • In Defense of Pretty Pictures – Enclosure


JMG-Galleries

 
Comments Off on Return of Film: Snowy Sunrise at Gates of the Valley

Posted in Equipment


Sunrise at the Yellowstone by Aleksey Khmyz

25 Jun

My wife and I had the opportunity to visit Yellowstone Park last fall. It was a wonderful experience and I highly recommend visiting if you have the chance. Primarily, I am a wedding and portrait photographer based out of the Buffalo, NY area, but it’s always nice to take a couple images of wildlife and […]

The post Sunrise at the Yellowstone by Aleksey Khmyz appeared first on dslrBlog.

dslrBlog

 
Comments Off on Sunrise at the Yellowstone by Aleksey Khmyz

Posted in Photography


Return of Film: Snowy Sunrise at Gates of the Valley

22 Apr

It’s been 10 years since I last took photographs with film. My backing a pinhole camera Kickstarter project, the Ondu camera, is what swayed me to take another stab at shooting film. The camera I chose from the project is a 6×12 medium format pinhole camera. It has an aperture equivalent to f/133 and a focal length of roughly 40mm (in 35mm camera terms).  I’ve never used a pinhole camera so it’s been quite an exciting exploration of a very primitive form of photography. No view finder, no glass lens, no CF cards, no histogram and being an extended piece of the camera as the human shutter (I open and close it) is a sure fire way to kick oneself into a new way of thinking and seeing.

Even with my digital camera I’ve been in a “slow photography” mode. Ironic considering I have been shooting a lot of time-lapse work. While my camera is running capturing a time-lapse I usually have a second camera in the wings where I very selectively take a dozen or so photos. To take that approach to another extreme I picked up the pinhole camera to capture a few frames here and there. I get 6 photos per roll with this camera so depending on the lighting conditions I’ll run through a roll quickly during the day or use the same roll of film over a few night shoots.

The photo above of a very foggy and snowy view of Gates of the Valley in Yosemite National Park was taken this past March. This brief window in the fog lasted but a minute. This was one instance when I was in the right place at the right time. Expect to see a few more pinhole photos in the future. As I venture around in the coming months we’ll see what other “right place at the right time” photos come about.


Copyright Jim M. Goldstein, All Rights Reserved

Return of Film: Snowy Sunrise at Gates of the Valley

The post Return of Film: Snowy Sunrise at Gates of the Valley appeared first on JMG-Galleries – Landscape, Nature & Travel Photography.


Related Stories

  • Return of Film: Snowy Sunrise at Gates of the Valley – Enclosure
  • In Defense of Pretty Pictures – Enclosure
  • Celestial Influences: Petroglyphs and Star Trails – Enclosure
Feed Ads by FeedBlitz
powered by ad choices


JMG-Galleries

 
Comments Off on Return of Film: Snowy Sunrise at Gates of the Valley

Posted in Equipment


8 Simple Guidelines for Capturing Spectacular Sunrise and Sunset Images

26 Mar

When we are asked to think of popular subjects for landscape photography, images of beautiful sunsets immediately come to mind. What outdoor photographer worth his or her salt doesn’t have at least a couple of images of the sun dipping below the horizon? In most people’s minds, it is an easy thing to capture; the beauty and scale of the event itself should carry the photo, with minimal interaction from the photographer.
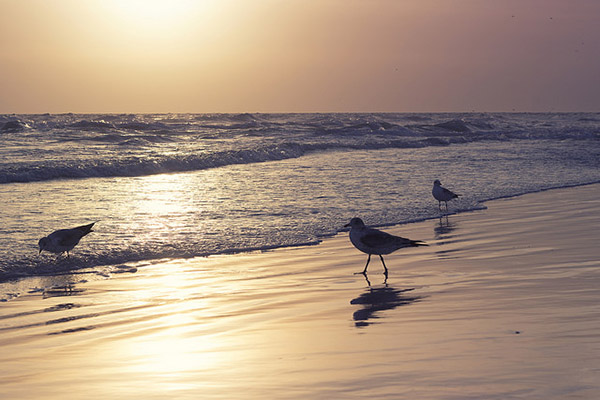
bird_trio

But is this really the case?

Unfortunately, it’s not. Unless you’re relying on luck alone, you’ll need to possess a few seeds of knowledge (eight in this case) to get you started in capturing that epic sunrise or sunset. None of these guidelines are difficult to comprehend, and can vastly improve your chances of properly capturing one of mother nature’s most incredible events.

1. Scout the Location

As tempting as it is to just show up at a convenient location and start shooting, you greatly increase your chances of success by planning the shoot in advance. The first thing you’ll want to determine is the best location from which to shoot.

Pick a location that is out of the way of road and foot traffic, where you’re unlikely to be disturbed. Go to the location in broad daylight before the shoot, and ensure your view of the horizon will be unobstructed and free of any hazards.

The most important factor after the location is time of the day. Obviously, this will vary depending on whether you’re capturing a sunrise or a sunset. Is there a storm coming? If your shooting time coincides with an approaching or recently-ended storm, the results can be staggering. Rain and storm clouds can add a dramatic layer of dimension to the scene.

Lastly, you can pinpoint the perfect time to shoot by using an online tool or smartphone app to determine precise sunrise and sunset times for your exact location. Many low-cost (and sometimes free) solutions are out there, including SunSeeker, Daylight Free, and the excellent Photographers Ephemeris to name a few.
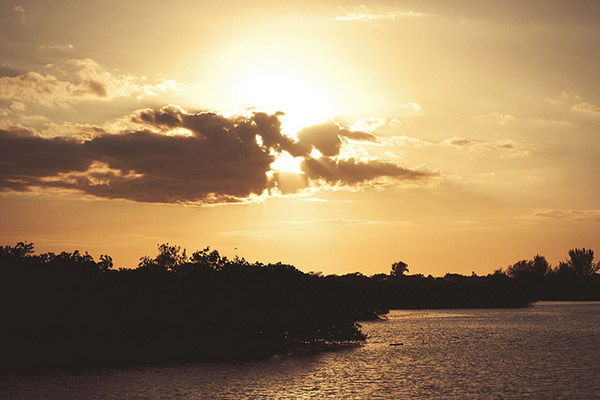
sunset_article3.jpg

2. Sunrise, or Sunset?

If you’re familiar with color temperature, you’ll know that there is a slight difference in the appearance of light at sunset versus what you’ll see at sunrise. Early morning light tends to be cooler (higher blue) than light in the late evening, which leans toward more warm color castings consisting of orange and red.

Since we know there are differing color temperatures at work here, you might need to adjust for this, depending on what feel you’re going for, either through warming or cooling filters, or adjustments in post-production to add or remove warmth into the color profile of the final photograph.

Be aware that physical filters used on your camera will degrade image quality slightly, due to the addition of another obstacle for light to pass through between your subject and your camera’s sensor
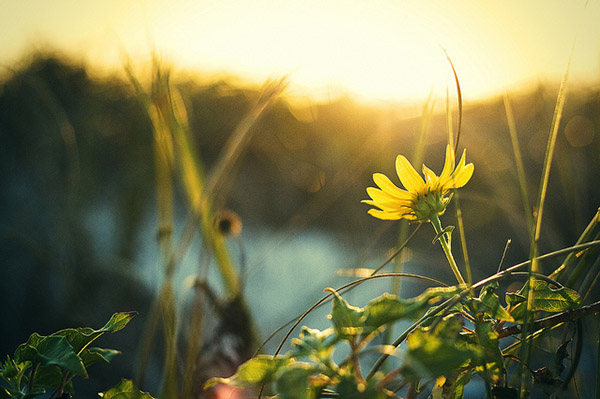
daisy

3. Plan your Shots

Another important step to accomplish before heading out is to plan out what you hope to achieve in the photo. What look are you going for?  Is there a definitive subject lit by the sunlight, or will the sunset itself be the star of the show?

This is also a great time to determine any other special considerations, such as the possibility of shooting an HDR (High Dynamic Range) photo. If that’s the case, you’ll need to prepare your camera for bracketed exposures to capture the full range of tones in the scene. Since these type of scenes normally consist of bright spots and shadows, this is a great way to produce some truly dramatic images.

4. Gather the Proper Gear

Obviously you can’t capture the right shot without the right gear; so make sure you have it all ready to go before you head out. First and foremost, you’ll want to bring your tripod. Sunrises and sunsets are potentially low-light situations (depending on what part of the sunset you’re trying to capture), so you want a steady base for your camera.

Secondly, you’ll want to determine what lens to use for the shot.  Even though beautiful landscapes can be captured using a 35mm or 50mm focal length (for sensors with a 1.6 crop factor – 56 to 80mm on a full frame system), a wide angle lens is preferred, including any zoom lenses that can capture a length of 25mm and below (40mm on a full frame system).  If you have a prime lens at these lengths, you will have a better chance of catching an even sharper image.  Using a wide angle lens will allow you to capture a more vast, sweeping portion of the scene.

Do you own and use screw-on filters for your camera?

Although using filters can degrade image quality a bit, due to the addition of another obstacle for light to pass through between your subject and your camera’s sensor, there are some that could be useful here, such as a GND (graduated neutral density) filter, to darken the upper portion of the sky a bit. Filters such as UV (ultraviolet) or polarizing filters may actually be a hinderance in these situations, and should be avoided. These filters reduce the amount of light coming in to the sensor, further increasing the required exposure time, which may not be idea if you’re trying to freeze any motion in the shot.
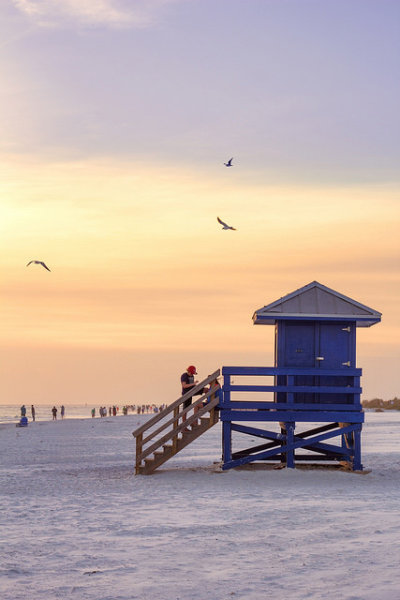
lifeguard_shack

5. Use the Right Settings

Another item that can be set up before you arrive to your shoot is the settings on the camera itself.

Since you’re shooting landscape, you’ll want to use a smaller aperture such as f/8, f/11 or even higher to maximize the depth of field and capture a sharp image throughout. If you’re using a tripod, this isn’t a problem.

Although shooting in manual mode is the norm here, to allow for minor changes in exposure compensation, I prefer to shoot almost everything in A/Av (aperture priority mode). This way I can lock in my aperture and let the camera choose a proper shutter speed. Since low-light situations like this can confuse the camera and you run the risk of overexposure, you can use your camera’s exposure compensation settings to fine-tune the exposure a bit lower.

A low ISO should also be used such as 100 or 200, to ensure there isn’t a lot of noise in the final shot. Again, with a tripod this isn’t an issue, but if you’re hand-holding for the shot, you will need to bump the ISO up to get a shutter speed that’s fast enough to avoid a disappointingly blurry photo.
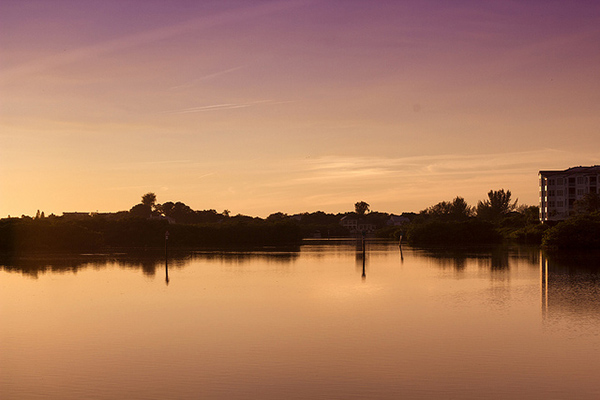
inlet_sunset

Another useful trick to increase warmth in your final shot is to set WB (white balance) to the “sunny” or “cloudy” setting instead of “auto”. Although you can certainly add warmth in post-processing, your initial image from the camera will be warmer if you make this adjustment now.

And of course, ALWAYS shoot in RAW! To a certain extent, shadows and highlights that are lost in a shot can be recovered in post-processing later.

6. Compose for Interest

Alright, the preparation is over, now we get to the fun part! Once you’re on location, and are ready to take the shot, you’ll want to make considerations for composition.

The most common error in shooting sunsets or sunrises is composing the horizon exactly in the middle of the photo. While this can work in some cases, it normally causes a bit too much symmetry and can make the picture uninteresting.

Take a moment to look the scene over; what part is the most dramatic? Are there any parts that aren’t as interesting of a focus?

Once you have identified that, simply compose the shot to include more of the most dramatic scenery. If you have an angry, cloudy sky that accentuates the sunlight, let that occupy the upper 2/3 of the scene. If you have an interesting foreground or landscape below the sun, and a less-intriguing sky, let that occupy the bottom 2/3 of the image. You want to draw the viewer into the horizon, and then let their eyes drift to the most dramatic part of the image.
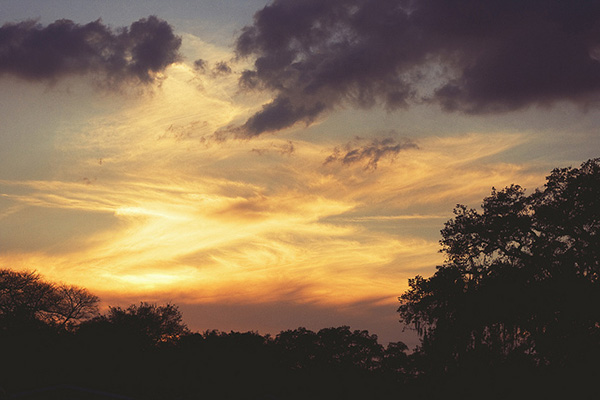
purple_sunset

7. Waiting for the Right Shot

If you already have experience shooting landscapes, you know that sometimes waiting is the name of the game. Because of the dynamics of natural lighting, a scene can completely change from one hour to the next, and sometimes even one minute to the next.

Now is the time to be creative! Try different exposure times, play with your exposure compensation settings for different tones. Let the clouds and sun change positions, and reshoot, or try a slightly different angle.

Maybe even allow different subjects to come in and out of frame, and shoot them in the foreground against the sunrise or sunset. The longer you’re at the location shooting, the more variety of shots you’ll end up with.
pier

Sunset article4

8. Don’t Leave Too Early

Lastly, one of the most common things you’ll hear about capturing sunsets, in particular, is to stick around after the sun dips below the horizon. This is certainly true, as the entire dynamic of a scene changes at this point.

Tones, colors and hues in the sky usually become more saturated and dramatic. You’ll need to allow for the loss of your main source of light, but it’s hard to deny some of the most beautiful images can be shot right after the sun is out of sight.

The post 8 Simple Guidelines for Capturing Spectacular Sunrise and Sunset Images by Tim Gilbreath appeared first on Digital Photography School.


Digital Photography School
 
Comments Off on 8 Simple Guidelines for Capturing Spectacular Sunrise and Sunset Images

Posted in Photography


8 Simple Guidelines for Capturing Spectacular Sunrise and Sunset Images

26 Mar

When we are asked to think of popular subjects for landscape photography, images of beautiful sunsets immediately come to mind. What outdoor photographer worth his or her salt doesn’t have at least a couple of images of the sun dipping below the horizon? In most people’s minds, it is an easy thing to capture; the beauty and scale of the event itself should carry the photo, with minimal interaction from the photographer.

bird_trio

But is this really the case?

Unfortunately, it’s not. Unless you’re relying on luck alone, you’ll need to possess a few seeds of knowledge (eight in this case) to get you started in capturing that epic sunrise or sunset. None of these guidelines are difficult to comprehend, and can vastly improve your chances of properly capturing one of mother nature’s most incredible events.

1. Scout the Location

As tempting as it is to just show up at a convenient location and start shooting, you greatly increase your chances of success by planning the shoot in advance. The first thing you’ll want to determine is the best location from which to shoot.

Pick a location that is out of the way of road and foot traffic, where you’re unlikely to be disturbed. Go to the location in broad daylight before the shoot, and ensure your view of the horizon will be unobstructed and free of any hazards.

The most important factor after the location is time of the day. Obviously, this will vary depending on whether you’re capturing a sunrise or a sunset. Is there a storm coming? If your shooting time coincides with an approaching or recently-ended storm, the results can be staggering. Rain and storm clouds can add a dramatic layer of dimension to the scene.

Lastly, you can pinpoint the perfect time to shoot by using an online tool or smartphone app to determine precise sunrise and sunset times for your exact location. Many low-cost (and sometimes free) solutions are out there, including SunSeeker, Daylight Free, and the excellent Photographers Ephemeris to name a few.

sunset_article3.jpg

2. Sunrise, or Sunset?

If you’re familiar with color temperature, you’ll know that there is a slight difference in the appearance of light at sunset versus what you’ll see at sunrise. Early morning light tends to be cooler (higher blue) than light in the late evening, which leans toward more warm color castings consisting of orange and red.

Since we know there are differing color temperatures at work here, you might need to adjust for this, depending on what feel you’re going for, either through warming or cooling filters, or adjustments in post-production to add or remove warmth into the color profile of the final photograph.

Be aware that physical filters used on your camera will degrade image quality slightly, due to the addition of another obstacle for light to pass through between your subject and your camera’s sensor

daisy

3. Plan your Shots

Another important step to accomplish before heading out is to plan out what you hope to achieve in the photo. What look are you going for?  Is there a definitive subject lit by the sunlight, or will the sunset itself be the star of the show?

This is also a great time to determine any other special considerations, such as the possibility of shooting an HDR (High Dynamic Range) photo. If that’s the case, you’ll need to prepare your camera for bracketed exposures to capture the full range of tones in the scene. Since these type of scenes normally consist of bright spots and shadows, this is a great way to produce some truly dramatic images.

4. Gather the Proper Gear

Obviously you can’t capture the right shot without the right gear; so make sure you have it all ready to go before you head out. First and foremost, you’ll want to bring your tripod. Sunrises and sunsets are potentially low-light situations (depending on what part of the sunset you’re trying to capture), so you want a steady base for your camera.

Secondly, you’ll want to determine what lens to use for the shot.  Even though beautiful landscapes can be captured using a 35mm or 50mm focal length (for sensors with a 1.6 crop factor – 56 to 80mm on a full frame system), a wide angle lens is preferred, including any zoom lenses that can capture a length of 25mm and below (40mm on a full frame system).  If you have a prime lens at these lengths, you will have a better chance of catching an even sharper image.  Using a wide angle lens will allow you to capture a more vast, sweeping portion of the scene.

Do you own and use screw-on filters for your camera?

Although using filters can degrade image quality a bit, due to the addition of another obstacle for light to pass through between your subject and your camera’s sensor, there are some that could be useful here, such as a GND (graduated neutral density) filter, to darken the upper portion of the sky a bit. Filters such as UV (ultraviolet) or polarizing filters may actually be a hinderance in these situations, and should be avoided. These filters reduce the amount of light coming in to the sensor, further increasing the required exposure time, which may not be idea if you’re trying to freeze any motion in the shot.

lifeguard_shack

5. Use the Right Settings

Another item that can be set up before you arrive to your shoot is the settings on the camera itself.

Since you’re shooting landscape, you’ll want to use a smaller aperture such as f/8, f/11 or even higher to maximize the depth of field and capture a sharp image throughout. If you’re using a tripod, this isn’t a problem.

Although shooting in manual mode is the norm here, to allow for minor changes in exposure compensation, I prefer to shoot almost everything in A/Av (aperture priority mode). This way I can lock in my aperture and let the camera choose a proper shutter speed. Since low-light situations like this can confuse the camera and you run the risk of overexposure, you can use your camera’s exposure compensation settings to fine-tune the exposure a bit lower.

A low ISO should also be used such as 100 or 200, to ensure there isn’t a lot of noise in the final shot. Again, with a tripod this isn’t an issue, but if you’re hand-holding for the shot, you will need to bump the ISO up to get a shutter speed that’s fast enough to avoid a disappointingly blurry photo.

inlet_sunset

Another useful trick to increase warmth in your final shot is to set WB (white balance) to the “sunny” or “cloudy” setting instead of “auto”. Although you can certainly add warmth in post-processing, your initial image from the camera will be warmer if you make this adjustment now.

And of course, ALWAYS shoot in RAW! To a certain extent, shadows and highlights that are lost in a shot can be recovered in post-processing later.

6. Compose for Interest

Alright, the preparation is over, now we get to the fun part! Once you’re on location, and are ready to take the shot, you’ll want to make considerations for composition.

The most common error in shooting sunsets or sunrises is composing the horizon exactly in the middle of the photo. While this can work in some cases, it normally causes a bit too much symmetry and can make the picture uninteresting.

Take a moment to look the scene over; what part is the most dramatic? Are there any parts that aren’t as interesting of a focus?

Once you have identified that, simply compose the shot to include more of the most dramatic scenery. If you have an angry, cloudy sky that accentuates the sunlight, let that occupy the upper 2/3 of the scene. If you have an interesting foreground or landscape below the sun, and a less-intriguing sky, let that occupy the bottom 2/3 of the image. You want to draw the viewer into the horizon, and then let their eyes drift to the most dramatic part of the image.

purple_sunset

7. Waiting for the Right Shot

If you already have experience shooting landscapes, you know that sometimes waiting is the name of the game. Because of the dynamics of natural lighting, a scene can completely change from one hour to the next, and sometimes even one minute to the next.

Now is the time to be creative! Try different exposure times, play with your exposure compensation settings for different tones. Let the clouds and sun change positions, and reshoot, or try a slightly different angle.

Maybe even allow different subjects to come in and out of frame, and shoot them in the foreground against the sunrise or sunset. The longer you’re at the location shooting, the more variety of shots you’ll end up with.

pier

Sunset article4

8. Don’t Leave Too Early

Lastly, one of the most common things you’ll hear about capturing sunsets, in particular, is to stick around after the sun dips below the horizon. This is certainly true, as the entire dynamic of a scene changes at this point.

Tones, colors and hues in the sky usually become more saturated and dramatic. You’ll need to allow for the loss of your main source of light, but it’s hard to deny some of the most beautiful images can be shot right after the sun is out of sight.

The post 8 Simple Guidelines for Capturing Spectacular Sunrise and Sunset Images by Tim Gilbreath appeared first on Digital Photography School.


Digital Photography School
 
Comments Off on 8 Simple Guidelines for Capturing Spectacular Sunrise and Sunset Images

Posted in Photography


Lightroom Workflow – from Setup to Finished Sunrise Photo

01 Dec

One of my favorite times of the day to photograph is sunrise. There’s just something about the peacefulness of being up before the sun, before most of the human world, that allows me to clear my head.

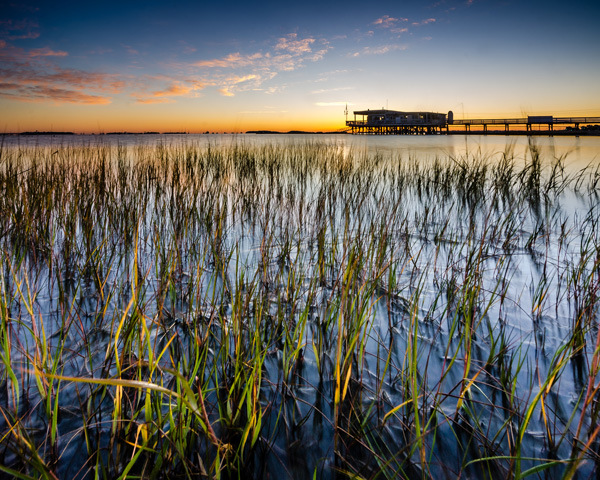
Sunrise photos have always been high on the list of fan favorites and I know that there are a great many DPS readers who love them as well, so I thought I’d share with you a little bit about how I made the shot above from finding the location to setting up the camera and then a step by step walk-through of my Lightroom workflow.

Lightroom Workflow Final Image

Determining a location

To begin a shoot you need a concept, and while photographing sunrise is always a great concept to start with, one of the most important things that you’ll need to do is find a location. This can be difficult to do sometimes, but if you’re struggling to find a new location, check out 5 Creative Ways to Find New Locations for Photography for some inspiration.

I can tell you that the inspiration for this photo came from my sister who saw this boat house while out on an afternoon jog. She sent me a text message demanding that I come spend a night so that I could photograph it at sunrise – and sure enough that’s exactly what I did. The key point to take away from this is, that inspiration can come from anyone and any where, so make sure that you are paying attention to your surroundings as well as what people are saying about their own.

As for getting to the location for a sunrise shoot you’re going to have to wake up early. Well before sunrise. For this reason I typically will either spend the night in a hotel or find a friend or family member who lives close enough to the location to allow me to crash for a few hours, otherwise there might not be any point of sleeping at all. Think of it like this… If you can still see stars – you’re doing it right!

Setting up the camera

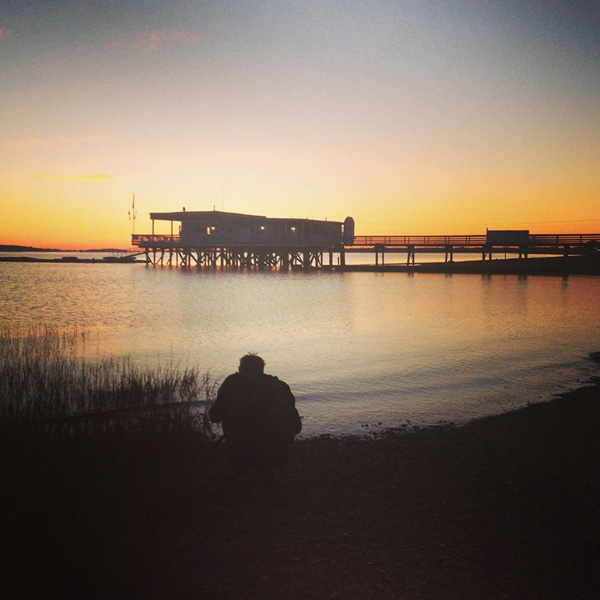
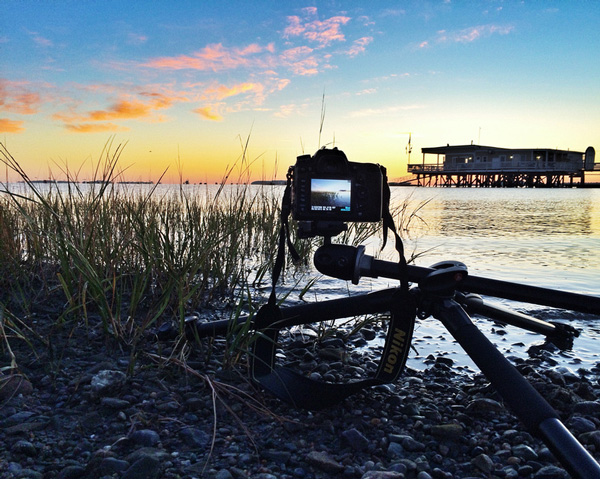
Since camera settings will vary depending on your scene I thought I’d share a couple behind the scenes shots. The first is one that my sister took of me while I was setting up my camera and tripod along the shore – notice how close to the water I get. The second shot is a close up that I took of my camera setup during the shoot, notice that for this particularity shot the tripod was nearly flat against the ground to allow me to get a very low perspective, and allow for the foreground sea grass to take up a good portion of the frame.

Lightroom Workflow - Setting up the shot

A behind the scenes shot of yours truly setting up the camera

Lightroom Workflow - Behind the Camera

A photo of the camera set up – notice how close to the water and how low to the ground I put the camera for this shot

It’s important to note that each shoot is going to be different and you must realize that with every sunrise and every location there will be challenges that you will have to overcome. While I can show you examples of how I set up the camera and my thought process behind it, when you get out to your own location it’s up to you to determine the best ways to photograph the scene.

Back home – it’s time to process the photos

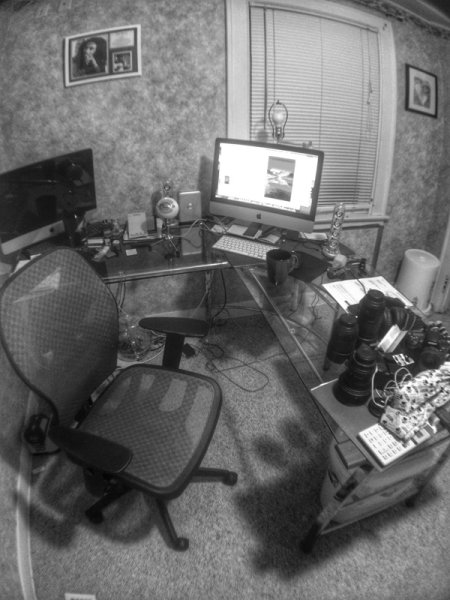
Lightroom Workflow - Office

Just for fun I thought I’d throw in this snapshot of my office – What’s your desk look like?

Lightroom workflow – which frame to process?

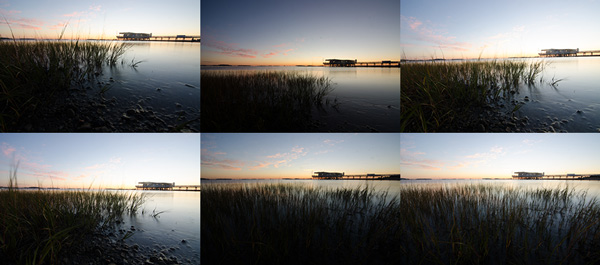
Before you can start processing you must determine which of the frames you want to use. There’s no “one-size-fits-all” way of doing this, it really comes down to the person behind the computer. Some people like to simply process everything from the start of their shoot to the end. Other people like to meticulously rate everything, fill in all the meta data and stay super organized. My own workflow usually consists of a quick browse through all the photos that I’ve captured in a particular shoot, rating each of the ones I want to edit with a 5-star rating, and leaving everything else untouched for the time being. I’ll usually come back to shoots from time to time, to see if anything I may have missed on my first go through jumps out at me on a second glance.

Lightroom-workflow-collage

Six different frames from the shoot – I chose the bottom right frame for today’s photo

Lightroom workflow – making adjustments

Now that you’ve chosen a photograph to edit, it’s time to dive into the develop panel and get started with the post production workflow.

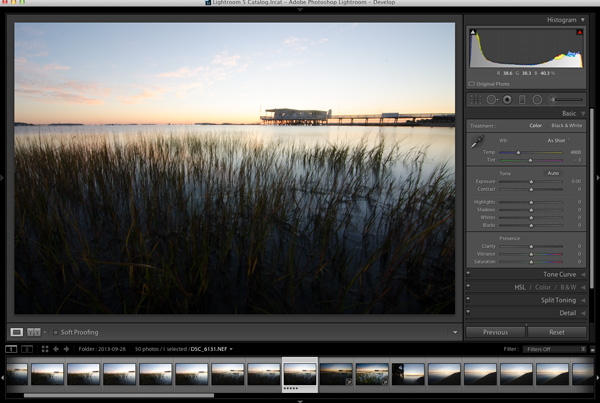
Lightroom Workflow - Oriignal

Enter the develop panel and select the photo to be edited.

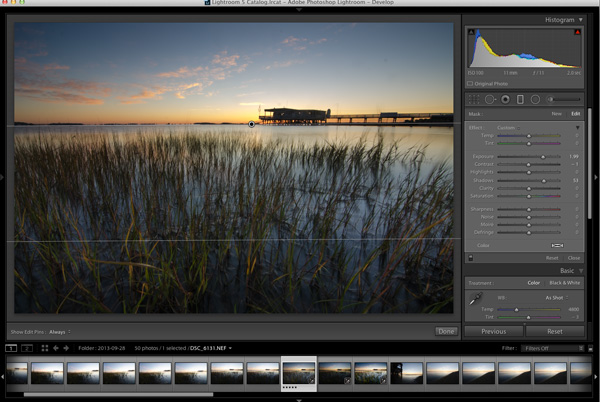
Since this photograph is all about the sunrise, the first step is to make sure that you get your sky exposure as close to perfect as possible. By making a small adjustment here to the exposure slider in the basic tab you can have a great effect on the sky which will set the foundation for the rest of the photograph. It might look a bit under exposed at first, but we will be fixing this and fine tuning everything throughout the tutorial.

Lightroom Workflow - Expose for the sky

Adjust the exposure for the sky

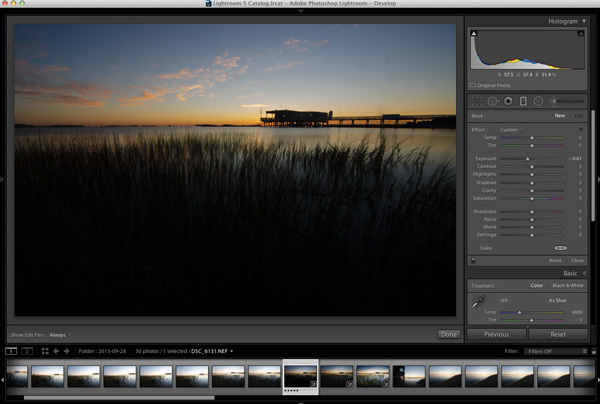
To bring the foreground back into the image you will want to add a graduated filter into the frame (assuming you didn’t use one in the field of course). To do this simply press the ‘M’ key on your keyboard to open that panel in Lightroom. To apply the graduated filter drag in from the bottom of the frame and place the filter on the horizon line. Remember the filter’s effect is greatest starting from the direction you initially dragged in from so here the effect will be greatest towards the bottom of the frame.

Next to bring the exposure back into the foreground by increasing the exposure and shadows sliders (moving them to the right) of the graduated filter until you’re satisfied with the look. You will be able to fine tune the image by using the basic tab a bit later. You can always go back to this graduated filter if you need to make a minor adjustment later on, as well, simply by revisiting the graduated slider panel and clicking on the button (dot) of the graduated slider to activate it for editing.

Lightroom workflow - graduated filter

Apply a graduated filter to adjust the exposure of the foreground without effecting the sky from the previous step

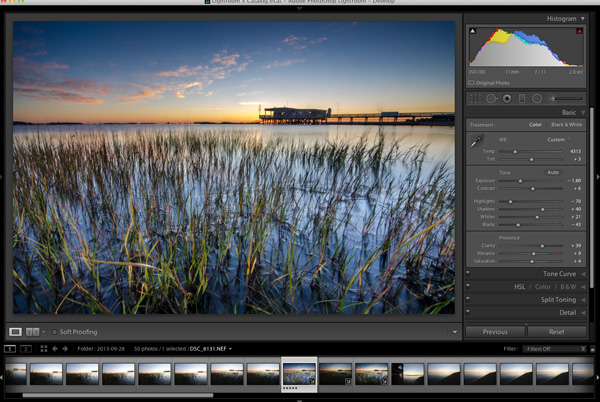
Now that you’ve exposed for the sky and brought back some foreground light, the next step is to add contrast, color, and clarity – all of which will help to make your image ‘pop’. This can be done by using the basic tab in Lightroom, which I’ve covered in Master These Five Lightroom Sliders and Your Photos Will Pop, if you’d like more information.

Lightroom workflow basic tab

After achieving a general evenness in the previous steps use the basic tab to add contrast, color and clarity

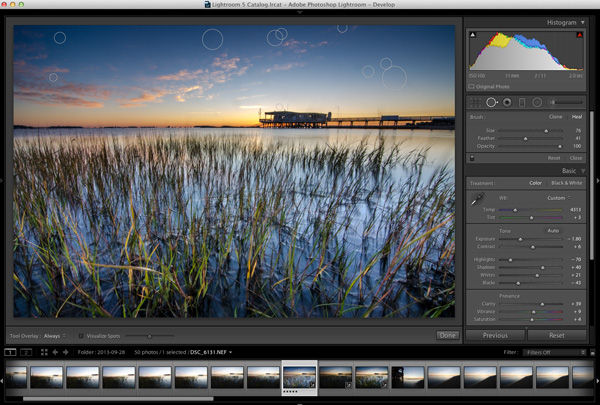
At some point you’ll want to clean up the dust spots or remove distracting pieces of litter or other unwanted items from your image so now’s a good time to jump into the clone/heal tool and do just that – as you can see I need to get my sensor cleaned.

Lightroom Workflow - Cloning

Here’s a good chance to clean up those pesky dust spots by using Lightroom’s clone/heal tool

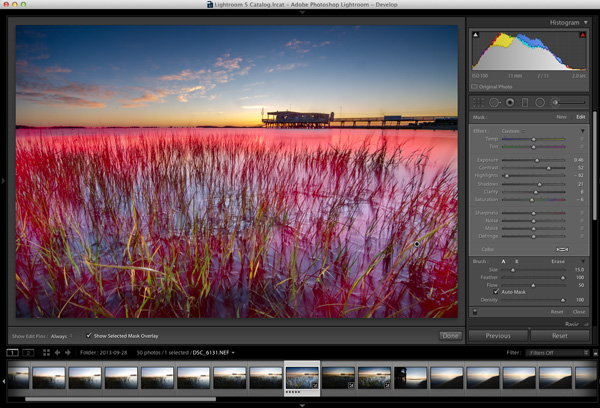
Final adjustments can be made by using a combination of different adjustment brushes. Usually you’ll want to use this tool to control specific areas of the photograph, or specific parts of the exposure. To open the adjustment brush panel press ‘K’ on the keyboard and click on your image to place a brush. If you’d like to use more than one brush you can click on ‘New’ and again click on your image which will allow you to adjust two different parts of your scene separately from one another.

In the photo below I’ve added an adjustment brush to affect the highlights, and contrast of the water at varying levels of intensity. You can control these levels of intensity by adjusting the “flow” slider of the adjustment brush which will determine how much of the effect is applied at each pass of the brush – a lower flow has less effect per pass than a higher flow.

Lightroom workflow - adjustment brush

Fine tune the highlights on the water with an adjustment brush. The red overlay can be turned on and off with the check box below the photo (or ‘O’ on your keyboard)

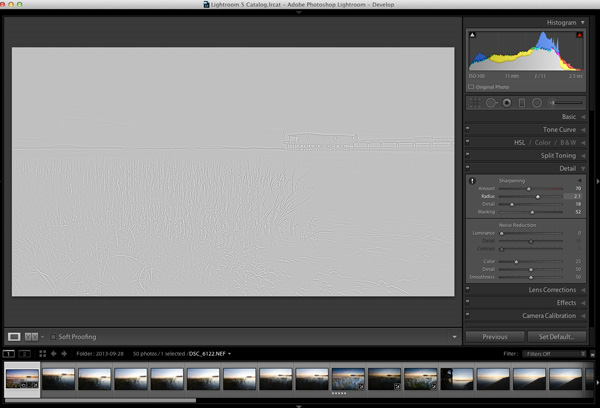
Before you call it a day – the last step is to dive into the detail panel in Lightroom and apply some sharpening. For some more information on Lightroom’s sharpening options you can watch this Youtube video A Look at Sharpening in LR4, which is part of a weekly series I run on my channel.

Lightroom workflow - sharpening

Apply any sharpening you wish using Lightroom’s sharpen panel.

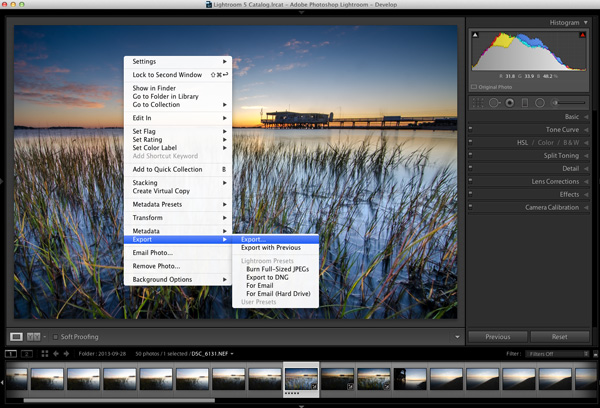
Lightroom Workflow Export

All that’s left to do now is export and share your work with the world.

Exporting and sharing

All that’s left now is to export the photo and share the results.

I hope this step by step Lightroom workflow helps you learn a bit about how to process your own photos. Share a before and after Lightroom edit in the comments below, and if you’ve got any behind the scenes shots, those are always fun to see as well. Don’t forget to let us know how you achieved the results.

Post originally from: Digital Photography Tips.

Check out our more Photography Tips at Photography Tips for Beginners, Portrait Photography Tips and Wedding Photography Tips.

Lightroom Workflow – from Setup to Finished Sunrise Photo

The post Lightroom Workflow – from Setup to Finished Sunrise Photo by John Davenport appeared first on Digital Photography School.


Digital Photography School
 
Comments Off on Lightroom Workflow – from Setup to Finished Sunrise Photo

Posted in Photography