RSS
 

Posts Tagged ‘Stacked’

Samsung details new 65/14nm stacked sensor design for improving power efficiency, density of mobile image sensors

08 Oct
Stacked Architecture of the chipset Samsung details in its new paper.

Samsung has published a paper detailing a new stacked CMOS mobile image sensor that uses a 14nm processing layer to deliver high-resolution images while reducing power consumption.

The stacked sensor consists of two chips: a 12MP backside-illuminated (BSI) pixel chip on the top that uses 65nm process and a bottom chip for analog and logic circuits that uses 14nm process. By using the super-fine 14nm process on the processing layer, Samsung says it could achieve a 29% drop in power consumption compared to current conventional sensors that use a 65nm/28nm process.

Microphotograph of Implemented Sensor (Left: Top Chip & Right: Bottom Chip)

Samsung says the chip is capable of outputting at 120 frames per second while consuming just 612mW of power. The analog and digital power supply requirements also drop to 2.2V and 0.8V, respectively, compared to conventional 65nm/28nm process chipsets.

What this all translates to is a more energy-efficient stacked sensor for future smartphones that also manages to improve data throughput and reduce noise. It also paves the way for creating sensors with smaller pixel pitches, maximizing the potential for even higher-resolution sensors without increasing the size of mobile sensors. As illustrated in the below graphic, a 16MP sensor with a 1.0um pixel pitch is the same size as a 13MP sensor with a 1.12um pixel pitch.

Of course, smaller pixels means each pixel will be less sensitive, but Samsung emphasizes this shortcoming can be overcome through its pixel-merging technologies such as its Tetracell (2×2) and Nonacell (3×3) technologies, which will merge data from neighboring pixels together to achieve better image quality when light is scarce.

Specifications of the 12MP sensor Samsung details in its paper.

Samsung specifically notes the power-saving nature of stacked sensors using the 65nm/14nm process will be ‘critical’ for 8K video capture and even higher-resolution sensors, as power consumption is one of the biggest factors limiting 8K capture on current smartphones.

As tends to be the case with developments of this kind, there’s no knowing when we might see this 65nm/14nm stacked sensor design inside a consumer smartphone.

Articles: Digital Photography Review (dpreview.com)

 
Comments Off on Samsung details new 65/14nm stacked sensor design for improving power efficiency, density of mobile image sensors

Posted in Uncategorized


How to Simulate Long Exposure using Stacked Image Averaging

18 Aug

The post How to Simulate Long Exposure using Stacked Image Averaging appeared first on Digital Photography School. It was authored by Rick Ohnsman.

Silky water effects, streaked clouds, motion-smoothed with an ethereal look; long exposure photography seems to be in vogue as photographers discover the looks that can be created. There are multiple ways to achieve this. The most basic is to buy a standard neutral-density photography filter which cuts the light, allowing you to use long shutter speeds without overexposing your shot. You can achieve exposures minutes long, especially when using 10-stop ND filters like the Lee Big Stopper or even the 15-stop Super Stopper.

I recently did an article on an alternative way to make long exposure photos, “Try this DIY Neutral Density Filter for Long Exposure Photos.” I encourage you to read the piece and learn how a piece of welding glass can be a budget substitute for more expensive photographic ND filters.

simulate-long-exposure-stacked-image-averaging

This is the same location I used for some of the other shots in this article but taken when the river was much higher and faster. The biggest difference is that I used DIY welding glass ND filter to achieve this shot. See my other article for this technique.

This article teaches you a third method of making long-exposure images with no filter at all. Unlike the welding glass trick which pretty much requires your final image to be monochrome so as not to have to fight the heavy color cast, this works great in full color, with no filter at all, and no color cast present. It’s a great method to simulate long exposure.

The technique uses a stack of multiple images of the same scene then processed with a Photoshop process called Image Averaging. It’s really quite simple and has some advantages over traditional methods with ND filters.

Advantages over the traditional ND filter method

When doing traditional long exposure photography with an ND filter you will be making long exposures.  (Duh!)  There are a few challenges with this:

  • If during the long exposure you bump the camera or things move in the shot you don’t want to be blurred, you will need to re-do the shot.
  • Long exposures can often be several minutes in length. Double the time if you also enable in-camera noise reduction. If it takes 2-minutes to expose and another 2-minutes for the noise reduction to work, you will only be making a shot every 4-minutes. This can really slow down your work, and if the light changes during that time, you could miss it.
  • With very dark ND filters, you won’t be able to see anything through the lens once the filter is in place. You will have to compose your shot, pre-focus, then mount the ND filter and make the image.
  • Determining exposure will take some calculation. You’ll check exposure without the filter then use a calculation tool to determine the new shutter speed the ND filter requires. Often this will need some tweaking after you see your shot and…yup, another re-do will be needed.
  • If back in editing you see the shots and wish you’d gone for longer or shorter shutter speeds to change the look, too bad. You’d have to go back and reshoot – if that is even possible.
Image: In fairly bright sunlight, even with the ISO at 50 and aperture at f/22, 1/5th of a second wa...

In fairly bright sunlight, even with the ISO at 50 and aperture at f/22, 1/5th of a second was as slow a shutter speed attainable while maintaining proper exposure. This was with no filter.

 The advantages of the Image Averaging method

The advantages of using the image stacking method are essentially the opposite of those things just stated above:

  • You’ll be making multiple images rather than one long one. If one of the images in the group has a problem, you may be able to eliminate it and use the rest to still successfully create the effect.
  • You can see what you’re doing! Not shooting with a dark filter means you’ll still be able to see, compose, use auto-focus, auto-exposure, and even image stabilization if you shoot handheld.
  • No calculation! Without the addition of a dark filter, you eliminate this step.
  • Adjust the length of your “simulated slow shutter” later in post-production. Want more or less blur? You can change your mind later.
  • Are conditions too bright for a standard long exposure shot? Maybe you only own a 6-stop ND filter, and daytime conditions are too bright to let you get the length of exposure you’d like. You can combine both methods to simulate a longer exposure than possible with the ND filter alone.
  • Are people in the shot you’d like to remove? Because they are likely to move during the multiple shots, when the averaging process takes place, they will vanish!
simulate-long-exposure-stacked-image-averaging

Make people disappear! Notice on the inset the people walking in the river, but on the completed shot, 15 images, each 1/5th of a second = 4 seconds simulated. They are gone.

Making the shots

Setting up and shooting the images you need for your image-averaged creation is much the same as any photography. Here are the factors and steps to keep in mind:

Composition still counts!

Because you introduce a long exposure blurred effect does not mean that you will have automatically created a good photo. Still consider how to carefully compose your image. Take into consideration that moving objects in the shot will blur and look simplified with less detail. Good long exposure shots often emphasize the contrast between static, non-moving objects (buildings, rocks, trees, etc.), and moving objects like clouds and water. Include both in your shot.

Shoot on a tripod

I mentioned you could do this handheld and, well…maybe you could. However, even with this technique, you will still want to shoot at the slowest shutter speed possible. That way, you won’t have to make too many shots for combining. Once you get much slower than 1/30th of a second (and faster than that if if you’ve just had coffee), handholding your camera is probably going to ruin your shots.

simulate-long-exposure-stacked-image-averaging

All Images ISO 50, f/22 . Top left – No filter – 20 images each 1/5 second = simulated total = 4 seconds. Top right – No filter – 35 images each 1/5 second = simulated total = 7 seconds. Bottom – 6-Stop ND filter – 15 images each 20 seconds = simulated total = 5 minutes.

How many shots?

This technique simulates long exposure by combining multiple shots.  The simple formula is:

(# Shots) x (Shutter Speed of each shot) = Total simulated shutter speed effect (in seconds)

Let’s plug some numbers into that and see the result.  Set your camera for the lowest ISO possible.  I can get my Canon 6D down to ISO 50.  Some cameras will have ISO 100 as the lowest.  Use whatever you can.  Set your aperture to the smallest aperture possible.  Meter with those settings and see how long you can make each individual shot and have it properly exposed.  Say we were able to do this in the shade: 1/4 second, f/22, ISO 50.  To get a simulated shutter speed of one minute (60 seconds), we’d need to make 240 shots.

240 shots x 1/4 second (.25) = 60 seconds

That’s a little unwieldy, and stacking 240 shots in Photoshop may cause your computer to choke. So what to do? Perhaps you don’t have an ND filter in your bag, but you do have a circular polarizer. It will help reduce the light. You mount it and now find you’ve lost 2-stops. So your exposure can be 1 second, f/22, ISO 50. Plug that into the formula, and you get:

60 shots  x 1 second = 60 seconds

If you’re shooting in lower light conditions, you may be able to get a slower shutter speed to start with. That will mean you can take fewer shots.

To make your job easier (and the computers as well), always try to get the slowest shutter speed you can for your shots. That will mean you can create the simulated long exposure with fewer shots.

Say you did have a 6-stop ND filter in your kit. You mount that, and now your settings are 16 seconds, f/22, ISO 50. Now, to get that simulated 1-minute exposure, you’d just need about four shots. Why not make 10 while you’re at it and you can simulate a 2.6 minute (160 seconds) exposure?

Had you done this traditionally, and had a 10-stop ND filter, you could take the unfiltered exposure down from 1/4 second, f/22, ISO 50 to 256 seconds (4.2 minutes), f/22, ISO 50. So, to get the same effect with a 6-stop ND filter as you could with a 10-stop by using image averaging, take 16 shots.

16 shots x 16 seconds each = 256 seconds (4.2 minutes)

simulate-long-exposure-stacked-image-averaging

35 images each 1/6 second combine to simulate a 6-second exposure. Shooting into the sun, it would probably be impossible to make a 6-second exposure without a filter.

Forget the math, make the shots!

If all that math made your head hurt (it did mine), here’s the simple way to get what you need so Photoshop can do its magic:

  • Use a tripod.  You don’t want to do all this and get shaky shots.  That will waste all your work.
  • Do what’s necessary to shoot with the slowest shutter speed you can get with the equipment you have.  In the camera, that will usually mean setting the lowest ISO and smallest aperture.
  • If you have a polarizer or ND filter, use those to get the shutter speed even slower if you can.
  • Make lots of shots for each stacked image you will create.  Depending on how slow you were able to get your shutter speed, a few dozen isn’t too many.  You don’t have to use them all when you get into editing, but having more will allow a longer simulated effect.

Putting it all together

This recipe assumes you will be using Adobe Lightroom and Photoshop in combination. You don’t have to use Lightroom. You can get your individual images into a stack in Photoshop another way if you need to (though using LR is much easier). Using Photoshop, however, is mandatory. Also, to use the Smart Objects function described, you will need a version of Photoshop that is Version 14.2 or higher. Older versions of Photoshop won’t have this.

There are ways to do this with older versions in a more manual process. If you have an older version, you will need to do a little online research to learn that technique. I used the latest version of Photoshop at this writing (Photoshop CC 20.0.4).

Let’s look at this step-by-step process visually…

simulate-long-exposure-stacked-image-averaging

1. From Lightroom, select the sequence of images you will use.  Edit the first one in the sequence to your liking.  Then select all of them and use the Sync function so all have the same settings as the first.

How to Simulate Long Exposure using Stacked Image Averaging

2. With all selected, send the images from Lightroom to Photoshop by going to Photo->Edit In->Open as Layers in Photoshop. (Photoshop will open, and the images will appear as layers in a stack). If you have a lot of images to be opened and stacked, this can take a while. Let it work.

How to Simulate Long Exposure using Stacked Image Averaging

3. With all the layers selected, in the menu select Layer->Smart Object->Convert to Smart Object. This can take a while to do its work. Be patient.

How to Simulate Long Exposure using Stacked Image Averaging

4. With the Smart Object layer selected, from the menu select Layer->Smart Objects->Stack Mode->Mean. This can also take a bit to work.

How to Simulate Long Exposure using Stacked Image Averaging

Wait for it…wait for it…and…

simulate-long-exposure-stacked-image-averaging

Presto!  You will have a simulated long-exposure image made from your stack of shorter exposures.  20 images each at 3.2 seconds, f/22, ISO 50.  No filter used.  Simulated long exposure of 64 seconds.

simulate-long-exposure-stacked-image-averaging

The water in this section of the river was pretty calm anyway, but look at the before and after areas pointed out by the arrow where the original shots were 3.2 seconds vs the combined 20 shots x 3.2 seconds = a simulated 64 seconds.

How to Simulate Long Exposure using Stacked Image Averaging

5. To finish up, go to Layer->Flatten Image.  Then File->Save As and save the finished image where you like.  If you want to give the completed image some additional tweaking, you can do that with Photoshop or Lightroom as you would with any other image.

Remember…

That’s the magic!  Here are a few things to remember for best results:

  • Consider your composition.  Look for a scene where you will have a combination of static objects that won’t move during the sequence and those that will.  An image with both will be more compelling.
  • Use a tripod.  You can do this handheld if you must, but know that any camera movement will be translated as a blur in the final result.
  • Do what you can to get as long a shutter speed with each image in the sequence as possible.  Drop your ISO to the lowest setting, use a small aperture, and use polarizing filters or whatever ND filters you have.  Longer exposures for each shot mean fewer images are needed to create a simulated long exposure.
  • Overshoot.  You don’t need to use all the images in a sequence if you decide you don’t want as much blur. However, if you don’t shoot enough, you might later wish you had them.
  • As you work through the steps, some things can take a long time.  Be patient and let your computer work.  If the process crashes, it could be you don’t have enough computer resources and will have to settle for a smaller stack.
simulate-long-exposure-stacked-image-averaging

5 images, each 6 seconds = a simulated exposure of 30 seconds. No filter used.

simulate-long-exposure-stacked-image-averaging

10 images, each 1/4 second combine to give a 2.5-second simulated exposure. This can be a great technique to use for getting silky water effects when you don’t have an ND filter and only need a longer exposure of a few seconds.

Final thoughts

Is this a better method than using an actual ND filter? Like so many photographic things, the answer is probably…it depends. Maybe you don’t have a filter or have one with you. Perhaps you don’t need a really long exposure, but just one a little longer than you can get with a low ISO/small aperture combination such as when seeking blur on a waterfall. Maybe you need to vanish people and don’t want to make a single multi-minute shot for various reasons. Alternatively, perhaps you have an ND filter but need an even longer exposure than it can give you.

There are lots of reasons to add this How to Simulate Long Exposure using Stacked Image Averaging Technique to your bag of tricks. Give it a try, and I’m sure you’ll have fun. Share your images with us in the comments!


simulate-long-exposure-stacked-image-averaging

The post How to Simulate Long Exposure using Stacked Image Averaging appeared first on Digital Photography School. It was authored by Rick Ohnsman.


Digital Photography School

 
Comments Off on How to Simulate Long Exposure using Stacked Image Averaging

Posted in Photography


These drink coasters look like a camera lens when stacked

02 Sep

Looking for a stylish way to keep condensation from forming unsightly rings on your desk? Are you a huge photography nerd? Fotodiox has a solution that will keep both parts of your psyche nice and happy: cup coasters that, when you stack them together, appear to form a single camera lens.

Fotodiox calls the quirky product the CraftMaster LenzCoaster, and offers them in three different varieties.

A careful look at each LenzCoaster ‘lens’ reveals that it is split into five sections, each section a different drink coaster with silicone padding. Magnets embedded in each coaster keep the pieces together when stacked.

The lens coasters are offered in white and black, the latter of which comes in a variety with black and red ‘caps.’ Fotodiox is offering all three versions now for $ 25.

Articles: Digital Photography Review (dpreview.com)

 
Comments Off on These drink coasters look like a camera lens when stacked

Posted in Uncategorized


How to do Post-Processing of Focus Stacked Images

22 May

Let me take you on a short walk through Lightroom and Photoshop. There are relatively few steps required to process focus stacked images. In a previous article (How to Photograph the Images Needed For Focus Stacking), I went through what I think you will find is the best and easiest way to take the required photographs.

focus stacked image

My Melbourne tea cup

This image is acceptably in focus from the front to the back. You can only achieve this sort of large depth of field by taking, and computationally combining, several photographs. You can work through the image, taking photographs which are focused on different points, then combine those photographs with software. Photoshop does the job well, but there are also other specialized programs for doing focus stacked images. Zerene Stacker and Helicon Focus are the ones which seem to be mentioned most often.

I hoped that the tea cup made a bright, attractive image, and gave a clear illustration. However, it is hardly a great photograph, is it? Being a little more aspirational, I have mostly used this technique to produce images of palm leaves. It would really be great if you could find your own project, your personal muse to apply this technique.

focus stacked image

Palm leaf

I confess that I am not always the most patient person when it comes to processing. Every now and then, I have spent hours on one image, but I generally like to get things done quickly. However, with focus stacked images, working in Lightroom, then Photoshop, I actually rather enjoy the process. I think part of the reason for that is that I am happy with the final product, but it is also quite a pleasant, simple routine, which can be almost relaxing.

Stage One – Lightroom

One of the joys of photography, and computers too is that there is often more than one way of doing things. This is my approach, it is probably not the only approach, but it works well.

Firstly, I import the RAW files into Lightroom.

focus stacked image

Import to Lightroom

The images to be focus stacked

The images below have not been processed, just converted to jpegs. I thought you should have some idea what I started with, and that it might be helpful for you to see where each individual shot was focused.

focus stacked image

Image #1

The next shot was focused on the other side of the frame, on the left. In the actual situation of taking the photographs, it was easy to see which part of the leaf was furthest from the camera, and which was just a little closer.

focus stacked image

Image #2

This is moving forward, with focus along the left edge of the leaf.

focus stacked image

Image #3

If you are photographing a subject which has a distinct edge, like this leaf, something running from the back to the front of the object, it can be very useful. It makes focusing easier, and it gives you something which you can work along in equal increments.

focus stacked image

Image #4

For the next shot, I moved to the other side of the leaf.

You may notice that I like to be extra careful to make sure that the front part of the photograph, where the viewer’s eye will go first, is extra sharp.

focus stacked image

Image #5

Three shots cover the front section at slightly different depths.

focus stacked image

Image #6

Lightroom adjustments

For these shots, I knew what my goal is for the final image. To that end, I did a modest amount of processing, using only the Basic panel in Lightroom. I certainly would not do anything like lens corrections, or transformations, or local adjustments – nothing beyond the basics, only global adjustments. The real work is going to be done by Photoshop, and we should give it the best possible chance to do its job.

It might be leaves, your favorite possessions, or even be a landscape (I would love to try and make a focus stacked portrait, a tight portrait with focus from front to back) the point is that your project will require your own individual processing. This is what I did for the highly-textured leaves.

focus stacked image

Lightroom settings

This processing revealed a few details and gave the images a little more bite or edge. That seemed to work well, and move towards what I had in mind for the final image. I then synchronized all settings in Lightroom.

focus stacked image

So far so good?

With all the images selected, in this case just six, press G and then CTRL/CMD + A. You can then move to the second stage, by going to Photo > Edit in > Open as layers in Photoshop.

focus stacked

Select Photo > Edit In > Open as Layers in Photoshop

Stage Two – Photoshop

You may well have Photoshop set up in your own individual way. This is what you should see in the Layers panel once your images are opened.

focus stacked image

The first step in Photoshop is to select all the layers. My habit is to do this by clicking on the top layer, holding down shift and clicking on the bottom layer.

focus stacked image - layers selected

All layers, all six images, selected.

Another confession? There is a part of me which would like to make this sound much more difficult, at least a little bit cleverer. There would then be more chance of you being impressed. However, the next two steps are too easy.

Align the images

Because the point of focus has moved through the image, the size of the object in the frame will have shifted slightly. But, Photoshop can handle this for you.

focus stacked image

Edit > Auto-Align Layers has always worked perfectly for me.

You could choose to go to great lengths to resize the images by hand, making the actual object the same size in each image, being careful to align parts of the subject in each of the photographs. I have never found it necessary, and any extra steps to achieve alignment, would probably be best covered by a video. For the moment, I am happy that Photoshop has never let me down using Auto-Align Layers.

focus stacked image - auto-align layers

The auto-align layers dialog box

Under the Projection area, I have found that Auto works perfectly well.

For the Lens Correction section, I have found it best to uncheck Vignette Removal and Geometric Distortion (as shown above). Those choices gave me a couple of strange results and did not provide any discernible benefit. I like to think that the secret for this smooth progress is having taken good images in the first place. Push OK, and Photoshop does its thing and does it very well.

Of course, you are welcome to try whatever settings you like. In fact, I would very much encourage you to experiment, have a play! However, the old KIS acronym, of Keeping It Simple, seems to work well enough.

Blend the layers

Next, go to Edit > Auto-Blend Layers. I do wish I could make this sound more difficult.

focus stacked image

Auto-Blend Layers…

As I am sure you will realize, you should choose the Stack Images option in the Auto-Blend Layer dialog box that pops up. With the images I have been feeding to Photoshop, I have chosen to put a check mark next to Seamless Tones and Colors.

But, if that does not produce a result you are happy with, it costs you very little time to experiment. This is what has worked well for me. The images which you have loaded into Photoshop may have been created in different circumstances to mine, and your desired final image may be very different too. The important thing is that the main steps will be the same.

focus stacked image

Auto-Blend Layers dialog box.

Below, you can see the layer masks which Photoshop has created. On a layer mask white reveals, so the white areas are where Photoshop has determined that the focus is good. The white areas are the parts that are allowed to come through and contribute to the final image. In this example, looking at the masking of the layers, you can see the focus stepping forward.

focus stacked image

I think the masks are quite interesting, pretty even.

Merge layers

Finally, right click on any layer and choose either of the Merge commands.

focus stacked image

Merge the layers.

What you see now, in your main Photoshop window, is your single, focus stacked image.

focus stacked image

Final focus stacked image result!

You might see the marching ants indicating a selection by Photoshop of part of the image. My advice is simple. It seems random in its placement, I have never found it helpful, so just ignore it.

When closing the image in Photoshop, simply click save, and you will find a file added to your Lightroom library. In this example, where there were six files to start with, there are now seven (the new focus stacked image has been added).

This extra file will be in TIFF or PSD format (whatever you have setup in your LR preferences).

That is just about it. Stages Two and Three, fulfill our initial brief. You have produced a focus stacked image. All that remains is to export the image from Lightroom.

However, I think you might find it a little unsatisfactory to leave the process at that point, to walk away with the job not completely finished. I think you might want to see what happened next.

Stage three – final processing

I chose to so some further processing to the TIFF file in Lightroom. Using the Adjustment brush I added some positive clarity, +20, on to the top section of the image. By pushing the ‘O’ key, you can see the red mask where painting has been applied.

focus stacked image - location adjustments

The red area is where a local adjustment has been applied of +20 Clarity.

I added a graduated filter with the exposure pulled down 2 stops to the left side of the image.

focus stacked image

A Graduated filter of -2 Exposure was added to the left side of the image.

Another was added to the bottom too, as I really like the black to be unquestionably pure black.

focus stacked image

Another Graduated filter with -2 Exposure was added to the bottom of the image.

I then took that image back into Photoshop, where I used the bucket to fill some more bits of black around the bottom left corner of the leaf.

Then I spot retouched some bits of nature which were a bit too real. In particular, I think any white spots are very distracting. Then I turned to one of my long-term favorites, Nik’s Silver Efex Pro.

focus stacked image

Sadly, it seems likely that Google is going down the route which it has gone down many times before. Having purchased the German company Nik Software a few years back, it seems it is now allowing the software to die through lack of attention. However, I still like the results I get from Silver Efex Pro and still use it. In this case, I applied the High Structure – Smooth preset.

I then cropped the into a square. The final result is below.

focus stacked image

Final focus stacked image.

Conclusion

I hope the first article helped you take photographs for focus stacking and this one helps you with the processing. Most of all, I hope that you might have a go at this. I hope you do not mind me repeating the same point, it would be great if you could find your own project and apply these techniques. For me, that is a major reason to write these articles.

Please share your questions, comments and focus stacked images in the section below.

The post How to do Post-Processing of Focus Stacked Images by Richard Messsenger appeared first on Digital Photography School.


Digital Photography School

 
Comments Off on How to do Post-Processing of Focus Stacked Images

Posted in Photography


Trainspotting Hotel: Stacked Shipping Containers Overlook the Rail Tracks

16 May

[ By SA Rogers in Boutique & Art Hotels & Travel. ]

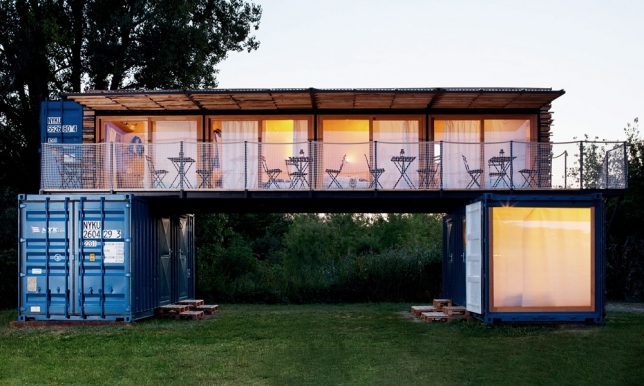
The phrase ‘Trainspotting Hotel’ probably doesn’t conjure visions of a cozy, comfortable and safe place to lay your head at night, but this hotel gets its nickname from its location overlooking rail tracks rather than anything relating to the heroin-charged cult classic film. Obviously, that’s a good thing for guests who want to enjoy a peaceful getaway on the Elbe River near the town of Litomerice, Czech Republic at this unusual pop-up structure by Artikul Architects. 

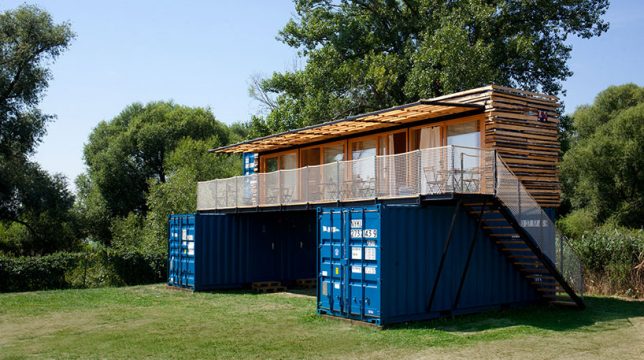
The hotel is comprised of just three shipping containers, with one forty-foot crate stacked atop two twenty-foot crates in a perpendicular arrangement to create a covered space underneath. The two ground-floor containers house the bathrooms, storage and one of the guest rooms, while four more guest accommodations are set into the top layer.

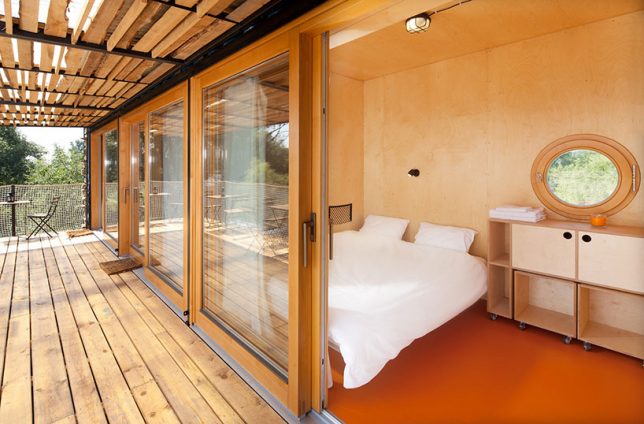
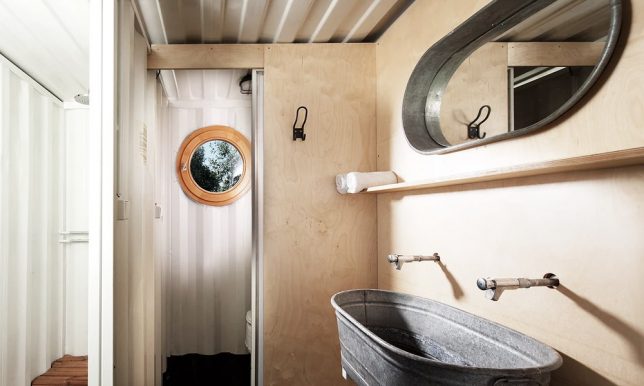
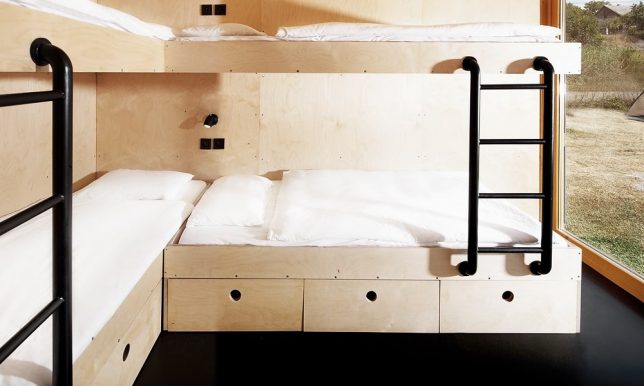
The client commissioned Artikul to produce a modular design that can be easily taken apart and moved when desired, and would have a light footprint on the land. The hotel has its own built-in water reservoir for the showers and sinks, and utilizes waterless toilets, and the bedrooms are compact but warm and welcoming, fitted with bunk beds and lined with birch plywood.

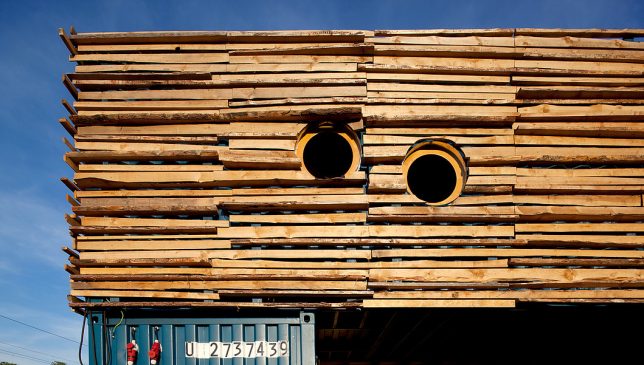
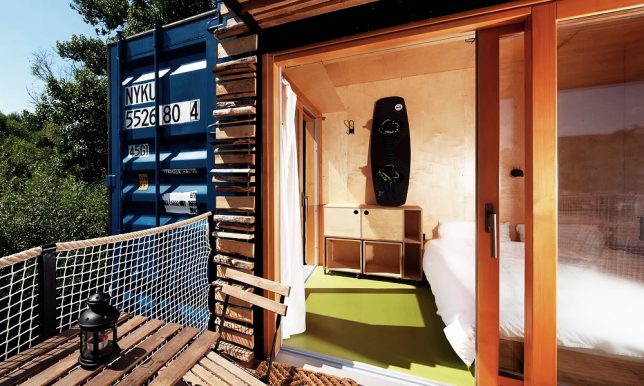
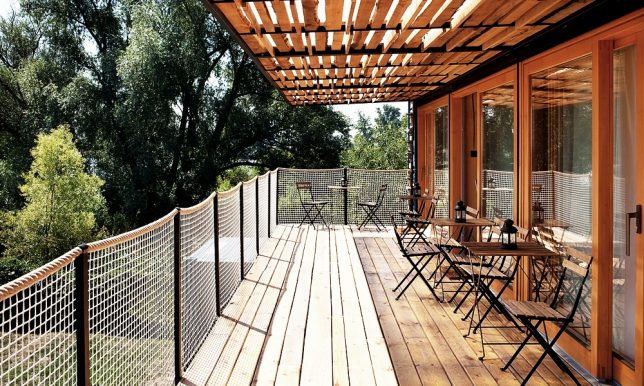
Artikul is known for producing sustainable structures, so it’s no surprise that they did something creative using recycled and natural materials. Barely any modification to the containers was necessary, preserving the ability to load them onto a truck. The top container is sheathed in reclaimed wood and features a terrace and awning so guests can hang out in the open air and enjoy the views.

Share on Facebook


[ By SA Rogers in Boutique & Art Hotels & Travel. ]

[ WebUrbanist | Archives | Galleries | Privacy | TOS ]


WebUrbanist

 
Comments Off on Trainspotting Hotel: Stacked Shipping Containers Overlook the Rail Tracks

Posted in Creativity


Stacked: Cleverly Designed Chinese Hotel Gives Everyone a Unique View

04 May

[ By SA Rogers in Boutique & Art Hotels & Travel. ]

Despite sharing a tiny footprint of land with other guests at this Chinese hotel, you can practically forget anyone else exists altogether thanks to a clever stacked arrangement that points each level in a different direction. Step out onto your private balcony – located on the roof of the room below – and look out onto the peaceful forest of rural Huang Shan, Anhui Province, China. Designed by Shanghai-based architecture firm Bengo Studio, the Qinyushan Tree House is a beautiful use of space.

A spiral staircase runs up through the center of the hotel, which includes two guest rooms, two bathrooms, one living room, and a ‘landscape room’ located at the top of the building. Each room has its own roof access with a glass railing to avoid interrupting views of the trees.

Elevated off the forest floor, the hotel features curvy volumes fanning out in different directions from the central core, capped on each cantilevered end by floor-to-ceiling windows. Guests ascend an enclosed glass hallway to either walk down into the lowest bedroom and bathroom, or ascend to the upper levels.

Its vertical wooden cladding helps it blend into its natural environment, and the minimalist design is an interesting take on modern treehouse-inspired structures.

Share on Facebook


[ By SA Rogers in Boutique & Art Hotels & Travel. ]

[ WebUrbanist | Archives | Galleries | Privacy | TOS ]


WebUrbanist

 
Comments Off on Stacked: Cleverly Designed Chinese Hotel Gives Everyone a Unique View

Posted in Creativity


Sony shows off 3-layer stacked smartphone image sensor that can shoot 1000 fps at 1080p

08 Feb

Sony has today announced the development of a 3-layer stacked CMOS image sensor with DRAM for smartphones, making it possible to capture video at 1000 fps. The new chip comes with a DRAM layer in addition to the conventional 2-layer stacked CMOS structure with a back-illuminated layer of photo-sites and a circuit layer for signal processing. The DRAM acts as a temporary buffer for image data that is recorded at very high speeds, before it is put out at normal speed to a conventional image signal processor.

The new design results in very fast readout speeds of 1/120sec for a 19.3 MP image which is approximately 4x faster than conventional chips. Due to the reduction of time it takes to read each line of pixels, the so-called Jello-effect, which occurs when shooting fast-moving subjects on cameras without mechanical shutter, has been greatly reduced.  

The sensor has also been designed to keep noise generated between the circuits on each of the three layers at a minimum. Given the technology is currently still in development stage, there is no way of knowing when it will appear in any production devices. That said, looking at the quite impressive slow-motion footage in the sample video reel below, we sincerely hope it won’t be too long. 

Articles: Digital Photography Review (dpreview.com)

 
Comments Off on Sony shows off 3-layer stacked smartphone image sensor that can shoot 1000 fps at 1080p

Posted in Uncategorized


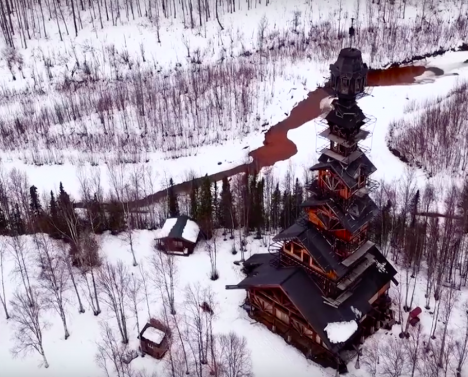
Dr. Seuss Tower: Get a Look Inside Precariously Stacked Cabins

08 Apr

[ By Steph in Architecture & Houses & Residential. ]

Screen Shot 2016-04-08 at 11.43.12 AM

The mysterious eight-story stacked cabin house spotted among the trees in a remote area of Alaska is even cooler than previously thought, now that filmmakers have caught up to creator and self-described “frustrated architect” Phillip Weidner. In a two-minute documentary by Great Big Story called ‘We’re Not in Whoville Anymore,’ Weidner calls his Frankenstein creation ‘Goose Creek Tower,’ and reveals his motivation for building it, along with a few of its most notable features.

Screen Shot 2016-04-08 at 11.42.26 AM

Screen Shot 2016-04-08 at 11.42.43 AM

“I like building. I just designed it out of my head, we didn’t have blueprints. We drew it out on cardboard, plywood, just as we were going. I started to build a 40 by 40 scribed log cabin, and I realized I could put pillars on top and put another house on top of the house. And I just kept going. We got to 185 feet and we stopped because two hundred feet is federal airspace.”

Screen Shot 2016-04-08 at 11.57.29 AM

Screen Shot 2016-04-08 at 11.42.52 AM

Previously, we got a look at the outside of the structure overlooking Mount McKinley and the Denali National Park via Alaska Aerial Footage, which captured a dizzying video of its full height against the snowy landscape.

Screen Shot 2016-04-08 at 11.57.50 AM

Screen Shot 2016-04-08 at 11.57.41 AM

Screen Shot 2016-04-08 at 11.58.03 AM

The tower remains pretty bare-bones, with all of the framing complete but no windows or finished surfaces. There are even more levels than you can see from the outside, as the interior winds from one split-level platform to the next. Weiner, a former attorney, reveals that a hidden escape tunnel at the basement level leads to a safe room.

Screen Shot 2016-04-08 at 11.58.34 AM

Screen Shot 2016-04-08 at 11.58.57 AM

Screen Shot 2016-04-08 at 11.59.53 AM

“I wanted to be able to see,” says Weidner. “And that’s the reason I went up. You could see for at least three hundred miles. And of course when the northern lights are out, you can really see ‘em. I hope that Goose Creek Tower will inspire other people to do worthwhile things, not just in building but whatever they do with their life. And every time I go up there, it’s a different experience. It kind of gives you a sense of the enormity of the universe.”

Share on Facebook


[ By Steph in Architecture & Houses & Residential. ]

[ WebUrbanist | Archives | Galleries | Privacy | TOS ]


WebUrbanist

 
Comments Off on Dr. Seuss Tower: Get a Look Inside Precariously Stacked Cabins

Posted in Creativity


Tetris House: Modular Structures are Made to be Stacked

18 Dec

[ By Steph in Architecture & Houses & Residential. ]

tetris house 6

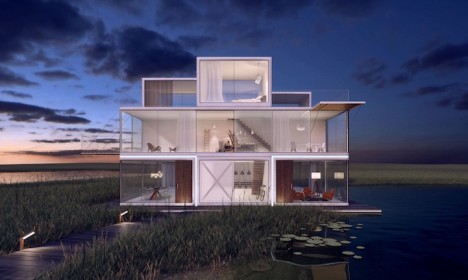
Modular living units in a range of sizes can be stacked, spun and cantilevered over each other to create unique custom dwellings with views in every direction. The Tetris House makes it possible for homeowners to design their homes to their own specifications, from the size of each room to the orientation of the windows, and enables developers to create apartment complexes that can be easily expanded or reduced in size.

tetris house 2

tetris house 3

tetris house 4

Dutch design studio Universe Architecture offers three basic sizes of steel units that can be enhanced with balconies, shutters, glazing and rooftop terraces. Plug three or more units together in pretty much any configuration you can think of, orient some of them to face the sun or your desired view, and stick on some pop-up decks with glass railings to take it all in.

tetris house 7

tetris house 8

tetris house 1

The company teamed up with interior design firm i29 to create minimalist, compact and efficient interiors that can adapt to all the different possibilities in each building’s individual floorpan, adding interior walls, staircases, fireplaces and other basic elements. The prototype will soon be completed in the Netherlands, with plans to expand availability to other countries in the future.

Share on Facebook


[ By Steph in Architecture & Houses & Residential. ]

[ WebUrbanist | Archives | Galleries | Privacy | TOS ]


WebUrbanist

 
Comments Off on Tetris House: Modular Structures are Made to be Stacked

Posted in Creativity


Stacked Ceramics: Shop Floor Made from 25,000 Pieces of Pottery

13 Sep

[ By WebUrbanist in Design & Fixtures & Interiors. ]

ceramic surface side view

A 400-year-old ceramics studio in Japan has completely remodeled their store with a most remarkable addition: a walkable surface constructed from a stack of tens of thousands of scrapped pieces of crockery.

ceramic walkable surface

ceramic stacked tableware discards

Yusuke Seki (photos by Takumi Ota) collected plates, saucers, bowls and cups for this creative endeavor, all to create a display platform for Maruhiro Ceramics in Hasami, Nagasaki.

ceramic steps display level

ceramics on display

To facilitate a more intimate experience, a pair of stairs is placed by the display platform, allowing visitors to walk up and peruse wares, all while enjoying a sense of wonder from the layers of history right beneath their feet.

ceramic platform in use

ceramic wood display cases

Traditionally, flawed ceramics are simply thrown into dedicated landfills, while this rethought application brings pieces of history back up to the surface.

ceramic top detail

ceramic space exxterior

Since the discards are eliminated before the coloring and glazing process, there is an aesthetic consistency to the materials reused in this creative context.

ceramic stairs side

ceramic view outside

Individually fragile, the tableware was turned into modular bricks by being filled with concrete, but their individual shapes and sizes still made this a daunting endeavor to actually deploy. Still, the result is compelling and interactive – not so much of a crackpot idea after all, as it turns out.

Share on Facebook


[ By WebUrbanist in Design & Fixtures & Interiors. ]

[ WebUrbanist | Archives | Galleries | Privacy | TOS ]


WebUrbanist

 
Comments Off on Stacked Ceramics: Shop Floor Made from 25,000 Pieces of Pottery

Posted in Creativity