RSS
 

Posts Tagged ‘Secrets’

Subterranean Secrets: The Mystery of Liverpool’s Tunnels

01 Oct

[ By Steph in Culture & History & Travel. ]

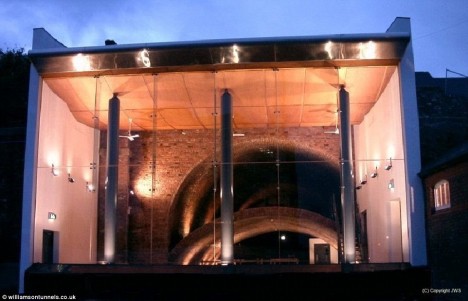
williamson tunnels

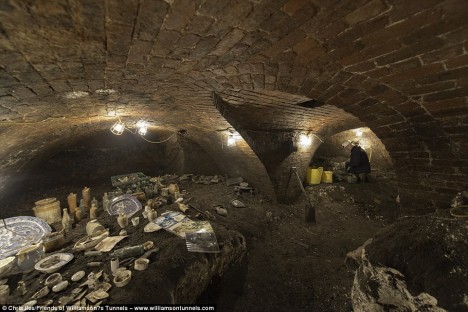
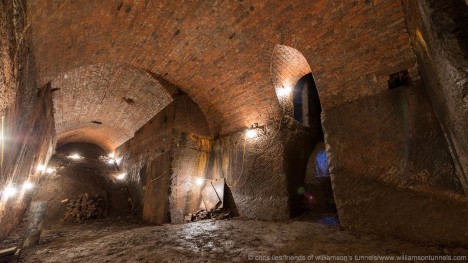
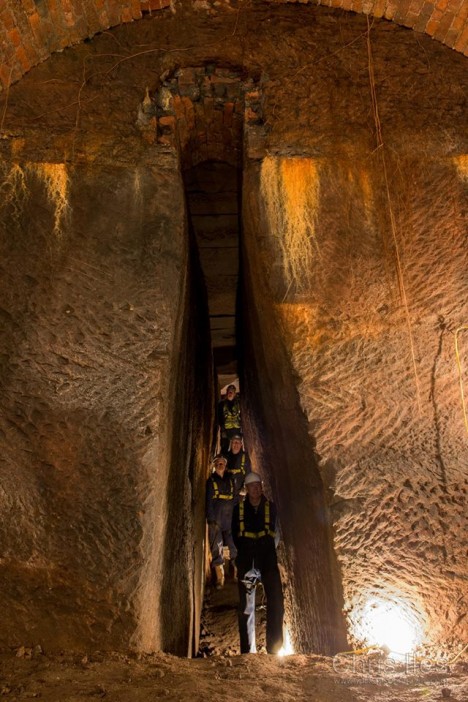
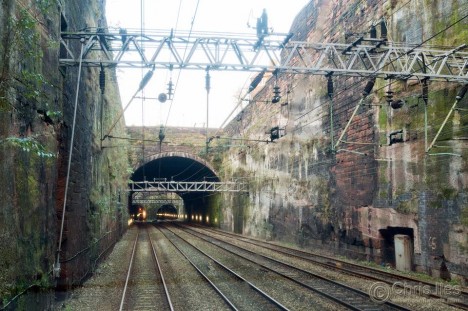
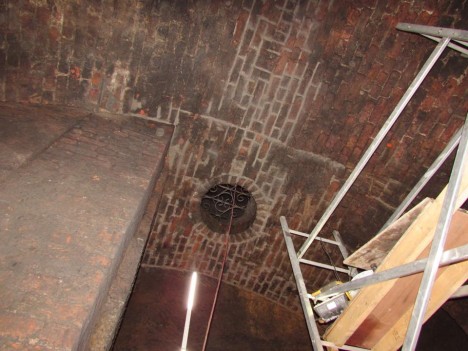
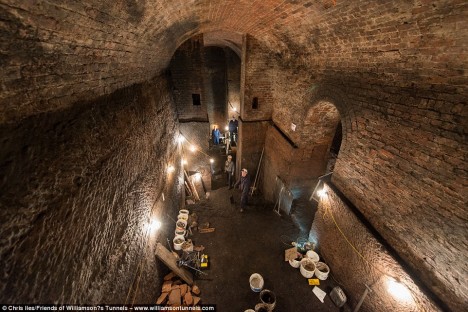
Starting in the basement of a home owned by a wealthy philanthropist in the 1700s, a network of tunnels descends into the earth beneath the city of Liverpool, their full extent still undiscovered even after fifteen years of exploration. Why did tobacco merchant Joseph Williamson start building them, and just how far do they go? Some people say they were meant to be the final refuge of a death cult in the event of the apocalypse, and the secretive nature of the tunnels don’t do much to refute that theory.

williamson tunnels 2

liverpool tunnels 1

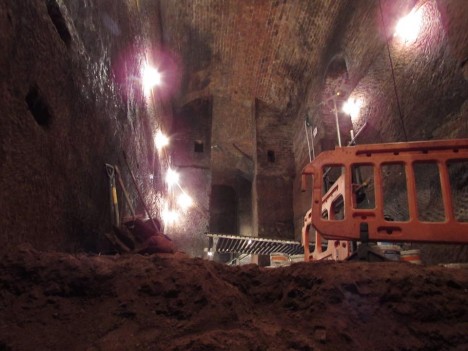
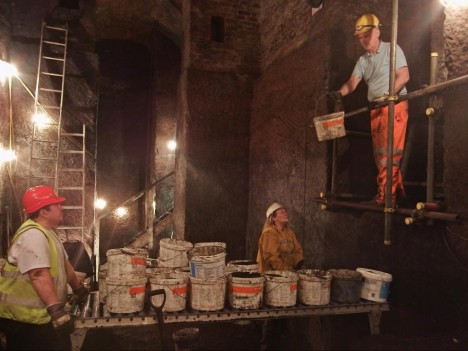
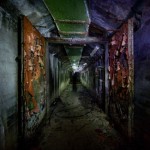
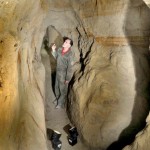
There are no records from Williamson’s time to give experts any clues, and over the centuries, the portions of the tunnels that were penetrated by the public were filled with trash and debris, creating quite a cleanup job for locals working to preserve them. The twisting labyrinth was forgotten for decades before their rediscovery in 2001, and a group called ‘Friends of Williamson’s Tunnels’ has been volunteering to dig them out ever since.

liverpool tunnels 3

liverpool tunnels 4

liverpool tunnels 9

Known for his charity work, Williamson may have just initiated the project to provide work for the many local men who were unemployed after the Napoleonic wars. Some of the tunnels seem to have been built and then immediately bricked up. But this and other maze-like pathways that ultimately lead nowhere could also be an attempt to disguise the true breadth of the tunnel system.

liverpool tunnels 6

liverpool tunnels 5

liverpool tunnels 7

Of course, the most obvious explanation is that Williamson was using them for illegal activity. Smuggling has been the main purpose of similar tunnels around the world, from the drug tunnels at the Mexican-California border to the human trafficking tunnels of Portland, Oregon. It’s impossible to say now whether these particular ones carried illicit goods, were envisioned as emergency bunkers or were perhaps a part of some grand plan to redevelop Liverpool.

liverpool tunnels 2

liverpool tunnels 8

williamson tunnels 3

The volunteers digging the tunnels have filled over 120 dumpsters with debris since they began, and they still have no idea how much more work is left to complete. Among it they’ve found all sorts of archaeological treasures, from pipes to ceramics. Many of these are now housed in the Liverpool Heritage Center, where excavated portions of the tunnels can be toured.


Share on Facebook


[ By Steph in Culture & History & Travel. ]

[ WebUrbanist | Archives | Galleries | Privacy | TOS ]


WebUrbanist

 
Comments Off on Subterranean Secrets: The Mystery of Liverpool’s Tunnels

Posted in Creativity


iFixit tears down Sony’s new a7R II to find its secrets

19 Aug

Earlier this week we took you ‘under the hood’ of the Sony a7R II, metaphorically. Now, thanks to our friends at iFixit, it’s possible to take a literal look inside the a7R II. Ifixit took delivery of a production sample a7R II at around the same time as we did, but while we were out testing its AF system and checking to see how its sensor measures up, the hard-working crew at iFixit were busy taking it to pieces. Click through to see what they found  

Articles: Digital Photography Review (dpreview.com)

 
Comments Off on iFixit tears down Sony’s new a7R II to find its secrets

Posted in Uncategorized


Discover the Secrets to Perfectly Focused Photos [Save 50% on Jay & Varina Patel’s Focus Collection]

06 Jul

It’s deal #6 in our mid year sale and this one is courtesy of two of our favourite photography teachers, Jay & Varina Patel.

For the next 24 hours, you can save 50% off their Focus Collection — In Sharp Focus & Hyperfocal Distance!

The $ 44.50 discount will be automatically applied when you click ‘Add to the Cart’ here.

These two in-depth courses will help master your focusing techniques.

You’ll learn the best practices and camera settings for getting sharp focus every time, and gain the confidence to get in close using a wide angle lens.

With 15 video lessons, over 80 minutes of invaluable content taught in the field, case studies and a post processing workflow walkthrough, not only will you be shown how to handle difficult focusing situations, but you’ll see how to get creative with focus too.

One day is all you have, so get this great training now before time runs out!

googletag.cmd.push(function() {
tablet_slots.push( googletag.defineSlot( “/1005424/_dPSv4_tab-all-article-bottom_(300×250)”, [300, 250], “pb-ad-78623” ).addService( googletag.pubads() ) ); } );

googletag.cmd.push(function() {
mobile_slots.push( googletag.defineSlot( “/1005424/_dPSv4_mob-all-article-bottom_(300×250)”, [300, 250], “pb-ad-78158” ).addService( googletag.pubads() ) ); } );

The post Discover the Secrets to Perfectly Focused Photos [Save 50% on Jay & Varina Patel’s Focus Collection] by Darren Rowse appeared first on Digital Photography School.


Digital Photography School

 
Comments Off on Discover the Secrets to Perfectly Focused Photos [Save 50% on Jay & Varina Patel’s Focus Collection]

Posted in Photography


3 Secrets for Creating Beautiful Nature Photos

19 Jun

Secret #1 Start with you

What elements of nature do you particularly like? You may already be clear on this; but even if you are, write it down, as something magical happens when you get things out of your head and living in front of you on paper.

00 Copyright Beth Jennings Photography Digital Photography School Nature 2423

Are you a flowers person? Do you like trees? How about specific elements of nature, for example, mushrooms on forest floors? No answer is a silly answer – just write them all down, no-one is screening what you say.

You have your own take on the world and you need to work out what it is. Then you’ll make nature photos that have a little piece of you in them.

Secret #2 How close is too close?

You can go as far away, or as close as you like when photographing nature. Just so long as the element of nature is clear within the photograph.

Let’s break it down a bit:

You can get a fair distance from your nature subject and allow it to dominate your frame. These trees were captured in late afternoon light with a polarizing filter to make the blue sky really intense. The light is pouring through – totally natural. Would you believe this was shot on transparency film – no post-production, ha! However, that means I can’t give you the camera settings. (slaps forehead).

Have a guess, what do you think the settings may have been?

Either ISO 100 or 400 because that’s what was available at the time! Handheld – 1/125th of a second or faster. F/? something large to keep the depth of field, maybe, f/11.

01 Copyright Beth Jennings Photography Digital Photography School Nature transparency

Take a few steps in toward your trees and your composition changes. The trees run right to the edges and now we are so close that some are cropped off. See how the meaning of this picture changes, just by moving in closer? (Yes, it’s a different scene, but work with me here!)

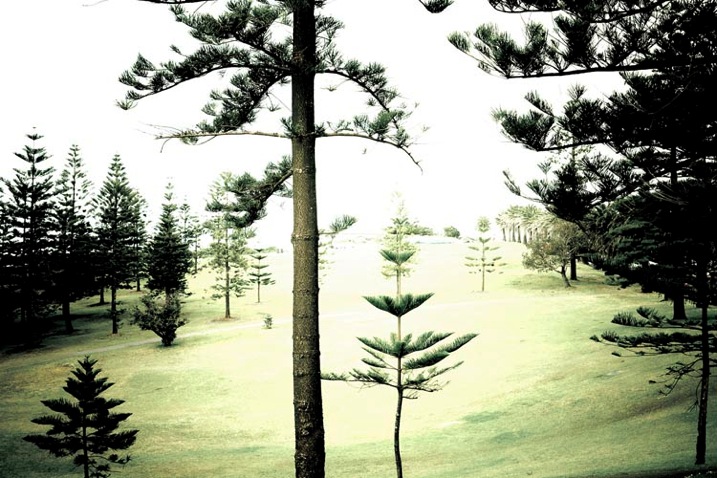
Where the previous picture was about the vast form of the trees, and the setting sun, this one is about the delicate nature of the branches and pine needles. It was taken about 11am on a bright, overcast day. The deep green needles contrast against the light, bright background.

See the careful placement of all the trees in the composition? Look all the way to the edges, then through all the grassy areas. Notice the care in the spatial placement of the trees and the green grass? Take your time, and really see where the elements are falling in the composition.

03 Copyright Beth Jennings Photography Digital Photography School Nature Photography 4348

ISO 400, f/10, 1/160th

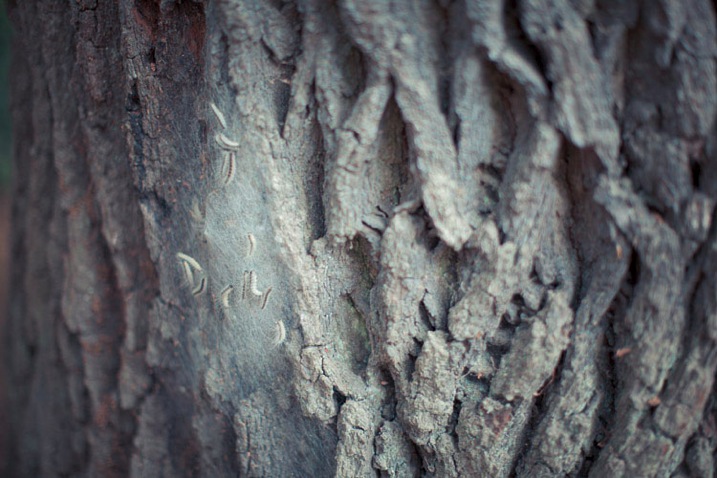
Take a few more steps in on one tree, right up close on the detail. You have a choice now about rendering most of the capture out of focus, or creating lots of depth with the f-stop. This one has a shallow depth of field, to keep the focus on the tiny caterpillars. You can see parts of the texture of the tree to give a little hint as to the environment they live in.

It was late afternoon with dappled, soft light coming through trees. The little creatures were spotted in their web in a soft, spot-lit area.

04 Copyright Beth Jennings Photography Digital Photography School nature 2229

ISO 320, f/1.2, 1/1600th

Secret #3 Move your feet

When you come to photographing nature, it pays not to be too fixated on how you want to photograph your subject in terms of distance to subject, camera angle, and technical settings. Do have ideas in mind, but be open to the possibility that you may see something else (possibly better) on the day.

05 Copyright Beth Jennings Photography Digital Photography School Nature 0332

Walking and looking does wonders. Relax and enjoy your surroundings first. The beautiful things will come to you as long as you don’t force it.

When something catches your eye, go up closer to it, study it, and figure out what element in particular it is that interests you. There is spontaneity in capturing nature in its living, untouched state. The key is being open to the most beautiful, particular and unique elements, and finding your composition, lighting and camera settings to suit.

06 Copyright Beth Jennings Photography Digital Photography School Nature Photography 2 5

It does sound a little new-age, but give this method a try, and hey, it costs nothing but your time to walk around and breathe it in.

So there you have it – three secrets revealed as to how you can create pretty nature images, without it costing you a cent!

What’s your secret to getting better nature photographs? Drop it in the comments area below.

googletag.cmd.push(function() {
tablet_slots.push( googletag.defineSlot( “/1005424/_dPSv4_tab-all-article-bottom_(300×250)”, [300, 250], “pb-ad-78623” ).addService( googletag.pubads() ) ); } );

googletag.cmd.push(function() {
mobile_slots.push( googletag.defineSlot( “/1005424/_dPSv4_mob-all-article-bottom_(300×250)”, [300, 250], “pb-ad-78158” ).addService( googletag.pubads() ) ); } );

The post 3 Secrets for Creating Beautiful Nature Photos by Beth Jennings appeared first on Digital Photography School.


Digital Photography School

 
Comments Off on 3 Secrets for Creating Beautiful Nature Photos

Posted in Photography


5 Secrets to Create a Perfect Silhouette Portrait Outdoors

22 May

DPS Silhouette 1

1) SHOOT LOW AND HEAD TO TOE

Place the subject’s entire body, from head to toe, against the sky. In order to do this, you will need to be lower than the subject. You can do this by laying on your back, or stomach, while taking the shot.

If you are unable to get low enough, you may need to have your subjects get higher, such as on the very top of a rock, small hill or sand dune. This will hopefully allow you, in most circumstances, to get an angle that places the subject’s entire outline against the sky. You can see a variety of landscapes utilized in the examples below.

DPS Silhouette 2

Hint: It’s so, so, SO important that their feet are against the sky! Legs in a silhouette portrait that are cut off above the feet look like weird, short stumps. If you can’t find a suitably spot at a location, you can play with silhouettes of a closer composition.

DPS Silhouette 3

2) IT’S ALL IN THE TIMING

Silhouettes work best around 20-30 minutes before sunset. However, it does vary with the angle you are able to achieve – the greater the height difference between you and the subject(s), the earlier you will need to take the shot.

If you wait any longer, the sun will be hidden behind whatever your subjects are standing on, and the sky might not be bright enough to make a silhouette. If you do it too early, the sky’s colours can be a bit boring and you will be dealing with other issues, such as sun flare.

DPS Silhouette 4

Tip: Silhouettes can be taken earlier before sunset if the sun is partially blocked or filtered through strong clouds.

3) SILHOUETTE SETTINGS ARE SIMPLE

Set your camera to Aperture Priority (AV) mode, with an aperture of f/2.8, and ISO of 400. Have Evaluative Metering selected, which means that the camera will take into account the whole scene when deciding how to find a balanced exposure.

If you fill the frame with your subjects’ faces or bodies, then the camera will expose for their skin, even with a bright background (see example below).

If you fill the frame mostly with a very bright sky, than the camera will expose for the bright sky, brining out the natural sunset colors and making everything else in the photograph dark.

So, if you place your subject directly against the sky (bright), than the subject (which is darker) will be heavily underexposed. The result – a silhouette!

DPS Silhouette 5 DPS Silhouette 6

Both photographs were taken on the exact same setting mentioned above, only seconds apart. The difference? Composition, and what is filling the frame – subject or sky.

4) SILHOUETTE PORTRAIT POSING IS SPECIFIC

Silhouettes are very forgiving of poor facial expressions (simply because you cannot see them), but very harsh when it comes to outlines. After taking each shot, check to make sure that nothing looks odd in the photograph.

Here are a few things to keep in mind when posing subjects in a silhouette:

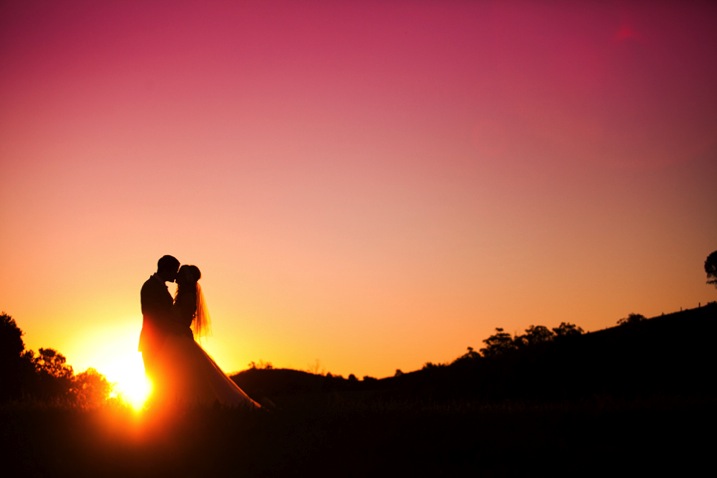
  1. Hugging poses do not work – A hug silhouette looks like a great big blob monster. All subjects need to be clearly defined, which means they need to be at least a couple of inches apart from each other. It’s nice for subjects to still be connected, through holding hands, or kissing, but their bodies should still be defined.
  2. Have your clients look away from camera – It’s much nicer and more natural to have poses where the faces are profiled.
  3. Watch the clothing – Very baggy clothing will not work as well for a silhouette, as the shape can become unflattering. It is best for females to wear dresses or skirts in silhouettes, as it brings a feminine shape and helps clearly define them against the male’s figure. – Very baggy clothing will not work as well for a silhouette, as the shape can become unflattering. It is best for females to wear dresses or skirts in silhouettes, as it brings a feminine shape and helps clearly define them against the male’s figure.

DPS Silhouette 7

5) SILHOUETTES SELL

Try to capture at least one silhouette at every photo shoot, whether it is a family portrait, maternity, engagement or wedding. Why? Because they sell!

Here are some reasons why clients love to purchase silhouettes:

  • Silhouettes add variety to your shoot. Silhouettes are so different in nature, in their colouring and style, that the variety they give instantly makes any shoot more interesting and saleable. As the silhouette is quite unique from all other photographs, it also makes it easy to sell individually as a unique piece of artwork.
  • Silhouettes are perfect for shy clients. Some clients hate the idea of their faces hanging up on their walls, making silhouettes the perfect objection handler. As the focus of the photograph is not on the subjects’ faces at all, it can be marketed to them as the perfect piece of personalized artwork, without battling their self-conscious nature.
  • Silhouettes look better bigger! If you capture silhouettes on a wide composition, it’s all too easy to sell them as very large piece of artwork. Because the subjects are relatively small within the frame, silhouettes can encourage a larger, more impressive piece of artwork for the client and a more profitable sale for you.

DPS Silhouette 8

We hope this guide gives you the confidence to go out and try your own silhouettes.

googletag.cmd.push(function() {
tablet_slots.push( googletag.defineSlot( “/1005424/_dPSv4_tab-all-article-bottom_(300×250)”, [300, 250], “pb-ad-78623” ).addService( googletag.pubads() ) ); } );

googletag.cmd.push(function() {
mobile_slots.push( googletag.defineSlot( “/1005424/_dPSv4_mob-all-article-bottom_(300×250)”, [300, 250], “pb-ad-78158” ).addService( googletag.pubads() ) ); } );

The post 5 Secrets to Create a Perfect Silhouette Portrait Outdoors by Alana Orth appeared first on Digital Photography School.


Digital Photography School

 
Comments Off on 5 Secrets to Create a Perfect Silhouette Portrait Outdoors

Posted in Photography


Bounce Flash Secrets – Bouncing Your Way to Better Photography

08 May

If you have ever seen a professional photographer using flashgun on top of their camera, and wondering why the flash is not pointing directly at the subject, that’s because they are bouncing the flash. In this article I will reveal to you the secrets of bounce flash, which I have learned over the years working as a professional wedding photographer. I will unveil my killer techniques that will allow you to bounce your way to better photography.

If you are new to photography you may be apprehensive about using flash. I understand. A lot of it has to do with when you first buy a point-and-shoot camera the flash on it just creates a horrible direct flash look and that is what you associate with flash photography. Once you master the art of bouncing however, I promise you will never look back.
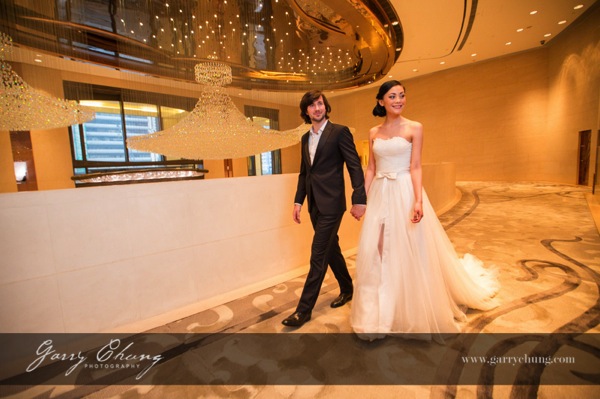
Garry Chung Photography 100

The image above is lit by bouncing flash off the wall on the right side, just out of frame. Notice how it doesn’t look obviously flashed.

What is bounce flash?

Bounce flash is when, rather than firing your flashgun pointing directly at your subject, you point it elsewhere typically up or at an angle, bouncing off a wall or ceiling. The objective is to “bounce” light to soften it before it hits your subject.

Why bounce it and not point directly at my subject?

Because generally speaking direct bare flash, pointing at your subject, is terrible for two reasons:

  1. The light is “hard” and can cash horrible shadows on your subject. It just generally is not very nice light for portraits. The definition of hard and soft light if you are confused is simply the transition the light makes between shadow and highlights. A gradual transition is called soft light and a sudden transition where you have a strong shadow edge is called hard light. Portrait photographers talk a lot about nice soft quality light and that is why they use light modifiers such as soft boxes and umbrellas.
  2. Direct flash produces “flat lighting” which gives that deer in the headlights look and also does not give a 3-dimensional quality to the photo

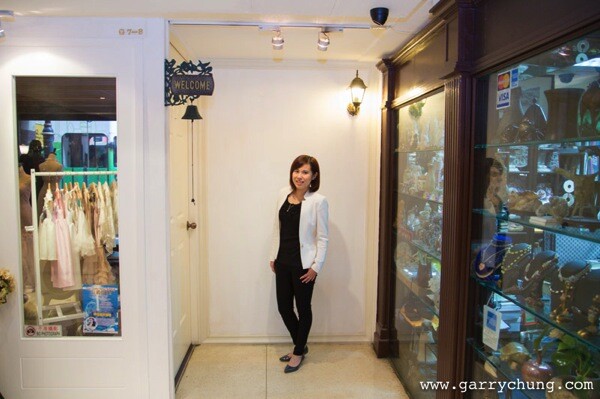
It is probably easier to show you in pictures so here are a few images of my friend Theresa, that I took just to illustrate the point. Just to set the scene, below is the area where I took these photos. This is a shopping center in Hong Kong and I have chosen the area because of the white walls.
Bounce flash 100

This was shot with the flash pointed directly at the subject. Because there were a lot of white walls surrounding Theresa, there was a lot of wrapping light and it didn’t turn out too bad. But, there is a hard shadow in the neck area and the lighting is flat.

Bounce flash 101

Manual Mode, 50mm lens, f/4, 1/80th, ISO 800, flash in ETTL Mode

This was shot with the flash tilted upwards towards ceiling. The light is much softer and you can see that the shadow on her neck is softened. It’s OK but could be better.

Bounce flash 102

Manual Mode, 50mm lens, f/4, 1/80th, ISO 800, flash in ETTL Mode

This is the way I would light this portrait. The flash is tilted, in this case aimed to bounce off the wall to the left, and bounce back. The result is a nice soft light, and also notice the eyes have better catch lights.

Bounce flash 103

Manual Mode, 50mm lens, f/4, 1/80th, ISO 800, flash in ETTL Mode

But wait, I think I can do one better. I want a more dramatic and contrasty image so I cut out the ambient light by setting a faster shutter speed and stopping down to f/8. Still with the flash pointed to the left I now have my nice professional high key headshot, one flash on camera, no light modifier shot in a shopping mall.

Bounce flash 104

Manual Mode, 50mm lens, f/4, 1/200th, ISO 800, flash in ETTL Mode

When do I bounce my flash?

Indoors when there is ceiling or wall, preferably a white wall so there is no colour cast in the light, or outdoors if there is a surface nearby to bounce off. I see so many “professional photographers” have their flash pointing upwards when shooting outdoors when there is nothing to bounce off and I assure that does nothing other than sap power from you flash as it requires more power to light your subject.

How do I bounce my flash?

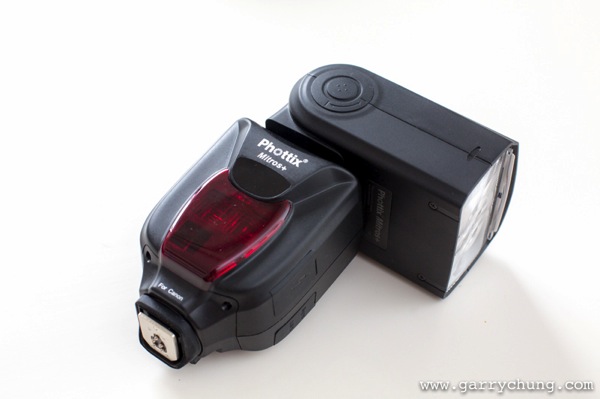
Firstly you will need a hotshoe flashgun (speedlight) that allows you to both tilt and swivel the head such as a Canon 600EX-RT, Phottix Mitros+ or if you are a Nikon user a SB900. Some flashes allow only tilt such as the Canon 430EX. This is not ideal as I like to bounce the flash in all directions.
Bounce flash 105

Phottix Mitros+ with swivel head

Which direction to bounce the flash?

Most people just point the flash upwards, which is fine, but I actually seldom do this because I always want to light a portrait using directional light if possible. So most of the time I am pointing the flash to the side, or tilted behind me to one side to give that nice slimming shadow on the face.

There is a simple formula to achieve this look that I learned from Jerry Ghionis – just point your flash head in the same direction as the nose of the subject so you are bouncing. So you are normally pointing the flash away from your subject, to one side. This is of course assuming that you have something to bounce off within a reasonable distance. The other way is to think of your walls as the light source itself, position your subject, frame your shot and then adjust your flash to target the walls.

Remember if you ware shooting events and weddings to readjust your flash direction when shooting from portrait to landscape. For me I am always looking at ways to bounce my flash. One final tip is to crop out the wall or ceiling that you are photographing, that way you don’t end up with a distracting bright wall in your photo.

Camera settings

In terms of camera settings I rely heavily on the Auto TTL system which works for me, so all I do is set the camera in manual mode so something like 1/60th of a second, ISO 1000 and let TTL do the rest. If you have a light subject and dark background, you can bring in more ambient light by:

  • Increasing ISO
  • Have wider aperture, lower F number
  • Slowing down the shutter speed

The more ambient light you drag in, the less “obvious” the flash effect. When it is a really dark scene, and most of the light is actually coming from your flash, I will drag the shutter down to 1/20th which sounds crazy because you could never handhold a shot at 1/20th in daylight. But, as you know the flash helps freeze the frame and hence helps get rid of camera shake. You want to be dragging in as much ambient light as possible if you don’t want your subject to be lit and the background very dark.

One method I use to see what Manual settings to dial into camera is to just take a picture with no flash and if it is totally black then I will increase ISO or switch to a faster lens. One I have the camera dialed-in with my Manual settings for the scene, I will use the flash exposure compensation to properly expose my subject.

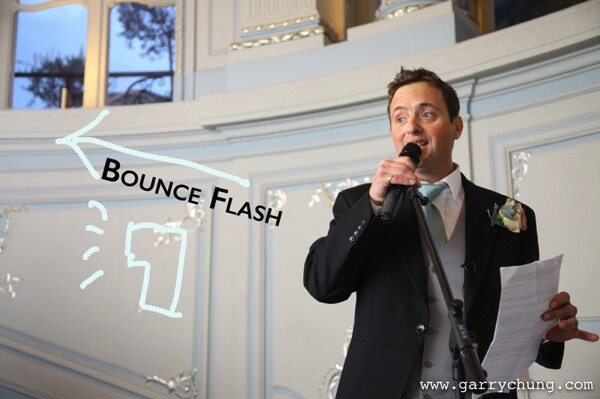
You can see from the below image taken of the best man at a wedding reception, there is no obvious harsh shadow behind him, there is nice light falloff and modelling on his face which adds to 3 dimensional quality of the picture, and the surrounding area is properly exposed. I was kneeling down at the time shooting at 1/30th, 1600 ISO, f/4, 50mm lens with the flash pointed camera left tilted upward behind me about 45 degrees.
Bounce flash 106

Some people put a plastic diffuser on top of their flash what is that for?

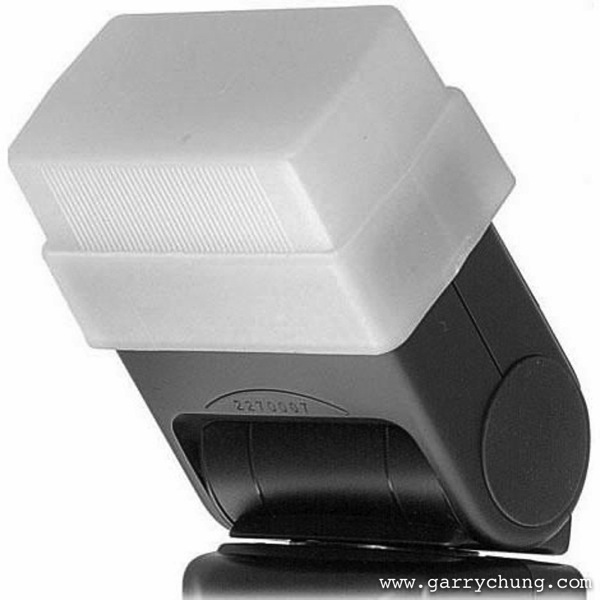
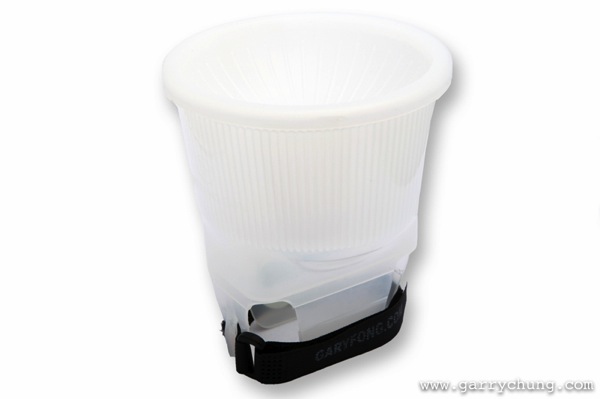
I should mention this, many photographers use diffusers on top of their flash to spread the light out in all directions, below are the two most popular products on the market, the Gary Fong Lightsphere and the Stofen Onmi Bounce. There are many more cheaper products, and copies, that essentially do the same thing.
Bounce flash 2

Gary Fong Lightsphere

Bounce flash 3

Stofen Onmi Bounce

I have actually owned, and tried, most of the diffuser products and I have nothing against them but I don’t use any of these any more. I prefer more bare bulb bouncing for more directional light and what the diffusers do is the opposite because they spread light in all directions.

Conclusion

Practice makes perfect and I have photographed many wedding receptions in the UK in the winter where it can be pitch black by 5 p.m. Mastering bounce flash technique really improved the quality of my work. Now when I know that there is not enough light and I have to use flash the first thing I do is look for surfaces to bounce off. Remember you have to be adjusting the direction of the bounce dependent on each frame if you are recomposing. So go ahead get a flashgun if you haven’t already and start experimenting with bouncing flash.

The post Bounce Flash Secrets – Bouncing Your Way to Better Photography by Garry Chung appeared first on Digital Photography School.


Digital Photography School
 
Comments Off on Bounce Flash Secrets – Bouncing Your Way to Better Photography

Posted in Photography


The Ultimate Five Secrets to Better-Looking Photographs

05 Mar

All photographers want their snapshots to turn out extremely well. This means pictures that are sharp, aesthetically appealing and sure to impress. Of course, many photographers don’t consistently turn out this type of quality in their photographs. These days, so many people are also pressed for time that they don’t really have the time or patience to study the masters Continue Reading

The post The Ultimate Five Secrets to Better-Looking Photographs appeared first on Photodoto.


Photodoto

 
Comments Off on The Ultimate Five Secrets to Better-Looking Photographs

Posted in Photography


Civic Secrets: Urban Patterns Revealed in Street-Side Snow

14 Feb

[ By WebUrbanist in Architecture & Cities & Urbanism. ]

urban sneckdown intersection image

Ingenious and contagious, the idea is spreading: after it snows, document where cars do not go, then use that to understand where sidewalks and other public areas can be expanded without any spatial cost to vehicular commuters.

urban public space activism

Jon Geeting of This Old City shows how these so-called ‘sneckdowns’ can work after a snowstorm in Philadelphia. Starting with simple phone-camera photographs, he added colored-line highlights that illustrate actual traffic patterns. These captures implicitly suggest ways to eliminate  car parking, introduce pedestrian plazas and potentially much more.

urban snow implied space

As for the strange name, he explains: a sneckdown “is a clever combination of “snow” and “neckdown” – another name for a curb expansion – that uses snow formations on the street to reveal the space cars don’t use. Advocates can then use these sneckdown photos to make the case to local transportation officials that traffic calming interventions like curb bumpouts and traffic islands can be installed without any loss to car drivers. “

urban post snow photos

Bypassing cumbersome urban planning studies, this approach is a free, easy and highly visual way for people to first understand and then communicate possibilities for future usage to local politicians and business owners. Simple cell phone photos provide the backdrop, allowing activist citizens to argue for everything from sidewalk and green space extensions to the creation of entire urban islands, outdoor seating for restaurants or other civic functions … all in places where, as the snow shows, no one generally drives anyway.

While the phrase and phenomena are gaining all kinds of fresh traction, the idea is not new to those in the know – Street Lessons from a Blizzard (above) by Streetfilms talked about the same process a few years back, and others have discussed it before as well. With the rise of Instagram and Twitter, however, more and more ordinary citizens are snapping shots locally, tagging them and spreading the word.

Share on Facebook


[ By WebUrbanist in Architecture & Cities & Urbanism. ]

[ WebUrbanist | Archives | Galleries | Privacy | TOS ]


WebUrbanist

 
Comments Off on Civic Secrets: Urban Patterns Revealed in Street-Side Snow

Posted in Creativity


Trapdoor Secrets: Furniture Hidden Inside Floors & Ceilings

22 Dec

[ By WebUrbanist in Design & Fixtures & Interiors. ]

hidden dining table

This remarkable remodel is full of fun and functional surprises ranging from ceiling-suspended swing sets, hammocks, bookshelves, tables and benches to flip-up, in-floor mirrors and trap-door storage spaces.

hidden ceiling hammock

hidden pulley system

hidden ceiling swing

Designed by Elii in Madrid, Spain, the compartment-centric project takes maximum advantage of high ceilings to add layers of usefulness above, below and ultimately between each of two levels.

hidden floor storage

hidden bathroom mirror

Discrete handles along the walls allow the occupant to deploy each function in piecemeal fashion, calling down an on-demand hammock and fans, for instance, or dining room surface and seating as needed.

hidden panels back forth

Hidden pulleys make it easy to drive each object back up and out of the way when not in use – no laborious reaching, pushing or pulling required.

Next Page – Click Below to Read More:
Trapdoor Secrets Furniture Hidden Inside Floors Ceilings

Share on Facebook


[ By WebUrbanist in Design & Fixtures & Interiors. ]

[ WebUrbanist | Archives | Galleries | Privacy | TOS ]


WebUrbanist

 
Comments Off on Trapdoor Secrets: Furniture Hidden Inside Floors & Ceilings

Posted in Creativity