RSS
 

Posts Tagged ‘Secrets’

4 Secrets for How to Get Tack Sharp Photos

01 Nov

We’ve all been here before. You get home from an afternoon with your kids in the park, at the ball game, or even a formal photo session only to load your pictures on the computer and realize that many of them are fuzzy, blurry, or just plain out of focus. It’s a problem that has plagued photographers for years. While new cameras offer all sorts of features like 3D focus tracking and real-time face detection to help make sure to get the ultimate tack sharp photos, the fact remains that out-of-focus images are still an issue for just about everyone with a camera.

It’s an unfortunate reality of the way cameras work with incoming light, and until we are all shooting with Lytro-style light field cameras we are all going to have the occasional out-of-focus picture or two. Fortunately, there are a few relatively simple things you can do to make sure your pictures are indeed as sharp as possible.
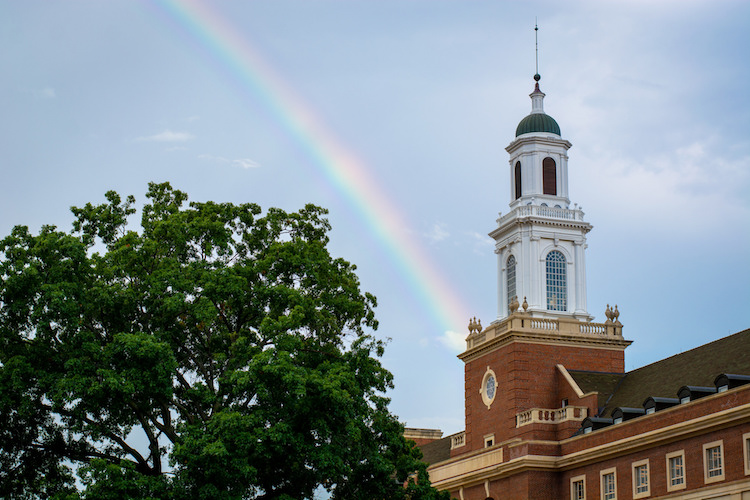
tips for getting tack sharp photos

Use a fast shutter speed

The world around you is constantly in motion, and having a camera means you are equipped to freeze that motion into a single frame. Depending on what you are shooting the result can sometimes be a blurry mess, which is often the result of a shutter speed that is simply too slow. There’s an old bit of conventional wisdom that says the minimum shutter speed needed to get a sharp image of a still subject is 1/focal length. So if you are shooting with a 50mm lens you need a shutter speed of 1/50th of a second.

Note: Due to the cropped sensor on cameras like the Canon Rebel series or lower-end Nikons the formula becomes 1/(1.5x focal length), so you would need a minimum shutter speed of 1/75 second.

This might sound fast but it’s actually not, especially if you are shooting in low light conditions or with a small aperture on your lens. It gets even worse when your subject is moving, in which case you need a much faster shutter speed! This is why many mobile phone pictures end up looking blurry, in order to let in enough light to get a photo they often use slower shutter speeds.

This jittery squirrel was moving all over the place, so I shot with a speed of 1/180 second to get a sharp picture. tips for getting tack sharp photos

This jittery squirrel was moving all over the place, so I shot with a speed of 1/180 second to get a sharp picture.

Proper settings

The solution is to use a faster shutter speed, which might sound fairly obvious but it doesn’t always work unless you have your camera configured properly. If you shoot in Auto your camera might not know you want to use a fast shutter speed. So shooting in Program or Shutter Priority is a good way to control the shutter speed to make it as fast as you want.

You can also utilize higher ISO settings like 1600 or 3200, which look just fine from most modern cameras if you need a fast shutter and there isn’t much light. Most photographers would take a slightly grainy (noisy) photo that can often be fixed with software like Lightroom or Photoshop over a blurry photo that can usually not be fixed. If you find that you consistently get blurry pictures of your subjects, try increasing your shutter speed and you just may just be surprised with the outcome.

Use a smaller aperture

The lens on your camera is designed to gather incoming light and focus it so you can take a picture. The amount of light it lets in is largely dependent on the size of the physical lens opening. A bigger opening, or aperture, lets more light pass through than a smaller opening, much in the same way a bigger hole in the bottom of a bucket lets more water leak out than a smaller hole. Wider apertures let you use faster shutter speeds and also help you achieve the type of beautiful out-of-focus backgrounds, called bokeh, that are common in portrait, wildlife, or even sports photography.

tips for getting tack sharp photos - family photo

Even though my 85mm lens has a maximum aperture of f/1.8, I shot this at f/2.8 because I wanted a wider depth of field in order to make sure all three subjects were in focus.

Depth of field

One tradeoff that comes into play when using wide apertures, is that your depth of field is much shallower. That means you have a very narrow section of the image that will actually be in focus or tack sharp.  Under very carefully controlled conditions this can be fine and even quite desirable. But in many situations, a thin depth of field can result in more headaches and frustrations than it’s worth.

Shooting with a wide aperture can result in a depth of field that is so narrow a person’s nose could be in focus but her eye might not. One of the best solutions is to just use a smaller aperture. The tradeoff when using smaller apertures like f/2.8, f/4, etc., is that your background won’t be quite as blurry and you will need a longer shutter speed, but if your lighting is good the latter won’t matter. And as for the former, I like to err on the side of caution and go with a technique that will give me a higher chance of having my subject sharp and focused, even if it means a slightly less blurry background.

tips for getting tack sharp photos

Use cross-type focus points

Almost every interchangeable-lens camera has one or more cross-type focusing points. That means they look along the horizontal and vertical axes to make sure things are tack sharp before taking a picture. These points are the little dots or squares you see when you look through the viewfinder of your camera. The ones that are cross-type are usually a bit faster and give you better results than their single-axis counterparts. Of course, you will need to know which of the points on your particular camera are cross-type but a quick online search of your camera model and “cross type focus points” will usually get you the information you need.

tips for getting tack sharp photos cross-type focus points

The center focusing points on my D750 are all cross-type, so I like to use them whenever possible in order to make sure to get maximum sharpness.

Cross-type focusing points are usually limited to a certain portion of the viewfinder. This can present a bit of a problem since normal-type focusing points are what is commonly used to lock focus on objects along the outer edges. A solution I like to use for these situations is the focus-and-recompose technique. I use a cross-type focusing point, often the one right in the center, to lock focus and then recompose my shot to frame it how I want. This does not always work when shooting wide open since even the smallest amount of movement can affect your shot when the depth of field is razor thin. But as I mentioned earlier, if you want tack sharp pictures you should probably stop your aperture down a little bit anyway.

Sharpness is critical when shooting macro pictures, so I used a wide aperture (f/8) and cross-type focusing points to make sure the foreground tulip was tack sharp.

Sharpness is critical when shooting macro pictures, so I used a small aperture (f/8) and cross-type focusing points to make sure the tips of the petals on the foreground tulip were tack sharp.

Use a tripod and Live View and zoom in to 100%

If you’re like me, you spend 99% of your time looking through the viewfinder of your camera as opposed to using the Live View function (where you use the LCD screen on the back of your camera to compose your shot). DSLRs have traditionally been designed for photographers to use the optical viewfinder which is why this method is generally faster and easier to use. But Live View has some very good features as well depending on the type of photos you want to take. If you are doing a lot of action shots like sporting events the Live View function is quite frustrating. But if you shoot landscapes, products, or other types of pictures where your subject remains relatively still, Live View can be a major advantage in terms of getting the sharpest image possible.
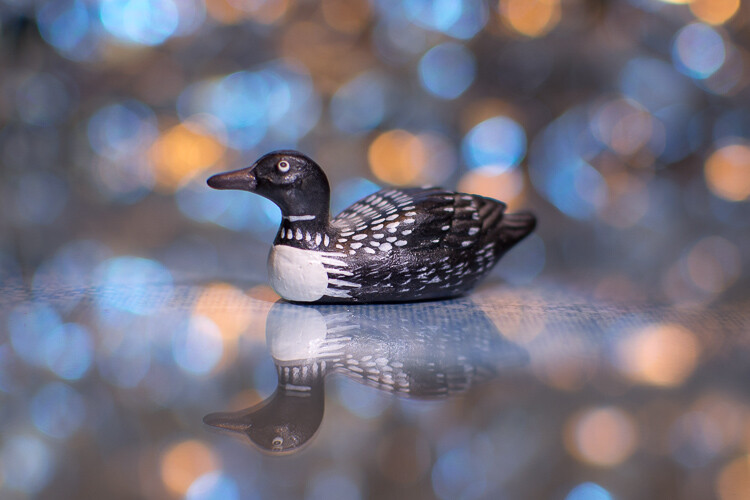
Using Live View helped me get this small wooden duck very sharp and focused.

Using Live View helped me get this small wooden duck tack sharp and focused.

Using Live View

The trick to using Live View for getting sharp images is to frame your shot with your camera on a steady surface such a tripod, then zoom in to 100%, using the controls on your camera. This gives you an ultra-close-up look at your image, and you can then use autofocus or manual focus to make sure everything is perfectly tack sharp.

While the autofocus points in the viewfinder do a good job, this type of 100% magnification shows you precisely how in-focus your image will be and helps you get pixel-perfect images. Landscape (and macro) photographers often use this technique, combined with small apertures for a wide depth of field, to get pictures that are much sharper than they could otherwise. It’s a tip that I highly recommend you try, especially if you don’t often shoot in Live View.
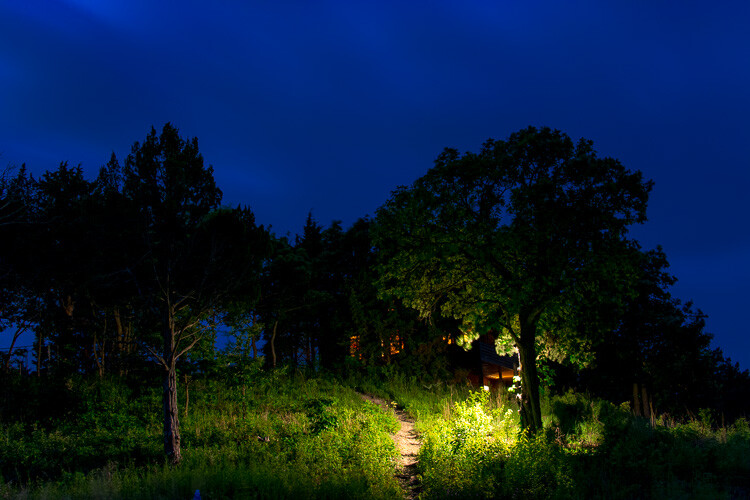
tips for getting tack sharp photos long exposure image

I wanted to get this 30-second exposure as sharp as possible. So I first used Live View and zoomed in to 100% to check that the foliage was focused.

Bonus tip: Use Focus-Peaking on mirrorless cameras

Most of the items in this article are geared towards traditional DSLR shooters, but if you use a mirrorless camera there is one handy tool you probably have that gives you a leg up on your traditional-style camera counterparts.

Focus-Peaking is a way for your camera to show you precisely what is tack sharp as you focus your lens. Many, but not all, mirrorless cameras have this capability and it is a fantastic way of making sure you get everything that should be tack sharp focused properly. With Focus-Peaking enabled, as you turn the focusing ring on your lens you will see a swath of dots (usually red or green) travel across the viewfinder. These dots indicate the spots that are perfectly focused, and when you see an outline of dots around the part of your image that you want focused, you can snap a picture and rest assured that it will show up exactly how you envisioned.

You can even use Focus-Peaking in conjunction with autofocus, so it’s another tool in your repertoire to help make sure you are taking the best possible pictures.

tips for getting tack sharp photos - focus-peaking

The edges of the leaves are all outlined in red by Focus-Peaking, which indicates that they will be in focus. Image by Bautsch (Own work) [CC0], via Wikimedia Commons

Over to you

Do you have any favorite tips or tricks for getting sharp photos? Are there things I left off this list that you’d like to share with others? Leave your thoughts in the comments below!

googletag.cmd.push(function() {
tablet_slots.push( googletag.defineSlot( “/1005424/_dPSv4_tab-all-article-bottom_(300×250)”, [300, 250], “pb-ad-78623” ).addService( googletag.pubads() ) ); } );

googletag.cmd.push(function() {
mobile_slots.push( googletag.defineSlot( “/1005424/_dPSv4_mob-all-article-bottom_(300×250)”, [300, 250], “pb-ad-78158” ).addService( googletag.pubads() ) ); } );

The post 4 Secrets for How to Get Tack Sharp Photos by Simon Ringsmuth appeared first on Digital Photography School.



Digital Photography School

 
Comments Off on 4 Secrets for How to Get Tack Sharp Photos

Posted in Photography


Discover the Secrets of Lightroom: 48 Hours Left to Save 50% Off Our Lightroom Mastery Course

31 Aug

dps-lightroom-mastery-hero-v1b-large

If you’ve ever wanted to learn more about Adobe Lightroom, now’s your chance to do it with our brand new Lightroom Mastery Course – and if you act fast you can save 50%!

Over the last few years here at dPS we’ve noticed that the most common tool that our readers use to process their photos is Lightroom.

Along with this rise in the use of Lightroom we’ve noticed that many of our readers are coming to us with questions about how to use it most effectively and the feeling of being overwhelmed by how to get started with it.

So earlier this year we approached Pro Photographer and Lightroom Expert Mike Newton to create a course for our readers on how to Master Lightroom.

Mike went above and beyond and created Lightroom Mastery – a course that we’ve had some fantastic feedback on.

Here’s what one of our readers said about the course a few days after it launched.

Lightroom mastery course review

Belle wasn’t the only one – much of the feedback was along similar lines with readers reporting that they finally felt like they knew how to take control over Lightroom and to develop a workflow to help them take their photos to the next level and create beautiful images.

Early Bird Special: Ends in 48 Hours

Over the last 4 weeks we’ve offered Lightroom Mastery at an Early Bird discount of 50% off. We’ve also been putting everyone who purchases a copy in the draw to win $ 1000 USD toward new camera gear.

Many of you have taken up this offer already but we wanted to let you know today that there are just 48 hours left to take advantage of it.

At midnight (US EDT) the competition closes off and we’ll be reverting the course to its full price so now is your last chance to take advantage of this Early Bird Offer.

Discover How to Transform Your Images Today

This online course includes 16 modules and just over 3hrs of video tutorials.

Here are some of the things you’ll learn:

  • Editing – How to use the crop tool, basics panel, tone curve panel, color panel, split toning, details panel, and lens corrections panel, all while improving the image.
  • Tools – Using the spot removal brushes (cloning/healing), red eye correction tool, graduated filter, radial filter, and adjustment brushes!
  • Workflow – Lightroom presets, finding lost photos, stacking, the face finder tool, lights out mode, and more advanced topics!
  • Creative Techniques – How to Create Panoramas and HDR images.
  • How to Bring your Photos to Life – Full Photo Edit Workflow.

… and much much more.

And remember – when you order before midnight EDT this Friday, not only will you save a whopping 50%, you’ll also go into the draw to win USD $ 1,000 to spend on your photography.

So don’t wait – grab Lightroom Mastery here – or you might miss out!

googletag.cmd.push(function() {
tablet_slots.push( googletag.defineSlot( “/1005424/_dPSv4_tab-all-article-bottom_(300×250)”, [300, 250], “pb-ad-78623” ).addService( googletag.pubads() ) ); } );

googletag.cmd.push(function() {
mobile_slots.push( googletag.defineSlot( “/1005424/_dPSv4_mob-all-article-bottom_(300×250)”, [300, 250], “pb-ad-78158” ).addService( googletag.pubads() ) ); } );

The post Discover the Secrets of Lightroom: 48 Hours Left to Save 50% Off Our Lightroom Mastery Course by Darren Rowse appeared first on Digital Photography School.

Digital Photography School

 
Comments Off on Discover the Secrets of Lightroom: 48 Hours Left to Save 50% Off Our Lightroom Mastery Course

Posted in Photography


5 Secrets for Finding Great Indoor Portrait Locations

04 Apr

156

Not all photographers choose to have a dedicated indoor studio, but sometimes you need to shoot a session indoors. Maybe it’s freezing outside, and you don’t want to be out in that weather. Maybe you have a bride who wants bridals, but is worried about her dress getting dirty. Maybe you just want something fresh and a little quirky. Maybe the building has special meaning to you or the person you are photographing.

Whatever your reasons, in this article you are going to learn all my secrets to finding indoor locations, and getting permission to use them. Hopefully they’ll help you find the perfect spot for your next session!

174

Secret #1: Always be on the lookout

Wherever you go, keep your photographer eyes open. You may be surprised at how many places transform into a great location once you really start looking. Some unique and exciting photography locations could be: family photos in the library, model portfolio shots in the city building, engagement session in the laundromat, dance group session in a hotel lobby, mom and toddler portraits in a grocery store, bridal session in a grand old house, a museum, a quaint bed and breakfast, a roller-skating rink, a university building, a furniture store, a toy store, or candy store – the list is endless.

Look for great lighting, open spaces, interesting backgrounds, and fun things to interact with. Notice if there are lots of people that you might be disturbing, or if it’s a relatively calm place that you could photograph in peace. Use your imagination and creativity to turn the ordinary into something extraordinary.

192

Secret #2: Always ask permission

Once you’ve found a place you’d like to try, make sure you ask permission before you bring a client there. I find, if possible, that asking in person is usually the best, because they can see who they are talking to, and are often less resistant if they can see your smiling friendly face. If you need to call, be professional and friendly on the phone, so they feel comfortable letting you come with your camera.

If you aren’t sure who owns the building, check with city or county records, or ask a neighboring building or house if they know who owns it. Do the legwork to find out who owns the property before you barge in uninvited. It gives all photographers a bad name if you trespass. I’ve had many times where I call to ask permission, and the owner thanks me profusely for asking permission. They express their frustration that other photographers just start shooting without asking. They allowed me to photograph on their property, so obviously they don’t mind people being there, but they always appreciate being asked first.

Some locations, like museums, or theme parks, are fine with you taking photographs inside, but you have to pay the entrance fee.

148

Some places charge a fee for photography, and some don’t allow photographers at all. If you whip your camera out in either of those types of places without asking permission first, you could be fined huge amounts. It’s not worth it. If you ask permission and get a no, just move on and find another place. However, it never hurts to ask. Most of the time you get a yes, and often they are pleased that you think their building is worthy of being a photography location.

112

Secret #3: Find an owner who will also benefit

I needed a place to have adorable kids come for Valentine’s Day photos, but I didn’t know who would want multiple kids and families traipsing in and out of their establishment. Then I came across an adorable little candy shoppe that was decorated perfectly, and full of delicious sweets and treats. My photography clients came in and out all day for their sessions, and ended up buying lots of candy in the process. Many who came had never noticed the little hometown shop, with homemade caramel apples and every kind of candy you can think of, and they were happy to have discovered it. I ended up having a great place for my Valentine’s Day photos, and the owner got a lot of new business.

177

Look for places that might have a similar situation, and chances are the owner will be more than happy to let you use their location, free of charge. Many small locally owned places need a couple of photos of their establishment for websites and advertising purposes, or maybe even a quick headshot, and would be thrilled to let you photograph there in exchange for a photo or two.

146

Secret #4: Explore any connections

Sometimes a friend may own a quaint little bed and breakfast, or maybe she works at a museum. If you are photographing that friend, that may be an especially smooth way to get your foot in the door. If things go really well, they may be okay with you bringing other people to their property again. Even if they aren’t the one that you are photographing, you could ask what they think about letting you use the property that they have a connection to.

Be careful not to ask for too much, and be careful not to put anyone in an uncomfortable position. If you sense that they are hesitant about having a camera there, don’t push it. A little respect goes a long way, and you don’t want to be the photographer that people avoid at all costs. Relationships are more important than having a cool place to photograph, so be extra sensitive when using this secret.

171

Secret #5: Be the best guest

When you’ve gotten permission to use a place, never, never, never ever let anything get destroyed, damaged, or left in any way other than how you found it. If you need to move something out of the way, ask if it’s okay first, and then put it back where you found it. Be mindful of what is going on around you, especially if you are photographing kids. You are responsible for what happens with your session, and you never want to pay a big repair bill, or lose a friendship because you were careless.

You are not only representing yourself, but all photographers everywhere, when you use a public or private property for photographs. If you make it a horrible experience for the owners, you have more than likely ruined it for future sessions for yourself, and for all other photographers who might think to ask permission. Please don’t be that careless photographer who ruins it for everyone. Instead, leave such a great impression that all photographers will be welcomed with open arms into almost every establishment, to create beautiful and unique photographs.

111

Do you have any other tips for finding great indoor portrait locations? Have you found any gems? Please share your comments and images of your favorite spots below.

googletag.cmd.push(function() {
tablet_slots.push( googletag.defineSlot( “/1005424/_dPSv4_tab-all-article-bottom_(300×250)”, [300, 250], “pb-ad-78623” ).addService( googletag.pubads() ) ); } );

googletag.cmd.push(function() {
mobile_slots.push( googletag.defineSlot( “/1005424/_dPSv4_mob-all-article-bottom_(300×250)”, [300, 250], “pb-ad-78158” ).addService( googletag.pubads() ) ); } );

The post 5 Secrets for Finding Great Indoor Portrait Locations by Melinda Smith appeared first on Digital Photography School.


Digital Photography School

 
Comments Off on 5 Secrets for Finding Great Indoor Portrait Locations

Posted in Photography


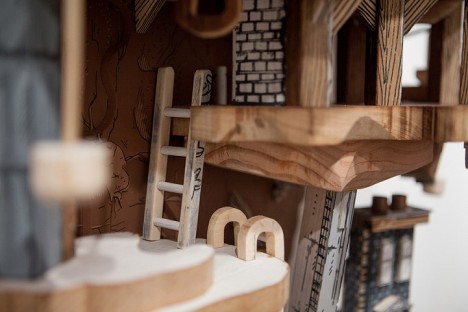
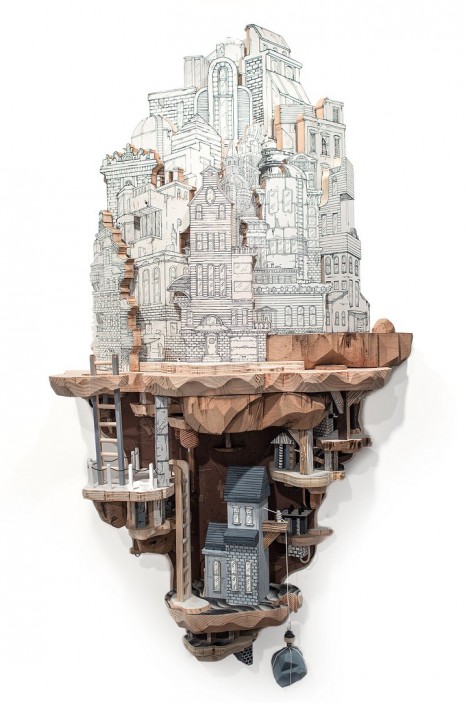
Secrets Beneath Cities: Sculptures Inspired by Nintendo Games

12 Mar

[ By Steph in Art & Sculpture & Craft. ]

secrets beneath cities 1

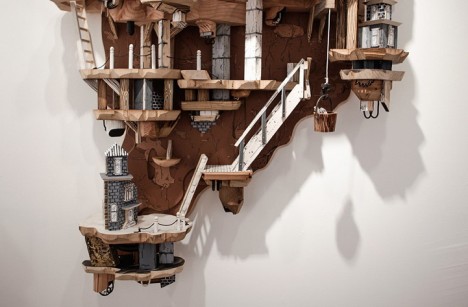
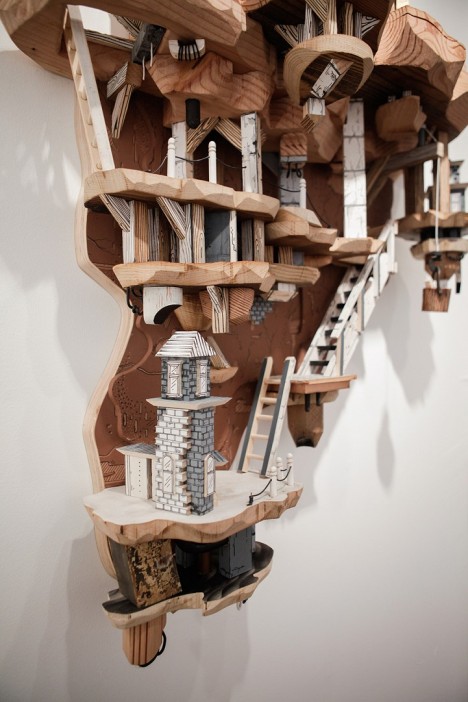
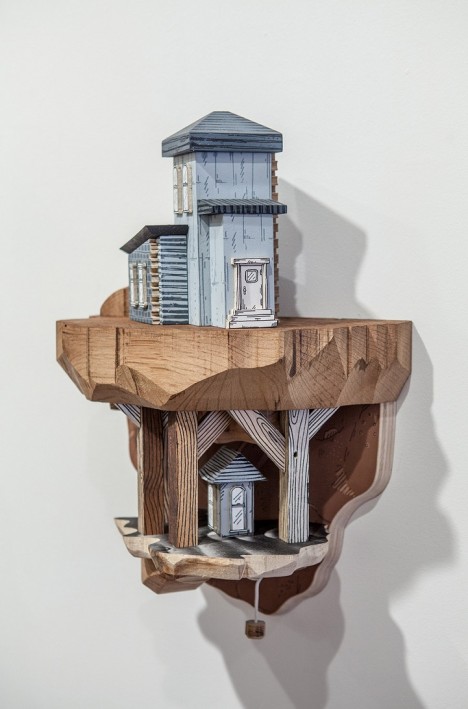
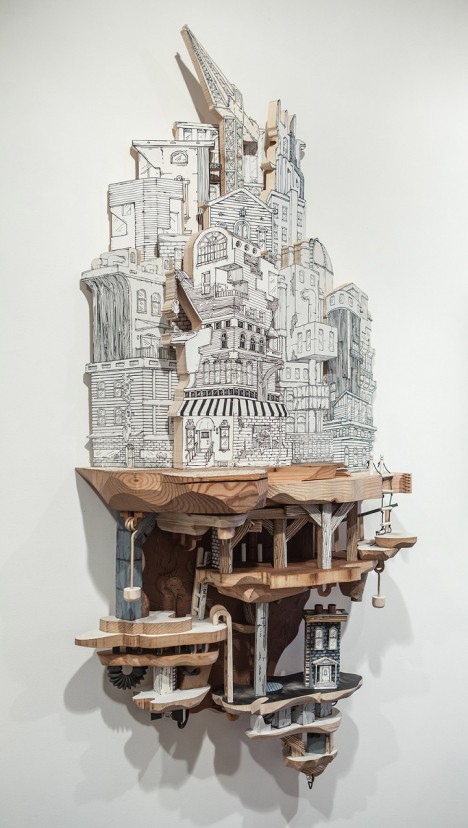
“The underworld is more fun,” says Luke O’Sullivan, the artist who painstakingly crafts stunning cityscape sculptures with intricate subterranean sections inspired by the seemingly never-ending underground worlds in early Nintendo games like Super Mario Bros. Working primarily in wood and salvaged materials, O’Sullivan creates surreal multi-level spaces with platforms , trapdoors, buckets and ladders. It’s easy to imagine Mario jumping from one area to the next inside, popping out of tunnels, racking up mushrooms and avoiding goombas.

secrets beneath cities 15

secrets beneath cities 13

secrets beneath cities 8

secrets beneath cities 9

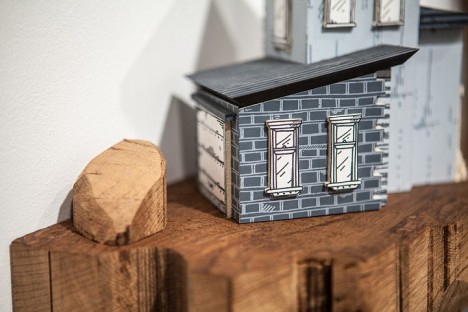
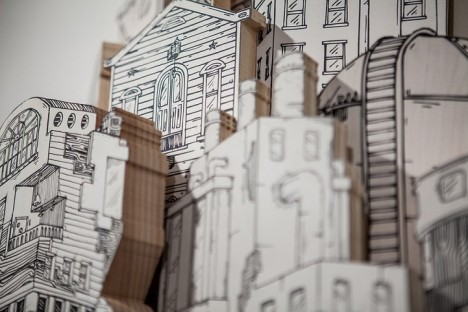
“My work is about the intersection of built environments and subterranean systems,” says O’Sullivan in his artist statement. “Through the application of screen-printed drawings on wood, metal and other flat surfaces, I create architecturally based sculptures. Often inspired by dystopian and science fiction films, I combine recognizable architectural forms and impossible buildings to create diorama-esque works.”

secrets beneath cities 2

secrets beneath cities 3

secrets beneath cities 4

secrets beneath cities 5

secrets beneath cities 6

The largest piece he’s completed, “Industry, Entropy,” measures ten feet long and took over three years to complete. The artist describes it as a “milestone piece.” This one is wider than it is tall, but others are like individual islands of towering structures that rise high above the surface and plunge deep below it.

secrets beneath cities 10

secrets beneath cities 11

secrets beneath cities 12

secrets beneath cities 17

Working in a restrained color palette, O’Sullivan keeps the above-ground sections of the cities relatively two-dimensional, hinting that the more detailed and literally well-rounded world beneath it is what’s really important. These subterranean areas seem full of secret functions, each one brimming with mysteries and begging to be explored. If only we could shrink ourselves down to climb around in them ourselves. See more on Instagram.

Share on Facebook


[ By Steph in Art & Sculpture & Craft. ]

[ WebUrbanist | Archives | Galleries | Privacy | TOS ]


WebUrbanist

 
Comments Off on Secrets Beneath Cities: Sculptures Inspired by Nintendo Games

Posted in Creativity


3 Secrets to Getting Amazing Toddler and Newborn Photos

04 Mar

Newborn sibling ct heather kelly photography 001

You are so excited about an upcoming newborn session. You can’t wait to cuddle the new baby, as you soothe them to sleep and pose them. Then you find out that the parents want to include their toddler, or even worse, toddlers! Now the excitement has changed to anxiety about throwing a toddler into the mix. Toddlers can be unpredictable, difficult to bribe, and sometimes want nothing to do with the new little person in their life.

Take a deep breath and remain calm. You can do this! Here are my three secrets to getting amazing toddler and newborn photos:

1. Friend the older sibling

Newborn sibling ct heather kelly photography 002

What are their interests?

Remember that just a couple weeks ago, they were front and center in their parents’ lives. There have been a lot of changes, and most likely a little less attention for them.

Talk with the parents to find out about big sister. What does she like? Does she have any favorite songs or shows? What is her favorite treat? Talk with mom and dad beforehand, and see if they are okay with a little reward. Make big sister the center of attention when you arrive. Get down on her level, tell her about yourself, and ask her questions. Have her introduce you to her new baby sister. You want big sister to trust and like you.

Siblings make great helpers

Toddlers are so curious, and love to help. Show them some of the hats or headbands you brought for their little sibling. Ask them to pick out their favorites. Once they are comfortable with you, it will be a lot easier to get them to listen, when you want to take a picture with their new baby sister.

After you are done setting up, ask them to help you test out the light. If you can get them to lie down, the battle is half over. Tip: have baby all wrapped up and ready to go, before you have big sister help by being a light tester.

Newborn sibling ct heather kelly photography 003

Newborn sibling ct heather kelly photography 004

newborn-sibling-ct-heather-kelly-photography-005

2. Let the toddler rule the session

Choices

Now that you and big brother are friends, give him some choices. He needs to know that he is in charge. Forcing him to do something he doesn’t want to do, can backfire.

Some choices could be:

  • Do you want to lay down on this cream rug or this blue rug?
  • Would you like your baby brother on this side or that side?
  • Would you like to kiss your brother or look at the camera?
  • Do you want the red truck or the blue car as your prize?

Choices make big brother feel in control. If he doesn’t want to cooperate in the beginning, that’s okay. You can try again later.

Do you want to take the picture now or come back in 5 minutes?

Let him take a break and then you can try again in a little bit. Use this break to get some images of baby alone. After big brother has had a break, you can give it another try. Sometimes multiple breaks are needed.

newborn-sibling-ct-heather-kelly-photography-007

Expectations

Tell big brother what to expect, and how long it’s going to take. Children have a much easier time if they know what to expect, and that there is an end time. You want to tell them what they’re going to do, how many pictures you’re going to take, and what happens after (the reward!).

“We are going to take a picture of you and your baby brother for mommy and daddy. It won’t take long. I will take five photos, then we’ll be done and you can pick out your prize! I’m going to start counting. 1 – 2 – 3 …”

Counting works great as even young toddlers can understand counting to three or five. You can take multiple photos while you draw out one number so you’ll end up with a lot more than five. With squirmy toddlers, multiple images are definitely needed. Once you hit the number, they are done.

If you don’t think you got a useable image give them a choice of counting again or taking a break. You want it to be short and sweet so big brother is more likely to cooperate.

newborn-sibling-ct-heather-kelly-photography-008

3. Praise and Reward

Praise

After big sister has done what you have asked, give her a lot of praise. Even if all she did was make a choice to do pictures in five minutes instead of now. You asked her to make a choice, and she did. Great job big sister! It might not seem like a big win, but it will help when you try again.

Praise and thank big sister for every little thing she does. Kids love being praised, and to know that they are doing a good job. There is no such thing as too much praise when you are trying to get a toddler to cooperate.

Reward

Make a toy chest or prize bin. You can add toys that your children don’t play with anymore, or find items at the dollar store. When you first meet big sister and are becoming friends, show her what you brought. Point out a few items in your prize bin, and tell her that after she takes some pictures, she’ll get to pick out any one item to keep.

While you are praising big sister, remind her of her reward. “You are doing such a great job with your little brother. I can’t wait to see what prize you pick out!”

You can show the prize bin during breaks. A toddler’s attention span isn’t the greatest, so sometimes they need reminding that they’ll get a prize soon. For a real challenging toddler, you can let them pick out their prize ahead of time, and put it on a shelf or with mom and dad as a reminder.

newborn-sibling-ct-heather-kelly-photography-009

newborn-sibling-ct-heather-kelly-photography-010

newborn-sibling-ct-heather-kelly-photography-011

Do you have any other tips for working with toddlers and newborns? Let us know if you try these and how you make out. Please share your results in the comments below.

googletag.cmd.push(function() {
tablet_slots.push( googletag.defineSlot( “/1005424/_dPSv4_tab-all-article-bottom_(300×250)”, [300, 250], “pb-ad-78623” ).addService( googletag.pubads() ) ); } );

googletag.cmd.push(function() {
mobile_slots.push( googletag.defineSlot( “/1005424/_dPSv4_mob-all-article-bottom_(300×250)”, [300, 250], “pb-ad-78158” ).addService( googletag.pubads() ) ); } );

The post 3 Secrets to Getting Amazing Toddler and Newborn Photos by Heather Symes appeared first on Digital Photography School.

Digital Photography School

 
Comments Off on 3 Secrets to Getting Amazing Toddler and Newborn Photos

Posted in Photography


Watch This: The Secret(s) to Alexis Cuarezma’s Success

19 Feb

Up for a quick shot of knowledge, with an order of motivation on the side?

Take a few minutes to watch this interview with photographer Alexis Cuarezma, a sports portrait specialist based in San Francisco and LA.

The short version? Be like water finding downhill. But the video is full of good tips, strong work and solid dose of BTS pics to satisfy your jones for lighting.Read more »
Strobist

 
Comments Off on Watch This: The Secret(s) to Alexis Cuarezma’s Success

Posted in Photography


5 Lightroom Develop Module Secrets Revealed

16 Jan

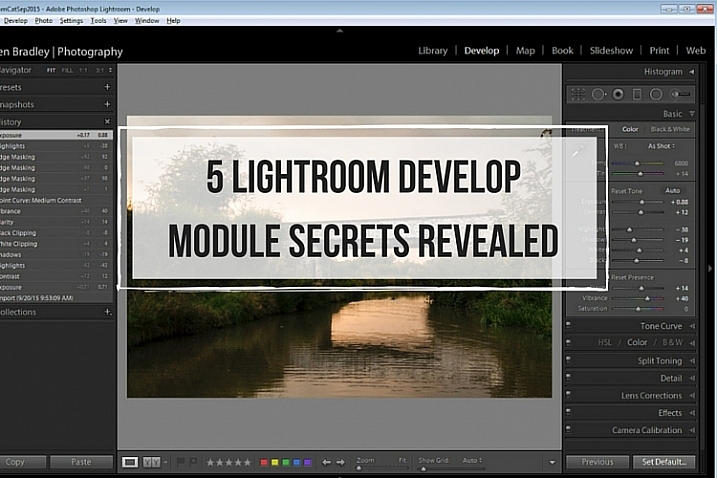
5-lightroom-develop-module-secrets-revealed

When you’re new to Lightroom, some features of the program aren’t immediately apparent, or easily discoverable. In this article I’ll introduce you to five Lightroom Develop module secrets that will help you get more out of photo editing in Lightroom.

#1 Smarter Virtual Copies

Often when you’re working in Lightroom you’ll edit an image to look one way, and then decide you’d like to try to edit it in a different way – without losing your work. The trouble is, that once an image has been edited, any virtual copy that you create will use the current look of the image as its starting point. So the first entry in the History Panel will be the creation of the Virtual Copy and you can’t, using the History Panel, wind the photo back to how it looked out of the camera.

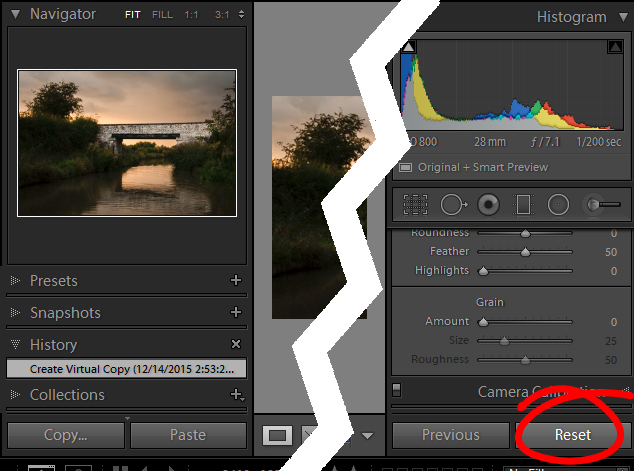
You can, however, use the Reset button at the foot of the right panel of the Develop module. Click Reset to reset your new Virtual Copy, so it is the original out of camera image with all edits removed. Of course, the edits will remain on your original image (just the Virtual copy will be reset).

reset a virtual copy to the original image state in Lightroom
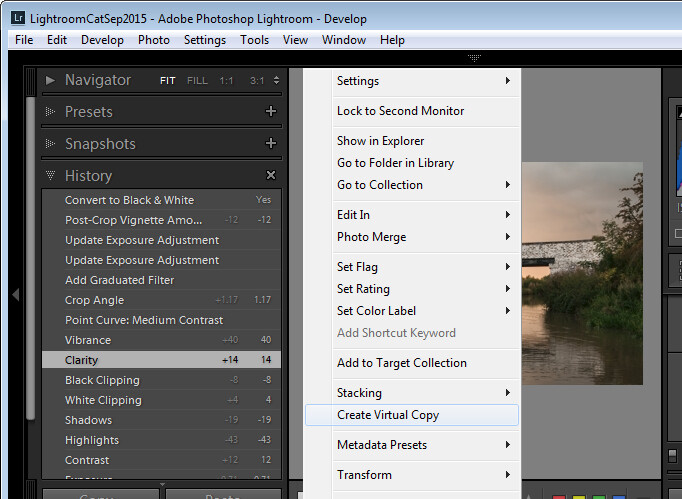
So far, so good. But what if you want to create a Virtual Copy that starts partway through the editing process? Well, that can be done too. Start with the original image, open the History Panel on the left, and click on the entry which shows the image looking as you want for your virtual copy. Note that the most recent edit is at the top of the History panel.

make a virtual copy from a partially edited image in Lightroom

Notice the History panel is opened, and a state other than the current one is chosen to make the Virtual Copy.

Now right click the image and choose Create Virtual Copy – Lightroom will create a new virtual copy and switch to it. Immediately after you do this, click back on the image that you made the copy from – the original image – and in the History Panel, click the topmost entry. This reinstates your edits to the original image, back to your last edit. It’s important to do this before you start working on the new Virtual copy as it is easy to forget to perform this step and, in doing so, you may lose your edits if you subsequently make changes to the original image.

#2 Comparing Before and After

In Lightroom you can compare the before and after editing state for an image by clicking on the image in the Develop module and pressing the backslash key on your keyboard (\). Press once to see the Before state and once again to return to the current edited state of the image.

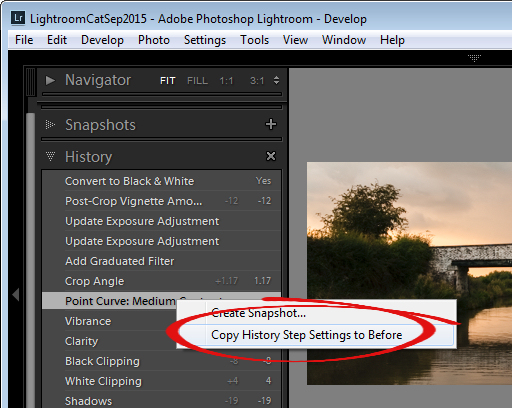
So far, so good. But what if you want to compare the current edited state with an earlier edited state – not with the original out of camera image? You can do this if you open the History panel, then right click the entry in the History list that you want to compare with the current state of the image – you can choose any of the states in the list. From the popup menu choose Copy History Step Settings to Before. Now when you press the Backslash key to compare the before and after, you’ll be comparing a previous state but not the original out of camera image.

change the starting point for a before/after comparison in Lightroom

#3 Reverse Engineer Presets

A Lightroom preset is a set of slider settings that have been saved in such a way that they can be applied to any image, at any time. That said, there is nothing that can be applied using a preset that you cannot also apply manually to an image, by using the tools in the Develop module. This means that Presets contain valuable information for editing images which you can discover by reverse engineering them. So, if you like a preset that ships with Lightroom, or if you have downloaded and installed other presets that you like, use the process that follows to learn how they work.

Start with an image that is in its original out of camera state, and apply the preset to the image. Now look through the settings in the Develop module panels on the right to see what adjustments have been made to the image.

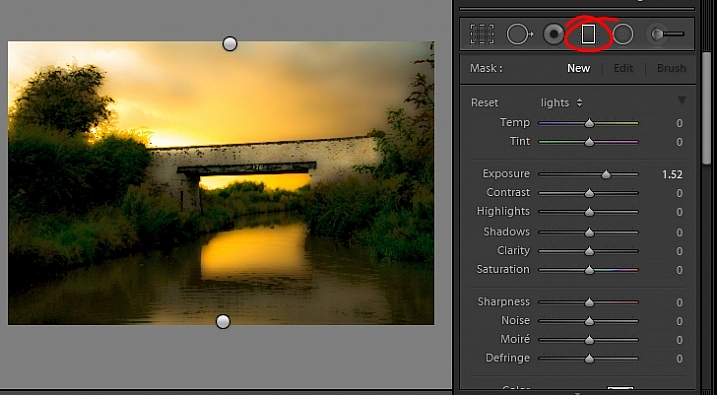
To see if there are any Graduated Filter or Radial Filter adjustments included in the preset, click the Graduated Filter tool, set the Show Edit Pins setting to Always and see if any pins appear on the image. If so, click to see where they have been applied and what their settings are. Repeat this step with the Radial Filter to see if any radial filter adjustments have been made to the image. As presets cannot contain Adjustment Brush edits there’s no point in checking that tool.

reverse engineer a preset in Lightroom

It’s best to study presets without first making any changes to your image, except for applying the preset. This way you will know that all the edits that have been applied to the image are part of the preset, and none of them are your own edits.

#4 The Alt Key works nearly everywhere

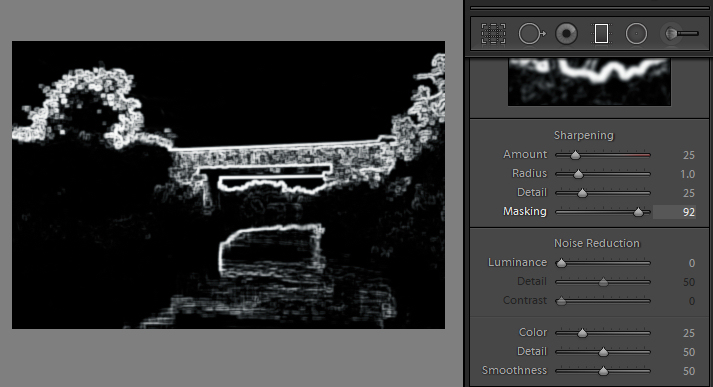
The Alt key is the biggest hidden secret keystroke in Lightroom. When you press it, various things appear on the screen that previously were not visible. For example, in the Basic panel you can use the Alt key to display Reset Tone and Reset Presence options. The Exposure, Whites, Blacks and Split Toning sliders all display visual feedback when you hold the Alt key while adjusting them. So too do the sliders in the Sharpening panel. To learn more about using the Alt key in the Lightroom Develop module, check out this post: Lightroom Tips for the Develop Module – the magic Alt key.

alt key provides visual feedback for many sliders in Lightroom

#5 Keyboard Adjustments

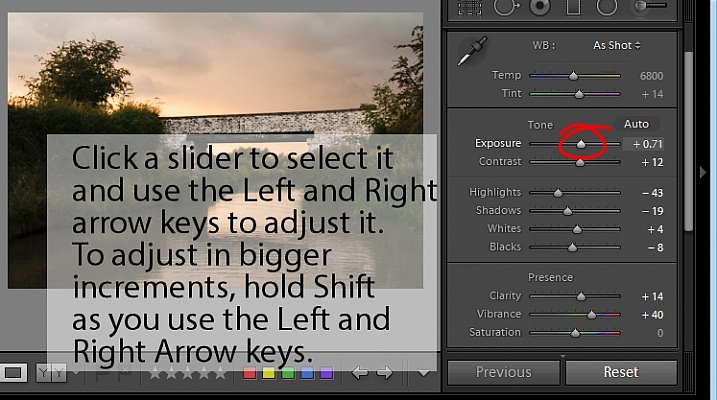
If you find it difficult to adjust the sliders in Lightroom using your mouse, then try adjusting them using the keyboard instead. To do this, click on a slider to target it and then use the left and right arrow keys to adjust the slider in small increments. To move in larger increments hold the Shift key as you press the arrow keys. You will find that the Up and Down arrow keys work identically to the Left and Right arrow keys.

adjust Lightroom sliders using the arrow keys

If you want to continue to use the sliders to make your adjustments, but you find that they travel too fast for you to get an accurate adjustment, hold the Shift key as you drag on a slider. This slows its movement down and makes it easier for you to make small adjustments. You can also click on the numeric value that a slider is currently set to and use the Up and Down arrow keys to adjust the value in small increments.

To reset a slider – double click its name and it will return to its default value for that type of image.

Watch the video

Here is a video version of this article so you can follow along as I walk you through each point.

googletag.cmd.push(function() {
tablet_slots.push( googletag.defineSlot( “/1005424/_dPSv4_tab-all-article-bottom_(300×250)”, [300, 250], “pb-ad-78623” ).addService( googletag.pubads() ) ); } );

googletag.cmd.push(function() {
mobile_slots.push( googletag.defineSlot( “/1005424/_dPSv4_mob-all-article-bottom_(300×250)”, [300, 250], “pb-ad-78158” ).addService( googletag.pubads() ) ); } );

The post 5 Lightroom Develop Module Secrets Revealed by Helen Bradley appeared first on Digital Photography School.


Digital Photography School

 
Comments Off on 5 Lightroom Develop Module Secrets Revealed

Posted in Photography


Secrets to Shooting the Northern Lights

15 Jan

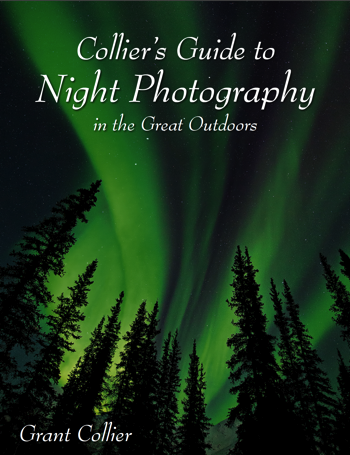
One sale now 32% OFF at Snapndeals: Collier’s Guide to Night Photography in the Great Outdoors eBook. Now only until January 26th, 2016


Of all the phenomena you can view in the night sky, the Northern Lights may be the most spectacular. The lights are created by charged particles from the sun, interacting with gaseous particles in our atmosphere. These lights also appear in the southern hemisphere, where they are known as the Southern Lights. Another name for both is the Aurora Borealis.

Grant Collier Northern Lights 1

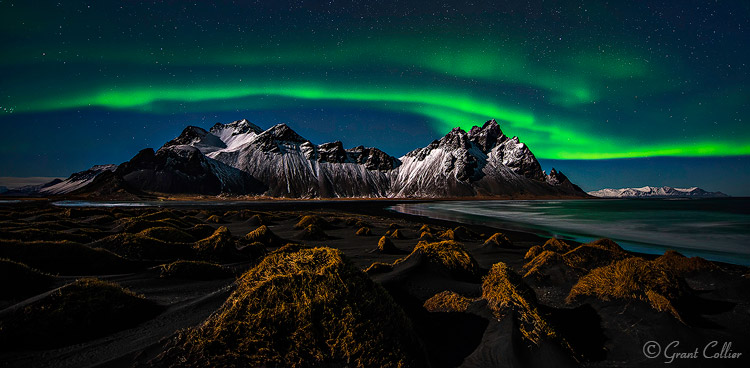
Vesturhorn Mountain, Iceland – 14mm lens, f/2.8, for 10 seconds at ISO 1600

How to find Northern Lights

You can view a forecast for the Northern Lights online here. This website gives you a general idea of where the Northern Lights will be visible on any given night. For example, if you are in the northern continental United States, you might be able to see the Northern Lights if the forecast is 5 or higher. However, to get the best chance of viewing the Northern Lights, you’ll need to travel even farther north. To discover the best locations, try to find a day when the forecast on the above website is a 1 or 2. Anywhere within the bright green circle is a prime viewing spot for the Northern Lights. Some places that are somewhat easier to access in prime viewing areas are Wiseman, Alaska; Yellowknife, Canada; Iceland and northern Norway.

What lens to use

When shooting the Northern Lights, it is very helpful to use a fast lens that has an aperture of f/2.8 or wider. These lenses can let more light into the camera, which will yield higher quality images at night. A good option is the Rokinon 14mm f/2.8, which costs round $ 300. This is an ultra-wide angle lens, which is important when photographing something as expansive as the Northern Lights. Another option is the Nikkor 14-24mm f/2.8. This is a phenomenal lens, but it does cost almost $ 2,000.

Grant Collier Northern Lights 2

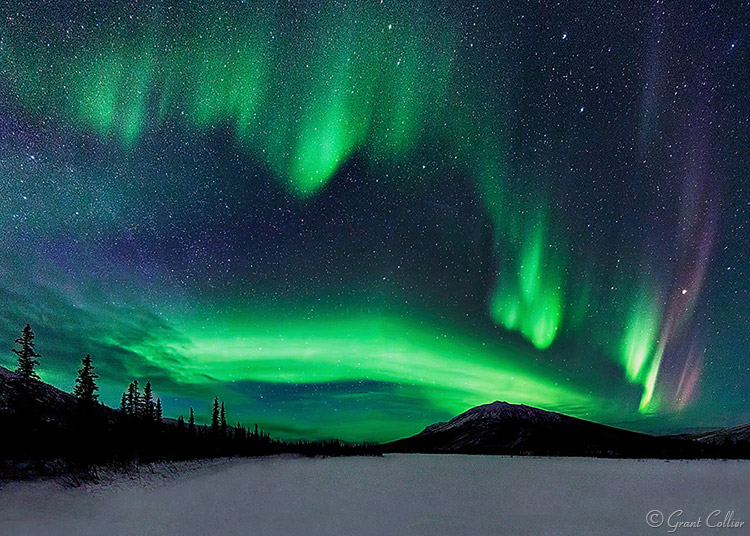
Wiseman, Alaska – 14mm lens, f/2.8, 15 seconds, ISO 6400.

Camera settings and exposure

You’ll typically need to use the widest aperture on the lens, and for shutter speed, you’ll normally want to use exposures between 10-15 seconds. If the lights are moving rapidly in the sky, they can start to blur too much with longer exposures. If the Northern Lights aren’t moving rapidly, you can get away with exposures of 20-30 seconds. You should use the highest native ISO on your camera that doesn’t cause the highlights to be overexposed (a native ISO is one that is represented by a number, as opposed to letters, like H1 or H2). Be careful, though because when the Northern Lights become really bright, it is possible to overexpose the shot.

I recommend underexposing the images a little, so that you won’t risk blowing out the highlights, if the lights suddenly brighten. You’ll want to frequently check your histogram to make sure you’re not coming close to clipping the highlights. If you are, you’ll need to lower the ISO or exposure length.

Grant Collier Northern Lights 3

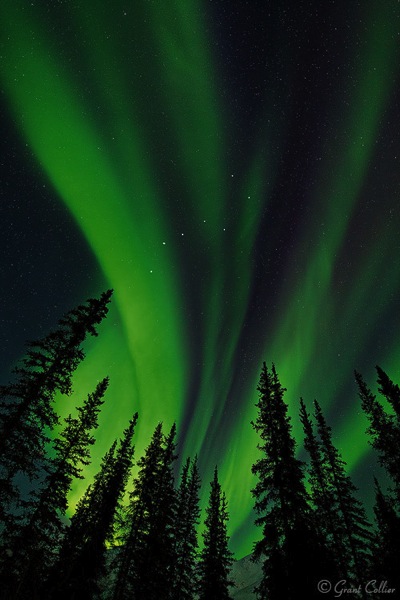
Wiseman, Alaska – 14mm lens, f/2.8, 8 seconds, ISO 6400.

Stitching images

The Northern Lights can fill up most of the sky, and even ultra-wide angle lenses may only capture a portion of the display. To overcome this problem, you can create stitched images to capture more of the scene. A stitched image is one where you take multiple shots, each comprising a small part of the scene you want to photograph. You then later use computer software, like Lightroom or Image Composite Editor (Windows only), to stitch these images together, to produce an image of the whole scene. The great thing about stitched images is that they will also produce larger images with more detail, and less noise.

If the aurora is bright and moving fast, you’ll typically want to use a very wide lens, like 14mm, to create a single-row stitched panorama. You’ll have to take all of the images pretty quickly, otherwise, the aurora can move so much that the images won’t stitch together seamlessly. If the aurora is relatively dim, it doesn’t tend to move as fast. In this situation, it’s possible to do multi-row stitched panoramas with up to 20 images. These large stitched images can help minimize noise, which is more noticeable when the aurora is fainter. I recommend a 24mm lens to capture such images.

Grant Collier Northern Lights 8

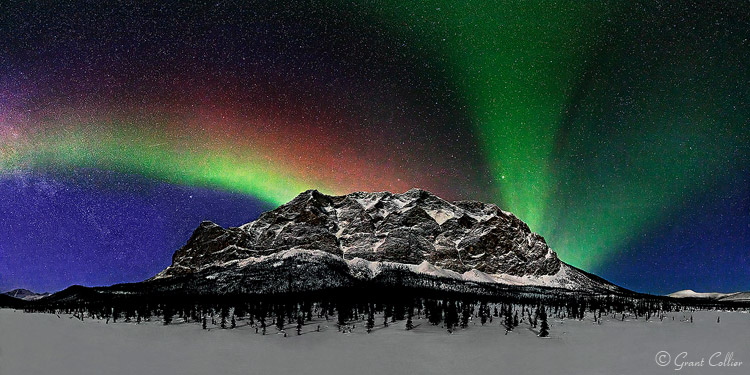
Supapak Mountain, Alaska – 24mm lens, f/2.8, 10 seconds, ISO 6400, 9 images stitched together.

When to look for the lights

The best time of the year to photograph the Northern Lights is near the spring and autumn equinoxes, in March and September. The Northern Lights tend to be somewhat more active during those months than others. Never plan a trip to photograph the Northern Lights between late-April and early-August. During this time, it isn’t dark for very long, if at all, at the far northern latitudes. If you plan a trip in December or January, it will be dark much of the day, if not all of the day. However, it can be bitterly cold during this time, so spring and autumn is still preferable for all but the most adventurous photographers.

Grant Collier Northern Lights 5

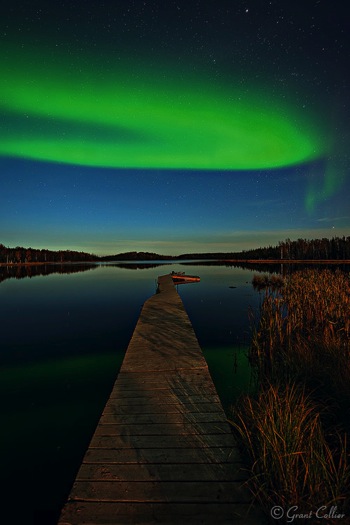
Yellowknife, Canada – 15mm lens, f/2.8, 30 seconds, ISO 1600.

Grant Collier Northern Lights 7

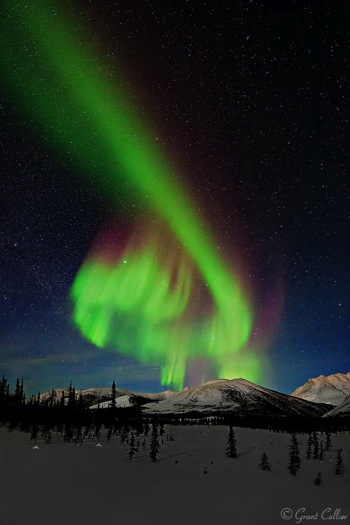
Brooks Range, Alaska – 14mm lens, f/2.8, 10 seconds, ISO 6400.

Other considerations

Since it can be so cold when shooting the Northern Lights, it’s possible that your lens will fog up over the course of the night. Lenses fog up much faster when they are taken from a warm location to a cold one. One way to prevent this is to keep your camera equipment cold, by storing it in the trunk of your vehicle rather than in a warm room. You will, however, want to store your batteries in a warm location, as cold batteries do not last as long as warm ones, so this can help maximize battery life. Another option to prevent a lens from fogging up is to attach hand warmers to the side of it using rubber bands to help keep it warm.

Grant Collier Northern Lights 6

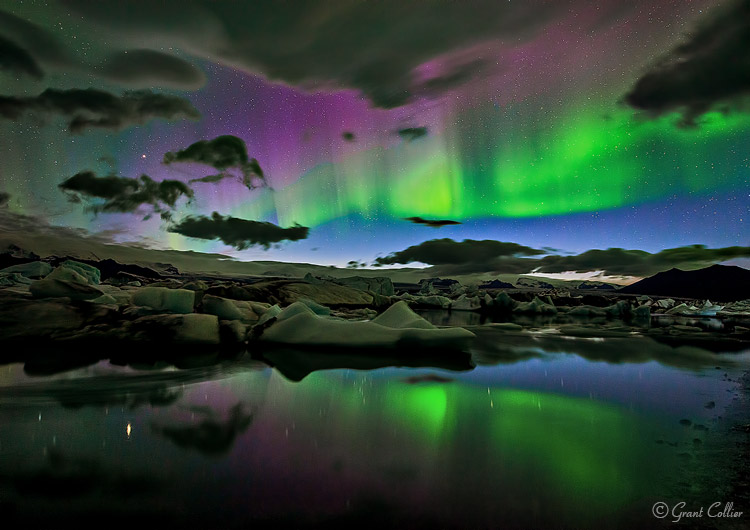
Jokulsarlon Lagoon, Iceland – 19mm lens, f/2.8, 20 seconds, ISO 3200.

You can shoot the Northern Lights under almost any moon phase. The aurora will be brighter under no moon, but any foreground in your shot will likely be rendered as a dark silhouette. Under a full moon, the foreground will be well-illuminated and the aurora will be fainter, but this may not matter. The Northern Lights are often so bright that they will be easily visible under a full moon. My favorite time to shoot the Northern Lights is under a moon that is 20%-50% illuminated. It will be dark enough to see the stars and aurora a little better than under a full moon, and you’ll still be able to render a lot of detail in the foreground. In order to be able to shoot under a variety of conditions, I recommend planning a trip so that you arrive near a new moon, and leave near a full moon.

Grant Collier Northern Lights 4

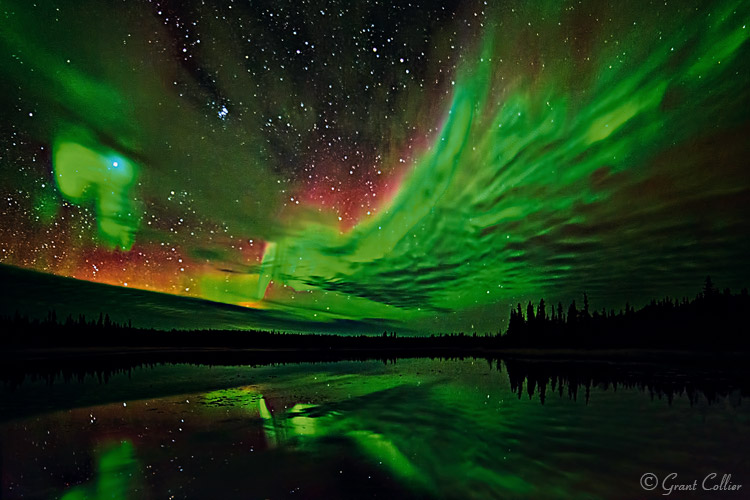
Yellowknife, Canada – 14mm lens, f/2.8, 15 seconds, ISO 6400.

Practice near home first

One mistake I’ve seen photographers make is to go on an expensive trip to see the Northern Lights without having done any night photography beforehand. They come away with subpar images that are out of focus, or improperly exposed. Unless you live in an area where you can see the Northern Lights, I recommend becoming proficient in night photography before paying for an expensive trip to see the aurora. Photographing the Northern Lights is more difficult than photographing most other night scenes. The lights can move fast and may not appear for very long, so you need to be able to make the most of your time when the lights are out. If you practice with easier subjects beforehand, you should be able to come away some great images!


Screen Shot 2015 12 27 at 5 15 21 PMOne sale now 32% OFF at Snapndeals: Collier’s Guide to Night Photography in the Great Outdoors eBook. Now only until January 26th, 2016


googletag.cmd.push(function() {
tablet_slots.push( googletag.defineSlot( “/1005424/_dPSv4_tab-all-article-bottom_(300×250)”, [300, 250], “pb-ad-78623” ).addService( googletag.pubads() ) ); } );

googletag.cmd.push(function() {
mobile_slots.push( googletag.defineSlot( “/1005424/_dPSv4_mob-all-article-bottom_(300×250)”, [300, 250], “pb-ad-78158” ).addService( googletag.pubads() ) ); } );

The post Secrets to Shooting the Northern Lights by Grant Collier appeared first on Digital Photography School.


Digital Photography School

 
Comments Off on Secrets to Shooting the Northern Lights

Posted in Photography


Discover the Secrets of Natural Light Photography With This 70% Off Deal

13 Dec

As we announced yesterday – today is Day 1 in our 12 Deals of Christmas dPS – and we’re kicking things off with fantastic deals on or popular Natural Light eBooks.

You can pick either one up for $ 7 (65% off) or grab them both for an even more amazing price of just $ 12 USD (a 70% saving).

PicMonkey Collage

The eBooks are:

  • Natural Light: Mastering a Photographer’s Most Powerful Tool – by travel photographer Mitchell Kanashkevich
  • Life in Natural Light: The Ultimate Guide Guide for Photographers – by family photographer Rachel Devine

These eBooks are normally $ 19.99 – today only either one is $ 7 USD!

Both of these beautifully illustrated and informative eBooks tackle this vitally important topic for photographers from different perspectives but together they make a beautiful little bundle of learning for just $ 12 (70% off).

Taking beautiful photos using nothing but the light around you can often seem as difficult as using the Jedi Mind Trick to get the people in your lens to sit still. But these two books will help you see your photography in… well…. a whole new light.

We could go on about these eBooks all day but this deal only lasts 24 hours so head to our 12 Days of Christmas Page and grab yours before this deal is over.

googletag.cmd.push(function() {
tablet_slots.push( googletag.defineSlot( “/1005424/_dPSv4_tab-all-article-bottom_(300×250)”, [300, 250], “pb-ad-78623” ).addService( googletag.pubads() ) ); } );

googletag.cmd.push(function() {
mobile_slots.push( googletag.defineSlot( “/1005424/_dPSv4_mob-all-article-bottom_(300×250)”, [300, 250], “pb-ad-78158” ).addService( googletag.pubads() ) ); } );

The post Discover the Secrets of Natural Light Photography With This 70% Off Deal by Darren Rowse appeared first on Digital Photography School.


Digital Photography School

 
Comments Off on Discover the Secrets of Natural Light Photography With This 70% Off Deal

Posted in Photography


NYC Secrets: 10 Hidden Sights in The City That Never Sleeps

08 Oct

[ By Steph in Destinations & Sights & Travel. ]

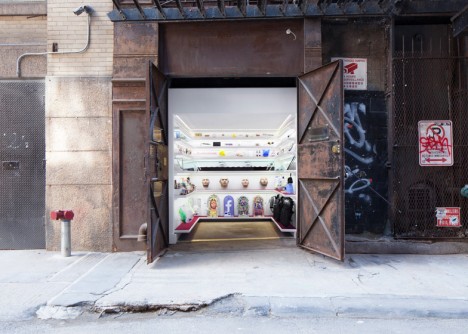
NYC secrets mmuseumm 1

Even if you’re sick of the surface-level, tourist-friendly version of New York City, there are still many sights to be seen, including fun little secret installations right under your nose in busy places like Grand Central Terminal and subway platforms. These 10 unexpected and little-known attractions in the New York City area include a tiny gallery in an elevator shaft, a slice of punk history, an actual piece of Berlin and a scenic tram ride straight to a stunning abandoned hospital on an island in the East River.

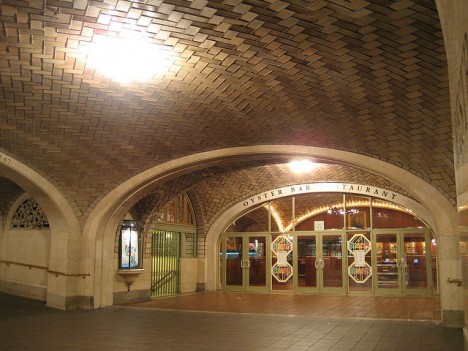
Whispering Gallery, Grand Central Terminal

NYC secrets whispering

If you see someone with their face in a corner and their lips nearly touching the walls in the middle of Grand Central Terminal, don’t worry – they’re not acting out the last scene of Blair Witch Project. They’re just whispering. The ‘Whispering Gallery’ is an unofficial attraction created by the acoustic properties of the ceiling between two diagonal corners between the archways. Whisper, and the person standing at the opposite end can hear what you’re saying as if you’re talking into a megaphone. Have a friend stand on the other side, or just freak out random passersby, as seen in the video above. It’s located just outside the Oyster Bar.

Pedestrian Shortcut with Waterfall View
NYC secrets 6 1:2 Ave

NYC secrets 6 1:2 Paley

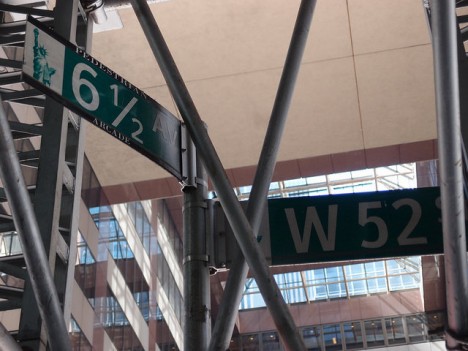
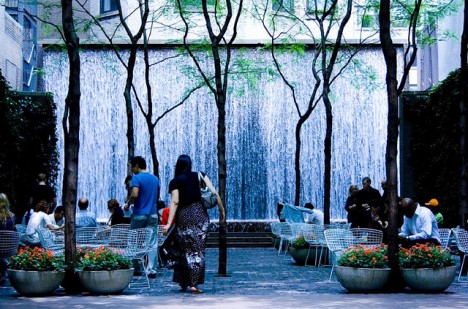
Like something out of Harry Potter, a street marked 6 1/2 Ave offers a semi-secret shortcut from 51st to 57th, and it’s only open to pedestrians. Take a break from screaming cabbies as you stroll (or whatever the New York City version of strolling would be called) down a slightly-slowed-down path through Midtown Manhattan, adjacent to the beautiful 20-foot waterfall in Paley Park. There’s another waterfall at Midtown East’s Greenacre Park at 217 East 51st St., as well as the five located within Central Park.

Remnants of the Berlin Wall

NYC Secrets Paley Park Berlin Wall

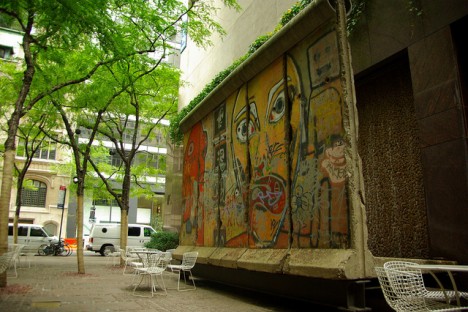
Speaking of Paley Park, this little pocket recreation space in the heart of Midtown at 3 East 53rd also boasts five sections of the Berlin Wall, originally located along the Waldemarstrasse and decorated by German artists Thierry Noir and Kiddy Citny in 1985.

C-Squat: Punk History in the East Village
NYC Secrets C-Squat 2

NYC Secrets C-Squat
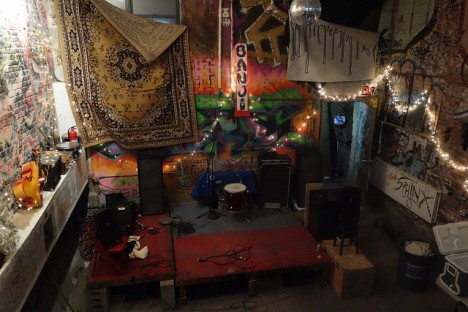
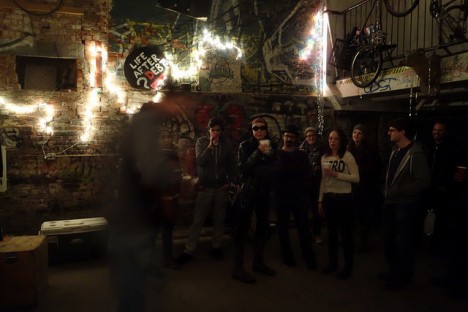
A little bit of New York City’s legendary punk heritage can still be found at 155 Avenue C, nicknamed C-Squat. Squatters claimed the abandoned space in the ‘80s, rebuilding it to make it habitable, and started throwing punk shows in the basement in the ‘90s. The city hammered out an agreement with the long-term residents, allowing them to stay as long as they bring it up to code, so it will soon officially pass into the hands of a bunch of artists and musicians. The walls are still covered in decades’ worth of graffiti and murals. One of the last holdouts of old school punk culture in the city, it’s still used as a location for underground parties.

Musical Subway Installation

strange new york reach 1

OLYMPUS DIGITAL CAMERA

OLYMPUS DIGITAL CAMERA

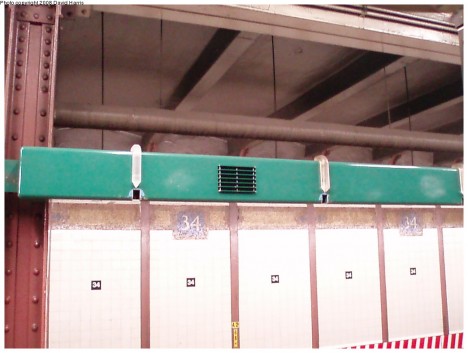
An unassuming pair of green metal bars blend into the walls of New York City’s 34th Street Subway Station, but pay closer attention and you’ll notice a sign alerting transit riders to an installation called REACH: New York. Created by Christopher Janney in 1995, this weird interactive exhibit features speakers embedded with motion sensors so that when you place your hand in front of one of the holes in the bars, you’ll trigger a sound. Move from one sensor to another to compose your own musical sequence. The artist changes out the sounds every year.

Roosevelt Island Smallpox Hospital
NYC Secrets Roosevelt Island Hospital

NYC Secrets Roosevelt Island Tram

Patients infected with smallpox, leprosy and other highly infectious diseases were once kept quarantined in a hospital on New York City’s Roosevelt Island, which treated about 7,000 people per year between 1856 and 1875. It was abandoned altogether by the 1950s and fell into disrepair before the Landmark Preservation Commission declared it an important part of the city’s heritage, reinforcing the walls. The island has also been home to insane asylums and prisons, and is now a great place to take a riverside walk and get a nice view of the Upper East Side. For the swipe of a MetroCard, you can take a scenic tram to gaze up at the hospital facades, check out a lighthouse and view some public art.

Next Page – Click Below to Read More:
Nyc Secrets 10 Hidden Sights In The City That Never Sleeps

Share on Facebook


[ By Steph in Destinations & Sights & Travel. ]

[ WebUrbanist | Archives | Galleries | Privacy | TOS ]


WebUrbanist

 
Comments Off on NYC Secrets: 10 Hidden Sights in The City That Never Sleeps

Posted in Creativity