A guest contribution by Misho Baranovic, co-developer of the Perspective Correct app and author of the iPhone Photography DPS eBook .

I’ve read a lot of perspective correction articles over the past few days and my head is spinning from the technical explanations, illustrations and equations. In this article, I’m going to keep it simple and talk about the role that perspective plays in photography.
What is Perspective?
Perspective is one of the many ways that the human eye can judge depth within a scene. Perspective is something that we can see with one eye (monocular) rather than two (binocular). It refers to the angle and location of parallel lines within a scene. The eye registers depth when parallel lines start moving towards each other (converging). An example would be standing on a straight road, looking down the road, and noticing how the road narrows as it gets further away from you.
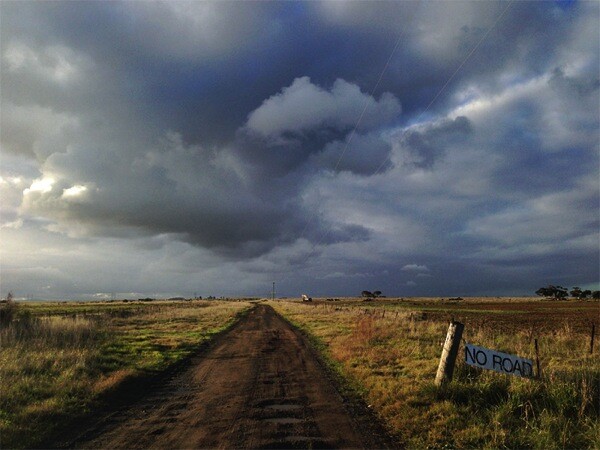
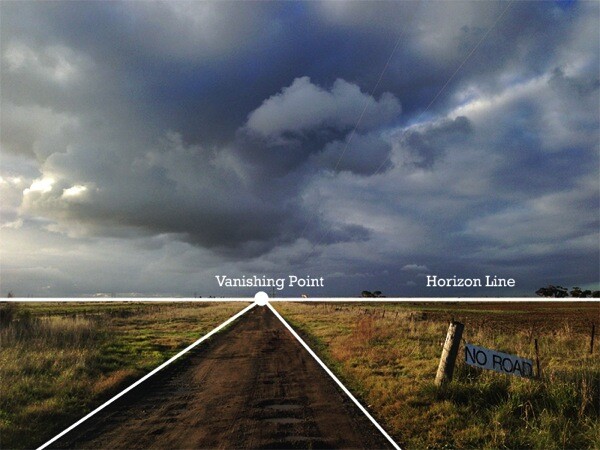
In art and photography, Linear Perspective refers to the way lines are drawn and captured to show an objects perceived size within space. In short, how we translate real world depth into a flat picture. Linear Perspective is made up of two basic concepts, the horizon line and vanishing point. The horizon line represents the viewing angle of the observer. Vanishing points are the point (on a horizon line) where parallel lines meet (converge). For example, the point where the two sides of the straight road meet (as shown below).
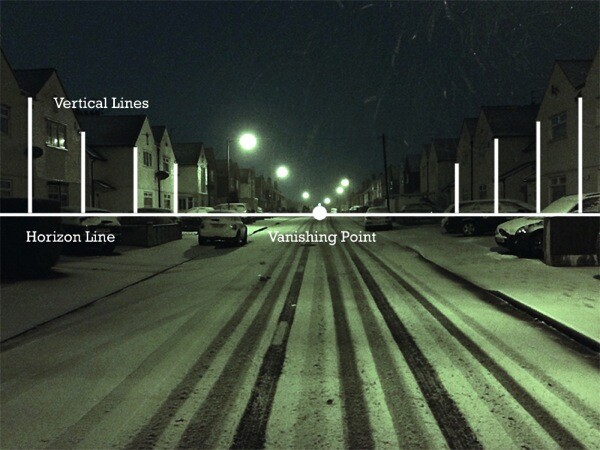
One of the key visual cues in Linear Perspective is that vertical lines and edges remain vertical in the scene. The only time you would have vertical lines coming together is if you are trying to show a triangular or pyramid shape within the scene, like the angle of a building’s roof or the shape of the Eiffel Tower.
Since the start of photography, camera and lens makers have focused on replicating the visual cues of Linear Perspective in order to make photos look as ‘true to life’ as possible. Nearly all modern lenses are rectilinear – they capture straight lines in a scene as straight lines in a photograph. Whether wide angle or zoom, DSLR or iPhone, lenses are designed to keep lines straight, which helps the eye judge depth within a two dimensional scene. The fisheye is the most popular non rectilinear lens as straight lines are shown as curved from the extreme field of view.
Perspective Distortion
For this article I’m going to focus on only one form of photographic perspective distortion – perspective convergence or keystoning. This form of distortion is very common across architectural, street and travel photography. It’s most often seen when tall buildings ‘fall’ or ‘lean’ within a picture. This distortion has become so common that most people have stopped noticing it within their pictures or just think it has something to do with the focal length of their lens. For example, you can see the extent of the vertical convergence below when the verticals are outlined in white.
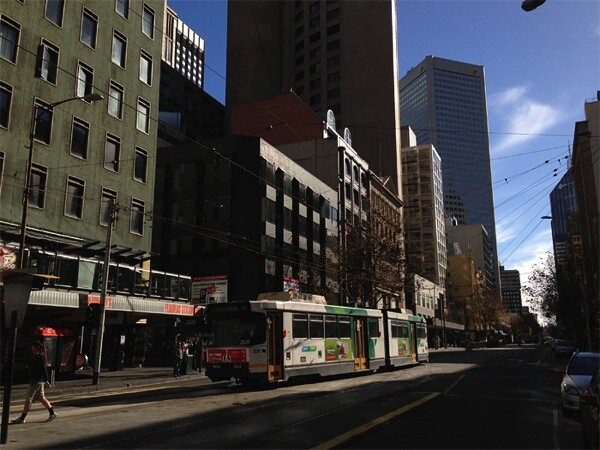
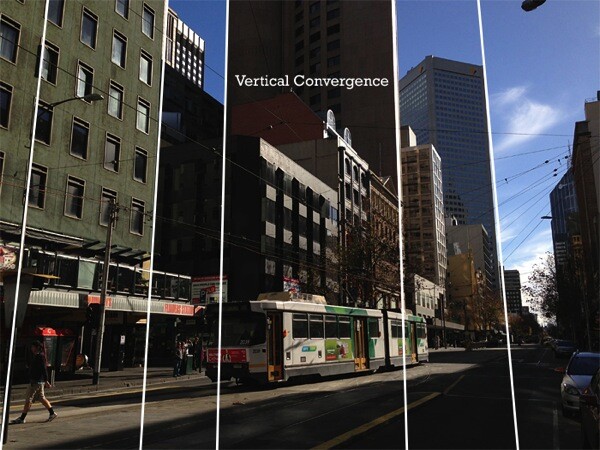
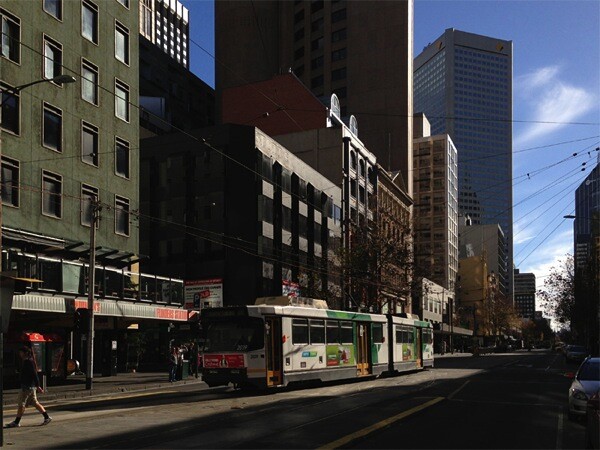
For a number of photographers, vertical convergence and distortion are unpleasant and unwanted because they don’t conform to Linear Perspective cues where vertical lines remain vertical. This makes the scene look different to how we think it should look. While this distortion can be used creatively, corrected photos often look ‘right’ to the viewer (see below).
Why does Distortion Happen?
It’s actually pretty simple. As mentioned, modern lenses are designed to show straight lines. However, this only works when we the camera is pointed straight at (in line) with the object that is being photographed. This is because the distance between the camera and object remains the same. As soon as the camera is titled then the distance changes. Let me explain, if I’m trying to capture a tall building straight on with my camera I can only get the bottom section – vertical lines are straight but I’m missing the rest of the building. Now if I angle the camera higher I can get the whole building into the frame but now the vertical lines (sides of the building) are converging. Why? It’s because the top of the building is now further away from the lens than the bottom – just like the road receding into the distance.
So how do you take a photograph of a tall building without this happening? There are a few ways. The most obvious is by changing your viewpoint. You need to get higher to shoot more of the building front on, with the mid-point being the best place to capture the maximum amount of the structure. You could shoot out the window of a neighbouring building, or if there is nothing around you could spend some money on a crane!
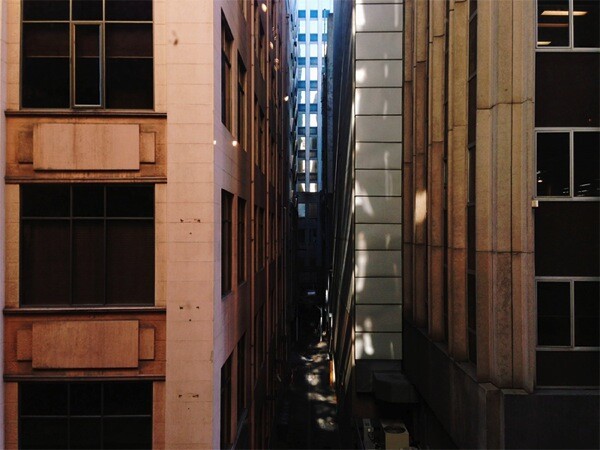
This photo was taken from the third floor of a neighbouring block. You can see that all the verticals in the photo are straight.
If you can’t physically get higher then you can change your viewpoint in two other ways. One is with the help of shift lenses the other is through perspective correction software.
Shift Lenses
The ability to shift the position of the lens has been around since the beginning of photography. The original view cameras (created in the 1840s) used a bellows system which let photographers change the position (shift) the lens in relation to the film. The shifting mechanism acted like a mini elevator, moving the photographer’s viewpoint higher and lower. Historically, shifting in order to correct perspective convergence was seen as an important part of the capture process, just like focus, shutter speed and aperture. Shifting was possible because the lens captured a much larger (circular) field of view than the film. The same way that modern shift lenses work. Modern shift lenses are commonly used by architecture photographers to limit vertical convergence on large buildings. However, these lenses can only be used on DSLR or medium format cameras and can also be very expensive (upwards of $ 1,000).
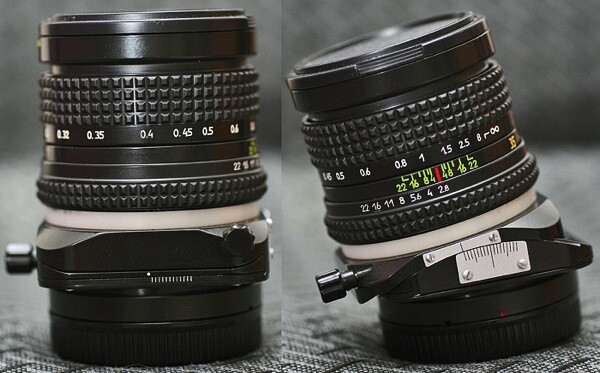
Here you can see the mechanical shift mechanism on an SLR lens – Photos by Bengt-Re
Software Correction
In recent years, digital technology has been able to replicate this shifting process, artificially changing the photographer’s viewpoint. Software like Photoshop, Lightroom or Gimp reworks the pixels in an image in order to straighten vertical lines in turn reducing distortion. Most of these programs allow you force the image back into a ‘correct’ position through either sliders or by selecting and dragging a corner. One of the downsides of the software is that significant adjustments require resampling of the image, often reducing sharpness in parts of the photograph.
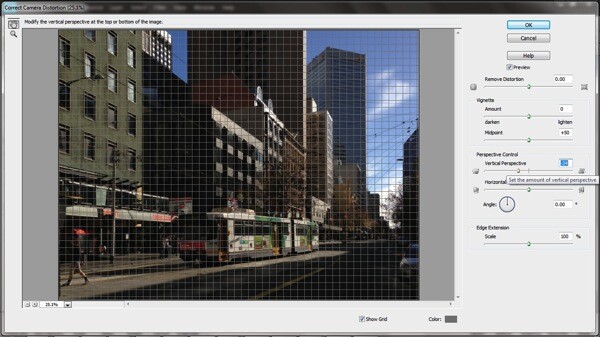
Camera Distortion Correction with Photoshop Elements 11
For photographers that either shoot or edit photos on their mobile phones, the Perspective Correct app for iPhone uses the touch interface to adjust both vertical and horizontal convergence within an image. For example, an up/down swipe on the screen represents the same movement as the shift mechanism on a lens.
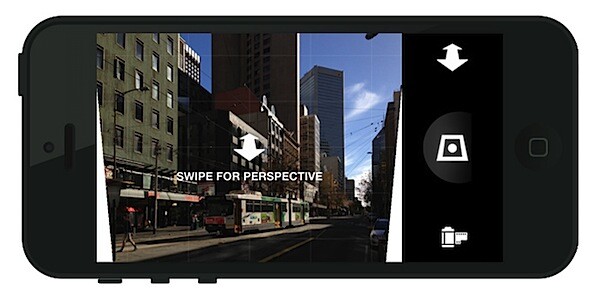
While it’s easy to overlook, small perspective adjustments can often be the difference between good and great urban and architectural photographs.
…………………………………….
Perspective Correct is the first app to offer live perspective adjustment of your photos and is available for download from the Apple App Store for US $ 1.99
Post originally from: Digital Photography Tips.
Check out our more Photography Tips at Photography Tips for Beginners, Portrait Photography Tips and Wedding Photography Tips.
Why are my Buildings Falling Over? A Short Guide to Perspective Distortion and Correction in Photography

Digital Photography School











You must be logged in to post a comment.