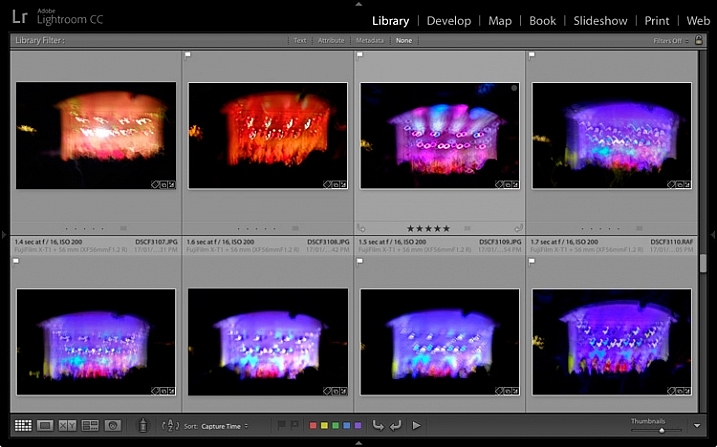
For those of you who have been following my Lightroom articles I thought it would be fun to test your knowledge. We’ll start with the Lightroom Library module because the work you do here, lays the foundation for everything you do inside Lightroom. Master the Library module and you’ll be well on your way to becoming an expert on the entire program.
Ready? Let’s start with what is probably the most important thing of all – backing up your Catalog.
1. How to back up your Catalog
This is really important. Your Lightroom Catalog is absolutely essential because it’s where Lightroom stores every piece of information it has about your photos. Not only does this include the location of your photos (i.e., where they are saved on your hard drive) but any metadata associated with them (from camera settings to keywords), Lightroom specific information (such as which Collections a photo belongs to) and any edits you have made in the Develop module. Yes, these are all stored in the Catalog.
How much of a disaster would it be if you lost all this data? I’m sure it would be a major loss. That’s why it’s so important that you back up your Catalog regularly. You should also back it up to an external hard drive, not to an internal one, in case your computer is lost or stolen.
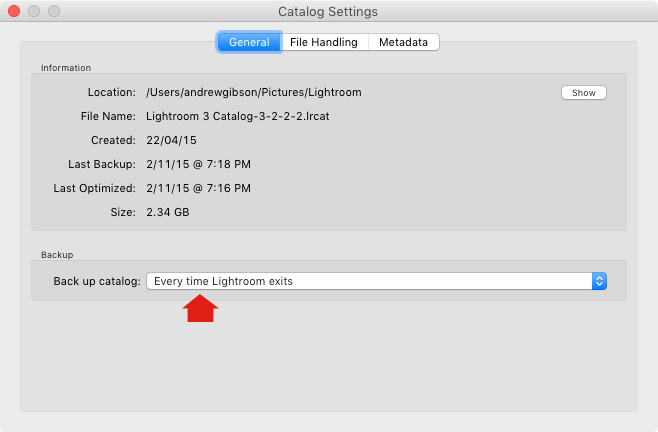
You can check your back up settings by going to Lightroom > Catalog Settings. Click the General tab – Back up catalog should be set to Every Time Lightroom Exits as shown below.
Connect the external hard drive on which you back up your Catalog, then exit Lightroom. Before Lightroom closes down, it displays the Back Up Catalog window. The Backup Folder setting should point to a folder on your external hard drive. If it doesn’t, click Choose and change it now.
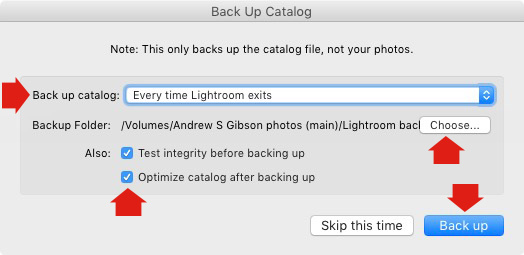
When you exit Lightroom is the only time you will see this popup box, and the only place you can change where it saves the backup of your catalog.
Make sure the Test integrity before backing up and Optimize catalog after backing up boxes are ticked. When you’re done click the Back up button. Lightroom will save a backup of your Catalog to your external hard drive before closing. This may take some time, especially for a large Catalog, so be patient.
Some important things to note about Catalog backups:
- You only need to keep the last two or three backups. You can delete older ones to free up hard drive space.
- If you have Lightroom 6 or Lightroom CC the backed up Catalogs are compressed, saving hard drive space.
- You should always back up your Lightroom Catalog to a different hard drive than the one the main Catalog is stored on. That way, if your main hard drive fails, the backed up Catalog is safe.
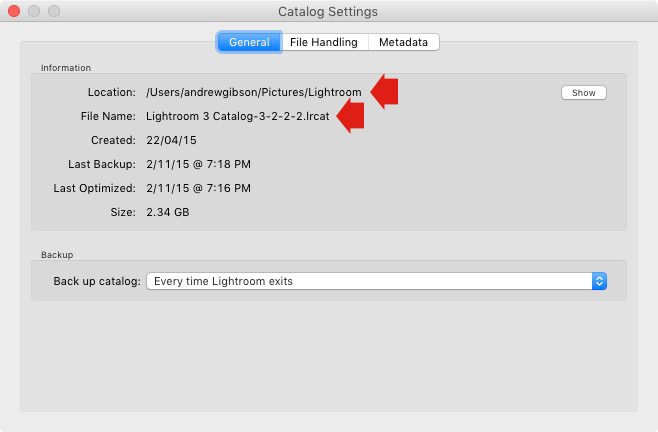
- Once a month (or more often if you like) copy the latest backup to Dropbox, Google Drive or another cloud storage solution. This is to protect you in case you lose both your computer and your external hard drive to theft or fire. The location and name of your Lightroom Catalog are recorded in Catalog Settings.
2. How to back up your photos
This is important to mention because I want to make sure you understand that your photos are not stored inside Lightroom, or in the Catalog. Your photos are saved on your hard drive (or drives) and you need to back them up yourself. It is your responsibility – Lightroom doesn’t do it for you.
There are many ways of backing up photos, you need to find the method that works best for you. However I’m sure it will help if I share my method. Feel free to use, adapt or ignore it.
- Create a folder called Raw. All your Raw files are stored in there (I shoot everything in Raw – you could simply call your folder something like Photos if you shoot a mixture of Raw and JPEG).
- In that folder create a new folder for every year you take photos.
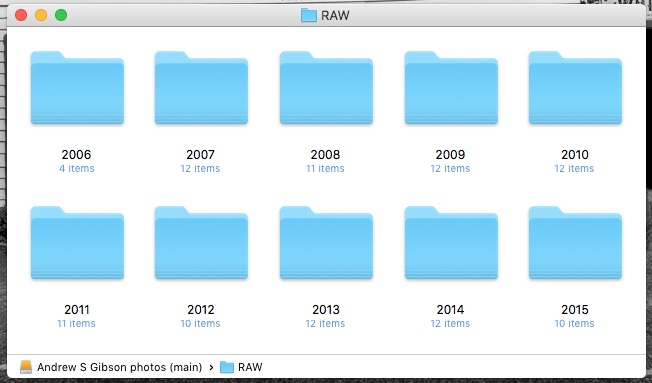
- In each of those folders, create 12 folders, one for every month of the year.
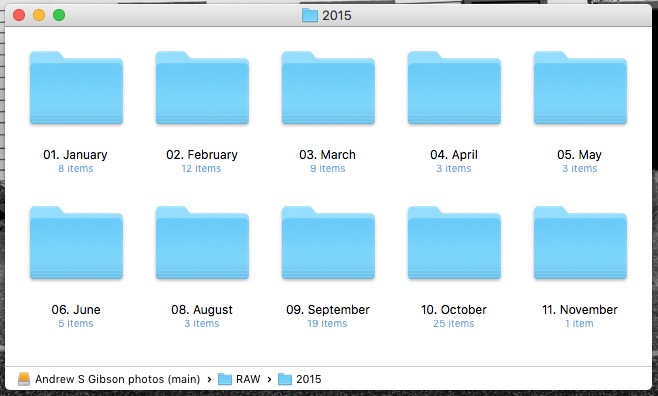
- Whenever you import photos into Lightroom, select the correct destination folder depending on the month and year the photos were taken.
- Place each shoot into a folder of its own. You can either give it a name or organize the folders by date.
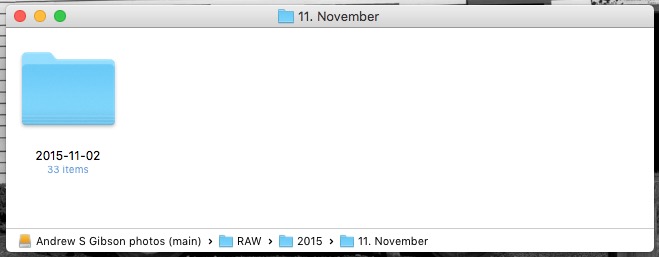
This system works because it’s easy to see whether your Raw files are backed up. Want to back up all your Raw files to another hard drive? Just copy the Raw folder. Want to see whether you’ve backed up all the photos you’ve taken this month? It’s easy to do so with this system.
By the way, I keep my Raw files backed up to four different external hard drives, one of which is stored off-site. That way, if one of the hard drives fails, I have three other copies.
3. How to set up File Handling in Catalog Settings
The File Handling settings are important because they help you strike a balance between optimizing Lightroom’s performance speed, and using hard drive space.
The first thing you need to look at is the total size of the cache. This tells you how much hard drive space your previews take up. For example, looking at mine (see below) I can see my Lightroom previews are currently taking up 28GB.
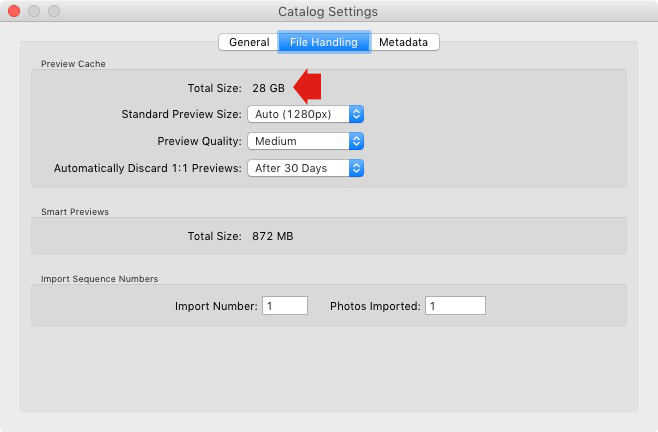
It’s important to keep some of your hard drive free (at least 10%, but preferably more) otherwise Lightroom will slow down (as will everything else your computer does). If you are running out of hard drive space, come and have a look here to see if your preview files are too large.
There are two steps to keeping your previews file under control.
1. Make sure Lightroom is generating the optimum size Standard Previews. These are used to display your photos in Loupe View and don’t need to be any larger than your monitor’s resolution.
If you have Lightroom 6 or Lightroom CC you can set the size to Auto. Lightroom will calculate the optimum size for you. In Lightroom 5 or earlier pick the size that best matches your monitor’s resolution.
Set Preview Quality to Medium – it gives you the best balance between quality and size.
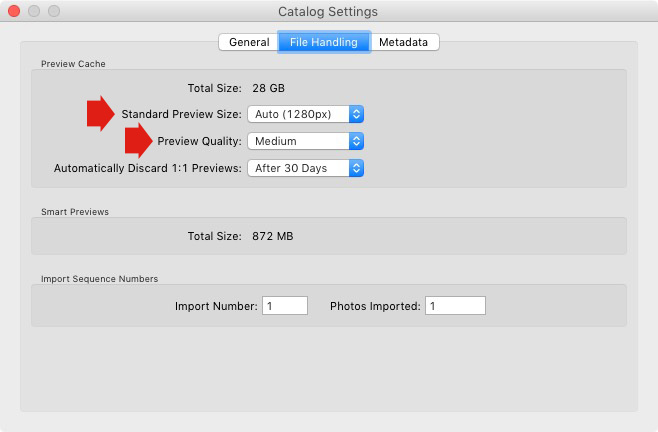
2. Set Automatically Discard 1:1 Previews to After 30 Days. You need 1:1 previews for zooming in to photos, and working on them in the Develop module. However, they are very large. If you generated 1:1 previews for every photo in your Catalog, and never deleted them, you would eventually run out of hard drive space. To be honest, it doesn’t really matter which setting you choose here as long as it’s not set to Never. You can always regenerate discarded 1:1 previews if you need them again later.
4. How to search for images
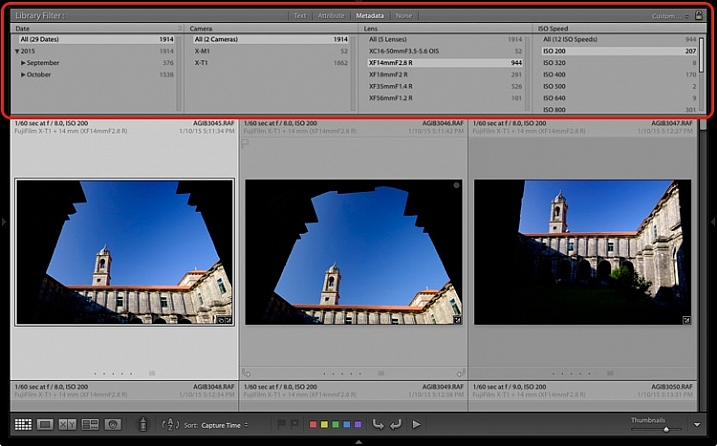
One of the benefits of building the Lightroom architecture on a database is that it is easy to search your photos. You do this in the Filter Bar, which is displayed above the Content Window in Grid View (press ‘\’ on the keyboard if you don’t see it).
There are three types of searches:
- Text: Search keywords, filenames, titles, captions, etc., for text sequences.
- Attribute: Filter by flag, star rating, colour label or file kind (master photo, virtual copy, or video).
- Metadata: Search by date, camera, lens, camera setting (ISO, shutter speed, aperture, etc.), aspect ratio or any of the dozen or so search options listed there.
Have a play with these options to see how it works. Just bear in mind that Lightroom is searching the selected folders or Collections, not your entire Catalog when you do so (select All Photographs to search your entire library).
5. How to use Collections
Collections are virtual Folders, which you use to organize your images. Folders are limited because a single photo can only be stored in one Folder at a time. The same photo can be stored in as many Collections as you like, making Collections the easiest, and most flexible, way to organize your photos.
An example of this is a photo taken of a person called Jenny in Rome in November 2015. The photo can only be stored in one Folder, but it can be added to a Collection called Jenny, another one called Rome, another called 2015 – in fact as many as you need.
Your folders should be set up to make backing up easy (see earlier point). Your Collections should be used to organize your photos. My article Use Lightroom Collection to Improve your Workflow will help you with this.
Your turn
Of course, this list is not exhaustive, but I’d like to hear your thoughts as well. What do you think is essential to know about the Library module? Do you have any questions about the points raised in this article? Please let me know in the comments below.
The Mastering Lightroom Collection
My Mastering Lightroom ebooks are a complete guide to using Lightroom’s Library and Develop modules. Written for Lightroom 4, 5, 6 and CC they show you how to import and organise your images, use Collections, creatively edit your photos and how to work in black and white.
googletag.cmd.push(function() {
tablet_slots.push( googletag.defineSlot( “/1005424/_dPSv4_tab-all-article-bottom_(300×250)”, [300, 250], “pb-ad-78623” ).addService( googletag.pubads() ) ); } );
googletag.cmd.push(function() {
mobile_slots.push( googletag.defineSlot( “/1005424/_dPSv4_mob-all-article-bottom_(300×250)”, [300, 250], “pb-ad-78158” ).addService( googletag.pubads() ) ); } );
The post 5 Essential Things You Need to Know About the Lightroom Library Module by Andrew S. Gibson appeared first on Digital Photography School.

Digital Photography School




















You must be logged in to post a comment.