Using layers in your photo editing software is one of the most important things you can do to create great images. Layers are so powerful, even the most basic understanding of them can improve your photography tremendously. The good news is that using layers is extremely easy, and very quick. If you follow along with this tutorial and incorporate the techniques, you’ll see a huge difference in the quality of your images.

While there are countless things you can do with layers, it’s convenient to group them into three main categories:
- Exposure blending
- Local adjustments to specific parts of an image
- Special techniques
We’ll go through all three categories in this tutorial. Please keep in mind this guide is meant to demonstrate the power of layers and why you want to use them. It’s not a software-specific guide and the exact mouse-clicks and menu items may vary slightly among the different photo editing packages available. That said, the use of layers is very similar in all software.
EXPOSURE BLENDING
Exposure blending is one of the best techniques you can use to improve your photos. It’s critical to understand and use this skill. It’s also super-easy!
First, let’s understand why you need to blend exposures. We know that a camera has limited “dynamic range”. That means the camera has a hard time capturing very bright parts of a scene and very dark parts in a single photo. As a photographer, you would generally choose to prioritize one over the other. This is a sacrifice photographers have been dealing with for decades.
Exposure blending solves this problem.
You simply take two or more photos of the scene at various exposures and blend the best parts of each exposure to produce a single image where all areas are exposed correctly. Wait you say, isn’t that HDR? In a way it sort of is. The difference between automated HDR software and this technique is that HDR software uses a computer algorithm to choose the areas of your photo to blend, while using layers gives you complete control over the final image. It can also be a much quicker process than using dedicated HDR software. Both processes can be considered “High Dynamic Range” photography, and both have their place.
So how do we do it? It’s very simple, you layer the photos with different exposures on top of each other and then manually blend them. Before we blend exposures, let’s take a quick look at how layers work.
Here we see two photos, one of the Brooklyn Bridge and one from Bora Bora.

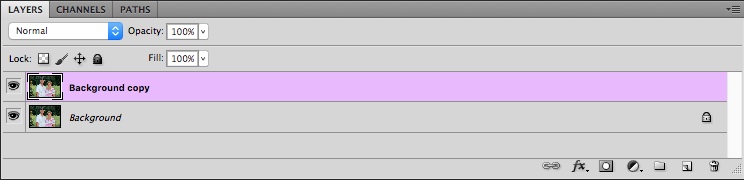
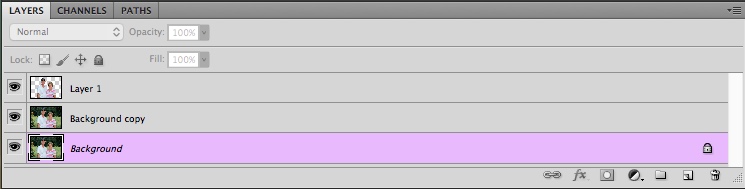
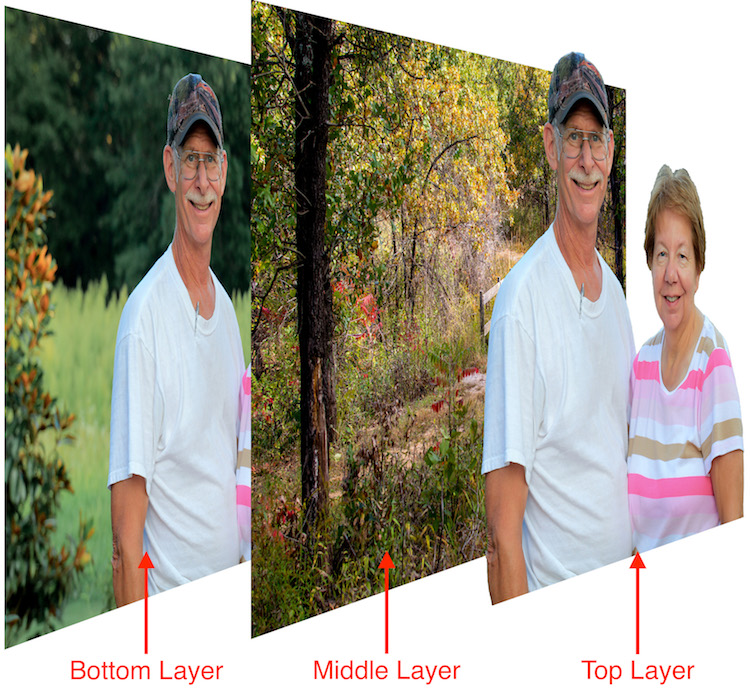
To layer them, I’ll copy-and-paste one photo on top of the other in my editing software. (There are a variety of ways to layer photos depending on the software you use. I use copy-and-paste). After I paste the Brooklyn Bridge photo on top of the Bora Bora photo, you can now see on the right of the screen, where the red arrow points, that the photos are now layered in one document (see image below).

If I were to take an eraser brush and swipe it across the top layer, I will erase that top photo and “reveal” the photo below it. Here’s an example after I’ve taken a swipe with the eraser brush.

That’s all there is to understanding the very basics of how layers work. With just that little piece of knowledge, your photography can be completely transformed.
In the example above, I used the eraser brush to reveal the layer below. That’s one way of doing it, and I showed you that first because it’s an easy way to demonstrate layers. However, most people use what’s called a “layer mask” instead of the eraser brush. Don’t worry, it’s not complicated.
A layer mask is just another way of revealing the photo below. Instead of using the eraser brush to reveal the bottom photo, you create a middle layer between the two photos called a “mask layer” and you draw on it with a paintbrush – wherever you paint, the top photo is “erased” revealing the bottom photo.
To create a layer mask, just layer two photos on top of each other like I did above, then from the menu click “Create Layer Mask –> Reveal All”. Then you use the paintbrush on the mask to reveal the bottom photo. Painting with the color black reveals the layer below, and if you switch the color to white, it will “undo” wherever you’ve painted black so you can clean up any strokes you didn’t want to make (black reveals, white hides the layer below). Here is the same example below with a layer mask – you’ll see the effect is identical. Notice the new mask layer by the red arrow.

The great part about layer masks is that you can save the entire set of multiple exposures along with the masks in a single file, which you can edit later. The original exposures are left completely untouched. That’s the difference between using a mask and using the “eraser brush” directly on your photo. With a mask, you can always go back at any time and paint with the white paintbrush to undo anything you need to.
Now that you know how to use layers, exposure blending is very easy. Here’s a photo I took in Grand Teton National Park. Notice that the mountains and sky look properly exposed, but the foreground foliage is way too dark.

Without exposure blending, the photo above is the best I could do. However, while I was at the location, I also took another photo with the foreground exposed properly. Notice though how the sky is completely blown out and the mountains are overexposed now.

With layers, I can easily blend these two images to create the perfect combination, and it only takes a few seconds. I just take the photo with the good exposure for the mountains and paste it on top of the photo with the good exposure for the foreground. With the properly exposed foreground on the bottom, I use the brush to reveal that bottom photo wherever the leaves are too dark. Here it is after one swipe with the brush. You’ll see the better exposure is revealed below.

That’s it. After some practice, you’ll be able to do this very quickly, with the final photo looking like this.

Of course there is one key thing to remember: You must take multiple exposures at varying brightnesses when you’re at the scene!
If you forget, you can sometimes fudge it and brighten dark areas in your editing software, but you can never darken the overly bright parts if you forget to take a photo with those areas properly exposed. Always make sure at least one photo has the bright areas exposed properly (nothing clipped or overexposed).
Here’s an additional example of exposure blending below. How many of us have taken this shot? Sure would be nice to see what’s outside that window.

If you took another exposure with the outside properly exposed, it’s simply matter of layering the two photos on top of each other and revealing the bottom photo with the properly exposed window. Here’s the photo for just the outside.

…and the final blend looks like this.

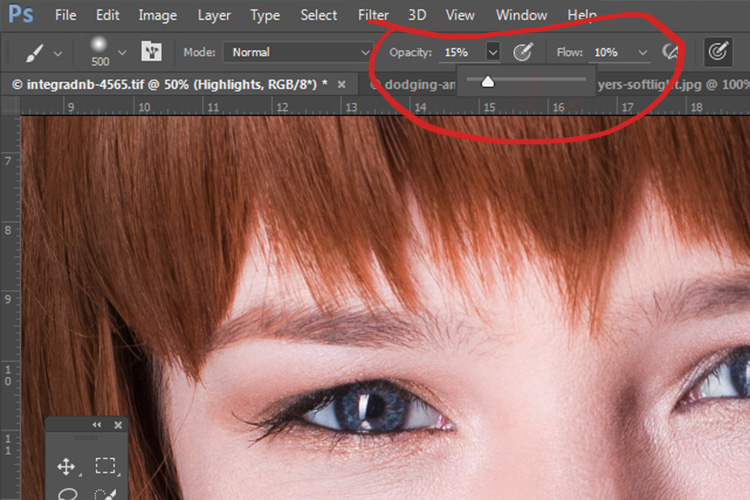
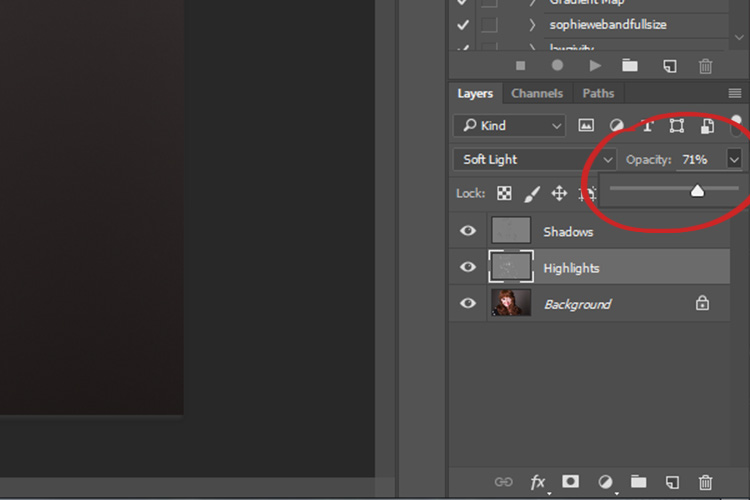
Let’s talk about the opacity and color you can use with the brush when painting on a mask layer. We know that a black paintbrush erases the top photo revealing the photo below, and that a white paintbrush is like an “undo” that puts the top photo back where needed. In addition to just the white and black paintbrush, you can also use any shade of grey. Using a grey paintbrush blends the two photos together, making the top photo slightly transparent so you see both the top and bottom photo at the same time. The darker the grey the more the top photo is erased. The lighter the grey, the more the top photo is visible. This allows for very subtle and realistic blending of the two photos. You may also see it as “opacity” in your software. When the brush opacity is 100%, the brush is at “full strength”. When you swipe the brush, it erases 100% of the top layer fully revealing the layer below. If you set it for 50%, a swipe of the brush works at half-strength.
Here’s an example of a swipe of the brush at 50% opacity or medium grey.

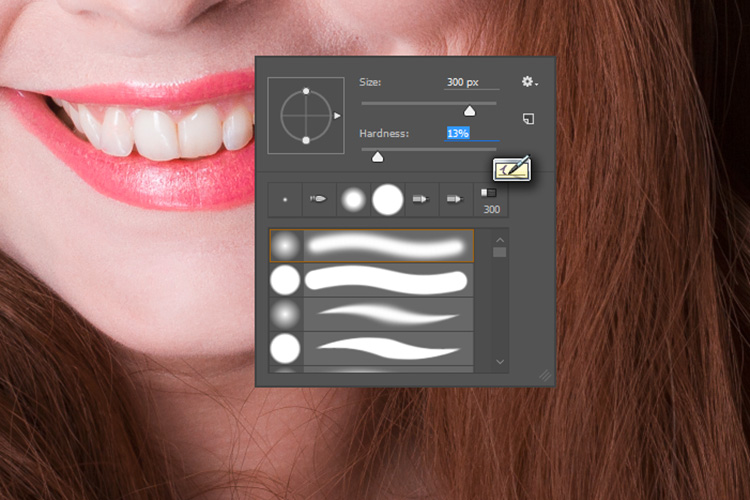
Notice how you can see both the Brooklyn Bridge and Bora Bora at the same time. Adjusting the opacity or grey-level lets you apply the effects more subtly and with more control as needed. For example, with the Grand Teton photo in the earlier example, where the foreground leaves meet the background mountains, I might use the brush with 50% opacity so it’s a nice seamless blend, that’s unnoticeable. Another way to create a seamless blend is to use a brush with a low “hardness” — that is, the center of the brush is 100% opacity while the outer edges are less strong, creating a smooth effect.
LOCAL ADJUSTMENTS
After exposure blending, one of the most important techniques you can do with layers is to make local adjustments. That just means tweaking certain parts of the photo while leaving the rest of the photo as is.
Below is a great example of using layers for a quick local adjustment. Have you ever taken a photo where different parts of the photo have mixed lighting and different white balances? In the photo below, you can see that the camera’s flash has cast an unflattering blueish tint onto the people’s faces, contradicting the warm glow of the Eiffel Tower in the background.

With layers, you can easily solve this problem. Here is the corrected photo.

To do this requires just three quick steps:
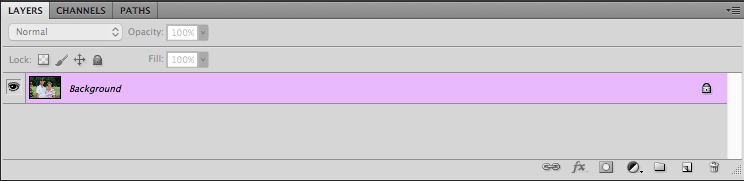
- Create a copy of the original photo and set it aside
- Adjust the original photo paying attention only to the area that needs to be fixed (in this case adjust the White Balance of the image paying attention to the faces and ignoring everything else)
- Paste the untouched copy that you put aside on top of the adjusted photo, and “erase away” the top photo revealing the adjusted layer below, just where you want to see the adjustment.
In this example, you can see exactly where I “erased away” the bad white balance revealing the better white balance below.

If you shoot in RAW format, you can create the two versions of the photo with the two appropriate white balances in your RAW converter. If you don’t shoot raw, just create a second copy of the original photo, change the color balance in your editing software, and layer as described above.
Using layers you can selectively apply saturation adjustments, brightness/contrast, sharpening, etc. This allows for an incredible amount of control over the final image. Just create a version of the photo with the adjustments, put it as the bottom layer, and reveal it with the brush just in the spots you choose.
For example, in this photo of the Rockefeller Center Christmas Tree in NYC, just the lights on the tree needed a levels and sharpness adjustment. You can see the difference that local adjustment makes to the entire photo in this before and after.

Before

After
SPECIAL TECHNIQUES
In addition to using layers for exposure blending and applying local adjustments, you can use layers for a wide variety of additional purposes. I’ve listed some really cool techniques below.
Blinking in group portraits: Have you ever taken a group shot and there’s always one person blinking or making an odd face? Next time, mount the camera on a tripod and use your camera’s continuous shooting (i.e. rapid-fire) mode to take a few photos in quick succession. If one person is blinking in the photo you like best, just put that photo as the top layer and put another photo without him blinking underneath, and “erase” the top photo with the blink to reveal the bottom photo below with his eyes open.
For cool sports effects, use a tripod and take rapid-fire photos of the action, layer the photos, and “erase” away the top photo to reveal the person moving in the subsequent shots.

You can get really creative with this effect – here’s six of me playing a soccer game.

For special “flying” effects, take two photos from a tripod, one with a person on a ladder, one with the just the background (ladder and person removed). Then layer the photos and “erase” the ladder.

Here’s what it looked like with one swipe of the brush “erasing” the ladder and revealing the background.

Many people find that automated HDR software can produce unnatural effects. If you’ve used HDR software to create an HDR image that you like, but there are certain parts that appear unnatural (for example, the sky), blend a little bit of the original non-HDR photo using layers to make it more natural.
You already learned that painting with a black brush reveals the layer below. Wherever there is black, the top layer is “erased”. What if we didn’t use a brush at all, and instead used another way to paint black? This opens up a whole new set of possibilities. For example, this is a simple gradient, a pattern that goes from white to black gradually.

If instead of using a black brush to reveal the bottom photo, we used this gradient, we get an instant Neutral Density filter! Apply this gradient using the Fill tool on the mask instead of painting with a brush, and where the black is, the bottom photo will be revealed. Put the black part of the gradient over the area of the photo where you want to adjust exposure and you’ll have a beautiful transition.
You can also use other tools to apply black to the mask. In the earlier example with the view outside the window, rather than painting with a brush, you could use the “draw rectangle” tool to place a black rectangle over the window, revealing the view outside.
Hopefully you’ve seen just how simple it is to use layers in your work, and how powerful they are. From blending multiple exposures, to adjusting your photos and using special techniques, layers take your images to a whole new level.
Please feel free to ask any questions in the comments below.
The post A Beginners Introduction to Using Layers by Paul Timpa appeared first on Digital Photography School.

Digital Photography School


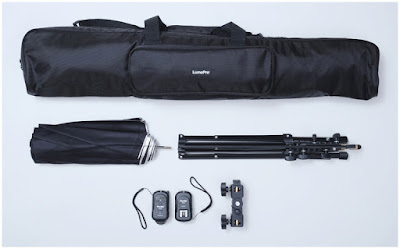


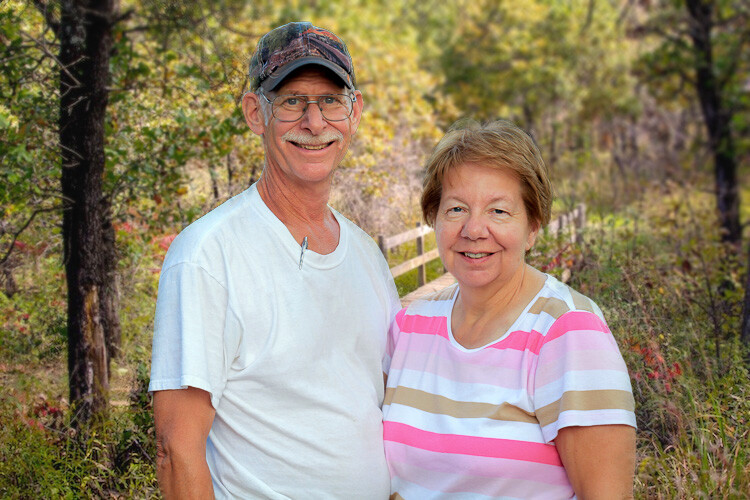
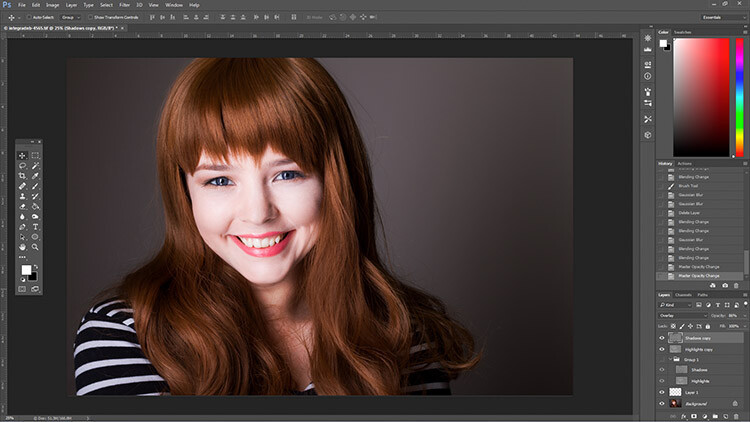
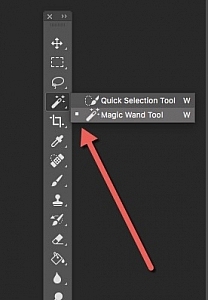 In the image above, the subjects are clearly distinct from the background with highly contrasting colors so an operation like this is pretty straightforward. But if your subjects blend in a little more with the foreground or background it can get a little tricky. Press the “W” key to access the Magic Wand tool. Then click [shift]+w until you end up with the Quick Selection tool (or you can access it on the toolbar see the screenshot to locate it). Now click and drag the Quick Selection tool around your subjects until they are outlined with a cycling dotted line that looks like black and white ants marching in a loop.
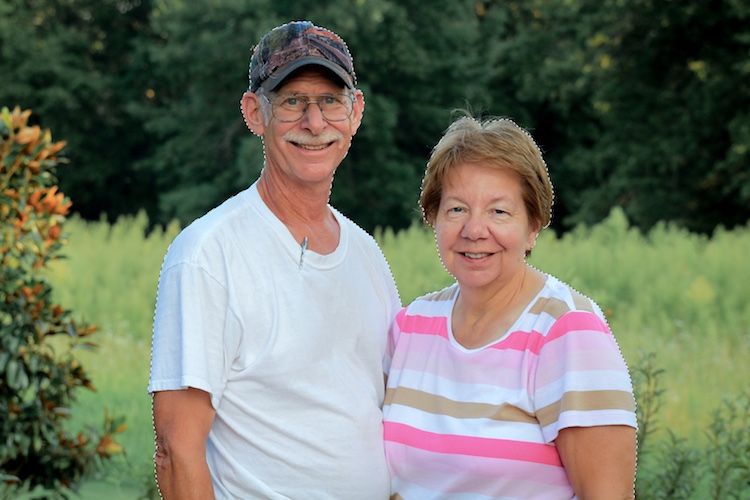


 I am happy to announce that Strobist’s video series, Lighting in Layers, has by special arrangement been adapted for the video tutorial site Lynda.com. Those of you who are Lynda subscribers can now view the videos there. (This includes Lynda’s many corporate subs, so check with your company.)
You must be logged in to post a comment.