RSS
 

Posts Tagged ‘layer’

A Beginner’s Guide to Layer Masks in Photoshop

17 May

The post A Beginner’s Guide to Layer Masks in Photoshop appeared first on Digital Photography School. It was authored by Simon Ringsmuth.

dps-layer-masks-in-photoshop

Adobe Photoshop has so many buttons, tools, and options it can seem overwhelming and intimidating to beginner photo editors. Rather than diving into the deep end and trying to learn every possible tool all at once, I recommend a more measured approach. Pick one thing and learn that, and then move on to the next tool or technique. And learning Layer Masks in Photoshop is one of the most important and useful tools for any editor.

layer masks in Photoshop high school senior
High school senior, class of 2017. There is no number 17 on his shirt. I added it in Photoshop with layer masking. Nikon D200, 50mm, f/1.8, 1/90 second, ISO 200.

In 1994, Photoshop Version 3 introduced a concept that blew the doors off the image editing industry: layers. This allowed editors to stack multiple image elements on top of each other to form a complete picture. This is all well and good, but what if you put one layer on top of another layer and still want to see something on the layer below?

You could use the Eraser tool to remove part of the top layer, which is what I used to do when I first started using Photoshop years ago.

A much better solution is to use a Layer Mask, which lets you show and hide any part of a layer. Instead of using the Eraser tool, you use the Paintbrush (or other tools) to make any part of a layer visible, invisible, or transparent.

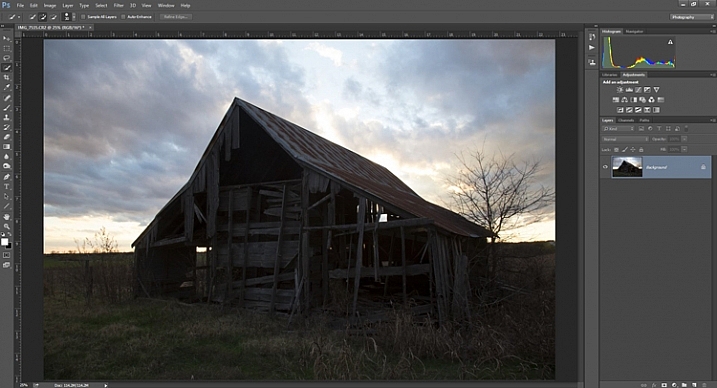
As an example, here’s a picture of a truck on a farm. It’s alright, but the sky behind the truck isn’t very dramatic.

layer masks in Photoshop truck on the prairie
Nikon D750, 95mm, f/2.8, 1/3000 second, ISO 100

What if I replaced the boring blue sky with this dramatic sunset? Surely that would be a much more interesting photo, and maybe help the farmer sell his truck too.

layer masks in Photoshop dramatic sunset
Fuji X100f, 23mm, f/16, 30 seconds, ISO 200

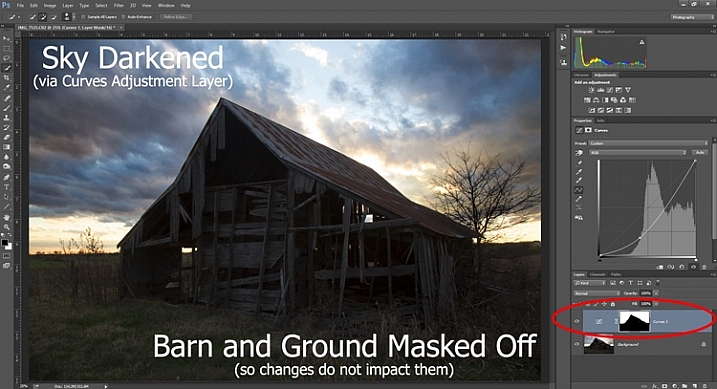
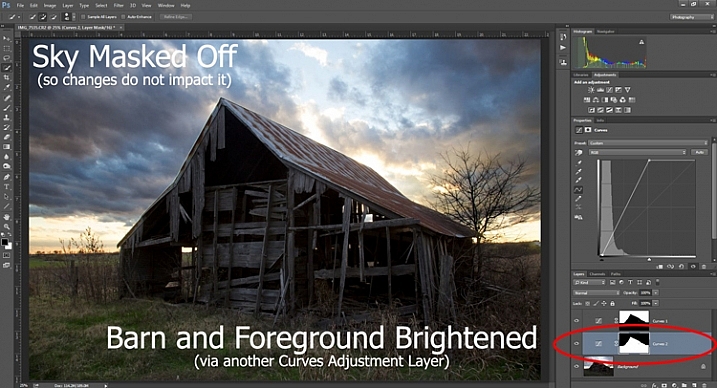
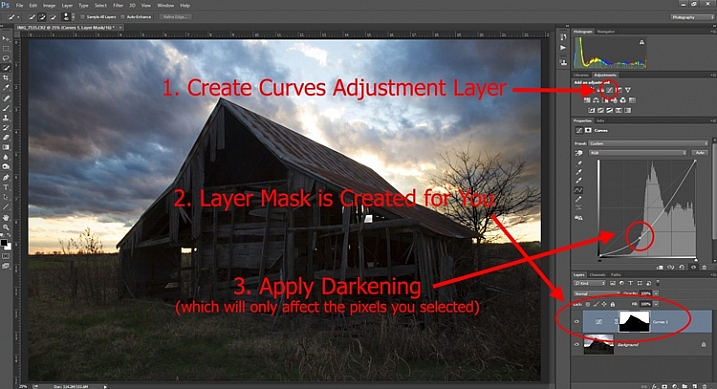
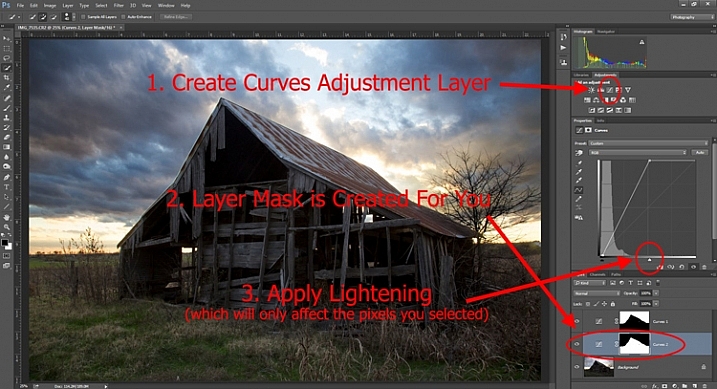
If the pictures of the truck and sunset are stacked in Photoshop, the truck is visible but not the sky. This is where Layer Masks in Photoshop can save the day! You can use a mask on the truck layer and then edit it to remove the sky. This would leave the truck visible but the sunset showing through.

layer masks in Photoshop
Layers are fundamental to the image editing process in Photoshop. Layers are on top are visible, whereas layers underneath cannot be seen unless some parts of the layers on top are visible.

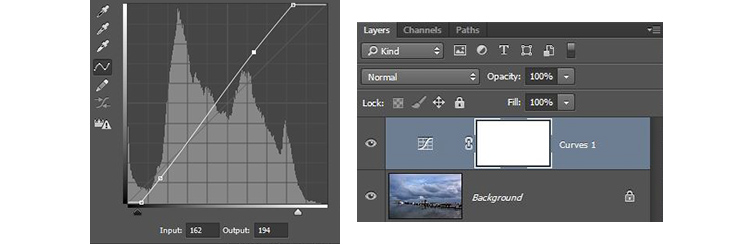
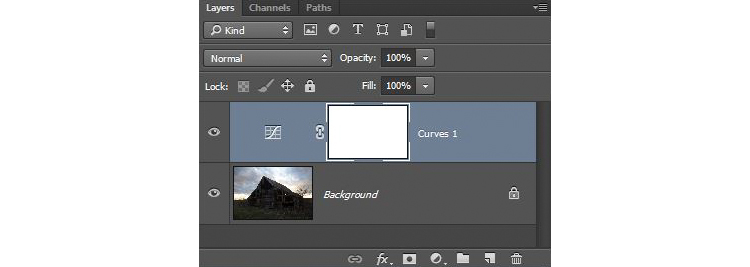
To add a Layer Mask, click the top layer (in this case, the truck) and choose Layer>Layer Mask>Reveal All.

Alternatively, click the Layer Mask icon at the bottom of the Layers panel.

layer masks in Photoshop
The rectangle with a circle icon will add a layer mask to the selected layer.

At this point, nothing in the picture has changed because the entire layer is still visible, and nothing has actually been masked out. This is why the menu command is “Reveal All.”

The layer mask shows the entire layer to which it is applied. At this point, you can use any number of methods to remove portions of the layer you are working on.

layer masks in Photoshop
The white rectangle is your layer mask. Click on it to select the mask, and then you can start hiding portions of the layer which it is attached to (in this case, the Truck layer).

My preferred method to show and hide Layer Masks in Photoshop is to use the Brush tool. Press the ‘B’ key on your keyboard or click the Brush tool icon on the left-side toolbar. Then start brushing the portions of the layer that you want to make invisible, just as though you were using an eraser.

layer masks in Photoshop layer mask erasing
Brushing the layer mask will reveal whatever is beneath the layer. Here you can see how, after a few brushstrokes, the sunset layer is starting to show through.

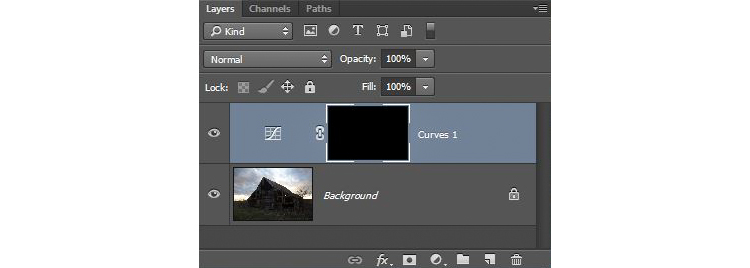
Notice how any part of the mask that you erase is also reflected in the thumbnail. Black portions are where the mask has been eliminated, which is a subtle but useful indicator of the work you are doing on the mask.

layer masks in Photoshop
As you apply the brush to portions of the mask, the mask thumbnail is updated accordingly.

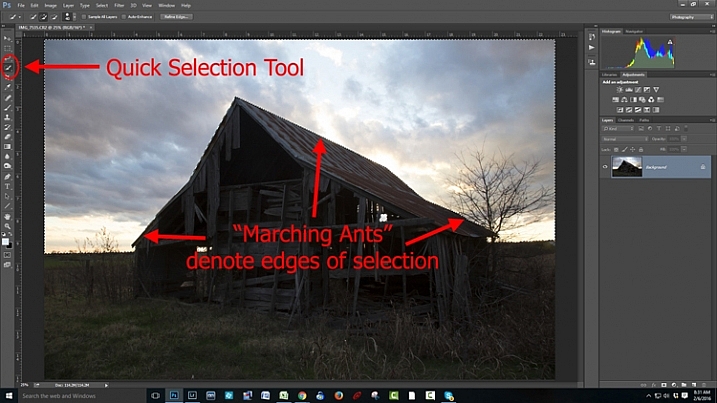
To completely remove the sky behind the truck, I used the Quick Selection tool to select the sky. Then I switched back to the Brush tool and brushed over the entire selected area.

layer masks in Photoshop layer mask demonstration with errors to fix
It worked! The original sky is gone, replaced with a dramatic sunset. But there are some errors that I still need to fix.

At this point, a Layer Mask probably seems much more complicated than just using the Eraser tool. If you want to erase part of an image, why over-complicate the matter with masks and brushes and selections? Layer Masks provide an enormous advantage in that you can un-erase whatever you want just as easily.

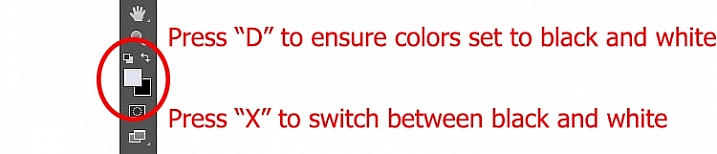
With the Brush tool selected, press the ‘X’ key to invert your brush, and you can now put everything you erased back. Use the ‘[‘ and ‘]’ keys to change the size of the brush, and the ‘Z’ key to zoom in on portions of the image to get the finer details.

layer masks in Photoshop modifying the layer mask
Invert the brush tool by pressing the X key to un-erase any part of the layer.

All the normal controls for brushes can be used when working with layer masks – opacity, smoothing, etc. This makes Layer Masks in Photoshop incredibly powerful and exponentially more useful than just using the eraser tool.

layer masks in Photoshop
It still needs some touch-ups, but it’s a lot better than before thanks to the flexibility of layer masks.

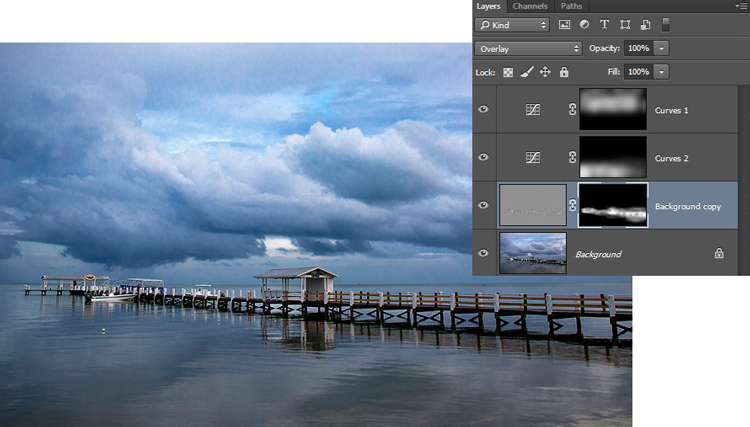
Layer Masks can do so much more than replacing the sky. They can be used to combine any number of images, layers, and effects.

I created the picture at the top of this article with Layer Masks in Photoshop in just a few minutes. It started with the picture below of a high school senior wearing a blue shirt. Since this young man graduated in 2017, I wanted to put a 17 on his shirt. Photoshop made it easy.

layer masks in Photoshop high school senior blank shirt
A high school senior, Class of 2017. A nice big 17 would look good on his shirt.

I started by using the Fyra font for the number 17. I set the color to white and used the Soft Light blend mode to make the number look like it was part of the shirt, not just sitting on top of it. The young man’s crossed arms presented a challenge, but one that was easily solved in seconds thanks to layer masks.

layer masks in Photoshop high school senior number 17 without mask
What to do about his arms? Layer Masks to the rescue!

With the base layer selected, I chose the Lasso tool and selected the portion of the picture containing the arms. Then with that selection active, I right-clicked on the image and chose “New Layer via Copy.” This created a new layer in my Layers panel, which I moved to the top of the list by clicking and dragging.

layer masks in Photoshop

With the new layer selected in my Layers panel, I went to the Layer menu and selected Layer Mask>Reveal All. This created a new masking layer, much like the truck and sunset example, that I could use to show and hide whatever portions of the arms I wanted to.

layer masks in Photoshop
Click the white box next to Layer 1 to edit the layer mask for the top layer.

With the new Layer Mask in place, the rest of the operation was fairly simple.

I zoomed in on the image to get a closer view by pressing ‘Z’ and then clicked on the arms. Then I pressed the ‘B’ key to select my Brush tool and used the [ and ] keys to get the right size. As I brushed out the part of the top layer I did not want, I pressed the ‘X’ key to switch back and forth between erasing and un-erasing. This makes it very simple to perform fine adjustments to your layer mask.

layer masks in Photoshop
Brush options such as Opacity and Smoothing can be used to perform edits to your layer mask with surgical precision.
layer masks in Photoshop fine adjustment to layer mask
With one hand on your mouse and another hand on the X key, you can quickly show and hide whatever part of your layer that you want.

Using layer masking instead of just erasing portions of an image means you can continue to manipulate your image as separate layers even after you have made your edits. Watch how the number 17 can be moved and resized without any additional editing or erasing. This is possible because the arms are a separate layer in front of the number, and the blue part of the arms layer has been erased or masked out.

layer masks in Photoshop transform layer

Reading through all these steps to learn Layer Masks in Photoshop might seem kind of overwhelming. If you follow along step by step, it’s a lot easier than it seems. Also, there are hundreds of ways to edit layer masks to create compositions you probably thought were previously unattainable.

If you have never tried using layer masks in Photoshop, I recommend giving it a try, and see where your creativity takes you. You might find that it opens up a door to entirely new types of artistic expression and editing possibilities.

Share your results with us in the comments below!

The post A Beginner’s Guide to Layer Masks in Photoshop appeared first on Digital Photography School. It was authored by Simon Ringsmuth.


Digital Photography School

 
Comments Off on A Beginner’s Guide to Layer Masks in Photoshop

Posted in Photography


How to Create a Portfolio Template in Photoshop and Profit from Layer Types

10 Feb

The post How to Create a Portfolio Template in Photoshop and Profit from Layer Types appeared first on Digital Photography School. It was authored by Ana Mireles.

Create-a-Portfolio-Template-in-Photoshop

Your portfolio is your presentation card. It should always be current with your latest works, coherent with your style and accessible to your clients. Perhaps there’s one on your website, another one printed, and one for pitch presentations. All of them need to be up to date. So, how do you keep up with that? Create a portfolio template that is easy to update that you can scale to different formats.

Keep reading to learn how to create a portfolio template in Photoshop.

Create a Portfolio template examples

While Photoshop is a fantastic photo editing software, it does have some tools that are useful for graphics work too. This will relieve you of the task of having to learn another program like Illustrator. One of the best things for creating a portfolio template is profiting from the characteristics that each type of layer can offer. You can use Vector Layers for your design and logos, Text Layers for all the information, and Smart Objects for your images.

Let’s go through it step by step.

The fundamentals

First of all, what is a Layer?

When you open a new project, whether this is a blank canvas or a photograph, it opens as an image layer by default. This is the base that you build upon. You can then add as many layers as you need.

Imagine that the Layers are paper sheets that you can stack. Each one will then modify, add or block the content of the ones below. The properties of each layer depend on the type of layer it is.


Photoshop Layers in Perspective

Layers are one of the most versatile and useful tools in Photoshop.

There are many types of layers, some are stand-alone layers like images or vectors. Others work only in combination, as Adjustment Layers.

The important thing to understand is that each one has different characteristics that can be used to simplify your life. Here I’ll discuss the ones I find most useful to create a portfolio template.

The template

Designing your template

The first thing you’ll need is to draw the design of the template. Here, you can decide the elements and colors you want to use. Because this is a template, it should be able to fit most images and situations. So, you might want to keep it simple, but this is up to you.

In any case, every element that you design is best drawn with the Shape tool. Doing this creates a vector layer by default. To make sure of this, check that the menu in the options bar is set to Shape.

Create a Portfolio Template with Shapes

This is important because, unlike images, vectors are independent of resolution. This gives you the advantage of modifying the elements without losing quality, as you would do with pixels. This is why most graphic programs, like Illustrator, work with vectors. Shapes and vector layers are also great for creating your logo.

Adding a logo

If your logo consists of many shapes, select all of them and turn them into a Smart Object by right-clicking on top and then choosing Convert to Smart Object from the menu.

This is a different type of layer, not only can you scale it as many times as you want – just like the vectors – but you also retain the source data so that you can work non-destructively.

Because of this, every time you open your Smart Object, you’ll still find all the original shape layers to work on them independently.

Create a portfolio template with smart objects

Another cool feature from smart objects is the possibility to link one or more copies.

This means that every time you modify your logo, it will automatically apply the changes to all the copies. This is useful if your design includes more than one logo. To do this, create a copy of the layer by dragging it to the Duplicate Layer button at the bottom of the panel.

Create a logo with smart objects

If you want to keep your copies working independently from each other, you can create a copy of the smart object that it’s not linked. Do this by using New Smart Object via Copy. You can find it in the menu that pops up when you right-click on the layer.

Create a portfolio template with logo

Adding text

This is as straightforward as it sounds. When you use the Text tool, it creates a Text Layer. Keep in mind that because it’s a different kind of layer, not all the tools are available for use. For example, you can’t use the filters.

If you want to use them, you will get a prompt asking you to “rasterize the layer.” This will turn it into an image (a pixel layer). You shouldn’t do this if you want to be able to edit the text in the future. If you do want to rasterize your layer, make a copy of it first and turn off the original by clicking on the “eye” next to the layer in the Layers panel.

Create a Portfolio Template Rasterize Layers

Another useful tip when designing your template is to confine the space for your text, so it doesn’t ruin your design if you change or add content later.

Instead of just clicking and typing, click and drag a rectangle text box where you want the text to be. That way, whatever you type adjusts to that space. I usually put one next to the image to add all the information like title, technique, and project. Then I can update it for every image.

Create a portfolio template

Adding images

The photos are the stars of your project, so you want to make sure to work non-destructively on them. The best choice for this is the Smart Object. 

To add your photo as a Smart Object layer, you have to go to Menu->File->Place. Because in my design, I added a rectangle to serve as a frame for my images, I can now add a Layer Mask to fit it inside without losing any information.

create a portfolio template for your photography

You can do this by placing the smart object directly on top of the rectangle shape designed at the beginning. Now create a Clipping Mask by pressing Cmd+Alt+g (Ctrl+Alt+g on PC). The Mask will reveal the image through the frame without cutting it or changing any of it.

Create a portfolio template

To update the images, you can open the Smart Object and place the new one there so that you don’t change the Layers or Masks of the template.

Save and close

Because you used Vectors, Texts, and Smart Objects, you can change the resolution from web to printing as many times as you want while keeping the quality of it. Just be sure to save each page of the portfolio separately, so you don’t overwrite your template.

Conclusion

I hope that you have found How to Create a Portfolio Template in Photoshop and Profit from Layer Types useful for creating your own portfolio templates.

Remember, save each template as a PSD file so that you can go back and utilize them again when you want to update your photos or text. Saving as a PSD file retains all of your layers so that you can access them and change them easily. If you save it as a JPG or another lossy format that flattens the layers, you will no longer have the ability to edit them.

If you have any other tips for creating a portfolio template, please share them with us in the comments below.


The post How to Create a Portfolio Template in Photoshop and Profit from Layer Types appeared first on Digital Photography School. It was authored by Ana Mireles.


Digital Photography School

 
Comments Off on How to Create a Portfolio Template in Photoshop and Profit from Layer Types

Posted in Photography


Samsung announces first 100+ layer V-NAND memory module

07 Aug

Fast storage solutions are essential for efficient digital photo and video workflows and Samsung Technology has announced the start of production of new V-NAND modules with more than 100 layers, which is an industry first and should give a boost to any editing workstation. According to the South Korean company, the 256GB 3-bit V-NAND will be used to make SSD drives for PCs and has already been delivered to a number global OEMs.

The new generation adds around 40 percent more cells to the previous 9-layer single-stack structure. Samsung achieves this by building an electrically conductive mold stack with 136 layers. The company claims this results in the industry’s fastest data transfer rate, citing writing speed of 450 microseconds (?) and a reading response time of 45?. Compared to the previous design performance has been increased by 10 percent and power consumption decreased by 15%.

The company claims this results in the industry’s fastest data transfer rate, citing writing speed of 450 microseconds (?) and a reading response time of 45?.

Samsung says that thanks to the new and faster design, it will be able to offer V-NAND solutions with more than 300 layers by combining three of the new stacks, without any negative impact on performance or reliability.

In addition to the performance increases, the engineers have been able to reduce production steps and reduce chip sizes, increasing production rates by 20 percent.

With the 250GB SATA PC SSD already released, the company is planning to increase production in second half of the year to meet growing global demand and produce SSDs and eUFSs using 512Gb 3-bit V-NAND in a variety of specifications. Samsung is also hoping to deploy the new chips for mobile and automobile applications in the future.

Articles: Digital Photography Review (dpreview.com)

 
Comments Off on Samsung announces first 100+ layer V-NAND memory module

Posted in Uncategorized


PhotoDirector 10 released with AI styles, new layer features, and tethered shooting

18 Oct

CyberLink has released PhotoDirector 10, the newest version of its PhotoDirector image editing and design software. The latest installment brings a number of new features, including tethered shooting and an AI Style Engine. CyberLink has also made a number of improvements to layer editing.

PhotoDirector 10 brings users workflow improvements, according to CyberLink, that are designed for “advanced photographers.” The inclusion of tethered shooting enables users to directly connect a camera to their PC, shoot images, and instantly preview them on the computer.

The newest upgrade also brings Soft Proofing for previewing a printer’s tone and color rendering, as well as improvements to layer editing. The latter change includes the ability to add empty layers to projects, use clipping masks, and group layers together.

Other features include the addition of integrated Express Layer Templates, additional template packs that can be purchased through CyberLink Store, AI Style Packs that use deep learning to be “more than just photo filters,” one-clicked keystone correction, advanced layer text editing, adjustment layers, and content-aware editing for moving, removing, and copying image elements.

PhotoDirector 10 is available now from CyberLink’s website for $ 99.99 USD for new customers, or starting at $ 69.99 USD as an upgrade for existing customers.

Articles: Digital Photography Review (dpreview.com)

 
Comments Off on PhotoDirector 10 released with AI styles, new layer features, and tethered shooting

Posted in Uncategorized


Play On, LEGO Brick Layer: 14 Complex & Creative Toy-Brick-Inspired Projects

23 Mar

[ By SA Rogers in Art & Sculpture & Craft. ]

lego main

Play on, LEGO brick layer, ’cause the projects adults are coming up with using these little plastic toy bricks are totally incredible. Some amazing recent creations either made from or inspired by LEGO bricks include a functional camera that prints photos, a plastic helmet based on LEGO figures’ bowl-cut hair, stop-motion animation, a life-sized Batmobile and a robot that folds and flies paper airplanes.

Twin-Lens LEGO Camera Prints Photos

lego camera

lego camera 3

lego camera 2

Making use of two retrofitted camera components and a LEGO brick housing, this fun model by a Hong Kong photographer blogging as Instax Magic doesn’t just take real photos, it also prints them. Taking lenses from a vintage Japanese Yashica camera and an ejection mechanism modified from a Fuji Instax mini camera, the creation playfully incorporates LEGO elements like figurines, fences and turbines. After seeing a neighbor throw a box of toy bricks in the trash, the photographer says “I started to think about the possibility of modifying a camera with LEGO. My impression is that there is always some creative way to use LEGO.”

LEGO Claw Shopping Bag

lego claw shopping bag

lego claw shopping bag 2

Walk down the street looking like you’ve got a yellow LEGO claw for a hand with this fun promotional shopping bag by New York-based advertising and designers Junho Lee and Hyun Chun Choi. The illusion only works when you’re wearing long sleeves, and you clutch a fabric ribbon hidden inside to hold the bag.

Intentional Helmet Hair, Courtesy of LEGO

lego bike helmet

lego bike helmet 2

Helmet hair is actually desirable if you wanna bike around town looking like a LEGO figure that sprouted to real-life dimensions. Design firm MOEF created a functional bicycle helmet mimicking the proportions and characteristics of the original plastic toy thanks to 3D scanning. Right now, it’s just a prototype, but it could go into production with the aim of encouraging kids to wear helmets.

LEGO Stop-Motion Marriage Proposal

lego stop motion marriage proposal

It took Atlanta-based filmmaker Walt Thompson 22 hours, 2,600 photos and hundreds of LEGOs to create a stop-motion animation marriage proposal to his girlfriend of four years, Nealey Dozier, even going so far as to dress the LEGO couple in outfits that matched what the real-life couple wore when they met.

Enlarged LEGO Vehicles in Real-Life Environments

life size lego cars

life size lego cars 2

life size lego cars 3

What would LEGO Lamborghinis, trucks, camper vans and helicopter models look like if they were kept exactly as they are, but enlarged to fit into the real world? Pretty ridiculous, as it turns out in this series of digital images by Italian photographer Domenico Franco, which sets them among Italian scenery. But at the same time, the models are so familiar, they don’t seem particularly out of place. “The aim is to transform ordinary contexts into extraordinary ones, thus compelling the toys to get out of the idyllic and politically correct landscapes belonging to their perfect and idealistic cities, with the result of instilling them in those vices, virtues and desires typical of human beings.” says Franco.

Next Page – Click Below to Read More:
Not Just For Kids 14 Complex Creative Lego Inspired Projects

Share on Facebook


[ By SA Rogers in Art & Sculpture & Craft. ]

[ WebUrbanist | Archives | Galleries | Privacy | TOS ]


WebUrbanist

 
Comments Off on Play On, LEGO Brick Layer: 14 Complex & Creative Toy-Brick-Inspired Projects

Posted in Creativity


How to Create an Antique Photo Look Using a Lemon and Layer Masks in Photoshop

17 Mar

Layers were presented for the first time in Adobe Photoshop in version 3.0, which launched in 1994. We take them for granted nowadays, but they were a total game changer at the time as they allowed image composites to be taken to a whole different level with image stacking and transparencies.

Layer Masks may seem like a scary monster for a Photoshop newbie, but they are in fact quite easy to understand as they work the same way as layer transparency. But layer masks use a non-destructive way to reveal or hide portions of a layer by defining pixel opacities without affecting the original data.

It all happens with greyscale data: think of black as transparent, white as opaque and gray as different levels of opacity depending on if they are lighter or darker. Following this theory, this also means that you can convert any greyscale image into a Layer Mask and use it to create many types of effects on your image.

This tutorial is a step-by-step example on how to use this technique.

How to create your own Layer Mask

Create an old school effect

For this particular image, I wanted to create an old-school or antique effect, like an alternative darkroom process of developing a black and white image with a brush. This mask could be done in many different ways, but, because I wanted to make it really textured and as authentic as possible, I used an oxidation process.

Prepare the paper first

To give this process a try, you will need a paper sheet and some lemon juice.

02 How to create your own Layer Masks

Brush the paper with the lemon juice and create you mask area

03 How to create your own Layer Masks

The lemon juice will oxidate upon contact with air, but it will take a long time. To accelerate the process, you can put the paper near a heat source like a tungsten lamp or if you want it even faster, you can use an oven at a low temperature setting like I did here.

04 How to create your own Layer Masks

The lemon juice will start to turn a brown color. Remove the paper from the oven when you get the color and texture you intend, and your paper sheet is ready to be scanned or photographed to create an image file like this:

05 How to create your own Layer Masks

Photoshop technique

Now open Photoshop and the image on which you want to create the mask.

06 How to create your own Layer Masks

Convert the layer to a mask

Now click on the layer mask icon on the bottom of the layers’ palette and your background layer will be converted into Layer 0 with a white mask next to it.

Press the alt/option key on your keyboard and click on the white mask to make it visible and active. This is a very important step! If you miss this step the image itself will be active and visible instead of the mask, that is what you will be working on.

Once you have done this, the image itself will not disappear, it will just be hidden.

07 How to create your own Layer Masks

Convert to greyscale

Now it’s time to open your mask image and convert it to greyscale. One easy way to do it is to use the desaturate function located in: Image > Adjustments > Desaturate (or keyboard shortcut Control/Cmd+Shift+U)

08 How to create your own Layer Masks

The final image you want to create is white around the edges, so your mask should be the opposite. You can use the invert function for this: Image > Adjustments > Invert (Control/Cmd+I)

09 How to create your own Layer Masks

Put the image into the mask

Next, it is time to paste the image into the mask with these simple steps:

  • Select > All (Control/Cmd+A)
  • Edit > Copy (Control/Cmd+C)
  • Now click on the original image where you created the layer mask and go to: Edit > Paste (Control/Cmd+P)
  • Click on the eye icon on the left side of the layers’ palette to see the image and the mask working together.

10 How to create your own Layer Masks

Add a white layer

As you can see the mask creates different levels of transparency on the image. To be able to see the transparency as white we can create a new white layer to use as a background.

  • Go to: Layer > New > Layer (Control/Cmd+Shift+N)
  • Edit > Fill > Contents: White; Mode: Normal; Opacity: 100%

11 How to create your own Layer Masks

Now just drag the new white layer to the bottom position of the layers panel, and you will have a full view of the final image appearance.

12 How to create your own Layer Masks

Fine-tune the effect

Now it is just a matter of a few adjustments to fine-tune the effect you want. In this particular image, I will adjust the size of the mask. Click on the mask icon in the layers’ palette and then click on the chain between the image and the mask icon to unlink them.

13 How to create your own Layer Masks

Next go to: Edit > Transform > Scale (Control/Cmd+T). Drag the image edge lines to transform the shape of the mask and adjust it to the image size.

14 How to create your own Layer Masks

The size of the mask is right, but the image looks to washed out. We can increase the contrast of the mask to make the blending with the image look better.

Go to: Image > Adjustments > Levels (Control/Cmd+L). Adjust the sliders on the levels dialogue box to create the effect you want.

15 How to create your own Layer Masks

Lastly, for the old image look, you can use the black and white function. Click on the image icon in the layers’ palette so that you are editing the image and not the mask, then go to; Image > Adjustments > Black & White (Control/Cmd+Alt+Shift+B). Adjust the sliders on the Black & White dialogue box to create the effect you want.

Note: You can also add the black and white as an adjustment layer to keep your editing non-destructive. Additionally, you can paint on the mask with a black brush, over any areas you want to keep clear (such as her eyes or face). 

16 How to create your own Layer Masks

There it is, a quick and easy way to create your own layer masks. Give it a try and share your images with us in the comments below.

The post How to Create an Antique Photo Look Using a Lemon and Layer Masks in Photoshop by Ivo Guimaraes appeared first on Digital Photography School.


Digital Photography School

 
Comments Off on How to Create an Antique Photo Look Using a Lemon and Layer Masks in Photoshop

Posted in Photography


How to Blend in Adjustments Using Layer Masking in Photoshop

26 Apr

In a recent article called: Getting Started with Layer Masks in Photoshop – a Beginners Tutorial, I showed you the basics of layer masks and why they are such powerful tools. Layer masks are essentially what gives Photoshop layers much of their power. They allow you to tell Photoshop exactly where you want your changes applied, and to what degree.

In that article, I also showed you how to use layer masks in pictures where you had a defined edge to the areas you wanted to change. Photoshop has a lot of great tools that allow you to make selections, which you can then use to define the mask.

Here is a picture I took in Florida where I used layer masks and to accentuate parts of the image without changing other parts.

Here is a picture I took in Florida where I used layer masks and blending, to accentuate parts of the image without changing other parts.

But what about pictures where you have a soft edge? Or where you want to blend in the effect gradually? That’s what I will cover in this article. It will pick up where the prior article left off, so if you haven’t seen that one yet, check it out. Once you have reviewed the basics of layer masks in that article, come back here and we will get started.

Step 1: Create an Adjustment Layer

The first thing to do is make the changes you want to the image, which will then be blended into the selected areas later. To make those changes, I am going to create a Curves adjustment layer. As mentioned in the prior article, Curves adjustment layers are one of the most powerful tools in Photoshop. They allow you to selectively effect brightness, contrast, and/or color. To create one, just select Layer > New Adjustment Layer > Curves. You can also click on the Curves icon in the adjustment layer panel. Don’t worry though – we are not going to do anything complicated with the Curves Adjustment layer.

Graphic9-NewAdjustmentLayer

Of course, you don’t have to use a Curves adjustment layer to make adjustments to your picture, you can use any of the adjustment layers offered by Photoshop. If you are more comfortable with Levels, use that. If you want to change the brightness levels, there are Exposure and Brightness/Contrast adjustment layers. If you want to make changes to color, you can use the Hue/Saturation or Vibrance adjustment layers. I consider Curves to be one of the most powerful tools in Photoshop, so that is what I use, but you can use whichever one you want, or you are most comfortable using.

Step 2: Add in the Effect

Once your Curves adjustment layer is created, just add the effect that you want. Remember that a white mask is automatically applied to all adjustment layers – so it reveals everything – but we will change that in a second.

I want to add contrast, therefore I will just scoot in the endpoints of my curves adjustment layer. You can also drag the line up or down in places. The idea is to steepen the curve where you have a lot of pixels. Doing so adds contrast, which is what we want.

You don’t need to do anything fancy here. Go ahead and add the effect to a greater extent than you will want it in your picture. In other words, overdo it. Don’t worry if the picture doesn’t look quite right.

Graphic1-Curves

In addition, don’t worry that the effect is occurring across the entire picture at this point. We will make the changes apply selectively in just a second. For now, just look at the area of the picture where you want the effect to be applied and add it in accordingly. For example, in this picture below, my change is added to the entire picture, even though it results in effects I don’t want (like blowing out the sky on the right). We will fix that in the next step.

Graphic2-InitialChanges

The left side of this image shows the original image, the right side shows it after the application of the curves adjustment layer. Notice the far right portion of the sky is blown out, but we’ll remedy that by limiting where the effect applies in the next step.

Step 3: Brush it in

Now comes the part when you limit the areas where your changes apply to the image.

Start by masking off the entire image, just press CTRL/CMD+I to do so. You will notice that two things happen. First, the effect you just added to your picture is hidden, it’s as if you never made any changes (don’t worry, the changes are still there, they’re just hidden). Second, the box next to the adjustment layer you created turned black. The box represents the layer mask. As we discussed in the last article, a white layer mask means the changes show through to the image (which is why you saw the effect of the changes when the layer mask was white). A black layer mask means the effect does not show up on the picture. Since our layer mask is now black, the effect does not apply anywhere in the picture.

Graphic3-BlackLayerMask

Now we can begin the process of adding the effect in gradually. To do so, we will use the Brush tool. You can select it from the list of tools on the left side of your screen (tool panel), or you can just press B to call it up. While you are at it, go ahead and press the D key on your keyboard. This will ensure that the brush is set to its default foreground color, which is white, which is what you want since you will be adding the effect to the picture.

If you just left the brush as is, when you used it to paint in your picture, it would add the effect 100%. That is not what you want here. You want to add the effect in gradually, so it blends in. Therefore, go to the top of your screen and find Opacity. Pull the Opacity to the left until it is in the range of 5% to 15%. In my case I will use 10% (you can also just type 15 on your keyboard and it will apply to the opacity of the brush while that tool is selected). The lower the opacity, the less the effect gets added with each brush stroke – and the more gradual the change. If you have the patience to keep the Opacity very low (some people go as low as 2-3%), you will be rewarded with very gradual changes.

Graphic4-BrushTool

Now you will just paint in the effect. Before you do so, also make sure that the hardness of your brush is set to 0%. You want as soft a transition as possible. In addition, use as large a brush as your picture allows. The larger the brush, the softer the transition. The easiest way to change the size of your brush is with the square bracket keys. The left bracket [ makes the brush smaller while the right bracket ] makes it larger.

Now just click in the areas where you want the effect applied. You will have to do this multiple times because you have the opacity set very low. That is okay though, be patient. By doing it this way you are ensuring that it’s blended in gradually. You can also add the effect more in some places and less in others. Just click a few more times where you want the effect to be the most visible.

Graphic5-BrushingIn

Step 4: Check Your Work and Adjust

You can check your work by clicking the eyeball next to the layer. When you turn off the layer, Photoshop will show your image without your effect added. Click the eyeball again to see your progress and turn the layer back on.

Here is the histogram after using the brush tool to paint in white. It shows only the pixels that were selected via the brush.

Here is the histogram after using the brush tool to paint in white. It shows only the pixels that were selected via the brush.

If you found you overdid the effect, you can always back it off. You do so by turning the color of your brush from white to black. Remember that white reveals the adjustments, black hides them. You could undo the effect by stepping backward (Edit > Step Backward), but the easiest way to do so is just press the X key (that switches the foreground and background colors so you now have black on top). Now when you use your brush it will be removing the adjustment you created. Remember that your opacity percentage applies whether your brush is painting with white or black. When you are done removing the adjustment, press the X key to go back to a white brush and continue adding the effect where you want it.

You can also go back and adjust your Curve after you have brushed it in. In fact, you should get in the habit of checking the curve your originally set. Once you have used your brush tool, the histogram will show only those pixels within the selected area (where you painted white). In general, you will want to make sure that the steepest part of the curve corresponds with the part of the histogram where you have the most pixels. Make a tweak to your curve to make sure it looks how you want.

Step 5: Repeat

Another great thing about this technique is that you can do it over and over again. It’s not uncommon to see photographers with a long list of layers, where they have made adjustments to specific parts of the image. You can use this technique to change the brightness values of the picture, making parts lighter or darker. You can also change the contrast, as we did above. You can even change the colors by going into the individual color channels of the Curves adjustment layer. Of course you could also use the brushing techniques above on a Hue/Saturation adjustment layer.

Here I used the same process that was set forth above to brighten the water. I created another Curves adjustment layer, turned the layer mask black, and then brushed in the effect with brush set to white at low opacity.

Graphic7-WaterAdjustmentToo

Other Changes to Your Image

In this particular image, I also wanted to sharpen the pier without sharpening the rest of the image. To do this, I will use the High Pass Filter (which is a remarkably powerful sharpening tool) and apply a layer mask to limit the effect to the pier. This will demonstrate the use of this layer masking technique outside the context of adjustment layers, which we have been using so far.

First, let’s quickly walk through the use of the High Pass filter. To sharpen with the High Pass filter, first duplicate the layer (CTRL + J). Then change the blending mode to Overlay (don’t worry about how this makes your image look). After that, call up the High Pass filter (Filter > Other > High Pass). This will result in a small dialog box where you set the amount. Here I will go with an amount of about 4, which I find is pretty typical. Press ok and the effect will be applied to the entire image. This is a pretty handy sharpening technique, but we’ll make it better by applying it only to a specific area (the pier).

To do this, we’ll add a layer mask and use the same brushing technique. Since we are not starting with an adjustment layer, we will need to add a layer mask. Just click on Layer > Layer Mask > Hide All, which will create a black layer mask. After that, select your brush (press B), set the color to white (press D for default), and set your opacity. Whereas you had been using a very low opacity earlier, in this case you can use a much higher Opacity. Brush in the effect just on the pier and watch it become sharper.

Graphic8-Sharpening

Conclusion

Although this technique is fairly simple, it is a pro move. I know photographers that edit their photos with nothing but a series of Curves adjustment layers where they blend in the effect in this manner. Give it a shot on some of your photos and I believe you will like the results.

googletag.cmd.push(function() {
tablet_slots.push( googletag.defineSlot( “/1005424/_dPSv4_tab-all-article-bottom_(300×250)”, [300, 250], “pb-ad-78623” ).addService( googletag.pubads() ) ); } );

googletag.cmd.push(function() {
mobile_slots.push( googletag.defineSlot( “/1005424/_dPSv4_mob-all-article-bottom_(300×250)”, [300, 250], “pb-ad-78158” ).addService( googletag.pubads() ) ); } );

The post How to Blend in Adjustments Using Layer Masking in Photoshop by Jim Hamel appeared first on Digital Photography School.


Digital Photography School

 
Comments Off on How to Blend in Adjustments Using Layer Masking in Photoshop

Posted in Photography


Getting Started with Layer Masks in Photoshop – a Beginners Tutorial

09 Mar

Barn-DPSexample

Much of the power of Photoshop comes from its use of layers, which can best be thought of as transparency over your image. Layers have lots of benefits, like the fact that you can work on your image without affecting the pixels in the underlying image. But perhaps the most powerful aspect of layers, is your ability to affect exactly where, how, and how much of your changes will affect the underlying image. That is all done through layer masks. In fact, it might be fair to say that layers are really only effective because of layer masks.

What are layer masks? Think of them as filters that let you control the impact of the changes you make to your image. Just like you can change ordinary filters to determine what gets through them, so you can adjust a layer mask to control what changes. If that sounds confusing, don’t worry, and I will walk you through the basics of layer masks now.

How Layer Masks Work

To understand layer masks, it is best to start with the simplest form. A mask that does nothing – that is, it lets absolutely everything through from the layer you are working on, to the layer underneath – it is represented by solid white. This is referred to as a “reveal all” layer mask in Photoshop. When you look at your layers palette with a white/reveal-all layer mask, it will look like this:

Graphic1-WhiteLayerMask

When your mask is all white, any change you make on that layer, will apply to the underlying image. How do you create an all white image layer mask? Very often – as in the case of adjustment layers – one will automatically be created for you. Or, to add one yourself, just go to Layer > Layer Mask > Reveal All. You can also click on this button at the bottom of the layers palette to create one on the layer you have selected

Graphic2-LayerMaskButton2

An all-white layer mask is actually pretty useless. The utility of the layer mask comes when we start masking (hiding) things off. Before we get into that, however, let’s talk about how to create an all-black layer mask. As you might expect, a black layer mask works the opposite way as a white one, and lets absolutely nothing through to the layer underneath. You can make all the changes you want to this layer, and it will have no impact on your underlying image. Here is how it will look when you create one:

Graphic3-BlackLayerMask

To create an all-black layer mask, just go to Layer > Layer Mask > Hide All or press ALT while clicking on the same button used in the graphic above to make a white layer mask. Now that you know what layer masks are, and the basics, we can get into the real fun of them, which is where you have blacks, whites, and even tones of gray in the same mask.

Masking

Layer masks allow you to apply changes to some parts of the image, but not others. Just remember that wherever your layer mask is white, it will let the changes you made to the layer through, so that they apply to your image below. Wherever your layer mask is black, it will not let the changes through, so they will not apply to the image. Before we get into how to do that, let’s talk about when you might want apply changes to only part of your image.

Let’s take this picture of an old barn. I’m choosing this image because it will be simple to adjust using masks, as it only involves two main areas. As you can see, the sky is too bright, while the barn and foreground are too dark. In doing this for yourself for the first time, use a simple picture like this to get started.

Graphic4-BarnOriginal

As you probably know, you do not want to edit these two areas in the same way, so a global adjustment to the whole image won’t help. You can, however, use masks so that edits only apply to the areas you want. For example you might darken the sky like this:

Graphic5-SkyDarkened

Here I masked off the barn and foreground so that the darkening only applies to the sky. I used a quick Curves Adjustment layer to darken the image. As you can see, the mask of the sky is white (so the changes affect the image in that area), while the mask of the barn and foreground is black (so the changes do not affect that part of the image).

Now let’s do the opposite to brighten up the barn and the foreground. Once again, I’ll use a layer mask so that my changes only affect the barn and the foreground, so that it looks like this:

Graphic6-ForegroundBrightened

This is the same move I made above, but in reverse. I created another Curves adjustment layer to brighten up the image. Now the layer mask is white over the barn and foreground, which means the brightening effect shows through in those areas. The layer mask is black over the sky though, so the brightening effect does not impact the sky (which is already bright enough).

But how do you do go about creating these layers and masks? Let’s find out now.

Creating a Layer Mask with Defined Edges

There are different ways to mask off portions of your images. Sometimes you will want to create a mask with a hard or definite edge, while other times you will want to gently blend in the effect to a portion of your image. In this article I will cover how to create a mask on an image with a hard edge (I will get into blending in changes in a later article). The photo of the decaying barn used above will work just fine for this, so let’s stick with that photo as our example.

Step 1: Make Your Selection

To darken the sky in the image, the first thing you need to do is select the sky. To do so, click on the Quick Selection tool from your tools panel. Then click anywhere in the sky, and while holding the mouse button down, move around where you want to select pixels for your selection. Photoshop will automatically detect edges. To make the Quick Selection tool larger or smaller, use the square bracket ( [ and ] ) keys. If you end up selecting pixels you don’t want for your selection (and you inevitably will), press the ALT key (Option on a Mac) while clicking and it will remove them.

Graphic7-MarchingAnts

Photoshop is famous for providing several different ways of accomplishing the same thing. Making selections with hard edges is just such a case. You don’t have to use the Quick Selection tool. You can also use the Magic Wand tool, which will select similarly-toned pixels. Or you could use the Pen tool, or the Magnetic Lasso tool to draw the edges yourself. I could actually see a good case here for the Color Range command (Select > Color Range), which selects pixels of similar colors. Any one of those tools could work. While I want to point that out, I don’t want to get bogged down covering each of them. For now, just know that while I typically use the Quick Selection tool and did so here, there are other tools you can use to make the selection.

Step 2: Refine Your Selection

Once you make your selection, you can refine it a bit if you wish. Just bring up the Refine Edge dialog box and make adjustments there.

Graphic8-RefineEdge

If you do not like the selection, you can always clean it up a bit later. Once you have made the adjustments, you can use the Brush tool to add or subtract parts of the image from the mask (more about that in a minute).

Step 3: Apply the Effect

Now that your selection is created and refined, you are ready to put it into action. What we want to do is darken the sky. There are different ways to go about doing that, but what I’m going to use is a Curves adjustment layer. You don’t have to use this tool though, this same process will work when you create any sort of adjustment layer. If you are more comfortable using Levels or Brightness/Contrast, for example, use those.

In any case, all you will do now (with your selection still active) is click to create the Curves adjustment layer (or whatever type of adjustment layer you are comfortable with) and voila, the layer is created with a mask that has hidden the pixels you don’t want to change. It will look something like this:

Graphic9-HardEdgedLayerMask

If you use a Curves adjustment layer like I did, you just pull the line down to darken the picture. Pull it down to the left of the main cluster of pixels so that the curve is steepened through that main cluster. Of course, you may be using Levels or some other darkening tool, so just use those in whatever way you are comfortable.

Step 4: Repeat for Other Areas

In our example, we have now darkened the sky, but there are other problems with the picture. In particular, the barn and foreground are still too dark. How do we go about changing that? Pretty much the same way we did for the sky.

Start by making the selection. You can do it the same way as you did for the sky if you want. Just grab the Quick Selection tool and click around in the dark areas to create the selection. In this case, you can also just create a selection that is the opposite of the selection we previously created. That is, you previously made a selection of the sky and left everything else alone. Now you want to make a selection of everything else and leave the sky alone. To do that, you can just call up your old selection (Select > Reselect) and then tell Photoshop to reverse it (Select > Inverse). You now have a selection of everything but the sky, which is what you want.

From there, just create a Curves adjustment layer (or whatever tool you prefer to use) and apply the effect. Once you brighten the foreground, here is how it looks:

Graphic10-Lightening

Step 5: Cleaning up Your Masks

You may find, when you are done, that there are parts of the image that don’t look quite right. Perhaps there are pixels included in one of your masks that you didn’t want, or conversely you missed pixels that should have been in the image. You can clean up the mask after the fact. I find that the easiest way is to use the Brush tool.

Graphic11-Brush

Select the Brush tool on the tools panel. Once you do so, pay attention to the foreground color, that which the brush will use. If you set the brush to white, it will add to a selection (show the layer through the mask). If you set the brush to black, it will remove pixels from the selection (hide the layer with the mask). Some keyboard shortcuts to keep in mind are B to bring up the Brush tool in the first place, then D to make sure the colors are set to the default (black and white), and finally X to switch between black and white.

Graphic12-BrushControls

The Brush tool is great because you can set the hardness of the edge. Start by keeping it at its softest setting, and just changing the size of the Brush by using the bracket keys [ and ]. Use it to touch up the selection (mask) where needed (make sure you are painting on the mask NOT on the actual layer). Another tip is to press ALT (option on a Mac) while clicking on the mask in your layers palatte, which will cause the screen to display the mask only. That way you can see exactly where your mask is being applied. Press ALT again while clicking on the mask to go back to normal view.

Moving on From Here

This exercise will get you started using layer masks to make adjustments to portions of your pictures. Once you have done this a few times and start to master it, there are a lot of other additional techniques you can add to further enhance your photos. For example, while this article showed you how to use masks where you have defined edges, you can gradually blend in effects using masks as well. Further, while in this article we only affected brightness, you can use layer masks to affect color, brightness, and contrast to a great degree.

Of course, masks are not just for adjustment layers either. You can make changes on layers and control where and to what extent, the change gets applied. For example, you might sharpen or blur a layer, and then use a mask to apply that effect to only a portion of the picture. It also works well by making changes with a plug-in to a duplicate layer, then creating a mask to control the application of that plug-in’s changes.

When you use layer masks, you are well on your way to unleashing the full power of Photoshop. Get started with the techniques in this article, then you can add on other aspects from there.

googletag.cmd.push(function() {
tablet_slots.push( googletag.defineSlot( “/1005424/_dPSv4_tab-all-article-bottom_(300×250)”, [300, 250], “pb-ad-78623” ).addService( googletag.pubads() ) ); } );

googletag.cmd.push(function() {
mobile_slots.push( googletag.defineSlot( “/1005424/_dPSv4_mob-all-article-bottom_(300×250)”, [300, 250], “pb-ad-78158” ).addService( googletag.pubads() ) ); } );

The post Getting Started with Layer Masks in Photoshop – a Beginners Tutorial by Jim Hamel appeared first on Digital Photography School.


Digital Photography School

 
Comments Off on Getting Started with Layer Masks in Photoshop – a Beginners Tutorial

Posted in Photography


Layer Chair: Mod Slots Let You Swap Out Panelized Acrylic Decor

10 Jan

[ By WebUrbanist in Design & Furniture & Decor. ]

layer chair

Treating the seat and back as blank slates for expression, the Layer Chair allows its owner to slip in and slide out works of art and design, transforming the look of the furniture on demand.

layer hologram pop art

layer print insertion

The clear acrylic framework “allows for a see-through structure. Both the back and the base of the chair have a void where the user can fit three different layers of printed or colored acrylic, or even wood, glass, or any other material that comes in mind.”

layer chair mod effect

layer chair diy mod

The approach by South Korean graphic and industrial designer Sohyun Yun is intended to address aesthetic limitations of traditional chairs, which are locked into a single style or look. Instead, through layers, this seat is visually refreshed through user-driven modifications.

layer normal seat use

layer seat insert

Anything is possible, from pairing a hologram back with an Andy Warhol seat print, to slotting in more conventional looking pieces and parts aligned with other furniture looks and styles.

layer custom chair color

layers sliding into place

layer simple colors seat

The layers also allow for experimentation and playful interactions between sheets, since their patterns can be partial and/or semi-opaque. A number of layers come with the initial object, but others can be created or bought by users as well.

Share on Facebook


[ By WebUrbanist in Design & Furniture & Decor. ]

[ WebUrbanist | Archives | Galleries | Privacy | TOS ]


WebUrbanist

 
Comments Off on Layer Chair: Mod Slots Let You Swap Out Panelized Acrylic Decor

Posted in Creativity


5 Photoshop Layer Mask Tricks – Video Tutorial

26 Apr

Photoshop has many features that can make photo editing both non-destructive and creative. Using Layer masks is one such feature. Masks can also be confusing to understand and they have many ways to apply and use them.

In this video tutorial Joshua Cripps goes over five layer mask tricks – I even learned a couple things I hadn’t seen before, so thanks for that! See if you can pick up some things you can use for post-processing your images:

Menu > Image > Apply image = brilliant!

Try and see for yourself. Do you have any other Photoshop layer masking tips or tricks? Please share with us in the comments below. There are a million ways to do things in Photoshop, no one can know them all so show me something else I haven’t seen!

googletag.cmd.push(function() {
tablet_slots.push( googletag.defineSlot( “/1005424/_dPSv4_tab-all-article-bottom_(300×250)”, [300, 250], “pb-ad-78623” ).addService( googletag.pubads() ) ); } );

googletag.cmd.push(function() {
mobile_slots.push( googletag.defineSlot( “/1005424/_dPSv4_mob-all-article-bottom_(300×250)”, [300, 250], “pb-ad-78158” ).addService( googletag.pubads() ) ); } );

The post 5 Photoshop Layer Mask Tricks – Video Tutorial by Darlene Hildebrandt appeared first on Digital Photography School.


Digital Photography School

 
Comments Off on 5 Photoshop Layer Mask Tricks – Video Tutorial

Posted in Photography