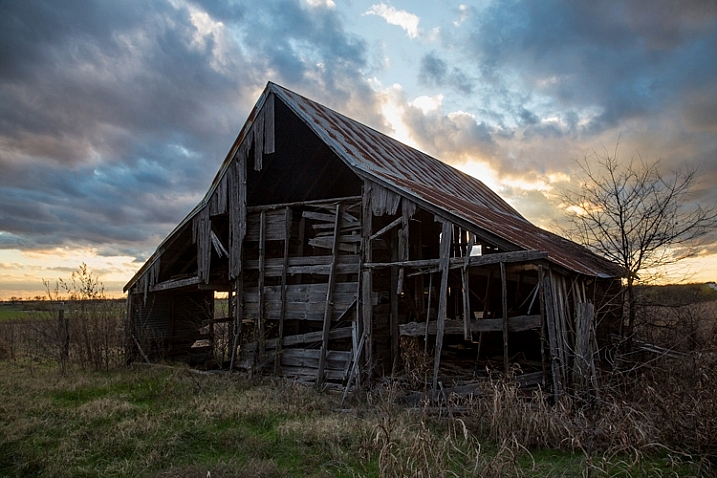
Much of the power of Photoshop comes from its use of layers, which can best be thought of as transparency over your image. Layers have lots of benefits, like the fact that you can work on your image without affecting the pixels in the underlying image. But perhaps the most powerful aspect of layers, is your ability to affect exactly where, how, and how much of your changes will affect the underlying image. That is all done through layer masks. In fact, it might be fair to say that layers are really only effective because of layer masks.
What are layer masks? Think of them as filters that let you control the impact of the changes you make to your image. Just like you can change ordinary filters to determine what gets through them, so you can adjust a layer mask to control what changes. If that sounds confusing, don’t worry, and I will walk you through the basics of layer masks now.
How Layer Masks Work
To understand layer masks, it is best to start with the simplest form. A mask that does nothing – that is, it lets absolutely everything through from the layer you are working on, to the layer underneath – it is represented by solid white. This is referred to as a “reveal all” layer mask in Photoshop. When you look at your layers palette with a white/reveal-all layer mask, it will look like this:
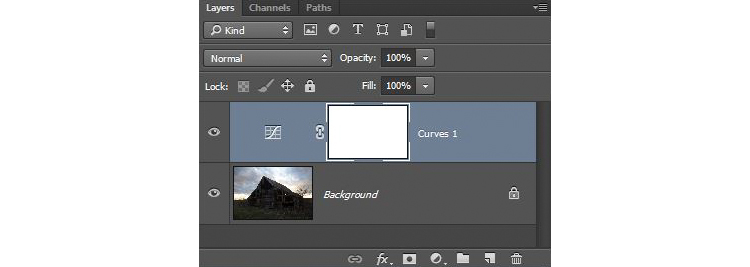
When your mask is all white, any change you make on that layer, will apply to the underlying image. How do you create an all white image layer mask? Very often – as in the case of adjustment layers – one will automatically be created for you. Or, to add one yourself, just go to Layer > Layer Mask > Reveal All. You can also click on this button at the bottom of the layers palette to create one on the layer you have selected

An all-white layer mask is actually pretty useless. The utility of the layer mask comes when we start masking (hiding) things off. Before we get into that, however, let’s talk about how to create an all-black layer mask. As you might expect, a black layer mask works the opposite way as a white one, and lets absolutely nothing through to the layer underneath. You can make all the changes you want to this layer, and it will have no impact on your underlying image. Here is how it will look when you create one:
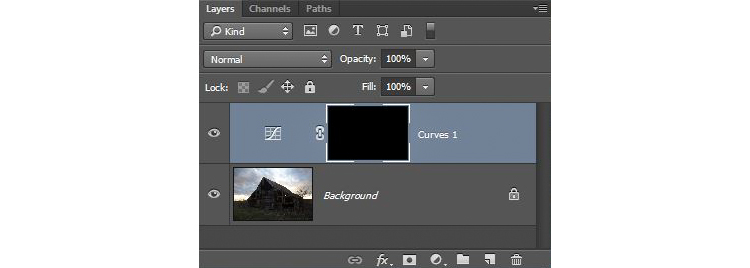
To create an all-black layer mask, just go to Layer > Layer Mask > Hide All or press ALT while clicking on the same button used in the graphic above to make a white layer mask. Now that you know what layer masks are, and the basics, we can get into the real fun of them, which is where you have blacks, whites, and even tones of gray in the same mask.
Masking
Layer masks allow you to apply changes to some parts of the image, but not others. Just remember that wherever your layer mask is white, it will let the changes you made to the layer through, so that they apply to your image below. Wherever your layer mask is black, it will not let the changes through, so they will not apply to the image. Before we get into how to do that, let’s talk about when you might want apply changes to only part of your image.
Let’s take this picture of an old barn. I’m choosing this image because it will be simple to adjust using masks, as it only involves two main areas. As you can see, the sky is too bright, while the barn and foreground are too dark. In doing this for yourself for the first time, use a simple picture like this to get started.
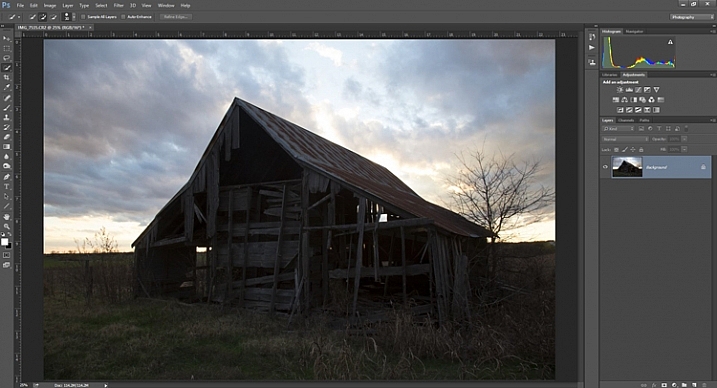
As you probably know, you do not want to edit these two areas in the same way, so a global adjustment to the whole image won’t help. You can, however, use masks so that edits only apply to the areas you want. For example you might darken the sky like this:
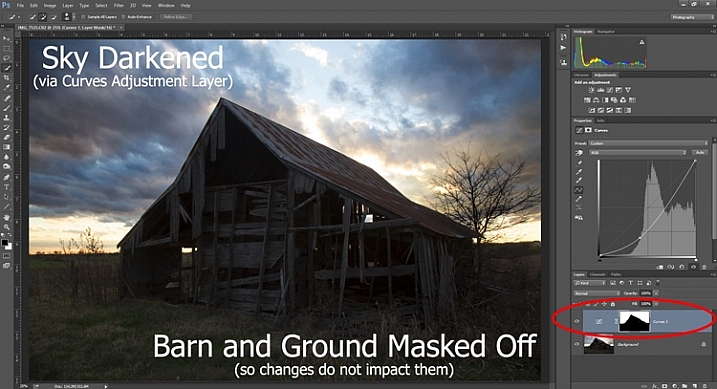
Here I masked off the barn and foreground so that the darkening only applies to the sky. I used a quick Curves Adjustment layer to darken the image. As you can see, the mask of the sky is white (so the changes affect the image in that area), while the mask of the barn and foreground is black (so the changes do not affect that part of the image).
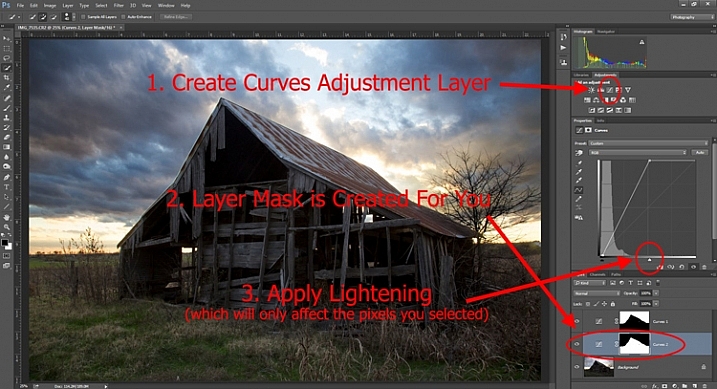
Now let’s do the opposite to brighten up the barn and the foreground. Once again, I’ll use a layer mask so that my changes only affect the barn and the foreground, so that it looks like this:
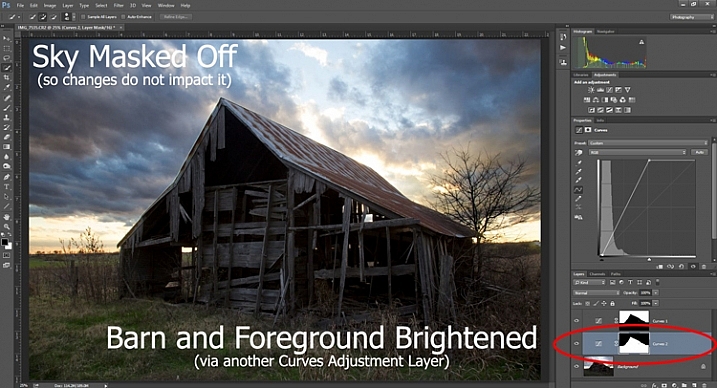
This is the same move I made above, but in reverse. I created another Curves adjustment layer to brighten up the image. Now the layer mask is white over the barn and foreground, which means the brightening effect shows through in those areas. The layer mask is black over the sky though, so the brightening effect does not impact the sky (which is already bright enough).
But how do you do go about creating these layers and masks? Let’s find out now.
Creating a Layer Mask with Defined Edges
There are different ways to mask off portions of your images. Sometimes you will want to create a mask with a hard or definite edge, while other times you will want to gently blend in the effect to a portion of your image. In this article I will cover how to create a mask on an image with a hard edge (I will get into blending in changes in a later article). The photo of the decaying barn used above will work just fine for this, so let’s stick with that photo as our example.
Step 1: Make Your Selection
To darken the sky in the image, the first thing you need to do is select the sky. To do so, click on the Quick Selection tool from your tools panel. Then click anywhere in the sky, and while holding the mouse button down, move around where you want to select pixels for your selection. Photoshop will automatically detect edges. To make the Quick Selection tool larger or smaller, use the square bracket ( [ and ] ) keys. If you end up selecting pixels you don’t want for your selection (and you inevitably will), press the ALT key (Option on a Mac) while clicking and it will remove them.
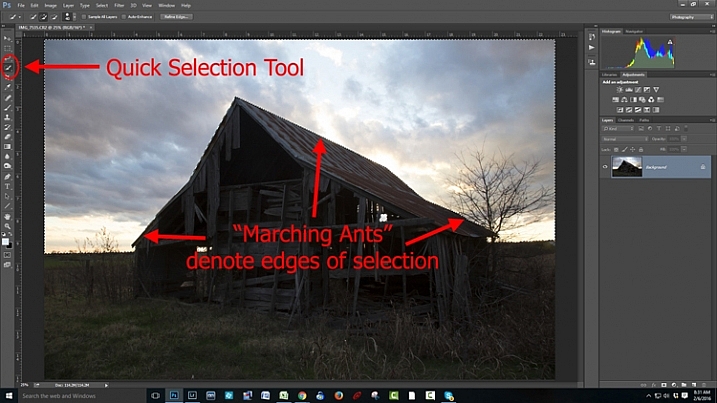
Photoshop is famous for providing several different ways of accomplishing the same thing. Making selections with hard edges is just such a case. You don’t have to use the Quick Selection tool. You can also use the Magic Wand tool, which will select similarly-toned pixels. Or you could use the Pen tool, or the Magnetic Lasso tool to draw the edges yourself. I could actually see a good case here for the Color Range command (Select > Color Range), which selects pixels of similar colors. Any one of those tools could work. While I want to point that out, I don’t want to get bogged down covering each of them. For now, just know that while I typically use the Quick Selection tool and did so here, there are other tools you can use to make the selection.
Step 2: Refine Your Selection
Once you make your selection, you can refine it a bit if you wish. Just bring up the Refine Edge dialog box and make adjustments there.
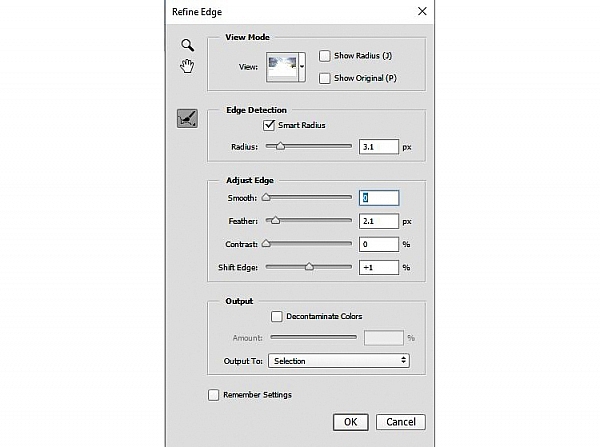
If you do not like the selection, you can always clean it up a bit later. Once you have made the adjustments, you can use the Brush tool to add or subtract parts of the image from the mask (more about that in a minute).
Step 3: Apply the Effect
Now that your selection is created and refined, you are ready to put it into action. What we want to do is darken the sky. There are different ways to go about doing that, but what I’m going to use is a Curves adjustment layer. You don’t have to use this tool though, this same process will work when you create any sort of adjustment layer. If you are more comfortable using Levels or Brightness/Contrast, for example, use those.
In any case, all you will do now (with your selection still active) is click to create the Curves adjustment layer (or whatever type of adjustment layer you are comfortable with) and voila, the layer is created with a mask that has hidden the pixels you don’t want to change. It will look something like this:
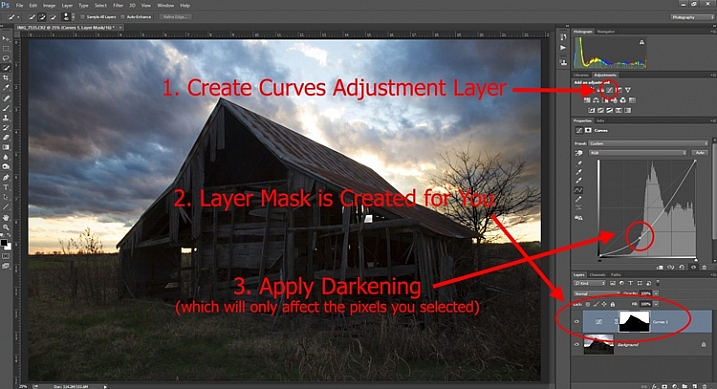
If you use a Curves adjustment layer like I did, you just pull the line down to darken the picture. Pull it down to the left of the main cluster of pixels so that the curve is steepened through that main cluster. Of course, you may be using Levels or some other darkening tool, so just use those in whatever way you are comfortable.
Step 4: Repeat for Other Areas
In our example, we have now darkened the sky, but there are other problems with the picture. In particular, the barn and foreground are still too dark. How do we go about changing that? Pretty much the same way we did for the sky.
Start by making the selection. You can do it the same way as you did for the sky if you want. Just grab the Quick Selection tool and click around in the dark areas to create the selection. In this case, you can also just create a selection that is the opposite of the selection we previously created. That is, you previously made a selection of the sky and left everything else alone. Now you want to make a selection of everything else and leave the sky alone. To do that, you can just call up your old selection (Select > Reselect) and then tell Photoshop to reverse it (Select > Inverse). You now have a selection of everything but the sky, which is what you want.
From there, just create a Curves adjustment layer (or whatever tool you prefer to use) and apply the effect. Once you brighten the foreground, here is how it looks:
Step 5: Cleaning up Your Masks
You may find, when you are done, that there are parts of the image that don’t look quite right. Perhaps there are pixels included in one of your masks that you didn’t want, or conversely you missed pixels that should have been in the image. You can clean up the mask after the fact. I find that the easiest way is to use the Brush tool.

Select the Brush tool on the tools panel. Once you do so, pay attention to the foreground color, that which the brush will use. If you set the brush to white, it will add to a selection (show the layer through the mask). If you set the brush to black, it will remove pixels from the selection (hide the layer with the mask). Some keyboard shortcuts to keep in mind are B to bring up the Brush tool in the first place, then D to make sure the colors are set to the default (black and white), and finally X to switch between black and white.

The Brush tool is great because you can set the hardness of the edge. Start by keeping it at its softest setting, and just changing the size of the Brush by using the bracket keys [ and ]. Use it to touch up the selection (mask) where needed (make sure you are painting on the mask NOT on the actual layer). Another tip is to press ALT (option on a Mac) while clicking on the mask in your layers palatte, which will cause the screen to display the mask only. That way you can see exactly where your mask is being applied. Press ALT again while clicking on the mask to go back to normal view.
Moving on From Here
This exercise will get you started using layer masks to make adjustments to portions of your pictures. Once you have done this a few times and start to master it, there are a lot of other additional techniques you can add to further enhance your photos. For example, while this article showed you how to use masks where you have defined edges, you can gradually blend in effects using masks as well. Further, while in this article we only affected brightness, you can use layer masks to affect color, brightness, and contrast to a great degree.
Of course, masks are not just for adjustment layers either. You can make changes on layers and control where and to what extent, the change gets applied. For example, you might sharpen or blur a layer, and then use a mask to apply that effect to only a portion of the picture. It also works well by making changes with a plug-in to a duplicate layer, then creating a mask to control the application of that plug-in’s changes.
When you use layer masks, you are well on your way to unleashing the full power of Photoshop. Get started with the techniques in this article, then you can add on other aspects from there.
googletag.cmd.push(function() {
tablet_slots.push( googletag.defineSlot( “/1005424/_dPSv4_tab-all-article-bottom_(300×250)”, [300, 250], “pb-ad-78623” ).addService( googletag.pubads() ) ); } );
googletag.cmd.push(function() {
mobile_slots.push( googletag.defineSlot( “/1005424/_dPSv4_mob-all-article-bottom_(300×250)”, [300, 250], “pb-ad-78158” ).addService( googletag.pubads() ) ); } );
The post Getting Started with Layer Masks in Photoshop – a Beginners Tutorial by Jim Hamel appeared first on Digital Photography School.
You must be logged in to post a comment.