RSS
 

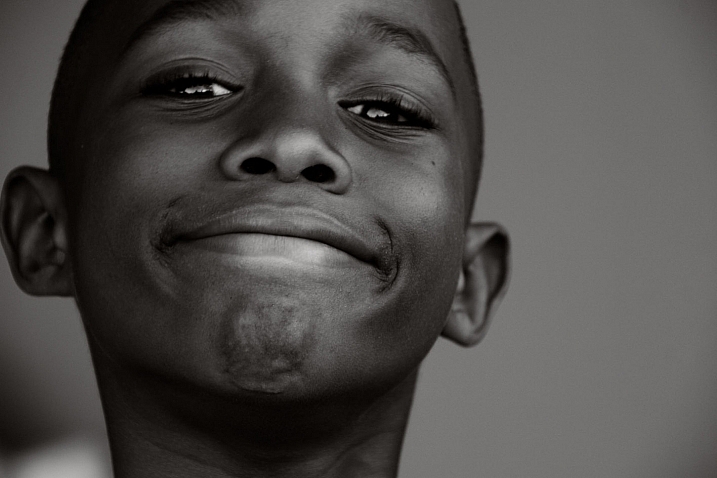
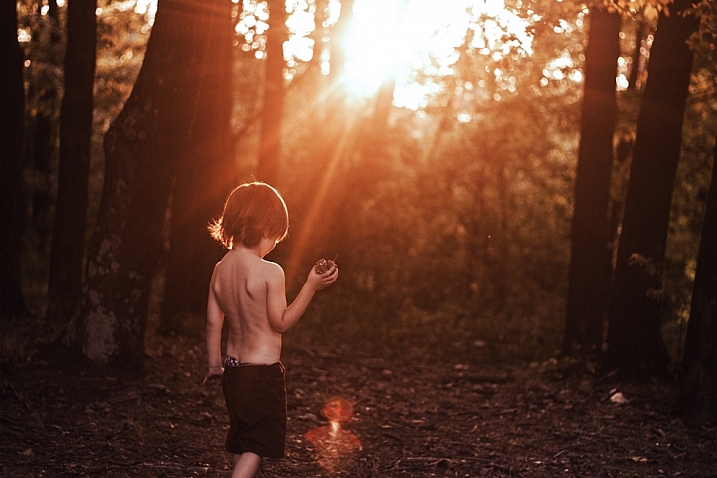
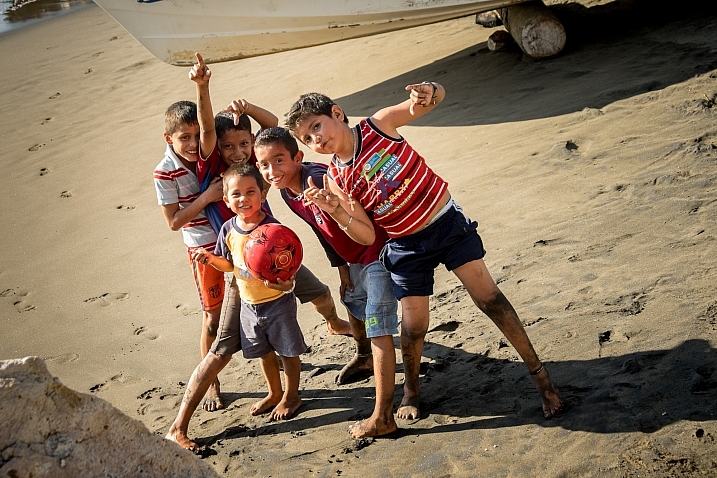
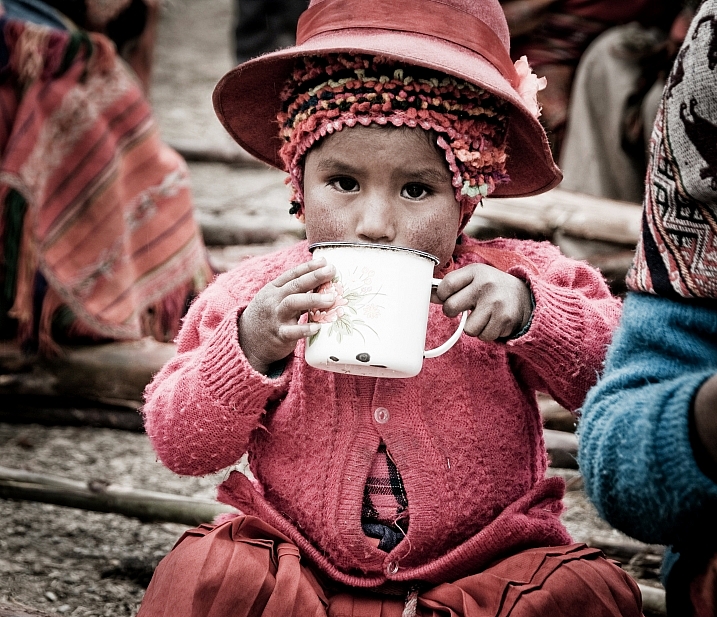
Posts Tagged ‘Kids’

DPReview recommends: Best Cameras for Kids 2015

16 Dec

If they’re young enough, your kids have always known a world in which smartphones are the most popular devices for taking photos. That’s too bad. To ensure that the next wave of young photographers understand the performance and ergonomic advantages of using a real camera, you’ll need to get one into their hands as soon as possible.

But wait! Before you sneak a Nikon D810 into your baby’s basket of toys, you’ll need to consider choking hazards and the fact that some children are a lot more careful than others when it comes to handling expensive electronics. If you want to buy a camera specifically for your child – or a camera that your entire family can share without worrying too much – durability and ease of use are just as important, if not more, as image quality and features.

And, of course, much of that depends on the age and maturity level of your child. We wouldn’t trust any toddler or the vast majority of 10-year-old boys with an advanced point-and-shoot, but for a teenager or pre-teen that’s wise beyond their years and genuinely interested in photography, a compact with a lot of zoom and manual controls to grow into might be a great fit.

So here’s a selection of some of what we think are the best camera options for your kids. Most of these models aren’t specifically for kids, and all of the obvious caveats apply. Batteries aren’t edible, memory cards are choke hazards, cameras can hurt when they’re thrown at people, etc. All prices are approximate street prices, correct at time of publication, and if you think we’ve missed a model that deserves consideration, let us know in the comments!

Younger Kids

If you’re shopping for kids 6 and under, you probably don’t want to spend a lot of money, and durability is likely to be important. You want something lightweight that won’t break the first time it gets dropped, and the simpler the operation the better.

Vtech Kidizoom Connect ($ 48)

1.3MP sensor | 4X digital zoom | 1.8″ LCD | 320 x 240 video | 128MB built-in memory | uses AA batteries

Baby’s first piece of kit should be tough and inexpensive, and the VTech KidiZoom fits the bill. This durable 1.3-megapixel camera/toy comes has a fixed lens with 4X digital zoom, 128MB of internal memory (with an option for MicroSD memory card expansion), a 1.8″ LCD and 320 x 240 video. There are even three photo-related games to keep your kids entertained.


Nikon Coolpix S33 ($ 99)

13.2MP CMOS sensor | 30-90mm equiv. lens | Waterproof to 32ft | Shockproof from 5ft | Full HD video

Cameras do get bumped and dropped (or worse), making Nikon’s inexpensive waterproof, shockproof and freezeproof Coolpix S33 worth a look. It features an easy-to-use interface and dedicated one-touch buttons for simple shooting. Although it’s 13.2 megapixel CMOS sensor is roughly the size of what’s in your smartphone, it can capture decent quality images. Its lens has a focal range of of 30-90mm – adequate for most purposes. A dedicated movie record button allows users to quickly shoot Full HD video clips. The S33 offers sixteen creative styles and effects options (including Underwater Face Detection) and an option to shoot videos with a miniature effect.


Fujifilm instax mini 8 ($ 80)

Makes card-sized instant prints | 60mm equiv. fixed lens | Uses AA batteries | Comes in several colors

Now your kids can relive the days of instant prints with the Fujifilm instax mini 8, one of several models available from the company. It’s definitely not rugged, but the thrill of getting a 2.4 x 1.8 inch print in about 2-3 minutes will excite both kids and adults alike. The mini 8 is a very basic camera, with a small optical viewfinder (and no LCD), dial-in exposure, and a flash that always fires. One important thing to know is that instax cameras are a bit of a money pit, with a ten pack of film priced at around $ 8.50, so your little photographers will need to be pretty selective before pressing that shutter release button.  


Viddy Pinhole Camera kit ($ 57)

DIY pinhole camera | Accepts 35mm or medium-format film | Available in four colors

For the creative kid with a do-it-yourself attitude, the VIDDY is a pinhole camera kit made from tough, durable recycled cardboard in four colors: green, black, blue or red. It accepts both medium format and 35mm film. Bonus: it’s a perfect project between parent and child. Pop out VIDDY’s screen printed parts and assemble in 30 minutes.


Polaroid Cube ($ 99)

6MP sensor | 35mm lens w/124° angle-of-view | Weatherproof | Full HD video | Numerous mounts available

The latest HD action camera from Polaroid combines a 6MP sensor with a lens with an impressive 124° field-of-view and puts it into a weatherproof body measuring just 35mm on each side. The camera has can record Full HD video onto an optional microSD card, and a 90 minute battery allows extended recording for every bike ride and beach adventure. Just like more expensive GoPros, there are numerous mounts available for the Cube, plus an underwater housing. And a magnet in the camera’s base opens up even more potentially interesting vantage points.

For those seeking Wi-Fi capabilities, the Cube+ offers that for $ 149.

Older Kids

Durability may be less important in a camera for this age group, but it really depends on the child. In our selection we’re assuming that you’re buying for a kid who’s learned not to throw precious things around, and most of the models we’ve chosen offer a little room for your child to grow away from the strictly auto-everything snap-shooting if they get more confident.

Olympus Tough TG-4 ($ 349)

16MP BSI CMOS sensor | 25-100mm equiv. lens | Waterproof to 50ft | Full HD video | Wi-Fi + GPS

For kids that are on the go – or have the tendency to drop expensive pieces of electronics, the Olympus TG-4 is a good choice. It’s well built, responsive, full-featured and produces excellent quality images for a small-sensor camera. It offers automatic shooting modes but opens up the world of manual exposure for older children ready to get their feet wet (no pun intended) in more serious photography. Other features include numerous ‘art filters’, Full HD video recording, and support for fisheye and telephoto conversion lenses. It has very good battery life as well, so it can make it through the day with ease.

The TG-4 is waterproof to 50ft, shockproof from 7ft, crushproof to 220lbf and freeze proof to +14F, so it can take a beating. Wi-Fi is built-in for easy photo sharing, and the GPS receiver will let young photographers check a map to see where a photo was taken.

Panasonic Lumix DMC-ZS50 ($ 250)

12MP BSI CMOS sensor | 24-720mm equiv. lens | Electronic viewfinder | Full HD video | Wi-Fi


For the child you trust with more fragile cameras, might we suggest the Panasonic Lumix DMC-ZS50. It’s a great camera to take on vacation, thanks to its long 24-720mm (30X) zoom lens and ultra-compact body. It offers speedy focusing and continuous shooting, and photos can be composed on either a 3″ LCD or a small (but still useful) electronic viewfinder. The camera can record Full HD video with ‘hybrid’ image stabilization to reduce severe camera shake. 

The ZS50 offers more advanced manual controls than the TG-4 above, so if you want to teach your budding photographer about aperture and shutter speed or how to manual focus, the ZS50 is a camera which can do it.


Apple iPod Touch ($ 199 and up)

Full-featured smart device | 8MP BSI CMOS sensor | F2.4, 29mm equiv. lens | 4″ Retina display | Full HD video

While it may be too early in their lives to buy your kids an iPhone, you might as well prepare for the inevitable by picking up an iPod Touch (2015). It’s essentially an iPhone without the phone, meaning that you get access to hundreds of thousands of apps, many photo-related, easy photo sharing over Wi-Fi, and all of the other things that have made iPhones a smash hit.

On the photo side, the iPod Touch sports a 8MP BSI CMOS sensor and an F2.4, 29mm equivalent lens, plus a lower resolution front-facing camera for selfies. It has the usual features you’d expect to see on a ‘regular’ camera, plus impressive Auto HDR and panorama features. The iPod Touch can also record Full HD video, with slo-mo and time-lapse options. You couldn’t ask for a better screen on which to compose photos, either, as the 4″ Retina display truly shines. You can even add extra lenses from companies like Olloclip for more flexibility.

Articles: Digital Photography Review (dpreview.com)

 
Comments Off on DPReview recommends: Best Cameras for Kids 2015

Posted in Uncategorized


Weekly Photography Challenge – Kids

05 Dec

Kids! Gotta love them. I don’t have any myself but I enjoy being around them, and taking in their energy and freedom they exhibit. They say what’s on their mind and aren’t afraid of what other people think when they dance, sing, do art, etc. We adults can learn a lot from them.

Jessica Lucia

By Jessica Lucia

Weekly Photography Challenge – Kids

So how can we capture the essence of what being a kid is all about in our photographs? These recent dPS articles may help you:

  • 5 Tips for Photographing Your Own Children Stress-Free
  • Tried and Tested Tips for Photographing Kids
  • 4 Tips for Connecting and Photographing Kids More Naturally
  • 10 Tips for Taking Stunning Winter Portraits of Your Kids

Now go photograph some kids. Your own, or borrow the neighbor’s kids.

Note: be very conscious of photographing kids in a public place, especially if you are male. It could be seen as creepy and you could get in big trouble. Make sure you have a parent’s approval first if you do so. 

Motiqua

By motiqua

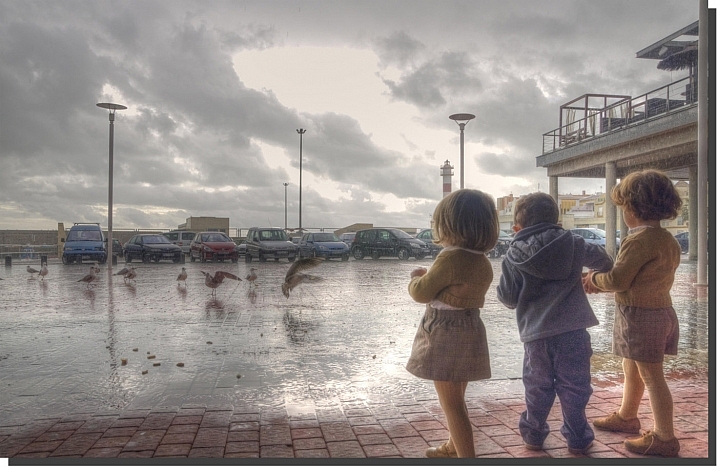
Paolo Marconi

By Paolo Marconi

Rafal Zych

By Rafal Zych

Susana Fernandez

By Susana Fernandez

Toni Verdú Carbó

By Toni Verdú Carbó

Rakesh JV

By Rakesh JV

Share your images below:

Simply upload your shot into the comment field (look for the little camera icon in the Disqus comments section) and they’ll get embedded for us all to see or if you’d prefer upload them to your favourite photo sharing site and leave the link to them. Show me your best images in this week’s challenge. Sometimes it takes a while for an image to appear so be patient and try not to post the same image twice.

Fergus Macdonald

By Fergus Macdonald

Tony Alter

By Tony Alter

Clappstar

By clappstar

googletag.cmd.push(function() {
tablet_slots.push( googletag.defineSlot( “/1005424/_dPSv4_tab-all-article-bottom_(300×250)”, [300, 250], “pb-ad-78623” ).addService( googletag.pubads() ) ); } );

googletag.cmd.push(function() {
mobile_slots.push( googletag.defineSlot( “/1005424/_dPSv4_mob-all-article-bottom_(300×250)”, [300, 250], “pb-ad-78158” ).addService( googletag.pubads() ) ); } );

The post Weekly Photography Challenge – Kids by Darlene Hildebrandt appeared first on Digital Photography School.


Digital Photography School

 
Comments Off on Weekly Photography Challenge – Kids

Posted in Photography


29 Unencumbered Images of Kids Being Kids

04 Dec

Kids have a natural free spirit about them. They don’t sensor themselves and they do what they want, how they want, when they want to – usually.

Let’s see some images (you’ll notice that a few of these are my own images) that capture this essence of what it is to be a kid:

Benurs - Learning And Learning...

By Benurs – Learning and learning…

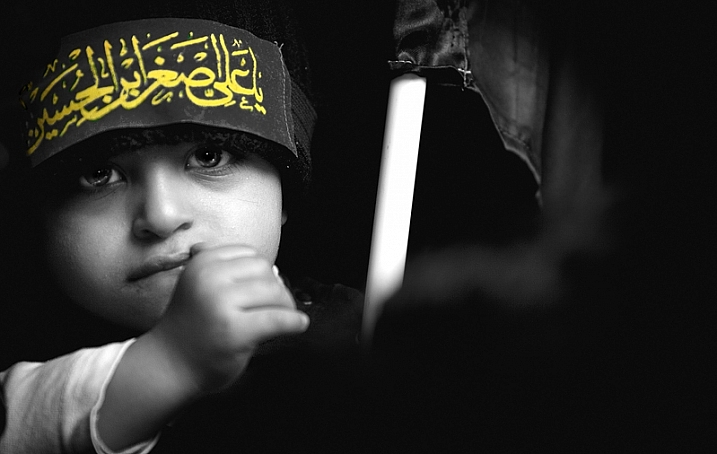
Maitham Rushaidan

By Maitham Rushaidan

Adoephoto

By adoephoto

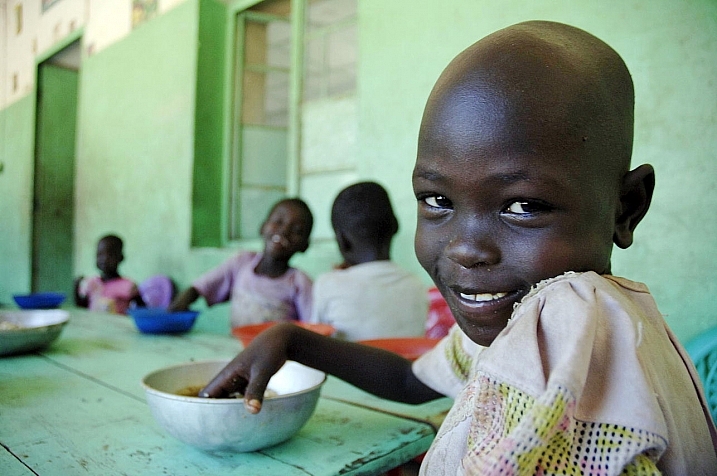
United Nations Photo

By United Nations Photo

Marcin Moga

By Marcin Moga

Attila Siha

By Attila Siha

Brighter Than Sunshine

By brighter than sunshine

Premnath Thirumalaisamy

By Premnath Thirumalaisamy

ThomasLife

By ThomasLife

Robbert Van Der Steeg

By Robbert van der Steeg

Donnie Ray Jones

By Donnie Ray Jones

Darlene Hildebrandt

By Darlene Hildebrandt

Darlene Hildebrandt

By Darlene Hildebrandt

Darlene Hildebrandt

By Darlene Hildebrandt

Steve Evans

By Steve Evans

Steve Evans

By Steve Evans

Darlene Hildebrandt

By Darlene Hildebrandt

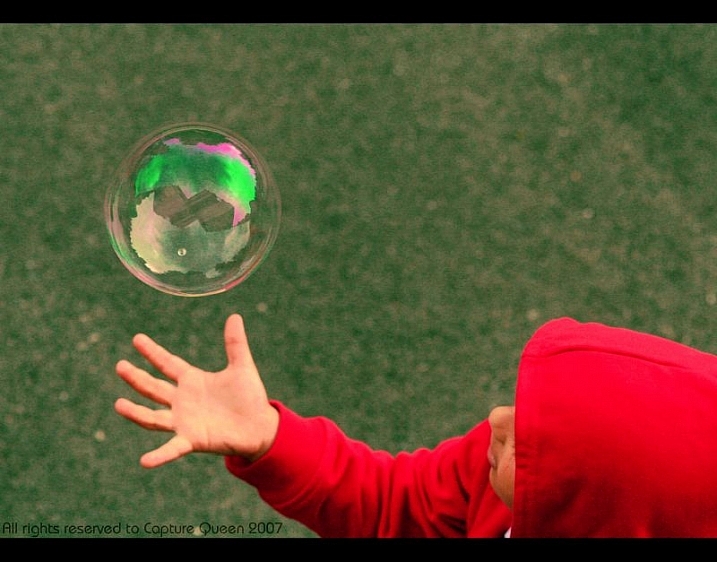
Capture Queen

By Capture Queen

ZOBEL *

By ZOBEL *

Kevin Conor Keller

By Kevin Conor Keller

Darlene Hildebrandt

By Darlene Hildebrandt

Darlene Hildebrandt

By Darlene Hildebrandt

Darlene Hildebrandt

By Darlene Hildebrandt

Amina Tagemouati

By Amina Tagemouati

Ilavanji Ilavanji

By ilavanji ilavanji

Paul David

By Paul David

Brittany Randolph

By Brittany Randolph

Peter Roome

By Peter Roome

David Guyler

By David Guyler

googletag.cmd.push(function() {
tablet_slots.push( googletag.defineSlot( “/1005424/_dPSv4_tab-all-article-bottom_(300×250)”, [300, 250], “pb-ad-78623” ).addService( googletag.pubads() ) ); } );

googletag.cmd.push(function() {
mobile_slots.push( googletag.defineSlot( “/1005424/_dPSv4_mob-all-article-bottom_(300×250)”, [300, 250], “pb-ad-78158” ).addService( googletag.pubads() ) ); } );

The post 29 Unencumbered Images of Kids Being Kids by Darlene Hildebrandt appeared first on Digital Photography School.


Digital Photography School

 
Comments Off on 29 Unencumbered Images of Kids Being Kids

Posted in Photography


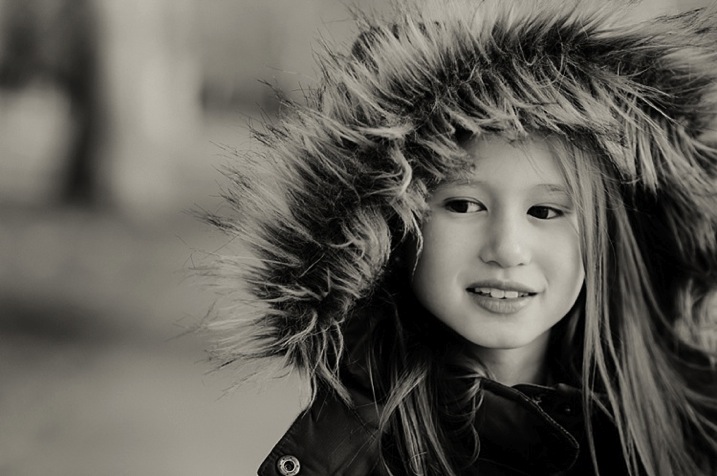
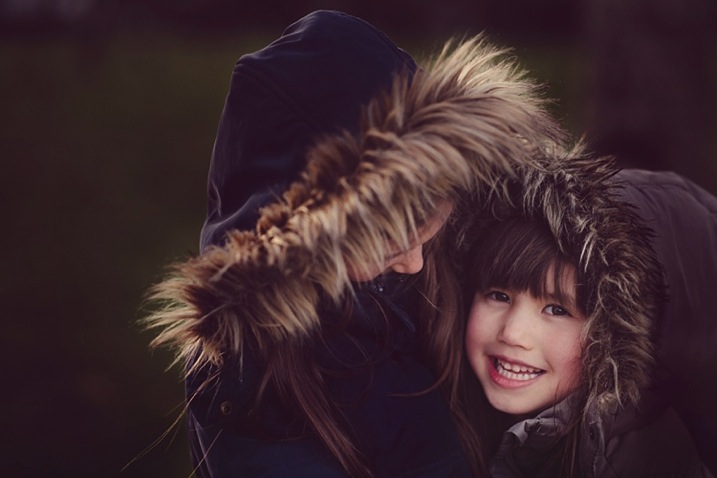
10 Tips for Taking Stunning Winter Portraits of Your Kids

03 Dec

Just because it’s winter doesn’t mean we can only shoot indoors. It may be cold (and rainy if you’re in London) most days, but when the winter sun shows its face, it fills the earth with a beautiful warm glow, especially late in the day. This bring us to what is known as the golden hour – typically about an hour before sunset. The further you are from the equator, the more time you would need, in my case about 1 – 1.5 hours, before sunset.

Winter portrait1

Here are my 10 top tips on how to get stunning winter portraits of your own kids:

#1 Choose the right day and time

Choose a sunny day and plan to get to your shooting location a good hour or so before sunset.

#2 Dress them warmly and make it fun

Wrap your children up nice and toasty so they won’t complain. Tell them you are taking them out for one hour to the park or the playground (or your chosen location) but that you would like to take a few photos of them before you get to the actual promised site. The easiest for us was the playground, as we have to walk about 10 minutes from the entrance to the park to get to there. It is a good idea to choose a halfway point to stop.

Winter portrait3

#3 Have warm beverages during or after the session

Either bring a snack or warm drinks in a thermos (keep it light and simple though), promise to take them for a nice warm drink in a nearby cafe after your little trip to the playground, or make them hot chocolates when you get home (whatever works for you).

#4 Find the good light and start shooting

Halfway to the playground, your kids would already have been having fun running and chasing each other. Remind them of the photos you want to take, and show them the light is so beautiful and perfect. Ask for their suggestions where you could stop and take some nice picture. Make sure there is light coming from one side, but that they are fully in the shade of a tree (open shade) to avoid hotspots and mottled faces.

Winter portrait2

#5 Be fast

Keep it quick! Kids get bored if you take too long so just aim for a few portraits. Ask them to stand, cuddle and tickle, or make each other laugh, swap places, do their own poses and click away like nobody’s business.

Techie tips: If shooting in semi-automatic mode, choose a wide aperture or set it to Aperture Priority (and choose a large aperture, small f-number) so you get the blurry background effect. Always focus on the child’s eyes if possible.

Winter portrait5

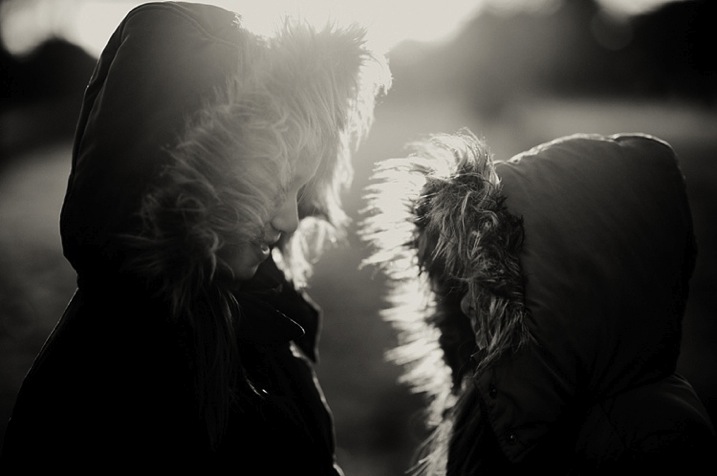
#6 Use backlight to your advantage

Shoot with the kids backlit. The best time to do this is during the golden hour. The sun is low, the sky is a reddish blue and the light is softer, more diffused, and indirect.

Shooting backlit is really quite a difficult technique which requires some mastering. This is when the sun or light source is in front of your camera, and behind your subject. The late sun gives stunning soft light, that illuminates your child’s hair or clothing like it has just been kissed by the sun.

Winter portrait4

You would also need either a really wide aperture, a flash, or a reflector to bring light back into your child’s face. A reflector can be a large white/silver/gold sheet that you angle towards their face, to bounce the light back into it. Or, you can choose a location with a natural reflector such as a white, or light coloured wall, facing the sunset and position your child in front of it, at an angle, so that part of their face gets the reflected light. I suggest a wide aperture for portraits as that helps give a nice glow to the skin, spot metered, and focused on the eyes.

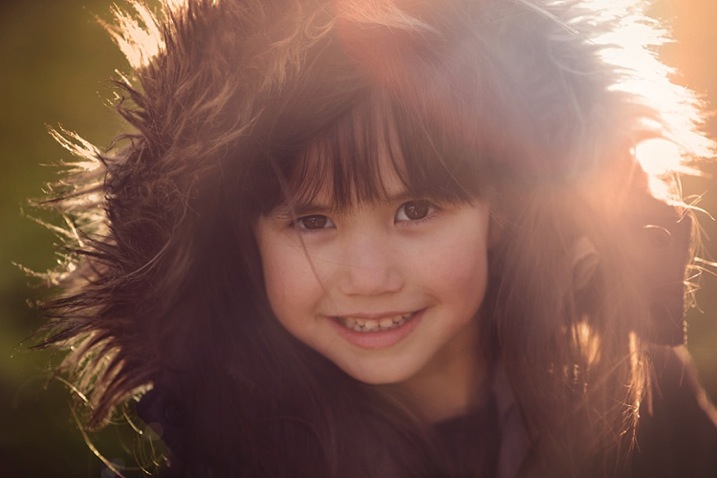
#7 Go for lens flare

This is really quite difficult as you don’t want to be looking straight at the sun. When you see the sun’s rays streaming through the viewfinder of your camera, that’s a sure sign that you are capturing flare. Flare floods your camera with light and everything else becomes a muddy, hazy silhouette. So try to get only a very small bit of flare right at the top or side of the viewfinder, and you will still get some good details, rather than a completely hazy image, devoid of any definition or detail.

Winter portrait6

#8 Embrace the imperfections

From personal experience, my imperfections, mistakes, and lack of skills fuel creativity. So don’t be afraid to make mistakes and have imperfections; they are a blessing. Use them and learn from them.

Winter portrait7

#9 Capture some scene details after the portraits are done

When the portraits are done, capture some contextual details such as the sky, trees, plants, grass, flowers, etc. Years down the line, when you look back at these photographs, details will help you remember the mood, the time, and the emotions of that day. Now that there’s no need to rush and the kids are playing, take your time and choose which details grab you, and take your breath away.

Techie tips: Don’t forget to change your aperture when shooting the sky and trees to a much smaller one, in this case around f/5.6 or smaller. I find that while you can shoot wide opened it is more prone to have chromatic aberration than if you shoot at a smaller aperture. Really, it’s personal preference, but this is what I recommend.

Winter portrait10

#10 Last but definitely not least, reward and celebrate

Promise your kids not just the playground, but extra treats like snacks and hot drinks, and even a small surprise. It reinforces having a photoshoot as a positive experience, and ends it on a happy note. Then top it with a movie night at home!

Have you done any winter portraits of your kids? Please share your images and any other tips you have in the comments below.

googletag.cmd.push(function() {
tablet_slots.push( googletag.defineSlot( “/1005424/_dPSv4_tab-all-article-bottom_(300×250)”, [300, 250], “pb-ad-78623” ).addService( googletag.pubads() ) ); } );

googletag.cmd.push(function() {
mobile_slots.push( googletag.defineSlot( “/1005424/_dPSv4_mob-all-article-bottom_(300×250)”, [300, 250], “pb-ad-78158” ).addService( googletag.pubads() ) ); } );

The post 10 Tips for Taking Stunning Winter Portraits of Your Kids by Lily Sawyer appeared first on Digital Photography School.


Digital Photography School

 
Comments Off on 10 Tips for Taking Stunning Winter Portraits of Your Kids

Posted in Photography


4 Tips for Connecting and Photographing Kids More Naturally

30 Nov

We’ve all seen family photos where everyone is happy, kids are smiling, and the whole brood looks like they are having the time of their lives. Photos like this seem so natural that it’s easy to think they required almost no work at all, when in reality the photographer was likely working like crazy behind the scenes trying to get the perfect pictures.

Shooting photos of adults is one thing, but working with kids brings a whole new set of challenges to the table. Whereas adults generally take directions and respond to requests, kids can be running all over the place, and getting kids to cooperate can be a bit like trying to herd cats. If you have ever had an experience like this, or if you are thinking about getting into family photography, here are four tips for photographing kids that might come in handy.

photographing-kids-girl-purple-dress

These usually help when I’m doing a family photo session, and if you struggle when taking pictures of kids, some of these tips might be just the ticket for that elusive perfect photo.

Get to know the children

Anyone who has spent time doing family photos already knows this rule, but I have seen plenty of photographers fail to get the shots they were aiming for, because they did not do this simple initial step. The first thing I do when taking family pictures is spend a few minutes getting to know the kids. I ask them what their names are, their age or year in school, and have them tell me a little bit about their lives. Ask them specific questions, otherwise you’ll get answers that are too general and unhelpful. “Do you have pets? What are their names? What’s your favorite kind of ice cream? What’s your favorite movie?”

photographing-kids-bridge

By learning a bit about these kids they felt more comfortable working with me and I got much better pictures as a result.

Don’t stop there though. Use these first few minutes as a chance to build a relationship with the kids, and tell them a bit about yourself too, so they see you as a friendly photographer, and not a scary adult with a giant camera lens. One trick to doing this is answering the questions you pose to them after they have had their turn. I like to get a little goofy and set a fun tone for the shoot by giving fake answers that usually make kids laugh. “I’ve got a pet iguana named Mr. Pickles. I like peanut butter and green bean ice cream.” You might feel a bit silly doing this, but it accomplishes two very important things:

  1. It helps establish a relationship and sense of trust between you and the kids, making them much more likely to cooperate during the rest of the session.
  2. It shows the parents that you care about their kids, which can make all the difference between a successful shoot, and a series of awkward moments that will haunt you for weeks.

photographing-kids-two-boys

Have them bring something special

Once you have a foundation built with the little ones, it’s time to actually take some pictures. This can be a little difficult because kids aren’t used to doing things that you usually want them to do when taking photos. You might have a specific pose or composition in mind, but the kids would much rather be running around or climbing trees.

One of my favorite tricks is to have children bring artifacts from their own lives such as books, stuffed animals, or a favorite toy. Not only will it give them something on which to focus their attention during the photo shoot, but it gives you something you can talk about to build a good working relationship for your brief time together. Have them tell you a bit about their stuffed animal, ask if you can read a few pages from the book, or spend a minute playing with their toys together.

It may seem silly to have thousands of dollars of camera gear sitting idle while you and the kids are pretending to play house with stuffed bunnies, but think about the big picture (ha!) here: by doing this you are sowing the seeds for a successful session and impressing the adults at the same time. And that can be worth a lot when they call you for more pictures in the coming years.

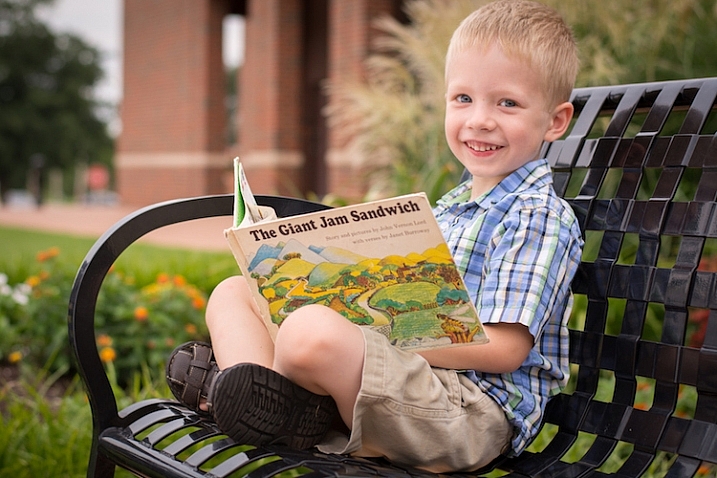
photographing-kids-boy-book

This boy’s grandfather told me this was his favorite photo of his grandson, partially because of the book which was a family favorite.

Take some information and twist it

One of my favorite tactics to get kids to smile and laugh, is taking something they already told me when I was getting to know them, and asking about it later on, but with a twist. I purposely get some basic facts incorrect.

If a little girl brought along her favorite toy truck, ask her about her airplane. “It’s not an airplane, it’s a truck!” she will often reply with a huge grin. If a boy told you he is five years old, ask him how he likes being seven. When he corrects you, tell him you’ve always been bad at math so you might keep forgetting.

My favorite trick is to make up my own words. A couple of kids brought their well-worn copy of the children’s classic Green Eggs and Ham, but when I talked with them about it I pronounced it Green Freggs and Fram. These little intentional screw-ups almost always make the kids laugh and smile, and it also gives them a chance to teach you something in return, which kids almost always like doing. Let them correct your mistake and show you how to do it properly, and they will start to feel like they have a true back-and-forth relationship instead of seeing you as just another adult bossing them around. In doing so you will find the kids to be much more cooperative when you really do have instructions for them to follow.

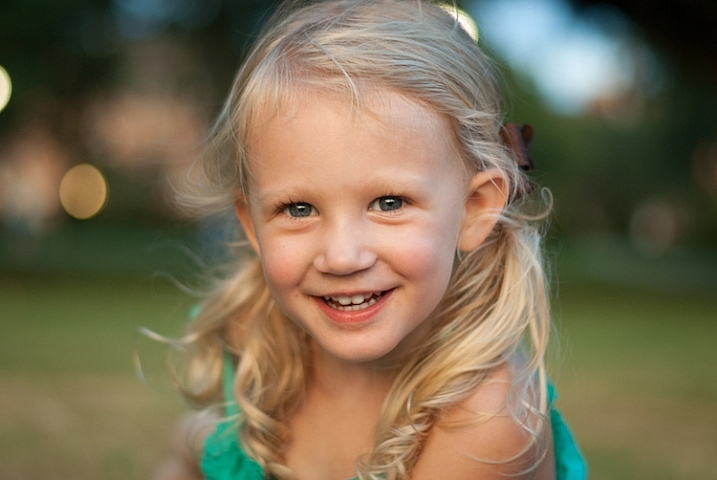
photographing-kids-girl-smiling

Embrace the absurdity

As adults we have all too many inhibitions when it comes to expressing ourselves. We worry about what people will think, how our clothes look, and what everyone around us is doing, and as a result we generally don’t like to make waves, cause a ruckus, or deviate from the norm. Most kids have no such filters, and the results can make for some hectic and stressful photography sessions – if you let it. If you’re the kind of photographer who relishes control and order, perhaps photographing kids is not your particular cup of tea. If you can learn to accept the absurd serendipity of kids, you will not only get some better photos as a result, but you and your clients will have a much better time as a result.

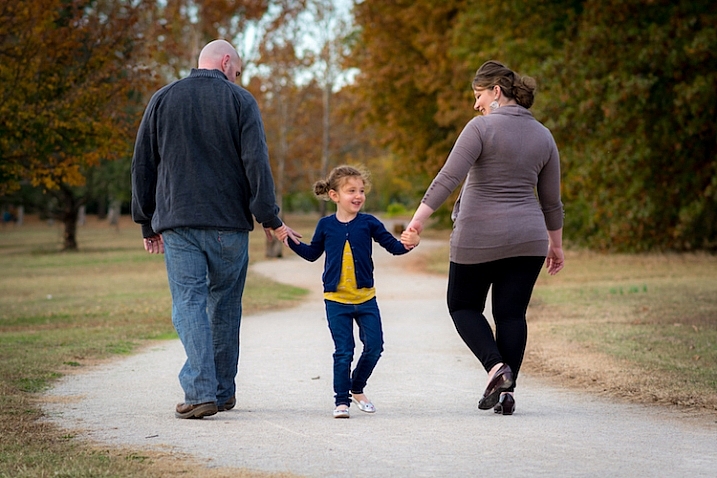
photographing-kids-family-walking

This girl was so bubbly that she rarely stood still, and by embracing her goofiness I got some pictures that her parents were thrilled with.

Rather than telling kids what to do and how to pose, let them just be themselves and capture pictures in the moment. Shots of them playing, goofing around, and jumping on each other might not be what you had in mind initially, but these are the kind of pictures parents, family, and friends often enjoy the most. If your clients do want some specific poses try to get them done first, and then let the kids have fun and loosen up a bit.

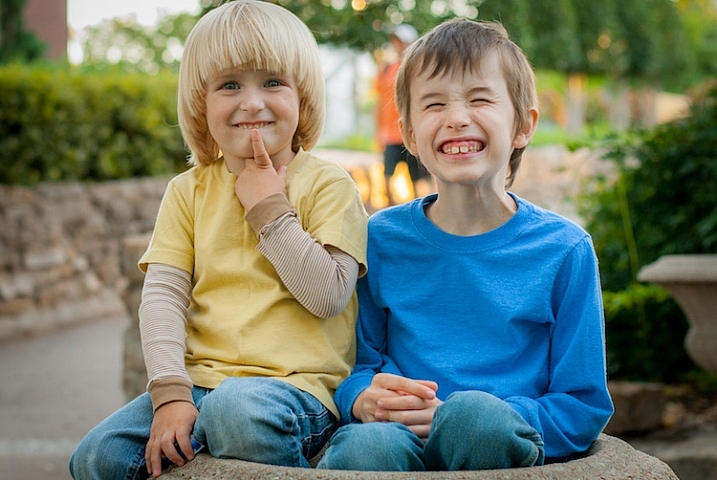
photographing-kids-boys-flowerpot

“Mr. Ringsmuth, can we take some photos in a flower pot?” “Sure boys, why not?”

One point to remember is that you’re not just taking pictures but creating and capturing memories. Months down the road when clients show your photos to their friends and family, they will often discuss the photo session itself, and how you treated them and their kids. Even if your photos are stunning, your clients will often sour the moment with a bit of commentary about you as an individual. “Yeah this photo is nice but the guy who took it was such a jerk! He practically yelled at our kids to get them to smile.” You want them to be saying things like “We are so happy with the pictures, and our kids had such a fun time with the photographer. She really connected with them and made them laugh.” Not only are your clients more likely to appreciate their pictures, they will be more willing to book future sessions with you, and sing your praises to their acquaintance,s which will often lead to more customers.

What about you? What are your favorite tips and tricks for taking pictures of little ones? Share your thoughts in the comments below, along with any examples of your favorite kid photos.

googletag.cmd.push(function() {
tablet_slots.push( googletag.defineSlot( “/1005424/_dPSv4_tab-all-article-bottom_(300×250)”, [300, 250], “pb-ad-78623” ).addService( googletag.pubads() ) ); } );

googletag.cmd.push(function() {
mobile_slots.push( googletag.defineSlot( “/1005424/_dPSv4_mob-all-article-bottom_(300×250)”, [300, 250], “pb-ad-78158” ).addService( googletag.pubads() ) ); } );

The post 4 Tips for Connecting and Photographing Kids More Naturally by Simon Ringsmuth appeared first on Digital Photography School.


Digital Photography School

 
Comments Off on 4 Tips for Connecting and Photographing Kids More Naturally

Posted in Photography


PIX 2015: Connecting kids with nature through photography

31 Oct

We’ve already introduced you to David FitzSimmons, so the topic of his PIX 2015 talk shouldn’t be a big surprise. The author of three photography-based children’s books about creatures of the natural world spoke on the importance of introducing children to the natural world. Read more

Articles: Digital Photography Review (dpreview.com)

 
Comments Off on PIX 2015: Connecting kids with nature through photography

Posted in Uncategorized


Lego Limb: Bionic Arm for Kids Makes Prosthetics Playful

15 Aug

[ By Steph in Gadgets & Geekery & Technology. ]

lego arm 4

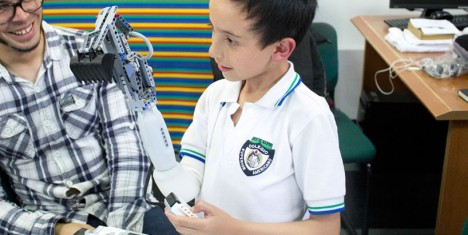
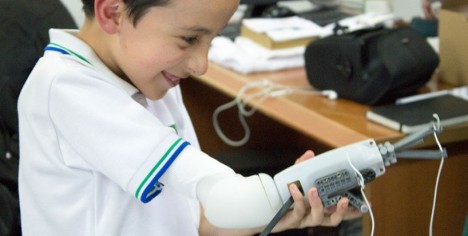
This modular twist-and-lock prosthetic arm for kids is designed specifically for integration with LEGO parts, turning it into a fun toy that makes it easier to engage with other children. A standard gripper makes the ‘Iko’ by Carlos Arturo Torres Tovar practical and functional for everyday use, but it can easily be popped off and replaced with designs of the kids’ own making.

lego arm 6 lego arm 5

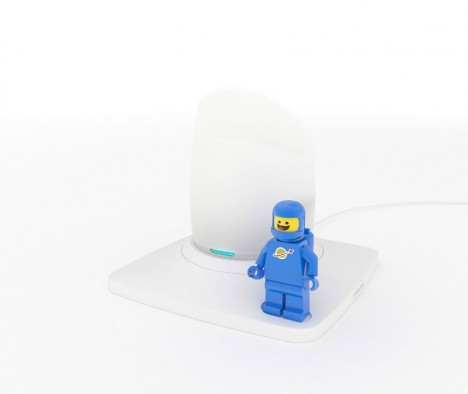
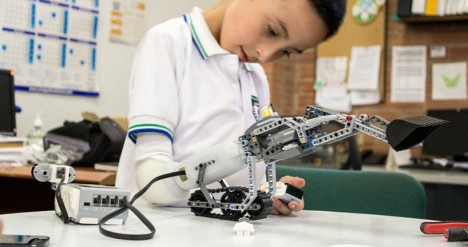
This creative prosthetic system lets children with disabilities use their imaginations to build tools that fit their own needs. The basic system includes a custom-fit prosthetic socket and forearm with a motorized adapter, a removable gripper and an easy-to-use charging station. Kids can swap out the gripper for backhoes and other LEGO creations. The arm can be programmed for various purposes and functions using myoelectric sensors.

lego arm 7 lego arm 2

Tovar came up with the idea while working at LEGO Future Lab, realizing that play is such an essential part of childhood and that a fun prosthetic could make it easier for children to engage with each other without discomfort.

lego arm 3 lego arm 1

“Currently I consider that prosthesis are not really designed for kids, yes they are functional in a traditional way, but kids in disability need more than a traditional tool, the physical aspect is just one of the big challenges of growing up, the psychological and the social aspect are as equally important and I wanted to do something about it.”

Share on Facebook


[ By Steph in Gadgets & Geekery & Technology. ]

[ WebUrbanist | Archives | Galleries | Privacy | TOS ]


WebUrbanist

 
Comments Off on Lego Limb: Bionic Arm for Kids Makes Prosthetics Playful

Posted in Creativity


Tried and Tested Tips for Photographing Kids

07 Aug

Why are kids so seemingly magical to adults? What is it about those young, wild, expressions in photographs that makes us love them so much? It’s their honesty and unwavering outlook on life.

Kids show their emotions freely, and share their feelings with genuine truthful expressions that we love to see. Whether they are excited or frustrated, they are always being honest and letting their personalities shine as they push their limits of learning in any new experience.

Tips-Photography-Kids-45

Though it’s something we witness in all children most the time, it is rare to capture a child’s magic in a photograph, the way we actually see it with our eyes. In this article you’ll learn about the psychological aspect of photographing children, with tips and tricks to show you how to create the perfect opportunities to capture those magical expressions and great personalities of kids.


Learn to Control the Scene

As with most photography, before you pick up the camera, become aware of what’s going on in your scene. When photographing children, it is important to know how much control you already have, or can possibly create.

Here are a few things to consider:

  1. Location: Are you outdoors or indoors?
  2. Limiting movement: Is the area confined to a single space with toys the child can play with?
  3. Allowing free movement: Are they running around in a big backyard with open space?
  4. Distractions: What in the environment could become a distraction or problematic?
  5. Get their attention: What can you use in this environment to help get the child’s attention?

Tips-Photography-Kids-4

Many times you can capture children before they really notice, you if you plan it right. This gives you the chance to witness the way they act while they are in their own little worlds, with their big imaginations. Be careful not to let the camera become a distraction. If they see you photographing, you don’t always know what immediate reaction you are going to get.

Assess your scene, and start to plan ahead, by preparing for the way you will introduce yourself. First impressions are important. Kids attach to their first instinct all the time. Get down on their level to say hello. The next thing to keep in mind is that you want to force the control as little as possible. This means the more natural the scene is, the more genuine their expressions.

How is the child reacting to you?

  • Do they acknowledge you?
  • Are they playing with you?
  • Are they playing on their own?
  • Are they really hyper active, or are they quiet?

You want to engage with them by relating to them in the moment. Begin by mirroring their behaviour. If the child says hello and wants to play right away, then you’re ready for a game. Sometimes children will be shy or unsure at first. It may take a few minutes before they are willing to trust. This is normal, and it is actually a good thing. So act that way too.

The Best Secret to Photographing Kids

For the purpose of a photo shoot, during your entire interaction with the child, you want to pretend like you are playing a game. Whether it’s a game you make up, or one they already know, make it objective and give the game a winning goal. Be enthusiastic about playing with them.

A game is fun and engaging; it is also a great distraction. Decide what type of game is best for the moment. You can always change the game in a split second. This is good to keep in mind as kids tend to change their behaviour, and mood in a split second.

Tips-Photography-Kids-38

It is always a fun challenge to see how well you can create a specific scenario in a scene. When playing the game, give it a twist or a surprise, addition to working in a benefit for your photo shoot. For example, you may want to direct them towards more light. Depending on the positions you want the kid to be photographed in, you can add that direction as a command into the game.

With a game, the beauty of photographing children is knowing you are getting a wide range of expressions and emotions. Sometimes they will be pouty, grumpy or not listening. Other times they can absolutely surprise and amaze you. No matter what, the kid’s personality will shine, and you will be prepared to capture whatever spontaneous reaction they give.

Fun Games to Play

A ball. A single game of rolling or tossing the ball. Always in conversation with them and full of enthusiasm, say, “One… two… three!” and pass the ball as you say three. When you act, notice how they react. When the time is right and it is your turn, alter the moment by giving a small command.

Try asking them to sit a little to the left after a few rounds of tossing the ball, pointing to the spot where you want them to sit. See if they listen to the direction. Say, “Okay, now lets try sitting right there (point the the spot). Great job, are you ready? One… two… three!” Then toss the ball. Doing this will psychologically instill a listening pattern any time in the near future when you say, “Three!”.

photographing children photography tips,

Keep using this method of adding in a twist to offer directions. Once you have them in the right place and pose, you can use the 1-2-3 method to grab their attention for the shots you want. When you get the ball, hold it at camera height and say it again. On three, snap the shot. Something always happens on Three!

Other Great Games

Simon Says: This works well with children four and up. Be animated with them as you participate. Make the moves simple and funny such as, “Simon says – pinch your nose”. Be ready for laughs with this one. Again, continue to test the waters and direct them with small commands during the game.

One toy at a time. If they have their own toys, or you give them ones to play with, let them choose whichever is most interesting to them. Make that toy seem like the coolest thing you’ve ever seen before. Turn it into a game. Use the method of 1-2,-3 in the game to prepare for the pause.

Tips-Photography-Kids-7

Use the camera as a story. It’s a magic camera. Make up a trick. Can you see my eye in this camera? What color is my eye? Is it purple? Be interesting and funny. Give them a reason to react to your words.

Create interest in your scene, and see how they react to what is going on. Point out something interesting around you. Find your point of excitement and go with it until they loose interest. No matter what game you choose to create in the moment, remember you are using it to take control of the situation as naturally as possible.

When all else fails, be a kid!

Ignore the camera to just play for a little while. Walk away and stop playing altogether. Remember you can mirror their actions. Act like them, and you will get a reaction that will make them relate and engage. Just play, don’t think about shooting for a few minutes. It’s all about engaging with their true personality to bring out the best in each kid.

Playing the first game for at least a minute or two before testing your chance to take a photo, is the best way to build trust with a child, especially if you’ve just met them. If you’re photographing your own children, or if the child is more stubborn and/or shy, it might take as long as 10 minutes of playing a game before they are comfortable, and being themselves, even if they are engaging with you.

Your goal is to be engaged without totally taking over the scene, just controlling the moments that are necessary to prepare for a natural expression to capture. You are building trust. Don’t loose patience. Take your time. It’s important to remember you are creating a simple game that allows you to gain control for just long enough (and in the right position) to snap the shutter.
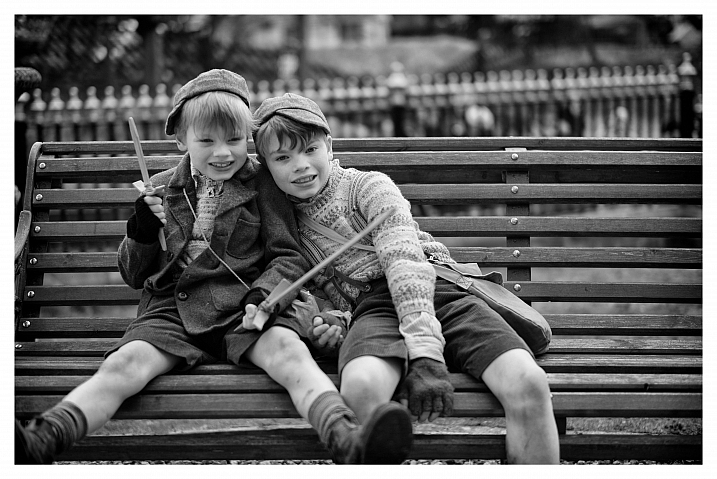
No Games Needed

Tips-Photography-Kids-44

Sometimes the best games are the ones they make up. Always set guidelines for playing but let kids be kids. Ask them what they want to do. Remember to mirror their behaviour, body language, and expressions when you can. As you build that trust you create great photo opportunities for moments coming up.

Many times you don’t even need a game at all. If they are entertaining themselves, that gives you a unique opportunity to become more intimate, and allow their surroundings to just be as they are without needing control. Photograph around the kids without asking for their attention. Instead just have a conversation, or say nothing at all, and watch expressions change.

What expressions do you notice? Often the best ones are not necessarily big, joyful smiles. Look for the soft, serious expressions as you engage by asking questions.

Get your camera ready

Up until now we have discussed very little about the actual process of taking photographs. The above information is the most important part. Once you master patience and the technique of controlling the scene, you are guaranteeing yourself beautiful, and unique portraits of kids. But what’s equally as important, is your role as the photographer.

photographing children photography tips,

As the game is being played, you have the responsibility of making sure your camera is set, and you are in the right position capturing the right angle at any given moment. These tricks will help better prepare you for that role.

First thing is first. Camera settings must be accurate. If they aren’t on point, all those beautiful expressions disappear in the blink of an eye. Most of the time, the important camera setting when photographing children is aperture. The next most important aspect is always the light.

Try this:

Set your aperture between f/2.8 and f/4.5. This is a a very wide aperture which gives you a soft, shallow depth of field. This depth of field bring focus to the child while also allowing for more light to come in through the lens.

From there, choose your ISO based on the lighting conditions, and then find a shutter speed that balances the light to create a proper exposure. Remember, keep your ISO as low as possible to avoid noise, and choose a shutter speed as high as possible to freeze the movement of playful kids.

Tips-Photography-Kids-47

Once proper exposure is achieved, you shouldn’t have to change your settings unless your intention, or the light changes. For example, if you decide want to capture the movement of a scene, your camera settings may change. 

Tried and Tested Tips

There are many simple things that you can control anywhere anytime even if you can’t control the kid in a photo shoot.

  1. Wear comfortable clothes. Clothes can get in the way when you’re trying to move around with a playful kid. Be prepared to move a lot. Wear clothes that you don’t care about getting dirty, and that have pockets to hide things.
  2. Think about the child’s size in relationship to you and the entire scene. Think about their relationship to what they are doing, or playing with. Use these elements to your advantage when shooting.
  3. Get down on their level and when possible, shoot up at them making them look bigger than life.
  4. Change your angles to create interesting view points that are unique to the scene, and incorporate more or less of the scene to add elements that accentuate the child’s size.
  5. Get in close. Zoom in, or walk close and capture their tiny features. When a child is distracted by a toy this is a perfect opportunity to get up-close and personal.
  6. Do your best to be the only one who is giving commands. Politely prepare the parents for not helping unless you ask for it. Then only ask for their help as a last ditch effort.

How Do You Stop “CHEESE!” ?

Tips-Photography-Kids-16

In the digital world we live in today, most kids are used to cameras, and many times they will create habits of specific, forced facial expressions, and fake poses that aren’t always so cute to capture. While smartphones and tablets are here to stay, so are the fearless kids who use them as a chance to over exaggerate, and get attention.

First, don’t acknowledge it as a bad thing. Don’t even mention it. Instead, change the game. Change the question. Change the whole topic. Give them something else to think about. When they do continue to over exaggerate, you can make it a game to not smile, then your challenge is to make them laugh, with your camera ready to go at a moment’s notice of course.

Be patient with them, and with yourself. Think like them. When they are upset, give them space. If they ignore you, ignore them. Stand back, capture them from afar as you slowly gain trust. All most kids ever want is a little attention. During a photo shoot, you are creating a special time when you can use these tried and tested tricks to give them just that, your undivided attention.

As you gain their trust by playing these games to naturally control the scene, you are creating the perfect scenario to capture real natural expressions, emotions and behaviours that we all love to witness in children. That’s how you capture their magic.

Tips-Photography-Kids-41

Kids are one of the most challenging, yet rewarding subjects, to photograph. I am always up for learning new techniques. Do you have any other great tips or tricks for photographing kids by engaging with them and bringing out their unique personalities and magical expressions?

googletag.cmd.push(function() {
tablet_slots.push( googletag.defineSlot( “/1005424/_dPSv4_tab-all-article-bottom_(300×250)”, [300, 250], “pb-ad-78623” ).addService( googletag.pubads() ) ); } );

googletag.cmd.push(function() {
mobile_slots.push( googletag.defineSlot( “/1005424/_dPSv4_mob-all-article-bottom_(300×250)”, [300, 250], “pb-ad-78158” ).addService( googletag.pubads() ) ); } );

The post Tried and Tested Tips for Photographing Kids by Danielle Werner appeared first on Digital Photography School.


Digital Photography School

 
Comments Off on Tried and Tested Tips for Photographing Kids

Posted in Photography


5 Unposing Tips for Kids for More Natural Photos

12 Jun

Editor’s note: this week we will be featuring a series of articles on posing for portraits. Look for a new one each day. If you miss any make sure you subscribe to our newsletter and you’ll get a reminder of all our articles once a week.

Posing kids is a whole different thing from posing models (unless you’re photographing a child model, and then you might not need this article). My biggest goal when capturing kids is to help them look as natural as possible, so truly I want to “unpose” them. Stiff, awkward, posed shots aren’t really what anyone wants, but I want to take this even a step further and talk about capturing kids’ true inner selves.

159

Have you ever had a kid in front of your camera, and whatever you tell them to do ends up looking like the most unnatural position ever? Chances are, the kid is as baffled as you are. He doesn’t know what you want from him. He hasn’t been studying pinterest boards and kid’s clothing catalogues. He just knows his mom dressed him up and told him not to get dirty or mess up his hair, and now some stranger is telling him to put his hand there, look over here, bend his elbow like this. Most kids don’t understand this.

Let me share some unposing tips with you for helping kids to be more nature, so you and your little model can get some great shots!

1. Kids don’t need much help to be adorable

135

If you can just let a kid be themselves, and explore, sometimes the photos you get can be more adorable than anything you could think up yourself. Part of each session could be unstructured, no posing direction, kid-led, fun. Photos like the above could happen all on their own, or if the child is shy, you could ask them, “What’s in that window?” Make picture time into play time, and let kids be themselves.

Some props can be good, but sometimes they just add to the chaos, and you end up with a lot of canned, posed photos. I love kids’ cute faces, and that’s what I want to be the main focus of my photos. Don’t stress too much about making everything around the kid amazing. Like I said, kids don’t need much help to be adorable!

2. Let them be with a buddy

196

Sometimes kids are nervous and anxious about getting their photos taken. Letting them take a few photos with a beloved pet, favorite stuffed animal, or even Mom or Dad, can really help relieve the pressure, and help them feel comfortable.

186

Sometimes the most spontaneous laughs, the happiest smiles, and the most relaxed poses, just happen when they’ve got their buddy with them in the photos. Adding a live wiggly friend can add extra work to getting a photo, but the payoff is often worth the work. Have Mom or Dad help you keep the pet under control, and be quick. Encourage a lot of interaction, and be ready for anything!

3. Work Quickly

161

Kids aren’t going to be patient with a lot of posing cues and tweaks. You can give general direction, and then shoot fast. You could give some quick commands, “Now laugh at the silly caterpillar on my head!”, but don’t take a long time moving their arm just so, or turning their heads just so. Most kids won’t respond well to that, and will quickly tire before you get any good photos.

Have your camera on a fairly fast shutter speed (I like mine at least 1/100th for kids), because they’re not going to hold very still for very long.

Kandice3

4. Some direction is good

You don’t want to stand there, staring the kid down, waiting for them to spontaneously be in a spot with great light, doing something amazingly photogenic. You’ve got to give some direction, but try to do it in a way that makes the whole experience fun and relaxed. Here are some phrases that you could try:

  • Could you come sit on my swing over here? Oh, you are so big! I didn’t know you could climb that high!
  • Can you sit here, criss-cross-applesauce? (Or whatever they call sitting cross-legged. You can ask them what they call it. Most kids learn this in preschool).
  • Let’s hug our freezing cold knees. Your knees say, thank you very much!
  • Where’s your tickle smile? Do I need to find your tickle smile? Is it hiding in your armpit?
  • Do you think you would be brave enough to stand on this rock?
  • Whatever you do, don’t smile. No, I said don’t smile! (Classic reverse psychology).
  • Where should we put your hands? We should put them away somewhere. Do they like pockets?
  • Could you hold this tree up with your back? Oh, thank you! That tree was getting tired of standing up by itself!
  • Let’s play copy-cat. Whatever I do, you do it too.

199

5. Pay attention to personality

Some kids love silly, others are pretty shy. Pay attention to how they react to you, and adjust accordingly. If they’re really rambunctious, you might want to dial down your silly a bit so you don’t get them too wound up. You can still have fun with them, but talk in a calm voice, and don’t ask them to do too many crazy things, because they’ll take what you say and bring it up a notch or two. Before you know it, you’ve got a kid running in circles that isn’t listening to a word you say.

If they’re really introverted, you might want to try to capture more serious photos, and let them be contemplative. Don’t ask them to do things they are obviously uncomfortable with. When they’ve warmed up to you a bit, you may be able to give more requests, but really pay attention to the cues kids are giving you, and focus on capturing who they are, not the canned five poses that you do with every kid.

AB07

I would love to hear your tips for getting great unposed shots of kids! What are the fun things that you say to coax a smile? How do you get their attention, and make photo time fun?

Check out Portrait Posing Tips- How to Help People to Relax and Take Better Photos for more in the posing series.

googletag.cmd.push(function() {
tablet_slots.push( googletag.defineSlot( “/1005424/_dPSv4_tab-all-article-bottom_(300×250)”, [300, 250], “pb-ad-78623” ).addService( googletag.pubads() ) ); } );

googletag.cmd.push(function() {
mobile_slots.push( googletag.defineSlot( “/1005424/_dPSv4_mob-all-article-bottom_(300×250)”, [300, 250], “pb-ad-78158” ).addService( googletag.pubads() ) ); } );

The post 5 Unposing Tips for Kids for More Natural Photos by Melinda Smith appeared first on Digital Photography School.


Digital Photography School

 
Comments Off on 5 Unposing Tips for Kids for More Natural Photos

Posted in Photography


3 Tips for Avoiding Blurry Photos of Kids

09 Jun

One of the best things about kids is also one of the most frustrating when it comes to photographing them; they are so full of life and energy they rarely sit still, which can lead to an abundance of blurry pictures and heavy sighs when you go back to review your images. Instead of smiling faces and cute outfits, you often end up with a memory card full of photos where their cute little faces are a mishmash of fuzzy pixels, and any details in their hair or clothes are hopelessly lost. This is a chronic problem with photos of kids from smartphones, but it’s all too common in pictures taken with more expensive DSLRs too.

One solution is to simply use the flash on your camera, but this has the unfortunate side effect of creating harsh shadows, poorly-lit backgrounds, and ghostly red-eye effects that have to be fixed on your computer. To get the types of photos of kids you’ve always wanted it’s important to know a bit about shutter speed, and look at some of the ways you can harness the controls of your camera .

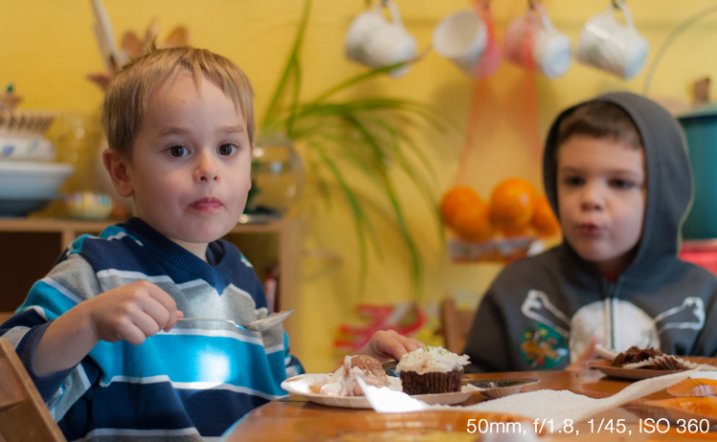
kid-dinner-table-eating

Understanding Shutter Speed

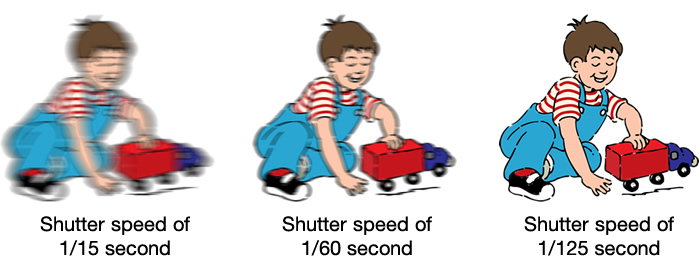
The underlying problem of blurry kid pictures usually stems from your camera’s shutter speed; kids move quickly so a fast shutter is usually required to snap clear pictures. This is fine if you have plenty of light, but as soon as the sun goes down, or you find yourself indoors, your camera’s shutter slows way down in order to let in enough light for exposing – too slow for non-blurry photos of fast-moving children.

A faster shutter will result in sharper photos with less motion blur.

A faster shutter speed will result in sharper photos with less motion blur.

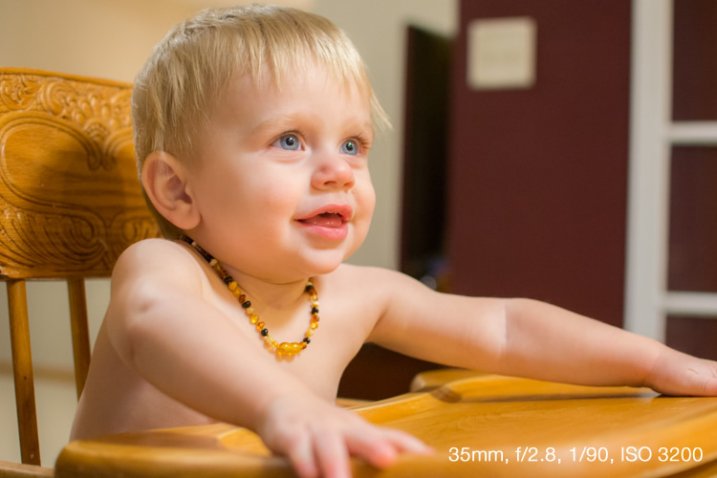
Unfortunately the solution is not always as easy as increasing your shutter speed, as this can lead to pictures that are underexposed if there is not enough light available. This is why your camera will often opt to use the flash if you are shooting in low-light situations on Automatic mode. Rather than decreasing the shutter speed your camera simply creates its own artificial light. If you’re using a kit lens with a focal length between 18-55mm a shutter speed of 1/90 is probably sufficient to capture blur-free images of little ones, though the exact value will change depending on the focal length of your specific lens and how fast the kids are moving. As a general rule I don’t use shutter speeds slower than 1/90 second when taking pictures of kids with my 35mm lens, but that usually means I have to compensate for low light in a few other ways. Here’s a few tips to help:

#1 Increase the ISO

There are three primary ways to control the amount of light that enters your camera:

  • Aperture: Increase size of the opening in your lens so more light can pass through it.
  • Shutter speed: Open the shutter for a longer period of time.
  • ISO: Make the piece of digital film (sensor) in your camera more sensitive to light.

The first method is limited by the physics of your lens. Most basic kit lenses simply don’t have large enough openings, or apertures, to let in much light (unless there is a great deal of light already available i.e. outside during the daytime or in a brightly lit room). The second method is easy if your subjects are not moving. You can leave the shutter open for many seconds at a time and get a non-blurry shot if everything is standing still, but that rarely happens with little kids. The third method, raising the ISO, was not a viable solution until recent years when camera technology advanced to the point that you could greatly increase the sensitivity of your sensor without a massive loss in overall image quality. Camera sensors are now so good that you can use faster shutter speeds to get blur-free shots of kids (even if your lens does not have a wide aperture) simply by raising the ISO.

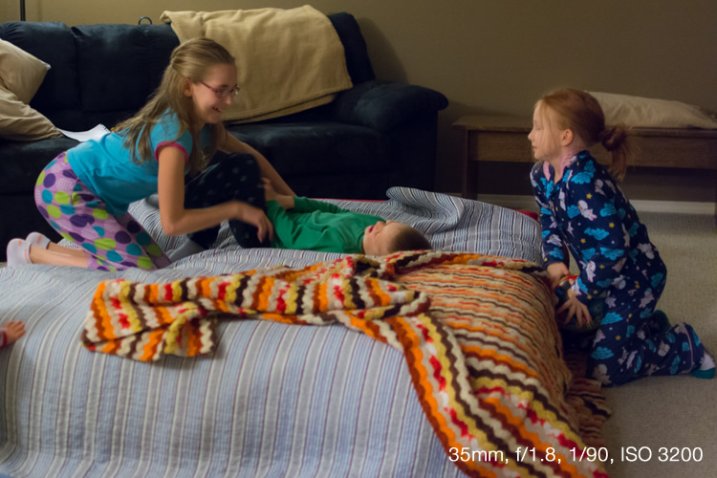
Shooting at ISO 3200 allowed me to get pictures of my nieces' pajama party without using the flash.

Shooting at ISO 3200 allowed me to get pictures of my nieces’ pajama party without using the flash.

Until a few years ago most DSLR cameras were fine at ISO settings of 400, 800, or even 1600. Beyond that, photos started getting quite noisy and grainy, almost as though they were coated with a fine layer of colored sand. Now even basic consumer cameras like the Canon Rebel T4i or Nikon D3300 can go all the way up to ISO 6400 without too much detriment to their overall picture quality. Granted an ISO 6400 picture is never going to be as clean and sharp as one taken at ISO 100 or 200, but ISO 6400 essentially allows your camera to capture 64 times more light than ISO 100 (equal to 6 stops more). This means an image that would normally require a shutter speed of 1/15 second at ISO 100 could be taken with a shutter speed of 1/1000 second at ISO 6400 – a massive benefit if your goal is to capture pictures that are not blurry.

Shooting at higher ISO values means your photos will have a bit more noise and grain, but you will be able to use much faster shutter speeds. It's up to you whether the tradeoff is worth it, but for me it usually is.

Shooting at higher ISO values means your photos will have a bit more noise and grain, but you will be able to use much faster shutter speeds. It’s up to you whether the trade-off is worth it, but for me it usually is.

One caveat to this technique is you simply cannot do it in Automatic mode. If you don’t feel quite confident to start shooting in Manual, try using the Program Automatic mode instead. Rotate your camera’s command dial to the P setting, then you are free to change the ISO while your camera figures out an appropriate shutter speed and aperture. The more you practice, the more you will get the hang of it, and start feeling comfortable with your particular camera’s capabilities at higher ISO values.

#2 Use a large aperture

I mentioned in the previous section that a wider aperture is one way to let in more light, and the best way to do this is with a prime lens. These lenses do not zoom in and out like the kit lens most cameras come with, but the trade-off is their extraordinarily large apertures – big enough to let in tons of light even at dusk, or in a dimly-lit room.

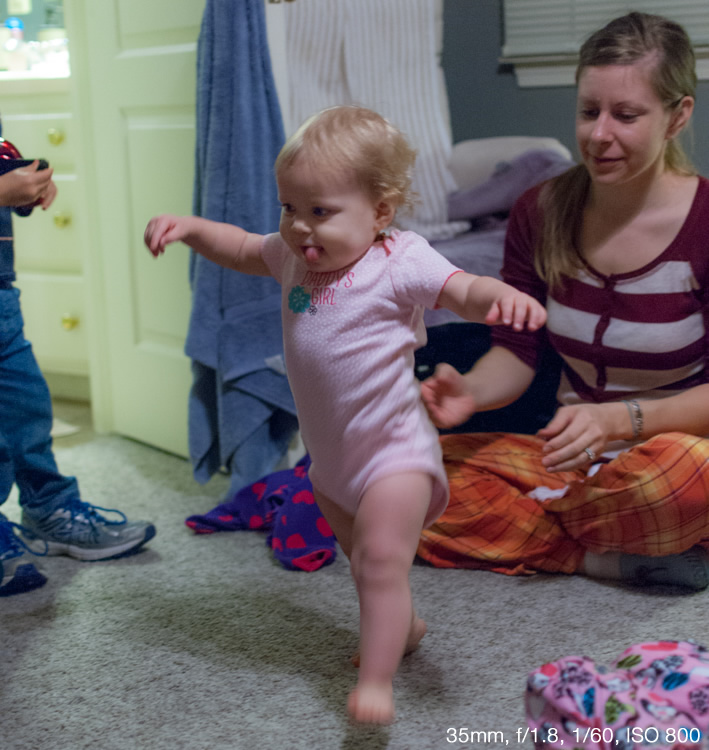
Shooting at an ultra-wide aperture of f/1.8 allowed me to get a picture of this girl taking her first steps. Using the flash would have resulted in washed-out colors and would have been quite a distraction for the little girl.

Shooting at an ultra-wide aperture of f/1.8 allowed me to get a picture of this girl taking her first steps. Using the flash would have resulted in washed-out colors and would have been quite a distraction for the little girl.

If you don’t have a prime lens you can still use wider apertures, but you will likely have to raise your ISO a bit more as well. Most kit lenses have apertures of roughly f/3.5 when zoomed out all the way and f/5.6 when zoomed in, which might not sound like much but it’s actually a massive difference (f/5.6 to f/2 is three stops or 8x less light so it is quite significant – in the example above it would mean shooting at 1/4 second or 6400 ISO instead). This just means you will have to move around a bit more to position yourself closer to the kids instead of standing across the room and using the telephoto end of your lens.

If you’re not entirely comfortable dealing with apertures and f-stops just yet, try using your camera in Shutter Priority (S or Tv) mode with auto-ISO. This lets you set the shutter speed while your camera figures out the best combination of aperture and ISO. As I said earlier, when taking pictures of kids with my 35mm prime lens I like to use a shutter speed of 1/90 second and faster, like 1/125 or 1/250, if they’re running around or jumping on furniture. The shutter speed you use will be different depending on your camera and the focal length you are using on your lens, but when you shoot in S/Tv mode with auto-ISO your camera will generally default to using the widest possible aperture and then start raising the ISO to get a good exposure. In other words, you are telling your camera “I want a fast shutter and no flash, so it’s up to you to figure out the biggest aperture and highest ISO to make this happen.” It doesn’t always work, but it’s certainly a good technique to try if you want clearer pictures of children.

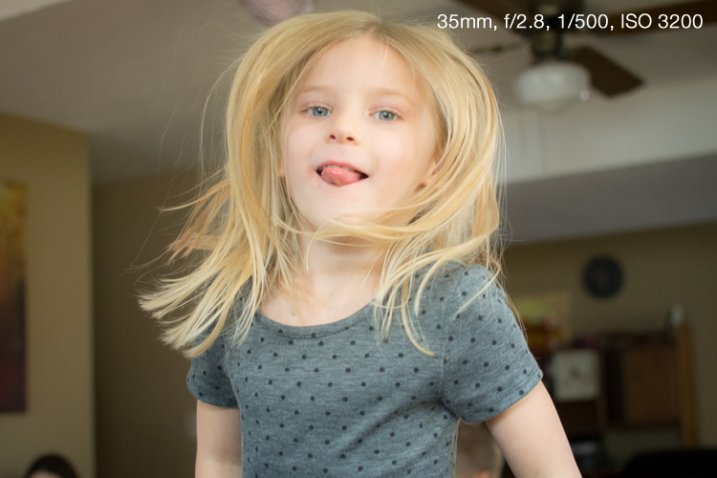
The only way to get a non-blurry picture of this girl jumping on her trampoline was to use both a wide aperture and fast shutter.

The only way to get a non-blurry picture of this girl jumping on her trampoline was to use both a wide aperture and fast shutter.

This might sound a little counter-intuitive, but if you shoot in Aperture Priority (A or Av) mode, you can tell your camera to use a large aperture but in order to get a good exposure it will usually give you a slower shutter speed. By contrast, shooting in Shutter Priority will force your camera to use the widest possible aperture every single time in order to get a good exposure at the shutter speed you set. (Unless of course there is already plenty of light available in which case it might select a smaller aperture, but you would still get the non-blurry photo you want.)

#3 Make better use of light

One of the best sources of light is available for free all day long right in the sky above you. However, while the sun is certainly the brightest light, it is also the least controllable. This means you have to find ways of making use of the light it does provide, which usually is a simple matter of repositioning yourself or your subjects. When working with adults this is fairly easy, but kids are another matter; they rarely go right where you want, and if they do they are not likely to stay there for long. If you’re the kind of person who likes to take pictures while resting comfortably on a couch you might find yourself with plenty of blurry, or excessively dark or light photos, as a result. If you get up and start roaming about the room you can not only get a better vantage point from which to take your pictures, but find ways of making much better use of the sunlight that is likely to be streaming in through the windows.

Sunlight was pouring in through a window just to the right of this photo, so I quickly found a location that took advantage of such a large amount of available light.

Sunlight was pouring in through a window just to the right of this photo, so I quickly found a location that took advantage of such a large amount of available light.

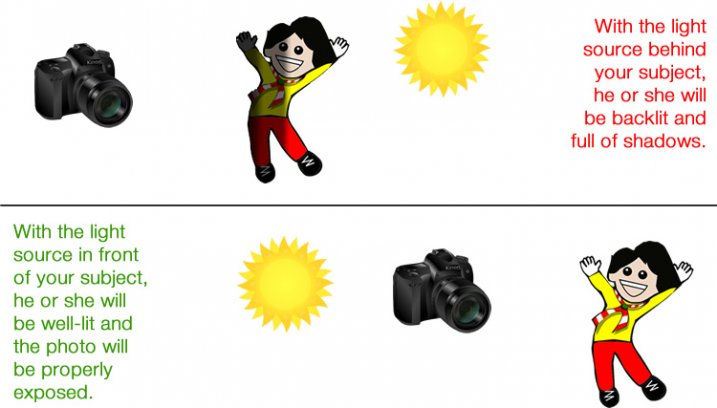
This technique works great even if you don’t have a fancy DSLR or other such expensive camera. I often see pictures of kids posted to social networks that are blurry because the shutter speed was too slow to capture the action, even though there is plenty of sun or other light available. The trick is to learn how to reposition yourself such that your subject is in front of you and the main source of light is behind you. This will help make sure your subjects (whether they are kids, adults, pets, plants, or anything else) are properly lit, while also giving you enough light to use faster shutter speeds.

light-sources


This takes a bit of time to adapt to because you may be used to staying relatively still while kids run around and play. Once you start getting up, moving around, and learning to harness the available light instead of using the flash, you will see a dramatic improvement and far fewer blurry photos, even if you are using an iPhone or an inexpensive point-and-shoot camera.

Do you like taking pics of children? What are some of your favorite techniques for getting photos that are sharp, in focus, and not blurry? Leave your thoughts in the comments below.

googletag.cmd.push(function() {
tablet_slots.push( googletag.defineSlot( “/1005424/_dPSv4_tab-all-article-bottom_(300×250)”, [300, 250], “pb-ad-78623” ).addService( googletag.pubads() ) ); } );

googletag.cmd.push(function() {
mobile_slots.push( googletag.defineSlot( “/1005424/_dPSv4_mob-all-article-bottom_(300×250)”, [300, 250], “pb-ad-78158” ).addService( googletag.pubads() ) ); } );

The post 3 Tips for Avoiding Blurry Photos of Kids by Simon Ringsmuth appeared first on Digital Photography School.


Digital Photography School

 
Comments Off on 3 Tips for Avoiding Blurry Photos of Kids

Posted in Photography