RSS
 

Posts Tagged ‘Halloween’

Lens Rentals celebrated Halloween by testing its rental gear for ghosts and good vibes

02 Nov

In the spirit of Halloween, the team over at Lens Rentals decided to do a little experiment to see if any of their gear was haunted. However just one item in, the plan took a very Roger-esque turn, pivoting from a ghost-hunting endeavor to tearing down the very pieces of gear he was originally using to look for paranormal activity.

After someone had remark that some of its photography gear was used to record various paranormal shows and another individual showed concern of whether or not any of Lens Rental’s gear was haunted, Cicala and his trusty sidekick Aaron decided to put their gear to the test unlike they’ve ever done before.

The array of paranormal-detecting devices Roger and Aaron purchased.

After hunting down an array of various paranormal-detecting devices (and purchasing a dozen 9-volt batteries), Roger and Aaron got to work setting up their testing area. At the suggestion of those more familiar with the paranormal, the duo set up what was supposed to be a pentagram (looks more like a random geometric shape in our book) with multiple ‘Ghost Detector’ modules around the perimeter and burned a candle in the middle to get the paranormal juju flowing.

Clearly someone used that mic pack under sketchy circumstances.

After letting the candle work its magic, the pair put a Sennheiser microphone in the center and used both the ‘Ghost Detectors’ and the EMF detectors to see which how it reacted. Sure enough, the wireless mic pack was haunted (according to the two detectors, at least). The pair also tested their microwave (definitely haunted), as well as their coffee maker (which was thankfully spared by the spirits). It was even discovered that Aaron was haunted too. As a result, it turned out their previous testings couldn’t hold up, as there’s the chance Aaron himself was causing the bad vibes.

So, Roger and Aaron decided to instead direct the various paranormal-detecting devices they purchased to test out the Lens Rentals gear. We’ll let you see the full teardown of the gadgets over on Lens Rentals’ blog post, but suffice to say the Ghost Detector Array, EMF Meter and Ghost Magnet were all relatively cheap pieces of tech that mostly consisted of random PCBs and (in the case of the Ghost Magnet) motors.

The inside of one of the EMF detectors Roger and Aaron purchased.

Considering all of the paranormal devices are now torn down, it’s safe to say Lens Rentals will no longer be offering a spirit-cleansing add-on for future rentals. So you might want to be careful and bring a Shaman along with you on your next photo shoot just in case.

Articles: Digital Photography Review (dpreview.com)

 
Comments Off on Lens Rentals celebrated Halloween by testing its rental gear for ghosts and good vibes

Posted in Uncategorized


Weekly Photography Challenge – Halloween

26 Oct

The post Weekly Photography Challenge – Halloween appeared first on Digital Photography School. It was authored by Caz Nowaczyk.

This week’s photography challenge topic is HALLOWEEN!

Image: Photo by Jon McIntire

Photo by Jon McIntire

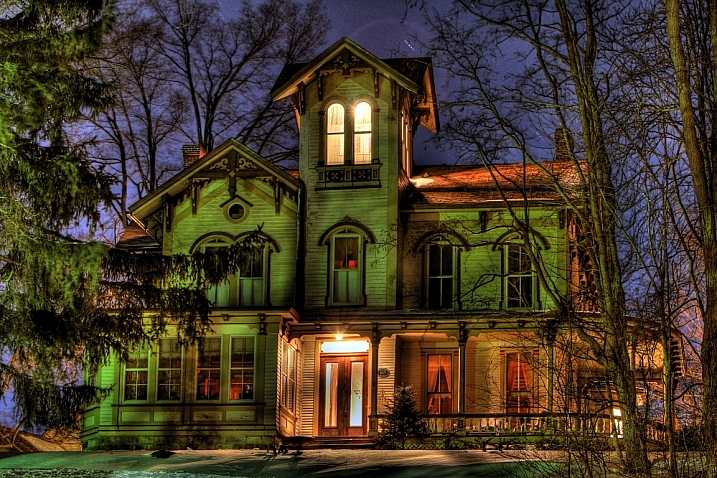
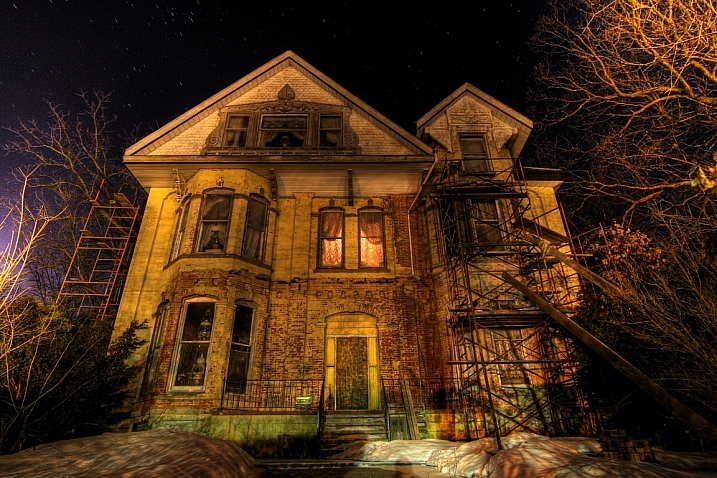
Seeing as though it is the week of Halloween, I decided to make that the weekly photography challenge this week. If there is no Halloween celebrations where you live, then just take some spooky photos and share with us!

So go out and shoot those spooky things that pop up for Halloween! Decorations, black cats, pumpkins, witches, creepy houses, trick or treaters, or anything that is spooky and resembles Halloween. Alternatively, shoot images of people setting up for Halloween.

Have fun (or get spooky), and I look forward to seeing what you come up with!

Image: David Menidrey

David Menidrey

Image: James Lee

James Lee

Image: Jen Theodore

Jen Theodore

Check out some of the articles below that give you tips on this week’s challenge.

Tips for Shooting HALLOWEEN

26 Spooky Images for Halloween Week

Creating Ghostly Images for Halloween

How to Light Creepy Halloween Masks for Added Drama

27 Sinister Images for the Week of Halloween

5 Tips for Creating Creepy Halloween Photos

Halloween Photography Tips


Weekly Photography Challenge – HALLOWEEN

Simply upload your shot into the comment field (look for the little camera icon in the Disqus comments section) and they’ll get embedded for us all to see or if you’d prefer, upload them to your favorite photo-sharing site and leave the link to them. Show me your best images in this week’s challenge.

Share in the dPS Facebook Group

You can also share your images in the dPS Facebook group as the challenge is posted there each week as well.

If you tag your photos on Flickr, Instagram, Twitter or other sites – tag them as #DPShalloween2019 to help others find them. Linking back to this page might also help others know what you’re doing so that they can share in the fun.

The post Weekly Photography Challenge – Halloween appeared first on Digital Photography School. It was authored by Caz Nowaczyk.


Digital Photography School

 
Comments Off on Weekly Photography Challenge – Halloween

Posted in Photography


Halloween – Weekly Photography Challenge

27 Oct

It’s coming up to Halloween and it’s a tradition that is being observed more and more in the Southern Hemisphere, so we thought no matter where you are, you might be up to the challenge. And if there’s no Halloween where you are, just take a spooky photo and see if you can scare us silly!

Tips for Shooting at Night

If you’re heading out to snap some ‘trick or treaters’ check out these tips on night time street photography:

In the Dark: 10 Tips for Street Night Photography

Or this one for getting proper exposure at night:

Tips for Getting Proper Exposure for Night Photography

Looking for some spooky techniques?

Here are some techniques you can try to get a spooky feel in your images:

Light Painting Part One – the Photography


Stuck for inspiration?

Here are some previous posts with plenty of ideas to motivate you for the challenge:

Halloween Photography Tips

26 Spooky Images for Halloween Week

27 Sinister Images for the Week of Halloween

Some Halloween Projects

Can’t think of anything? Here’s a few project ideas:

How to Light Creepy Halloween Masks for Added Drama

Creating Ghostly Images for Halloween

Weekly Photography Challenge – Halloween

Simply upload your shot into the comment field (look for the little camera icon in the Disqus comments section) and they’ll get embedded for us all to see or if you’d prefer, upload them to your favorite photo-sharing site and leave the link to them. Show me your best images in this week’s challenge.

Share in the dPS Facebook Group

You can also share your images in the dPS Facebook group as the challenge is posted there each week as well.

If you tag your photos on Flickr, Instagram, Twitter or other sites – tag them as #DPSHALLOWEEN to help others find them. Linking back to this page might also help others know what you’re doing so that they can share in the fun.


The post Halloween – Weekly Photography Challenge appeared first on Digital Photography School.


Digital Photography School

 
Comments Off on Halloween – Weekly Photography Challenge

Posted in Photography


Behind the scenes: Capturing creepy Halloween wet plate portraits

01 Nov

While most people will be out experimenting with a little chemical called Ethanol on Halloween, at least one photographer decided to use some Ethyl Ether and Silver Nitrate instead. Markus Hofstaetter—whose work we’ve featured in the past—decided to take a few wet plate collodion portraits this Halloween, and documented the entire process in a creative 360° video.

The main shot Hofstaetter was after is actually not the hard-core looking skull portrait in the GIF at the top. Instead, he wanted to take a self-portrait in the style of Walter White “Heisenberg” of Breaking Bad.

“I feel always like him when I prepare the chemicals for my collodion wet plate process,” Markus writes on his blog. He also went for an imperfect look. By not cleaning the edges of the plates after the silver bath and not cleaning the plate holder. “It’s not always about perfection.”

Here are a few BTS shots, the final images, and a couple of high res crops from the wet plate scans Markus sent over:

$ (document).ready(function() { SampleGalleryV2({“containerId”:”embeddedSampleGallery_3515928389″,”galleryId”:”3515928389″,”isEmbeddedWidget”:true,”standalone”:false,”selectedImageIndex”:0,”startInCommentsView”:false,”isMobile”:false}) });

Speaking to DPReview, Markus explained some of the particulars of his process:

I like to use trays for sanitizing my plates much more than typical silver bath tanks. That’s because mamut plates are easier to handle, the alcohol (that comes from the collodion coating into the silver bath) can easier evaporate in a tray and it’s so much easier to fill 2 Liters of nitrate back in a bottle with a tray.

All Chemicals I use are self-made and the collodion is typically done on the day before the shooting to get the plates more sensible to light. I make developer and fixer occasionally – these are very stable. The silver bath is Maintained two to three times a year.

As you can see in the video, I forgot to wear my glasses when I put the plate into the silver bath tray the first time – this is very dangerous!!! Because one drop of silver nitrate in your eye will blind you. Never happened before – but I was kind of busy with the 360 cam 🙁

Normally I wear masks too (the Ether in the Collodion is unhealthy), but I didn’t want to get indents on my face from the mask. You would have seen that in the picture.

To see more from Markus, be sure to visit his website, check out his blog, or follow him on Facebook, Twitter, and Instagram.


Photos, GIF and Video by Markus Hofstaetter and used with permission.

Articles: Digital Photography Review (dpreview.com)

 
Comments Off on Behind the scenes: Capturing creepy Halloween wet plate portraits

Posted in Uncategorized


26 Spooky Images for Halloween Week

02 Nov

It’s that time of year again when the ghosts and goblins take over and the timid and meek take shelter and hide. Yes, it’s Halloween this coming week.

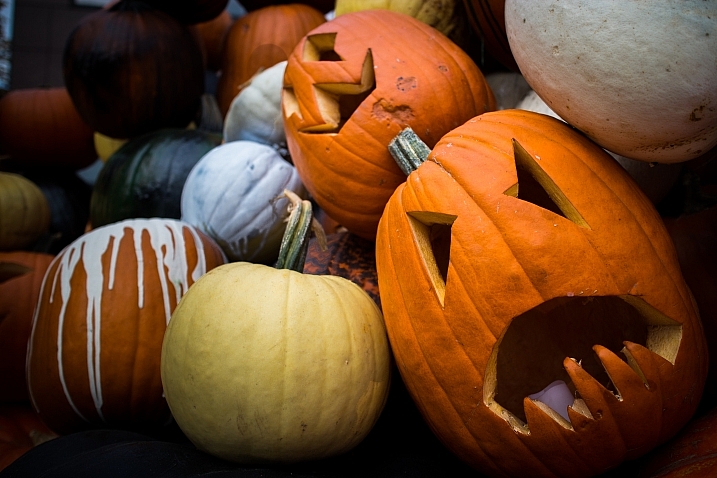
Depending on where you live, this may be a holiday the kids enjoy, but we adults can have a little fun too. Spooky images of ghosts in the night, apparitions, scary pumpkins and more. Let’s see what these photographers found spooky and captured for Halloween.

Krystian Olszanski

By Krystian Olszanski

Anne Marthe Widvey

By Anne Marthe Widvey

Rachel.Adams

By Rachel.Adams

Chris JL

By Chris JL

Jader56

By jader56

Micadew

By micadew

MattysFlicks

By MattysFlicks

Stefano Corso

By Stefano Corso

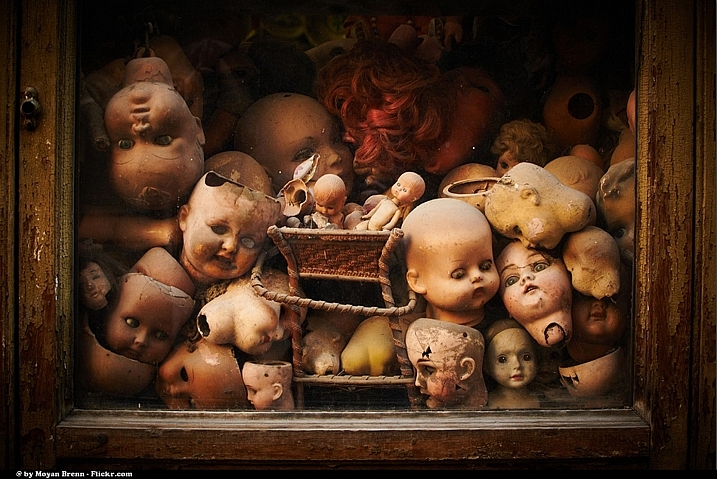
Moyan Brenn

By Moyan Brenn

Thomas Hawk

By Thomas Hawk

WxMom

By WxMom

Jpellgen

By jpellgen

Darlene Hildebrandt

By Darlene Hildebrandt

Craig

By Craig

Kevin Dooley

By Kevin Dooley

JLS Photography - Alaska

By JLS Photography – Alaska

Kris Williams

By Kris Williams

Nesster

By Nesster

Thomas Hawk

By Thomas Hawk

Flood G.

By Flood G.

Neil Howard

By Neil Howard

Adrian Kingsley-Hughes

By Adrian Kingsley-Hughes

Andrew Kuznetsov

By Andrew Kuznetsov

Christopher Bligh

By Christopher Bligh

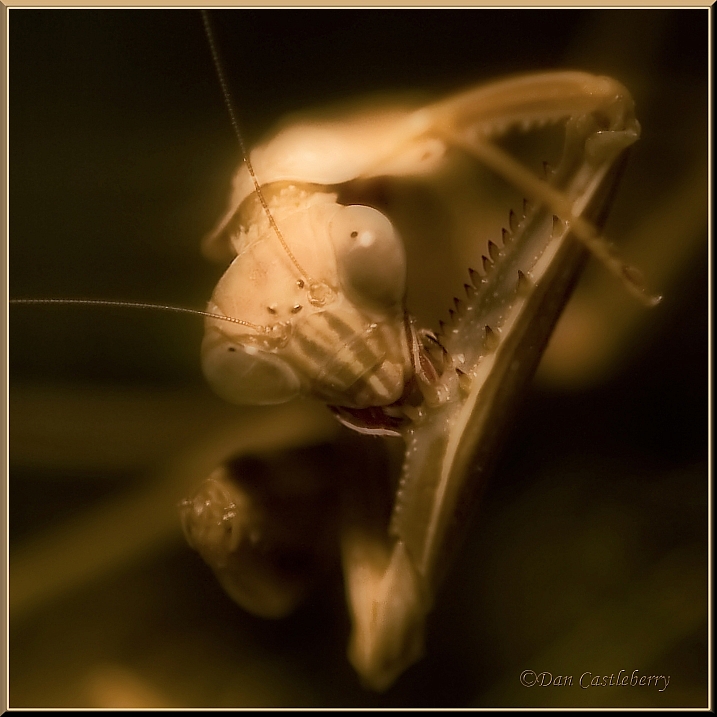
Dan Castleberry

By Dan Castleberry

Hjl

By hjl

googletag.cmd.push(function() {
tablet_slots.push( googletag.defineSlot( “/1005424/_dPSv4_tab-all-article-bottom_(300×250)”, [300, 250], “pb-ad-78623” ).addService( googletag.pubads() ) ); } );

googletag.cmd.push(function() {
mobile_slots.push( googletag.defineSlot( “/1005424/_dPSv4_mob-all-article-bottom_(300×250)”, [300, 250], “pb-ad-78158” ).addService( googletag.pubads() ) ); } );

The post 26 Spooky Images for Halloween Week by Darlene Hildebrandt appeared first on Digital Photography School.


Digital Photography School

 
Comments Off on 26 Spooky Images for Halloween Week

Posted in Photography


6 Ways to Skill Up Your Night Photography on Halloween

30 Oct

Lights, camera, action. Photography is often referred to as painting with light, and one of the more enjoyable ways to experiment with photography is to grab your camera and capture the lights of the night. Halloween offers a unique opportunity to have fun photographing the lights and colors of the season while honing your nighttime skills. 1. Have fun with Continue Reading

The post 6 Ways to Skill Up Your Night Photography on Halloween appeared first on Photodoto.


Photodoto

 
Comments Off on 6 Ways to Skill Up Your Night Photography on Halloween

Posted in Photography


Creating Ghostly Images for Halloween

29 Oct

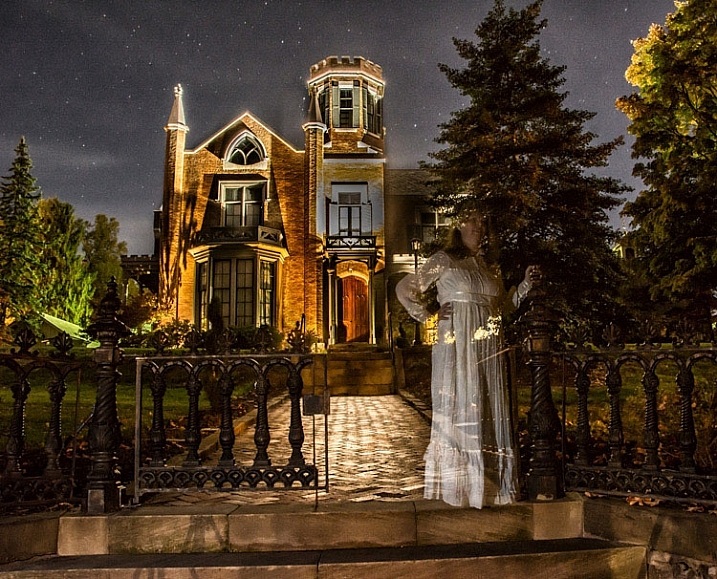
While we may never actually see, let alone photograph a real ghost, we can create the illusion of a ghost image with our cameras. There is no exact science to capturing these images, and it sometimes takes some trial and error to create the effect you are looking to achieve. Still, there are several ways this can be accomplished, so let’s take a look at three of them:

  1. Multiple exposures in-camera
  2. Long exposures
  3. Combining images in Photoshop
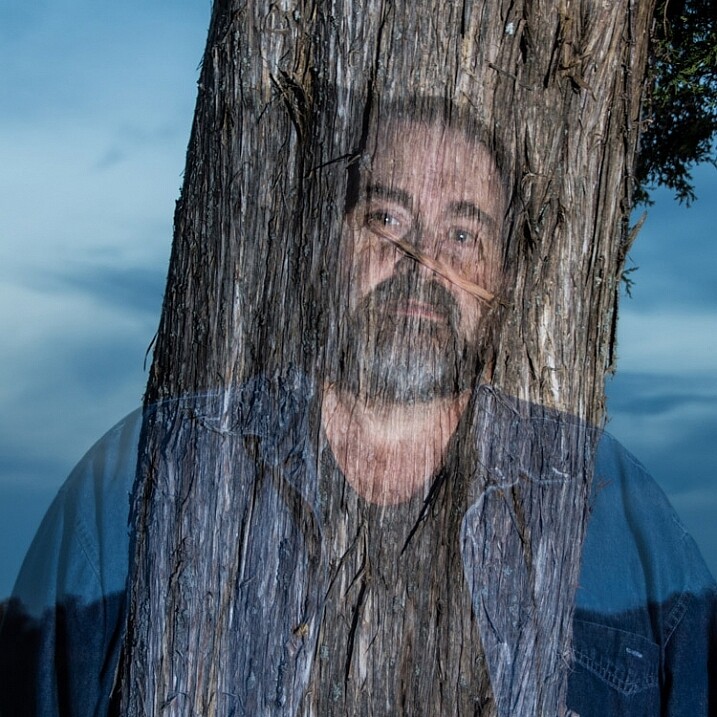
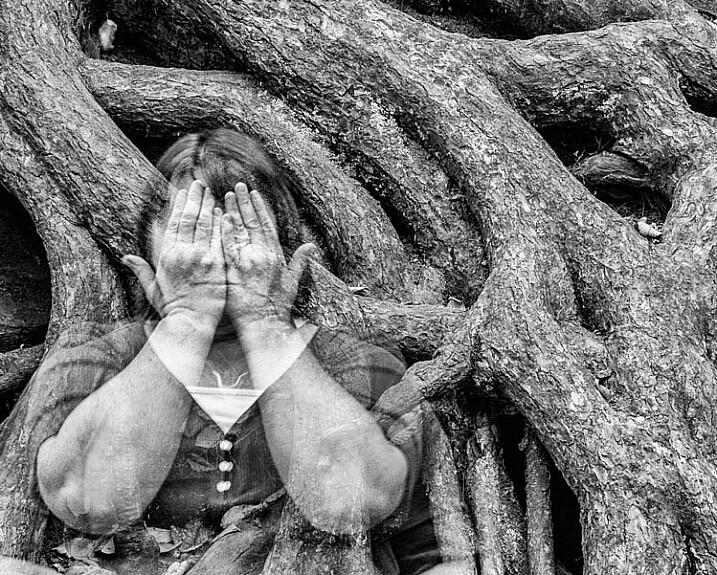
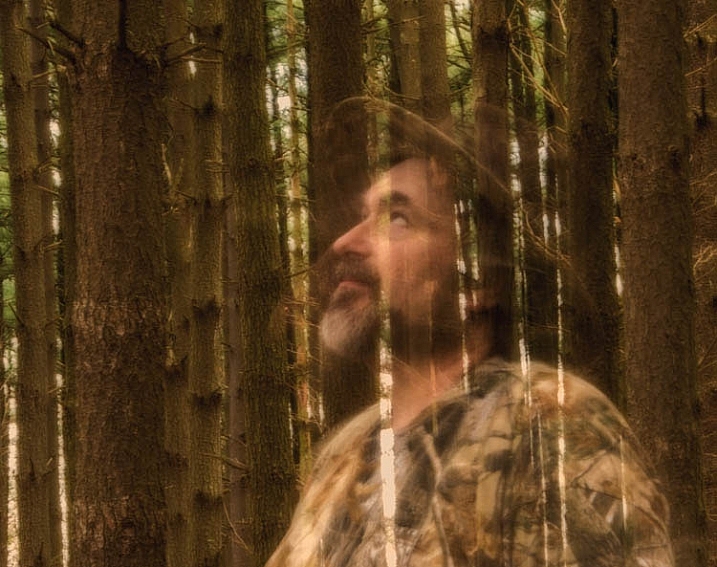
To create this multiple exposure image, two exposures were captured on one frame. The first exposure captured the ghost and the tree and the second exposure was of the tree only. Notice the dark areas do not reflect light, allowing the tree to show through the ghost.

To create this multiple exposure image, two exposures were captured on one frame. The first exposure captured the ghost and the tree and the second exposure was just of the tree. Notice the dark areas do not reflect light, allowing the tree to show through the ghost.

Equipment

  • DSLR Camera: or at least a camera that will capture multiple exposures, and allow you to set your shutter speed.
  • Tripod: In most cases this is a must to keep your images aligned and sharp.
  • Remote Shutter Release: Any touch of your camera can cause enough shake to create a blurry image.
  • Neutral Density Filters: If you are trying to create ghost images in the daytime you may need to limit the light entering your camera to get a longer exposure.
  • Flash/Speedlight: While not a necessity for capturing ghost images, one or more flash can be added to light your subject and also will freeze the movement. Which is especially helpful in ghost images done in low light.

creating-ghost--images-3

Different types of ghost images

  • Sharp transparent figure: These ghosts will be sharply focused, which means a faster shutter speed should be used, or your subject must remain motionless during the exposure. Using a short burst of flash (freezes them) on the exposure that includes your ghost will also help to accomplish this.
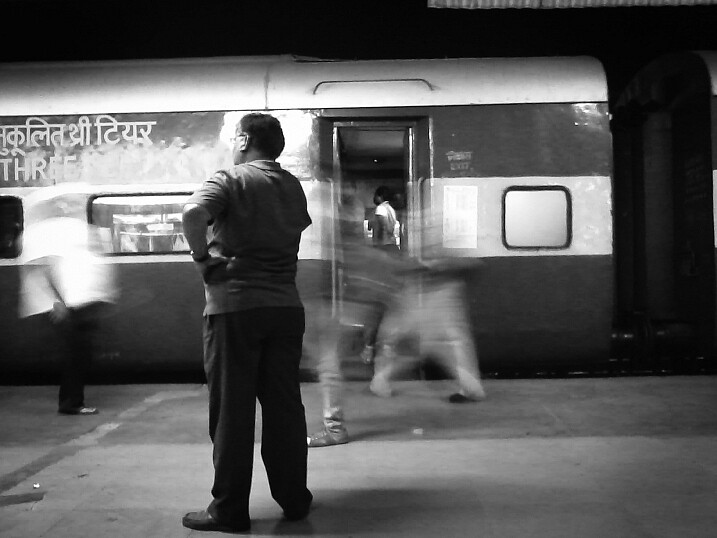
  • Blurred motion figured: A blurred ghost is accomplished by allowing your ghost subject to move during a longer exposure. The trick here is not to have too long of an exposure or too much movement by your subject, because this may cause your ghost to completely disappear, or become so faint it is not noticeable.
creating-ghost-images2

This multiple exposure ghost had three shots combined. In the first exposure, the ghost had her hands over her face, then for the second exposure, the ghost removed her hands. Finally, in the third exposure the ghost was removed from the scene to allow the tree roots to show through her.

Multiple exposures ghosts

Most DSLRs now have a multiple exposure function which will allow you to take two, or more, images on the same frame. This method of shooting ghosts can be used in any lighting, especially in a daylight scene. Here are the simple steps for this method:

  1. Choose a unique location. Though a popular location is a graveyard, be creative in choosing your spot.
  2. Set the exposures for the lighting of the scene. Depending on your camera, this means you may have to compensate your overall exposure to allow for the multiple exposures. Some cameras will have an auto gain setting that will auto correct the exposure to compensate for the multiple exposures (basically it adds them all together).
  3. Set your camera to Multiple Exposures. This function offers various amount of control, depending on the camera model. Choose the number of multiple images you want, a number that also varies among different camera models. At minimum, you will want two exposures.
  4. Placing the camera on a good sturdy tripod is a must, so that the background does not shift from exposure to exposure.
  5. Test your exposure by taking a complete set of images. At this point it is not necessary for your model (ghost) to be present.
  6. Once you have the settings correct for a desirable image, it’s time to add your ghost. Pose your ghost in the scene and take the first exposure.
  7. Remove the ghost from the scene or move the ghost to another location and take as many additional images as you choose.
  8. The final exposure should be taken without the ghost to allow the background to show through the ghost.
  9. Your camera should now display your final image.
  10. Repeat steps 3 through 8 until you get the desired results. It may take some experimentation.

creating-ghost-images7

Long exposures ghosts

Taking a long exposure shot while your ghost moves through the image will create a blurred-motion figure. This method is especially useful for ghost images in low-light situations. The best time of day to shoot this type of image outdoors is right around sunset, while there is still enough light to illuminate the background.

  1. Again, choose a unique location. Though a popular location is a graveyard, be creative in choosing your location.
  2. Set your camera to its lowest ISO and set the shutter speed to a slow speed (long exposure), typically around 10 seconds (or more, depending on the light and amount of movement your ghost makes). This means you may need to use a small aperture to achieve a correct exposure. You may even need to add an ND filter to limit the amount of light that is reflecting onto your camera’s sensor.
  3. Placing the camera on a good sturdy tripod is a must, because you don’t want your background to be blurry, only the subject.
  4. Compose your image.
  5. Test your exposure without the ghost so that you are happy with it before you add your ghost.
  6. Have your ghost rehearse the movements you are expecting. Keep in mind that the motion should be smooth and continuous. If the ghost stops moving in multiple spots during the exposure, you may end up with multiple ghosts in your image. Also, if the motion is too fast the ghost may not show up in the image at all.
  7. Begin shooting the long exposure with your ghost in motion in the scene.
  8. Check your results. Review and continue.
  9. Repeat steps 2-7 as necessary until you get the results that you want.
Naveed Dadan

By Naveed Dadan

Creating ghost images in Photoshop

If your camera doesn’t have multiple exposure capability, don’t worry! You can accomplish nearly the same effect in Photoshop. This option works best on black and white images. While it is not impossible to process a ghost image with color, sometimes it is difficult to get the color tones to look right.

  1. Open both images in Photoshop – your background image and your ghost one.
  2. Outline the ghost image.
  3. Copy and paste the ghost image onto the background image, which will place your ghost on a separate layer.
  4. Select the ghost layer.
  5. Move the ghost image into place in the image using the Move tool. You may need to enlarge or reduce the size of the ghost (use Transform) to match the proportions of your background image.
  6. In the layer palate, change the transparency of the ghost layer until you get the ghostly effect you want.
  7. You may want to add a layer mask to the ghost to hide sections of the ghost, especially if you want them to appear behind objects in your background image. You could also use some special effects such as motion blur to add mystery to the image.
  8. Save the image as a Photoshop file (.psd) so if you want to edit the image later you still have the layers to edit.
  9. Flatten layers and save the final image as JPG or Tiff, whichever is your preferred file type.
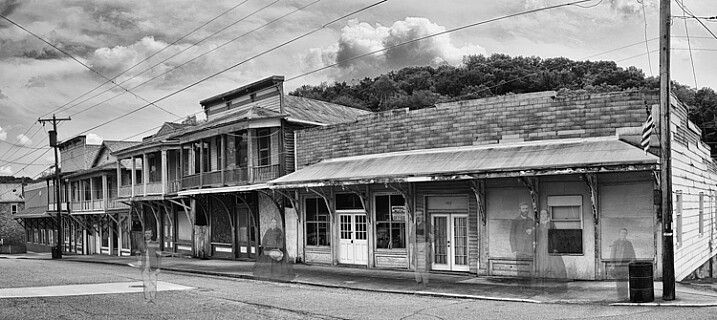
This ghost image was created in Photoshop by combining an image of an old ghost town and scanning some old family photos to use as ghost images.

This ghost image was created in Photoshop by combining a photo of an old ghost town with scans of some old family portraits to appear as ghosts.

Get out and try it

It may take a good deal of experimentation to come up with results you are looking for, but hopefully the steps above will kick-start your imagination. There are so many possibilities, so don’t be afraid to try creative methods, sometimes the best results happen when you least expect them!

Another aspect of the shot: the color of your ghost’s clothing may make a big difference in your result. Light colored clothing will reflect light, and reversely, darker clothing will not reflect much light, which will create an almost invisible effect for the ghost figure.

One reminder I’d like to pass on to you is to not trust your LED screen in low light for proper exposure. Learn to use your camera’s histogram, because in low-light an image may look really bright on the back of your camera, but still be extremely underexposed.

Now get out there and shoot, and don’t be afraid of the ghosts! (Unless, of course, you see a real one!) If you try one or more of these techniques please share your images in the comment below, I’d love to see what you come up with.

googletag.cmd.push(function() {
tablet_slots.push( googletag.defineSlot( “/1005424/_dPSv4_tab-all-article-bottom_(300×250)”, [300, 250], “pb-ad-78623” ).addService( googletag.pubads() ) ); } );

googletag.cmd.push(function() {
mobile_slots.push( googletag.defineSlot( “/1005424/_dPSv4_mob-all-article-bottom_(300×250)”, [300, 250], “pb-ad-78158” ).addService( googletag.pubads() ) ); } );

The post Creating Ghostly Images for Halloween by Bruce Wunderlich appeared first on Digital Photography School.


Digital Photography School

 
Comments Off on Creating Ghostly Images for Halloween

Posted in Photography


How to Light Creepy Halloween Masks for Added Drama

28 Oct

It’s October again and that means Halloween is around the corner. This is good news for you as a photographer, Halloween is a visual holiday like no other. With all of the decorations, theme shaped food, Jack-o-lanterns and costumes you have more potential for photography than you can shake a selfie stick at.

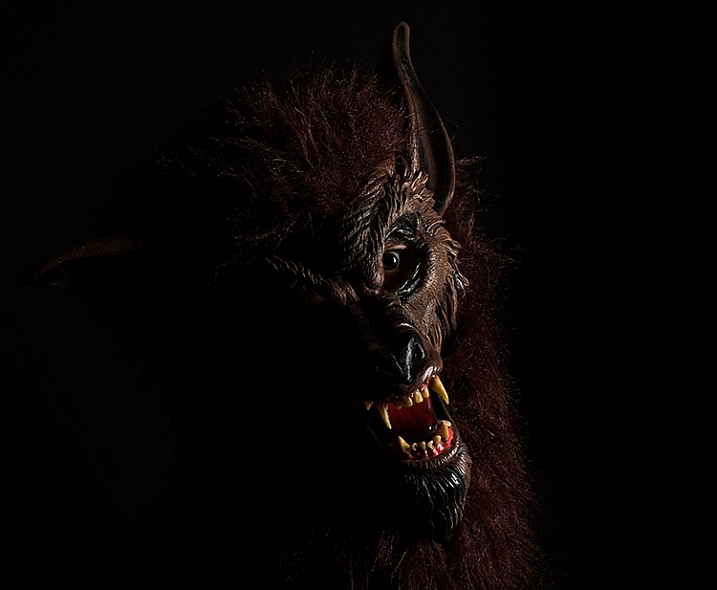
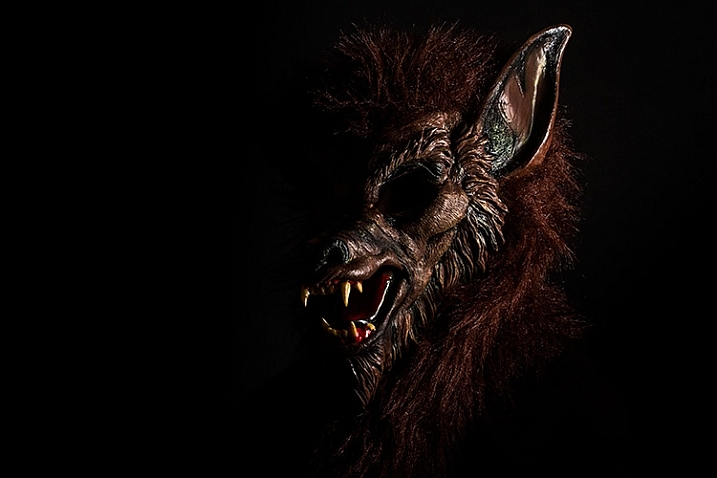
One of my favorite parts of Halloween are the masks. Many of the better quality masks available are extremely detailed and creepy, lending themselves well to visceral imagery.

halloween-lighting-tutorial-1923

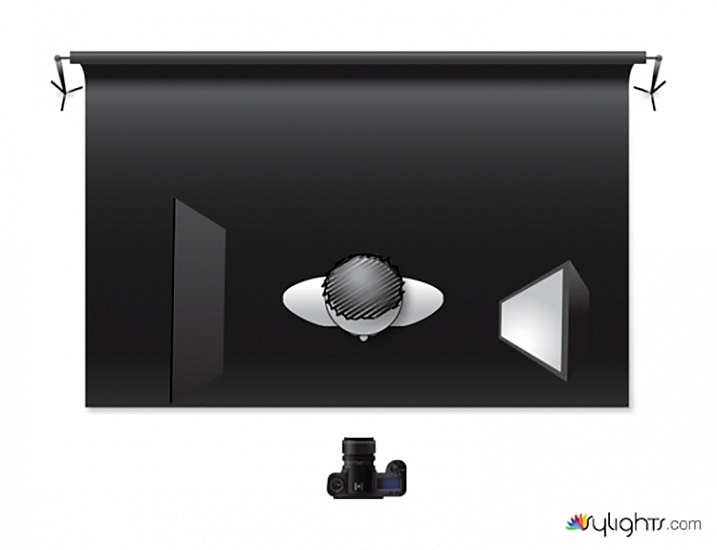
Because of the monsters they often portray, they also tend to be suited for a more cinematic approach to lighting, which will give you the opportunity to explore ways to create mood and drama in your images. This tutorial covers how to light using a basic side-lighting technique that will allow you to create heavy shadows, to shape and accentuate the creepiness in your masks.

What you need:

  • Studio strobe or speedlight fitted with a softbox or a window
  • Black paper – enough to cover the edges of the softbox (heavy, non-transparent curtains will work with a window)

Optional but useful extras:

  • Seamless paper, black background
  • Black reflector/ flag or a piece of black poster board

Setting it up

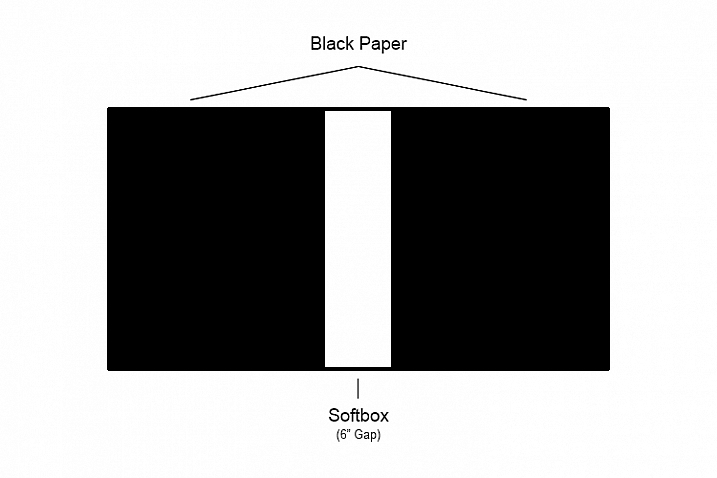
The first thing you need to do is turn your light source into a strip light. This will create a very narrow shaft of light that will skim the front of your subject, creating a lot of contrast that will emphasize all of the fine details.

To do this with a softbox, tape a few pieces of black paper over the sides leaving only about 6” (15cm) of white showing. You can make the gap smaller if you like, but for this technique you shouldn’t go for more than 6”.

halloween-lighting-tutorial-softbox-setup

Tip: If you use seamless paper backgrounds, save the scraps whenever you trim the ends. They always come in handy at times like these.

If you’re using a window with curtains, simply draw them closed until you have a six inch gap.

Execution

Once your light source is modified, you’re ready to go. To side-light, place your light so that it is pointed directly at the side of subject. If you start with the light aimed at the front of the mask, you can then fine-tune as your images require, by moving it an inch or two forward or backwards. Because the light source is so narrow, moving it in tiny increments will result in drastic changes to the final images.

halloween-lighting-tutorial-lighting-diagram

Pay careful attention to any light falling on the background. The narrow beam of light shouldn’t allow much light to spill over, but if it does, try moving your subject and light source a few inches forward (away from the background).

When working with detailed subjects like this, I like to use a smallish aperture like f/11. This ensures that all of the fine details are sharp in the final images. However, if you’re working with window light it may be a struggle to stop down that far without setting a high ISO (or using a tripod, which is a good idea for maximum sharpness anyway). Feel free to use whatever aperture provides you with the best quality results.

halloween-lighting-tutorial-1940

Flagging

When you’re attempting to get really deep shadows with a technique like this, sometimes things like white walls reflect a lot of light back onto the shadow side of your subject. This is where having a black reflector, known as a flag, comes in handy. By holding your flag to the side of your subject, you are blocking the light from reflecting off of other objects that can affect your images.

In the end

Even though this an easy technique, hopefully you can see that with some simple, but careful manipulation, you can take control of even the most basic lighting equipment to create bold and evocative imagery.

If you do decide to give this technique a go, I’d love to see the results you get with your masks. Happy Halloween!

googletag.cmd.push(function() {
tablet_slots.push( googletag.defineSlot( “/1005424/_dPSv4_tab-all-article-bottom_(300×250)”, [300, 250], “pb-ad-78623” ).addService( googletag.pubads() ) ); } );

googletag.cmd.push(function() {
mobile_slots.push( googletag.defineSlot( “/1005424/_dPSv4_mob-all-article-bottom_(300×250)”, [300, 250], “pb-ad-78158” ).addService( googletag.pubads() ) ); } );

The post How to Light Creepy Halloween Masks for Added Drama by John McIntire appeared first on Digital Photography School.


Digital Photography School

 
Comments Off on How to Light Creepy Halloween Masks for Added Drama

Posted in Photography


Get Spooky With a DIY Halloween Photo Booth!

27 Oct
Halloween DIY

Photo booths are a must for Halloween parties and we’ve got all the tricks and treats you need to make a screamin’ good one using either your phone or DSLR.

(…)
Read the rest of Get Spooky With a DIY Halloween Photo Booth! (0 words)


© Erin for Photojojo, 2015. |
Permalink |
No comment |
Add to
del.icio.us

Post tags:


Photojojo

 
Comments Off on Get Spooky With a DIY Halloween Photo Booth!

Posted in Equipment


27 Sinister Images for the Week of Halloween

23 Oct

So next week it is Halloween and the goblins and zombies will be out in full force. To get you in the spirt and maybe scare the pants off you – let’s look at a few spooky, creepy images:

Shane Gorski

By Shane Gorski

Kris Williams

By Kris Williams

Shane Gorski

By Shane Gorski

TexasEagle

By TexasEagle

Jimmy McIntyre

By Jimmy McIntyre

Calvin Smith

By Calvin Smith

Cosmo_71

By cosmo_71

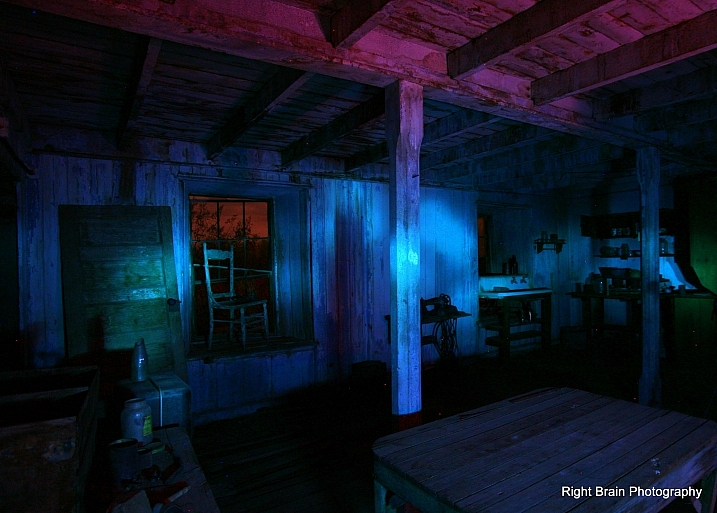
RightBrainPhotography

By RightBrainPhotography

Stefano Corso

By Stefano Corso

Christophe Verdier

By Christophe Verdier

Troy B. Thompson

By Troy B. Thompson

Jill

By Jill

Moyan Brenn

By Moyan Brenn

David Ohmer

By David Ohmer

Kasia

By Kasia

Aftab Uzzaman

By Aftab Uzzaman

Rob

By Rob

D.loop

By d.loop

Freeparking :-|

By freeparking 😐

Darlene Hildebrandt

By Darlene Hildebrandt

Mark Lobo

By Mark Lobo

Dani Foster Herring

By Dani Foster Herring

Slimmer_jimmer

By slimmer_jimmer

Yasser Alghofily

By Yasser Alghofily

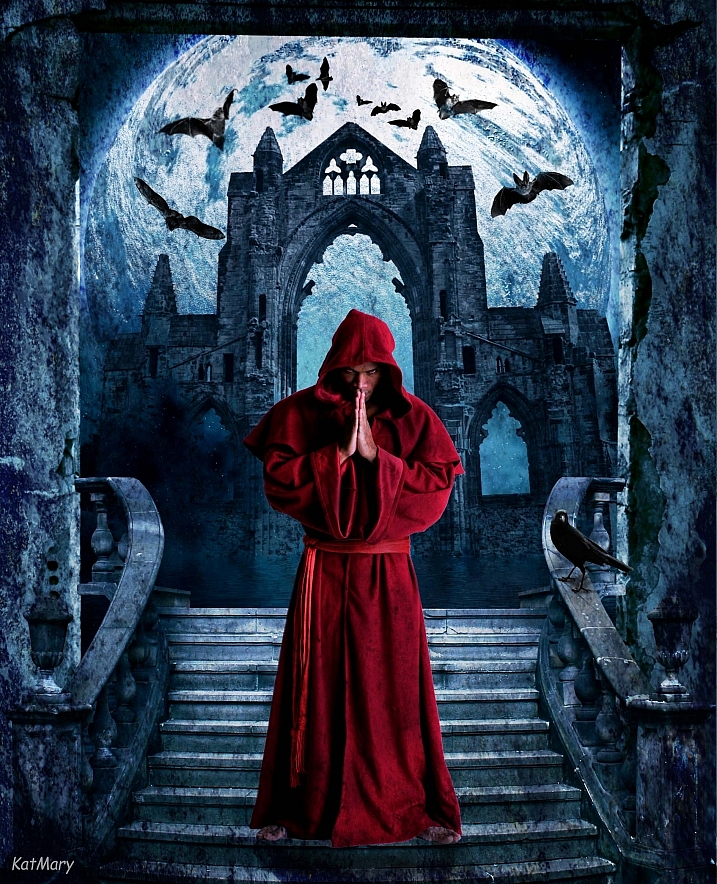
Katmary

By katmary

Neil Howard

By Neil Howard

Matt MacGillivray

By Matt MacGillivray

googletag.cmd.push(function() {
tablet_slots.push( googletag.defineSlot( “/1005424/_dPSv4_tab-all-article-bottom_(300×250)”, [300, 250], “pb-ad-78623” ).addService( googletag.pubads() ) ); } );

googletag.cmd.push(function() {
mobile_slots.push( googletag.defineSlot( “/1005424/_dPSv4_mob-all-article-bottom_(300×250)”, [300, 250], “pb-ad-78158” ).addService( googletag.pubads() ) ); } );

The post 27 Sinister Images for the Week of Halloween by Darlene Hildebrandt appeared first on Digital Photography School.


Digital Photography School

 
Comments Off on 27 Sinister Images for the Week of Halloween

Posted in Photography