While we may never actually see, let alone photograph a real ghost, we can create the illusion of a ghost image with our cameras. There is no exact science to capturing these images, and it sometimes takes some trial and error to create the effect you are looking to achieve. Still, there are several ways this can be accomplished, so let’s take a look at three of them:
- Multiple exposures in-camera
- Long exposures
- Combining images in Photoshop
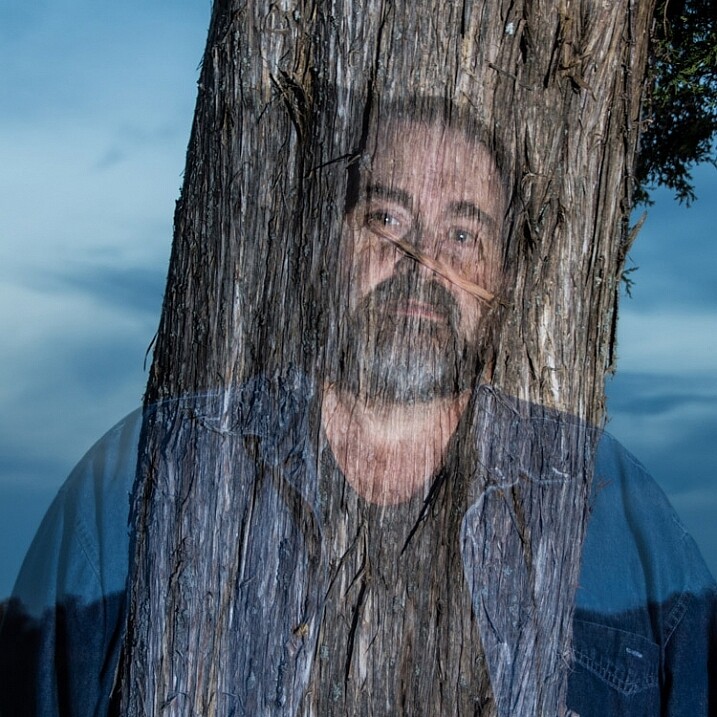
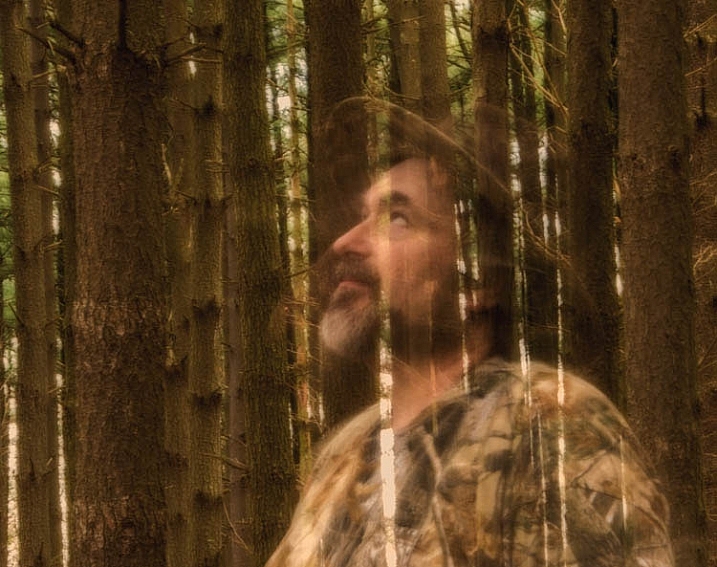
To create this multiple exposure image, two exposures were captured on one frame. The first exposure captured the ghost and the tree and the second exposure was just of the tree. Notice the dark areas do not reflect light, allowing the tree to show through the ghost.
Equipment
- DSLR Camera: or at least a camera that will capture multiple exposures, and allow you to set your shutter speed.
- Tripod: In most cases this is a must to keep your images aligned and sharp.
- Remote Shutter Release: Any touch of your camera can cause enough shake to create a blurry image.
- Neutral Density Filters: If you are trying to create ghost images in the daytime you may need to limit the light entering your camera to get a longer exposure.
- Flash/Speedlight: While not a necessity for capturing ghost images, one or more flash can be added to light your subject and also will freeze the movement. Which is especially helpful in ghost images done in low light.
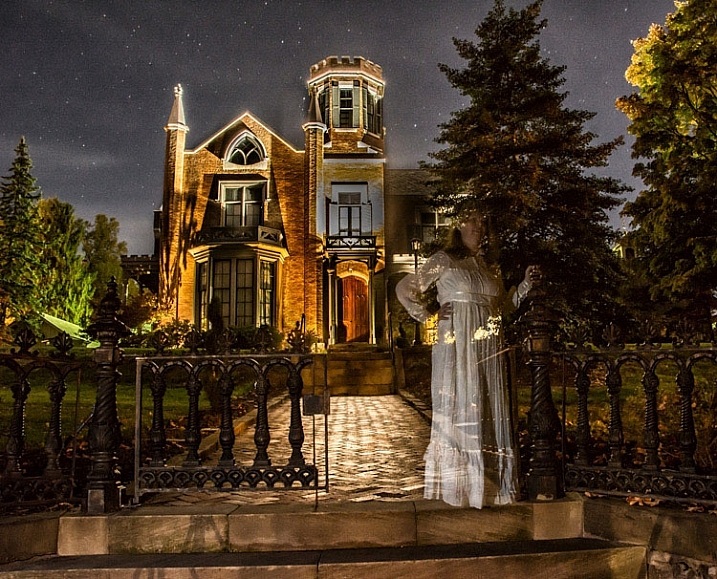
Different types of ghost images
- Sharp transparent figure: These ghosts will be sharply focused, which means a faster shutter speed should be used, or your subject must remain motionless during the exposure. Using a short burst of flash (freezes them) on the exposure that includes your ghost will also help to accomplish this.
- Blurred motion figured: A blurred ghost is accomplished by allowing your ghost subject to move during a longer exposure. The trick here is not to have too long of an exposure or too much movement by your subject, because this may cause your ghost to completely disappear, or become so faint it is not noticeable.
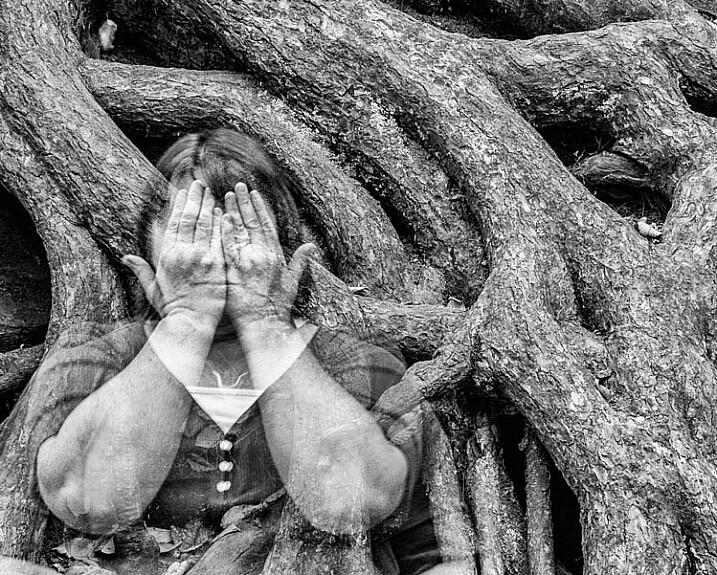
This multiple exposure ghost had three shots combined. In the first exposure, the ghost had her hands over her face, then for the second exposure, the ghost removed her hands. Finally, in the third exposure the ghost was removed from the scene to allow the tree roots to show through her.
Multiple exposures ghosts
Most DSLRs now have a multiple exposure function which will allow you to take two, or more, images on the same frame. This method of shooting ghosts can be used in any lighting, especially in a daylight scene. Here are the simple steps for this method:
- Choose a unique location. Though a popular location is a graveyard, be creative in choosing your spot.
- Set the exposures for the lighting of the scene. Depending on your camera, this means you may have to compensate your overall exposure to allow for the multiple exposures. Some cameras will have an auto gain setting that will auto correct the exposure to compensate for the multiple exposures (basically it adds them all together).
- Set your camera to Multiple Exposures. This function offers various amount of control, depending on the camera model. Choose the number of multiple images you want, a number that also varies among different camera models. At minimum, you will want two exposures.
- Placing the camera on a good sturdy tripod is a must, so that the background does not shift from exposure to exposure.
- Test your exposure by taking a complete set of images. At this point it is not necessary for your model (ghost) to be present.
- Once you have the settings correct for a desirable image, it’s time to add your ghost. Pose your ghost in the scene and take the first exposure.
- Remove the ghost from the scene or move the ghost to another location and take as many additional images as you choose.
- The final exposure should be taken without the ghost to allow the background to show through the ghost.
- Your camera should now display your final image.
- Repeat steps 3 through 8 until you get the desired results. It may take some experimentation.
Long exposures ghosts
Taking a long exposure shot while your ghost moves through the image will create a blurred-motion figure. This method is especially useful for ghost images in low-light situations. The best time of day to shoot this type of image outdoors is right around sunset, while there is still enough light to illuminate the background.
- Again, choose a unique location. Though a popular location is a graveyard, be creative in choosing your location.
- Set your camera to its lowest ISO and set the shutter speed to a slow speed (long exposure), typically around 10 seconds (or more, depending on the light and amount of movement your ghost makes). This means you may need to use a small aperture to achieve a correct exposure. You may even need to add an ND filter to limit the amount of light that is reflecting onto your camera’s sensor.
- Placing the camera on a good sturdy tripod is a must, because you don’t want your background to be blurry, only the subject.
- Compose your image.
- Test your exposure without the ghost so that you are happy with it before you add your ghost.
- Have your ghost rehearse the movements you are expecting. Keep in mind that the motion should be smooth and continuous. If the ghost stops moving in multiple spots during the exposure, you may end up with multiple ghosts in your image. Also, if the motion is too fast the ghost may not show up in the image at all.
- Begin shooting the long exposure with your ghost in motion in the scene.
- Check your results. Review and continue.
- Repeat steps 2-7 as necessary until you get the results that you want.
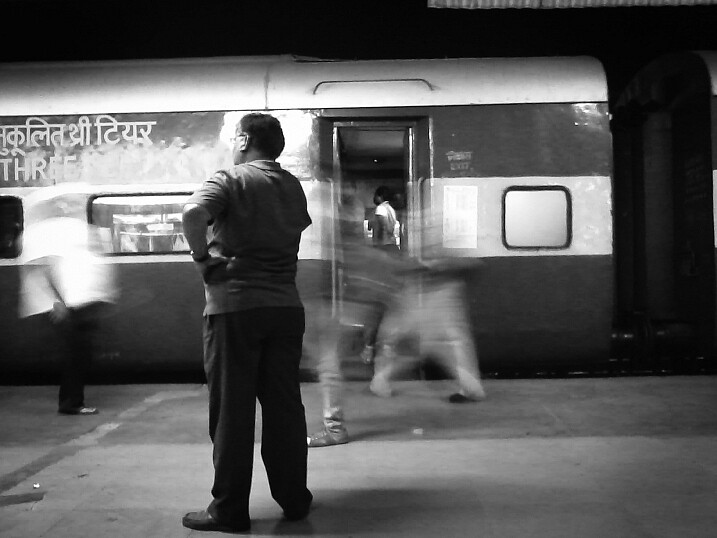
By Naveed Dadan
Creating ghost images in Photoshop
If your camera doesn’t have multiple exposure capability, don’t worry! You can accomplish nearly the same effect in Photoshop. This option works best on black and white images. While it is not impossible to process a ghost image with color, sometimes it is difficult to get the color tones to look right.
- Open both images in Photoshop – your background image and your ghost one.
- Outline the ghost image.
- Copy and paste the ghost image onto the background image, which will place your ghost on a separate layer.
- Select the ghost layer.
- Move the ghost image into place in the image using the Move tool. You may need to enlarge or reduce the size of the ghost (use Transform) to match the proportions of your background image.
- In the layer palate, change the transparency of the ghost layer until you get the ghostly effect you want.
- You may want to add a layer mask to the ghost to hide sections of the ghost, especially if you want them to appear behind objects in your background image. You could also use some special effects such as motion blur to add mystery to the image.
- Save the image as a Photoshop file (.psd) so if you want to edit the image later you still have the layers to edit.
- Flatten layers and save the final image as JPG or Tiff, whichever is your preferred file type.
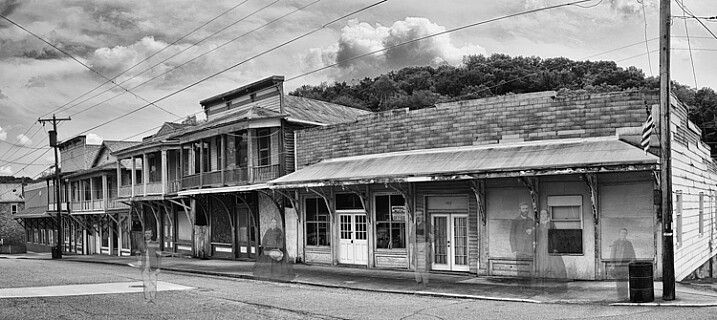
This ghost image was created in Photoshop by combining a photo of an old ghost town with scans of some old family portraits to appear as ghosts.
Get out and try it
It may take a good deal of experimentation to come up with results you are looking for, but hopefully the steps above will kick-start your imagination. There are so many possibilities, so don’t be afraid to try creative methods, sometimes the best results happen when you least expect them!
Another aspect of the shot: the color of your ghost’s clothing may make a big difference in your result. Light colored clothing will reflect light, and reversely, darker clothing will not reflect much light, which will create an almost invisible effect for the ghost figure.
One reminder I’d like to pass on to you is to not trust your LED screen in low light for proper exposure. Learn to use your camera’s histogram, because in low-light an image may look really bright on the back of your camera, but still be extremely underexposed.
Now get out there and shoot, and don’t be afraid of the ghosts! (Unless, of course, you see a real one!) If you try one or more of these techniques please share your images in the comment below, I’d love to see what you come up with.
googletag.cmd.push(function() {
tablet_slots.push( googletag.defineSlot( “/1005424/_dPSv4_tab-all-article-bottom_(300×250)”, [300, 250], “pb-ad-78623” ).addService( googletag.pubads() ) ); } );
googletag.cmd.push(function() {
mobile_slots.push( googletag.defineSlot( “/1005424/_dPSv4_mob-all-article-bottom_(300×250)”, [300, 250], “pb-ad-78158” ).addService( googletag.pubads() ) ); } );
The post Creating Ghostly Images for Halloween by Bruce Wunderlich appeared first on Digital Photography School.
You must be logged in to post a comment.