RSS
 

Posts Tagged ‘creatively’

My Space: 15 Creatively Painted High School Parking Spots

29 Aug

[ By Steve in Art & Street Art & Graffiti. ]

senior-parking-1aa

So custom-painted assigned high school senior parking spots are a thing now, and it appears students are expressing a LOT (ahem) of creativity.

senior-parking-1b

senior-parking-1c

The concept looks to be a win-win for both schools and students: the former collect fees for each space and nip parking spot rage in the bud; the latter get to be creative and take pride in their work. Take Martha Caldera’s take on Drake’s “If Youre Reading This Its Too Late” mixtape, which garnered her (and others as well) a measure of Twitter fame and thousands of shares.

States Caldera, “The only thing that’s going to motivate me to wake up for school tomorrow is pulling up in my parking spot.” One wonders if Drake – who played high school student Jimmy Brooks in Degrassi: The Next Generation – would approve.

PokeSpot

senior-parking-2a

Topics and themes for the parking spaces are pretty much left up to the individual students. Many choose to express their currents interests as illustrated by Reddit-user mrpopper96 above. Trends are fleeting, of course, but no worries since next year’s senior class simply paints over the work of their predecessors.

School Of Fish

senior-parking-9a

senior-parking-9b

This parking space may be slippery even when it’s NOT wet. We’re not sure what kind of car this student drives but please, please, please let it be the one in the second image.

Tread On Me

senior-parking-4a

Jeep Patriot parking only? We’ve come a long way since Peter Fonda’s character was hassled for his Stars & Stripes motorcycle gas tank. We’d hassle the dude above over his spelling but hey, that’s the school’s job.

Reece Witherspot

senior-parking-5a

senior-parking-5b

When the Good Lord gives you lemons, make lemonade. When your parents name you “Reece“, well, see above. By the way, is that a space painted like a Rebel Flag just intruding into the top of the second photo? Who knows, Reece might go to Robert E. Lee High School.

Next Page – Click Below to Read More:
My Space 15 Creatively Painted High School Parking Spots

Share on Facebook


[ By Steve in Art & Street Art & Graffiti. ]

[ WebUrbanist | Archives | Galleries | Privacy | TOS ]


WebUrbanist

 
Comments Off on My Space: 15 Creatively Painted High School Parking Spots

Posted in Creativity


How to Use Portrait Angles More Creatively: A Visual Guide

11 Jul

When it comes to creating a successful portrait, there are a lot of moving parts! We talk often about finding the light, composition, and camera gear when it comes to portraits. While all three of those things are important in creating your final image, they aren’t the only variables at play.

Another important aspect in capturing portraits is angles. Understanding and making good use of angles in portrait photography, allows you to capture images of your subjects in the most flattering way, unique to each person you’re photographing.

portrait-angles1

Under the umbrella of “angles” are two different aspects – facial view, and camera angle. Facial view simply refers to how much of a person’s face is visible in the photograph. Whether or not you recognize the term facial view, you probably understand that there’s a visual difference between a photograph of someone looking directly into the camera, and a photograph of them in profile. These are examples of both ends of the facial view spectrum. In addition to facial view, you’ll also want to learn to utilize camera angle in portraiture. Camera angle refers to whether you’re holding the camera at eye level, or above or below the eye level of your subject.

The concepts themselves are pretty simple, right? However, the difficult part is learning how each of these variables interact with each other, and your subject. Let’s walk through some visual examples of different facial views and camera angles using the same gear, subject, location, and same time of day, while observing how different angles change the look and the feel of each image.

Camera Angles

portrait-angles2

Eye Level

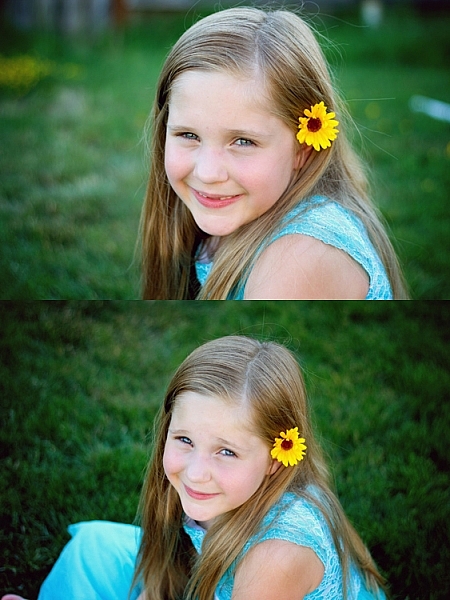
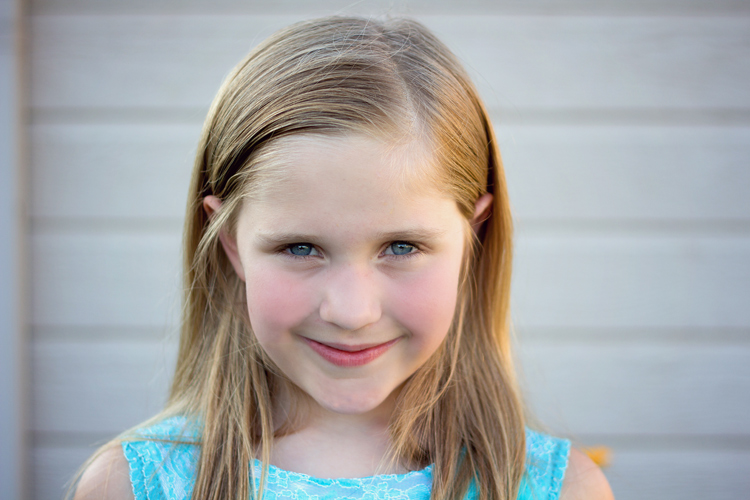
One of the most common camera angles for portraits is to place the camera at the subject’s eye level. This camera angle results in a final image that is balanced, and proportionate between head and body. It also allows for the subject to look directly into the lens, which tends to create the feeling of connection in a portrait. This is a flattering camera angle for most people.

portrait-angles3

High Camera Angle – Above Eye Level

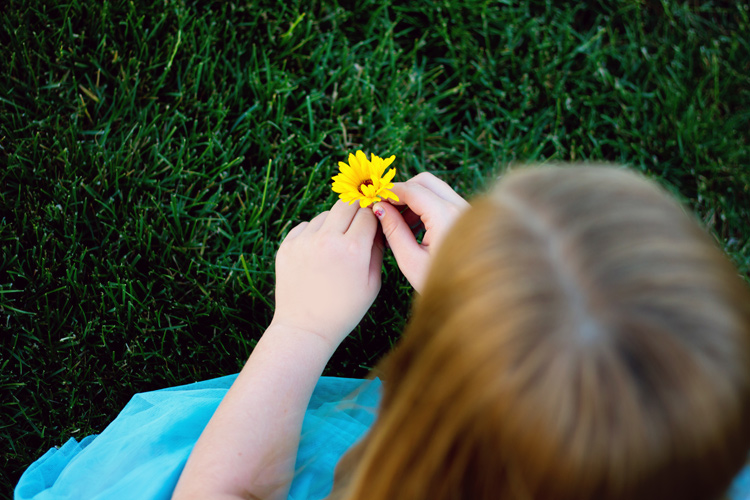
Shooting from a high camera angle (with the camera above the subject’s eye level) is another great option to try in your portrait photography. With this angle, the focus is on the face rather than the body and can be a very slimming angle for adults. I’m not at all concerned with making children seem slimmer than they really are, but find that I use this angle a lot when photographing children because I like the way that it emphasizes the childlike qualities of kiddos. I find that parents tend to really enjoy photographs of their children taken from a high camera angle, and I believe that’s because parents see their children from this angle quite often in their day-to-day life, so it feels very natural and candid.

As a bonus, shooting from a high angle makes it really easy to achieve good catch lights in their eyes, and can also help to camouflage a less than desirable background. On the other hand, this camera angle may not be to your advantage in some situations; if your subject is very thin, shooting from above can sometimes make your subject look like a bobble-head, which is very rarely flattering.

portrait-angles4

Low Camera Angle – Below Eye Level

Shooting from a low camera angle (with the camera placed below the subject’s eyes and tilted up) can make people seem tall and authoritative, but can also tend to make people (their body in particular) look larger than they really are, which is not very flattering for most people.

This is particularly important to keep in mind if you’re photographing someone who is taller than you. If you’re 5’2″, and the person you’re photographing is 6’4″, you may need to be creative to make sure that you’re not photographing the whole session from a low camera angle. Have your subject sit, crouch, or find something that you can climb on to create a more even plane, for at least some of the photos – it really will make a difference.

I’ve used this camera angle a handful of times with newly walking babies, and could envision using it with a wider angle lens (to capture more of the body) if I were photographing a politician, a football player, or someone who wished to appear particularly powerful. Overall though, this is usually not the most flattering angle for portraits.

portrait-angles7

Don’t be afraid to experiment. Try capturing the same image from two different camera angles. The image above demonstrates how the same subject and pose appears from eye level, as well as from a high camera angle. If you did a poll, I bet you’d find that some people prefer the eye level shot, and some prefer the high camera angle. This is largely a matter of taste and preferred aesthetic, so I frequently make a point to include both sorts of angles in my portrait sessions.

Facial Views

portrait-angles6

Photographing a subject full-face means that their face is pointing directly towards the camera lens – you can see both ears, and both sides of the face in equal amounts. Full-face portraits often convey a sense of confidence and assertiveness, especially when the person being photographed is looking directly into the camera with their eyes also.

portrait-angles8

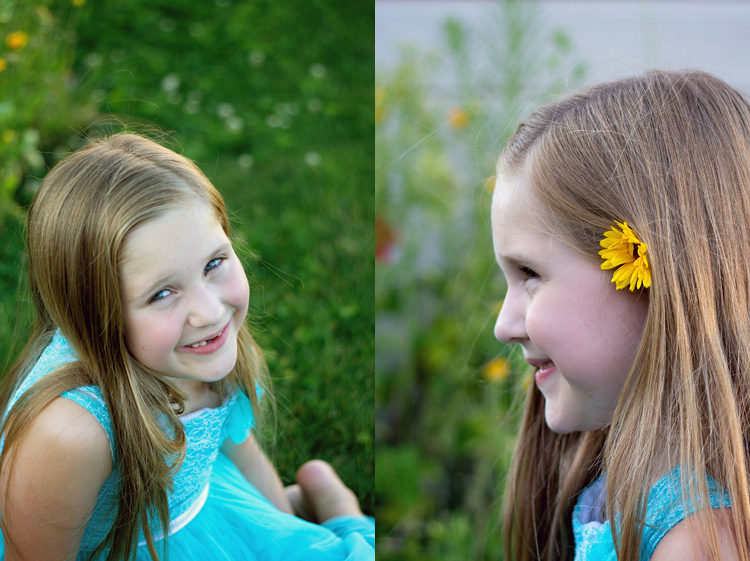
Other facial views include 3/4 view, 2/3 view, and profile view. With 3/4 view, the subject has turned just enough so that one of their ears is no longer visible to the camera. With 2/3 view, the subject has continued to turn so that their nose is just about to break the plane of their back cheek. For a true profile portrait, the subject’s face is turned 90 degrees, and is perpendicular to the camera.

Shooting with the subject’s face turned to 2/3 view or 3/4 view tends to convey a more casual, and less assertive portrait. Images shot with a 3/4 facial view, and the subject looking just off camera, are often the most successful candid images, because the facial expressions are still easily visible to the viewer. Similarly, shooting in profile allows for portraits that feel unposed, while also being graceful and demure (particularly when shot in silhouette).

portrait-angles5

The best way to begin to learn, and really understand angles, is to grab a friend and go experiment. Take photos from every camera angle you can think of, including non-traditional angles like a bird’s eye or worm’s eye view. Then, take a photo with every facial view – full face, 3/4 view, 2/3 and profile. If you’re really feeling ambitious, try combining facial views and camera angles – does the feel of the portrait change if you shoot full-face from eye-level versus from a high camera angle?

Chime in below, do you find that you gravitate towards images with a particular facial view and/or camera angle? What tends to be your preference and why?

googletag.cmd.push(function() {
tablet_slots.push( googletag.defineSlot( “/1005424/_dPSv4_tab-all-article-bottom_(300×250)”, [300, 250], “pb-ad-78623” ).addService( googletag.pubads() ) ); } );

googletag.cmd.push(function() {
mobile_slots.push( googletag.defineSlot( “/1005424/_dPSv4_mob-all-article-bottom_(300×250)”, [300, 250], “pb-ad-78158” ).addService( googletag.pubads() ) ); } );

The post How to Use Portrait Angles More Creatively: A Visual Guide by Meredith Clark appeared first on Digital Photography School.


Digital Photography School

 
Comments Off on How to Use Portrait Angles More Creatively: A Visual Guide

Posted in Photography


How to Creatively Alter the Light in Your Photo Using Lightroom

28 Jul

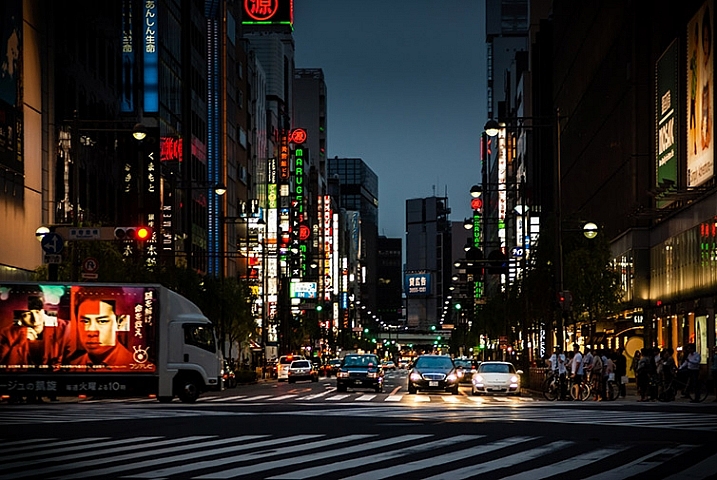
photo of a Tokyo streetscape after being fixed in Lightroom

Learn how to fix problem light and enhance your vision for your photos in Lightroom.

If you’re like most of us, you’ve taken photos from time to time that you’ve had high hopes for, only to realize later on that they didn’t turn out the way you’d hoped. Often what looks like awesome light when you captured the image, just doesn’t translate to great light when you view the photo on your computer screen.

When the photos you’ve captured are once in a lifetime memories they deserve better than this. Thanks to Lightroom they can be improved, fairly quickly and easily. In this video you’ll see how to relight a photo in Lightroom. You’ll learn techniques that you can use on your photos to move the light from where it is now to where you want it to be.

You will see how to use the Graduated Filter to darken skies, how to use the Radial Filter and the Adjustment Brush to bring light and saturation to where you want it to be.

Don’t get me wrong, I’m a big advocate of using the correct settings and capturing a good photo right in the camera. I’m also pragmatic and I know that, despite the best of intentions, the photos you capture don’t always look as good you’d like. Lightroom can help.

So here’s how you can use Lightroom’s tools to improve a photo. This rather lifeless Tokyo streetscape is improved so it is a crisper, shinier image with light and saturated color where it should be. This is something you can do too.

We’d like to see what you do with these tools and your photos, so feel free to show us in the comments below.

googletag.cmd.push(function() {
tablet_slots.push( googletag.defineSlot( “/1005424/_dPSv4_tab-all-article-bottom_(300×250)”, [300, 250], “pb-ad-78623” ).addService( googletag.pubads() ) ); } );

googletag.cmd.push(function() {
mobile_slots.push( googletag.defineSlot( “/1005424/_dPSv4_mob-all-article-bottom_(300×250)”, [300, 250], “pb-ad-78158” ).addService( googletag.pubads() ) ); } );

The post How to Creatively Alter the Light in Your Photo Using Lightroom by Helen Bradley appeared first on Digital Photography School.


Digital Photography School

 
Comments Off on How to Creatively Alter the Light in Your Photo Using Lightroom

Posted in Photography


Enter the Void: 14 Creatively Concave & Sliced-Out Structures

24 Jun

[ By Steph in Architecture & Public & Institutional. ]

concave twin moon 2

Cutting curves or slices into the facades of buildings doesn’t just make them more visually dynamic, it can create terraces, divert prevailing winds, concentrate sunlight and direct the eye to particular views.  These seemingly random depressions and voids completely transform the shapes of each structure, often leading to an alien appearance.

Twin Moon Cut-Outs

concave twin moon 3

concave moon 5

concave twin moon 1

Two buildings set side-by-side look like they were dented by a massive sphere, the concave cut-out creating two moon shapes recessed into the concrete facades. Architect Moon Hoon designed the mixed-use Two Moon buildings for a South Korean client who needed one building for himself and another for his brother. The structures were envisioned as twins, with one sitting ever-so-slightly closer to the street than the other.

TEK Building by BIG Architects

concave tek 2

concave tek 3

concave tek 4

concave tek

Each ‘slice’ that you see in the main volume of the TEK building by BIG Architects is a functional step, with the entrance spiraling throughout the interior to create one big continuous outdoor staircase leading to a series of terrace-like spaces before finally exiting onto the roof. The building, which is full of exhibitions paces, conference rooms, shops, restaurants and galleries, consists of a system of stacked plate-like pieces that also create solar shading for the interior spaces.

Barn House Sliced Like a Cake

concave barn house 1

concave barn house 2

concave barn house 3

This barn-shaped house looks like a massive black-frosted cake that’s had slices randomly taken from its perimeters, revealing its white interior. These concave cut-outs act as terraces, reflecting and maximizing natural light.

DUO Skyscrapers with Concave Walls

concave duo skyscrapers

Singapore’s historic Kampong Glam district is set to get a pair of curving skyscrapers arranged in a half-circle, one containing apartments, the other offices and a hotel. The DUO towers by Buro Ole Scheeren feature a stepped design that creates large outdoor spaces at various levels, and are covered in a distinctive grid of hexagonal windows.

The Bow by Foster + Partners

concave the bow 1

concave the bow 2
Calgary’s tallest building, The Bow by Foster + Partners is a 58-story wave-like structure with a concave side gathering sunlight and a convex side reducing the load of prevailing winds. Atriums within the concave side separate the glass facade from the offices within, offering meeting spaces, lounges and sky gardens.

Next Page – Click Below to Read More:
Enter The Void 14 Creatively Concave Sliced Out Structures

Share on Facebook


[ By Steph in Architecture & Public & Institutional. ]

[ WebUrbanist | Archives | Galleries | Privacy | TOS ]


WebUrbanist

 
Comments Off on Enter the Void: 14 Creatively Concave & Sliced-Out Structures

Posted in Creativity


6 Ways to Use Shutter Speed Creatively

05 Feb

In many ways, shutter speed is an inaccurate term. I read an article a few years ago and the photographer referred to shutter speed as shutter time. The logic was spot on. A shutter always opens or closes at the same “speed”. The key value is how long the shutter stays open, hence shutter time. On Canon cameras the shutter speed function (shutter priority) on the mode dial is abbreviated to Tv, which stands for “Time Value”, and is a more accurate description of what this article is about. I am going to refer to shutter time as opposed to shutter speed, it sounds crazy, but it will make more sense. The reason this definition is important is because, we are going to be looking at how you can use the time that the shutter is open (and gathering light onto the sensor) creatively.
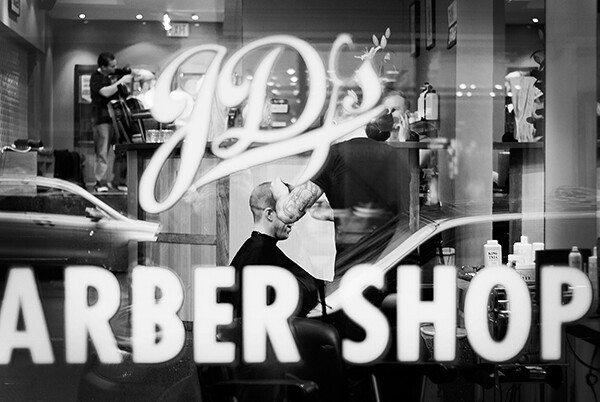
Waiting for an image to unfold requires patience

In a sense, shutter time is a bit like time travel. You camera’s shutter can open and shut in 1/8000th of a second. Think about that. Take one second, divide it by 8000 and one of those units is the time your shutter was open. That is very quick. On the other end of the spectrum, you can shoot super long exposures of 20 or 30 minutes. That means the shutter stays open for that length of time. Again, amazing. Think of all that light falling onto the sensor during that time, and the images that can be created doing so.

The shutter time becomes more than simply a moment in time, it could be a split second (literally) or a few seconds. The resulting image will capture and freeze the moment or, with a longer shutter time, there will be blurred movement. This is the fun part of photography. In many ways, your camera can “see” events that happen which you cannot. The camera can capture a frozen moment and suspend your subject in that moment forever, this is like magic. The compelling images are amazing to see and are reasonably easy to make, so let’s take a look at a few of them and see how they are done.

6 Ways to Use Shutter Speed Creatively

1. Freezing the moment

These are the images we all know about; ones that have captured a frozen moment in time. Normally these are sports images, the winning goal, or the knockout punch connecting. They are intriguing to most people and are compelling because we can’t freeze the moment in our eyes. We see a moving, continuous rendition of the events happening in front of us. You have seen “slo-mo” shots of the winning goal; the frozen moment image is that equivalent.

These images take a bit of practice to get right. Lets assume for a moment, you are photographing a soccer match. It is great to get action shots, but you will want to get any shots of the teams scoring goals. You will then need to have the correct lens. In sports photography, it will be a pretty long zoom or telephoto lens. Most sports photographers will use 400mm and longer. You will also need to keep your camera steady. A tripod in these cases is somewhat impractical as you need to be able to move the camera quickly and easily to follow the game. A monopod is normally what works best.
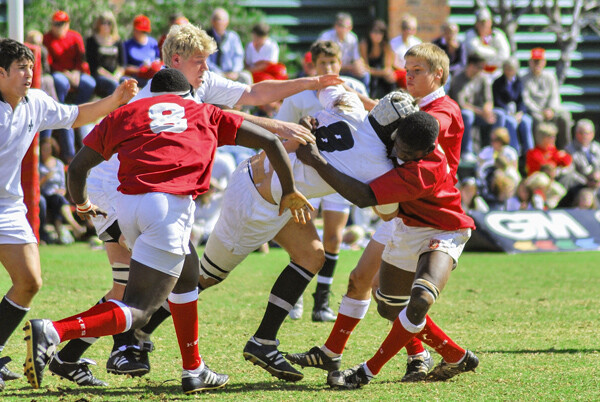
freeze action 2

Depending on the lighting conditions you need to make sure you have a shutter time that captures the players in mid-action. You also need to take the lighting into consideration. If you are shooting in an outdoor arena, the natural light may be sufficient, but if you are in an indoor arena, you might need to be more aware of your exposure. In that case, you may need to push your ISO up high enough to allow you to freeze your subject. In most sports 1/1500th of a second is the starting point for freezing action. In very fast sports like ice hockey, soccer, rugby and so on, you may need to be shooting at even faster speeds than that. This is how you set up the shots.

Technique

How to do it: Set your aperture to an aperture setting of f/2.8 or f/4.5. This will allow for a quicker shutter time, which will in turn freeze the action. If you are shooting a sporting event in the sunlight, you may need to have your shutter time set to 1/1500 or faster. If this is still not freezing the action, make the shutter time even quicker. Try and anticipate the action and release the shutter at the moment you think it will happen. Be aware that your focus will need to be spot on. With a wide aperture, you run the risk of misfocusing and missing a shot. I once heard a sports photographer say this ” If you see the goal in your viewfinder, you missed the shot”. When you do get that shot though, it will be worth it.

2. The decisive moment

Henri Cartier-Bresson coined the phrase, “The Decisive Moment”. Do a google image search on Cartier-Bresson and the decisive moment, you will see many of his great images. He was well known as a street and people photographer, and he believed that you need to choose the precise moment when something happens to hit the shutter release. As you can imagine, this is not easy. Sometimes this might mean you need quick reflexes. Freeze actionMost of the time, it requires patience. He would often set up the shot, get the framing right and then wait. You don’t want to wait for hours, but be patient, sit there for 20 or 30 minutes and watch the scene. Take note of how people are moving into, and out of your frame. When time is right, or the perfect subject (person, vehicle, animal, whatever you choose) moves into the best position, release your shutter at that moment. This will take practice and more than a few shots to get it right, but when you do, you will be ecstatic. The shot will look candid, but you will know what it took to get that image. Many people assume Cartier-Bresson’s images were simply shot quickly from the hip, but much of the time they were planned and he waited patiently for the decisive moment.
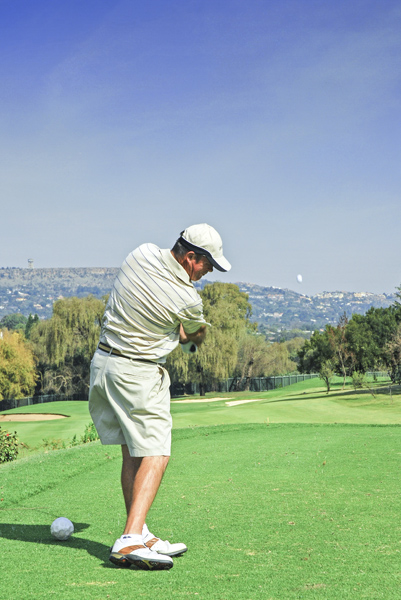
Technique

How to do it: You need to think of a scene you would like to capture, visualize it. You may want to capture the comings and goings at a coffee shop in your city. You may want to have someone with a red coat sitting outside, sipping coffee. You should then set up and frame your shot, then sit there until the scene unfolds. Someone with a yellow jacket may sit down, which might work too. So be flexible, but be patient, sooner or later the shot will unfold.

3. Abstract and creative blur

As I said earlier, shutter time is a bit like time travel. You can capture an infinitesimally small slice of a moment, and in other cases you can capture seconds, or even minutes. When the shutter is open, light is coming through your lens and falling onto the cameras sensor. If you allow this to happen for a long enough time, some part of your image will blur. Sometimes blur in an image is unwanted. This happens when your shutter time is too long, your camera moves unintentionally, and the image is ruined.

A close up image of a flower, shallow depth of field blurs the background, but the yellow stamens are in focus

A close-up image of a flower, shallow depth of field blurs the background, but the yellow stamens are in focus.

The kind of blur I am talking about here is intentional blur. This technique can be used to make slightly, or completely, abstract images, depending on the shutter time. The longer the shutter time, the more movement there is, and the more blur you will see. Blurring can be the result of your subject moving, you moving the camera, or both. If your subject is moving and the camera moves, the blur can be very dynamic. If your camera is on a tripod and the subject moves, this creates a sense of speed.

Technique

How to do it: Set your aperture to f/5.6 or higher (smaller opening). Attempt this in low light conditions, just before and just after sunset. Set your shutter time to 1/10th of a second or longer. Release the shutter and move the camera quickly from left to right. You can rotate the camera, move it up and down, or even just shake it in your hand while the shutter is open. In this technique, you will be moving the camera and the scene could have moving elements in it too (i.e. a car or a bus could be driving past, or people could be walking in the scene). The results will be random and unusual, but with practice, you can create some pretty compelling abstract images.

Camera swirl, this image was made by rotating the camera anti-clockwise while the shutter was open

Camera swirl, this image was made by rotating the camera anti-clockwise while the shutter was open

4. Low light exposures

The goal in low light exposures is to have the scene in focus, and only one part in the scene moving. This is particularly interesting at night when you get light trails from a vehicle driving through your scene. You can do this in the early evening or evening if it has become dark. These images are compelling because the light trails from the vehicle seem to hang magically in the air while the vehicle itself is invisible. Another great time to shoot longer exposures is during the blue hour; the 20 to 30 minutes of soft blue light that fills the sky after the sun has set. This is a great time to do longer exposures too as the sky will look blue and your subject (a city or a landscape scene) will be well lit.

Technique

How to do it: Set your camera up on your tripod. Select an aperture setting of f/8 to f/11. Set your shutter time to expose correctly for the scene. Depending on the light your shutter time could be anywhere from 1/10th of a second to three or four seconds. As it gets darker, your shutter time will need to increase. Set yourself up in a position where something will be moving – cars, boats or even people can work well for this. Take a few shots to see how it is all working and make any adjustments. The important technique here is timing. If you want to get a shot with the car lights streaming through your shot, time it so that you release the shutter as the car is in the best place in your scene, similar to the decisive moment.
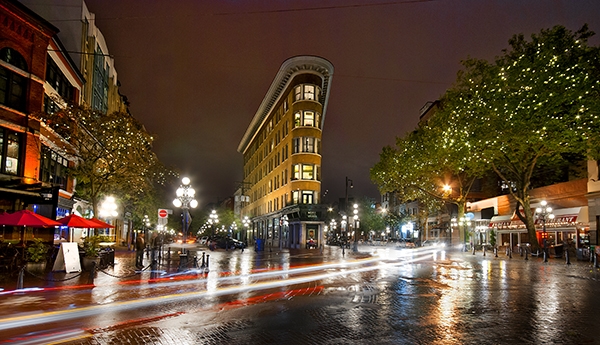
This scene works well because the light trails add some dynamic interest to the image

This scene works well because the light trails add some dynamic interest to the image

5. Long exposures

As the name suggests, these are longer shutter times. In some cases, they may be 20-30 seconds long, but for some really interesting images, you will want keep the shutter open for 15-20 minutes. Long exposures require the use of a 10 stop Neutral Density filter. This filter will block out the light sufficiently to allow you to open your shutter for long periods of time. The results can be amazing. You can use the ND filter in the day to make your shutter time longer. “Why would I want to do that?”, you might ask. You might have a scene with a windmill in it and you want to blur the movement of the windmill as it rotates. You might also want to create a seascape scene where the waves look silky and smooth. In these cases, an ND filter will be very useful.

Technique
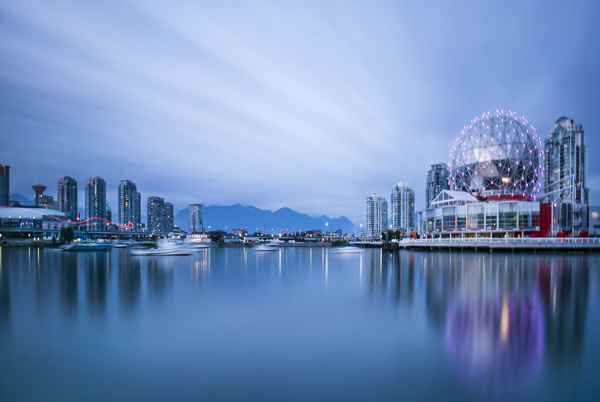
Long exp 2

ISO 100, f/11, just under 13 minute exposure.

How to do it: Set up your camera on a tripod. Set your aperture to anywhere between f/11 and f/16. In these images, you will want to have an exposure time of 15-30 seconds and longer. You will need a cable release to go beyond 30 seconds on your exposure. You want a lot of movement in the scene, whether it is light trails or clouds moving across the sky. The longer you have the shutter open, the more surreal the image will become.

If you have an ND filter, set up your shot first, use autofocus to get everything in focus, then switch your camera to manual focus. The reason is, once you put the ND filter on your lens, the scene will become very dark. If your camera is on autofocus, it may struggle to find a focal point. If that happens, your lens will “hunt” for something to focus on and you won’t be able to get the shot, or it may be out of focus. So, once you have focused your image, switch to manual focus and mount the ND filter onto your lens to make the shot. Be aware, long exposure photography can really eat up battery life, so carry spare batteries if you have them, especially on cold winter evenings!
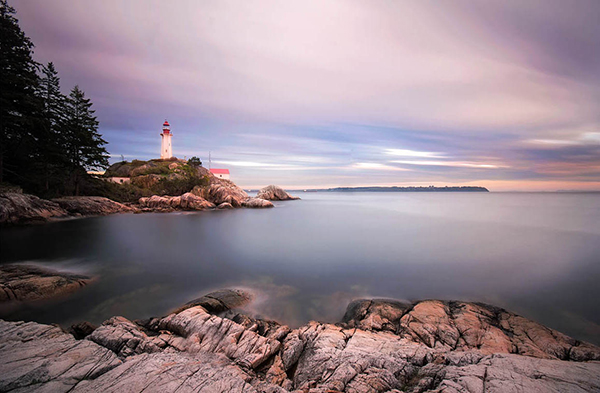
This image was exposed for 4 minutes, which softened the water and the clouds

This image was exposed for four minutes, which softened the water and the clouds

6. Panning

This technique, when done correctly, can produce amazing results, but it’s not easy. Panning is when you focus on a subject that is moving, and you move your camera in a horizontal plane with them. During that movement, you will release the shutter. Your exposure time will depend on the subject and the light, but in this technique you don’t want to freeze the action, you want to suggest movement. A longer shutter time is preferable, so you may be shooting at 1/30th or slower. To pan effectively, you will need to practice a few shots, here are some pointers.

Technique

How to do it: Firstly, stand with a wider stance than normal. When you pan with your subject, move your body from the hips up. Timing is key, release the shutter when you think the subject is in a good position in the frame. Follow through, don’t stop the movement when you release the shutter, keep moving with your subject (and at the same speed as the subject) until the shutter closes (think golf swing).
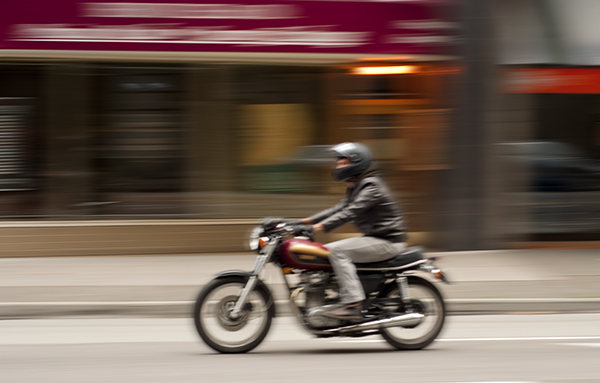
A panning shot creates a very unique sense of movement

A panning shot creates a very unique sense of movement.

The next step is to go out there and get these shots. I would recommend you make an effort to try at least 20 to 30 shots of each of these techniques. Play with the settings, see what works and what doesn’t. Let me know what you think and maybe even put some of the results in the comments, lets see what you get.

googletag.cmd.push(function() {
tablet_slots.push( googletag.defineSlot( “/1005424/_dPSv4_tab-all-article-bottom_(300×250)”, [300, 250], “pb-ad-78623” ).addService( googletag.pubads() ) ); } );

googletag.cmd.push(function() {
mobile_slots.push( googletag.defineSlot( “/1005424/_dPSv4_mob-all-article-bottom_(300×250)”, [300, 250], “pb-ad-78158” ).addService( googletag.pubads() ) ); } );

The post 6 Ways to Use Shutter Speed Creatively by Barry J Brady appeared first on Digital Photography School.


Digital Photography School

 
Comments Off on 6 Ways to Use Shutter Speed Creatively

Posted in Photography


Start a New Great Year – How To Develop Ideas More Creatively

05 Jan

As a photographer, coming up with ideas and visualizing what you imagined in an image, is an essential progress. Coming up with those (hopefully) great ideas isn’t an easy task though because of the sheer flood of pictures that everyone sees everyday. Here are my strategies for coming up with ideas that help you stand out from the masses. According Continue Reading

The post Start a New Great Year – How To Develop Ideas More Creatively appeared first on Photodoto.


Photodoto

 
Comments Off on Start a New Great Year – How To Develop Ideas More Creatively

Posted in Photography


Tips for Using Shutter Speed Creatively

23 Nov

Shutter speed is one of those things that is initially a problem to be solved, but once you do that it becomes a tool that allows you to take better and more creative photos.

First you should understand how shutter speed works and how to change it. You will need to make sure it is fast enough that your pictures turn out crisp. But once you’ve mastered those things, you can start using shutter speed to your advantage. You can slow it down to create a sense of movement, or speed it up to stop the action.

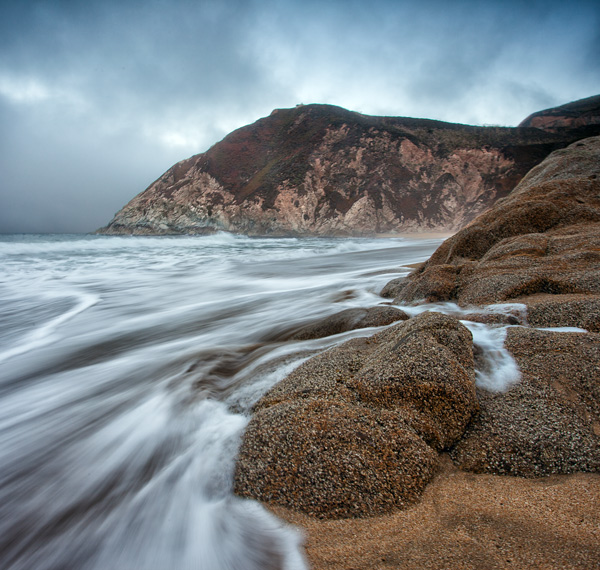
GreyWhale

Grey Whale Cove: 1/4 second at f/16, ISO 100

This article will show you the basics of what you need to know regarding shutter speed and get you started with some creative effects using different shutter speeds.

What is Shutter Speed?

Shutter speed is simply the amount of time the shutter inside the camera is open, allowing light onto the digital sensor to expose the picture. The longer you hold the shutter open, the more light is let in to the camera to expose the picture.

But holding the shutter open longer than a tiny fraction of a second has consequences. The camera must be held completely still during the exposure or the picture will be blurry. Without using a tripod or some other means of support, you cannot hold the camera still for longer than about 1/60th of a second and blur will start to creep in to the picture (more on this in a second).

Shutter speed is recorded in fractions of a second. So a shutter speed that says 1/60 (it may just show 60) means that when you take the picture the camera will open the shutter for 1/60th of a second.  Most cameras have shutter speed ranges between 1/4000 of a second (on the short side) and about 30 seconds (on the long side). In addition, many cameras have a Bulb mode that allows you to hold the shutter open as long as you wish.

Make Sure Your Shutter Speed is Fast Enough

One of the first issues you will confront as a photographer is making sure your shutter speed is fast enough. If you have a tripod, this will not matter as much and you can leave the shutter open a long time (sometimes even several minutes). But assuming you are hand-holding your camera, a long shutter speed will introduce camera shake and make your image look blurry.

But how fast is fast enough? There is something called the Reciprocal Rule designed to help you with that answer. This rule states that your shutter speed should be at least the reciprocal of your focal length. That sounds complicated, but don’t worry it is easy to figure out. You just put a one over your focal length and that is your minimum shutter speed.  So, for example, if your focal length is 60mm, just make sure your shutter speed is 1/60th of a second or faster. If you are zoomed in and your focal length is 200mm, make sure your shutter speed is 1/200 of a second or faster (remember to consider lens factor as well if you have an APS-C sensor) Any slower than that and it is time to break out the tripod (or raise open your aperture and raise the ISO).

Beam

1/200th at f/2.8, ISO 3200

Changing Shutter Speeds

The next question you will confront is how to change your shutter speed. The actual physical changing of the shutter speed is pretty simple, it’s typically done via a dial on top of your camera. The more important question is how are you to offset the change to shutter speed, assuming you are in manual mode (if you are in Aperture priority or Program mode the camera will make the change for you).

If you use a faster shutter speed, the shutter is not open as long so the camera gathers less light. So, without something else changing, your picture will be underexposed by using a shorter shutter speed. To make a proper exposure, additional light has to come from somewhere. You can add that extra light to offset the use of a faster shutter speed in one of two ways:

  1. Open up the aperture: The aperture is the hole your the lens that allows light to pass into the camera. A larger aperture allows more light into the camera. So if you open up your aperture by one stop, you are letting in twice as much light during the same period of time.  But be careful, a larger aperture also creates a shallower depth of field, which you might not want.
  2. Increase the ISO: The ISO is the rating assigned to how sensitive your digital sensor is to light. It is adjustable, and the higher the number, the more sensitive you make your camera’s digital sensor to light. But this comes at a cost, digital noise, which increases as you increase the ISO.

There are separate controls on your camera to make these changes.  Use either of these methods to add more light to your exposure whenever you are shortening your shutter speed.

Using Shutter Speed Creatively

Now that you understand shutter speed a little bit, you will want to put it to use creatively. There are several ways to do this, and we will work through some of them from the faster shutter speeds to the slowest.

Stopping the Action

In times of high action or drama, you can stop the motion by using a very fast shutter speed.

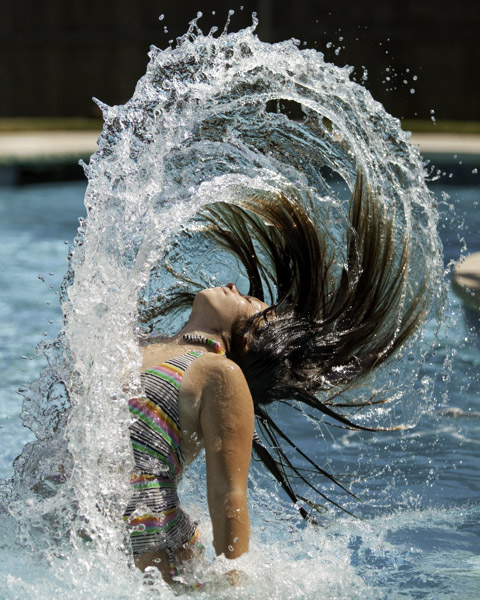
To do this, you will want your shutter speed to be 1/250 of a second or faster. At times, like with the picture below of the water droplets being flipped through the air, you may want the shutter speed to be significantly faster. This particular picture was shot at 1/8000th of a second.

Water

1/8000th at f/2.8, ISO 250

Accomplishing shutter speeds this fast, even on bright sunny days, will require offsetting moves. For example, you will need to open up the aperture to its widest setting. Doing so will result in a shallow depth of field, but in this sort of picture that usually won’t matter. You will also probably need to increase the ISO (a little on bright days, a lot on cloudy days or indoors).

Another key for these type of shots where you are stopping the action, is to anticipate the shot. With the speeds at which modern cameras shoot, you may often want to just hold the shutter button down and blast away, this rarely works though. The decisive moment is usually only captured by anticipation and triggering the shutter at precisely the right moment.

Panning

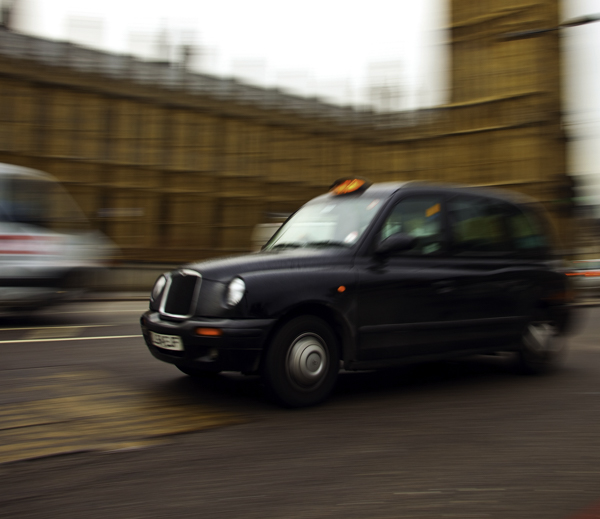
Another way to use shutter speed creatively in times of action is to pan the subject. Panning is where you move the camera during the exposure to follow the subject. Done properly (or when you get lucky) the subject is relatively sharp, while the background is blurred and conveys a sense of motion.

LondonCabPan

1/15th at f/7.1, ISO 50

Accomplishing this is usually best at slower shutter speeds between 1/8 and 1/30 of a second. Being able to slow down the shutter speed is typically welcome news, as it will mean you do not have to crank up your ISO, or make other offsetting moves. Getting a good result will frequently require at least a few attempts, while you gauge the speed, and other settings.

If possible, get your exposure set up before you attempt to pan. That way you are only thinking about the panning during the shot, as opposed to worrying about all your other settings.

Creating a Sense of Motion

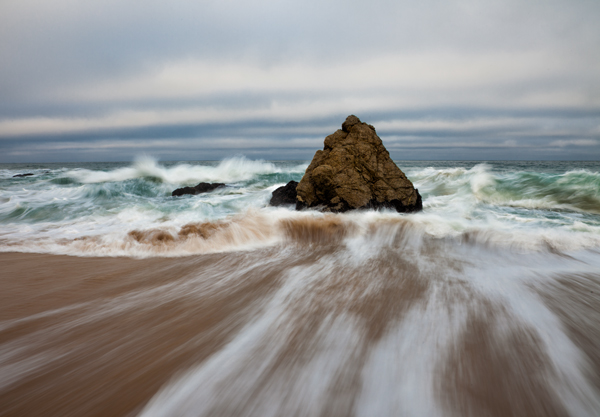
Still another creative use of shutter speed is slowing it down to create a sense of motion. This is accomplished when the subject is moving slightly through the frame during the exposure. This idea is for the subject to be identifiable, but slightly blurred.

GreyWhaleRock

1/4 second at f/16, ISO 50

Shutter speeds for this type of shot are between 1/4 and 1/10th of a second. That is virtually always too slow for you to hand-hold your camera, so you will probably need to break out the tripod for this type of shot.

Long Exposures

The final creative use of shutter speed we will cover here is a long exposure. This is where you hold the shutter open for a long time and allow certain parts of your picture to move through the frame. You will always need a tripod for this technique.

DavenportRock

20 seconds at f/8, ISO 400

Long exposure shutter speeds are between 10 and 30 seconds. Most cameras offer you the ability to go even longer by using Bulb mode, where the shutter will stay open as long as you hold the shutter button down. A remote shutter release, which is always a good idea when you are shooting from a tripod, is almost a necessity for this type of shot.

Long exposure is a great technique whenever there is moving water involved, such as coastal scenes, rivers, and waterfalls. It is also great for streaking lights in night photography.

Whereas most of the time, your challenge with shutter speed is to get enough light into the camera; in this context getting the shutter speed you want usually involves the opposite problem. The challenge is to limit the amount of light entering the camera so that you can leave the shutter open a long time without overexposing the image. To do that, first close down the aperture to its smallest setting and use the lowest ISO setting on your camera. The lowest ISO setting is usually 100, but some cameras contain an expandable ISO range that will allow you reduce the ISO further, so be sure to check your camera’s menu for that.

But if those moves don’t restrict the light enough, you will need to use a neutral density filter. These are filters that restrict the amount of light coming into your camera. They come in different strengths, with typical values between two and 10 stops of light. Get one of these (or a few different strengths) and keep it in your bag if you think you will have any long exposures in your future.

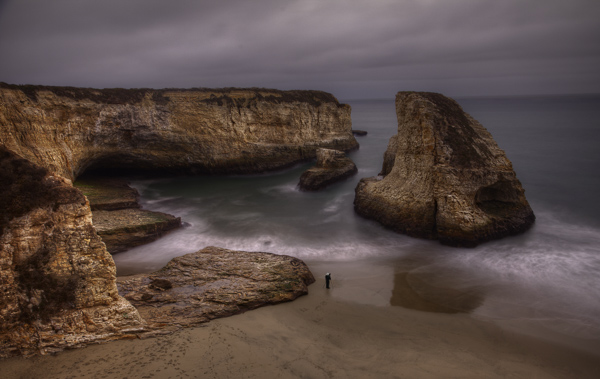
Guadalupe

15 seconds at f/8, ISO 500

Conclusion

Once you have mastered the basics of shutter speed, it is a great tool for adding creativity to your photography. It is perhaps the most effective way to make our photos more interesting. So lock down the basics, and then give some of these techniques a try.

The post Tips for Using Shutter Speed Creatively by Jim Hamel appeared first on Digital Photography School.


Digital Photography School

 
Comments Off on Tips for Using Shutter Speed Creatively

Posted in Photography


Creatively Recolor Photos with Color Tables in Photoshop

04 Aug

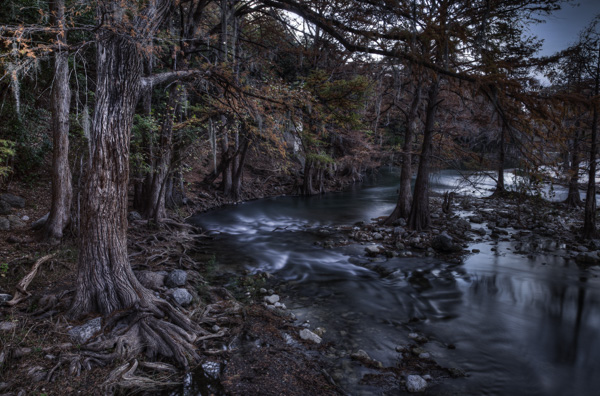
Photoshop-color-tables-opener

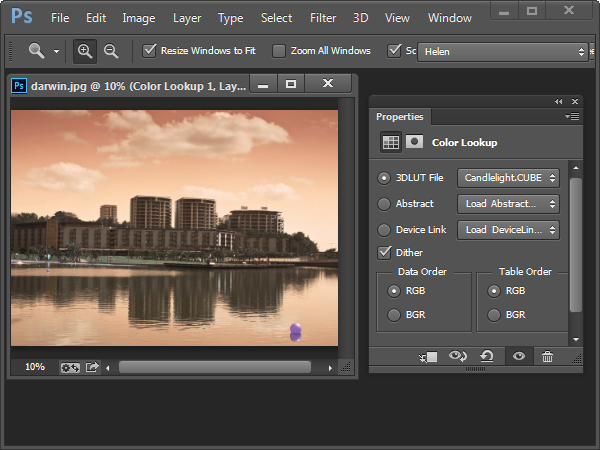
If you’re looking to use some creative enhancements on your photos in Photoshop CS6 or CC then the new Color Lookup adjustment is one to consider. The Color Lookup adjustment is used to remap the colors in an image to a set of colors that comes pre-configured and stored inside a color table file. Color Tables are used primarily with film but they are also useful for applying creative coloring to photos.

You don’t need to know anything about color tables to use this feature, as is a default set of color tables in Photoshop that you can use. Better still, if you like the effects and you subscribe to the Creative Cloud you can grab more color tables from the Adobe Speed Grade application, store them in the Photoshop PresetDLUTs folder, and use them inside Photoshop.

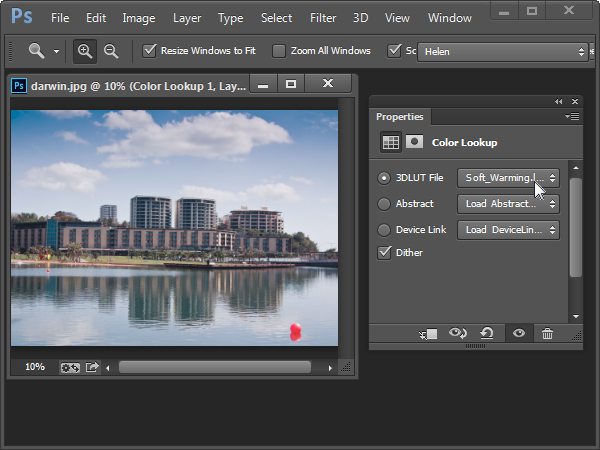
To see the Color Lookup adjustment at work open a photo and choose Layer > New Adjustment Layer > Color Lookup. This opens the Color Lookup dialog where you will find three settings; 3DLUT File, Abstract and Device Link. Select one of the options from one of the dropdown lists to see it at work. When you do this, the colors in the photo will be remapped.

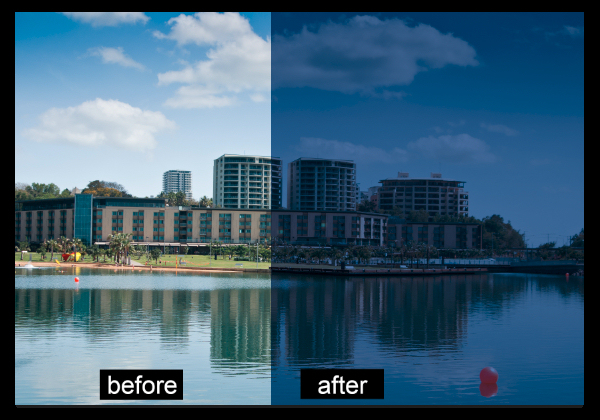
For example the Soft_Warming.Look in the 3DLUT collection warms up the image.

Photoshop-color-tables-img1

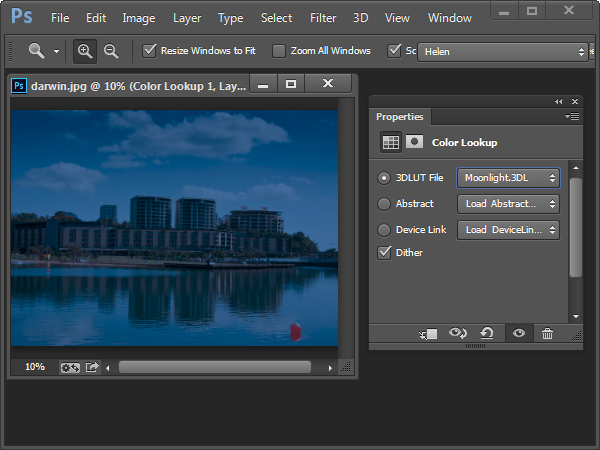
The Moonlight.3DL option gives the image the look of being shot on a moonlit night.

Photoshop-color-tables-img2

You can experiment to see which of the options you like.

Some of the options open up additional Data Order and Table Order settings which let you create different effects. The Device Link collection on a Mac includes some additional options which are not available on a PC.

Photoshop-color-tables-img3

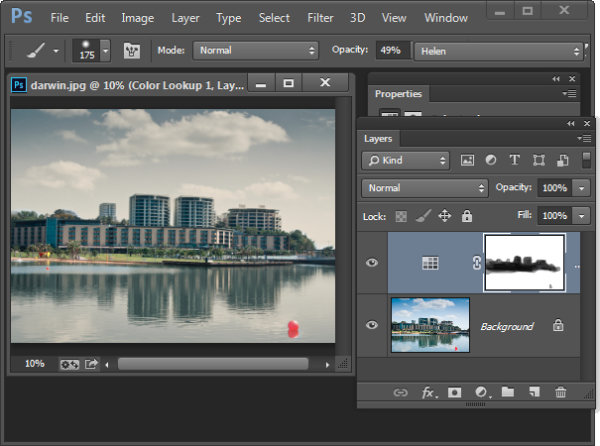
Like any other Adjustment Layer the Color Lookup option has a mask you can use to mask out the effect on selected areas of the image. You do this by selecting the mask and then paint on the image with black or grey to remove the effect from that area of the image. Paint with white to bring it back.

Photoshop-color-tables-img4

You can also use a blend mode to blend the Color Lookup adjustment into the image layer below and reduce its opacity if desired.

Here is a video tutorial for the Color Table Adjustment Layer. It includes details of how to find and use the .Look files shipped with Speed Grade in Photoshop:

If you haven’t tried this technique before give it a go and show us what you come up with. For more Photoshop tutorials check these:

  • Ten Go-to Editing Tips for Using Photoshop
  • 5 Photoshop Tools to Take Your Images from Good to Great
  • 3 Easy Steps Using Photoshop to Making your Images POP
  • 5 Easy Photoshop Tips for Beginners

The post Creatively Recolor Photos with Color Tables in Photoshop by Helen Bradley appeared first on Digital Photography School.


Digital Photography School

 
Comments Off on Creatively Recolor Photos with Color Tables in Photoshop

Posted in Photography


Get Intimate With Depth of Field: Using Depth of Field Creatively

28 Jul

Controlling your camera’s exposure is not only a fundamental topic to achieve good photographs, but it also becomes essential knowledge to be able to explore the creative possibilities of photography. You might have heard of aperture, shutter speed and ISO. These are the camera controls that directly affect exposure and, finally, how the picture turns out. You can use many Continue Reading

The post Get Intimate With Depth of Field: Using Depth of Field Creatively appeared first on Photodoto.


Photodoto

 
Comments Off on Get Intimate With Depth of Field: Using Depth of Field Creatively

Posted in Photography


Subway Cars to Churches: 15 Creatively Converted Offices

22 Jul

[ By Steph in Architecture & Offices & Commercial. ]

Converted Offices Soccer 1

Anything from a graffiti-covered subway car to a Route 66 gas station can become the setting for creative modern offices. Architects and intrepid homeowners have converted junked buses into home offices, $ 20 construction trailers into backyard studios and subterranean garages into company headquarters.

Slice of an Old Bus Turned Home Office
Converted offices School Bus 1

Converted Offices School Bus 2

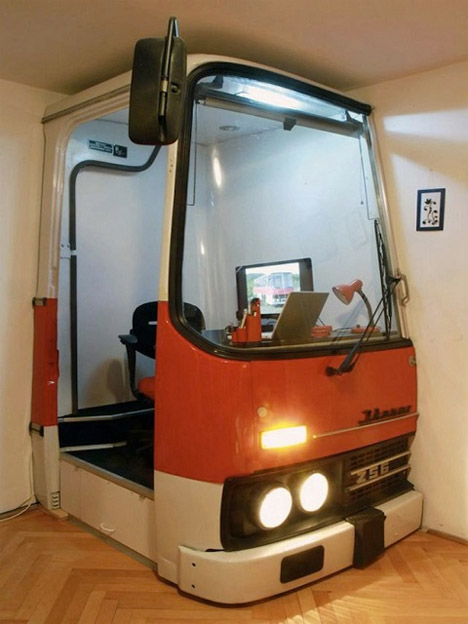
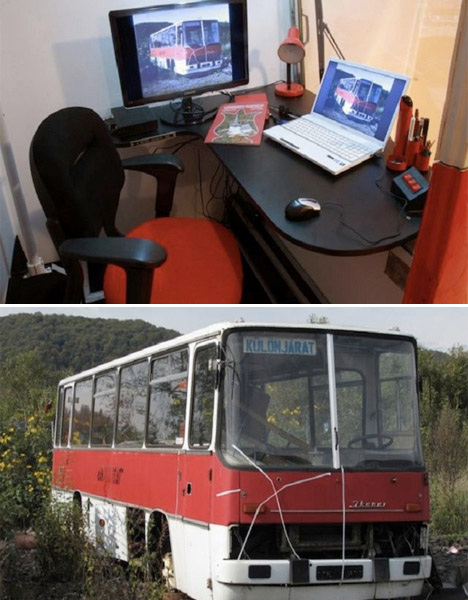
One creative thinker in Hungary saw something most of us wouldn’t when he gazed at an old bus sitting in a junkyard: a corner office. That is, a home office in the corner of his bedroom, made from a sawed-off section of the bus. A new paint job and working lights give the bus a fun update.

Former Steel Plant to Light-Filled Work Space
Converted Offices Steel Plant 1

Converted Offices Steel Plant 2

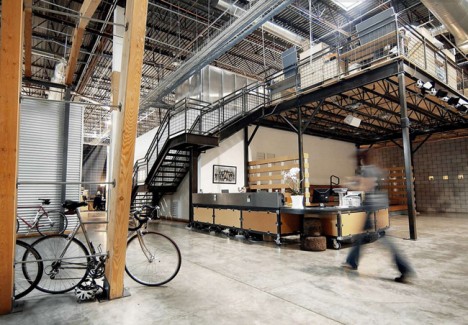
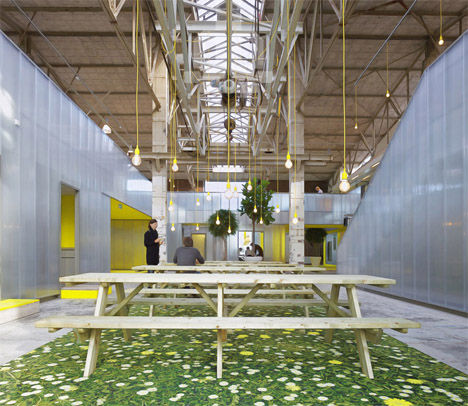
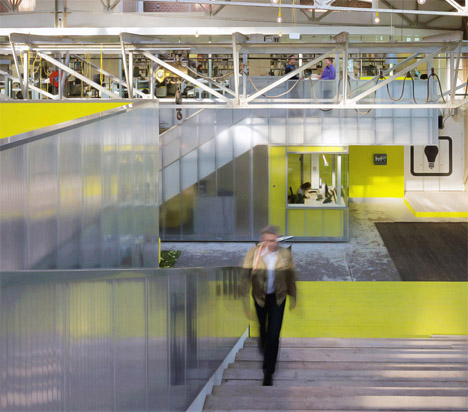
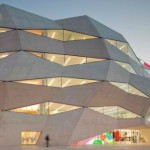
The existing shell of a former steel plant has become a wide-open industrial setting for the offices of engineering firm IMd, with sections in the two-story structure linked by foot bridges. Translucent volumes set within the large space provide quiet and private places to work and meet without sacrificing the spacious feel.

Underground Garage to Architecture Studio
Converted Offices Garage 1

Converted Offices Garage 2

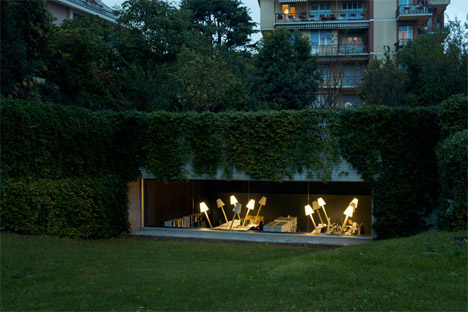
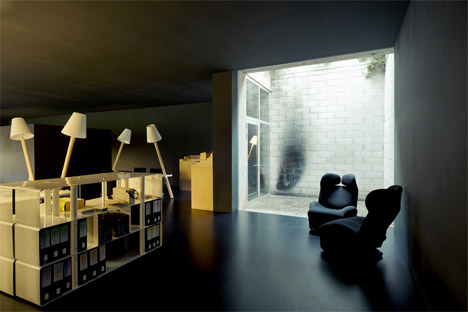
Half-hidden by an overgrowth of ivy, all that’s visible of this architecture office from ground level are a few desks and some unusual lighting. Architect Carlo Bagliani remained an underground car garage as an inhabitable workspace filled with industrial accents. A long glass wall facing the lawn prevents the subterranean space from feeling dark and cramped.

Low Budget House-to-Office Conversion
Converted Offices Low Budget House

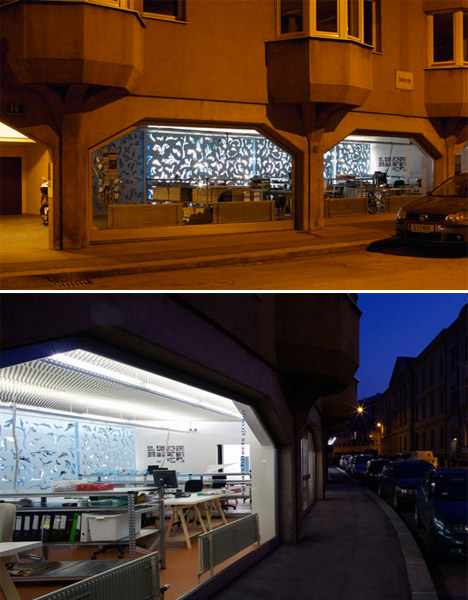
Austrian architecture firm Bad Architects turned a house in Innsbruck into their own office on a tight budget using sliding-wall systems made of foam to divide the interior spaces. The foam panels feature cut-out patterns that let light pass from one space into another, and give the office visual appeal from the street.

Graffiti-Covered Subway Cars to Rooftop Offices
Converted Offices Subway Cars 1

Converted Offices Subway Cars 2

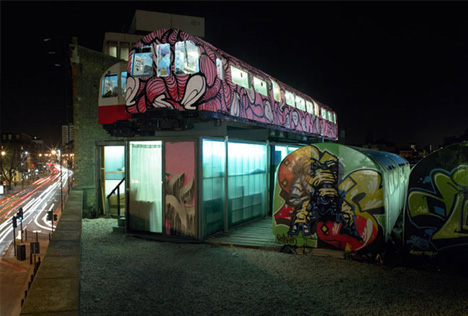
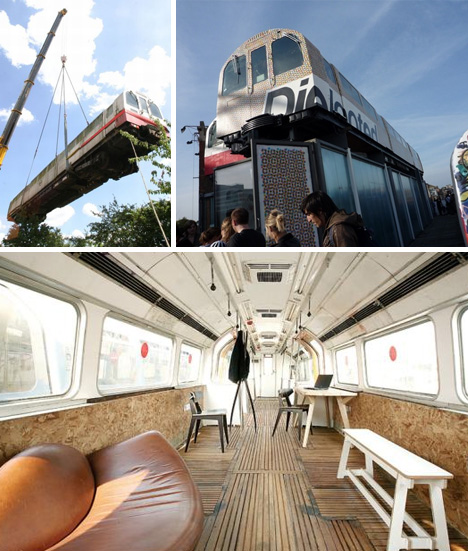
Graffiti-covered subway cars (or ‘tube carriages’ as they’re known in the UK) were hauled onto a rooftop and stacked together to create offices for international arts charity Village Underground. The spaces are leased to creative small businesses and art-related start-ups, who’d naturally feel right at home in a reclaimed urban space decorated with vivid street art.

Next Page – Click Below to Read More:
Subway Cars To Churches 15 Creatively Converted Offices

Share on Facebook


[ By Steph in Architecture & Offices & Commercial. ]

[ WebUrbanist | Archives | Galleries | Privacy | TOS ]


WebUrbanist

 
Comments Off on Subway Cars to Churches: 15 Creatively Converted Offices

Posted in Creativity