There are ways to use selective focus, or shallow depth of field, to completely control how you look at an image. Selective focus is using a large aperture, like f/4.5 or wider, to show only a small part of your image in focus. You can control where you want your viewer to look in your image by using this technique.
Eliminate Distracting Elements
If you have a potentially busy scene or environment, you can use selective focus to calm things down a bit and get your viewer to look where you want.
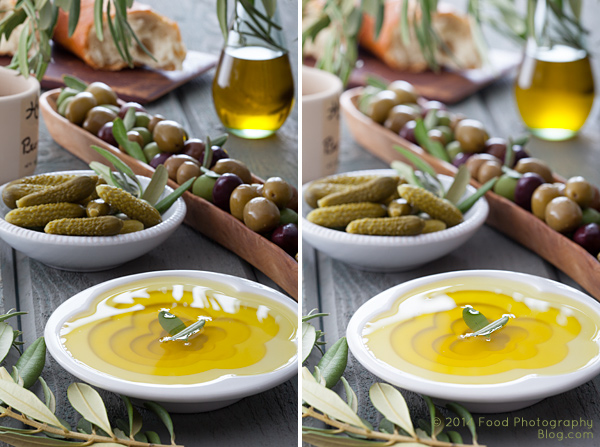
The left image was shot at f/16 while the right image was shot at f/5.6
When you compare the two images above pay attention to what you are looking at first, and how your eye moves around the images. There’s a lot going on in the image on the left. You really don’t know where to look at first. In the image on the right your eye goes right to the olive oil in the front, which is exactly where I wanted you to look. I wanted to make sure you didn’t get distracted by the text on the jar on the left side, so I focused on the garnish in the olive oil and blurred everything else out. I wanted the first read to be the olive oil, then all other items become secondary. Your eyes naturally look at what is in focus in an image.
Which Element is the Hero?
You can use focus in some shots to clearly show which element the image is about – this element is your hero element. In food photography we call this the hero food.
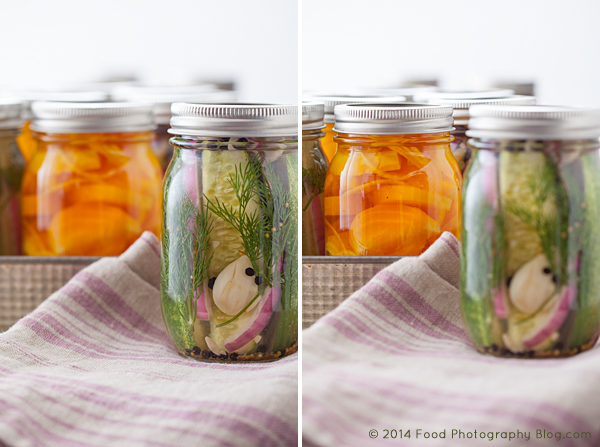
In each shot the focus is shifted to change which jar of pickles is the hero jar, the one I want you to look at.
Here are some pickles that I made. You can use selective focus to tell the viewer where they should be looking. If this image was for a recipe of dill pickles, then you would use the image on the left. If this image was for a recipe on golden pickled beets, then you’d use the image on the right.
Pick Your Focus Point
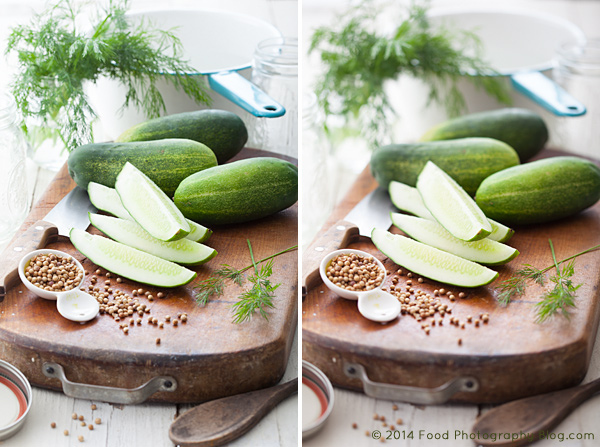
The image on the left was shot at f/8 while the image on the right was shot at f/4.5
I focused on the dill pickle laying on top of the cut pickles. In the left image you really can’t tell where my focus point is so your eye goes all over the place. In the image on the right, it’s a little more obvious. My hero food is the cut dill pickles.
All the images including pickles were styled by my good friend and prop stylist, Amy Paliwoda. We work on a lot of jobs together. Amy is always talking about using props to tell your story. It’s my job as the photographer to make sure I use the proper aperture to have the props help with the story, not cause distractions. With everything in focus, a simple prop can take away from your story. Once you pick your focus, take several shots at different apertures to see which one works the best to tell your story.
When One Aperture Isn’t Enough
Now I’m going to show you a technique I use a lot. I take two images at different apertures, with different depth of fields and then I composite them together in Photoshop by using layer masks. I use this technique when I want the background to be more out of focus, yet keep the food or product in focus.
I have to mention that I ALWAYS shoot with my camera on a tripod. This type of compositing would be very difficult with files that were handheld.
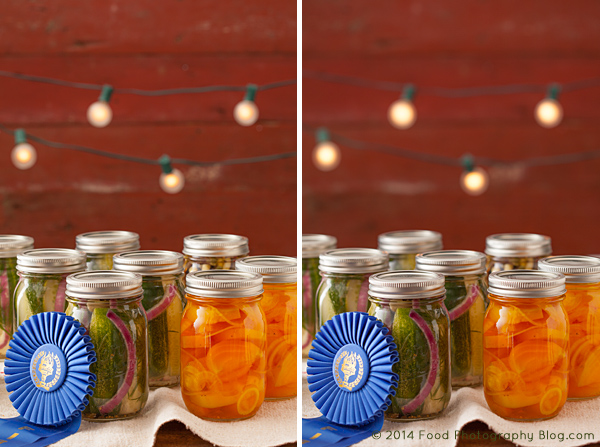
The image on the left was shot at f/8 and the image on the right was shot at f/4.5
For this image I really like how the jars look at f/8, but I prefer the background shot at f/4.5, so I’m going to put the two together in Photoshop by creating a layer mask and put the best background, on top of the preferred foreground.
Making a Layer Mask
There are many ways to do the same thing in Photoshop. My favorite way to do a composite of multiple images is to use layer masks.
In the final composite I will be putting the background of one image onto another image, and also making a duplicate of one light bulb and pasting it onto the background.
I first open both files that are to be put together in Photoshop.
Next, I copy the image with the desired background and then paste the entire image into the file with the jars that I like. Now I have one file with two layers.
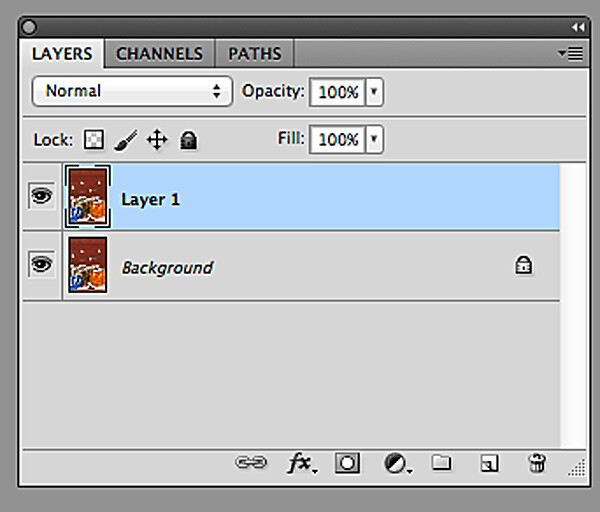
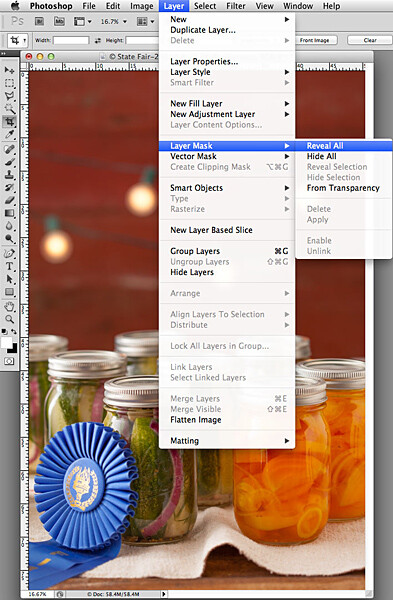
Now I need to make the top layer into a layer mask:
- Go to the top menu
- Click on “Layer”
- Scroll down to “Layer Mask”
- Scroll over to “Reveal All”
Now, look in your layers palette. Your image should look similar to what you see below – the two files, with the top one having a white box next to the image. That is the layer mask.
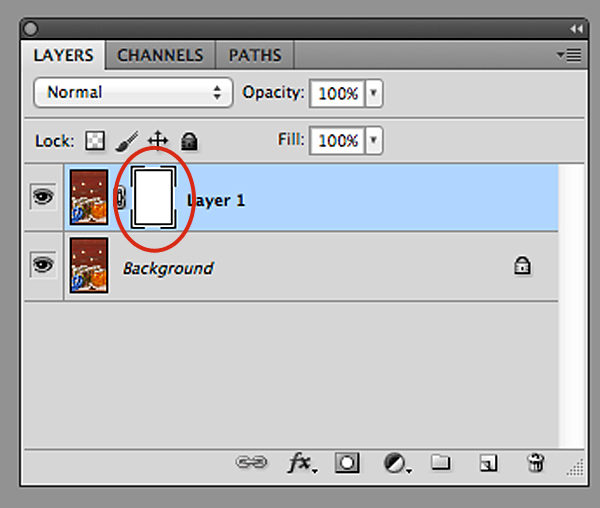
You can see the new layer masked circled in red.
To start working inside the layer mask, you have to use the brush tool. Then make sure your color palette is set to black on top of white for masking through the image. If you mask too far in one area, you can correct it by reversing the color palette to white on top of black and then go back over the area.
In this image I am using a soft edge brush (brush set to a hardness of “0″) for masking through the foreground of the top layer so that only the red background with the lights are left. The image below is how my layer looks mask work completed.
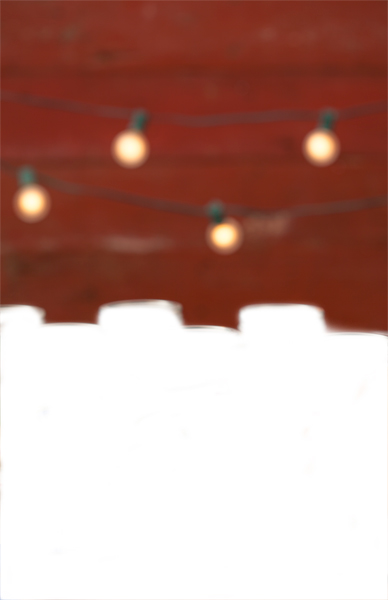
This only took me a few minutes to create in Photoshop.
Now for the final composite below. I also added some text, then copied and pasted an additional light bulb in Photoshop to balance things out in the background.
The additional light bulb was also turned into a layer mask so that I could blend the edges of the image I pasted on top of the file.
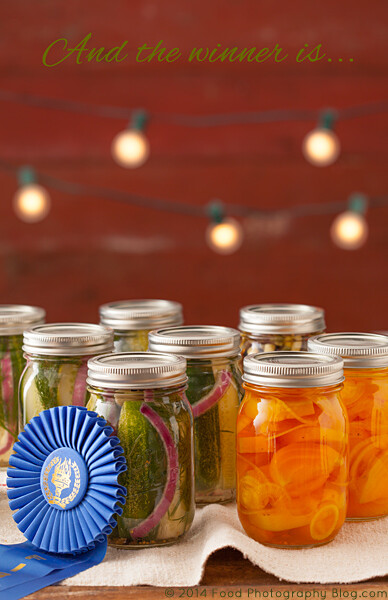
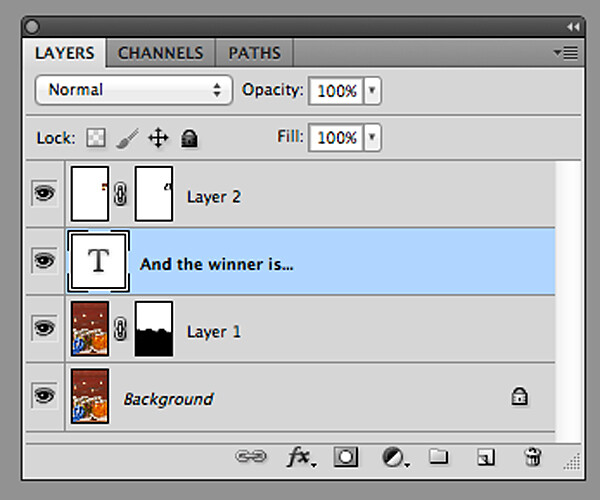
Here is what all the layers look like. Layer “2″ is the extra light bulb. If this was a file with a lot of layers, I would name each layer so that I knew what they were. In this case it’s easy to figure out, so I didn’t do that. You can see in the mask of layer “1″ that the bottom half of the frame is black. This is the part of the image that I masked.
So, next time when shooting on a tripod, experiment a little and take your shot with multiple apertures to bracket your depth of field, and maybe you’d like to composite a couple of files together.
The post Using Focus Creatively with Food Photography by Christina Peters appeared first on Digital Photography School.

Digital Photography School


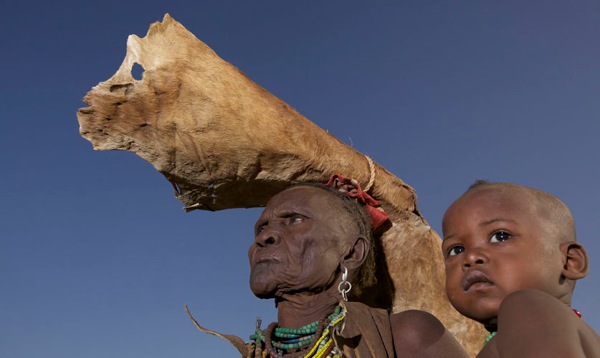
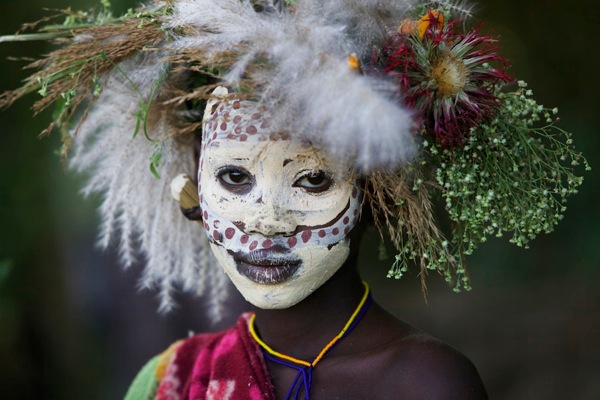 The eyes are the windows to the soul. If you are going to place your subject in the center, get close, fill the frame and deeply connect with your subject.

You must be logged in to post a comment.