RSS
 

Posts Tagged ‘Clean’

How to Clean Your Camera Sensor and Lenses

14 Sep

It’s important to take good care of your camera gear and an occasional cleaning is in order. You want to make sure you are using the right tools for the job and proceed gently.

In this first video see how to clean your lens elements to make sure you have nice sharp images:

In this second one see some techniques for remove dust from inside your camera and on the sensor.

For more information if you do want to use the kits to clean your sensor, read: How to Clean Your Camera Sensor in 3 Easy Steps

googletag.cmd.push(function() {
tablet_slots.push( googletag.defineSlot( “/1005424/_dPSv4_tab-all-article-bottom_(300×250)”, [300, 250], “pb-ad-78623” ).addService( googletag.pubads() ) ); } );

googletag.cmd.push(function() {
mobile_slots.push( googletag.defineSlot( “/1005424/_dPSv4_mob-all-article-bottom_(300×250)”, [300, 250], “pb-ad-78158” ).addService( googletag.pubads() ) ); } );

The post How to Clean Your Camera Sensor and Lenses by Darlene Hildebrandt appeared first on Digital Photography School.


Digital Photography School

 
Comments Off on How to Clean Your Camera Sensor and Lenses

Posted in Photography


Sans Ads: See Tokyo Scrubbed Clean of Signs & Advertisements

23 Mar

[ By WebUrbanist in Design & Graphics & Branding. ]

tokyo ad free art

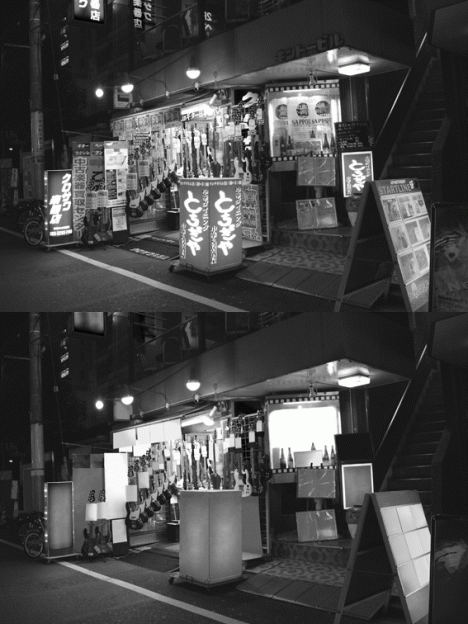
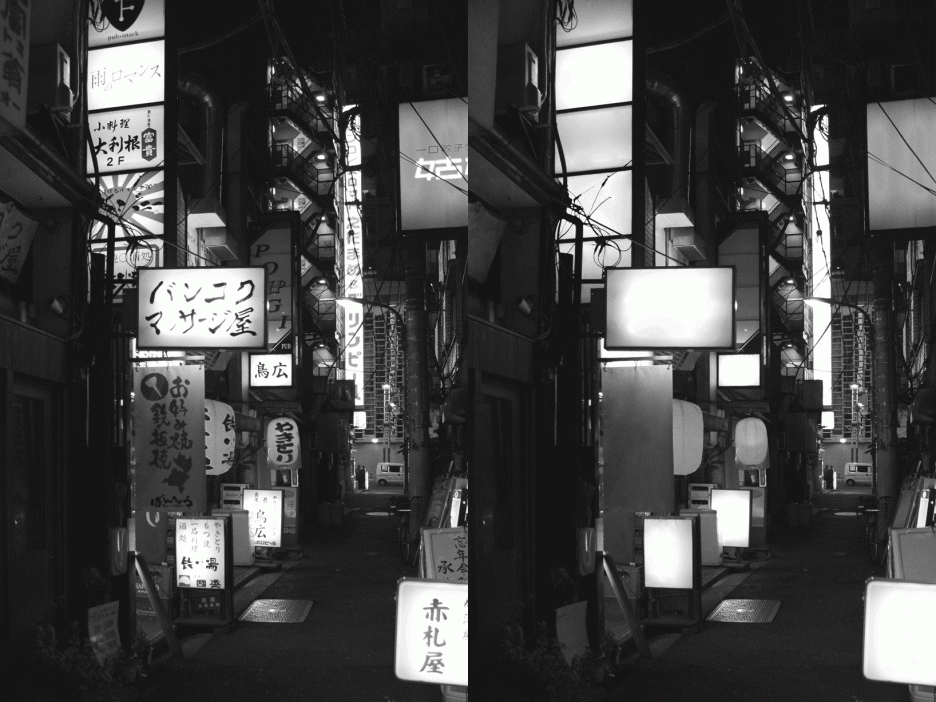
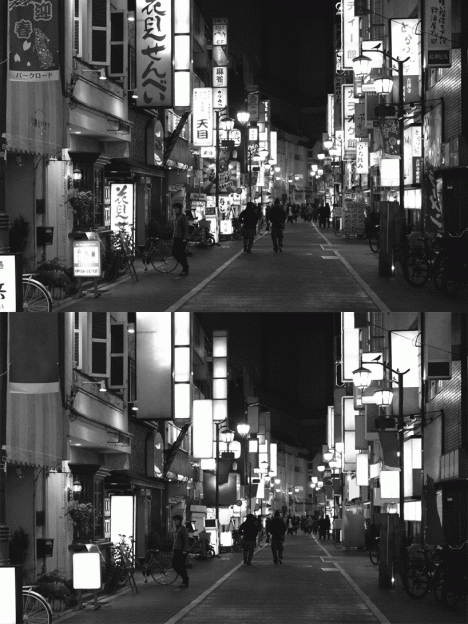
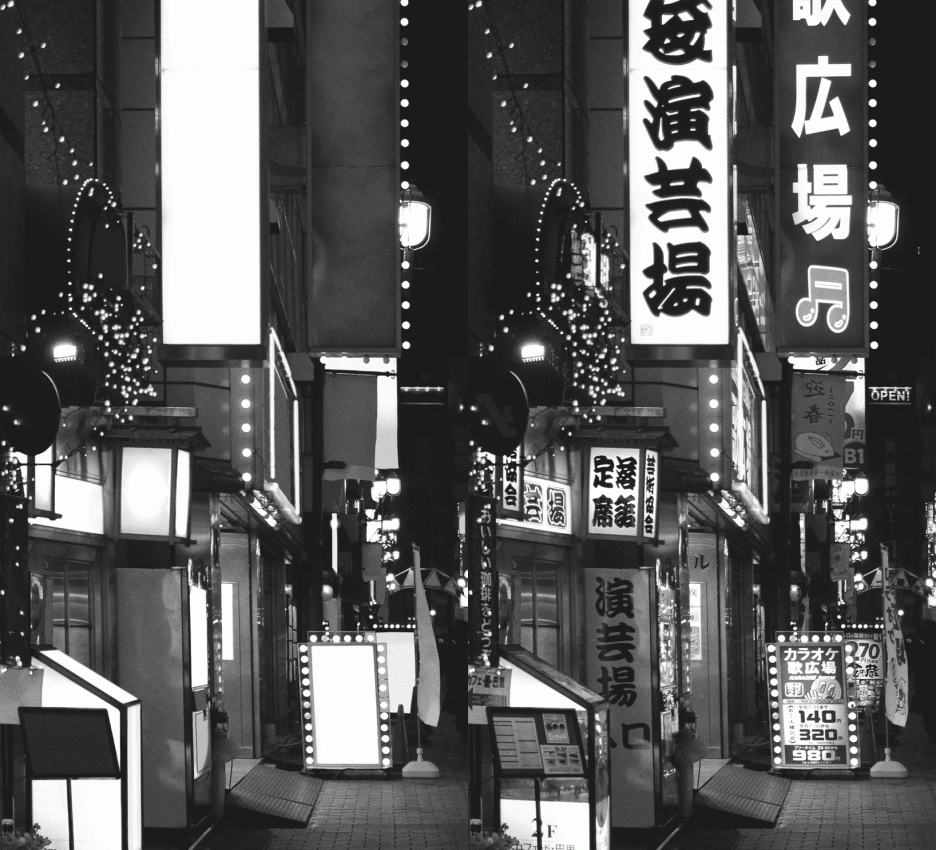
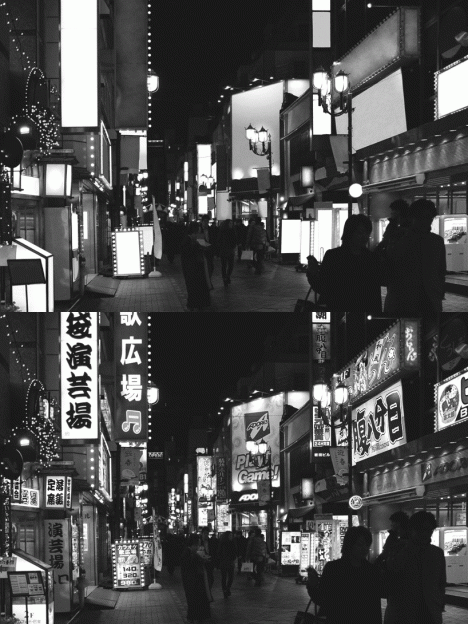
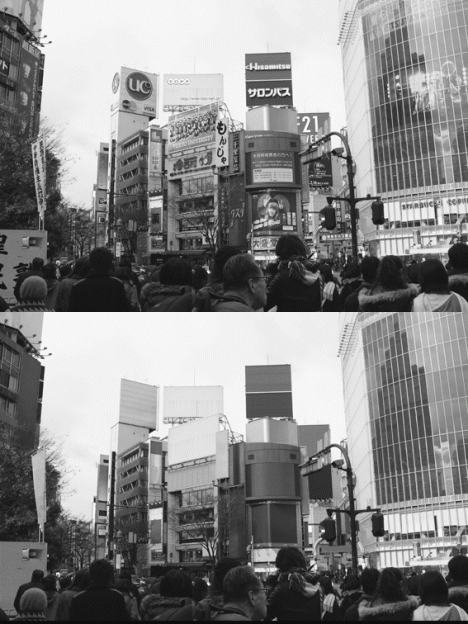
Tokyo seems inseparable from the banners, billboards, logos, slogans and other flashy neon alerts, except when seen through the lens of this French graphic designer in a startling black-and-white image series turned into a alternating GIFs.

tokyo no ads new

tokyo vendor sans ads

tokyo without advertisements signs

Tokyo No Ads by Nicolas Damiens illustrates just how shocking the contrast is, particularly when switching back and forth between before and after versions. Each of the seven scenes here was meticulously edited with attention to every last pixel of graphics.

tokyo with blank billboards

tokyo street no neon

tokyo scrubbed white clean

To outsiders, Japan’s capital is nearly synonymous with signage saturation, so stripping them away changes the character of the place dramatically. Promoting everything from TV shows and movies to local shops and businesses, it is almost impossible to find a place in the city not showered in advertising. Perhaps the biggest surprise: the landscape almost looks more alien without its characteristic adverts.

Share on Facebook


[ By WebUrbanist in Design & Graphics & Branding. ]

[ WebUrbanist | Archives | Galleries | Privacy | TOS ]


WebUrbanist

 
Comments Off on Sans Ads: See Tokyo Scrubbed Clean of Signs & Advertisements

Posted in Creativity


*Almost* Spring Clean Up: Get Power and Organization with This Bag Divider

09 Feb

Extra photos for bloggers: 1, 2, 3

Your camera bag is a grab bag of lenses, batteries, candy… and sometimes even a camera or two.

Then take charge (literally) of that bundle of goodies with the Super Charged Bag Divider.

The Super Charged Bag Divider attaches to the inside of any camera bag to create an organized space for all that gear with a bonus hidden backup battery.

Keep your cameras, phone, accessories, and more charged up while also keeping them snugly packed in your bag… and away from that sticky candy!

Divide and conquer with the Super Charged Bag Divider
$ 35 at the Photojojo Shop


© Britta for Photojojo, 2015. |
Permalink |
No comment |
Add to
del.icio.us

Post tags:


Photojojo

 
Comments Off on *Almost* Spring Clean Up: Get Power and Organization with This Bag Divider

Posted in Equipment


How to Clean Your Camera Sensor in 3 Easy Steps

04 Sep

There is really nothing more frustrating for photographers than a camera sensor that is full of dust and specks. Dust on the sensor happens, it’s just a fact of digital photographic life. If you’re an outdoor photographer with a zoom lens, or one who changes lenses in the field, dust and particles will find a way onto your sensor on an almost regular basis. But even studio photographers experience the distress of a dirty sensor.
_2DS3368Wjpg

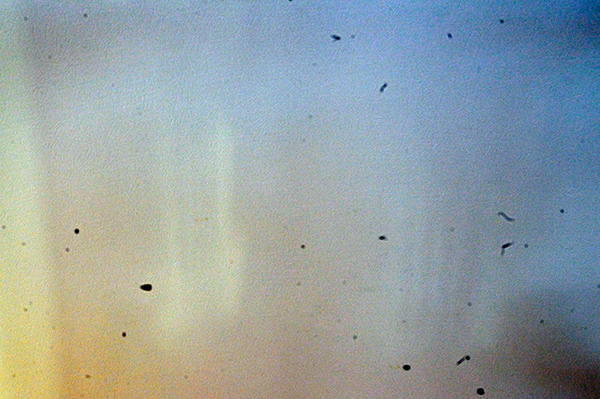
The world’s dirtiest camera sensor. Yuck.

A few weeks ago I was on a mountain photo tour, and was constantly changing lenses in the windy and dusty alpine weather. This is a photo taken to show you my sensor dust. All those black specks are fragments of airborne stuff that either gets sucked into your sensor when you use a zoom lens, or when you change your lens outdoors. The image above is the result.

There’s not too much you can do about it if you’re out on a shoot, other than know that there will be many hours spent on your computer editing out those miserable spots from your otherwise beautiful photos. However, you needn’t stress once you get back to your home base, where you can easily take care of cleaning the sensor and removing the smudges in three easy steps.

Is Your Sensor Dirty?

Check to make sure your sensor needs cleaning. It’s quite possible that it does, but you may not know it. If you shoot wide open, or at larger apertures (smaller f-stop number, such as f/2.8) you may not really see any sensor gunk on your images unless you view them at 100% on your monitor. But one day you’ll want, or need, to set your aperture to f/8, or f/16; then sensor dust will become visible, almost as if from nowhere, to torment you, frame by frame.

To see if you have sensor dust right now, so you won’t be surprised when you’re out in the field shooting, stop down to the smallest aperture on your lens (the largest f-stop number, f/32 for example) and take a photo of a white or light colored wall. What I do then, is open the image in Photoshop and click on Auto Tone (under the Images Menu item). Horrors! Do you see it? Hopefully your sensor dust won’t look as bad as mine, above. But if you see the dreaded black specs, read on.

Step 1) Using the Auto Clean Function

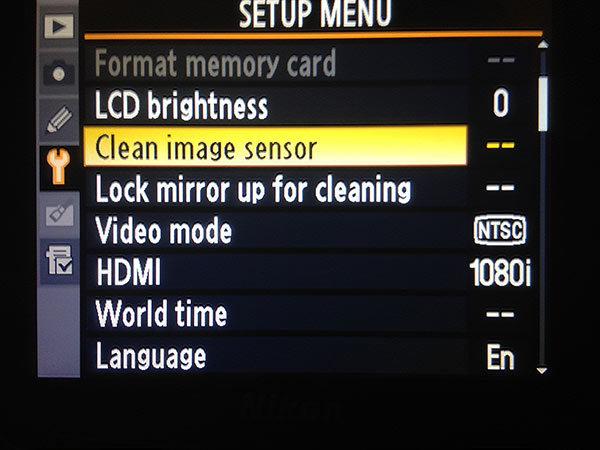
Many newer DSLRs have a special function for automatically cleaning the sensor.  Look for it in the Tools menu on your camera. When you use this tool, the camera gives the sensor a series of micro-vibrations that “shake” the dust loose, in theory anyway. You may have to repeat this process several times. But with some patience, and providing your sensor is not as bad as the example in my image above, you’ll be relatively free of most of your sensor dirt in a few minutes.
sensorclean-menu

If you don’t have this feature on your camera, don’t worry, there is a way to manually clean your sensor. Sooner or later, even those photographers with auto-clean cameras will have to wash their sensors using this manual method, Step 2 below.

Step 2) Using Sensor Swabs and Eclipse Fluid

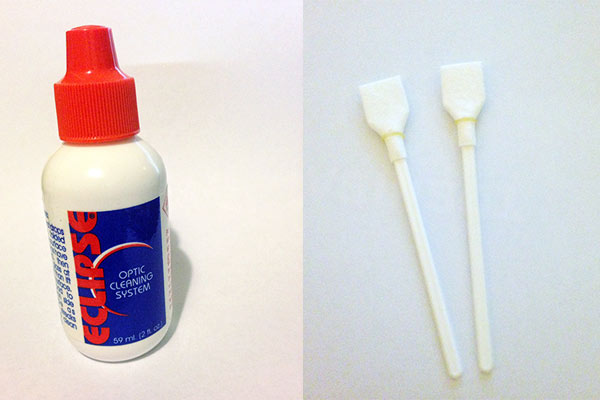
Sensor swabs are specially designed cleaning pads for camera sensors. Used with a few drops of Eclipse cleaning fluid they will wipe you sensor clean. Think of it as a tiny Swiffer for your sensor. You can get the swabs in exactly the right size for your sensor, so one swipe in each direction could be all you need.
comboW

The procedure is easy. You’ll simply put 2 drops of the fluid on a pad, and then gently wide the swab across your sensor ONCE, ONE WAY. Then change directions and swipe the other way. Throw that swab away. If you need to repeat the process, use a new swab.

Step 3) Power up, Mirror Up

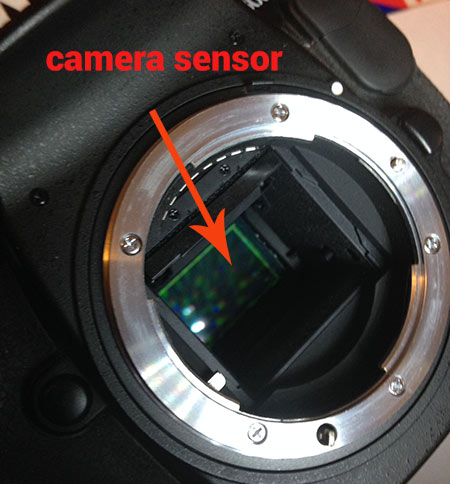
To use the swabs you’ll need to keep your mirror up to give you access to your sensor. This is the tricky part – you don’t want your mirror to come down while the swab is still inside your camera.

If you don’t have a setting for Lock Mirror Up for Cleaning, make sure your battery is fully charged, and set your camera exposure on Bulb. The Bulb setting will allow you to keep the mirror up until you release the shutter (use a locking shutter release to hold it not your finger). This way you can access the sensor, and do the quick sensor two-step, swipe left, swipe right.
sensor1W

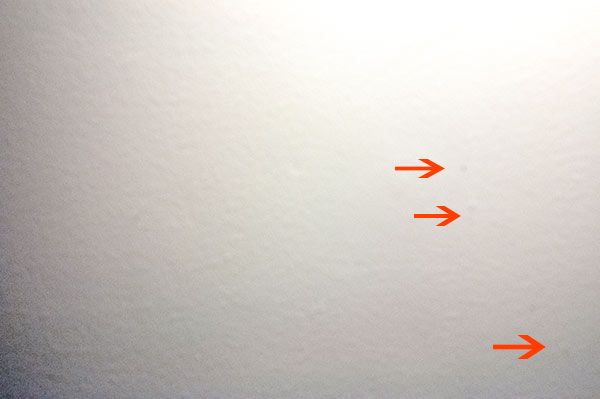
Check your results: take another shot at the same stopped down aperture and take a look at the difference.
_2DS3392w

Image of sensor dust after using Sensor Swabs. The main culprits are gone.

There are still three spots but all the big blobs, and large dust particles are gone. Depending on your preferences, you may be happy with this knowing that it’s a few easy clicks of the clone tool to remove these small faint marks. Or you may want to give the sensor another round of swabbing. Either way the sensor is super clean compared to the initial test image.

Cleaning your sensor is not difficult, you do need to be careful but it’s very worth the effort. Your photographs will love you for it.

I’d love to see your sensor dust horror stories – post your before and after cleaning shots here.

Editor’s note of warning: if you are terrified of damaging your sensor (it is delicate) you can usually find a local camera store that offers this service. You will pay a lot more for it than doing it yourself, but if they damage it, they have to replace it for you. The camera that is! If you damage your sensor there is no going back. So do follow the directions exactly, and do be cautious. Perform this procedure in as dust-free, windless room as possible. And remember to NEVER, EVER touch your sensor with your fingers. The oil from your fingers will do more damage and is much harder to remove (i.e. you’ll likely be sending it to the manufacturer to get that off).

The post How to Clean Your Camera Sensor in 3 Easy Steps by Alex Morrison appeared first on Digital Photography School.


Digital Photography School
 
Comments Off on How to Clean Your Camera Sensor in 3 Easy Steps

Posted in Photography


Drinkable Book: Tear-Out Pages Filter, Clean & Purify Water

09 May

[ By WebUrbanist in Design & Products & Packaging. ]

drinkable book front pages

Each sheet from this life-saving tome can provide 30 days of drinkable water – all together, the entire volume is able make a total of 5,000 liters fit for human consumption (enough for four years).

drinkable book final design

The project, a collaboration between scientists, engineers and typographer Brian Gartside, was created for the non-profit WaterIsLife as both an educational tool and vital resource.

drinkable stacked book

drinkable volume front back

Coated in silver nanoparticles and written on with food-grade inks, the pages are able to actively kill off deadly diseases found in the water supply of developing countries. Straining out particles and reducing bacteria counts by over 99.99%, their filtering capabilities leave safe-to-consume potable liquid on par with American tap water.

filter book box

drinkable book page tear

Co-engineered by creators from Carnegie Mellon and the University of Virginia, the sheets are made to be torn out easily and inserted into a filter box, which doubles ingeniously as a storage and shipping container for the books as well.

drinkable book filter insertion

drinkable reservoir safe pour

Best of all, the book is cheap to produce and thus practical to manufacture and distribute in bulk to those in need. Including various tips teaching proper sanitation techniques and the dangers of dirty water, its messages of awareness are also translated into numerous languages to make it globally legible.

Share on Facebook


[ By WebUrbanist in Design & Products & Packaging. ]

[ WebUrbanist | Archives | Galleries | Privacy | TOS ]


WebUrbanist

 
Comments Off on Drinkable Book: Tear-Out Pages Filter, Clean & Purify Water

Posted in Creativity


How to Spring Clean Your Memory Cards

14 Apr

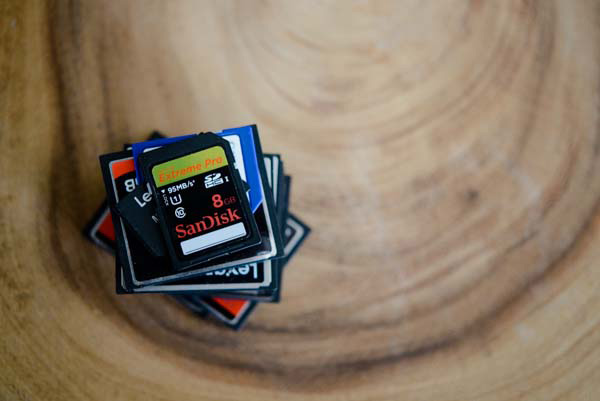
Ahhh spring. A great time to bust out your lens pens and lens cloths and dust off your photography equipment. But don’t forget to spruce up your memory cards before heading into the summer season.

memory_cards_clean006

Start With a Memory Card Inventory

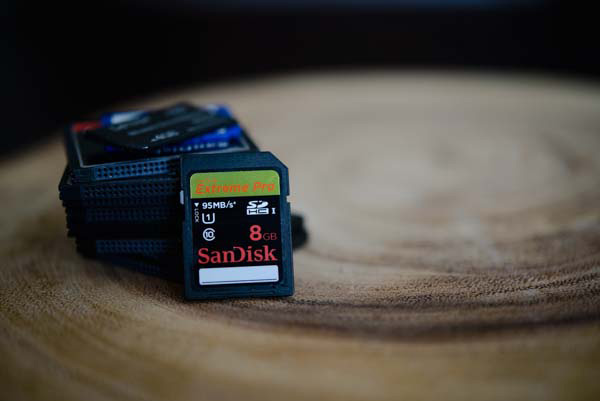
Take the time to survey how many cards you have and what state they are in. This is especially important if you have multiple types of cards floating around. Ensure that there are no stragglers hiding in a camera bag pocket or at the bottom of a lens case. My tip: I write numbers on my memory cards so I can double check I have all my cards before leaving a location.

Back-up Images on Your Cards

Do you ever snap a quick photo but forget to move it off the card? Now is a great time to move those images over to your computer, leaving room on your memory cards for new photos. Here is another great tip: delete images from your card in a batch. Limiting the amount of times you change data on your memory card will help extend the life of your cards. So choose to delete the images off your card in one format, either in your camera or on your computer, instead of deleting single images as you shoot. Better yet use “Format” to wipe and reformat the card in camera.

Store Your Cards Properly

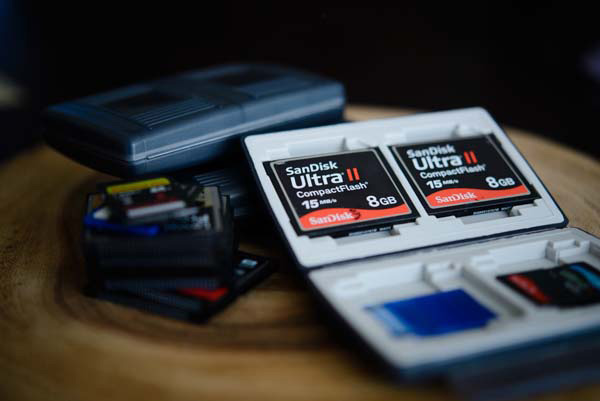
All memory cards, no matter the type, have delicate parts. Keep your cards safe and dust free by storing them in a container designed for memory cards. There are a ton of memory card wallet options available. Take a few minutes to think about what your memory cards go through and then look for a container that will work for you. Do you need a waterproof case? Are you a wedding photographer who carries around more than a few cards? If so, this is a worthwhile investment for you.

memory_cards_clean007

Write Your Name on Your Cards

We’ve all seen the Facebook posts of an image being shared around the web off of a found camera or memory card, in an effort to return the device to its owner. Don’t let that be your photo! Write your name and contact information on your cards. Losing a memory card is a downer – they aren’t cheap and those images could be lost forever. Simply including your email address, website, or phone number along with your first name, may increase the odds of having a lost memory card returned.

Label Used Cards

Come up with a system to label used cards. It happens – you start taking photos, and forget which cards you’ve used and which you haven’t. You then have to do the classic move of putting the card into your camera to check if it is full. Skip this step by coming up with a way that quickly identifies which cards are full. If you’ve numbered your cards, you can keep track of the numbers. My personal system is to put used cards into my card wallet backwards. A quick glance tells me which cards are ready to use.

memory_cards_clean005

Do you have a memory card organization system? Tell us what works for you in the comments below.

Need some new cards or some accessories? Try some of these:

The post How to Spring Clean Your Memory Cards by Nikole Bordato appeared first on Digital Photography School.


Digital Photography School
 
Comments Off on How to Spring Clean Your Memory Cards

Posted in Photography


Roger Cicala gives Nikon D610 a clean bill of health

07 Nov

D610_24_85_front.png

Lensrentals’ Roger Cicala has beaten us to testing the Nikon D610 for oil and dust accumulation – concluding its ‘certainly no worse than other cameras.’ Cicala has had an initial look at 25 D610s and a further look after the first ten of them came back from being rented-out, making him uniquely well-placed to comment on the phenomenon. Click through for a link to his article.

News: Digital Photography Review (dpreview.com)

 
Comments Off on Roger Cicala gives Nikon D610 a clean bill of health

Posted in Uncategorized


Tidying Up Art: Messy Masterpieces Made Neat & Clean

03 Jan

[ By WebUrbanist in Art & Installation & Sound. ]

The Swiss are known for leading an orderly existence, so you can imagine their frustration at grandiose works of German art and the excesses of their French neighbors as well.

Ursus Wehrli is fighting back, organizing everything from parking lots and pine branches to alphabet soup and classic artworks of masters present and past, collected in a series of (humorous but thought-provoking) books about cleaning up all aspects of life.

No one is safe from his exacting eye, precise brushstrokes and poignant photography as he sweeps a Van Gogh bedroom scene out of sight in one stroke and crushes a Postmodern Campbell’s soup can in the next. Jackson Pollock, beware!


Not even childrens’ sandboxes or Chinese signs are safe from this process of global reorganization – but while some things gain order from the process, others (like letters) lose meaning and devolve into absurdity. Even the stars themselves are in reach.

Share on Facebook


[ By WebUrbanist in Art & Installation & Sound. ]

[ WebUrbanist | Archives | Galleries | Privacy | TOS ]


WebUrbanist

 
Comments Off on Tidying Up Art: Messy Masterpieces Made Neat & Clean

Posted in Creativity


Photoshop CS3 – Portrait Clean 01

28 Oct

Clean up a portrait very quick and easy

 
Comments Off on Photoshop CS3 – Portrait Clean 01

Posted in Retouching in Photoshop