RSS
 

Posts Tagged ‘Clean’

You Can Delete These Lightroom Files to Clean Up and Make Room

20 Aug

Every serious photographer has experienced this. You have too many files and too little hard drive space. The result? No space for other data or laggy performance in Lightroom or on your computer as a whole.  Thus begins the search for figuring out Lightroom’s deepest, darkest secrets. Thankfully, this article will tell you everything you need to know to clean Continue Reading
Photodoto

 
Comments Off on You Can Delete These Lightroom Files to Clean Up and Make Room

Posted in Photography


FiLMiC Pro update brings Clean HDMI output to Android, iOS smartphones

10 Sep

Professional smartphone video capture app, FiLMiC Pro, has received a new update that adds the ability to stream a clean HDMI output to external livestreaming and recording solutions.

FiLMiC Pro version 6.12 supports a clean HDMI output over compatible HDMI adapters or over Wi-Fi using AirPlay (limited to iOS devices). You can even use multiple smartphones at once running FiLMic Pro to create a multi-cam setup that can be controlled by a livestreaming program such as OBS Studio or a hardware solution such as an ATEM Mini from Blackmagic Design. When paired with the FiLMiC Remote app (Android, iOS), it’s also possible to control each of the cameras wirelessly for more fine-tuned control.

A screenshot from the above tutorial showing how you can use FiLMiC Pro to turn your smartphone into a webcam with the help of an USB HDMI input adapter.

In addition to livestreaming and recording options, this functionality also means you can use your smartphone as a webcam when paired with an HDMI input device, such as an Elgato CamLink 4K. Output resolutions are limited by the devices being used, but in general, Lightning-based iOS devices are capable of 1080/60p output, USB-C iOS devices are capable of 4K/60p and select Samsung devices can max out at 4K DCI 60p.

FiLMiC Pro is available for both Android and iOS devices for $ 15. The update is free for existing users. If you want to find out more about FiLMiC Pro, head over to FiLMiC’s comprehensive support page.

Articles: Digital Photography Review (dpreview.com)

 
Comments Off on FiLMiC Pro update brings Clean HDMI output to Android, iOS smartphones

Posted in Uncategorized


Video: How to thoroughly clean and disinfect your camera

18 Aug

Olympus Europe has partnered with photographer Fernando Marmolejo to share an in-depth guide on how to clean and disinfect both non-weather-sealed and weather-sealed camera systems. While this is clearly an advertisement of sorts for Olympus camera systems, it’s also an insightful guide on how you can keep your gear as clean as possible, especially during a global pandemic.

The nearly eight-minute-long video is entirely in Spanish, so you’ll want to turn on translated subtitles if you don’t speak the language. Language barriers aside though, this is one of the most in-depth guides on cleaning cameras we’ve come across.

The thought of using actual soap and water on a camera — even a weather-sealed camera — can be daunting, but Marmolejo’s guide breaks down how you can do just that without breaking your gear. And, as helpful and sincere as the guide is, there’s also a bit of humor splashed in throughout the guide.

It’s worth noting that even when following this guide, there is a risk for damage and the possibility you’ll void your camera’s warranty, so proceed with extreme caution, regardless of how weather-sealed your camera is.

Articles: Digital Photography Review (dpreview.com)

 
Comments Off on Video: How to thoroughly clean and disinfect your camera

Posted in Uncategorized


DPReview TV: How to clean your camera lens (hint: not like this)

13 May

There’s a right way and a wrong way to clean your camera lens. Naturally, we’re going to show you the wrong way.

Subscribe to our YouTube channel to get new episodes of DPReview TV every week.

  • Introduction
  • A few things first…
  • Wiping surfaces
  • Cleaning liquids
  • Scratch resistance
  • Sand damage
  • An exciting new tool from Chris and Jordan!
  • In summary…
  • Lens tissues

Articles: Digital Photography Review (dpreview.com)

 
Comments Off on DPReview TV: How to clean your camera lens (hint: not like this)

Posted in Uncategorized


Capture Moments Clearly: How to Clean Camera Lenses Properly

01 Aug

Imagine yourself at an important job, maybe a big, beautiful wedding by the beach. You open your bag and reach for another lens. It’s windy, and sand is blowing in your eyes, but you power through and switch lenses. As soon as you start shooting again, you review your images and see a tiny little speck on the same spot Continue Reading

The post Capture Moments Clearly: How to Clean Camera Lenses Properly appeared first on Photodoto.


Photodoto

 
Comments Off on Capture Moments Clearly: How to Clean Camera Lenses Properly

Posted in Photography


How to Achieve a Consistent and Clean Photo Editing Style

07 Oct

As a photographer, achieving a consistent and clean photo editing style is important for developing your work.

Depending on your photographic niche, the way you choose to post produce and edit your images is a key factor in achieving cohesiveness in your portfolio. Utilizing editing software such as Adobe Lightroom or Photoshop can help you develop a style and aesthetic that is personal to you.

Let’s discuss some of the necessary elements for achieving a consistent and clean photo editing style. 

Focus on Lighting to Achieve a Consistent and Clean Photo Editing Style

In order for your images to look polished and professional, you will want to focus the majority of your edits on making lighting corrections. It is important to note that shooting in camera RAW mode will allow you to make the most of your editing process. If you have this capability, change your image capture mode prior to shooting. 

Lighting corrections in post-production include changes to exposure, highlights, shadows and adjusting your black and white points. By shooting in RAW mode, you can bring details back into the image that may have been lost while shooting by increasing or decreasing some of these lighting values. This allows you to set a base for your images that define your editing style.

Whether you want to create bright, airy images or darker, moody edits – these can all be achieved by manipulating your lighting. 

Take a look at the clean photo editing style in the before and after of the images below. 

How to Achieve a Consistent and Clean Photo Editing Style - Focus on Lighting example 01


How to Achieve a Consistent and Clean Photo Editing Style - Focus on Lighting example 02

How to Achieve a Consistent and Clean Photo Editing Style - Focus on Lighting example 03

Avoid Harsh Color Edits 

While using editing programs including Lightroom or Photoshop, it can be easy to over-manipulate the color of your image. With tools such as the RGB curve, HSL or Split Toning, these capabilities can be very powerful and effective when used properly. When aiming to create a consistent and clean photo editing style, avoid harsh or dramatic color edits that appear inauthentic to the original image. 

In order to stay true to the original tones of your image, consider adjusting your white balance to ‘AUTO’ within your camera before shooting. You can manually adjust this using Lightroom if your images are shot in RAW format. The white balance ‘Auto’ mode on your camera is designed to achieve the most authentic and true-to-life color under most shooting circumstances. During the editing process, color adjustments can be made by changing values such as temperature, tint, saturation, hue and tone. 

Each photographer has a colour editing style that is specific and recognizable to their work. Whilst you can create a color style that is unique to you, be sure to remember that professional images maintain accurate color consistency. You want to make sure to change your image color values with intention, and use this same method across your body of work.

How to Achieve a Consistent and Clean Photo Editing Style - Color Editing - Example 01

How to Achieve a Consistent and Clean Photo Editing Style - Color Editing - Example 02

Eliminate Distracting or Unnecessary Elements

Another tip to creating a consistent and clean photo editing style is to remove distracting elements from your images. This may include background elements, imperfections of your subject, or even poor composition. Many of these imperfections can be fixed by utilizing removal tools such as healing brushes or the clone stamp.

The overall composition of the image can also be improved by altering the cropping and fixing alignment problems with straightening. In order for your work to have a professional appearance, you must remember to fix the imperfections and pay attention to the smaller details of your images.  

For example, in the image below,  I wanted more of the sky and less of the tree branches. Using the Lightroom Clone Stamp tool, I was able to remove some of the branches by replacing it with the blue detail of the sky. You can change your image as you see fit to avoid an image with distracting or unnecessary elements. 

How to Achieve a Consistent and Clean Photo Editing Style - Using the Clone Stamp - Example 01

Create Tools for Consistency

The most effective way to create consistent editing in your post-production workflow is to create tools such as presets in Lightroom or actions in Photoshop. These capabilities were created so you can save edits and reapply them across multiple sets of images. Depending on the editing software you prefer to use, presets and actions are both fairly simple to create and integrate into your editing workflow. 

Presets

Presets are used in Adobe Lightroom to copy and paste edits from one image to another. In order to create a preset, you must first make edits to an original image. To do this:

  1. Open your original image in the Develop Module in Lightroom. 
  2. Apply the color edits and lighting adjustments you want to make. 
  3. Once satisfied with your results, navigate to your keyboard and press ‘Command + C’ (the shortcut for copy). 
  4. The Copy Settings dialog box will appear, guiding you to choose the settings you would like to copy. Make your selection and press ‘Copy’. 
  5. Navigate to the left tool bar and find the tab labeled ‘Presets’
  6. Press the ‘+’ button and choose the option of ‘Create Preset’ or alternatively, go to the menu bar, choose ‘Develop’ and then select ‘New Preset’.
  7. A ‘New Develop Preset’ box will appear asking you to name your preset and choose the settings you want to save. 
  8. After you have determined these values, press ‘Create’ and your preset will now show in the ‘User Presets’ tab in the Develop Module.
  9. You can now apply this preset to any of your images with one simple click to paste the edits. 

How to Achieve a Consistent and Clean Photo Editing Style - Using Presets in Lightroom


Here is an example of a before and after edit with one of my personal Lightroom image presets. 

How to Achieve a Consistent and Clean Photo Editing Style - Using Presets in Lightroom Example image

Actions

Actions are created in Adobe Photoshop by recording adjustments made in the program. Unlike presets, actions are developed by pressing the ‘RECORD’ button while editing your image. Once satisfied with an edit, press the ‘STOP’ button and your action is created. Actions are used for specific adjustments to an image such as color, light and retouching. 

To create an Action, you will need to go to the right side panel and find the ‘play’ button denoted as a triangle pointing to the right. 

  1. Choose the paper icon to ‘Create New Action’.
  2. Name your Action and press ‘RECORD’.
  3. Photoshop will record your adjustments and save them to your new Action.
  4. When you are satisfied with your changes, press the ‘Stop’ button to save it. 
  5. Once your Action is complete it can be applied to your images by selecting the name of your action and pressing the ‘Play’ button.

How to Achieve a Consistent and Clean Photo Editing Style - Using Action in Photoshop


Actions can be very effective for portrait photographers who need to retouch and fine tune the facial features of their subject. You can create actions to smooth skin, remove blemishes and even for methods such as frequency separation.   

Here is an example of a before and after edit with one of my personal Photoshop Color Actions.

How to Achieve a Consistent and Clean Photo Editing Style - Using Action in Photoshop Example image


As you can see, a consistent and clean photo editing style is achieved through integrating techniques such as; lighting adjustments, natural color edits, and the elimination of distracting elements. It is also achieved by using tools such as Lightroom Presets or Photoshop Actions. In your body of work, having an editing style that is cohesive and visually appealing will give your images a truly professional touch.

Do you have any tips for creating consistent and clean photo editing styles in either Lightroom or Photoshop? Share with us in the comments below.

The post How to Achieve a Consistent and Clean Photo Editing Style appeared first on Digital Photography School.


Digital Photography School

 
Comments Off on How to Achieve a Consistent and Clean Photo Editing Style

Posted in Photography


How to Clean Your Tripod and Make it Like New

25 Mar

Your tripod deserves a good cleaning if you don’t want to have to buy a new one every couple of years. Cleaning your tripod will help it last 10+ years and keep Gear Lust at bay. It also makes you feel like you just got a new piece of equipment for the cost of only 1-2 hours of mild effort.

How to Clean Your Tripod and Make it Like New

What’s You’ll Need

Before you get to the cleaning part, you’ll need some supplies. I suggest the following:

  • Cotton cloth.
  • Soapy water in a bowl.
  • Old toothbrush.
  • Canned air or blower.
  • Waterproof lubricant (marine grease, brake grease, etc.)
  • Tools to disassemble your tripod (typically Allen wrenches, socket wrench or a screwdriver).
  • Camera (ideally just a smartphone) so you can document how things came apart
  • A small bowl for the small parts.
  • Clean and clear working surface.

Disassemble the Legs

The first step to cleaning your tripod is taking it apart. A number of tripods come with the tools to disassemble them, but if not, a quick search of your owner’s manual will point you in the right direction.

How to Clean Your Tripod and Make it Like New

I’m going to use two tripods as examples in this article because they should cover a wide range of options included on tripods on the market today. The first is a Vanguard Abeo Plus 323CT carbon fiber tripod with BBH-200 Ballhead and the second is the MeFoto Classic Aluminum Globetrotter Tripod/Monopod. The Vanguard has flip-lock on the legs, and the blue MeFoto has twist locks. This matters most in the leg section of the tutorial.

It’s important to take photos when cleaning your tripod the first time. This helps you remember what went where and how to put it all back together. I suggest using a clean surface, free of clutter so nothing gets lost.

Taking the legs apart

Twist locks, like those on the MeFoto, are straightforward. Simply twist the lowest section as if you are extending the leg, then keep twisting until the ring comes free.

cleaning, tripod, twist lock, twist-lock - How to Clean Your Tripod and Make it Like New

Slide the lowest leg section from the one above it, being careful to not lose any plastic parts near the top of the tube. Under normal use, these plastic parts (typical of most tripods) help the leg section to not slide out under normal use. They are important don’t lose them!

twist lock, twist-lock, tripod, cleaning - How to Clean Your Tripod and Make it Like New

Flip locks need a little extra help. In this case, the Vanguard requires the flip lock to be open and then use a Phillips head screwdriver to loosen the bolt.

tripod, disassemble, clean - How to Clean Your Tripod and Make it Like New

Note that on the back side of the screw is a nut that needs to be retained. Not all tripods require complete removal of the screw/nut for the leg to slide free.

screw, nut, tripod, cleaning - How to Clean Your Tripod and Make it Like New

The top of each tripod leg also has a plastic retaining cap, the same as the twist lock, that may fall out when the leg is removed.

clip, tripod, cleaning - How to Clean Your Tripod and Make it Like New

It’s also important to note that your tripod might have notches to help it align when assembled. In this case, the Vanguard has two small notches in each leg tube that fit in the gap between the top plastic cap. Keep in any rubber O-ring gaskets in the correct order.

notches, tripod, cleaning, clean - How to Clean Your Tripod and Make it Like New

Remove all legs pieces, laying them out in order. The Vanguard I am using also has an added shim that sits in the flip-lock mechanism and I need to keep this safe.

shim, vanguard, tripod, latch, flip-lock - How to Clean Your Tripod and Make it Like New

The shim inside the legs of the Vanguard tripod. Yours may contain something similar if it has flip-lock legs.

Once all the legs are removed, use the blower/compressed air to clear obvious dust, dirt, and sand. Next, dip your toothbrush in soapy water and scrub the remaining debris from threads and leg parts. Dry with a rag.

How to Clean Your Tripod and Make it Like New

Use air first to blow any debris out of the grooves.

How to Clean Your Tripod and Make it Like New

Then use an old toothbrush and soapy water to get the hard to remove dirt.

cleaning, tripod, legs - How to Clean Your Tripod and Make it Like New

The tops, where the legs attach to the tripod head unit, may or may not have the ability to be dissembled. The Vanguard pictured is not user-friendly and the best I can do is to clean it with the toothbrush and blower.

The MeFoto tripod, however, has two easily removed screws which, when removed, allow me to clean the sliding mechanism underneath.

How to Clean Your Tripod and Make it Like New

dirt, cleaning, tripod - How to Clean Your Tripod and Make it Like New

Dirty

dirty, clean, tripod - How to Clean Your Tripod and Make it Like New

All clean!

Wipe down the outside of the leg tubes with the damp rag.

Tripod Feet

The feet of tripods take the most abuse and deserve to be cleaned too, even if you will just get them dirty again tomorrow. The Vanguard pictured here has rubber feet to cover spikes which invite sand and debris aplenty.

The MeFoto has flat feet that can be screwed off (and replaced with other optional feet) which trap grit.

How to Clean Your Tripod and Make it Like New

Dirty

cleaning, feet, tripod - How to Clean Your Tripod and Make it Like New

Clean!

For removable feet, give them a dip in the soapy water and a scrub with the brush. Otherwise, use your blower and toothbrush to remove all dirt.

Let all the components dry thoroughly before moving on to reassembly (below).

Tripod Head

Most tripod heads are not meant to be fully disassembled like the legs. The ball heads pictured here are sealed at the factory and can only be cleaned to a certain degree.

Remove any quick release plates and clean under and around them. Loosen up all twist-locks that tension the ball or swivel head and clean the threads the best you can.

How to Clean Your Tripod and Make it Like New

cleaning, tripod, head - How to Clean Your Tripod and Make it Like New

Remove the head from the tripod and clean the underside with a damp cloth.

Other Parts

Both of my tripods have a removable hook on the bottom to hold a weight for stabilization. I will take those apart too and give them a cleaning.

How to Clean Your Tripod and Make it Like New

Reassembly

When all parts are dry, it’s time to put everything back together. I suggest using the waterproof grease on threads that are meant to tighten and loosen. In my case, I’ll grease the threads of the MeFoto leg twist-locks and the control screws for the ball head.

cleaning, grease, clean, tripod, legs

How to Clean Your Tripod and Make it Like New

Add a small amount of the grease to the threads to ensure easy movement of the parts.

Some people prescribe putting a little bit of grease in the ball head and working it around. This can be helpful, but I would check your owner’s manual first to see if the manufacturer recommends it or not.

Sliding the legs back together, make sure any notches are properly aligned and that plastic end caps are in place before assembly. It’s also important to ensure you aligned the flip-locks so they are all facing the right way. Tighten up all locks and give your tripod a quick run through to make sure nothing is too loose or too tight.

Conclusion

A properly cleaned tripod will last much longer than any camera body you will ever own. While you may want to upgrade to a lighter or stronger unit in the future, there’s no reason your current tripod can’t serve you well into the future.

The post How to Clean Your Tripod and Make it Like New by Peter West Carey appeared first on Digital Photography School.


Digital Photography School

 
Comments Off on How to Clean Your Tripod and Make it Like New

Posted in Photography


Doing Our Dirty Work: Crows Trained to Clean Up Cigarette Butts

10 Oct

[ By SA Rogers in Gadgets & Geekery & Technology. ]

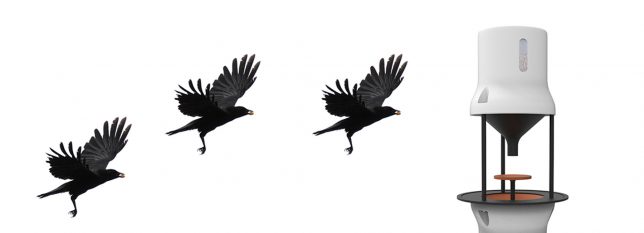
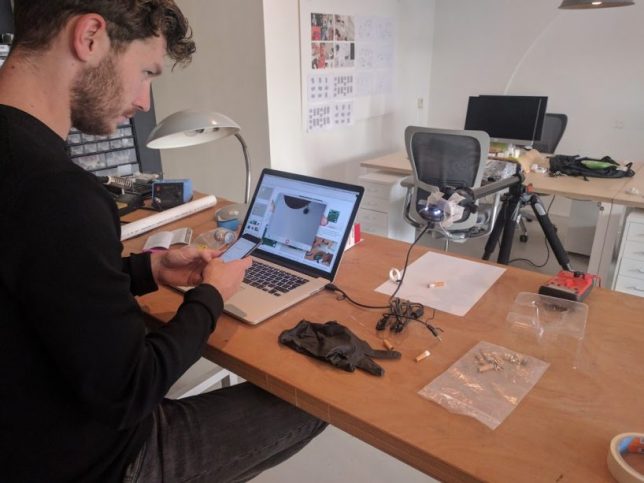
Should we really be training ultra-smart birds to do our dirty work for us, picking up cigarette butts all over our cities in exchange for treats? One Dutch start-up hopes their clever ‘Crowbar’ will be an easy and mutually beneficial way to deal with the ongoing problem of this specific kind of urban litter, making use of the corvid’s unusual intelligence. Crowded Cities proposes hanging smart machines around the city that train the birds to clean up butts.

‘Crowbar’ is based on the ‘Crow Box,’ an open-source project that gives crows peanuts in exchange for coins. The birds learned that they only get rewarded for inserting a particular kind of object. The Crow Box is just one example of humans testing crows’ ability to understand cause and effect and documenting the results.  They explain the process as follows:

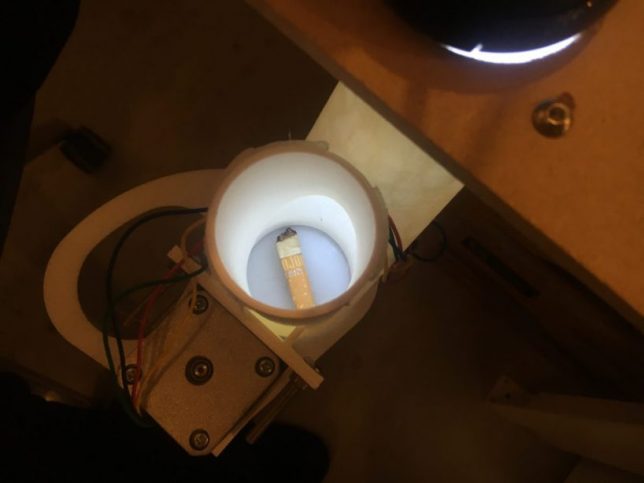
“The crows bring a cigarette filter to the Crowbar, where they drop it into the bottom funnel to get it checked. After the camera has recognized the cigarette filter as  a filter, it returns a bit of food to the table in front of the crow. The crow goes out telling others, or keeps his secret to himself – we are not sure.”

Apparently we’ll find out, as the team finishes assembling the CrowBar and puts it out into the world. In the Netherlands, more than 6 billion cigarette filters are tossed onto the street each year, and each one takes 12 years to degrade. It’s not hard to imagine this project seeing some kind of success – have you ever had a crow drop a nut right in front of your car while you’re driving, in the hopes that your tires will act as giant nutcrackers? They’re incredibly smart.

But it’s a bit disturbing to imagine crows being repeatedly exposed to the carcinogens present in cigarette butts, potentially punishing them in the long term for a stupid human behavior. Plus, it’s only a matter of time before the crows start snatching lit cigarettes right out of people’s hands.

Share on Facebook


[ By SA Rogers in Gadgets & Geekery & Technology. ]

[ WebUrbanist | Archives | Galleries | Privacy | TOS ]


WebUrbanist

 
Comments Off on Doing Our Dirty Work: Crows Trained to Clean Up Cigarette Butts

Posted in Creativity


Step by Step How to Clean Camera Gear so it Stays in Good Shape

29 Sep

You may be very aware that photography equipment is not cheap. If you’re not, you’re in for a rude awakening! Camera bodies can cost thousands of dollars and it’s not uncommon for a lens to be even more expensive than a body! Sometimes it’s very tempting to baby your equipment; treat it with extra caution and wrap it up in cotton wool so as no harm will come to it. But with the right care and maintenance, your equipment will last and continue to perform for many years, no matter what, and without the babying!

DANS4206-2

Being a professional photographer myself, my equipment is often subject to some not-so-camera-friendly circumstances. Rain, snow, dust, and even champagne (!) are not uncommon encounters for my equipment. Even though I generally take the right precautions (for example, I use rain covers on for my cameras and lenses if it’s raining) there are times when the conditions are just unavoidable and my equipment gets a little dirty. It’s going to happen. But because I care for my equipment (even though it may look like I don’t!), it keeps on performing and hasn’t let me down. So I thought that I would share some of my tips to help you do care and maintenance on your gear, too.

Supplies needed

The good news about caring for your equipment is that it’s relatively cheap to buy what you need. With so few things in photography being cheap, this comes as a nice relief! Here is a list of what I use to care for my gear.

From a camera store (camera specific tools)

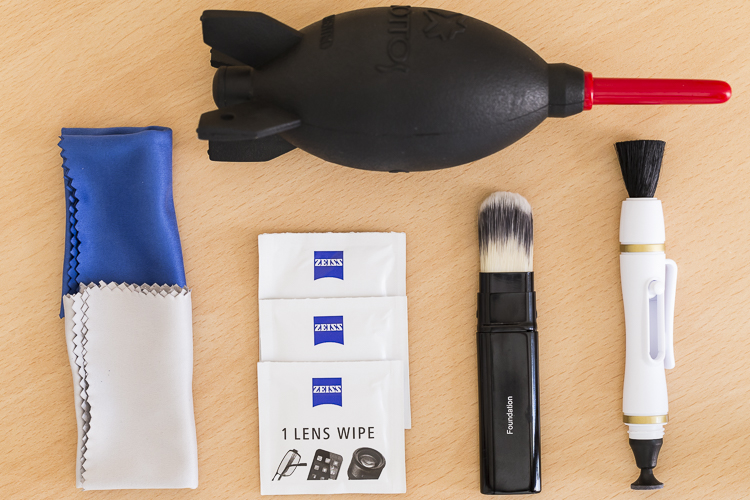
An overview of essential cleaning items.

An overview of some essential cleaning items.

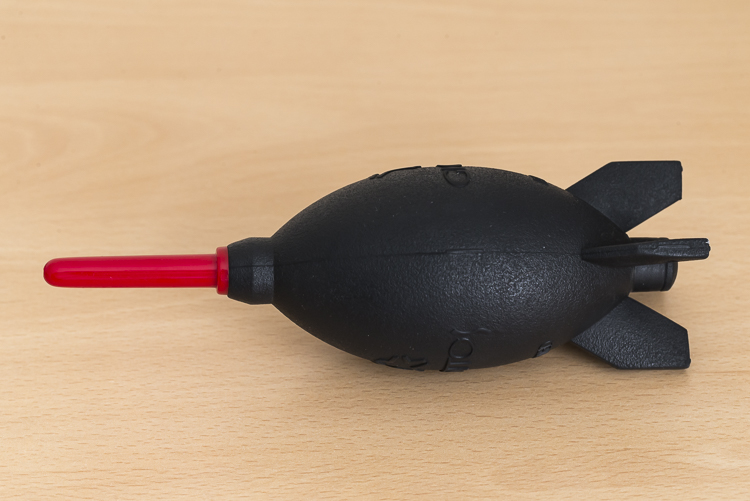
  • Rocket blower: I use this a lot! Squeezing it blasts out a puff of air to blow away any dust.

DANS4199

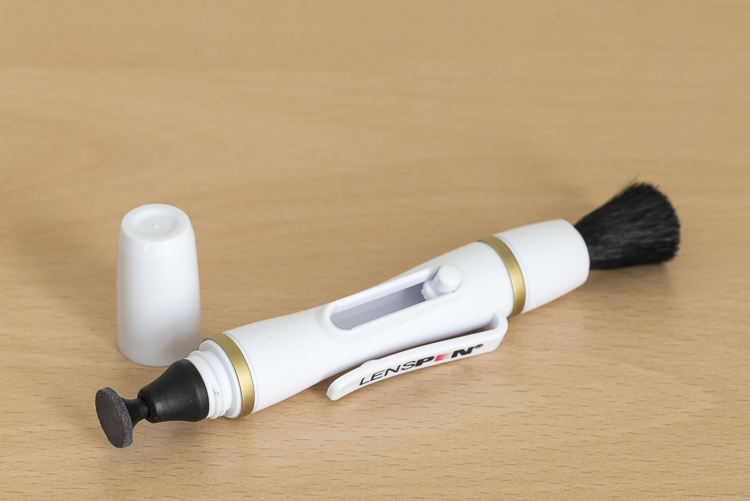
  • LensPen: I have just added one of these to my kit. At one end there’s a small soft, cleaning tip. At the other, is a retractable brush. I haven’t yet used it extensively but have been impressed with it so far. However, the cleaning tip is quite small so it’s not something I use on my larger lenses, such as a 400mm f/2.8; it would take forever.
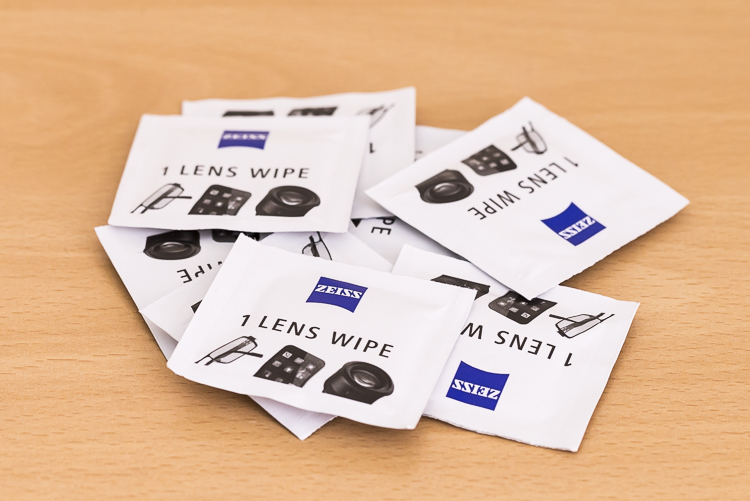
  • Pre-moistened lens wipes: I love these things. These are almost like the refresher towelettes you can get at KFC, but for lenses. They’re pre-moistened with a lens cleaning solution that quickly evaporates from the lens. They’re also dirt cheap. I use the Zeiss brand ones (only ones I’m aware of) which for a pack of 200, cost about $ 13.90USD. (Note: also available by Hoodman especially for camera lenses)

DANS8686

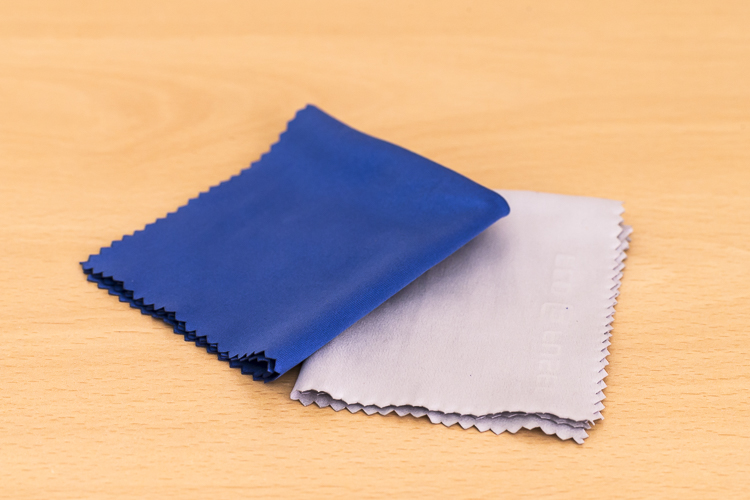
  • Microfibre cleaning cloths: Another cheap must have. I like to have several of these. I reserve one just to buff lenses after using the wipes, and another just for cleaning the lenses without any product at all. I avoid using the same one across many devices, for example, using the same clothing to clean my iPhone screen, then using it to clean my lenses.

DANS8688

From a regular store (non-camera tools):

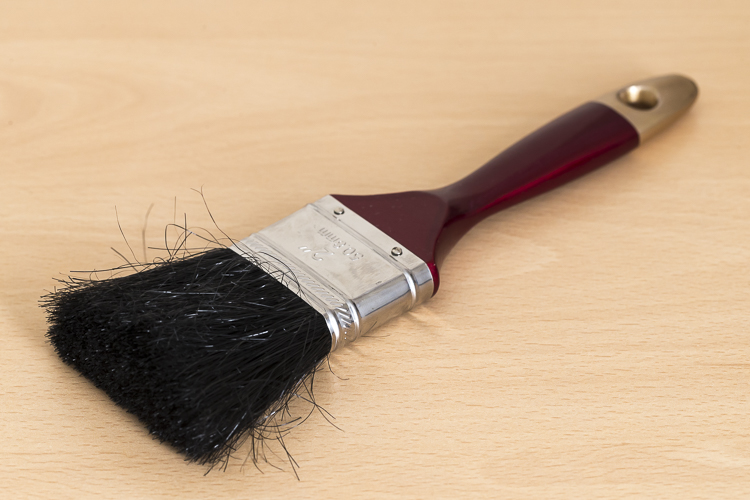
  • A paint brush: These are very handy at removing dust from the surface of camera bodies and lens barrels. Again, buy this brand new. You don’t want this to be super soft either, as it’s just being used on the outside of the cameras and lenses and not on anything that needs to be protected.

DANS4195

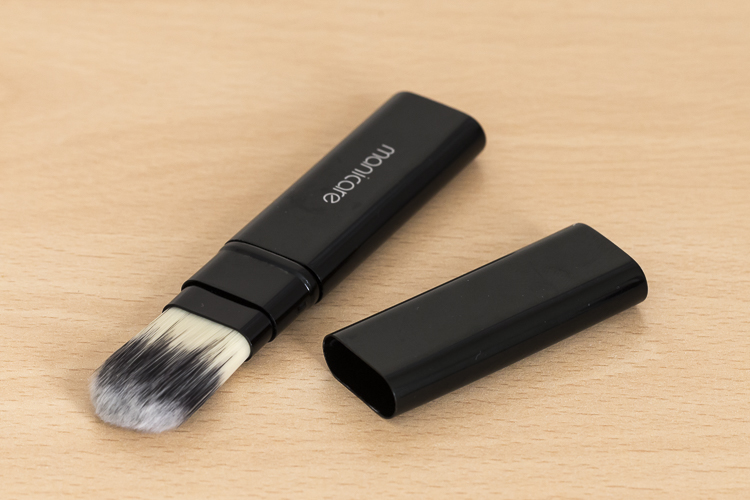
  • Make-up brush: this is something that people often have a laugh at when they see it in my bag. But then think, “Hey that’s a good idea”. If you want to add one to your kit, make sure you buy one brand new. You don’t want your partner’s blush going all over your lens. Generally, the more expensive brushes are better as their bristles are much softer. The one I have is also retractable, which is ideal as it protects the brush.

DANS4193

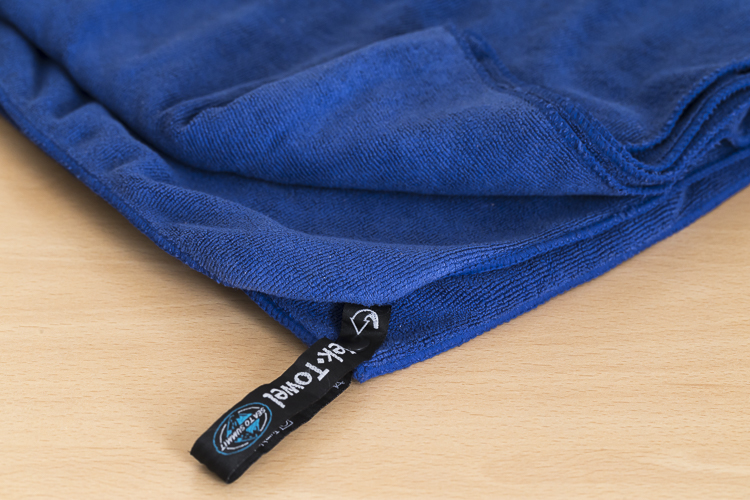
  • Teck Towel: I got a Tek Towel for my birthday years ago and decided to give it a go cleaning my gear. It works brilliantly, but a clean towel will work just as well.

DANS4197

  • Zip-Lock Bag: This is where I store my cleaning gear, to keep it clean and as dust free as possible!

With these items, I am able to keep my lenses and camera bodies looking (almost) like new. Here’s my workflow when it comes to cleaning time.

Lenses

Step 1. Use the Rocket Blower

The first step is to remove any larger bits of dust, etc., from the lens. For this, I use the rocket blower. Squeezing it blows air out of the tip and will blow away larger, loose bits of dust, etc. It’s important not to use a cloth for this step as this can drag dust over the lens and scratch it. This is why the Rocket Blower is very useful.

Step 2. Use the LensPen

DANS4194

Hopefully, the blower was able to remove all the dust. However, there are times when some little specs remain. To remove these, I use the brush on the end of the LensPen. Doing a quick flick of the brush around the lens should do the trick. There shouldn’t be a need to apply much if any pressure at all. This should remove all the dust from the surface of the lens. You may need to do a quick repeat with the blower, though. If you don’t have a LensPen, using a makeup brush works just as well.

If you don’t have a LensPen, using a makeup brush works just as well.

Step 3. Clean the glass

Your lens should now be free of dust and other debris. If there are some marks surface on the lens, this is when to give it a little clean. First off, use the cleaning end of the LensPen. It is very soft and doesn’t damage the glass at all so it is ideal for this. Using a circular motion, work your way around the lens until all the marks have been removed. This may take several passes to achieve. It’s important to not be tempted to push on the lens too hard. Just keep going around in a circular fashion until it’s satisfied. Give the blower another quick go over, too if necessary.If you don’t have a LensPen using a

If you don’t have a LensPen using a clean micro fibre cloth will also do the job. Just use the same circular motion and again, repeating the motion is preferred over applying more pressure.

Step 4. Get rid of stubborn marks

After Step 3, I am normally done cleaning the lens. Step four is completely optional, but sometimes, there is some muck on the lens that just will not budge; no matter how many times it’s gone over. This is when to use the pre-moistened lens tissues.

Using the same circular motion, I work my way around the lens until it’s been completely gone over (I normally go over it two or three times). Then I get a microfibre cloth (generally, a different one that I use just for this purpose) and give the lens a bit of a buff using the same circular motion. I’ll go over it a few times.

I favour these tissues over sprays because I don’t like the idea of having a bottle of liquid inside my camera bag. If it breaks, it can leak into my gear and cause major damage. I also quite like their single-use quality.

For me, using cleaning solutions is an absolute last resort and not something I do each and every time I clean my gear. I also don’t breathe on my lenses (you know, to fog them up to make it easier to wipe off grime) if I can avoid it. If you’re like me and quite a coffee drinker, your breath can be slightly acidic and with repeated use, it can wear down the coatings on your lens. At least that’s what Nikon mentioned a while back in an article I read (ps, I’m a Canon guy).

Step 5. Don’t forget the lens cap

The front element is now clean. But for me, the process is still not yet finished. Before placing the lens cap back on, I have a quick look at it – there could be grit and dust on it that is about to put back on my newly cleaned lens. Giving it a quick once over with the blower and a paint brush will keep it and the lens cleaner.

Step 6. Clean the rear element

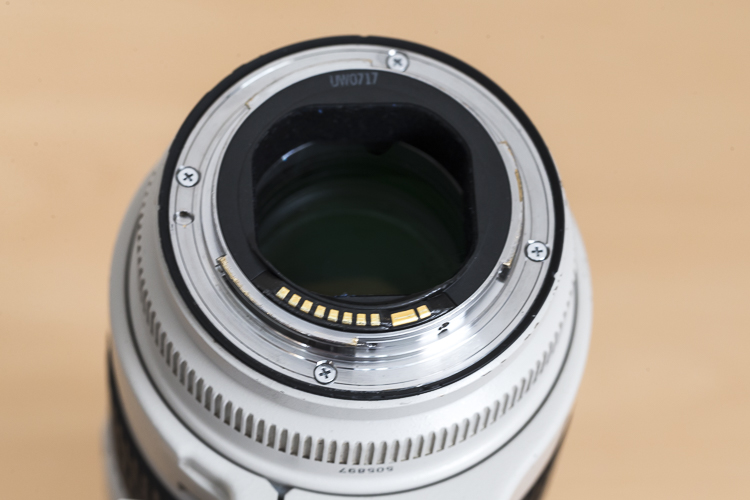
Now it’s time to have a quick look at the rear element – the bit that goes inside your camera. This shouldn’t be too messy; after all, it stays inside the camera. But dust can fall on it, especially when changing lenses and this dust, while it may not show up in pictures, can definitely make its way on to the sensor. I give it a quick once over with the Rocket Blower making sure the bottom of the lens is facing down. Doing so will stop any dust from falling back on it.  Some rear elements are further recessed into the lens than others. With lenses that have the rear element much closer, I also may give it a quick wipe with a micro fibre cloth or LensPen to clean it up.

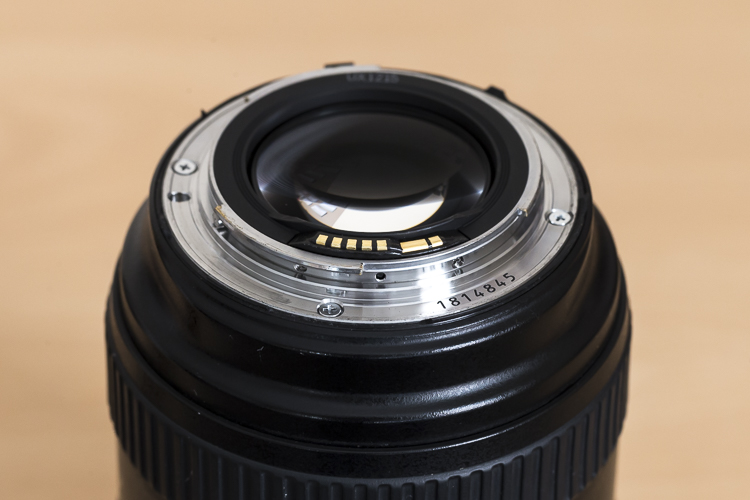
DANS4207

Notice with this lens, the rear element is very close to the surface. Also, those gold bars are the lens contacts.

Occasionally, I’ll also give the mount a clean up too, as well as the lens contacts. For this, I just use a Tek Towel, although any clean towel will do. Carefully wipe around the mount and go over it a couple of times. A small amount of alcohol on a cotton tip can be used to clean the contacts. Cleaning the contacts every now and then can help to prevent errors between the camera and lens caused by a build up of grime.

Now it’s time to give the rear cap a quick go over. Remove any dust with the blower and put it back on the lens.

With this lens the rear elements sits deeper in the lens barrel.

With this lens, the rear element is recessed deeper into the lens barrel.

Step 6. Clean the outside of the lens

Now that the elements (both front and rear) and the lens mount are clean, it’s time to give the outside a quick go over. For this, I whisk away any dust with the paint brush and wipe the whole surface area with the Tek Towel. If I’ve been at the beach (salt in the air), or my lens has had a shower, I’ll dampen the towel in fresh water to remove any salt or champagne, etc.

This step, while very quick and simple, has proven to be quite helpful in picking up some things that may need my attention. For example, a while back I was cleaning my 70-200mm lens and I noticed that the end of the barrel was a little loose. I took it into Canon it was fixed in 10 minutes and cost nothing. Prevention is the best remedy.

Camera

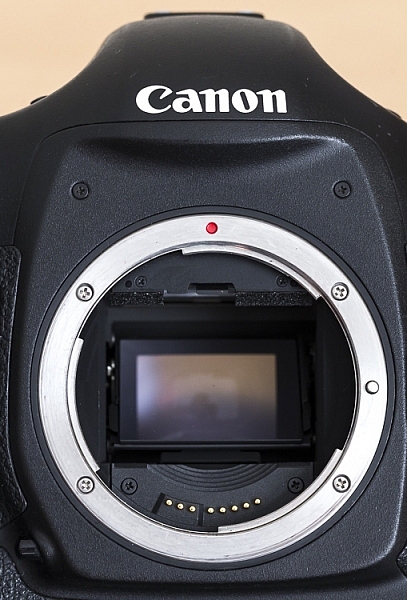
Here is a view of one of my camera bodies without its body cap. Care should be taken when cleaning around the lens mount so as to avoid dust/dirt etc from falling in. It's good practice to do this with the lens mount facing down.

Here is a view of one of my camera bodies without its body cap. Care should be taken when cleaning around the lens mount as to avoid dust, dirt, etc., from falling inside. It’s good practice to do this with the lens mount facing down.

Cleaning the camera is MUCH easier and quicker than the lenses. First off, I start by giving the outside a once over with the paint brush, followed by a thorough wipe down with the towel. I make sure the screens and the viewfinder are all nice and clean, too. As with lenses, I make sure that the mount and the contacts on the body are clean using the same steps and dampen the towel in fresh water if I’ve been at the beach.

While I have the body cap off, I’ll also blow out any dust that may be in the camera with the blower. With this step, I am much more cautious as I don’t want to blow into the body too much. Again, I also have the camera mount facing down to prevent dust from re-entering. This step can help reduce the amount of particles inside the camera which may eventually find their way onto the sensor.

Sensor

For me, this is where the cleaning process stops. I don’t do my own sensor cleaning as I much prefer it be done by the right people. Some people like to do their own sensor cleaning, and that’s completely fine. This is just something I like to give to professionals because if anything goes wrong, I can blame them.

Filters

Cheap-UV-Filters-202px.jpgYou may have noticed that I haven’t mentioned anything about UV filters. The reason for that is simply I don’t use them. I am yet to be convinced that they will actually save a lens from breaking if being dropped and have the view that if a lens is going to break from a fall, it will break; filter or no filter. I always use lens hoods which not only help to reduce lens flare but also provide some protection from objects falling on to the front element. However, if you’re in an extremely dusty environment, for example, then the use of a UV filter could be a smart investment.

Conclusion

So that’s it for my gear cleaning process. This isn’t something I do after each and every shoot, but I do try to get to it at least once a month or after shoots where my gear has been a little abused by the elements. It may seem that there are a lot of steps involved, but it really doesn’t take that long to do it. It’s even quite therapeutic when you get into it.

How do you clean your gear? Do you have any other tools you use? What’s your procedure and how often do you do it? Please share in the comments below.

googletag.cmd.push(function() {
tablet_slots.push( googletag.defineSlot( “/1005424/_dPSv4_tab-all-article-bottom_(300×250)”, [300, 250], “pb-ad-78623” ).addService( googletag.pubads() ) ); } );

googletag.cmd.push(function() {
mobile_slots.push( googletag.defineSlot( “/1005424/_dPSv4_mob-all-article-bottom_(300×250)”, [300, 250], “pb-ad-78158” ).addService( googletag.pubads() ) ); } );

The post Step by Step How to Clean Camera Gear so it Stays in Good Shape by Daniel Smith appeared first on Digital Photography School.


Digital Photography School

 
Comments Off on Step by Step How to Clean Camera Gear so it Stays in Good Shape

Posted in Photography


How to Clean Your Photography Gear and Keep it in Good Shape

23 May

A long time ago when I started my first steps into the photography world, a good friend of mine that worked many years as a photojournalist, told me:

“Treat your camera like a soldier treats his gun, keep it clean and ready to fire!”

I never forgot that advice from him, and I kept a Pentax K1000, my very first camera, in pristine condition to this day. Nowadays things are a bit different, and electronic digital equipment is not really built to last like in the good old days of mechanical equipment.

Modern cameras and lenses are built with a lot of sensitive electronic components, and are much more difficult to maintain. Most of the equipment I use is exposed to the elements, and to a lot of abuse during my shooting sessions, and to me it is fundamental to sometimes take a little bit of time off and make sure everything is clean, working properly, and ready to fire.

01

In this article I will guide you through the steps I usually take cleaning my photo equipment.

Like everything in life, everyone has their own method of doing things. The way I do this process might not be perfect, but it is the best method I have used so far, with all the tips and tricks I have been collecting along the years.

To start, I always try to be in a dust free environment, and have an anti-static microfiber cloth under the equipment I am cleaning. This is really important because your equipment is going to grab all the dust that is in the air like a magnet every time you try to clean it.

The way I do it is always to go from the outside to the inside, meaning I always clean the outer part of the lenses before I clean the glass, and I always clean the outside of the camera body before I clean the sensor. This way I gradually eliminate the dust that is stuck to the equipment.

Starting with the lenses, I used to just clean the outside of the lens with a microfiber cloth, and use a blower to keep the dust away. But a few years ago I was introduced to a new product from Japan that was the answer to all the germophobes that were really concerned with all the germs computer keyboards collect.

02

This cleaning compound is like a sticky jelly, with anti-bacterial properties that can be used on everything you want to keep clean and germ free.

I use it on the outside of my lenses and camera body, always with the caps on, because it is not supposed to be used on glass.

03

This product was expensive, and really hard to find when I first bought it, but nowadays it seems to be much cheaper and available in most stores online.

I find it really useful to clean the camera body in the buttons areas, where it collects a lot of dust that is difficult to clean.

04

Next it’s time to concentrate on the glass

Dust specs are really difficult to keep away from your lenses, and you should never try to wipe the glass off with a cloth like most people do. Wiping off dust might result in scratching your lens. The correct process should always be to blow it off first. You can use a blower or a compressed air can, and this way you remove the dust but don’t touch the glass.

05

Now the dust is gone it is time to clean eventual smudges or fingerprints you might have on the glass. My favorite tool for this process is the Lens Pen. It has a tip with a soft compound that is made to safely wipe the glass, without damaging it.

After cleaning with the soft tip, you may use the anti-static brush on the other side of the pen to get rid of any dust that is still around.

I usually don’t use any lens cleaning fluid unless it’s really needed. Those kinds of chemicals are never good for your lens coating, but if your lens has grease smudges, then cleaning fluid and a soft cloth might be the only solution.

06

Repeat that process on the glass on the other side of your lens, and while you’re at it it’s also a good idea to check the electrical contacts of your lens (metal parts on the back). Dirty or oxidized contacts are most often responsible for camera malfunctions or errors, so I always clean them off with a soft cloth.

In extreme situations I have heard of people cleaning these contacts with a rubber or really fine sand paper, but I’ve never had to do anything like that.

07

Dirty lens caps are also something to keep in mind to clean, as they always end up in your pocket or at the bottom of your camera bag while you’re photographing, so they collect a lot of dust. It doesn’t make sense to have your lens all cleaned up, then cover it with a dirty cap, the same applies to the body caps.

Replacing your caps with new ones from time to time might be a good idea, as they are not that expensive and give your equipment a newer look.

08

Now it is time to clean the camera body

After cleaning the outside with the anti-bacterial jelly compound, I usually clean the viewfinder. That is a difficult operation as it is a small, deep, and difficult to reach area. My trick for it is Q-Tips, but not the regular ones. I use some special ones made for babies that have a smaller pointy tip, and are made from a softer cotton, which allows a deeper and more efficient cleaning.

09

Next I clean the LCD screen glass with a little drop of glass cleaner and a paper tissue. This removes all the grease that the LCD screen gets from being stuck to my face all the time.

10

Cleaning the inside of the camera

As tempting as it might be I never try to clean the mirror of the camera. It usually seems to do more harm than good, and it usually sends more dust to the inside of the camera chamber, making it land on the sensor sooner or later.

We finish with the most complicated part of the whole process that is the sensor cleaning.

Camera makers always advise that this process should only be done in the brand’s technical assistance, by a trained technician, so if you are not comfortable with doing this yourself, please don’t try it.

I remember I was a bit scared the first time I tried to clean the sensor myself. But, the fact is that I have done it lots of times, with different cameras over the years, and it always worked out fine. You just have to be careful and do things slowly and steadily.

This is a totally optional step, but I usually use a sensor loupe to check the sensor before I clean it. It is a really nice device that illuminates and magnifies the inside of your camera, making it possible to see with good precision any dust that is on your sensor.

11

Now for the cleaning part itself, there are many different systems and brands out there for sensor cleaning. I have tried a few and my favorite is the Vswab by Visible Dust which consists of one time use soft-edge swabs, and a sensor cleaning fluid that you use to clean the sensor from any smudges or dust specs. There are specific swabs for different size sensors, so be sure to buy the correct one for your camera.

12

Just get the swab a little wet with the cleaning fluid (a drop or two is all you need) then activate the mirror lockup on your camera (or use the sensor clean setting – check your camera’s user manual if you aren’t sure how to lock it up for cleaning). Wipe your sensor from left to right, just one time, touching it but trying not to apply too much pressure.
Most of the times it works at first, but I always check it again with the sensor loupe after cleaning, and if needed I swab a second time.

Note: Keep it mind that these swabs can only be used one time, so if you go for a second clean use a new swab.

This allows the sensor to be clean all the time, avoiding spots on your images, caused by dust specs the get inside your camera every time you change your lenses.

13

These simple maintenance steps gives me confidence that my equipment is in top shape, and that I can be sure that it is going to work fine next time I pick it up.

Remember, keep it clean and ready to fire!

googletag.cmd.push(function() {
tablet_slots.push( googletag.defineSlot( “/1005424/_dPSv4_tab-all-article-bottom_(300×250)”, [300, 250], “pb-ad-78623” ).addService( googletag.pubads() ) ); } );

googletag.cmd.push(function() {
mobile_slots.push( googletag.defineSlot( “/1005424/_dPSv4_mob-all-article-bottom_(300×250)”, [300, 250], “pb-ad-78158” ).addService( googletag.pubads() ) ); } );

The post How to Clean Your Photography Gear and Keep it in Good Shape by Ivo Guimaraes appeared first on Digital Photography School.


Digital Photography School

 
Comments Off on How to Clean Your Photography Gear and Keep it in Good Shape

Posted in Photography