RSS
 

Posts Tagged ‘Changes’

Travel Photography Simplified: 4 Changes that Made me a Better Photographer

19 Feb

Get Viktor’s Lightroom Rapid Editing System for Travel Photography Course 50% off now at SnapnDeals for a limited time only – February 9th-23rd, 2016.

When I look back and analyze how my photography has changed over time, I see that the last couple of years were the most eventful in regards to the evolution of my photography. I see that rapid advances in technology, in combination with my attempts to simplify various aspects of my photography, gradually changed my entire workflow.
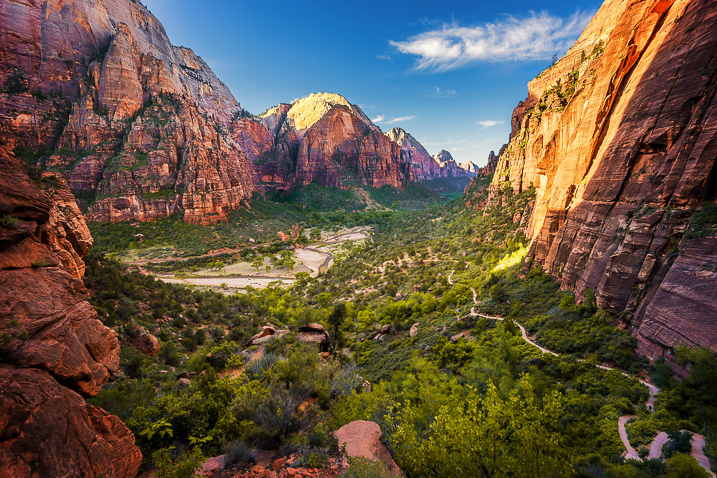
Images Travel Photography Simplified 01

If I had to identify the key moments that triggered the rest of the changes, my switch from DSLR to a mirrorless system would be at the very top of the list.

1. Mirrorless Setup

Depending on the type of photography, the switch to a mirrorless system affects photographers differently. As a travel photographer, the effect of the change was huge for me, and even though the learning curve was steep, it was liberating from the very beginning.

The compactness of mirrorless systems was the most obvious factor for the switch. Here is the breakdown of my camera, plus lenses setup:

  • Sony A6000 (344g, 12oz)
  • Sony 10-18mm (220g, 8oz)
  • Sony 16-70mm (308g, 11oz)
  • Total: 874g (31oz)

It’s hard to believe that a high-quality, wide angle zoom lens (10-18mm) can weigh only 220g (8oz). The full set, including the camera and two lenses that cover 90-95% of my needs, weighs less than 900g (32oz). I call it freedom.
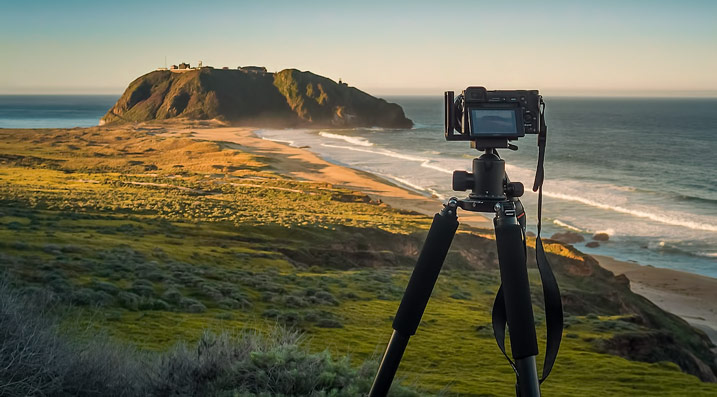
Images Travel Photography Simplified 02

From a practical standpoint, it actually means that I can pack the entire setup into a carry-on when traveling by plane. It also means that I do not have to think about what equipment to bring when packing for a demanding hike. Instead, I bring everything with me.

The other two factors of my switch that impacted my photography were the amazing dynamic range of the Sony sensor and its EVF (Electronic Viewfinder). The extended dynamic range of the sensor allows me to reduce the number of brackets I have to take, to cover the entire dynamic range of the scene. Also, it saves me time editing, since I do not have to use HDR, and Image Blending techniques, as often as before.

The Electronic Viewfinder also allows me to more accurately assess the scene before taking the shot and, as a result, reduces the number of unsuccessful shots.

Images Travel Photography Simplified 03

2. Changing Travel Routine

I did not expect that one small change to my travel routine would impact my photography so much. So what was the change? I simply stopped editing photos while traveling. Instead, I began concentrating all my efforts on finding interesting locations and capturing them – nothing else. This new focus makes my trips more enjoyable, reduces stress, and improves my photography in general.

Before, I always loaded all of the new photos at the end of the day to Lightroom using my laptop. While checking the day’s results, I would often start culling and editing.

Now, when I want to check if a shot is successful, I can do it while shooting, simply by wirelessly connecting my camera with my tablet. And, if it is absolutely necessary to post a couple of new photos to social media, I can edit them in seconds using Snapseed on my tablet, then easily post them online.

Images Travel Photography Simplified 04

3. Simplified Backup System

Keeping photos safe while traveling is a big issue for any photographer. Up until recently, there was no reliable enough solution for a photographer, like myself, to go on an extended photography trip without bringing a laptop. For years, a laptop was the center of my backup strategy while traveling, which only added unnecessary bulk to my setup.

Finally, I think this is starting to change. For the last few months I’ve been testing a laptop-less travel approach, and I am confident that a new setup this year will completely replace my outdated backup system.

This new workflow is possible because of a device that was recently released: WD My Passport Wireless. The device has a variety of interesting features, but the most important one, from a photography standpoint, is the SD Memory Card Reader. When you insert a memory card into the reader, it automatically backs up all the contents of the card to the drive. Plus, it supports incremental backups, which means that it backs up only new files rather than those previously transferred.
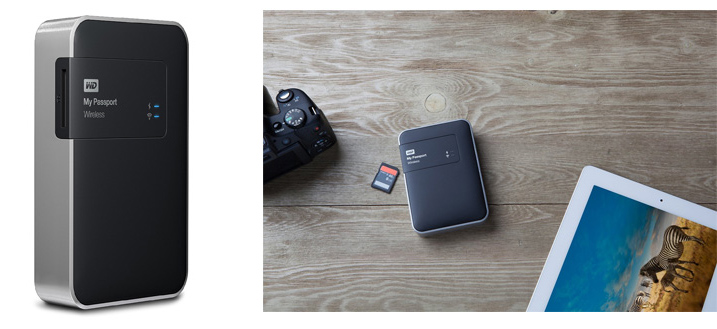
Images Travel Photography Simplified 05

Photo courtesy Western Digital

This device makes it possible to travel without a computer. Also, it minimizes the risk of losing images due to memory card failure. Now, I incrementally backup my new images multiple times throughout the day, and by the end of the day back at the hotel, I already have all of my new images on two devices.

Another feature of the WD My Drive Wireless that excites me as a photographer, is its ability to connect to the drive with a mobile app and grab any photos (JPEGs only) for editing.
Images Travel Photography Simplified 06

4. Rapid Editing

Lightroom is my primary photography editing tool. At some point, I realized that 80% of my editing steps were identical for every photo. This meant that only 20% of my efforts were spent on what really mattered: making every photo unique. I also recognized that if I could automate the 80%, then I could drastically reduce the time I spend in front of the computer.

The obvious choice for editing automation was Lightroom’s preset functionality. The presets allow users to record their editing steps in Lightroom for later use.

The main obstacle in developing and implementing a new system was Lightroom’s presets limitations. You have probably already noticed that it is rare when you apply one of the presets to a photo that are happy with the final results. You still have to dive deeper into the Lightroom editing tools to compensate for the level of exposure, lighting conditions, shadows, and the dynamic range of the scene.

I solved this problem by introducing a two-level editing system which I call Lightroom Rapid Editing. I separated my Lightroom presets into two categories:

Style Presets: The presets that establish the artistic style and reflect our creative vision. For example, a dreamy, warm look or an aggressive and contrasted style, soft black & white or a vibrant cross processed treatment.
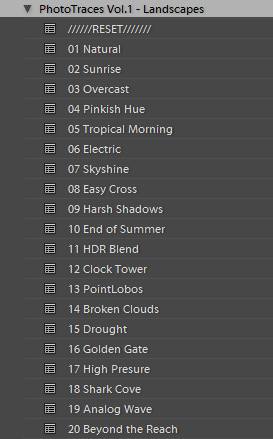
Images Travel Photography Simplified 07

Adjustment Presets: The presets that do affect the style of the photograph but help us to fine-tune the following parameters: exposure, shadow recovery, contrast, clarity, vignetting. I called the collection of the adjustment presets the TOOLKIT.
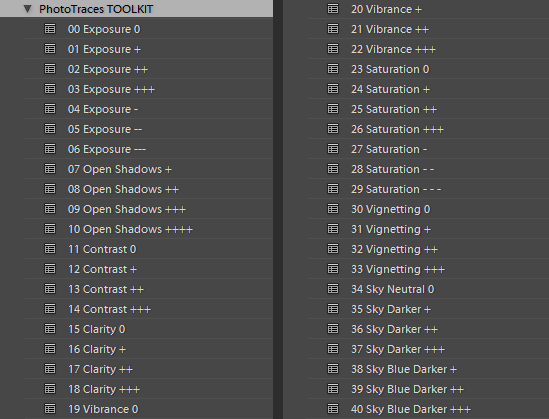
Images Travel Photography Simplified 08

This is how my workflow looked after I implemented the two level preset system:

First, I applied one of the Style Presets. Then, I used the Adjustment Presets from the TOOLKIT to fine tune the image. Simple, effective, and automated. The Lightroom Rapid Editing System reduced my editing time by more than half and made my photography more consistent.

Here is a quick demonstration:

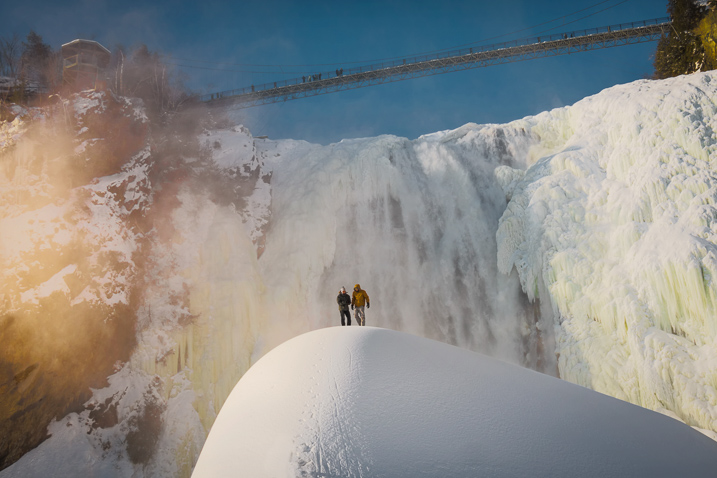
For the demonstration, I selected a photo of Niagara Falls (American and Bridal Veil Falls). The scene was somewhat challenging as the water of the falls, was much brighter than the rest of the scene. I intentionally set exposure for the brightest areas, making sure I preserved enough details in the water. It resulted in an underexposed capture, making it more challenging to edit.
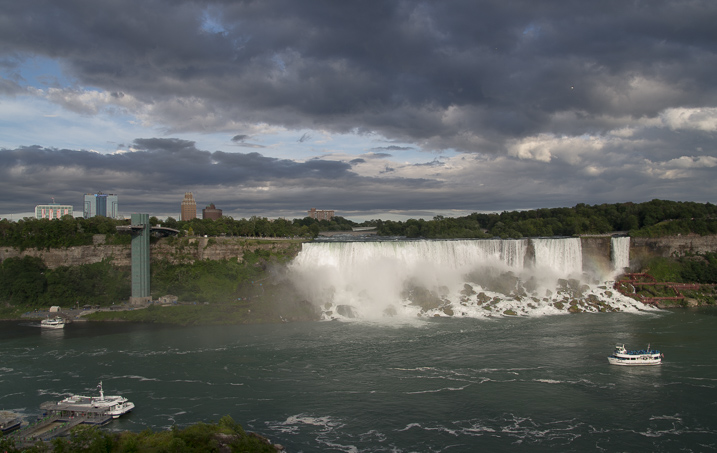
Images Travel Photography Simplified 09

First, I applied one of my favorite presets from the Landscape Collection – Natural. Second, I used the following TOOLKIT adjustments (Adjustment Presets):

  • 01 Exposure +
  • 08 Open Shadows ++
  • 17 Clarity ++
  • 31 Vignetting +

Here is the result. It took me five clicks, and no more than two minutes to complete the editing. To record my editing steps for future reference and easy sharing, I used Lightroom Rapid Editing Formula: Natural (02, 08, 17, 31).
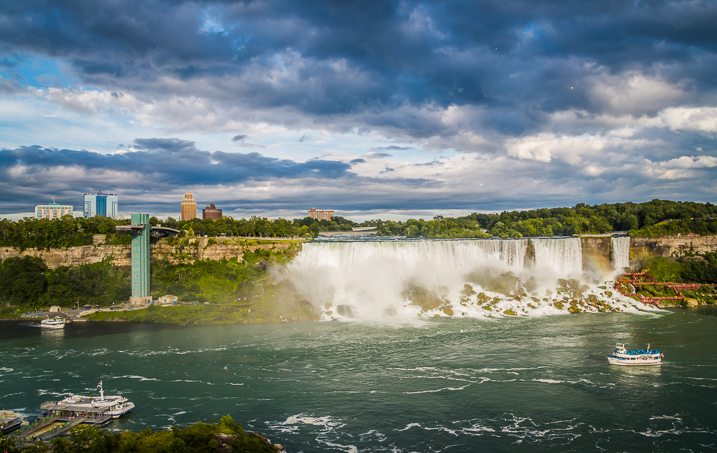
Images Travel Photography Simplified 10

Read a more detailed explanation of my travel photography workflow here: Photo Editing Workflow for Travel Photography

Conclusion

I believe that simplification is the key factor in mastering any complex process. If you reject unnecessary complexity by drastically simplifying it, you can invest more time and effort into what really matters. The changes I listed above did not happen overnight but they were always driven by the desire to simplify my photography.

How have you simplified your photography? Share with us in the comments below.


If you found this helpful, get Viktor’s Lightroom Rapid Editing System for Travel Photography Course 50% off now at SnapnDeals for a limited time only – February 9th-23rd, 2016.

googletag.cmd.push(function() {
tablet_slots.push( googletag.defineSlot( “/1005424/_dPSv4_tab-all-article-bottom_(300×250)”, [300, 250], “pb-ad-78623” ).addService( googletag.pubads() ) ); } );

googletag.cmd.push(function() {
mobile_slots.push( googletag.defineSlot( “/1005424/_dPSv4_mob-all-article-bottom_(300×250)”, [300, 250], “pb-ad-78158” ).addService( googletag.pubads() ) ); } );

The post Travel Photography Simplified: 4 Changes that Made me a Better Photographer by Viktor Elizarov appeared first on Digital Photography School.
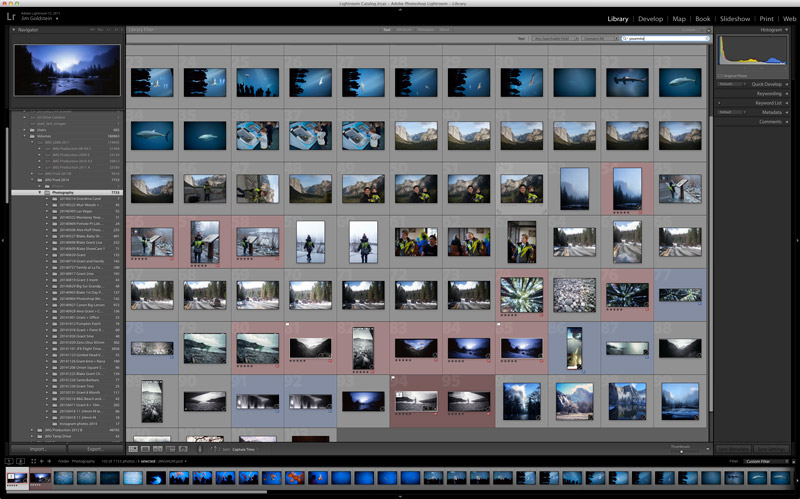
Digital Photography School

 
Comments Off on Travel Photography Simplified: 4 Changes that Made me a Better Photographer

Posted in Photography


6 Steps to Save Your Ass With Lightroom Catalog Changes

22 Apr

Avoid downtime with these 6 steps to keep your Lightroom Catalog in tip top shape:

1. Know Where Your Catalog Resides

Lightroom saves catalogs in the following folders:

  • Windows: \Users\[user name]\Pictures\Lightroom
  • Mac OS: /Users/[user name]/Pictures/Lightroom

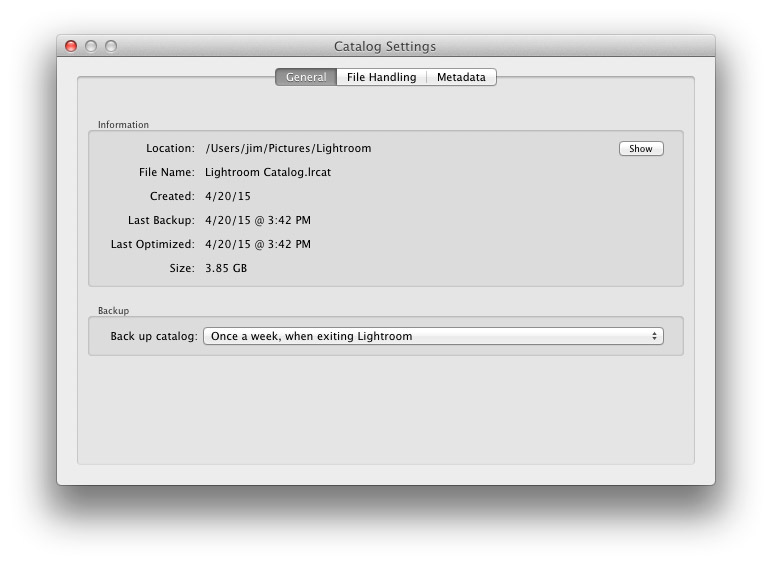
When in doubt check here:

(Mac OS) Lightroom > Catalog Settings

(Windows) Edit > Catalog Settings


Know Where Your Lightroom Catalog Resides

2. Save Metadata to Your Files

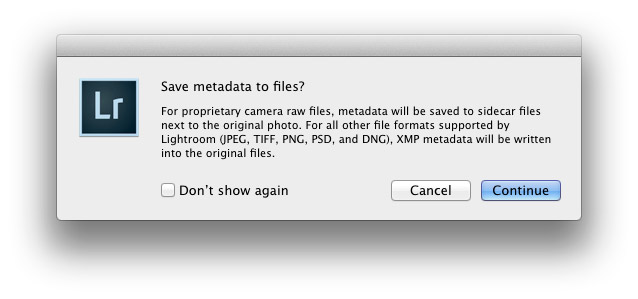
To save metadata to your files highlight your images and hit Command-S on Mac or Control-S on Windows. This will save author’s name, resolution, color space, copyright, and keywords to a sidecar file for proprietary RAW files or directly to the file if JPEG, TIFF, PSD, and DNG. This is a great precursor step that builds in redundancy in case there are any catastrophic failures in your future.

Why you should use DNG:  DNG, RAW and JPEG: What I Use & Why

More on Metadata: Metadata Basics and Actions via Adobe


Save Metadata to Your Files

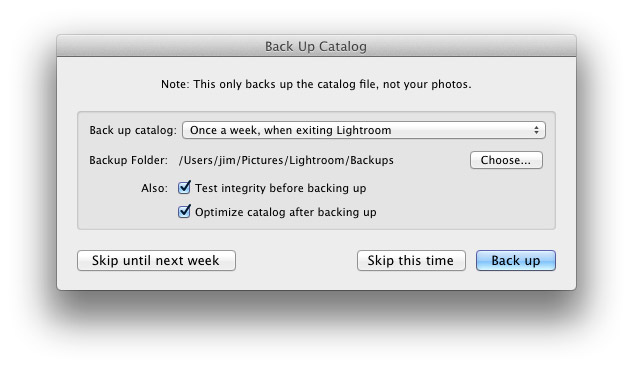
3.  Back Up Your Catalog Regularly

There is one key prompt you should never ignore in Lightroom and it is the “Back Up Catalog” prompt.  Always take the time to regularly backup your catalog in the event your hard drive fails, you suffer file corruption or a meteor crashes into your home destroying your computer. Well for the last point see step 4 below.


Back Up Your Lightroom Catalog Regularly

4. Save Your Back Up Catalog to the Cloud

Redundancy is the name of the game in case you suffer a catastrophic data corruption or loss of equipment at home. By having your most recent catalog saved to the cloud (Dropbox for example) you can restore the organization (color coding, stars, edits, etc.) of your entire catalog assuming you have an off site backup of your image files.

The quick and dirty of how I back up my image files in case you’re wondering…

I have a hard drive enclosure that mirrors 2 drives (RAID 1). As I work on my files they’re saved to 2 drives simultaneously. At regular intervals I back up these mirrored drives to a 3rd drive that I keep offsite. In the event of a catastrophic event I always have 1 copy of my image files at an outside location. This combined with my Lightroom Catalog being saved to the cloud means that I can restore my Adobe Lightroom environment at any time.


Save Your Back Up Catalog to the Cloud

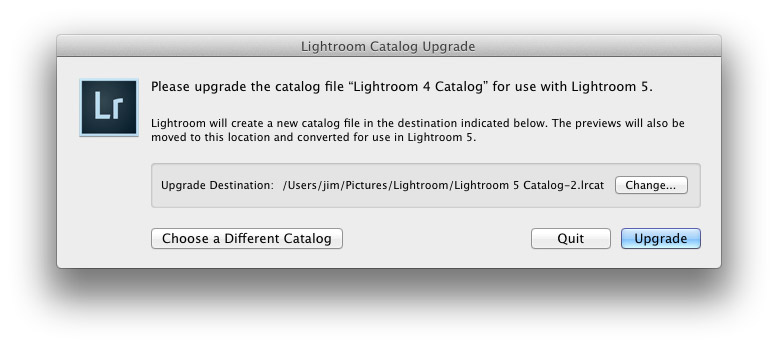
5. Before You Upgrade Lightroom Make A New Catalog Back Up

Lightroom will prompt you to upgrade your catalog when you upgrade your copy of Lightroom to the latest version.  To avoid any risk of a fluke corruption when you upgrade your Lightroom Catalog always make sure you have a very recent back up copy of your catalog. Before any upgrade my first step is to make sure I have a recent catalog backup.

Before You Upgrade Lightroom Make A New Catalog Back Up


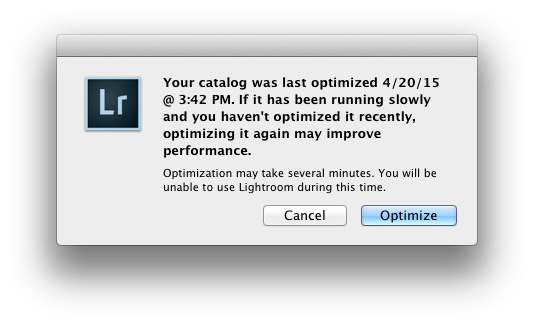
6. Regularly Optimize Your Catalog

If you’re experiencing performance issues or you want to make sure that your catalog is in optimal condition then be sure to optimize your catalog from time to time. To do this go to Lightroom > Optimize Catalog

Regularly Optimize Your Lightroom Catalog


Recommended Reading: Lightroom Catalog FAQ and Lightroom Help / Optimize performance

Did I miss any precautions you take? If so add them to the comments.


Copyright Jim M. Goldstein, All Rights Reserved

6 Steps to Save Your Ass With Lightroom Catalog Changes

The post 6 Steps to Save Your Ass With Lightroom Catalog Changes appeared first on JMG-Galleries – Landscape, Nature & Travel Photography.


Related Stories

  • 6 Steps to Save Your Ass With Lightroom Catalog Changes – Enclosure
  • Talking Lightroom & Photography
  • Talking Lightroom & Photography – Enclosure


JMG-Galleries

 
Comments Off on 6 Steps to Save Your Ass With Lightroom Catalog Changes

Posted in Equipment


Opinion: Why Small Changes Make a Big Difference to Nikon’s D810

28 Jun

The Nikon D810 might seem like an incremental update to the older D800 and D800E but under the hood there are some significant new features. In this article, contributing writer Damien Demolder tells us why the numerous small changes that Nikon has made in the D810 add up to a big difference in the final product. Click through to read his opinion piece.

related news: Digital Photography Review (dpreview.com)

 
Comments Off on Opinion: Why Small Changes Make a Big Difference to Nikon’s D810

Posted in Uncategorized


Pentax Ricoh changes name and reveals branding strategy

02 Jul

pentaxricoh.png

Hot on the heels of Carl Zeiss’s decision to become simply Zeiss, Pentax Ricoh has decided that from August 1st it will be known simply as Ricoh. It’s not all bad news for Pentax fans though – the brand name will continue to be used on the company’s SLRs and interchangeable lens cameras. Meanwhile the Ricoh name will be used for compact cameras and, cryptically, ‘new technological innovations’.

News: Digital Photography Review (dpreview.com)

 
Comments Off on Pentax Ricoh changes name and reveals branding strategy

Posted in Uncategorized


3 Small But Important Lightroom 5 Beta Changes You Might Have Missed

17 Apr

Adobe announced the availability of Lightroom 5 Beta at Adobe Labs today and by all means, go grab a free copy and play. I’ve been using Lightroom since version 1 and have been impressed with every upgrading to the program, gladly plopping down my money for a new version as I have found the enhancements in subsequent revisions well worth the funds. And Lightroom 5 seems to be on the same track, based on my findings while playing with the beta this last week.

Adobe has a number of fine new features in this revision and they are sure not to be missed. They include

  • A Smart Preview feature which mobile photographers will love as it creates a smaller, editable version of their monstrously sized RAW image that is easily portable on a laptop and can be synced when the originals, possibly stored on an external drive or NAS back at home, become available.
  • Radial Gradient which allows for selecting oval or circular shaped areas for specific effects.
  • Upright, which attempts to correct crocked images or fine tune vertical lines. (My experience with this tool has been less than stellar on simple horizon shots at sea. More on this in a minute.)
  • Advanced Healing Brush. This one, I like a lot and it is very helpful. Now your “Spot Removal Tool” can be used as a brush to wipe out items that are not in the shape of a circle. This helps a lot and means I spend even less time in Photoshop CS6.

That’s the obvious stuff that Abode packs into their press kit and you probably have seen those items demonstrated on other sites. What I want to show you are three things I found to be helpful in little, but repetitive ways for how I use Lightroom.

(Click any image for a larger version)

Invert Mask

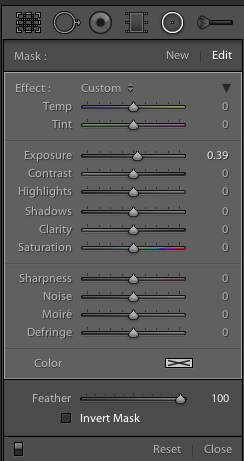
Shot4Thank you! I’ve been wanting this feature for the longest time to save time. But it’s not quite right.
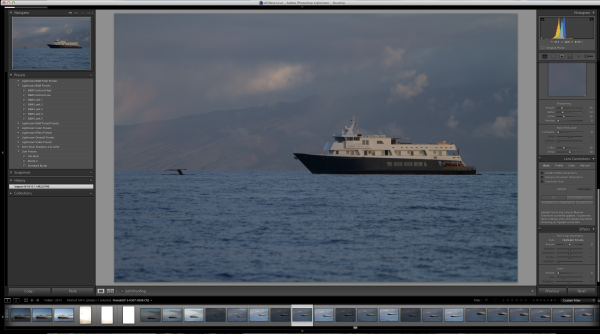
Invert Mask is currently only available with the new Radial Gradient feature. See it at the right? It works well and I’d like to see if appear in the Gradient Tool (especially when creating a new gradient…it would be great to great one just the opposite of the one I am using at the moment) and in the Adjustment Brush.

Here’s a simple rundown of how the tool works.

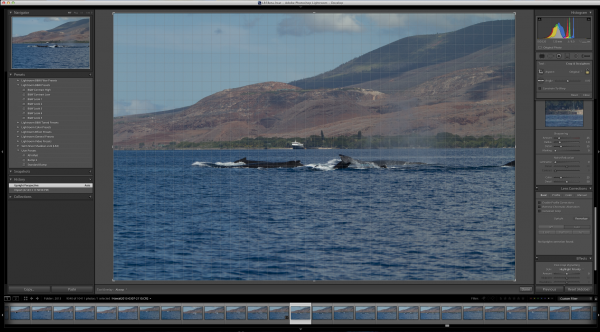
Starting with this image of one of my client’s boats, the Un-Cruise Adventures Safari Explorer off the shore of Maui, Hawaii, I want to see which direction works best: highlight the boat and darken the surrounding seas or slightly darken the boat and bring up the seas, in order to add contrast to the main subject.

Shot1

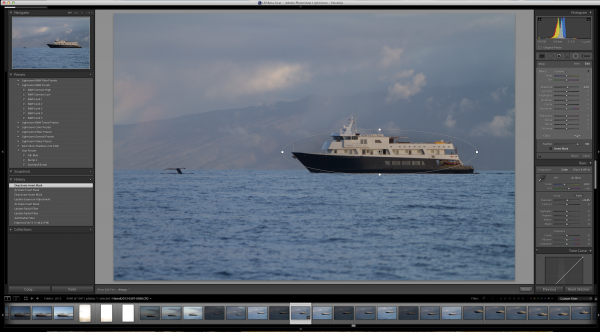
I select the new Radial Gradient tool and draw an oval over the boat (Dear Adobe, please make this tool work like the Ellipse Tool in Photoshop for consistency. Specifically, please allow me to grab a “corner” of the ellipse and drag it down instead of starting with the middle of the ellipse. Consistency would really help. Thanks.).

Shot2

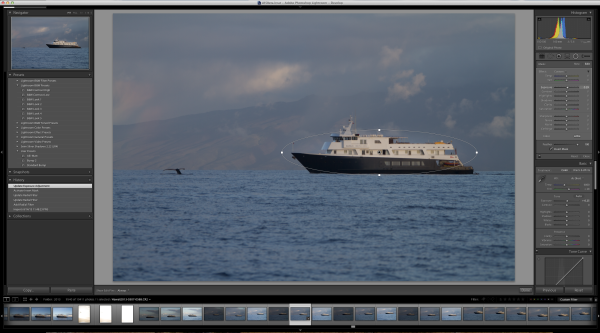
Because I have chosen only to increase the exposure by .39, Lightroom masked the boat and increased the exposure for the rest of the image. But if I want to swap that and mask the entire picture except for the boat, it’s just a simple click of the “Invert Mask” check box.

Shot3

Subtle, but useful to me.

Now please, Adobe, add that ability to the Gradient Tool and to the Adjustment Brush especially.

Visualize Spot Healing

I’d like to think my sensor was perfectly clean before leading a recent tour to Bhutan. As a matter of fact, it was extremely clean before I left. But, as life goes, things don’t stay clean.

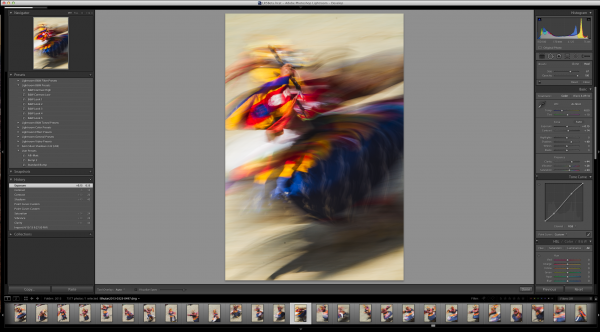
Take this image of a masked dancer at the Paro Tsechu.

Viz1

I wanted some blur (obviously) and used a small aperture to achieve a slow shutter speed. In this case, f/25 and 1/6th of a second. Closing down that aperture makes dust on the sensor more obvious, but this image has a lot going on making it hard to find all the dust.

Viz1-2


Viz2


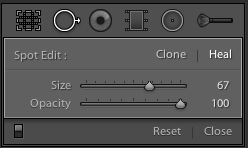
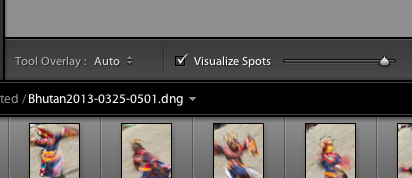
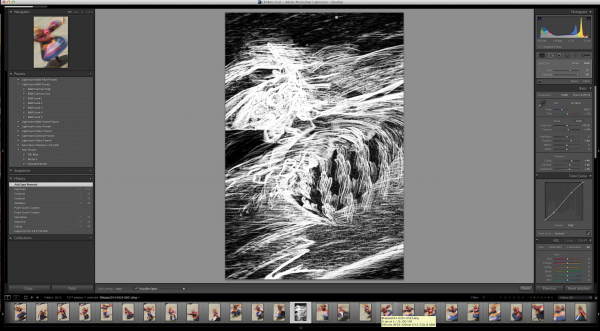
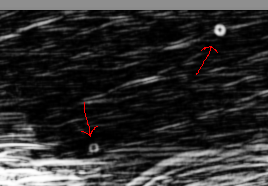
If I click on the “Visualize Spots” check box after clicking the Spot Removal Tool, the slider to the right of it comes alive and I can now more easily see spots. This is a technique used in Photoshop for a while and it works best where edge contrast can be spotted, so in areas without a lot going on.

Viz11

In this image, I found three additional spots, two of which would have been easy to miss without the tool.

Viz4

Remove Chromatic Aberration Check Box

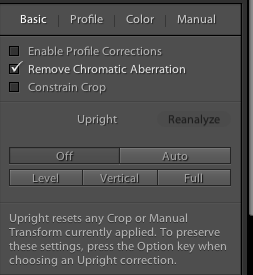
This one is really small, but helpful. With the addition of the “Upright” feature to the Lens Correction panel, Adobe made it easier to get to the Chromatic Aberration removal check box.

Rem1

It’s a small thing, but I often use the check box for “Enable Profile Corrections” for my lens and then want to remove chromatic aberration on only select images, but many. The placement of the box here, as well as on the “Color” tab, helps.

Upright Is Not That Functional For Me

Maybe I’m doing something wrong, but I doubt it. This is one of Adobe’s touted JDI (Just Do It) features and it seems to work well on the demos, but not in real life. If it did, it would be cool. I can get the feature to work part of the time, but no where near even 25% of the time reliably.

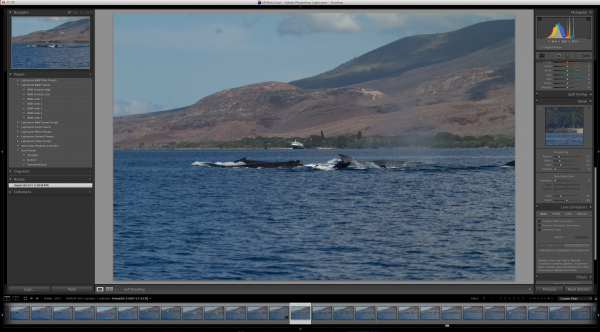
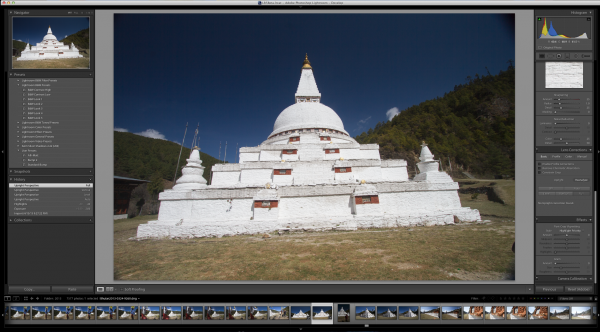
The feature is supposed to level a scene and make diverging or converging vertical lines straight. It can be helpful when it works. But something as simple as a horizon, an obvious one, in this example is not being leveled.  Here’s the initial image out of the camera.

Level1

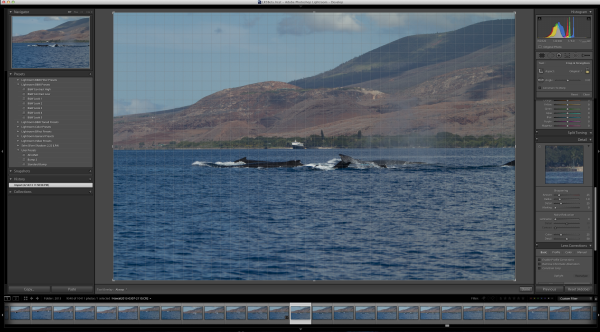
Now to show that the horizon is not level using the Crop Overlay.

Level2

And now using the tool in Auto mode.

Level3

I tried in Level and Full modes to no avail. The program clearly states “No Upright Correction Found”. This is supposed to be a boon for landscape photographers, but even with a clear horizon like this, it failed.

I tried another obvious shot from Bhutan.

Level4

Now how can it say, in all four modes (Auto, Level, Vertical and Full) that no data can be found?

I’m not saying it doesn’t work, I’m saying it’s wonky and not yet reliable.

But this is beta software and that is why they put it out, to find the kinks that mean the most for their users.

Give it a try, Lightroom 5 Beta is quite useful with all the upgrades instituted.


Post originally from: Digital Photography Tips.

Check out our more Photography Tips at Photography Tips for Beginners, Portrait Photography Tips and Wedding Photography Tips.

3 Small But Important Lightroom 5 Beta Changes You Might Have Missed


Digital Photography School

 
Comments Off on 3 Small But Important Lightroom 5 Beta Changes You Might Have Missed

Posted in Photography


Instagram backs away from controversial changes to terms of service

19 Dec

Istagram_logo.png

Instagram has backed away from controversial changes it planned to make to its terms of service. Co-founder Kevin Systrom has used the company blog to announce that the most sensitive phrase in the terms will be revised. The update would have given Instagram the right to sell user’s images to third parties without compensating them. Systrom says this was never the company’s intention. Instead, he says, wording will be developed to allow it to associate information such as users’ profile images with commercial postings (as Instagram’s owners, Facebook, do).

News: Digital Photography Review (dpreview.com)

 
Comments Off on Instagram backs away from controversial changes to terms of service

Posted in Uncategorized


CS4 Patch tool changes: Photoshop

13 Mar

High Quality www.youtube.com Learn why the Patch tool in CS4 works differently to the earlier versions and how to to use correctly.
Video Rating: 4 / 5