RSS
 

Posts Tagged ‘Blending’

How to Use Photoshop Blending Modes for Fine Art Portraiture

14 Oct

The post How to Use Photoshop Blending Modes for Fine Art Portraiture appeared first on Digital Photography School. It was authored by Charlie Moss.

photoshop-blending-modes-for-fine-art-portraiture

Layering images experimentally in photoshop can be an exciting way to bring a fine art feel to your photography. It is spontaneous and unpredictable, with different outcomes each time.

The layering technique I talk about in this article is a way you can explore and get inspired by the work of Victorian art photographers like Julia Margaret Cameron. They would have used long exposures because of the limitation of their cameras, which added a dream-like quality to their images.

Instead of long exposures, I have used multiple images shot of the same subject, layering them and using Photoshop blending modes. It gives a different kind of ethereal feeling to the images which you can use on any subject, not just portraits.

Start with a portrait

Your portrait doesn’t have to be sophisticated, but it should be able to be repeated over a dozen shots or so. I opted for simple natural window light, but there’s no reason why you couldn’t use flash instead.

photoshop-blending-modes-for-fine-art-portraiture

The image I found worked best was one with strong colors and features with a simple background. I opted to take inspiration from Julia Margaret Cameron’s photography by using simple historical clothes, and an instantly recognizable prop.

You want to try to end up with a dozen or so slightly different images of your subject. Take far more images than you need so that you have lots of choices when it comes to selecting images for your layering effect.

Between each shot, ask your subject to move just a small amount – perhaps their head or their hands, but just a fraction. Try to avoid any dramatic pose changes.

Layering the images in Photoshop

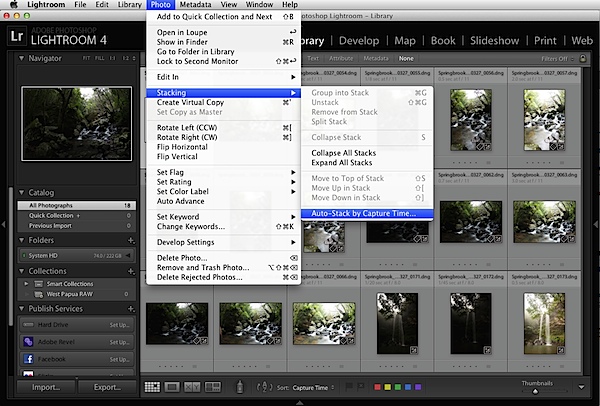
When it comes to selecting images and editing them, there are many different software packages and options. I’m going to talk about how I use Lightroom Classic and Photoshop to achieve this effect. Even within these two software packages, there are other ways you can accomplish the same effect. As long as you end up with a photograph that you love, then you haven’t done anything wrong!

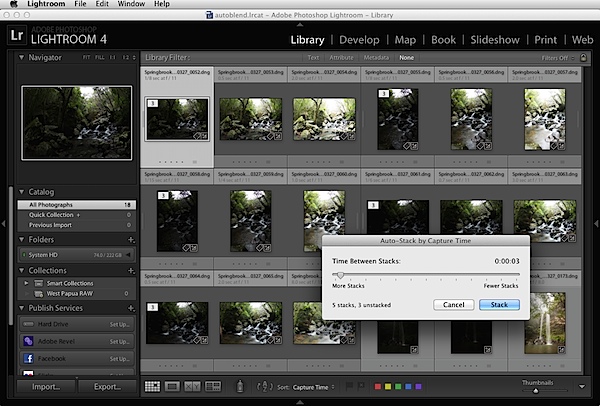
I start by importing my images into Lightroom Classic and then selecting the ten or so images that will make up the layers of my final image. At this point, I try to choose a ‘base’ image that will be at the bottom of the layer stack in Photoshop and will show through the strongest. Generally, this is my favorite image out of the set.

How to Use Photoshop Blending Modes for Fine Art Portraiture

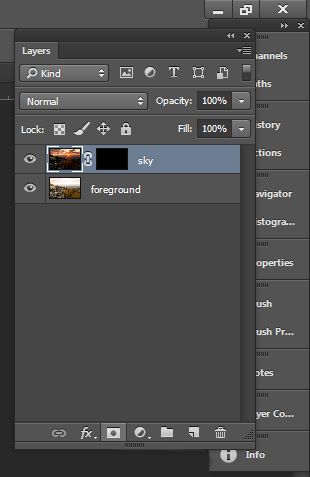
When you’ve got your images selected in Lightroom Classic in the Develop module, open the ‘Photo’ menu and select ‘Open as Layers in Photoshop.’

This will save you having to manually stack all of the images together. You’ll end up with a single file open in Photoshop with all of your selected images placed on layers.

How to Use Photoshop Blending Modes for Fine Art Portraiture

The next stage is to place your ‘hero’ image (the one that you want to show through the most) at the bottom of the layer stack by dragging and dropping it. Then select all the layers above and reduce their opacity.

Playing with Photoshop Blending Modes

This is when it starts to get interesting. Playing with the different photoshop blending modes for the layers will give you all kinds of different results. Dark images will suit different blending modes to lighter images. You can check out a comprehensive guide to photoshop blending modes here!

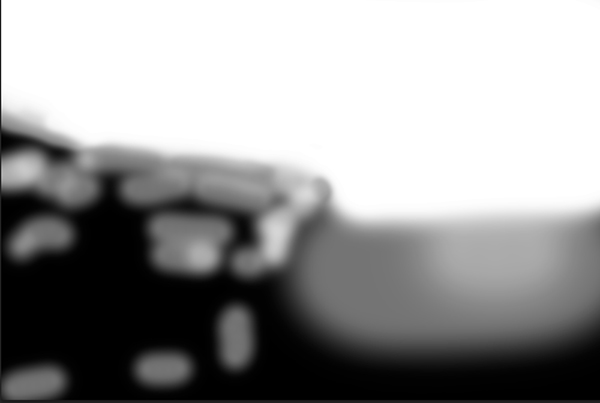
You’ll want to turn down the opacity of the layers quite far so that the original ‘hero’ image shows though. The other layers should then become more of a fuzzy halo rather than a focal point for the shot.

photoshop-blending-modes-for-fine-art-portraiture

Once you’ve found a blending mode and opacity that looks good, you can start to fine-tune the image.

Begin by identifying parts of the images that don’t really work, and work out which layer they’re on. Then create layer masks and use a black paintbrush to gently fade those unwanted parts away.

I decided to remove almost all of the layers from the face of my subject since it was a portrait, and I wanted to be able to see her clearly. I also took away some distracting echos of hands, which I felt made the final image stronger. Since you’re working using layer masks, you can always undo any of your choices at this stage – just simply paint over the bits you want to see again on the layer mask with a white paintbrush!

How to Use Photoshop Blending Modes for Fine Art Portraiture

As you can see from my layer masks, they don’t have to be neat. Just use a fairly large brush with soft edges and a low opacity and you won’t be able to see the brushstrokes of your mask in the final image.

Finishing your image

Once you’re happy with the basic image you’ve achieved through layering, I’d suggest saving a copy of your work. Then you can experiment further with different techniques.

photoshop-blending-modes-for-fine-art-portraiture

Once I’d saved my image in Photoshop, I closed it and went back to Lightroom Classic to work on the shot further. Here, I simply changed the toning of the image slightly with a preset and applied some sharpening to key areas of the picture.

The result was a warmth that always makes me think of Old Masters paintings in galleries. Together with the effect of the layers, it creates a rather painterly fine art image.

photoshop-blending-modes-for-fine-art-portraiture

But, of course, there’s absolutely no harm in processing the same image in a different way. This is one of the reasons I love Lightroom Classic – you can create virtual copies of a single shot and work on them all differently!

photoshop-blending-modes-for-fine-art-portraiture

This variation I processed in Nik Analog Efex Pro 2, which you can use straight from the Lightroom Classic interface in the same way that you can take photos to Photoshop. The software itself is very similar to Lightroom Classic with its adjustment panels on each side but instead specializes in replicating old film effects.

It is a great way to create an image that pays homage to the great Victorian art photographers.

You could get a similar effect by layering wet plate textures and dust and scratch layers in Photoshop before adding a black and white conversion.

There are many ways to get all these different effects – please try some and post your results in the comments. I’d love to see what you did with this technique and how you achieved it!

The post How to Use Photoshop Blending Modes for Fine Art Portraiture appeared first on Digital Photography School. It was authored by Charlie Moss.


Digital Photography School

 
Comments Off on How to Use Photoshop Blending Modes for Fine Art Portraiture

Posted in Photography


Learn about Photoshop blending modes in just 8 minutes

21 Jan

Confused about what all those layer blending modes do in Photoshop? Well, you don’t need to be any more. Jesus Ramirez of the Photoshop Training Channel has made an excellent short video tutorial that explains each mode in simple and easily-understood terms, so even beginners will get the picture.

His 8-minute Crash Course uses a gray tone chart over a normal photograph to show how each blending mode alters the way the chart appears. Jesus also demonstrates how different brightness values blend together, and how to use layer blending to control color density and saturation. Finally, he also explains why the modes are grouped into six sections on the drop-down menu, so you can quickly find the mode you need depending on the situation.

Check out the full video above. It’ll only cost you eight minutes of your life, and you’ll almost certainly learn something new unless you’re already a Photoshop expert.

Articles: Digital Photography Review (dpreview.com)

 
Comments Off on Learn about Photoshop blending modes in just 8 minutes

Posted in Uncategorized


How to do Digital Blending in Photoshop to Create a Composite Photo

14 Feb

Normally when talking about digital blending, people will first think of exposure blending. That is correct, but it can do more than that. There is several situations where digital blending can be very handy. Not only can it help create a better photo, it also eases you in your shooting experience. In this article, I will share how I use a digital blending in Photoshop to create a much more interesting composition.

digital blending

I took the photo above of Batu Cave in Malaysia. I chose to add a few pigeon photos from a series that I captured, and blended them all together into a single photo with the digital blending technique.

Select images

Here are the raw photos that I going to use. You can see that there are pigeons in different locations in each of the photos.

digital blending Photoshop

Open Photoshop

Next with Photoshop open, I load all the photos into one place as different layers. You can rename them if you want, as I did here.

digital blending in Photoshop

Back up for a second: How the shots were done

Notice there’s a “base” layer at the bottom. That image was captured with different camera settings compared to the pigeon shots. I do this because normally before capturing any additional photos such as the pigeon images, I will first take a few photos with the BEST camera settings for that situation. In this case, that was ISO 100, aperture of f/8, 1/30th of a second shutter speed.

However, the 1/30th shutter speed was too slow to capture any photos of pigeons. So I needed a faster shutter speed which ended up with camera settings of; ISO 800, f/5, and 1/640th of a second. This allowed me to freeze the movement of the pigeons, but at the same time, it also generated more noise in the photos (ISO 800 compare with ISO 100) and a slightly more shallow depth of field (f/5 compared with f/8) resulting in a softer background.

So the ideal scenario is to have them both together in one final image. Using the digital blending technique you can have the best image quality photo with lesser noise and better focus, and then blend in only the pigeons from later photos. The pigeons will appear to have more noise than other areas of the photo but only in very small areas and you can do a separate Noise Reduction just for the pigeons if needed.

Shooting sequence

Here is the shooting process in sequence, to give you a better picture:

  1. Decide on a composition.
  2. Take your photo with the best (optimal) camera settings for the scene.
  3. Without moving your composition, change the camera settings to capture anything that looks interesting to you. For example; animals, people that able to bring out the atmosphere of the place such as monk praying in a temple, or even any lifeless objects such as trains or boats, or anything else you can think of or notice in the scene.

Photoshop steps

Step #1 – Turn off some layers

Back in Photoshop, you will see there is an “Eye” icon beside each layer. This means that all these layers are visible. Temporary, let’s hide all the pigeon photos first by clicking on the “Eye” icon to uncheck each layer. Leave only two visible, the Base and Pigeons 1 layers.

digital blending

Step #2 – Add a layer mask

Next, select the Pigeons 1 layer and while holding down the Alt key, click on the “add layer mask” icon (circled in the red in the photo below left). You shall have a black rectangle appear at the right side of the layer, as seen in the photo below right. This is to add a reverse layer mask on your layer, the black mask means it is hiding what is currently in this layer. If you don’t hold the Alt key when you click on the icon, it will create a white mask which will reveal what is currently in the layer.

digital blending layer mask

Step #3 – Paint on the mask to reveal the bird

Now we have a black mask. To blend in only the pigeon from that layer, we will need to select the Brush Tool and paint on the mask in white over the pigeon’s area. Note: A black mask means hiding and white means revealing the layer.

digital blending Photoshop

After selecting the Brush tool, make sure you are using a soft edged brush, and the opacity is set to about 75%. The opacity will affect how much of your painting result will be applied. Using opacity at 100%, you only need to paint once to fully reveal that particular area. However at 75 % or lesser opacity, you will need to repeat the painting few times in order to achieve the 100% effect. It is slower, but at the same time it create a smoother edges and the layer is better blended to the original image.

digital blending brush tool

Notice when you do the painting, the mask on the layer also reflects your painting result. Congratulations, now you have the first pigeon blended in! Let’s repeat the same process for the next layer.

digital blending Photoshop

Step #4 – Repeat on next layer

By performing the same steps on the “Pigeons 2” layer, you will now have the second pigeon added. But wait, something is not right. Do you notice that the second pigeon has dark edges surrounding it? Why?

digital blending Photoshop

This is because even at the same camera settings, the lighting conditions may have changed during the shooting process. This image was captured when there were clouds blocking the sun and it dimmed the light in the cave. Instead of solving this by doing some really precise masking (by zooming in and brushing carefully on the edge of the pigeons, which can be a tedious process), let’s try adding a Curves adjustment layer.

Before doing any adjustment with the curve layer, right-click on it and choose “create clipping mask”. This will make sure whatever adjustment is done here will only affect the layer below it. Now add some brightness by slightly pulling the curve up, as shown below right.

digital blending Photoshop

The surroundings of the second pigeon looks much better now. Other than using a Curve, you can do this on any other adjustment layers such as color balance adjustment layer to correct the tone of the particular layer, if the white balance is not equal with the background.

digital blending Photoshop

You can see the bird blends in much better now with the Curve applied.

Step #5 – Complete masking on all layers

Let’s continue with the rest of the layers. The masking results will look like the photo below once you have done the blending process.

digital blending Photoshop

Finally

Here is the final output of the digital blending. Now you can perform any other post-processing adjustments from here by applying contrast, changing color balance, sharpening, or any other process that you think is necessary to enhance your photo.

digital blending Photoshop

I hope you have enjoyed this article, and it gives you some ideas or inspiration. If you have any questions or suggestions, feel free to leave a comment below.

googletag.cmd.push(function() {
tablet_slots.push( googletag.defineSlot( “/1005424/_dPSv4_tab-all-article-bottom_(300×250)”, [300, 250], “pb-ad-78623” ).addService( googletag.pubads() ) ); } );

googletag.cmd.push(function() {
mobile_slots.push( googletag.defineSlot( “/1005424/_dPSv4_mob-all-article-bottom_(300×250)”, [300, 250], “pb-ad-78158” ).addService( googletag.pubads() ) ); } );

The post How to do Digital Blending in Photoshop to Create a Composite Photo by Grey Chow appeared first on Digital Photography School.


Digital Photography School

 
Comments Off on How to do Digital Blending in Photoshop to Create a Composite Photo

Posted in Photography


5 Easy Steps to Exposure Blending for High Contrast Landscapes

27 Oct
Final Image  Bear Rock, Dolly Sod Wilderness Area, West Virginia

Final Image: Bear Rock, Dolly Sod Wilderness Area, West Virginia. Sunrise and Sunsets can be extremely contrasting and very challenging to capture the wide exposure range.

Here’s a problem I am sure you have encountered, instances where you try to photograph an image that has a greater range of light and dark than your camera can accurately capture. In the example above, when we set our exposure to expose the sky correctly, the foreground objects are severely under-exposed. Likewise, if we set our exposure to correctly expose the foreground, the sky is blown out and loses almost all detail. One solution to this dilemma might be to use HDR software to combine several bracketed exposures into one image. However, this method can be overwhelming and time-consuming to do correctly for a pleasing result. Another solution to this problem could be to use graduated neutral density filters. Unfortunately, a good set of filters can be quite expensive and a cheap set can harm the quality of your image.

A simple solution to this problem scenario may be as easy as taking two exposures, one correctly exposed for the dark areas (in this case the foreground) and the other correctly exposed for the lighter area (in this case the sky). Place your camera on a tripod so that both images will be composed exactly the same.

image correctly exposed for the sky 1/10 of a second @ f/10. ISO 100

Image exposed for the sky: 1/10th of a second @ f/10, ISO 100

Image exposed for the foreground: 1 second @ f/10, ISO 100

Image exposed for the foreground: 1 second @ f/10, ISO 100

Now, let’s look at a simple five step exposure blending process, performed in Photoshop, to resolve this contrast issue.

Step 1: Open your images

Open the two exposures in Photoshop as layers. This can be simply done with the following script. In Photoshop, select: File/Scripts/Load files into stacks (if you use Lightroom just select both thumbnails, right click and choose “Edit in>Open as Layers in PS). Then select your two exposure files. Label the layers for identification. (In this case we label one layer “Sky” and the other “Foreground”). Drag the Sky to the top layer if not already in that position.

Step 2: Add a layer mask

Add layer mask filled with black to top layer.

Add layer mask filled with black to the top layer.

Add a layer mask, as shown below, to the highlighted Sky layer. While holding down the ALT (opt) key, select the Add layer mask button located at the bottom of the layer palette. This will add a layer mask to the Sky layer and automatically fill it with black. The black-filled layer will mask out all of the Sky layer and reveal all of the Foreground layer.

Step 3: Paint over sky

Click on the black layer mask and select the paintbrush tool. Set your paintbrush to paint with white, and set the size of your brush as needed. Set the hardness of your brush to a low number to give it a soft edge while you paint. Paint over the sky area of the image, which will reveal the Sky layer. By adjusting the opacity, size and hardness of the brush as you paint, blend the two exposures together.

Paint with white on your layer mask to reveal the sky in the top image. use different opacities and hardness to make the blending look natural.

Paint with white on your layer mask to reveal the sky in the top image. Use different opacities and brush hardness to make the blending look natural. This is what the mask might look like.

Step 4: Add finishing touches

Add adjustment layers (see below) as needed to adjust colors and contrast of the layers to make the image look natural.

Final layer palette

Final layer palette

Step 5: Save your file

Save your file as a Photoshop document (.PSD). This will preserve your image with layers which you can return to if you need to make further adjustments to improve the image.  You can now can flatten the layers (Layer/ Flatten Image) and Save As a single layer file such as a JPG.

This image was created from three files using Exposure blending. Exposure #1 was exposed for the light green area above the falls and exposure #2 was exposed for the shadow area below the falls. The light was hitting the rock on the left  very hard so a third exposure was need just for that rock.

This image was created from three files using exposure blending. Exposure #1 was exposed for the light green area above the falls and exposure #2 was for the shadow area below the falls. The light was hitting the rock on the left very hard so exposure #3 was needed just for just that rock.

So next time you are faced with an extremely contrasting scene, try this easy exposure blending process to extend the exposure range of your image. Do you have any exposure blending tricks that you use? Post samples of your images.

The post 5 Easy Steps to Exposure Blending for High Contrast Landscapes by Bruce Wunderlich appeared first on Digital Photography School.


Digital Photography School

 
Comments Off on 5 Easy Steps to Exposure Blending for High Contrast Landscapes

Posted in Photography


Exposure Blending Using Luminosity Masks Tutorial

18 Apr

There will be a time when the wizards behind your camera technology conjure up a sensor so powerful they will swallow up any scene and spit it out just as it was – no over, or underexposed areas. Until then, in order to produce an image with a high dynamic range of light, you have to work with the sensors available to you and create your own post-processing magic.

Pink sunset

Image created by blending two exposure with luminosity masks, one for the sky and one for the foreground.

While you, and many photographers, may have relied heavily on HDR programs in your exposure blending quest, many more are now beginning to turn to luminosity masks as a cleaner alternative. Through the use of luminosity masks you can create stunning, balanced images that encapsulate a vast dynamic range of light. They give you incredibly fine control over your imagery in almost every area.

While some HDR programs nowadays produce very natural, clean HDR images, luminosity masks do not affect the original files at all, so there is literally zero image degradation during the blending process. That is why so many digital photographers are beginning to make luminosity masks a staple in their workflow.

What are Luminosity Masks?

Luminosity masks break an image down into various channels of luminosity. In other words, they allow you to make very specific selections in Photoshop based on how bright or dark an area is. Let’s say you were looking at a beautiful nighttime cityscape shot. Everything is exposed correctly apart from the street lights, which are completely blown out. You also have a darker exposure in which the street lights are ideally exposed.

Through luminosity masks you can make an accurate selection of the street lights because you can hone in on their brightness, or luminosity values. With this selection you can simply replace the overexposed streets lights with the correctly exposed ones in the darker image.

What You Need to do Luminosity Masking

Firstly, creating your own luminosity masks is a complex and cumbersome process. However, I have a free Photoshop Luminosity Mask Action Set that will do all of the work for you. You can download it here: Free Luminosity Mask Action Set.

Secondly, it is imperative that you have a good understanding of Masking in Photoshop. If you’re a little bit unsure of the process, you can visit Adobe’s site which has a useful video tutorial for you to follow: Masking in Photoshop.

Which exposures to blend?

Ideally, the exposures you choose to blend should cover the full range of light in a given scene. Your brightest exposure should contain information in the darker areas, while your darkest exposure should contain information in the brightest areas. You are not limited to the number of exposures you can blend. Sometimes, in scenes of extremely high contrast, you may need to use as many as five to ensure a smooth transition between exposures and to cover the full range of light in the scene.

The order you choose to layer the exposures in Photoshop is dependent on your personal preference and the exposures you’re working with. Usually working with your normally exposed image as the base layer will derive the best results, but sometimes you may need to work with a darker or brighter exposure as your base layer.

Once you’ve decided on your exposures and have layered them in Photoshop, you now must decide which exposure you will run the actions on. Generally this will be done on your normally exposed image because it will offer the widest range of usable masks. For example, if you ran the luminosity mask actions on a darker exposure, you would gain a full range of dark and mid-tone luminosity masks, but very few, if any, workable bright masks, because the darker exposure is lacking in highlights. The converse is true for a strongly overexposed image.

Blending Exposures Using Luminosity Masks Tutorial

Today you’ll work with two exposures. One is ideally exposed for the sky and sea (download the underexposed image here), while the other is exposed for the foreground elements (download the overexposed image here).

Original files

You want to combine the sky and the sea in the underexposed image with much of the foreground in the overexposed image. To do this, you need to find a way of selecting the sky and the sea (i.e., the blown out areas) in the overexposed shot. Once you’ve done that you just need to replace it with the sky and sea of the darker exposure.

Steps in Photoshop For Blending Exposures

1. Install the Photoshop Action set

Instructions on how to install actions can be found here: Get Creative With Photoshop Actions

2. Import your two images into Photoshop

Bring both images into Photoshop as layers, placing the underexposed image on top. Align the images by selecting both of them on the layers panel, and going to Edit > Auto-Align Layers.

3. Turn off the top layer

Uncheck the eye on the layers panel next to the underexposed layer. This will make it invisible and ensure that the luminosity mask actions will run on the overexposed layer only.

4. Run the Masking Action

Go to your Actions panel, which looks like a Play button on the toolbar. Open it up and go to the set called JM Luminance Masks. Click on the arrow to the left of that. You will now see an option called Generate Luminance Masks. Select it and press the Play button at the bottom of the Actions panel to begin the process.

Luminosity mask actions

5. Add a Layer Mask to the Dark Underexposed Layer

Now, check the eye next to the underexposed layer, so that it is visible again. Make sure that layer is selected, then go down to the bottom of the Layers panel and, while holding Alt (Option on a Mac), left click the Add a Mask icon. This will create a black layer mask on the underexposed layer, making it invisible again.

6. View Luminosity Masks

To see the Luminosity Masks that you’ve generated, go to your Channels palette, next to the Layers panel (if it is not showing go to: Window > Channels and it will appear). You’ll see 18 monochromatic channels, ranging from Brights 1-6, Darks 1-6, Midtones 1-6. Every one of these channels is a potential mask.

Luminosity mask channels

7. Comparing and Selecting a Luminosity Mask

For this set of images, you only need to use one mask in order to blend the sky from the darker exposure into the overexposed image. In this instance, you’ll need to select Brights 3.

Comparing Masks

Just as with normal masking, the brighter the pixel the stronger the selection. In other words, in the image above, if you used Brights 3 you are selecting much of the sky and sea, but none of the foreground which is completely black. Conversely, if you selected Darks 3, for example, you would only be making a selection of the foreground sand and the poles that lead out to sea.

When choosing the appropriate mask, you are looking to isolate different areas. Therefore, it’s important that the mask you choose has the greatest contrast between the areas you wish to select and the areas you wish to ignore.

For example, if you were working on an image of a nice green field on sunny day, but the sky was blown out and you wished to exchange it with the sky from a darker exposure. You would run the luminosity mask actions and choose the mask where the field was black and the sky was white. This would ensure you would only select the sky and not the field in the foreground.

To turn Brights 3 into an actual selection, you just need to hold Control (Command on a Mac) and click the left mouse button on the thumbnail of the Brights 3 channel. Marching ants will appear to indicate your selection. Press “Control + H” to hide the marching ants.

8. Get Ready to Paint on the Mask

Now switch back to your Layers panel and select the underexposed layer. Make sure you select the mask, and not the actual layer itself.

9. Set up the Paint Brush Tool

Choose the Paint Brush tool on the toolbar and make sure the foreground colour is set to white. Choose the correct brush size. This will depend entirely on the area you’re working with in a given image, but usually, a larger brush is better. A brush size of 2,000 pixels was used here. Set the opacity depending on the strength of the masking you wish to use. For example, with this image, you will mask the sky with an opacity of 100%, but the overexposed areas in the water and foreground will only be masked at 40% opacity. This is because you don’t want to darken the sea too much.

10. Painting or Applying the Mask

Now you’re ready to begin masking. Freely move your paint brush around the areas you wish to affect. Since you are masking with a luminosity mask selection you don’t have to worry about going over the edges. Try varying opacities in different places. Even if your brush opacity is set to 100%, you can still run your brush through certain areas a few times to strengthen the effect.

By holding Alt (Option on a Mac) and clicking on the layer mask you’re working on, you can see exactly what the mask now looks like. The image below is the final layer mask after you’ve finished painting. Remember that white equals visible and black equals invisible. So the sky in this layer is completely visible, the sea is grey so it is partially visible. Since the foreground is black, which means invisible, you will be left with a foreground that is 100% from the overexposed layer below.

Final Mask

After a small contrast adjustment and a selective vignette added, here’s the final image along side the original overexposed image you were working with.

Final images

You now have a nicely balanced image with a good range of dynamic light and tones.

Deleting the Luminosity Masks

While working in Photoshop, the more layers you work on, the larger the demand on Photoshop and your system. Large workflows can seriously slow down your operating system. To ease the load, you should delete the luminosity masks once you’ve finished working with them.

To do this, go back into your Channels palette and select Brights 1. Then hold down Shift and press your left mouse button on Brights 2 to select this too. Do the same with each luminosity mask below. Once all are selected, click your right mouse button on any of the selected masks and choose the Delete Channels option. This will remove the selected channels.

Summary

At first, luminosity masks seem complex and sometimes daunting, but in truth, this whole workflow took less than 5 minutes. After a little bit of practice you begin to get an intuitive sense of how to use these powerful tools, and once you do, you gain extensive control over your images that can change your photography forever.

Have you tried this method of blending images, if so share your thoughts or images in the comments below. Or do you prefer the HDR tone-mapping process? Do you think HDR is dead or maybe it should be? Or perhaps you are somewhere in the middle in the 10 steps every HDR photographer goes through? What are your thoughts?

Check out the newest dPS ebook – Loving Landscapes A guide to landscape photography workflow and post-production – a brand new dPS ebook by the authors of Living Landscapes

The post Exposure Blending Using Luminosity Masks Tutorial by Jimmy McIntyre appeared first on Digital Photography School.


Digital Photography School

 
Comments Off on Exposure Blending Using Luminosity Masks Tutorial

Posted in Photography


Blending modes: Tools for post-processing

26 Jul

thomas-park--ari--originalhands.jpg

In this article, Seattle-based photographer Thomas Park shows how you can use Photoshop’s layer ‘blending modes’ to remove stains and blemishes from scanned images, sharpen up your photographs and even warm up cold hands! (sort of). Click through for a link to the full article, ‘Blending modes: Tools for post-processing’.

News: Digital Photography Review (dpreview.com)

 
Comments Off on Blending modes: Tools for post-processing

Posted in Uncategorized


Save Time with Batch Exposure Blending

10 May

A Guest Post by Nick Rains.

Do you ever shoot a bunch of exposure-bracketed shots and then never get around to blending them together?

Maybe you don’t shoot multiple exposures in the first place because you don’t want to spend hours in front of the computer blending together the individual images. If you are like me, the thought of individually exposure-blending a whole load of images is just not what photography is all about – I know I can produce better images with better tonal range this way but it seems like a lot of work in front of the computer.

What if I told you I do most of my exposure blends automatically?

Here’s how :

You need Lightroom and a Lightroom plug-in called LR/Enfuse.

This is free to download but is restricted to work only on low resolution images. The good news is that the full version is donationware and when you find out just how genuinely useful it is you’ll be happy to pay a modest amount. The guys who write these plugins do need support – I’d suggest $ 10 – $ 20 – but it’s up to you

So, here we go…

1. Shoot your exposure blend image sets as normal – I recommend using the two-second self-timer combined with auto-bracket so that you get all three shots with one press of the shutter button. I normally set the auto-bracket to plus and minus 2 stops which seems to cover most high contrast scenes.

2. Import the images into Lightroom as per usual.

3. In the Library Module, view the folder of the images you just imported and choose Photo / Stacking / Auto-stack by Capture Time. Set this to about three seconds and Lightroom should collect all your sets of bracketed images into stacks because they will normally have been shot less than three seconds apart. Adjust the slider and you’ll see them stack and unstack in ‘real time’. Choose Photo / Collapse All Stacks and you should now see single stacks each containing the images which make up each exposure blend sequence.

Batch Exposure Blending 1.png

Batch Exposure Blending 2.png

Batch Exposure Blending 3.png

Auto-stacking is not foolproof, but you will soon get the hang of it – the trick is to make sure the folder only contains bracketed images that need stacking. If you mix them up with single captures it’s possible that you’ll get a few odd stacks.

4. Now select all the stacks that are made up of your three exposure brackets (command or control-click to multi-select).

5. Choose File / Plug-in Extras / Blend Exposures using LR Enfuse.

6. Use the default settings under the Enfuse tab but on the Ouput Tab check the box at the top called “Batch Mode”, check the box labelled “Create blended image in the same folder as the primary image in the set” and check the box labelled “Reimport image into Lightroom”.

Batch Exposure Blending 4.png

You can ignore ‘Auto-align’ if you used a tripod, otherwise, if you shot hand held, turn this one.

7. Hit the “Enfuse Images” button.

8. Go get a cuppa whilst LR/Enfuse works its way through each individual stack of images, converts them according to any raw settings in the Lightroom Develop Module, exposure blends them, saves the result into the same folder as the originals, and imports them back into the Lightroom catalogue. All on full automatic.

What you’ll see is one new file pop up next to each stack in the folder. These will be your exposure blended images.

Batch Exposure Blending 5.png

Batch Exposure Blending 6.png

Pretty cool huh? Here’s the before (top) and after (bottom) of the image we processed (click to enlarge to full size).

Before.jpg

After.jpg

Images: Springbrook National Park, QLD – Twin Falls. Shot on a Canon EOS 5D Mk III – EF8-15F4L

This is only a quick run through the method, it’s not completely foolproof and occasionally you’ll have to go back and manually blend a difficult image using Photomatix or something similar, but, on the whole, LR Enfuse does a superb job.

One refinement would be not to do much adjustment in LR before blending, set LR/Enfuse to create 16bit TIFFs and then use LR’s extensive tone mapping tools to adjust the new output file to suit your tastes. I intend to go through this process in greater detail in a Lightroom eBook I am currently working on.

In the meantime, automating your workflow like this can save you a huge amount of time. Setting it up in the first place might take a bit of thought and effort but, believe me, it’s well worth it.

Nick Rains has been a professional photographer for almost thirty years, doing mostly editorial work for clients such as Australian Geographic and has made a point of keeping up to date with technology. His latest forays into the world of current technology have been shooting more and more video and creating an iPad app called Photique where he publishes articles and interactive eGuides as well as free image portfolios.

Post originally from: Digital Photography Tips.

Check out our more Photography Tips at Photography Tips for Beginners, Portrait Photography Tips and Wedding Photography Tips.

Save Time with Batch Exposure Blending


Digital Photography School

 
Comments Off on Save Time with Batch Exposure Blending

Posted in Photography


Ultimate Guide To Blending Modes in Photoshop

26 Apr

The blending modes feature is one of Photoshop’s most undervalued tools for Photographers. Blending modes can be used to alter the ways in which each layer interacts with the layers below it, allowing for endless possibilities when it comes to setting the right tone or adding artificial lighting. Graphic designers and digital illustrators use blending modes all the time to Continue Reading

The post Ultimate Guide To Blending Modes in Photoshop appeared first on Photodoto.


Photodoto

 
Comments Off on Ultimate Guide To Blending Modes in Photoshop

Posted in Photography


Getting The Image You See In Your Head: Blending vs HDR

18 Apr
This shot is an HDR shot blended from 6 bracketed shots.  Each shot is one stop different from the next. The exposures range from -2 through +3. Aperture was set to f/16. The shutter speed ranged from 1/125 at -2, to 1/4 at +3.

This shot is an HDR shot blended from 6 bracketed shots. Each shot is one stop different from the next. The exposures range from -2 through +3. Aperture was set to f/16. The shutter speed ranged from 1/125 at -2, to 1/4 at +3.

Often times when I’m photographing landscapes, the image the camera sees versus the image in my head are quite different.  Sometimes that image in my head doesn’t mesh with what the camera capture, because the dynamic range is far too great.  The contrast between the highlights and shadows is just too great.  Such was the case with this shot I took a week ago of Arch Rock in Valley of Fire State Park in Nevada.

These are the six shots I used for the HDR blend. I also used the even exposure, and the +2 exposure, for the two image manual blend I did in Photoshop.

These are the six shots I used for the HDR blend. I also used the even exposure, and the +2 exposure, for the two image manual blend I did in Photoshop.

With the sun setting directly behind it, exposing for the sky would have rendered the rock a silhouette.  This may have been fine had I intended a silhouette shot- which I did capture and intend to use. But ultimately I wanted some detail in the rock, I wanted detail in the sky, and I wanted to maintain the drama of the spectacular desert sunset that I was witnessing.  Because of the way the landscape was laid out before me, graduated neutral density filters were not going to work for this shot.  If I wanted to bring down my highlights and keep detail in the shadows, I was going to have to either blend two shots, or use an HDR program to get the result I was looking for. HDR stands for High Dynamic Range, meaning an image where the range of tones is higher than what the camera can accurately record.

I really wasn’t sure which processing technique would give me the best results.  And sitting there in the desert, I didn’t want to place any bets on it.  So I bracketed my shots using the auto exposure bracketing mode on my EOS-1D X.  I shot in Av mode, at f/16, with the EF 14mm f/2.8L II lens. I bracketed for 7 exposures, but ended up only using six. The -3 exposure really didn’t add anything to the HDR, so that was dropped from my processing.   I use Nik HDR Efex Pro 2 for my HDR processing to blend the exposures, and then finish in Photoshop, adjusting color, saturation, etc.  Nik HDR Efex Pro offers a variety of presets, but I always try to keep the HDR processing fairly subtle. I don’t like the over the top look that some get, but I do like the image to pop a bit. I try to minimize any halos, and keep the tones fairly smooth.

Before I processed the HDR image, I also tried a simple two shot blend in Photoshop. I first processed the even exposure and adjusted for color and saturation.  Then, I took the +2 exposure, and processed in the same way, dropping that image on a new layer in photoshop over the even exposure. I then apply a layer mask to the +2 layer, and paint the entire mask black to hide the layer.

Then, using white, I painted the arch back in to reveal the arch at +2 against the sky at even exposure. This takes a lot of patience since with the exposure difference, it’s very easy to see halos if the masking isn’t done carefully. One way to ease the transition is to run a gaussian blur filter on the mask to soften the edges. How much will depend on what the mask is like. You may need to run the gaussian blur more than once to get it just right.

Looking at the two images, the HDR blend seems to have a smoother transition from lights to darks, as well as a richer overall look. I know there is a lot backlash against HDR, and I understand it’s not everyone’s cup of tea. But I believe in using any tool available in order to express what I felt when I looked upon the scene as it happened.  Every scene will be different, and will lend themselves to different processing techniques. Understanding what techniques are available to you can help you overcome the shortcomings of technology and allow you to express your creativity to the fullest.

This shot was done by blending an even exposure with a shot exposed at +2.  The +2 exposure was masked off in Photoshop so only the areas I needed to show through did.

This shot was done by blending an even exposure with a shot exposed at +2. The +2 exposure was masked off in Photoshop so only the areas I needed to show through did.


Post originally from: Digital Photography Tips.

Check out our more Photography Tips at Photography Tips for Beginners, Portrait Photography Tips and Wedding Photography Tips.

Getting The Image You See In Your Head: Blending vs HDR


Digital Photography School

 
Comments Off on Getting The Image You See In Your Head: Blending vs HDR

Posted in Photography


Article: Blending images in Photoshop

10 Mar

BeforeAndAfter-with_adjustments.jpg

Photographer and imaging professional Jean Miele demonstrates how to combine images in Photoshop for seamless and natural-looking results. In this article he takes you through the basics of making Gradient tool adjustments to layer masks. Follow along with a simple tutorial that adds a dramatic sky to an interesting foreground. 

News: Digital Photography Review (dpreview.com)

 
Comments Off on Article: Blending images in Photoshop

Posted in Uncategorized