RSS
 

Posts Tagged ‘Beyond’

Beyond Chernobyl: 15 Design Concepts for a Post-Nuclear World

26 Jul

[ By SA Rogers in Art & Drawing & Digital. ]

Screen Shot 2016-07-25 at 8.51.52 AM

30 years post-Chernobyl and 5 years after Fukushima, we still haven’t figured out how to deal with lingering radiation in the wake of a nuclear disaster or come up with a foolproof way to protect ourselves from similar incidents in the future. Nuclear disaster-focused concept designs address everything from repopulating Chernobyl and safeguarding against radiation-poisoned seafood from Japan to living in a dystopian post-apocalyptic future where mechanical dogs scout the streets.

Self-Contained Fallout-Absorbing City for Chernobyl

nuclear pripyat-self-contained-city

nuclear pripyat-city-in-a-box

nuclear pripyat-aurora-skyscraper-design

People are beginning to resettle the post-Chernobyl nuclear wasteland surrounding Pripyat, Ukraine whether radiation reaches safe levels or not, and this skyscraper concept is an attempt to minimize harm, creating a sort of self-contained oasis among the fallout. The skin of the building essentially acts as an anti-radiation force field, and the ‘Unexpected Aurora’ building itself filters air and water and harvests solar energy.

HAL Exoskeleton Turned Radiation Suit

nuclear HAL suit 2

Originally designed to help people with muscle diseases, the Hybrid Assistive Limb (HAL) suit got a post-Fukushima upgrade to make it a radiation-proof suit for emergency responders. A typical anti-radiation tungsten vest weighs up to 132 pounds, making it very difficult to wear for long periods, but the HAL exoskeleton supports its weight, reducing fatigue and allowing greater access to hazardous sites.

Revitalization of the Chernobyl Zone

nuclear chernobyl revitalization

nuclear chernobyl revitalization 2

nuclear chernobyl revitalization 3

nuclear chernobyl revitalization 4

Another proposal for repopulating the Chernobyl exclusion zone seeks not to be entirely self-contained, but act as a framework for further development of human activity in the area, with a mono-railroad as its backbone. This rail line leads to modular train stations with emergency shower cabins and a decontamination zone, as well as honeycomb-shaped modular housing and observation towers. The development accommodates stubborn residents and curious tourists alike, providing plenty of opportunities to observe Pripyat in its new form.

Fukushima Plates Detect Radiation

nuclear radiation plate

nuclear radiation plate 2

nuclear radiation plate 3

After the Fukushima disaster in Japan, a lot of sushi lovers questioned whether seafood imported from the region was safe, hence this concept by German designer Nils Ferber. There’s a radiation meter built right into each plate, with LED lights to warn you if your food is dangerously radioactive. One glowing white light tells you your food contains low levels of radiation, two white lights advise caution while a large red ring tells you it’s not safe to eat. “In a society that sacrifices reason to profit, security becomes a luxury for those who can afford it,” says the designer. “The plate might become an indispensable tool of survival in the future.”

Mech Suits, Chernobyl Patrol + More by Vitaly Bulgarov

chernobyl black phoenix main

Screen Shot 2016-07-25 at 8.52.41 AM

nuclear bulgarov 1

nuclear bulgarov

nuclear bulgarov 4

nuclear bulgarov 3

nuclear bulgarov 5

Moscow-based concept designer Vitaly Bulgarov presents a series of digital proposals for ‘The Black Phoenix Project: Chernobyl Patrol,’ ranging from semi-civilian drones to advanced weaponry systems. The artist works for game developer Blizzard and created this 3D visualization as a demonstration on speeding up the process of creating concept art with design software like Brush and SoftImage XSI. The mech designs include robotic Scout Dogs, an ‘Arachnid Tank,’ a missile-launching ‘Public Protector,’ infantry bots and an ambulance/rescue robot, and they’re clearly oriented toward a post-apocalyptic, war-torn scenario in Chernobyl rather than just dealing with radiation.

Next Page – Click Below to Read More:
Beyond Chernobyl 15 Design Concepts For A Post Nuclear World

Share on Facebook


[ By SA Rogers in Art & Drawing & Digital. ]

[ WebUrbanist | Archives | Galleries | Privacy | TOS ]


WebUrbanist

 
Comments Off on Beyond Chernobyl: 15 Design Concepts for a Post-Nuclear World

Posted in Creativity


Looking Beyond Land: 12 Floating Galleries, Schools & Cemeteries

22 Jun

[ By SA Rogers in Architecture & Offices & Commercial. ]

jellyfish barge main

Even without the threat of rising sea levels, we’ve got land scarcity issues in nearly every major city, prompting engineers and architects to look towards the rivers and seas as settings for floating structures that could support not just housing and restaurants but also farms, movie theaters, schools and even cemeteries.

Floating Movie Theater: Pavilion of Reflections

floating pavilions reflection 2

floating pavilion reflection 3

pavilion of reflections 2

pavilion of reflections

Assembled on Lake Zurich for the contemporary art biennial Manifesta 11, ‘Pavilion of Reflections’ is an open-air floating cinema with an integrated swimming pool that dips right into the lake. In the daytime, it functions as an urban island, while at night , the LED screen lights up and spectators take their seats to watch a series of documentaries.

Floating Hawker Center: Solar Orchid for Singapore

floating pavilion solar orchid

floating pavilion solar orchid 2

floating pavilion solar orchid 3

Singapore’s traditional hawker culture of food and retail street carts extends out onto the water with the Solar Orchid by SPARK Architects. The self-contained, solar-powered pods encourage interaction with the harbor while reinterpreting the nation’s traditional pastime. Each individual pod accommodates cooking stalls with built-in exhaust, water, electrical, gas, waste collection and water recycling services as well as places for diners to sit.

Floating Eternity Cemetery for Hong Kong

floating pavilion cemetery 1

floating pavilion cemetery 2

Hong Kong has a bit of a corpse burial problem, as they run out of land space even for their efficient hillside cemeteries and skyscraper vaults. Could a floating cemetery island that’s able to move from one port to the next throughout the region offer a solution? It’s certainly a novel idea. The Floating Eternity Cemetery by BREAD Studio leaves the land for the living with an exterior looping wall housing urns and central space for ceremonies. Families can come aboard at certain times of year to honor their dead, making it a special, shared experience, before the offshore cemetery moves along again.

Floating Swimming Pool: Baltic Sea Park

floating pavilion baltic 3

floating pavilion baltic 1

floating pavilion baltic 4

When you run out of land for parks, build them on the water. This way of thinking is spreading across the world, from New York City to Estonia, envisioned as the home of this ‘Baltic Sea Park’ by kilometrezero. The circular pavilion honors thousands of years of history and cultural exchange on the Baltic Sea, and connects buildings on land to a floating structures that acts as a dock for a changing series of floating pavilions. In the summer, the protected circle of water within it becomes a giant swimming pool.

Next Page – Click Below to Read More:
Looking Beyond Land 12 Floating Galleries Schools Cemeteries

Share on Facebook


[ By SA Rogers in Architecture & Offices & Commercial. ]

[ WebUrbanist | Archives | Galleries | Privacy | TOS ]


WebUrbanist

 
Comments Off on Looking Beyond Land: 12 Floating Galleries, Schools & Cemeteries

Posted in Creativity


Above and beyond: Lenovo Moto G Plus first impressions review

17 May

The Moto G Plus is a brand new model in Motorola’s Moto G mid-range series, but its camera specification looks pretty much top-notch. A 1/2.4-inch Omnivsion OV16860 16MP sensor with a large pixel size of 1.34um is paired with a fast F2.0 aperture. Its contrast detect autofocus is supported by on-sensor phase detection and a laser to measure subject distance. A dual-LED flash is on board for shooting in very dark conditions, and in the camera app a new Professional mode allows for manual control over the most important shooting parameters like shutter speed and ISO.

The new Professional mode allows for manual control over shutter speed and other shooting parameters via a range of virtual dials. It’s also possible to display just one dial at a time.

We have had the chance to use the Moto G Plus for a couple of days before launch and shot a good number of samples in a variety of situations. Read on for our first impressions of the new smartphone and its camera. 

Image Quality

In bright light the Moto G Plus 16MP camera module does a very good job at resolving detail. Thanks to very well balanced sharpening and noise reduction, fine textures and low contrast detail, such as the trees in the distance in the left sample below, are rendered very nicely. The lens in our test unit is sharp,  with only some minor softness toward the edges. Skin tones look natural and color is overall pleasantly neutral, without any white balance issues in natural light. 

 ISO 64, 1/1236 sec  ISO 64, 1/137 sec
 100% crop  100% crop

Some luminance noise is visible in blue skies but it is finely grained and not too intrusive. In the shadow areas some smearing of detail is noticeable, but again this is well within acceptable limits. Shadow noise is very well controlled as well.

 ISO 64, 1/2836 sec  ISO 64, 1/450 sec
 100% crop  100% crop

The well-balanced approach toward noise reduction is maintained throughout the ISO range and while noise and the effects of noise reduction inevitably become more evident in lower light the Moto G Plus performs very well in dimmer conditions. 

 ISO 160, 1/33 sec  ISO 400, 1/30 sec
 100% crop  100% crop

In lower light shutter speeds are reduced down to 1/15 sec which, without optical image stabilization, can result in the occasional shaky image. However, as long as you keep your hands steady the Moto captures very good detail, color and exposures in lower light. Both images below were shot in fairly dim conditions. In the one on the right the camera deals particularly well with the mix of artificial and very low natural light.

 ISO 640, 1/20 sec  ISO 800, 1/15 sec
 100% crop  100% crop

Like on the higher-end Moto models, the Moto G Plus offers a multi-frame Night Mode that kicks in when things get too dark. This allows for decent exposures of even very dark scenes, such as the image on the left below which was captured in a museum in very low light. We also liked the Moto G Plus flash performance which delivered well-exposed images with good color and detail during our brief test. 

 ISO 1250 1/15 sec  ISO 2000, 1/15 sec, flash on
 100% crop  100% crop

Special modes

The Moto G Plus comes with the same panorama mode as previous Moto devices and image output is very similar. Stitching is generally very good but panorama mode does not deal well with moving subjects in the scene. At under 3000 pixels the output size is very small. 

 Vertical panorama, 2472 x 704 pixels

HDR mode works in the conventional way and combines several exposures into one. On the Moto G Plus the effect is much more pronounced in shadow areas, which are noticeably lifted while highlights are only recovered minimally. 

ISO 64, 1/1196 sec,  HDR off  ISO 64, 1/1158 sec, HDR on

In video mode the Moto G Plus can capture 1080p footage at 30 frames per second that is digitally stabilized. Detail is good, the autofocus tends to be stable and the stabilization works efficiently, making for smooth panning and stable hand-held recording.

First impressions

During our testing we were impressed with the image output produced by the Moto G Plus. The large pixels in combination with very well-balanced image processing result in image quality that we would typically expect from devices in a higher price category. Images show good detail and well-controlled noise levels across the ISO range. Colors are pleasantly natural, even in difficult light situations, and thanks to its night mode the Moto is capable of capturing decent exposures even at very low light levels. On the downside, in dim conditions camera shake can lead to some image blur, though it is typically only noticeable at a 100% view.

The new Professional mode is good news for those mobile photographers who want maximum control over the capture process, and the large 1080p display is nice for viewing and composing images. The fingerprint sensor performs very swiftly and increases the security of your image and video files that are stored on the device. The plastic back is in line with a mid-ranger but overall the Moto G Plus looks like a great option for consumers who want excellent camera performance without spending money on a flagship device.

Articles: Digital Photography Review (dpreview.com)

 
Comments Off on Above and beyond: Lenovo Moto G Plus first impressions review

Posted in Uncategorized


Beyond the Glass Ceiling: 14 Houses & Hotels Made for Stargazing

19 Mar

[ By Steph in Boutique & Art Hotels & Travel. ]

iceland igloo hotels 4

Watch for shooting stars and identify constellations from the comfort of a warm and cozy bed in rooms designed to provide nearly unfettered access to the sky, with transparent roofs blurring the lines between indoors and out. From hotels in some of the world’s prime stargazing locations like Finland and Chile to homes equipped with observatories to a tree house that literally lifts its lid, these see-through structures flood the interiors with sunlight during the day and offer amazing views at night.

Starlight Room

starlight room

starlight room 2

starlight room 3

starlight room 4

starlight room 5

Set on faux skis, with a glass ceiling and walls, the Starlight Room looks out onto the Dolomites in the northern Italian town of Cortina d’Ampezzo for high-altitude views far from light pollution and noise. The tiny hotel room accommodates singles and couples, and contains little more than a double bed and television. Guests arrive via snowmobile or snow shoes, and room service is delivered, though it looks like exiting the cabin to go to the bathroom in the snow might not be the most pleasant experience in the middle of the night.

The Sky Den Literally Lifts its Lid

sky den 2

sky den 4

The roof of this tree house by architect George Clark opens to the sky, enlarging the space so it can be used as a protected indoor shelter or an open-air observatory. Located in England’s Kielder Water & Forest Park, the Sky Den has flat-pack furniture built right into its movable walls, so guests can pull down and set up whatever they need to be comfortable, from beds to stools and benches.

Camouflage House
camouflage house 1

camouflage house 2

camouflage house

A habitable greenhouse, Hiroshi Iguchi’s Camouflage House blends into the landscape, with an inner core of private spaces surrounded by a glass enclosure. Almost completely transparent, the house in Nagano, Japan incorporates an interior garden via openings that allow trees to grow straight up the angled roof from the courtyard.

Transparent Ceilings and Floors

glass ceiling house

glass ceiling house 2

glass ceiling house 3

glass ceiling house 4

This four-story house in Shanghai by architect Yung Ho Chang of Atelier FCJZ features a glass roof as well as transparent floors on three levels, so you can see the interior of each floor in addition to the sky. Designed as a concrete box with no windows, the home gets all of its daylight from the ceiling. Talk about radical transparency – the toilet is even visible from just below the dining room.

Bob Hope’s UFO House
bob hope ufo house

bob hope ufo house 2

bob hope ufo house 3

bob hope ufo house 4

bob hope ufo house 5

Designed by John Lautner in 1973, the house Bob Hope lived in for decades with his wife Dolores features a dramatic oculus for daylight and stargazing. The bizarre-looking structure was nicknamed ‘UFO House’ and ‘Volcano Home’ for its unusual shape when viewed from afar. Lautner refused to claim the project as his own work, reportedly because Dolores Hope demanded changes to the interior that didn’t fit his artistic vision.

Next Page – Click Below to Read More:
Beyond The Glass Ceiling 14 Houses Made For Stargazing

Share on Facebook


[ By Steph in Boutique & Art Hotels & Travel. ]

[ WebUrbanist | Archives | Galleries | Privacy | TOS ]


WebUrbanist

 
Comments Off on Beyond the Glass Ceiling: 14 Houses & Hotels Made for Stargazing

Posted in Creativity


6 Moments of Childhood to Capture Beyond the Obvious

18 Feb

If you are a parent, you probably pull out your camera to take photos of the big moments in your child’s life. You have almost certainly captured her first taste of solid food, his first steps, and her first day of school. You probably also have a handful of photos from family vacations, and you may even have an annual portrait for the end-of-year holiday card.

dps-3

But, looking back, you are likely to find that these photos don’t tell you much about what life was like for you, and your child, during his early years. To help you capture the smaller, but special, moments of your little one’s childhood, be sure to take photos of these essential parts.

1) Your Child’s Friends

Your child will always hold a special place in his heart for his childhood friends. While it is tempting to always get shots of your child alone, you and your child will appreciate having photos of him with his friends to look back on through the years, especially if you, or a special friend, may one day move away. To make these photos even more meaningful, get a shot of the kids engaging in a favorite activity together – whether it’s playing board games, dolls, or soccer.

dps-2-750

Dps 8

2) The Fits

One look through your Facebook or Instagram feed, and you might think that all of your friends’ kids are happy, all the time. While your friends may work hard to make their little ones seem perfect, the reality is that disappointment is a big part of childhood. Don’t overlook taking pictures of your kids when they are in the midst of a temper tantrum, or when they are doing their Oscar-worthy performance to try to convince you to give them an extra 10 minutes of screen time.

Dps 7

dps-7-750

3) Bedtime

Bedtime happens every night, and by the time it rolls around you are probably just ready to get the kids to bed, and aren’t thinking about taking photos. But, there are lots of great memories being made at the end of the day. Your kids probably look adorable in their jammies, and brushing their teeth. If you read books before bed, getting photos of your child flipping through her favorites, while snuggled under the covers, will bring back memories of the books she loved the most, years later. On the nights you take out your camera, be sure to get at least one shot of your sleeping angel.

dps-1-750

4) Their Little Quirks

Although they may not seem like picture-perfect moments, capturing the little mannerisms that your child makes as he grows up, will be precious to you when he’s older. Did your baby start putting his hands on his head when he’s upset? Does your toddler cross her arms to show she’s angry? Has your pre-schooler started covering her mouth with both hands when she’s excited? Whether these mannerisms are fleeting, or stay with your child for life, you will appreciate having photos of his little quirks when he’s older.

dps-4-750

dps-8-750

5) Playtime

Your child sitting on the floor playing with blocks, or on lounging on the sofa with his tablet, may not seem noteworthy now, but in a few years her interests will change. Having photos of your child at play, will bring back precious memories of what your child was like back then, and will help him remember specific toys and games he liked to play during that time.

Dps 6

Dps 2

6) You and Your Child

There is probably no people more important to your child, than his Mom and Dad. If you are the one picking up the camera, you are probably not in a lot of pictures. Your child will want to remember what you looked like when they were little, and will treasure photos of you and him doing activities together, even if it’s as simple as playing a game or baking cookies. Find a way to get into some photos with your child, whether it’s by using a tripod and remote, handing the camera to a friend, or hiring a professional photographer.

Dps 9

dps-3-750

dps-5-750

Do you have any other moments in your child’s life that you feel are important to capture in photos? Please share in the comments below your thoughts and your images.

googletag.cmd.push(function() {
tablet_slots.push( googletag.defineSlot( “/1005424/_dPSv4_tab-all-article-bottom_(300×250)”, [300, 250], “pb-ad-78623” ).addService( googletag.pubads() ) ); } );

googletag.cmd.push(function() {
mobile_slots.push( googletag.defineSlot( “/1005424/_dPSv4_mob-all-article-bottom_(300×250)”, [300, 250], “pb-ad-78158” ).addService( googletag.pubads() ) ); } );

The post 6 Moments of Childhood to Capture Beyond the Obvious by Jamie Davis Smith appeared first on Digital Photography School.


Digital Photography School

 
Comments Off on 6 Moments of Childhood to Capture Beyond the Obvious

Posted in Photography


Cruelty of Concrete: Harsh Architecture in Berlin & Beyond

17 Nov

[ By Steph in Architecture & Public & Institutional. ]

berlin brutalism fem 1

There is an innate coldness and harshness to concrete that lends it a sinister air, as if unsavory practices are carried out within, even if the building is actually in use as a church or monastery. Spanning a range of architectural styles and movements from Bauhaus to Constructivism, most of these concrete wonders of Europe are in use as animal research facilities, former bunkers, libraries and hotels, while others remain abandoned.

Mouse Bunker, Berlin: FEM Animal Testing Facility

berlin brutalism fem 2

berlin brutalism fem 3

The imposing exterior of the FEM facility at Berlin’s Research Institute for Experimental Medicine is fittingly frightening for the activities that take place within: namely, testing on 88,000 laboratory animals. Known locally as the ‘Mouse Bunker,’ FEM was built in 1980 and its shape was ironically inspired by the sheep-stalls of Lower Saxony.

Sainte Bernadette Church, Nevers
cruel concrete st bernadette 1

cruel concrete st bernadette 2

cruel concrete st bernadette 3

Designed by French architect Claude Parent and built in 1966, the Sainte Bernadette Church in the city of Nevers is about as un-churchlike as churches get. The solid concrete Brutalist structure eschews ornamentation for a utilitarian appearance that continues into the interior.

Bibliotheque Louis Nucera, Nice, France

crucl concrete bibliotheque

cruel concrete bibliotheque 2

This modern library in Nice is among the world’s most unusual, with a square block sitting atop a giant sculpted neck. Named for author Louis Nucera, the building is a joint project between architects Bayard and Chaps and sculptor Sacha Sosno.

IBM France Research Center

cruel concrete ibm france

cruel concrete ibm france 2

cruel concrete ibm france 3

Marcel Breuer’s 1962 IBM Research Centre and Forum features a double Y-shaped plan situated on a sloping site overlooking the French Riviera. Precast concrete units on the facade disguise a system of in-situ concrete columns

Ghostly World War II Boat Pen, Bordeaux, France
cruel concrete sous marine 1

cruel concrete sous marine 2

cruel concrete sous marine 3

cruel concrete base sous marine 4

Sections of the abandoned Base Sous-Marine in Bordeaux are occasionally put to use as a dramatic backdrop for special events, but otherwise, this World War II wonder completed by the Germans in 1944 remains hauntingly empty. It once served as a home base for supply boats, torpedo transports, U-boats and the 12th Flotilla of long-range boats in the war and features a nearly indestructible 30-foot-thick roof. The whole thing occupies a total area of nearly 463,000 square feet and was made from 21,188,800 cubic feet of concrete.

Forum Hotel, Krakow

cruel concrete forum hotel

cruel concrete forum hotel 2

cruel concrete forum hotel 3

Constructed between 1978 and 1989, Krakow’s Hotel Forum remains one of Poland’s most sci-fi-looking structures, but today, it’s deteriorating, its facades often covered in oversized billboards.

St. Agnes Church, Berlin

cruel concrete st. agnes church

Once adorned with a neon blue cross that gently illuminated its harsh silhouette in the geographical center of Berlin, St. Agnes Church (built in 1967) was recently turned into an art gallery.

Jesuit Cloister by Paul Schneider-Elsleben, Nymphenburg
cruel concrete jesuit cloister

Life must have felt harsh for the Jesuit monks who inhabited this Nymphenburg monastery by Paul Schneider-Esleben, completed in 1965.

Water Towers in Germany by Bernd & Hilla Becher
cruel concrete water towers 3

cruel concrete water tower 2

Water towers take on all sorts of weird shapes around the world, but Germany has its own special collection of Brutalist concrete versions by Bernd & Hilla Becher and Helmut Erdle.

Tour Vigie et Reservoir, Gaston, France
cruel concrete tour vigie

Undeniably weird, this watchtower and reservoir designed by Gaston Jaubert and built in 1974 looks over the port of Fos-sur-Mer in France.

Radio Kootwijk, Netherlands
cruel concrete radio netherlands

cruel concrete radio netherlands 2

Pre-dating most Brutalist and modernist architecture by several decades, the Radio Kootwijk building began construction in 1918. Designed by Dutch architect Julius Maria Luthmann in Art Deco style, it’s an interesting juncture of a typically ornate architectural style and a rather impersonal material. The Germans blew up the transmitter during World War II and the building has been in disuse ever since.

Pilgrimage Church by Gottfried Bohm, Neviges, Germany
cruel concrete pilgrimage church 1

cruel concrete pilgrimage church 2

Designed by Pritzker Prize-winnign architect Gottfried Böhm and built in 1963, the Pilgrimage Church in Neviges, Germany resembles nothing more than an organic composition made from an unnatural medium, like a cluster of oversized crystals rising from the green hillside.

Share on Facebook


[ By Steph in Architecture & Public & Institutional. ]

[ WebUrbanist | Archives | Galleries | Privacy | TOS ]


WebUrbanist

 
Comments Off on Cruelty of Concrete: Harsh Architecture in Berlin & Beyond

Posted in Creativity


3 Tips for Waterfall Photography Beyond Just Using a Long Exposure

30 Oct

JacksonFalls-3

Of course, shutter speed plays an essential role in creating silky smooth waterfall photographs, but does it get a little too much attention in tutorial articles? I think so.

In this article you’ll learn about three other key elements to creating a successful silky smooth waterfall photograph, and when you put it all together, all you’ll need to do next is find a waterfall to photograph.

JacksonFalls-5

ISO 100 | 62mm | f/16 | 1/3

Composing waterfall photographs

Like many landscape photographs, composition plays a huge role in whether or not the final photograph you capture is more than just a snapshot. Even if you nail the shutter speed, have perfect lighting, and just the right amount of depth of field, a poorly composed image will still fall flat.

In the video below I take you through the thought process behind a waterfall photography session I went on last year. I try to drive home the point that getting the best composition of a scene involves more than just moving the camera, but also includes thinking about why the choices you make matter to the photograph itself.

When composing a waterfall scene you’ll have to take into account not just the waterfall itself, but the direction of water flow, the rocks and debris that make up the foreground, the trees in the background, and everything in-between. Next time you’re photographing a waterfall, try just moving the camera around, get high, get low, pay attention to what you see through the viewfinder, and take as many different photographs as you have time for.

Importance of light in waterfall photography

As with most photographs, light is key in setting a tone or mode of the scene, however with waterfalls it can arguably be even more important.

Not only does light determine the mood of the scene you’re photographing, but it may downright determine whether or not you can get a slow enough shutter speed on your camera for the silky smooth water that you want to create. On top of that, you’ve got to absolutely watch out for photographing on a sunny day or this might happen – look at all those hot spots!

trapfallssun-2

ISO 100 | 11mm | f/11 | 0.5 sec

There’s no amount of highlight recovery or post production magic that will bring this image back, and give it a more refined tone. The light simply makes the photograph feel harsh, and while the snapshot showcases the falls, it does little to make the photograph interesting.

Due to the nature of waterfalls often being off the beaten path, and being dangerous to get to, it can be difficult to photograph at sunrise or sunset if you’re not a seasoned hiker. Therefore, as a second best option, I’d highly recommend planning your waterfall adventures for cloudy day. At the very least this will reduce the occurrence of hot spots on the water, and at best it will give you a few extra stops of shutter speed to work with if you need it.

dianesbaths-2

ISO 100 | 11mm | f/14 | 0.4 secs

Don’t forget about water flow

When it comes to creating the silky smooth waterfall effect, the amount of water actually flowing through the waterfall plays an important role in the end result. A powerful current has more movement to it than a small stream, and as a result this high flow waterfall may not require an exposure as long to achieve the desired result.

Take a look at the following two photographs, they are from the same waterfall one year apart. the first image is during a drought resulting in a waterfall that had almost no water flowing over it, while the second image was taken after Hurricane Irene came through the area dropping more than 10 inches (25cm) of rain in some locations. As you can see, the two images offer quite a different view of this waterfall.

Trap-Falls

ISO 100 | 11mm | f/11 | 5 seconds

Trap-Falls-2011

ISO 100 | 11mm | f/11 | 0.5 secs

In most cases it’s probably better to photograph smaller waterfalls with a light flow of water when you’re looking to create the silky smooth waterfall effect, as it tends to work best with those. Often, high flow waterfalls, will simply overpower the look that you’re trying to achieve, and as a result are often better photographed at a faster shutter speed in order to freeze the motion, and showcase their power.

Overall, waterfall photography is a lot of fun, the experience of hiking to the waterfall is often just as rewarding as the photographs themselves, so be sure to enjoy the entire experience.

googletag.cmd.push(function() {
tablet_slots.push( googletag.defineSlot( “/1005424/_dPSv4_tab-all-article-bottom_(300×250)”, [300, 250], “pb-ad-78623” ).addService( googletag.pubads() ) ); } );

googletag.cmd.push(function() {
mobile_slots.push( googletag.defineSlot( “/1005424/_dPSv4_mob-all-article-bottom_(300×250)”, [300, 250], “pb-ad-78158” ).addService( googletag.pubads() ) ); } );

The post 3 Tips for Waterfall Photography Beyond Just Using a Long Exposure by John Davenport appeared first on Digital Photography School.


Digital Photography School

 
Comments Off on 3 Tips for Waterfall Photography Beyond Just Using a Long Exposure

Posted in Photography


Beyond the table top: 5 mini tripods reviewed

01 Jul

As capable cameras get smaller, photographers and camera bags have adapted to hold these systems. Camera supports have evolved as well – enter the mini tripod, a class of legs and head that can hold up tiny cameras and flashes, but is also strong enough to support full-sized gear. In this group test we look at five such tripods. Which one should you take on your next hike? Read more

Articles: Digital Photography Review (dpreview.com)

 
Comments Off on Beyond the table top: 5 mini tripods reviewed

Posted in Uncategorized


Photography Workflow Tips – From Memory Card to Computer and Beyond

06 Nov

Discover the best workflow protocol for safe long-term file storage, and efficient file retrieval.

“Be willing to give that extra effort that separates the winner from the one in second place” – H. Jackson Brown Jr.

MemoryCards 1

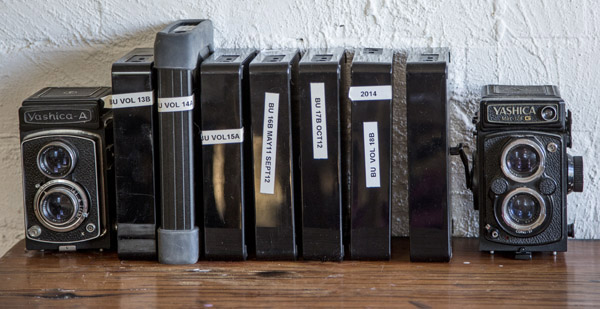
All images copyright Gina Milicia – Playing your cards right means having a consistent workflow, which leads to safer long-term file storage and efficient file retrieval. Photo credits: Promo shoot for Fat Tony and Co. Image courtesy Nine Network Australia

“Respect your efforts, respect yourself. Self-respect leads to self-discipline. When you have both firmly under your belt, that’s real power.” – Clint Eastwood

It’s very easy to become lazy and a bit sloppy with post-production workflow protocols. If you are like many people I know, then you are currently downloading your files to a folder marked “downloads” or “photos” or “John”. Inside this folder you may have hundreds, perhaps thousands of images with file names like 5U9D2496.jpeg or 5U9D2497.CR2. This is all perfectly fine if you never want to see those images again but what if in five years time you need to find those images again?

Following a constant workflow protocol will save you hours of valuable time and also prevent potential heartbreak caused from lost files.

MemoryCards 2

An overview of the workflow tips:

  1. Import the images from your camera (first backup)
  2. Backup to portable hard drive (second backup)
  3. Backup to external hard drive (third backup)
  4. Editing
  5. Final backup
  6. Delivery

Workflow tips – step by step

“Success is the sum of small efforts, repeated day in and day out.” – Robert Collier

Step 1: Import the images from your camera (backup #1)

You can get the images off the memory card in a few different ways. Here are the pros and cons of each method.

Memorycards 3

Instant gratification: In this image I’m shooting tethered on a photo shoot for Australian entertainer Todd Mckenney (pictured second from left) and makeup artist extraordinaire, Fotini Hatzis (far right) with stylist to the stars Louise Petch (far left).

Shooting tethered to your laptop

I shoot about 70 percent of my work tethered (connected to my laptop) and it’s my preferred way of shooting. I have a memory card in the camera but the images are being downloaded straight to my laptop via image capture software. The memory card is just a backup.

My preferred software for viewing images as I shoot is Phase One Capture One. I use Capture One to view my files because it’s very fast and I’ll often have several people crowded around the computer waiting to see the image. In these cases a couple of seconds can make all the difference.

Shooting straight to memory card

MemoryCards 5

This shoot with Australian model, Mimi Elashiry was shot on location in Paris. It was photographed at dawn to avoid the crowds and I needed to work quickly in order to get all my shots done before the light became too hard and the crowds became an issue. This is a perfect situation for me to shoot straight to card.

I will shoot straight to a memory card when I can’t have my laptop with me. Like, on remote locations, in extreme weather conditions, at press conferences, at events where I need to be mobile or I’m on stage photographing someone.

I carry a special cardholder that is clearly marked “To be downloaded” and stored away from my gear. This way, if my camera bag is lost or stolen (or the day gets a bit frantic) before I’ve downloaded all the memory cards, I won’t lose my files.

The images are then downloaded to my laptop using a memory card reader via Capture One.

I use RAW capture software at this stage because it’s crucial to check my exposures and expressions as I work. I’m also often working with art directors, magazine editors, fashion designers or publicists who want to view the images straight away.

All images stay as RAW files. This step is simply for checking, viewing and selecting (tagging) images.

MemoryCards 4

Some people will prefer to copy the images directly onto their computer desktop and use other software. I choose Capture One because for most of my shoots, my clients are right next to me and we’re making sure we’ve got the shot. I’ve also got an assistant double-checking the technical aspects of the shots.

Capture One lets me handle the process simply and quickly, and the software is easy enough for clients to use. Lightroom works just as well but when I’m shooting thousands of images, I don’t like the interface. It’s a personal preference, that’s all.

As long as you can organize, select and name your files at this point in the workflow – use whatever works for you.

The memory card that has just been downloaded to my laptop is then put aside and not reused that day. This works really well when I’m shooting across multiple cards as it prevents any card being wiped, accidentally.

I never leave a memory card in the camera, always removing the last card at the end of a shoot. This is another way of protecting my files and prevents me, or anyone else assistants, from accidentally deleting files.

Renaming images

Now back to all those images you have sitting in a folder marked “Photos” or “John” or they may be roaming free across your desktop and stored wherever they happen to land when you download them. I call this the “shoebox file storage system”. Everything gets stuffed in one place without any thought to ever having to retrieve the information again.

For the sake of your own sanity, I beg you to not ignore this section.

I rename images when I download the files from the camera to my laptop.

My shoots often have very fast turnaround times with art directors, publicists, or clients choosing their images during or at the end of a shoot. Having the files already in an organized and consistent structure saves everyone a lot of time and hassle.

  • Images for private clients are renamed as:
    Folder name: Client name + year
    Filename: Client surname_first initial+last 2 digits of year_4 digit counter
  • So my shoot for James Brown in July 2014 would be named:
    Folder name: James Brown 2014
    Filename: Brown_J14_0001.CR2
  • Images for companies are renamed as:
    Folder name: Company + job + year
    Filename: Company_job+last 2 digits of year_4 digit counter
  • So when I shoot the next Nutella® Winter campaign (Dear Nutella® I’m available and will work for product. Call me.) I would create the folder and files as follows:
    Folder name: Nutella Winter 2014
    Filename: Nutella_Winter14_0001.CR2

This naming system allows me to search by folder or file and find shoot quickly and efficiently.

Step 2: Backup to portable hard drive (backup #2)

I backup my RAW files onto a portable external hard drive every hour. During a full day shoot I may end up with 3000-5000 files so I need to make sure they are secure as I go.

Step 3: Backup in the office (backup #3)

When I get back to my office, I copy the images from the external portable hard drive I used at the shoot onto one of three working hard drives. In this case, I copy them on to working hard drive A.

At this point in my workflow I have the entire shoot in three locations: my laptop, an external portable hard drive and working hard drive A. The shoot stays in all three locations until the job is delivered.

I only use hard drives that are two or three terabytes in size because I don’t want everything on one single hard drive.

I don’t use cloud storage mainly because my files are just too big. My website has storage for my final processed images and I use my website to deliver images to my clients. I trust the business hosting my website but if anything should happen, I still have the files on two other hard drives.

Step 4: Editing

I edit my images using Adobe® Photoshop® or Lightroom, or a combination of both, and the edited versions are saved to working hard drive A.

Step 5: Archiving

Memory6_11

Once post-production is complete I copy all my files onto working hard drive B, which is stored in an off-site location for safety.

If you think this is overkill, remember: memory cards corrupt, laptops crash and hard drives fail. Protect your work with as many backups as you can.

As a minimum, save your images in two different locations. Keep one with you, and store the other in a safe location off site. This way if disaster strikes you will still have a backup copy of your precious files.

Step 6: Deliver

Nearly all my jobs are delivered as electronic files with the exception of a small percentage of clients (about 5%) who require prints.

The images they have selected are delivered via file transfer protocol (FTP), my website image archive (I use Photoshelter), DVD or an external hard drive.

Editor’s note: your version of “deliver” might look like sharing photos online in social media, emailing a couple to friends, or making prints for yourself.

What are some of your favorite workflow protocols? Do you have any great workflow, storage and delivery techniques you’d like to share? How do you safely store your memory cards before you download them? I’d love to hear about them.

The post Photography Workflow Tips – From Memory Card to Computer and Beyond by Gina Milicia appeared first on Digital Photography School.


Digital Photography School

 
Comments Off on Photography Workflow Tips – From Memory Card to Computer and Beyond

Posted in Photography


Beyond the Postcard – 14 Tips for Creating Unique Photographs in Iconic Locations

28 Aug

Photography has been around since the early 1820’s. Of course, back then the technology of “picture taking” was not accessible to the common person. But have things ever changed! With the availability of digital cameras ever present, even in our cell phones, take a moment to consider these facts. Every two minutes today there are as many photos taken as were taken in the entire 19th century (1800s), and ten percent of all the photos ever taken were snapped within the last twelve months!

The Postcard: The Start Westward Monument in Marietta, Ohio.  (18mm 1/80th of a second at f/5, ISO 100)

The Postcard: The Start Westward Monument in Marietta, Ohio. (18mm 1/80th of a second at f/5, ISO 100)

So, with nearly 200 years worth of photographs in our collective albums and portfolios, it has become challenging to find an iconic view or subject that hasn’t been overdone by millions of photographers, especially when it comes to state and national outdoor landmarks. In order to look beyond the “postcard shot”, you need to research unique perspectives and techniques to capture that popular subject in a way that creates an original image. But first, go ahead and take that “postcard shot”. (You know you want to!) Then consider the following 14 different suggestions for creating unique photographs of the most popular spots.

#1 Check the internet

This is a resource past generations would have loved to have! By searching Google, Flickr, 500px and other photo sharing sites you can see how other photographers have captured most popular scenes. Besides seeing the images that have already been done, this will give you an idea of the layout of the location before you arrive. You may also find ideas that other photographers have tried and notice something that you might do differently to make the same image better.

#2 Get to know your location

Research the area by downloading maps and brochures from the internet. If your destination is only open certain days and hours, be sure you’ve garnered that information before you head out on your shoot. Stop at the visitor centers and ask questions.

#3 Talk to the locals

Talking to a “local” can often lead you to all kinds of special photo opportunities that may have never been visited before, such as discovering a special lighting effect that only happens at a certain time of the day or year, or maybe a waterfall that is hidden from view.

#4 Shoot at popular sites during the week

Avoid the weekends when the crowds can make it almost impossible to get an image, especially if you are looking for a shot free of human presence.

#5 Look for new angles

While looking for different angles, don't forget to explore all sides of your subject.

While looking for different angles, don’t forget to explore all sides of your subject.

Try to avoid the obvious straight-on shot that presents itself right in front of you,(the typical postcard shot), but look around for other angles instead – high, low or from the right or left. If you must shoot straight in front, try to include a foreground object.

Caution: If you are in a state or national park, be sure to abide by all park rules! Photographers sometimes tend to think that rules do not apply to them, but you will find that most park rangers will not agree with this point of view. These rules are put in place for your safety or to preserve the beauty of the area you are photographing.

#6 Photograph in different seasons

Photograph the scene or subject in all four seasons. Mother Nature provides amazing changes to scenery, from the different angles of the sun to the different colors of the leaves on the trees.

#7 Look for special events in nature

Some natural happenings can make your image unique, such as a full moon which may be included in the image if you are into nighttime photography. Special weather conditions can be conducive to producing a once-in-a-lifetime image. For example, some photographers may reject shooting on rainy days, but if you have the protective gear for your equipment, the rain can add special visual effects such as reflections or rainbows. Ice and snow coatings are often quite striking additions to outdoor objects both in nature or manmade.

#8 Look for special lighting

Of course the best light of every day will come during the golden hours, following the early morning sunrise and just before evening sunset. If you must shoot in the harsher lighting of midday, consider black and white images which can often produce some visually appealing contrast. If you are out on a heavily overcast day, you may be able to shoot all day, but in most of these cases avoid including the sky in your image. If you have the option, research natural lighting sources by using computer software, such as The Photographer’s Ephemeris, that show the position of the sun and moon to help you determine when the lighting will be best, and what time to arrive to capture your shot. These kinds of software can allow you to anticipate exactly when and where the best lighting may fall, on just the right spot, to create that once in a lifetime image.

Black and white image shot after dark was lit with an off camera flash from the left side of the image.

Black and white image shot after dark was lit with an off camera flash from the left side of the image.

#9 Add the human element

Including a person in the scene not only will add a sense of scale, but can also add excitement and fun to your photo, which will make your image much more interesting to your viewer.

Special events present an opportunity to include a human element, which add extra excitement to your image.

Special events present opportunities to include human elements, which add extra excitement to your images.

#10 Focus on details

Narrowing your focus to capture details can be an especially effective way to create a unique photo. Whether zeroing in on the part of the vista that makes that site unique, or the feature of the statue that expresses its purpose, an original visual story may be captured in your image.

#11 Include a foreground element

Incorporating a foreground object to frame the subject can add depth to your scene and also enhance the image. A foreground object can also be used to lead the viewer’s eye to the subject of your photo.

#12 Use special effects

Two filters that could help make that standout image are the polarizing and neutral density filters. Use of a polarizing filter will enhance the blue of the sky and add color saturation. Use of a neutral density filter will cut down the light entering your camera, which allows you to slow down shutter speeds to capture interesting motion effects with the sky or water. Experimenting with your white balance can also create some interesting results.

This image was created by using multiple exposures. the first image was of the monument against the sky, in the second the camera was turned upside down and captured the top of some nearby tree tops. In each image the sky was overexposed creating the white background.

This image was created by using multiple exposures. The first exposure was of the monument against the sky.  In the second exposure, the camera was turned upside down, capturing the top of some nearby trees. The sky was overexposed in each image, creating the white background.

In this image shot at night the white balance was changed to Tungsten, which causes the monument to have a teal color. The glow above the head was created by the moon glow.

This image was shot at night the white balance was changed to Tungsten, which caused the monument to have a teal color. The glow above the head was created by the moon’s glow.

#13 Vary your focal length

Try different lenses to get varied results, for instance a telephoto lens will not only bring the scene closer to you, but will also compress the scene. On the other hand, a wide-angle lens allow you get more of your subject in the view, make background objects appear farther away, which adds depth to the scene.

In this image the monument is captured just after sunrise giving the monument a nice glow. Also by using a telephoto lens at 150 mm @ f4.8 we compress the photo and the background is out of focus to make the monument stand out

In this image the monument is captured just after sunrise giving it a nice glow. Also by using a 150mm telephoto lens at f/4.8 we compress the photo and the background is out of focus to make the monument stand out.

#14 Experiment with DOF

To narrow your depth of field, open your aperture to a lower number, such as f/ 2.8, and make your subject stand out from the background. A distant landscape requires more depth of field to keep objects in focus, so you may want to close your aperture to something like f/16 to sharpen your image.

Researching your options and incorporating some of these tips will enhance the creative bent so many photographers already possess! Just don’t settle for the easiest, most common photographic result if you can take the time to shoot a more memorable image. Think and imagine your own photographic creations “beyond the postcard”. You’ll be glad you did!

Have any unique photographs from iconic locations or landmarks? Please share in the comments.

The post Beyond the Postcard – 14 Tips for Creating Unique Photographs in Iconic Locations by Bruce Wunderlich appeared first on Digital Photography School.


Digital Photography School

 
Comments Off on Beyond the Postcard – 14 Tips for Creating Unique Photographs in Iconic Locations

Posted in Photography